All posts by The Perfect Blogger

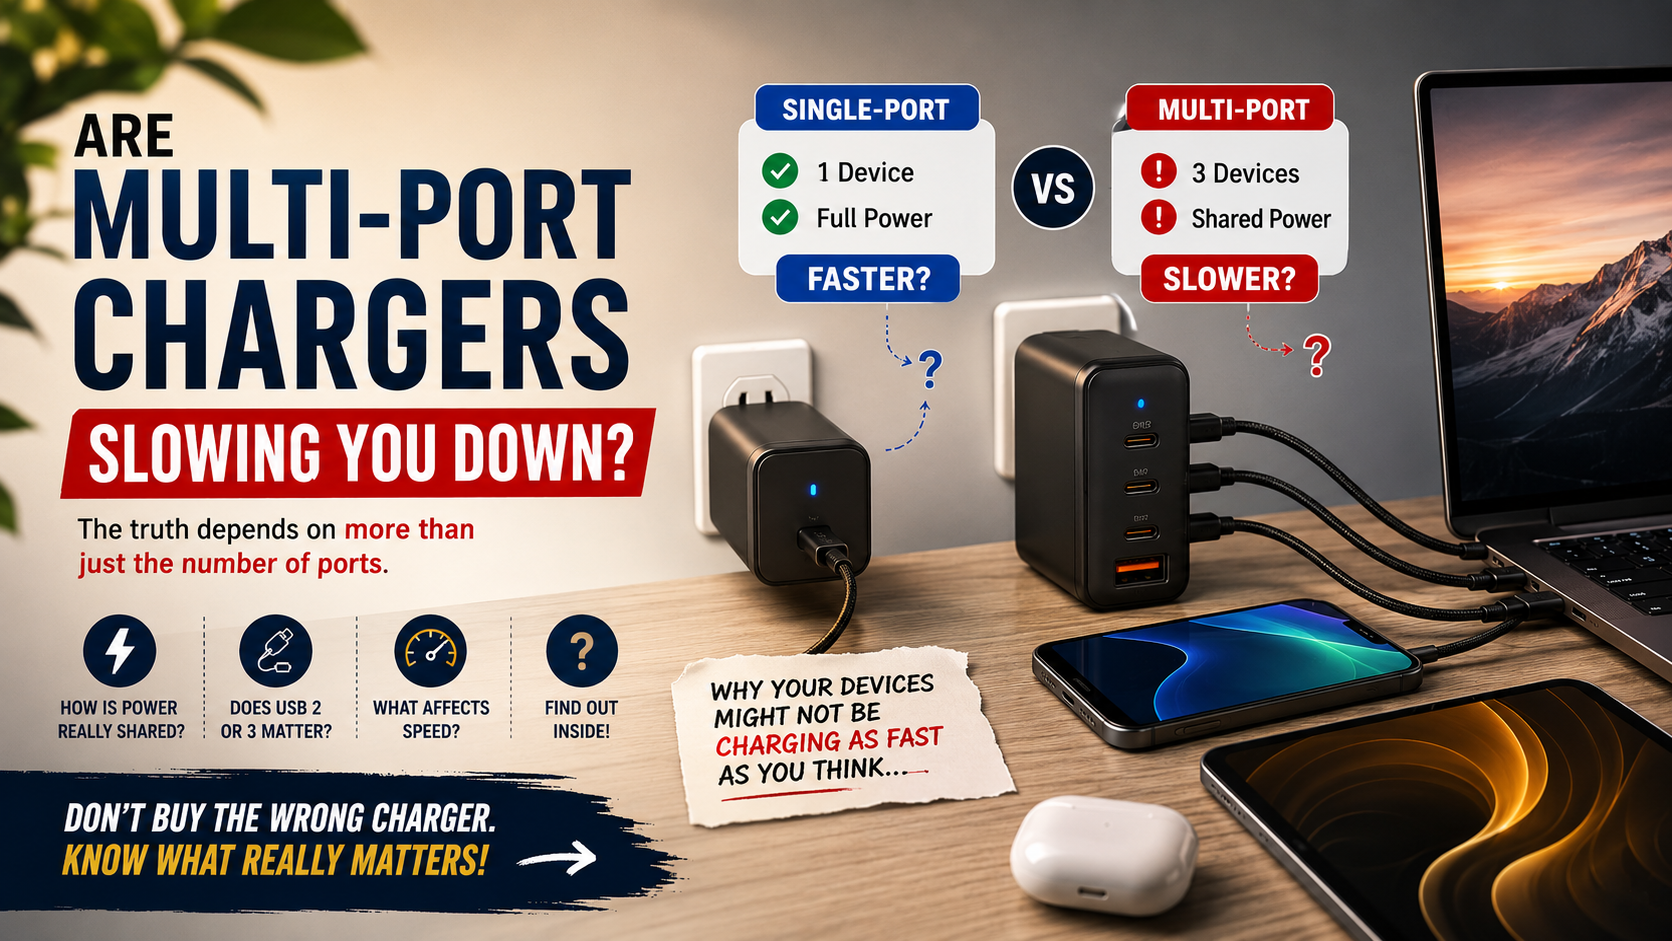
Are Chargers With Multiple Ports Slower Than Normal Ones?

Are Chargers With Multiple Ports Slower Than Normal Ones?

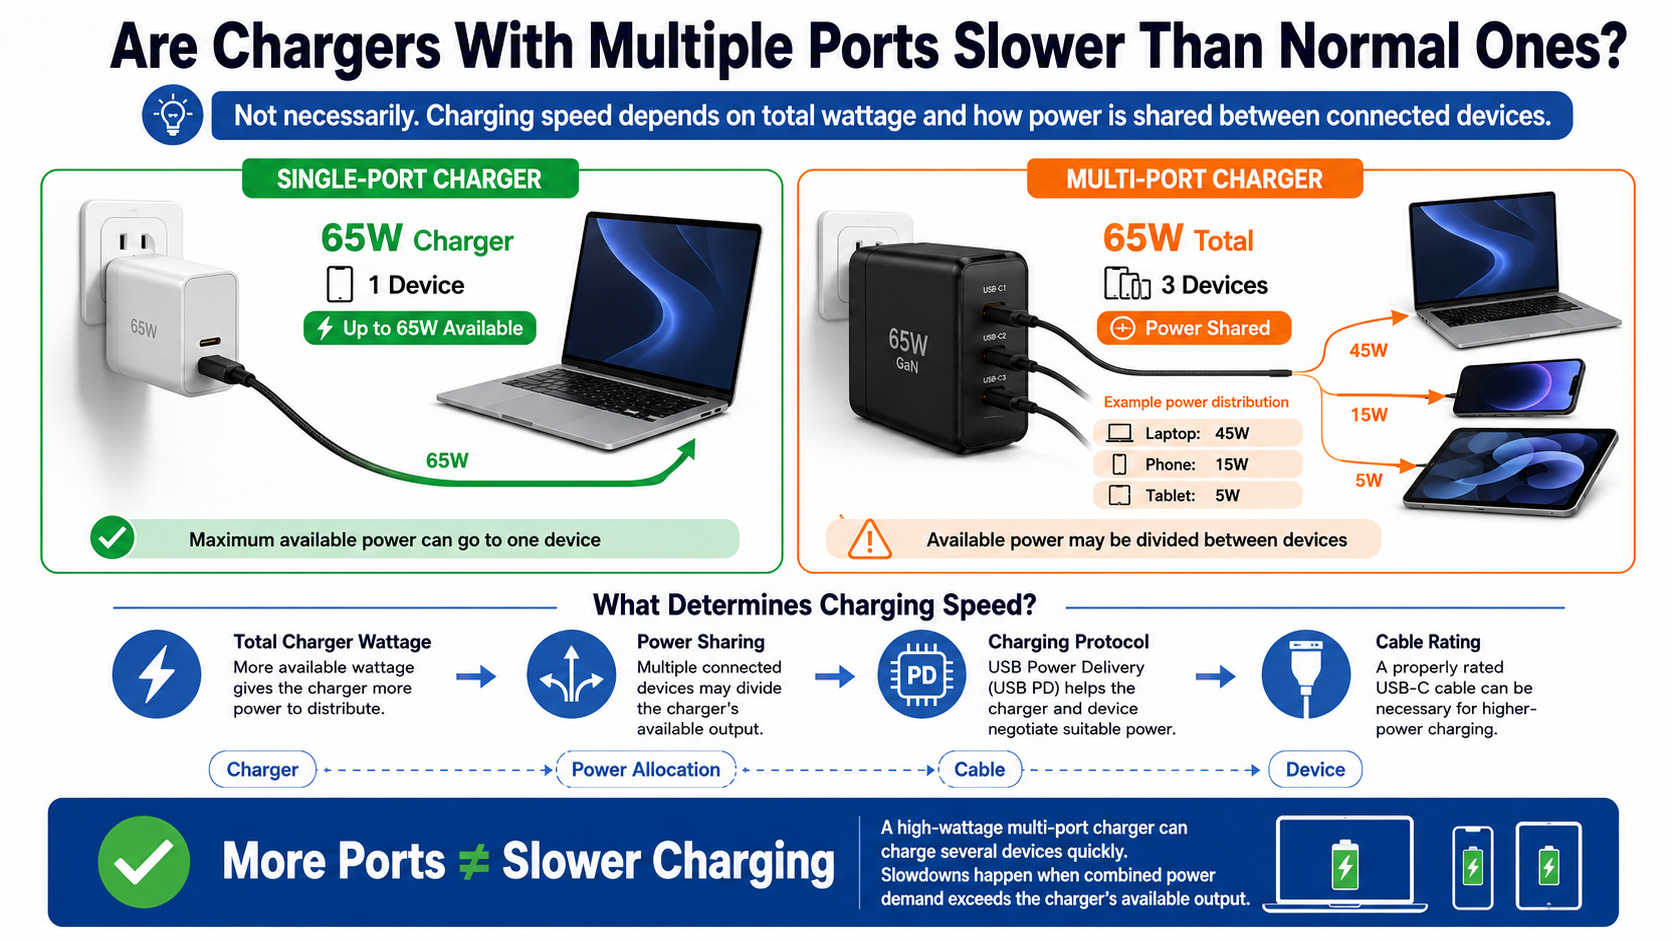
Chargers with multiple ports can sometimes charge devices more slowly than single-port adapters. However, having several ports does not automatically make a charger slower. Charging speed mainly depends on the charger’s total wattage, port allocation, charging protocol, and connected devices.

A high-wattage charger can power several devices quickly at the same time. A lower-wattage model may need to divide limited power between connected devices. For example, a 65W charger could provide 65W to one compatible laptop. When you connect a phone, it may divide that available power between both devices. For more context on charging limits, see 5V 1A Vs. 5V 2A.

Modern chargers use standards such as USB Power Delivery (USB PD) to negotiate suitable voltage and current. The device, cable, and charger all play a role in determining the final charging speed.

Your cable also matters. A properly rated USB-C cable can support higher power levels than some older cables.

Understanding power sharing helps you choose the right charger. It also explains why some chargers slow down when multiple devices are connected.

Do Multi-Port Chargers Charge Slower?

Chargers with multiple ports do not always charge slower. They become slower when the connected devices require more power than the charger can provide at the same time. If only one device is connected, many multi-port models can provide their maximum available output.

Consider a 65W charger with a laptop that supports 65W charging. With only the laptop connected, it may receive the full 65W. Connect a smartphone, and the charger may redistribute its output. Depending on the model, the laptop might receive 45W while the phone receives 20W.

The exact power split varies between chargers. Some models maintain higher output on one primary port. Others divide power differently when additional ports become active.

This makes the total wattage rating especially important when choosing a charger. You should also check the charger’s per-port limits before buying. Understanding common charging misconceptions can also help you make a better choice, as explained in Stop Believing These  Myths About Charging Your Phone.

A 100W charger does not necessarily provide 100W to every port. Its maximum output may be shared across several connections.

Therefore, the number of ports matters less than how intelligently and efficiently the charger distributes its available power.
Understanding Dynamic Power Allocation

Chargers with multiple ports use power management systems to distribute available wattage between connected devices. When you connect another device, the internal controller may detect the new load and renegotiate the available power.

For example, a laptop may initially receive 65W from a charger. When you connect a smartphone, the charger can reduce laptop output and reserve some power for the phone. The exact allocation depends on the charger’s design and supported charging profiles.

Some chargers briefly interrupt charging during this process. This happens because the charger needs to establish new power agreements with the connected devices. A short interruption is generally normal.

Choosing a charger with enough total capacity can reduce noticeable slowdowns. A 100W or 140W model may suit users who regularly charge laptops and phones together.

Remember that a higher charger rating does not force extra power into a device. Compatible devices draw the power they are designed to accept.

Does USB 2 or 3 Charge Faster?

USB 3 generally offers more standard bus power than USB 2 when both are connected to compatible computer ports. However, USB version alone does not determine charging speed. Modern charging systems use additional standards that can provide much more power than basic USB connections.

A standard USB 2.0 port can provide up to 500mA at 5V. That equals 2.5W of basic bus power. USB 3.0 increased the standard current to 900mA at 5V, providing up to 4.5W.

These figures apply to the original standard bus-power specifications. They should not be confused with dedicated USB charging technologies or USB Power Delivery.

This distinction matters when comparing chargers with multiple ports. A modern USB-C PD port can deliver considerably more power than a traditional computer USB port.

USB 2 and USB 3 also describe data-transfer capabilities, not simply charging speed. A newer USB data standard does not automatically mean faster charging.

For modern phones, tablets, and laptops, focus on the charger’s supported power protocol, output wattage, device compatibility, and cable rating rather than USB version alone.

Legacy Power Limits on Modern Electronics

Older USB standards were designed primarily for data transfer and basic bus power. As a result, charging a modern laptop or smartphone through a standard computer USB port can be much slower than using a dedicated wall charger.

A standard USB 2.0 port can provide up to 500mA at 5V. That equals 2.5W of basic bus power. USB 3.0 increased the standard current to 900mA at 5V, providing up to 4.5W. For another practical look at USB power, see Use Your TV’s USB Port To Level Up Your Device.

Modern USB Power Delivery provides a much broader power range. USB PD 3.1 can support up to 240W with compatible chargers, devices, and cables.

This does not mean every USB-C charger provides 240W. Actual output depends on the equipment and negotiated power profile.

The same principle applies to chargers with multiple ports. A charger may support high power overall but divide that power between ports when several devices are connected.

Therefore, USB 3 is not automatically faster than every USB 2 setup. Check the complete charging system instead of relying on the USB generation printed on the port.

Which Charging Port Is Faster?

For modern high-power charging, USB-C is generally the most versatile port. It supports USB Power Delivery and can handle higher power levels than traditional USB connections when compatible hardware is used.

However, USB-C does not automatically mean fast charging. The charger’s wattage, the device’s charging requirements, the cable, and the supported protocol all affect performance.

USB Power Delivery can support up to 100W within its Standard Power Range. USB PD 3.1 Extended Power Range increases the maximum to 240W with compatible equipment.

USB-A can also support faster proprietary charging technologies. Some USB-A chargers can deliver considerably more than the basic USB bus-power level. However, USB-C offers broader support for modern high-power USB PD charging.

This makes USB-C especially useful in chargers with multiple ports. One USB-C port can power a laptop while another port charges a phone or tablet.

When comparing charging ports, look beyond the connector shape. Check the actual wattage and charging standards supported by each port. A USB-C port with limited output may still charge more slowly than a high-output USB-A implementation.

The Superior Architecture of USB-C Ports

USB-C connectors have 24 contacts and include configuration channels that support connection and power negotiation. These features help compatible devices and chargers determine how much power can safely be delivered.

USB Power Delivery uses this communication to negotiate suitable voltage and current levels. The result is more flexible power management than older USB charging methods.

USB-C also supports features beyond charging. Depending on the hardware, the same connector can carry high-speed data and video signals.

This versatility explains why USB-C has become common across phones, tablets, laptops, monitors, and accessories. It also makes USB-C a practical choice for chargers with multiple ports.

However, the connector itself does not guarantee maximum performance. A USB-C charger may offer only modest wattage on a particular port. Likewise, a USB-C cable may have limited power or data capabilities.

For the best results, consider the complete setup. Check the charger’s output, the device’s maximum input, the cable’s rating, and the supported charging protocol before expecting maximum speeds.

Is USB-C to C Faster Than A to C?

USB-C to USB-C cable is often the better choice for modern fast charging. It can support USB Power Delivery when the charger, device, and cable are compatible. This makes it especially useful for laptops, tablets, smartphones, and other higher-power devices. Choosing the right accessories is also important when setting up a tablet, as covered in Best iPad Accessories.

USB-A to USB-C cables can also provide effective charging. Their performance depends on the USB-A port, charging technology, cable design, and connected device. Therefore, it is not accurate to assume that every A-to-C cable has the same charging limit.

USB-C to C connections are particularly useful with chargers with multiple ports. They can take advantage of modern USB PD profiles when the charger supports them.

Cable construction also matters. Some USB-C cables support only lower power levels, while others are designed for higher-power charging.

The cable must also match the required data and charging capabilities. A cable can physically fit both connectors but still have lower performance.

For the fastest supported charging, choose a properly rated cable that matches your charger’s output and your device’s requirements.

Built-in E-Marker Chips Ensure Speed

Some high-power USB-C cables include an E-Marker chip. This electronic marker tells compatible devices and chargers about the cable’s capabilities.

E-Marked cables are important for certain higher-current USB-C configurations. Cables designed for currents above 3A require electronic marking under USB-C specifications. High-power USB PD applications can therefore require an appropriately rated E-Marked cable.

However, not every USB-C cable needs an E-Marker. Lower-power cables can operate without one.

This distinction is important when using chargers with multiple ports. A charger may support high wattage, but an unsuitable cable can prevent a device from receiving its maximum supported power.

Cable labels and certifications can help you identify suitable products. For high-power laptop charging, check whether the cable supports the required wattage.

Remember that an E-Marker does not make every cable faster. It identifies the cable’s capabilities. The charger and device must also support the required charging profile.

For reliable performance, match the cable rating with the charger and device. This avoids unnecessary charging limits and helps your equipment use its supported power safely.

Why Is Everyone Switching to USB-C?

The move toward USB-C comes from its combination of versatility, reversible design, compact size, and broad industry support. A single USB-C connection can support charging, data transfer, and video output when the connected hardware supports those features.

USB-C also works well across different categories of electronics. Phones, tablets, laptops, headphones, monitors, and accessories increasingly use the same connector.

This reduces the need for several different proprietary cables. It also makes chargers with multiple ports more useful because one charger can support several types of modern devices.

USB Power Delivery adds another advantage. Compatible devices can negotiate suitable power levels instead of relying on one fixed charging output.

Regulation has also encouraged USB-C adoption. The European Union has introduced common-charger requirements covering many electronic devices. These rules are intended to simplify charging and reduce electronic waste.

However, USB-C does not make every device identical. Different products still support different charging speeds, data standards, and power levels.

For consumers, the main benefit is flexibility. One well-equipped USB-C charger can replace several older adapters while supporting a wider range of everyday devices.

Streamlined Convenience and Electronic Waste Reduction

A wider USB-C ecosystem can make charging simpler. Instead of carrying separate adapters for every device, users can often rely on one compatible charger and several cables.

This is especially useful with chargers with multiple ports. A single power adapter can charge a laptop, phone, tablet, earbuds, and other accessories at the same time.

Fewer chargers can also mean less physical clutter. They can make travel easier because users need fewer bulky power adapters.

Standardization may also help reduce unnecessary accessory production and electronic waste. When devices share charging infrastructure, older proprietary adapters may become less necessary.

However, USB-C does not guarantee universal performance. Two USB-C cables can support different wattages or data speeds. Likewise, two USB-C ports can have very different power capabilities.

A cable designed for a phone may not provide enough power for a demanding laptop. The same applies to chargers.

Before buying, compare the charger, cable, and device specifications together. This approach helps ensure that your USB-C charging setup delivers the speed and compatibility you actually need.

Frequently Asked Questions

Can a Multi-Port Charger Damage My Smartphone Battery?

A reputable multi-port charger should not damage your smartphone simply because it has several ports. Modern charging systems are designed to negotiate appropriate power between the charger and connected device.

Your smartphone also controls how much power it accepts. Its charging system can regulate voltage, current, temperature, and charging speed throughout the charging process.

Chargers with multiple ports do not force their maximum wattage into every connected device. A charger rated at 100W does not automatically send 100W to a phone that supports a lower input level.

Heat is a more important consideration for battery health. High temperatures can accelerate battery aging, especially when they occur frequently.

Using reputable charging accessories can reduce unnecessary risks. You should also avoid damaged cables, poorly ventilated charging environments, and unreliable adapters.

If a phone becomes unusually hot while charging, investigate the charger, cable, and device. Persistent overheating is not something to ignore.

For everyday use, a compatible charger with appropriate safety protections is a sensible choice. More ports alone do not make a charger harmful to your smartphone.

What Wattage Multi-Port Charger Should I Buy?

The right wattage depends on the devices you plan to charge together. Start by checking the maximum charging input of each device you regularly use.

A phone and wireless earbuds typically require far less power than a laptop. A 45W charger can be suitable for many smaller setups.

If you regularly charge a laptop and phone together, 65W or more can provide greater flexibility. Users with several demanding devices may prefer a 100W, 140W, or higher charger.

Remember that the total rating is not the only specification that matters. Chargers with multiple ports can divide their total output between ports.

For example, a 100W charger might provide 65W to one port and 35W to another. Another model could use a completely different allocation.

Before buying, check the manufacturer’s power table. Look for both maximum total output and individual port limits.

Choosing more wattage than your current needs can also provide useful headroom. However, there is no need to buy an extremely high-wattage charger if your devices require very little power.

Why Does My Charger Momentarily Disconnect When I Plug in a Second Device?

A brief interruption can happen when chargers with multiple ports detect a newly connected device. The charger may need to recalculate how its available power should be distributed.

For example, a laptop could initially receive 65W from a charger. Connecting a phone may cause the charger to change the laptop’s available power and reserve some output for the phone.

During this process, some charger designs briefly interrupt power. The charger then renegotiates the appropriate power profiles with the connected devices.

This behavior can be normal, especially when the charger is designed to dynamically manage its ports. The interruption should usually be brief before charging resumes.

However, repeated disconnections are different. If devices continually stop and restart charging, check the cables and charger specifications.

You should also verify that the charger can handle the combined power requirements. An overloaded or poorly designed adapter may struggle with multiple demanding devices.

If the behavior persists with different cables and devices, replacing the charger may be appropriate. A quality charger should manage power consistently under normal operating conditions.

Does Fast Charging Degrade Battery Life Quicker Than Slow Charging?

Fast charging can produce additional heat, and excessive heat can contribute to battery aging. However, modern smartphones use charging controls to manage power and temperature.

The device does not necessarily maintain maximum charging power throughout the entire charging cycle. Charging often becomes slower as the battery approaches a high state of charge.

This helps manage heat and reduce stress on the battery. Battery management systems can also adjust charging based on temperature and other conditions.

Using chargers with multiple ports does not automatically increase battery wear. The phone still controls the power it accepts within its supported charging limits.

Battery longevity depends on several factors. Temperature, charging frequency, battery chemistry, usage patterns, and the device’s charging system all play a role. For a closer look at battery longevity, see Battery Health Vs. Cycle Count: Which Matters More?

Fast charging can therefore be used safely when supported by the device and charger. The important factor is using compatible, reputable charging equipment.

Avoiding excessive heat is particularly useful. Do not cover a phone with insulating materials while it charges, especially during demanding use.

Fast charging may affect battery aging in some situations, but it does not automatically mean your battery will degrade quickly.

Conclusion

So, are chargers with multiple ports slower than single chargers? Not necessarily. Their performance depends mainly on total wattage, power allocation, charging protocols, cable capability, and the connected devices.

Chargers with multiple ports can be extremely convenient when you regularly power several devices. They may slow individual devices when their combined power demand exceeds the charger’s available output.

A high-wattage charger can reduce this limitation. Models offering 100W or more can provide useful headroom for laptops, phones, tablets, and accessories.

Before buying, check these specifications:

  • Total output wattage
  • Per-port power distribution
  • USB Power Delivery support
  • Maximum device input
  • Cable wattage rating
  • USB-C and USB-A capabilities
  • Power allocation when multiple ports are active

A quality GaN charger with USB-C PD can provide a compact and efficient solution. Pairing it with properly rated USB-C cables can help your devices reach their supported charging speeds.

Do not choose a charger based only on its port count. Instead, consider how much power it can provide when all required ports are active.

With the right charger, cable, and device combination, chargers with multiple ports can keep your entire setup powered efficiently from one wall outlet.
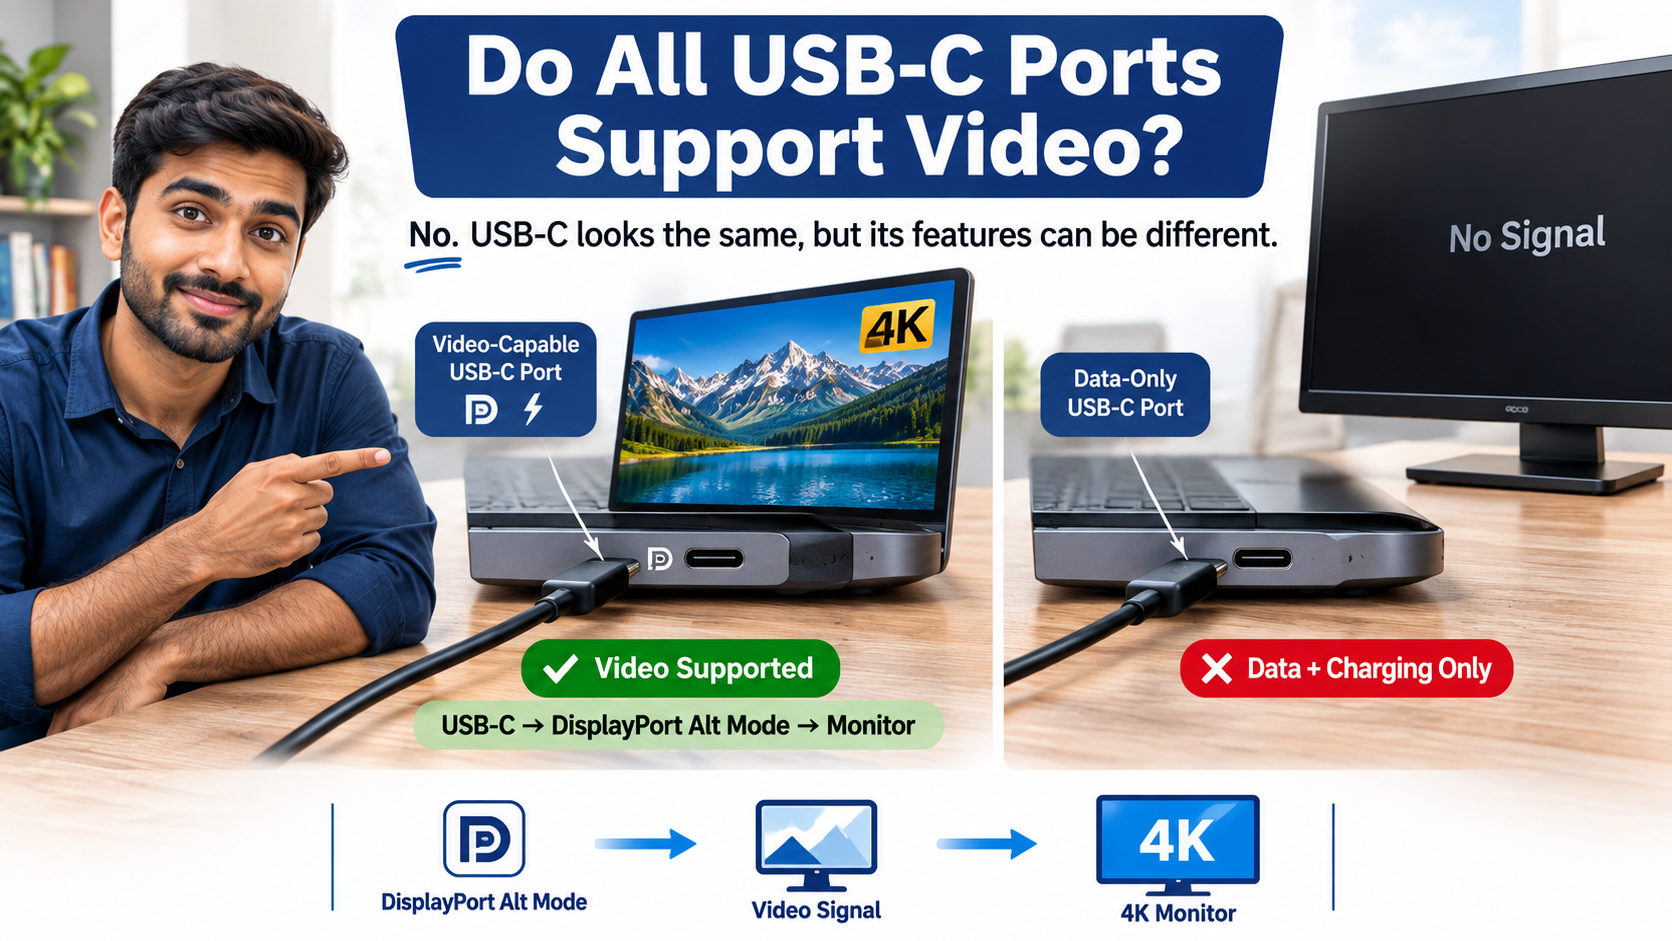
Do All USB-C Ports Support Video?

Do All USB-C Ports Support Video? The Ultimate Compatibility Guide

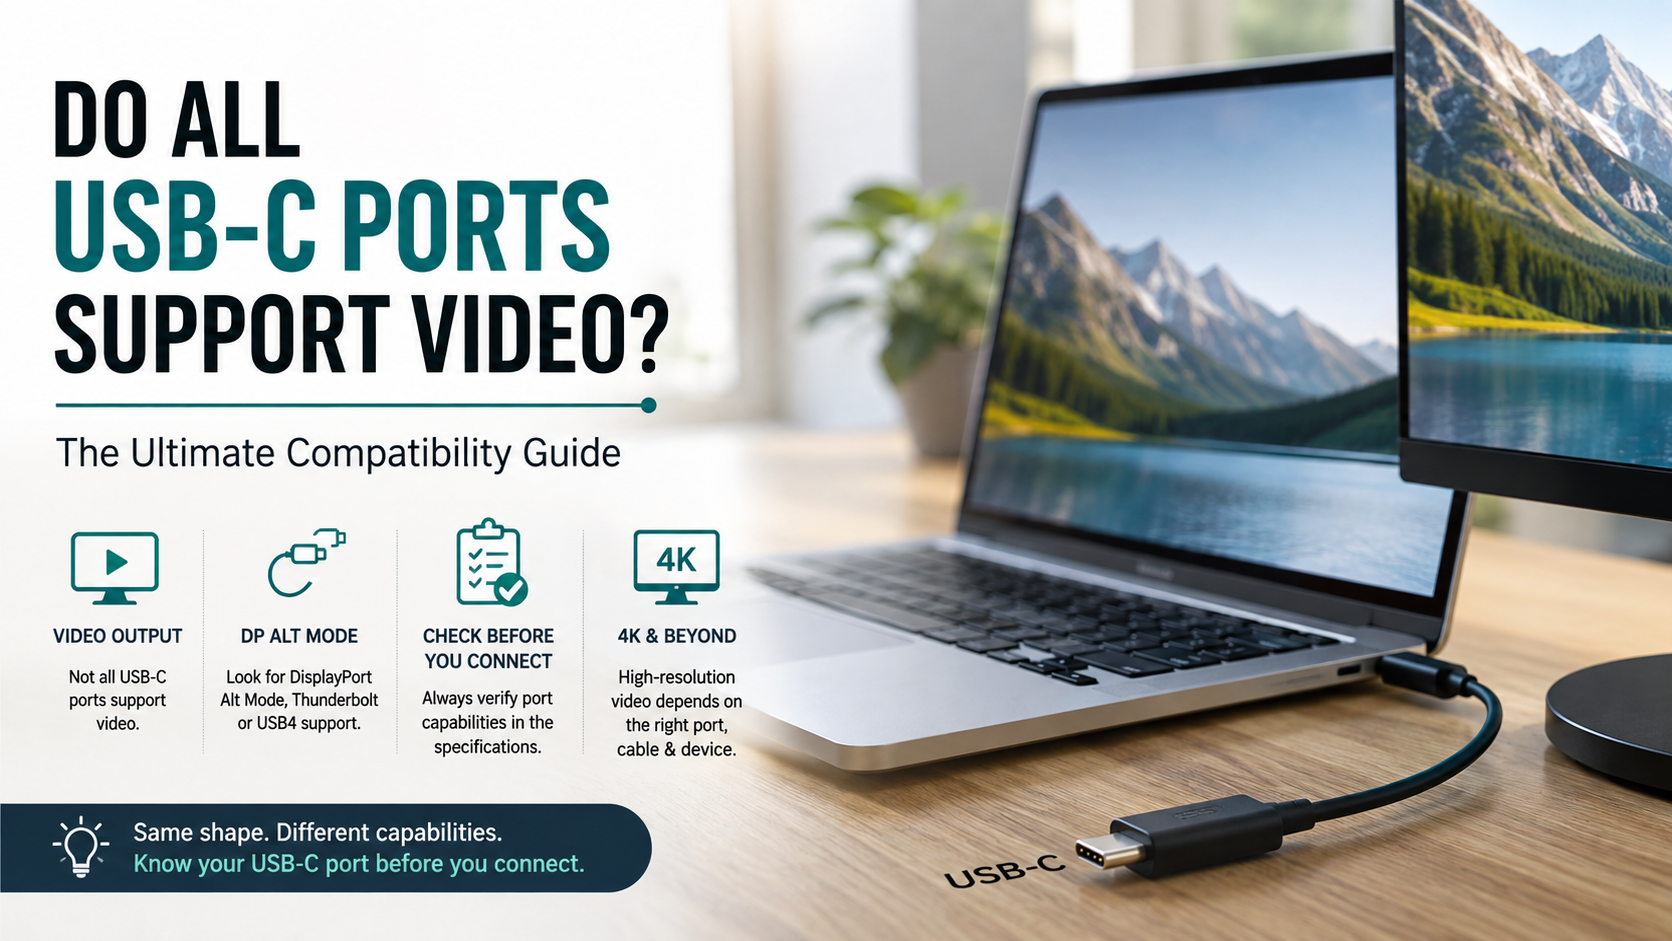
Plugging a monitor into a modern laptop should feel simple. Yet many users see a blank screen after connecting a USB-C display. If you are asking, do all USB-C ports support video, the answer is no.

USB-C describes the connector shape, not every feature supported by the port. Manufacturers can equip USB-C ports with different combinations of data, charging, and display capabilities. Some ports support only USB data and power. Others also support DisplayPort Alternate Mode (DP Alt Mode), Thunderbolt, or USB4 display features.

This difference explains why one USB-C port may connect to a monitor while another identical-looking port cannot. You cannot determine video support from the connector shape alone.

The official USB Implementers Forum (USB-IF) sets standard specifications, but device makers decide which features to include. Some ports only transfer data, others handle high-speed power delivery, and select ports carry rich audio-visual signals to external monitors.

In this guide, you will learn how to identify video-ready USB-C ports, understand DP Alt Mode, choose compatible cables, and determine whether USB-C can deliver 4K video.

How do I know if my USB-C port supports video?

If you are wondering, do all USB-C ports support video, start by checking the markings around your port. Look for a DisplayPort logo, monitor symbol, or Thunderbolt lightning-bolt icon. These symbols can indicate that the port supports video output.

If you see no useful symbol, check the manufacturer’s specifications or user manual. Search for terms such as DisplayPort over USB-CDisplayPort Alt Mode, Thunderbolt 3, Thunderbolt 4, or USB4 with display support.

You can also check your computer’s technical specifications. Operating system menus may show graphics and Thunderbolt hardware. However, they may not confirm the capabilities of each individual USB-C port.

When specifications are unclear, the manufacturer’s documentation is the safest source. This matters when you need 4K resolution, high refresh rates, HDR, or multiple external displays.

Check Hardware Logos and Device Specifications

Start by examining every USB-C port on your laptop, tablet, or desktop. A DisplayPort logo usually indicates video output through USB-C. A Thunderbolt lightning-bolt symbol generally indicates Thunderbolt support and display capabilities.

However, manufacturers do not use identical markings. Some devices have no symbol even when the port supports video. Others place port information only in the technical specifications.

For a reliable answer, search for your exact device model. Look for these terms:

  • DisplayPort Alt Mode: Enables native DisplayPort video through USB-C.
  • Thunderbolt 3 or 4: Supports high-bandwidth data and display connections.
  • USB4: May support display output, depending on the implementation.
  • USB-C data only: Does not provide native video output.

Do not assume every USB-C port on one device has identical capabilities. Manufacturers can assign different functions to individual ports.

Can all USB-C carry video?

If you are asking, do all USB-C ports support video, the answer is no. USB-C describes the connector and interface, not a guaranteed set of features. A USB-C port may support data, charging, video, or several functions together.

For native video transmission, the source device needs a compatible display technology. The most common option is DisplayPort Alternate Mode (DP Alt Mode). It allows DisplayPort signals to travel through a compatible USB-C connection.

Some systems provide display output through Thunderbolt or USB4. Other USB-C ports support only data transfer and charging. This difference is common across laptops, phones, tablets, and desktop computers. If you’re troubleshooting a computer that may have broader compatibility issues, How to Safely Upgrade to Windows 11 Without Losing Data may also be useful.

Two USB-C ports can therefore look identical but behave very differently. One may connect directly to a monitor, while another may show no signal.

Before buying a USB-C monitor, dock, or adapter, verify that the specific port supports video output. This simple check can prevent compatibility problems and unnecessary purchases.

The Role of Dedicated Hardware Protocols

USB-C video output depends on more than the connector itself. The device needs compatible hardware that can route display signals through the USB-C interface.

With DisplayPort Alt Mode, compatible DisplayPort signals from the graphics system can travel through selected USB-C lanes. Both the port and device must support the required configuration.

USB-C ports without display support can still provide fast data transfer, charging, and peripheral connectivity. They simply lack the required display pathway.

This distinction matters on laptops, desktop motherboards, tablets, and docking stations. A motherboard USB-C port may support video only when the processor or graphics hardware provides the required display output. For broader laptop hardware considerations, see Warning Signs for Your Laptop: 15 Red Flags.

When checking whether your USB-C port supports video, confirm three components:

  • The source device supports USB-C video output.
  • The dock or adapter supports the required display standard.
  • The cable supports the required bandwidth and features.

Checking all three helps prevent black screens and unreliable display connections.

Do all USB-C sockets support video?

No. Do all USB-C ports support video? No, because USB-C sockets can serve different purposes. The connector can support data transfer, charging, peripherals, and display output.

A device may include several USB-C sockets with different capabilities. One port might support DisplayPort Alt Mode, while another handles only USB data and power. This arrangement is common on laptops, monitors, docking stations, and desktop computers.

Monitor and docking-station ports need particular attention. A USB-C port designed for downstream accessories may connect keyboards, storage devices, or webcams. It may not accept video from a laptop.

Check the device documentation to determine whether a port is an upstream connection, display input, display output, or standard USB data port. Port labels can also provide useful clues.

The important point is simple: never judge a USB-C socket by its appearance. Confirm its supported protocols and bandwidth before assuming it can transmit video.

Identifying Downstream and Dedicated Peripheral Sockets

USB-C ports on monitors and docking stations can be confusing. They may look identical even though they perform different functions.

A monitor may have one USB-C input that accepts video and charging from a laptop. Nearby USB-C ports may connect only USB peripherals. Those accessory ports cannot necessarily receive or forward a laptop’s display signal.

Docking stations work in a similar way. They often include a dedicated upstream connection and several downstream USB ports. The downstream ports may support data transfer without supporting video.

Check the labels and specifications before connecting your display cable. Look for descriptions such as USB-C display input, DisplayPort Alt Mode, or Thunderbolt.

Also check power requirements for USB-C monitor connections. A display may support video but provide limited charging power.

Understanding these port roles prevents a common mistake. Not every USB-C socket performs the same job, even on one device.

Can a USB-C port be used for video output?

Yes. A USB-C port can provide video output when the device supports a compatible display protocol. So, if you ask do all USB-C ports support video, remember that video support depends on the port’s underlying hardware.

The most common method is DisplayPort Alternate Mode. Thunderbolt-enabled USB-C ports can also carry display signals. Depending on the device, one USB-C connection can carry video, data, and power simultaneously.

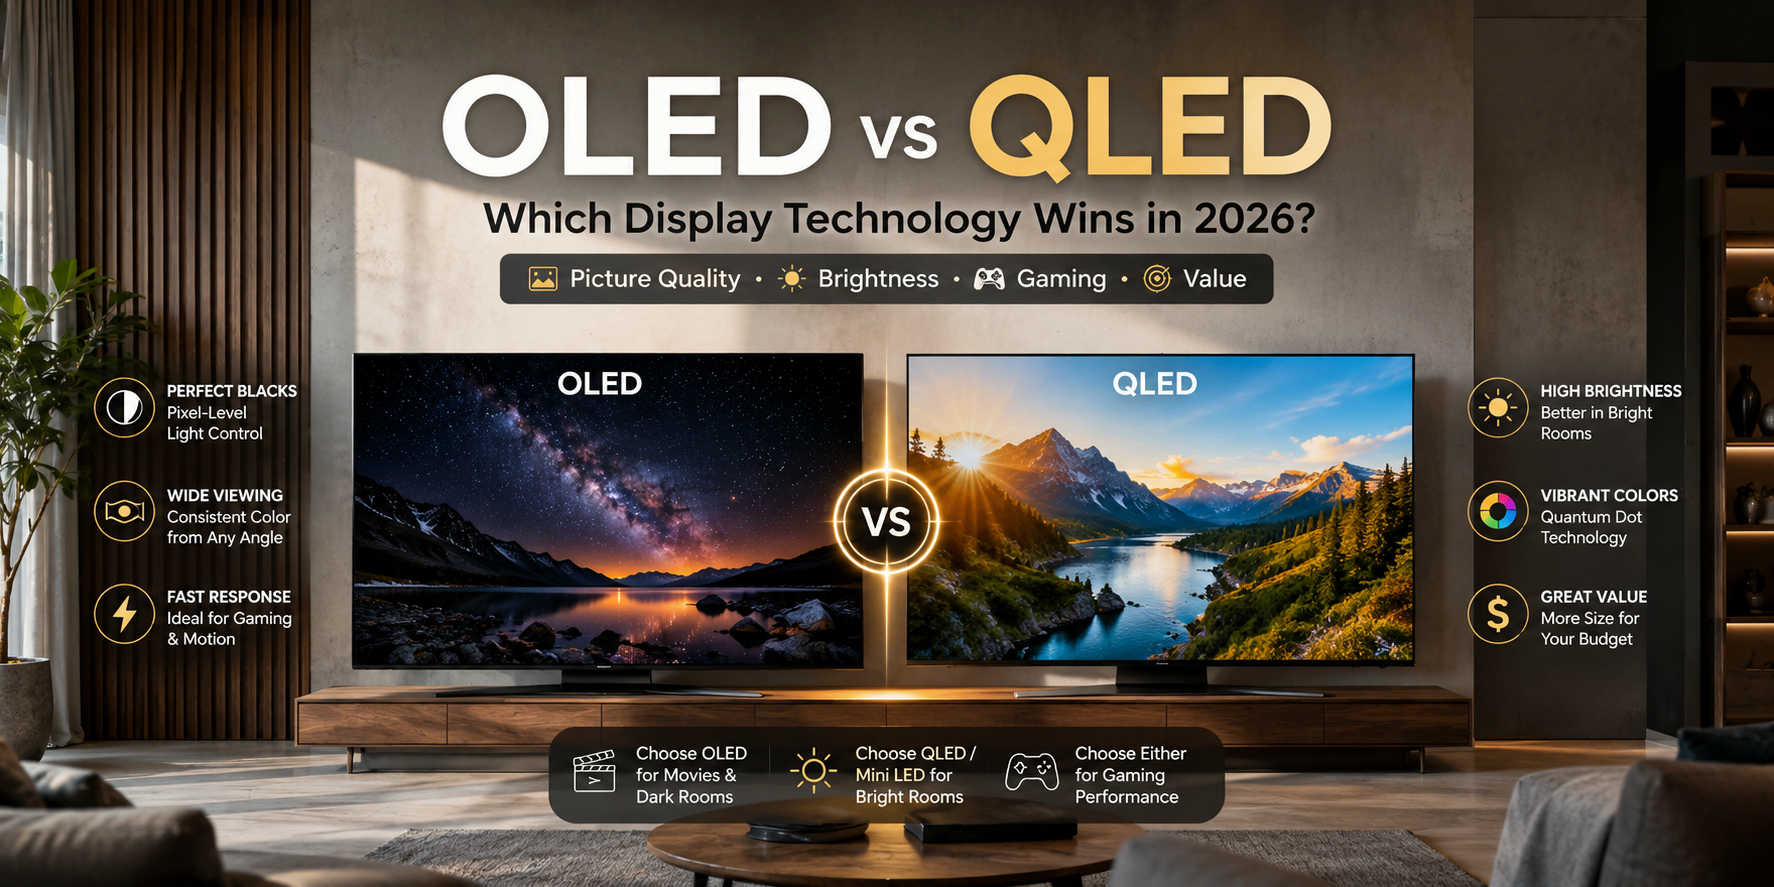
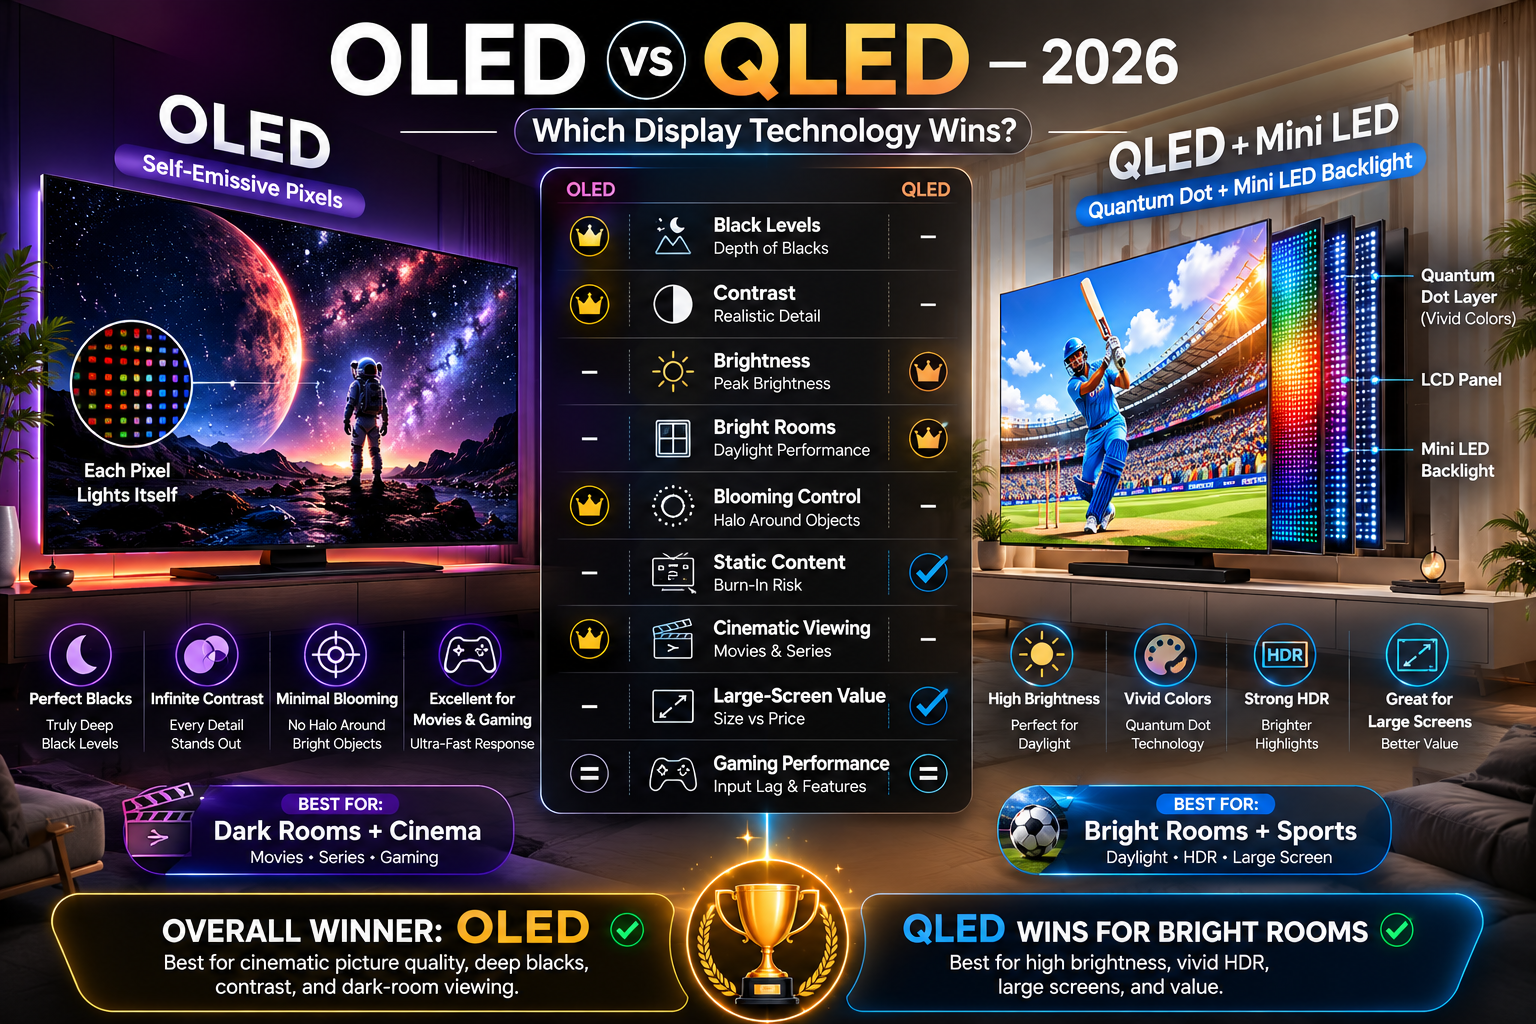
You can use a compatible USB-C-to-DisplayPort cable, USB-C monitor, or USB-C-to-HDMI adapter. The correct option depends on the video standard supported by your computer and display. If you’re also comparing display technologies, OLED vs QLED 2026: Which Display Technology Wins? can help you evaluate your monitor or TV options.

For reliable results, check the entire connection. Verify the source port, adapter or dock, display input, and cable.

Windows systems may also support multiple displays through Multi-Stream Transport (MST). However, the number of displays and supported resolutions depend on available bandwidth and graphics hardware.

USB-C can be an excellent single-cable display solution. However, you must confirm compatibility before connecting your equipment.

Essential Cables and Multi-Stream Transport Hubs

A video-capable USB-C port still needs the right cable or adapter. Not every USB-C cable provides the same data rate, display support, or power capabilities.

For direct DisplayPort connections, choose a cable rated for the required DisplayPort version and bandwidth. For HDMI displays, choose an adapter that clearly lists the resolution and refresh rate you need.

When selecting a cable or adapter, check:

  • Supported resolution, such as 4K.
  • Maximum refresh rate, such as 60Hz or 120Hz.
  • DisplayPort version or supported USB standard.
  • HDR support when required.
  • Power Delivery requirements.

MST hubs can allow compatible Windows systems to drive multiple displays from one USB-C connection. Available bandwidth and graphics hardware determine the practical limit.

Do not assume a USB-C charging cable supports high-resolution video. If you are asking do all USB-C ports support video, remember that both the port and cable must support the required display technology.

Always match your cable and adapter to your intended monitor setup.

Can USB-C transmit 4K video?

Yes. USB-C can transmit 4K video when the source port, display standard, adapter, and cable support the required bandwidth. This means the answer to do all USB-C ports support video is still no, even though compatible USB-C ports can handle high-resolution displays.

DisplayPort 1.2 over USB-C can generally support one 4K display at 60Hz under suitable conditions. DisplayPort 1.4 provides more bandwidth and can support higher refresh rates. Demanding modes, such as 4K at 120Hz, may require Display Stream Compression (DSC).

Thunderbolt 3 and Thunderbolt 4 can support multiple high-resolution displays. The

Frequently Asked Questions

What is DisplayPort Alternate Mode (DP Alt Mode)?

DisplayPort Alternate Mode is a functional extension of the USB-C standard that allows physical USB data lanes to transmit native DisplayPort audio and video signals. When active, it connects your computer’s internal graphics card directly to an external monitor without requiring proprietary drivers, delivering lag-free display performance over standard reversible cables.

Can I use a regular USB-C phone charging cable to connect a monitor?

No, standard white or black charging cables supplied with smartphones usually only support basic USB 2.0 data transfer speeds (480 Mbps) alongside power delivery. They lack the internal high-speed physical wiring needed to transmit high-bandwidth video signals, so your external monitor will display a “No Signal” error. For more information about USB-C connectivity and device capabilities, see 5 Ways To Use Your TV’s USB Port To Level Up Your Device.

Will a USB-C to HDMI adapter work on any computer?

A passive USB-C to HDMI adapter only functions on computers whose ports feature DisplayPort Alt Mode or Thunderbolt support. If your computer’s port handles data only, the adapter cannot extract a video feed. For data-only ports, you must use an active, driver-powered DisplayLink adapter instead.

What is the difference between Thunderbolt and standard USB-C for video?

While both share the identical physical plug, Thunderbolt guarantees high minimum bandwidth (up to 40Gbps on Thunderbolt 3 and 4) and native multi-display support. Standard USB-C ports may offer lower bandwidth, might limit display refresh rates, or might lack multi-monitor daisy-chaining capabilities entirely.

Conclusion

The answer to do all USB-C ports support video is a clear no. USB-C defines a connector and a set of capabilities, but manufacturers can implement different features on individual ports.

Some USB-C ports support only data and charging. Others provide DisplayPort Alt Mode, Thunderbolt, or USB4 display functionality. This explains why two identical-looking USB-C ports can behave completely differently when connected to a monitor.

Before purchasing a cable, adapter, dock, or display, verify the complete connection. Check your computer’s port specifications first. Then confirm the cable and adapter support your required resolution and refresh rate. If you’re choosing accessories for an Apple tablet, Best iPad Accessories Cheaper Than Apple  offers additional guidance.

For 4K displays, pay particular attention to bandwidth and refresh-rate specifications. A compatible USB-C connection can provide excellent video quality and support convenient single-cable setups.

Once you understand the difference between the connector and the underlying protocols, USB-C video compatibility becomes much easier to evaluate. Always check the specifications rather than relying on the port’s appearance alone.

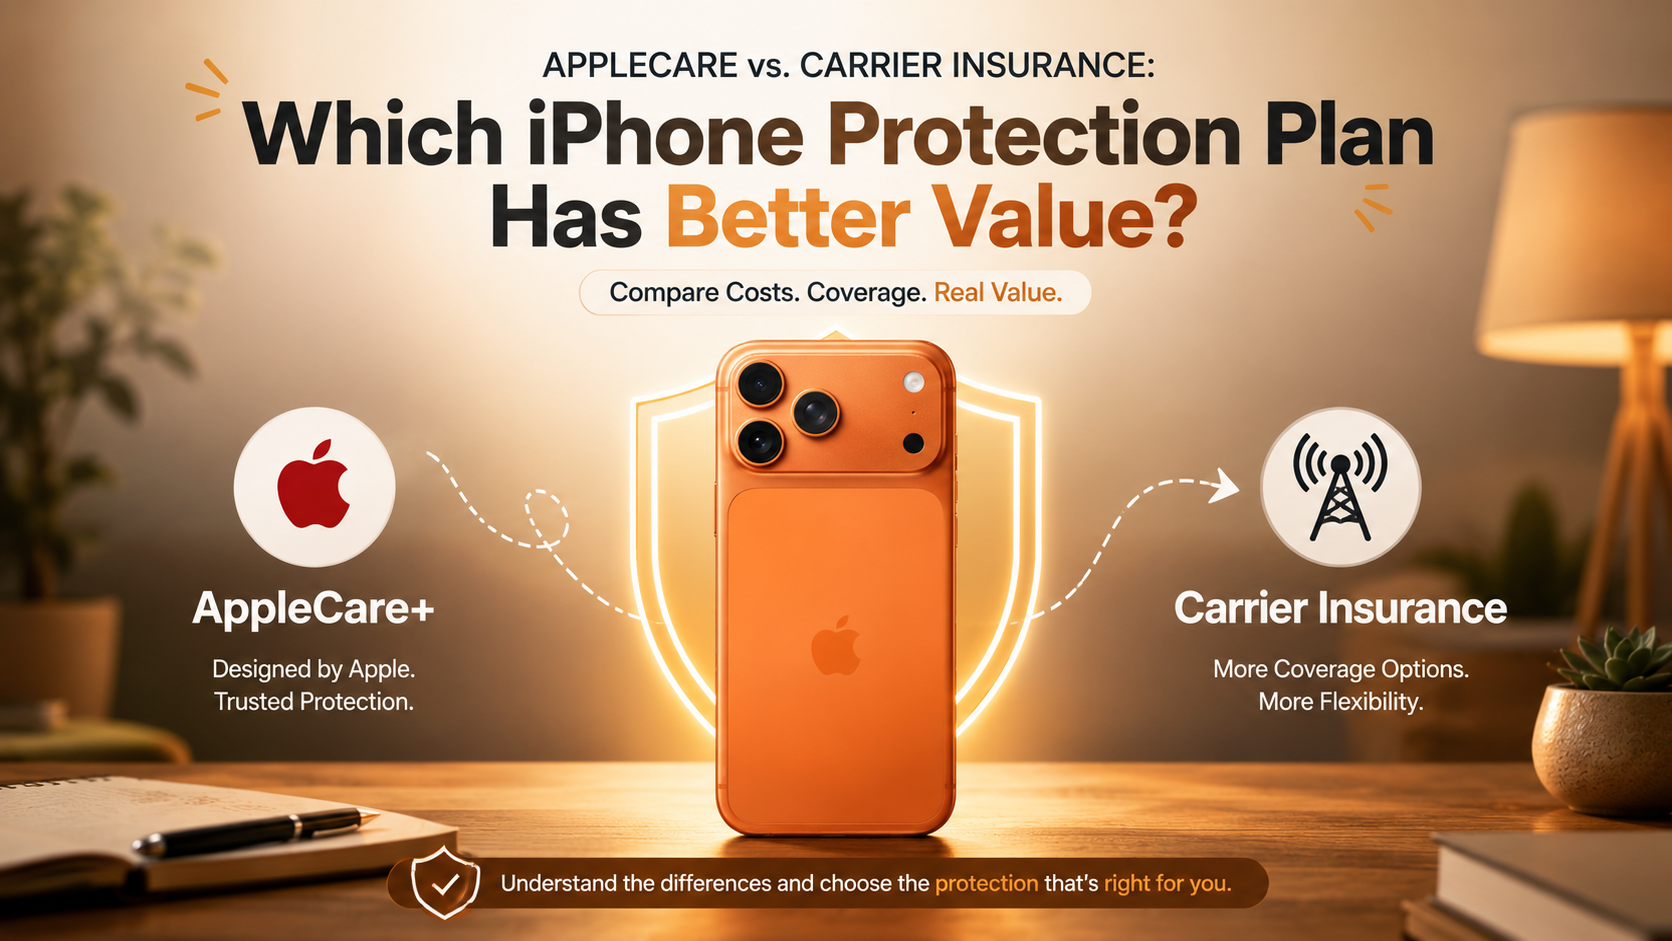
AppleCare vs. Carrier Insurance: Which Is Better?

AppleCare vs. Carrier Insurance: Which iPhone Protection Plan Has Better Value?

Protecting your iPhone is important, especially as flagship models become more expensive. A major repair can also cost hundreds of dollars without coverage. That makes choosing between AppleCare vs. carrier insurance an important decision after buying a new iPhone.

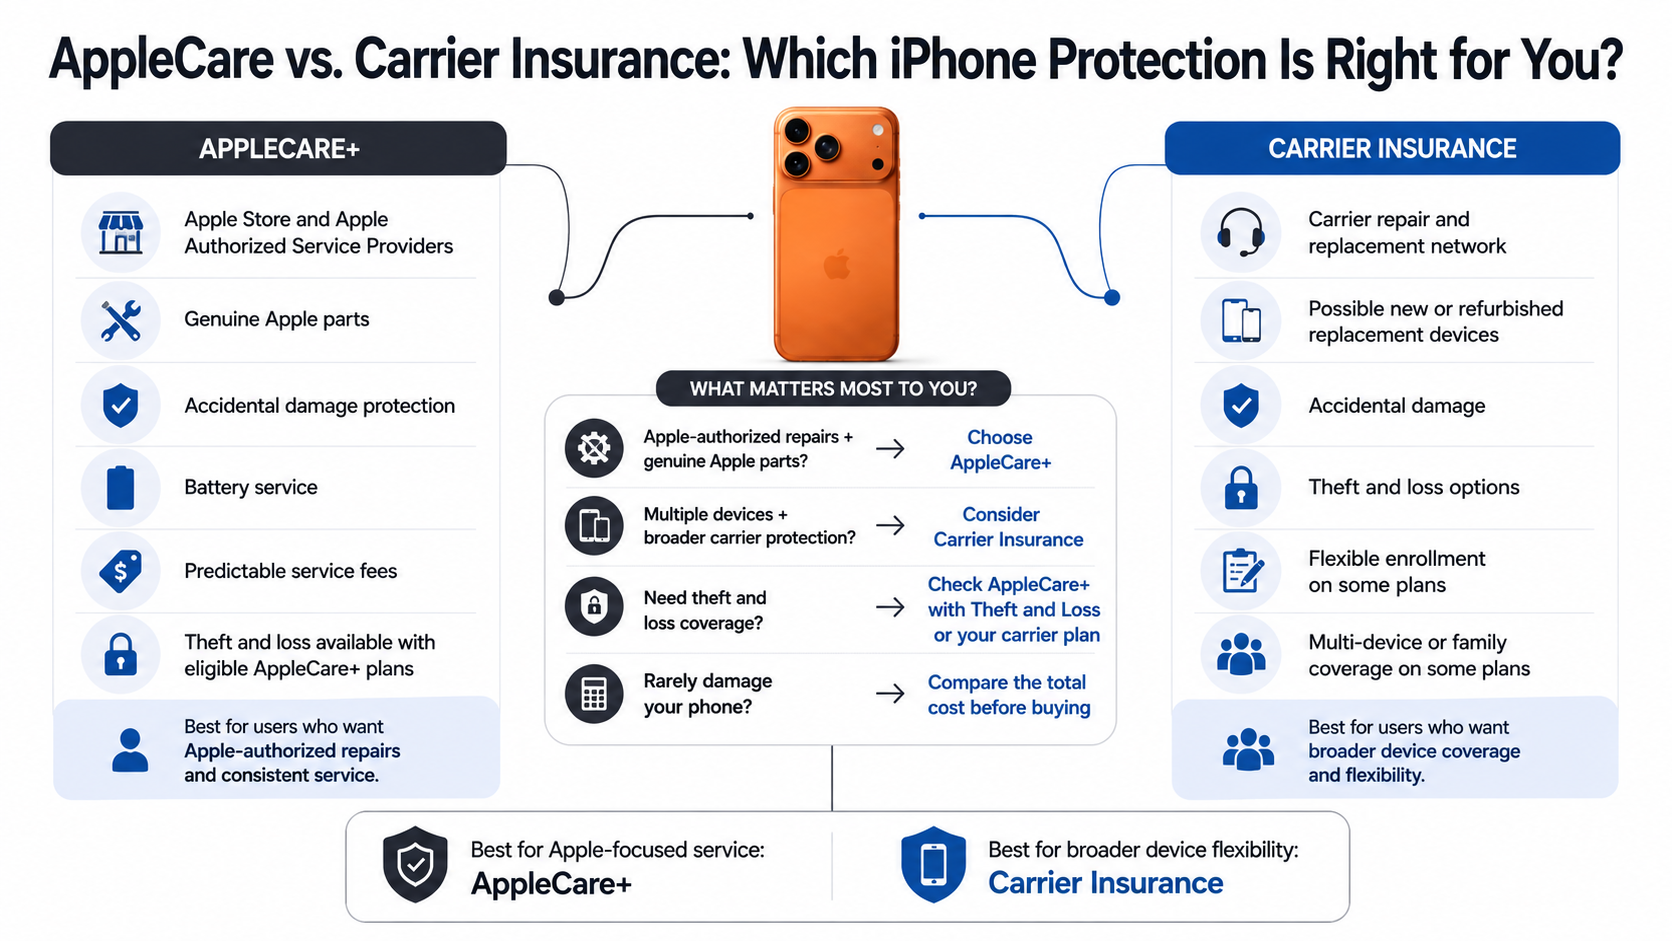
AppleCare+ and carrier protection plans can cover accidental damage. Some carrier plans also cover theft, loss, battery issues, and post-warranty failures. However, prices, deductibles, claim processes, and repair options can differ significantly.

AppleCare+ provides access to Apple Stores and Apple Authorized Service Providers. Carrier plans may offer broader protection, flexible enrollment, and multi-device options. The best choice depends on how you use your phone and which risks concern you most.

Apple’s plans also vary by market. In India, AppleCare Guide: Coverage, Cost, and Plans in India covers the latest details on AppleCare+ pricing and options. AppleCare+ with Theft and Loss is also available for eligible iPhones.

Is AppleCare better than carrier insurance?

When comparing AppleCare vs. carrier insurance, AppleCare+ is often the stronger choice for iPhone owners. It combines accidental-damage coverage with Apple’s repair network and technical support. Eligible plans also provide battery service and unlimited accidental-damage incidents while coverage remains active.

Carrier insurance can still make sense when you want broader protection. Depending on the provider, coverage may include loss, theft, damage, battery problems, and certain post-warranty failures. Some carrier plans also support multiple devices or offer convenient replacement services.

Repair costs are another important consideration. In the U.S., Apple lists a $29 service fee for screen-only damage and $99 for other accidental damage. In India, the current fees are ₹2,500 for eligible screen or back-glass damage and ₹8,900 for other accidental damage.

Carrier deductibles vary by provider and device. Therefore, compare the complete cost instead of focusing only on the monthly premium.

Genuine Parts and Service Reliability

AppleCare+ has a clear advantage for owners who prefer Apple-authorized repair service. Apple provides service through Apple Stores and its network of Authorized Service Providers. AppleCare+ repairs use genuine Apple parts when Apple performs or authorizes the service.

This can make the repair experience more consistent. Depending on your location, you can arrange in-person service or pickup and delivery. Apple also offers same-day service at some locations for eligible repairs.

Carrier insurance follows a different service model. Insurance administrators may use repair networks or provide replacement devices. Some replacement devices may be new, while others may be refurbished.

That does not automatically make carrier insurance a poor choice. It simply means the repair process differs from Apple’s ecosystem. If genuine Apple parts and Apple-authorized service matter most, AppleCare+ has a meaningful advantage.

Which insurance is best for iPhone?

When evaluating AppleCare vs. carrier insurance, AppleCare+ with Theft and Loss is a strong option for many iPhone owners. It combines accidental-damage protection with coverage for eligible theft and loss incidents. Apple says the plan includes up to two theft-or-loss incidents every 12 months.

AppleCare+ also covers accidental damage from incidents such as drops and spills. Battery service is included when the battery retains less than 80% of its original capacity. Apple also provides priority support and several repair options for covered devices.

In India, current AppleCare+ service fees are ₹2,500 for eligible screen or back-glass damage and ₹8,900 for other accidental damage. Theft or loss has a ₹15,900 service fee under the applicable plan.

Carrier insurance may be better if you prioritize flexible enrollment, broader device coverage, or household protection. However, compare exclusions, deductibles, and replacement terms before choosing.

The Impact of Deductibles and Hidden Fees

Understanding costs is essential when comparing AppleCare vs. carrier insurance. The monthly premium tells only part of the story. Your total cost can include premiums, service fees, deductibles, replacement charges, and other plan-specific expenses.

AppleCare+ uses defined service fees for covered accidental damage. In India, the current fees are ₹2,500 for eligible screen or back-glass damage and ₹8,900 for other accidental damage. Theft or loss under AppleCare+ with Theft and Loss carries a ₹15,900 service fee.

Carrier deductibles can vary significantly. Some carrier plans may charge a deductible for replacements while offering lower-cost repairs for certain screen damage. The exact amount depends on the carrier, device, location, and protection plan.

Before buying coverage, calculate your expected cost over the ownership period. Then compare that amount with the potential cost of one or two repairs.

Which device protection plan is better, AppleCare or Asurion?

When comparing AppleCare vs. carrier insurance, AppleCare+ and Asurion serve different needs. AppleCare+ is built around Apple’s repair and support ecosystem. Asurion, meanwhile, administers protection programs for major wireless carriers and manages carrier-specific claims and replacements.

AppleCare+ can be attractive when you own one iPhone and want Apple-authorized service. Apple offers accidental-damage repairs, battery service, priority support, and repair or replacement options through its support network.

Asurion can provide broader flexibility through carrier plans. Carrier protection programs can cover eligible loss, theft, accidental damage, battery issues, and certain device problems. Some plans also include technical support and additional service benefits.

Replacement quality can differ. Carrier protection claims may be fulfilled with new or refurbished devices. Replacement devices can also have different parts or components depending on the program.

Therefore, AppleCare+ is usually stronger for Apple-focused service, while carrier insurance can appeal to households wanting broader protection.

When Multi-Device Flexibility Outweighs OEM Exclusivity

Carrier protection plans can become more attractive when you manage several devices. A household might have iPhones, Android phones, tablets, and other connected products. A multi-device plan can simplify billing and claims across different brands.

However, Apple also offers a bundled option called AppleCare One. It allows eligible customers to protect multiple Apple devices under one plan. The plan can include iPhone, iPad, and Apple Watch devices under its applicable terms. If you also use an iPad, Best iPad Accessories Cheaper Than Apple  covers ways to save on compatible iPad products.

That means multi-device households should not assume carrier insurance is their only bundled option. Compare AppleCare One with your carrier’s multi-device protection before enrolling.

Enrollment flexibility can also affect your decision. Apple generally allows eligible customers to purchase AppleCare+ within 60 days of buying a new Apple device. The exact eligibility window can vary by country and product.

Choose the broader option when convenience matters most. Still, compare coverage limits, deductibles, exclusions, and enrollment rules before making your final decision.

Which is better, AppleCare or AppleCare+?

AppleCare+ is the more comprehensive option when you want protection against accidental damage. Apple’s standard limited warranty covers eligible manufacturing defects and hardware problems. It does not work like accidental-damage insurance.

Apple’s limited warranty generally provides one year of hardware coverage for eligible defects. AppleCare+ extends coverage and adds accidental-damage protection. It also provides additional service and support benefits.

That distinction matters when comparing protection plans. A display that fails because of a manufacturing defect is different from a screen cracked after a drop. Liquid damage is also different from a covered hardware malfunction.

AppleCare+ is designed to address everyday accidents that the standard warranty does not cover. Depending on the plan and market, it can also provide battery service and other support benefits.

If you only need protection against manufacturing defects, the standard warranty may be enough. If you want accidental-damage protection, AppleCare+ is the relevant upgrade. Theft and loss require a plan that specifically includes those benefits.

Understanding the Free Limited Warranty Limitations

The standard Apple limited warranty protects against manufacturing defects and eligible hardware problems. It is not designed to cover accidental drops, liquid damage, or other external causes. This difference is important when comparing Apple’s warranty with insurance-style protection.

A warranty and a protection plan serve different purposes. The warranty addresses qualifying defects. AppleCare+ adds protection for accidental damage and provides additional support services.

Without accidental-damage coverage, you may need to pay Apple’s applicable out-of-warranty repair price. Repair costs depend on the iPhone model and the type of damage.

AppleCare+ changes that calculation by applying defined service fees to eligible accidental-damage claims. In India, the current fees are ₹2,500 for screen or back-glass damage and ₹8,900 for other accidental damage.

Always check the terms for your exact iPhone and country. Coverage, service fees, and enrollment rules can change.

Is AppleCare+ really worth it?

AppleCare+ can be worth the cost when you are likely to make a claim. Its value becomes clearer when you compare the plan’s total cost with potential repair expenses. This is especially important for expensive iPhone models.

AppleCare+ covers eligible accidental damage and provides battery service when the battery retains less than 80% of its original capacity. These benefits can reduce repair and maintenance costs during ownership.

The plan can also reduce downtime. Apple provides repair options through Apple Stores and Authorized Service Providers. Pickup and delivery are also available in eligible situations.

However, AppleCare+ is not automatically worthwhile for everyone. If you rarely damage phones and can comfortably pay unexpected repair costs, self-insuring may be cheaper.

Consider AppleCare+ if you:

  • Frequently drop or damage devices.
  • Own an expensive Pro or Pro Max model.
  • Want Apple-authorized repair support.
  • Prefer predictable service fees.
  • Need theft and loss protection.

Your decision should depend on your risk level, repair budget, iPhone value, and expected ownership period.

Long-Term Value for Heavy Smartphone Users

Heavy smartphone users may receive more value from AppleCare+ because they face more opportunities for accidental damage. Frequent travelers, commuters, outdoor workers, and people who use their phones constantly may benefit from predictable repair costs.

AppleCare+ provides unlimited accidental-damage incidents for covered devices. Each approved incident remains subject to the applicable service fee. This can make the plan more useful for people who expect multiple repairs during ownership.

Battery service can also improve long-term value. Apple provides battery service when the battery retains less than 80% of its original capacity. This can reduce maintenance costs during extended ownership.

For long-term ownership, these benefits can add up. However, you should compare total premiums with your expected repair needs.

If you rarely damage your devices, coverage may not provide the best financial return. If one major repair would create financial pressure, AppleCare+ can provide valuable protection and peace of mind.

The best approach is to consider your risk level, iPhone value, ownership period, and available repair budget before purchasing.

Frequently Asked Questions

Can I buy AppleCare after buying carrier insurance?

Yes, you can purchase AppleCare+ within 60 days of your iPhone purchase regardless of whether you have carrier insurance. You simply need to run a remote diagnostic test on your iPhone via the Settings menu or visit an Apple Store to verify the device remains undamaged before activating the policy.

What happens if I lose my iPhone without theft coverage?

If you purchase standard AppleCare+ without the Theft and Loss add-on, lost or stolen devices receive no coverage. You will be forced to pay the full retail replacement price for a brand-new iPhone out of pocket. Always ensure the “Theft and Loss” tier is selected if misplacing devices is a concern.

Does carrier insurance cover older or used phones?

Yes, most wireless carrier protection plans allow enrollment for older, pre-owned, or refurbished devices during promotional open-enrollment periods or when switching lines. AppleCare+, on the other hand, strictly requires enrollment within the initial 60-day window following the official retail sale of a new device.

Does my credit card offer free cell phone protection?

Many premium credit cards offer built-in cell phone protection benefits if you pay your monthly wireless carrier bill using the card. This complimentary coverage typically includes accidental damage and theft with low deductibles, serving as an effective alternative to both carrier plans and standalone manufacturer insurance policies.

Conclusion

Choosing between AppleCare vs. carrier insurance depends on your priorities, budget, and risk level. AppleCare+ is often the stronger choice for iPhone owners who value Apple-authorized service, genuine Apple parts, and predictable service fees.

Apple provides accidental-damage coverage, battery service, priority support, and repair options through Apple Stores and Authorized Service Providers. AppleCare+ with Theft and Loss adds coverage for eligible theft and loss claims.

Carrier protection can still be useful. It may provide broader device coverage, flexible enrollment, multi-device options, or additional services. Carrier insurance can also offer repair and replacement choices through the carrier ecosystem.

Before choosing a plan, compare:

  • Monthly or upfront cost
  • Repair and replacement fees
  • Theft and loss coverage
  • Repair and replacement process
  • Enrollment requirements
  • Parts and replacement-device terms

For many single-iPhone users, AppleCare+ offers a strong balance of coverage and service quality. For households with several devices, a carrier plan or AppleCare One may be more convenient. If you’re also considering Apple’s broader product lineup, Apple Price Hike covers recent pricing changes affecting other Apple devices.

Check your eligibility, compare the complete costs, and review the current terms before enrolling.

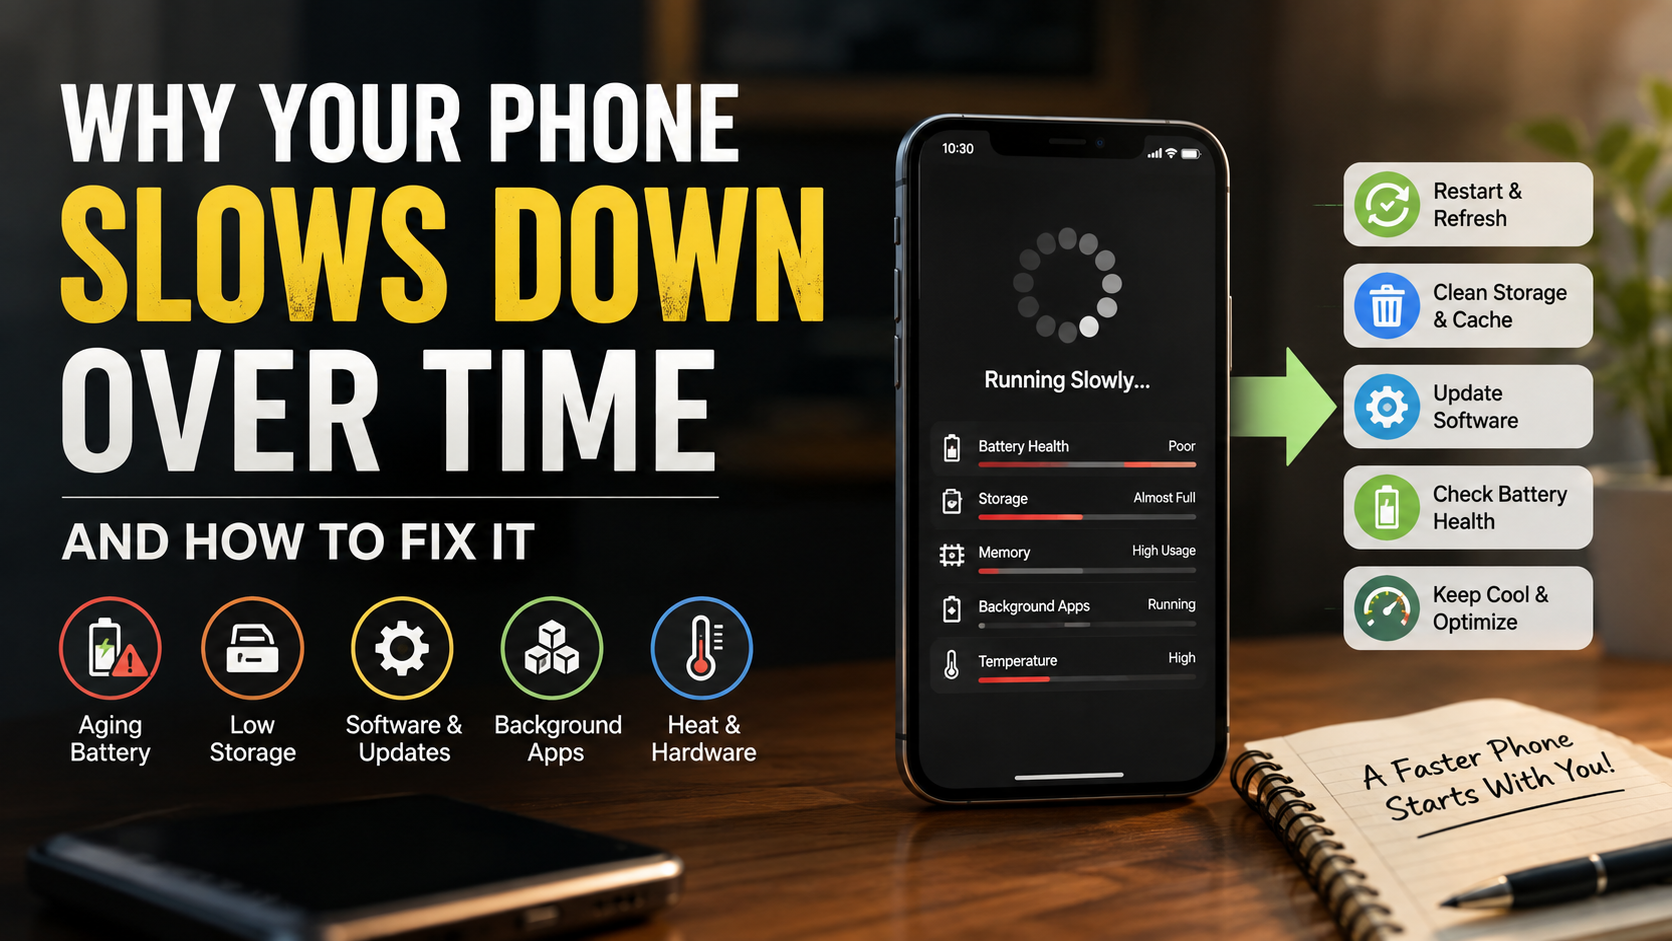
Why Your Phone Slows Down Over Time and How to Fix It

Why Your Phone Slows Down Over Time and How to Fix It

When you wonder why your phone slows down over time, the answer usually involves several factors working together. When you first unboxed your smartphone, it probably felt fast, responsive, and effortless. Months or years later, apps may take longer to open, animations can stutter, and menus may freeze. This gradual decline is common, but it does not always mean your phone is ready for replacement.

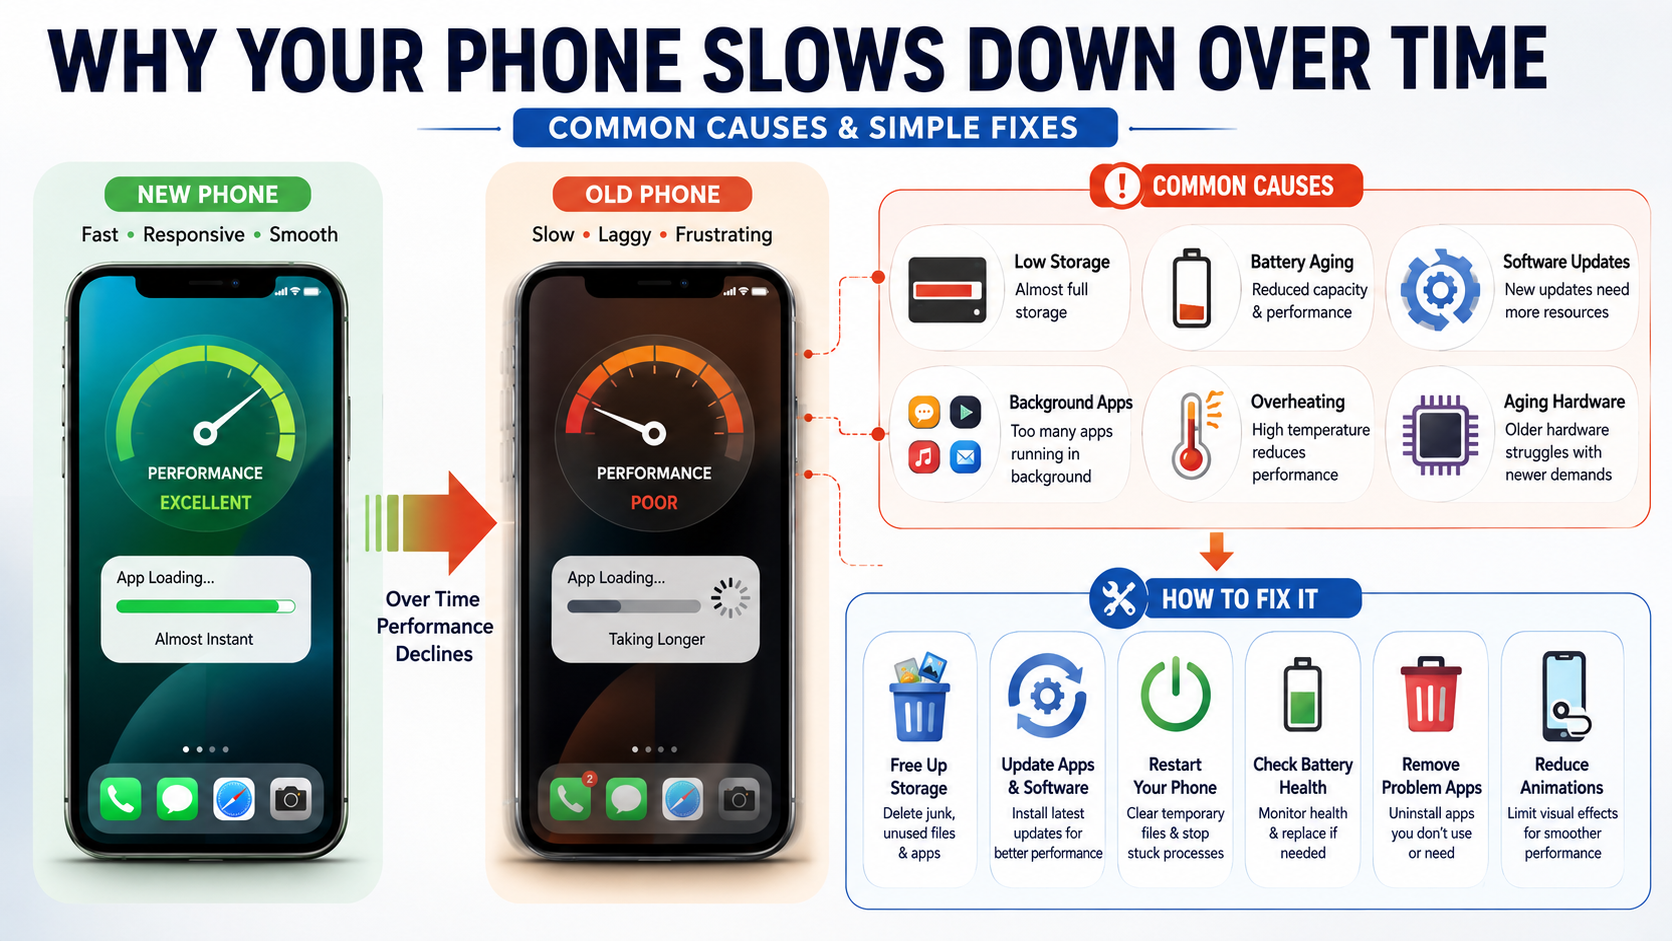
There are several reasons why your phone slows down over time. Aging batteries, limited storage, demanding software updates, background activity, heat, and aging hardware can all contribute. Some slowdowns are also caused by a single poorly optimized app.

According to hardware efficiency guidelines from the Federal Communications Commission, active device management and regular digital maintenance significantly protect both user security and daily processing performance.

Understanding why your phone slows down over time can help you find the right solution. Instead of immediately replacing your device, you can identify the specific problem and address it with simple maintenance.

The good news is that many performance problems are fixable. Simple maintenance can recover storage, reduce background activity, and improve everyday responsiveness. In this guide, you will learn why your phone slows down over time, what causes phone lag, how to speed up a slow smartphone, and when replacing the battery or device makes sense.

How do I fix the slowness of my phone?

You can often make a slow phone feel faster by reducing the workload on its processor, memory, and storage. Start with a simple restart, especially if the phone has been running for days. A restart can stop stuck processes and clear temporary system problems.

Next, check your available storage. Delete unwanted videos, downloads, duplicate photos, and unused apps. Keeping a reasonable amount of free storage gives your phone room to manage temporary files and everyday operations. You can also learn how to speed up your Android phone for additional performance improvements.

Then install available operating system and app updates. Updates can fix bugs and improve compatibility with newer services. Also check battery usage for apps that consume unusual amounts of power.

If you are still wondering why your phone slows down over time, check these common problem areas:

  • Remove apps you no longer use.
  • Reduce unnecessary background activity.
  • Restart the phone when performance problems appear.
  • Keep sufficient free storage available.
  • Check battery health on supported devices.
  • Consider a factory reset only after trying simpler solutions.

These steps address many common causes of smartphone slowdown without requiring a new device.

Clear Cached App Data Regularly

App caches store temporary files that help applications load certain content faster. Over time, these files can become large or cause app-specific problems. Clearing a cache can help when one particular app behaves slowly or incorrectly.

However, you do not need to clear every cache constantly. Modern phones manage temporary data automatically, and clearing caches too often can temporarily make some apps slower. Understanding the difference between clear cache and clear storage can help you avoid deleting important app data.

When troubleshooting why your phone slows down over time, focus on apps that are unusually large or frequently misbehave. Browsers, social media apps, and streaming services can accumulate substantial temporary data.

Before changing an app’s storage settings, read the available options carefully. Clearing a cache removes temporary files, while clearing storage can remove the app’s saved data and settings.

If an app still feels slow after clearing its cache, update it or reinstall it. If several apps have problems, investigate system-wide causes such as low storage, overheating, or outdated software.

Why do phones slow down over time?

The main reason why your phone slows down over time is the combination of aging hardware and growing software demands. New versions of apps often introduce richer graphics, larger files, and additional background features. Older processors and limited RAM may struggle with those demands.

Storage can also become a problem. When internal storage gets very low, phones may experience performance issues. A nearly full storage drive leaves less room for temporary files and normal system operations.

Battery aging is another important factor. Lithium-ion batteries gradually lose capacity and can become less capable of delivering peak power. Some devices can reduce performance when an aging battery cannot reliably provide the required power. Following good charging habits can help minimize unnecessary battery wear, so it is worth avoiding common myths about charging your phone.

Heat can make the problem worse. Phones may reduce performance when temperatures rise to protect internal components from excessive heat.

Software support also matters. A phone may remain physically functional while newer applications become increasingly demanding or unsupported. Together, these factors explain why your phone slows down over time and why an older device may feel less responsive after several years.

The Impact of Chemically Aged Batteries

Lithium-ion batteries naturally lose capacity as they chemically age. Their internal resistance can also increase, which affects how effectively they deliver power during demanding tasks.

This does not mean every old battery automatically slows a phone. Battery-related performance management depends on the specific device and operating system.

On some supported devices, power management can reduce peak performance when an aging battery cannot reliably deliver enough power. This can help prevent unexpected shutdowns during demanding tasks.

If you are investigating why your phone slows down over time, battery health should be one of the factors you check. Look for noticeably poor battery life, unexpected shutdowns, or a battery service warning. A qualified repair provider can determine whether battery replacement is appropriate.

battery replacement can improve reliability and may restore performance affected by battery-related power management. However, it will not fix problems caused by insufficient storage, outdated hardware, damaged components, overheating, or poorly optimized software.

Avoid assuming that an 80% battery-health reading automatically means your phone is being throttled. That percentage is not a universal performance threshold across all smartphones.

What is the lifespan of a phone?

There is no single lifespan that applies to every smartphone. A phone’s useful life depends on its hardware, battery condition, software support, repairability, and how heavily it is used.

Many modern smartphones can remain useful for several years when they receive security updates and maintain adequate battery health. Premium models may remain capable for longer, while some budget devices can reach hardware limitations sooner.

Storage and RAM also influence how long a phone feels comfortable to use. A device with limited storage can become harder to manage as apps and media grow larger. Newer applications may also perform poorly on older processors.

Physical condition matters too. A damaged charging port, failing display, swollen battery, or water damage can shorten a phone’s practical lifespan.

Software support is particularly important. A phone can still turn on after manufacturers stop providing updates, but compatibility and security may gradually become bigger concerns.

Rather than focusing on a fixed three-to-five-year lifespan, judge your device by its actual condition. If it remains secure, reliable, and fast enough for your needs, there may be little reason to replace it.

Software Support Defines Usable Longevity

Software support is one of the most important factors in determining how long a smartphone remains practical. Manufacturers eventually stop providing operating system upgrades or security patches for older models. At that point, the phone may still work, but its long-term usefulness can decline.

Newer applications may also require operating system versions that older devices cannot install. Some services may eventually stop supporting outdated software. This can affect productivity, payments, communication, and other everyday tasks.

Before buying a new smartphone, check the manufacturer’s stated software and security support period. Longer support can make a device a better long-term purchase, even when its initial hardware specifications are similar to cheaper alternatives.

You should also install available updates while your device remains supported. Updates can address security vulnerabilities, fix software bugs, and maintain compatibility with newer applications.

Still, software support is only one part of longevity. Battery health, storage capacity, processor performance, physical condition, and repair costs also matter.

A phone that receives updates but has a failing battery may need service. Conversely, a healthy phone with limited software support may eventually need replacement for security and compatibility reasons.

Why is my phone so laggy all of a sudden?

Sudden phone lag usually has a different cause from gradual aging. A new app update, background process, overheating, or critically low storage can create an immediate performance problem.

Start by checking whether your phone feels hot. Gaming, video recording, navigation, charging, and other demanding tasks can raise internal temperatures. Phones may reduce performance temporarily to control heat.

Next, check storage. Remove large files and unused applications if space is nearly full. Running out of storage can interfere with normal system operations and make everyday tasks feel sluggish.

You should also review recently installed or updated apps. One poorly behaved application can consume excessive processing power or repeatedly crash in the background.

Try restarting the phone and updating affected applications. If one app continues causing problems, force-stop it or uninstall it temporarily.

If lag affects the entire system, not just one application, look beyond individual apps. Check for overheating, low storage, battery problems, operating system issues, or failing hardware.

Check for Rogue Background Applications

Background applications can affect performance when they repeatedly use processing power, network connections, location services, or other resources. Modern operating systems limit background activity, so simply having many apps installed does not automatically make your phone slow.

The problem is usually an app that behaves poorly. A recently updated application may repeatedly crash, sync excessively, or consume unusual amounts of battery and processing resources.

Start by checking your phone’s battery or app usage settings. Look for applications that consistently rank unusually high without a clear reason. Compare their activity with how often you actually use them.

If one application stands out, update it first. If an update does not help, force-stop the app and monitor your phone. You can also uninstall an application temporarily to test whether it is responsible.

If the lag disappears, reinstalling a clean, updated version may solve the problem. Avoid installing aggressive phone booster or RAM cleaner apps because they can add unnecessary background activity. You can also review how much RAM an Android phone  to better understand whether memory limitations are contributing to slowdowns.

The goal is not to keep your recent-apps screen empty. Instead, focus on rogue or unnecessary background activity that actually affects performance.

How can I remove lag?

Removing persistent lag starts with identifying the cause rather than changing every setting at once. Check storage, battery condition, recent applications, software updates, and device temperature first.

If your storage is nearly full, remove large files and unused apps. Keeping a comfortable amount of free space gives your phone more room for normal system operations.

Next, install available system and application updates. If a specific app causes the lag, update, force-stop, or reinstall it.

You can also reduce unnecessary visual effects. Lowering animation scales can make an older phone feel faster because menus complete transitions more quickly. This improves perceived responsiveness rather than increasing the processor’s actual speed.

Avoid relying on aggressive task killers. Constantly closing applications can increase reload times and may use additional battery power.

If the phone remains slow across menus and apps, back up your important data and consider a factory reset. A reset removes personal data and installed apps, so it should be a later troubleshooting step rather than the first solution.

If a clean reset does not improve performance, aging hardware may be the real limitation. At that point, compare repair costs with the price of replacing the device.

Adjust System Transition Animation Speeds

Reducing animation duration can make a slow phone feel considerably more responsive. On Android devices that expose Developer options, users can adjust settings such as window animation scale, transition animation scale, and animator duration scale.

For example, changing an animation from 1x to 0.5x makes the transition shorter. Turning animations off removes the visual transition entirely. These settings do not make the processor faster, but they reduce the time spent watching interface effects.

The exact menu names and available options vary between Android manufacturers and software versions. Avoid changing unrelated developer settings unless you understand their purpose.

If you use an iPhone, the equivalent approach is different. iOS provides accessibility settings that can reduce motion and certain visual effects without exposing Android-style developer animation controls.

Animation changes are most useful when the phone responds quickly but feels slow because of lengthy transitions. They will not solve overheating, failing storage, battery-related performance management, or an overloaded processor.

Use animation adjustments as a finishing touch after addressing the underlying cause of the slowdown.

Frequently Asked Questions

Does factory resetting a phone make it run faster?

Yes, performing a factory reset reliably restores lost speed. Over years of use, operating systems accumulate broken registry entries, orphaned cache files, and fragmented app data. A complete factory reset wipes your internal storage drive entirely, reinstalling a clean, pristine version of the operating system. This process eliminates background bloatware and software bugs, making your phone feel brand new. Just ensure you back up all vital data beforehand.

How much free storage space does a phone need to avoid slowing down?

Your smartphone needs at least ten to twenty percent of its total storage capacity left unallocated to perform optimally. Solid-state storage drives rely on wear leveling and active background file arrangement to write incoming data quickly. When storage fills up completely, the system struggles to create temporary swap memory, leading to severe app crashes, frozen touch interfaces, and sluggish file access.

Will replacing my phone battery fix slow performance?

Replacing a worn-out battery frequently resolves chronic sluggishness on older devices. Both Apple iOS and modern Android platforms utilize intelligent power management software that deliberately downclocks processor speeds when battery health drops below eighty percent. Installing a fresh, certified replacement battery allows the processor to draw maximum voltage safely again, instantly restoring peak processing clock speeds during everyday multitasking.

Do background apps really slow down modern smartphones?

Yes, poorly optimized background apps can noticeably degrade overall system performance. While modern operating systems efficiently freeze idle tasks in random access memory (RAM), apps that continuously fetch location data, sync push feeds, or run unoptimized background scripts keep processor cores awake. This persistent CPU activity drains battery life, raises internal temperatures, and robs foreground applications of necessary processing power.

Conclusion

Understanding why your phone slows down over time can help you avoid an unnecessary upgrade. Slow performance often results from several factors working together. Limited storage, demanding software, background activity, heat, battery aging, and older hardware can all affect responsiveness.

Start with simple fixes. Restart the device, free up storage, update your software, and investigate applications that behave unusually. Clearing an app’s cache can also help with specific app problems, while reducing animations can make an older phone feel more responsive.

If battery health has significantly declined, a professional battery replacement may extend the device’s useful life. A factory reset is another option when software problems persist, but make sure your important data is backed up before resetting.

Aging hardware eventually creates limits that software maintenance cannot overcome. Still, good storage management, regular updates, careful battery use, and timely repairs can help your smartphone remain reliable and responsive for longer.

Peer-Reviewed Research : How It Works and Why It Matters

Peer-Reviewed Research Study: Why It Matters & How It Works

Navigating academic publishing can feel overwhelming for beginners. Understanding how a peer-reviewed research study works is essential when evaluating trustworthy information. Anyone can publish content online within seconds. That makes separating verified evidence from misinformation more difficult.

Peer review provides an important quality-control step in academic publishing. Experts evaluate research before a journal accepts it for publication. However, peer review does not guarantee that every published finding is correct. Instead, it helps identify weaknesses, methodological problems, unsupported claims, and other issues before publication.

According to the National Institutes of Health (NIH), peer review is an important part of scientific publishing and research communication. This guide explains how the process works and why it matters. You will learn what makes a research paper credible and how experts evaluate scholarly work.

We will also examine common peer-reviewed sources and explain how to identify them. By the end, you will better understand academic research and make more informed decisions when evaluating scholarly information.

What is a peer-reviewed research study?

A peer-reviewed research study is an academic paper that experts in the same field evaluate before publication. Researchers typically submit their findings to a scholarly journal after completing their study. An editor then assesses the submission and may send it to independent reviewers with relevant expertise.

Reviewers examine the research methods, evidence, analysis, and conclusions. They may identify errors, missing information, unclear explanations, or unsupported claims. They can also recommend changes that improve the paper before publication. Based on the reviewers’ feedback, the editor may accept, request revisions, or reject the manuscript.

Peer review helps journals maintain academic and scientific standards. It does not guarantee that every published study is flawless. Research can still contain limitations or produce conclusions that later studies challenge.

The Role of Blind Reviews

Some journals use double-blind peer review, where authors and reviewers do not know each other’s identities. Other journals use single-blind or open review systems. Anonymity can reduce certain personal biases, but it cannot remove every source of bias.

The review system depends on qualified reviewers, appropriate editorial decisions, and transparent publication practices. Together, these elements help strengthen the reliability of scholarly research.

What is peer review and why is it important?

Peer review is a formal evaluation process used by academic journals to assess submitted research. Experts with relevant knowledge examine a manuscript before the journal makes a final publication decision. Their role is to identify weaknesses and determine whether the research meets the journal’s standards.

This process matters because researchers often work with complex methods, large datasets, and specialized evidence. A second expert perspective can reveal problems that the original researchers may overlook. Reviewers may question research methods, statistical analysis, interpretations, or unsupported conclusions. Understanding the difference between research-based and evidence-based information can also help readers interpret these findings more carefully.

Peer review also encourages authors to explain their work more clearly. Reviewers can request additional evidence, stronger reasoning, or better descriptions of the research process. These revisions can improve the final article.

However, peer review is not a guarantee of truth. Reviewers can miss errors, and published findings can later be challenged or corrected. Still, peer review provides an important layer of academic quality control.

Protecting Academic Integrity

The review process supports academic integrity by encouraging researchers to present evidence honestly and clearly. Reviewers may identify questionable methods, inconsistencies, missing disclosures, or potential ethical concerns.

Editors can request clarification or further documentation when serious issues arise. Journals may also investigate concerns after publication when new evidence appears. These safeguards help maintain confidence in the academic record.

Peer review therefore supports research integrity without making research infallible. Scientific knowledge remains open to correction as better evidence becomes available.

What is peer review in simple terms?

In simple terms, peer review is an expert check performed before research is published. Imagine writing a complex essay and asking several teachers to examine it before submission. They would look for factual errors, weak arguments, unclear explanations, and missing evidence.

Academic reviewers perform a similar role, but they have specialized knowledge within a particular field. They examine whether the research question is appropriate and whether the methods support the conclusions. They may also identify weaknesses that require revision.

Reviewers can recommend acceptance, changes, or rejection. The journal editor makes the final decision after considering the available feedback. This process helps improve research before other scientists and readers rely on it.

Peer review is not simply a test that separates good research from bad research. It is also a structured way to strengthen scholarly communication and encourage researchers to address important weaknesses.

The Expert Feedback Loop

The reviewer-author relationship creates an important feedback loop. Reviewers identify problems, while authors respond with explanations, corrections, or additional analysis.

This exchange can make research clearer and more transparent. It can also encourage authors to explain limitations rather than presenting conclusions too broadly.

The process varies between journals and disciplines. Some reviews are anonymous, while others identify reviewers or publish review reports. Regardless of the format, constructive expert feedback remains an important part of scholarly publishing.

What are the 7 importances of research?

Research plays an important role in expanding knowledge and addressing practical problems. Its value extends beyond universities and laboratories. A peer-reviewed research study can contribute to evidence that influences medicine, technology, business, education, and public policy. Evidence-based research is especially valuable when making informed decisions across these fields.

Seven common importance areas include:

  • Gathering reliable information to answer specific questions.
  • Supporting medical progress through new evidence and treatments.
  • Building professional knowledge within specialized fields.
  • Understanding social issues through systematic investigation.
  • Encouraging critical thinking and evidence-based reasoning.
  • Supporting informed decisions in organizations and businesses.
  • Expanding knowledge by testing existing ideas and developing new explanations.

Research can also challenge theories that no longer fit available evidence. This process helps knowledge evolve rather than remain fixed.

Driving Daily Innovation

Research contributes to many technologies and services people use every day. Smartphones, medical treatments, communication systems, and modern materials all depend on years of investigation.

Innovation usually develops through multiple stages. Researchers identify problems, test ideas, analyze evidence, and refine their approaches. Other researchers then build on published findings.

Not every study produces a major breakthrough. Many studies provide smaller pieces of evidence that eventually contribute to larger advances. This cumulative process is one reason reliable research matters to society.

What are the 5 key elements of peer review?

The peer review process depends on several principles that help maintain research quality. Five key elements are impartiality, reviewer expertise, confidentiality, constructive criticism, and editorial oversight.

Impartiality means reviewers should evaluate research based on its quality rather than personal preferences. Reviewer expertise is equally important because complex studies require informed technical assessment. Confidentiality may protect unpublished research and allow reviewers to provide candid feedback.

Constructive criticism helps authors address weaknesses without turning the process into personal judgment. Useful reviews explain what needs improvement and why the issue matters.

Finally, editorial oversight keeps the process organized. Editors select reviewers, evaluate their recommendations, communicate decisions, and determine whether a manuscript is ready for publication.

These elements work together rather than independently. A journal can have skilled reviewers but still produce inconsistent decisions if editorial standards are weak.

The Role of Editorial Oversight

Editors have a central responsibility throughout peer review. They usually select reviewers with appropriate expertise and consider whether potential conflicts of interest could affect the evaluation.

When reviewers disagree, editors assess the reasoning behind their recommendations. They may request another review or ask authors for additional clarification.

Editors also decide whether revisions adequately address major concerns. This makes editorial judgment an important safeguard within academic publishing.

A well-managed review process should be fair, transparent, and appropriate for the journal’s subject area. Standards can differ between disciplines, so readers should consider the journal’s policies when evaluating published research.

What are examples of peer-reviewed sources?

Examples of peer-reviewed sources include research articles published in established scholarly journals. Well-known journals include Nature, The Lancet, and the Journal of the American Medical Association (JAMA). However, a journal’s reputation alone does not make every individual article correct.

Academic databases can help readers locate scholarly research. PubMed, JSTOR, Google Scholar, and Scopus provide access to large collections or indexes of academic literature. Their coverage and search features differ, so the best database depends on the subject.

When evaluating a source, check whether the specific article underwent peer review. Look for the journal’s publication policies and information about its editorial process. Some databases also provide filters that help users narrow results to scholarly or research-focused material.

Remember that conference papers, books, preprints, and reports may follow different review processes. They should not automatically be treated as peer-reviewed journal articles.

Identifying Credible Journals

You can assess a journal by reviewing its official website and publication policies. Look for clear information about peer review, editorial leadership, submission requirements, and ethical standards.

A credible journal should explain how manuscripts are evaluated. It should also provide information about conflicts of interest, corrections, and publication ethics when applicable.

Be cautious with journals that make unrealistic publication promises or provide little information about their editorial process. Predatory journals may prioritize publication fees over meaningful scholarly review.

Checking the journal, article, authors, methods, and evidence gives you a stronger basis for judging credibility. Evaluating research quality systematically can help you determine whether a study is reliable. Peer review is an important signal, but it should be only one part of your evaluation.

FREQUENTLY ASKED QUESTIONS

How can I tell if an article is peer-reviewed?

You can confirm an article’s status by checking the journal’s official website for an “Editorial Board” and “Review Policy” section. Additionally, search for the publication title in Ulrichsweb or academic databases like PubMed and JSTOR, which explicitly label evaluated periodicals. Standard popular magazines and general blogs never feature structured academic peer-review policies.

What is the difference between single-blind and double-blind review?

In a single-blind review, the expert reviewers know the identities of the authors, but the authors do not know who evaluated their manuscript. In a double-blind review, both the authors and the reviewers remain anonymous to each other. Double-blind evaluation minimizes unconscious geographic, institutional, and gender biases during assessment.

Can a peer-reviewed study contain errors?

Yes, peer review is not completely infallible. While the process catches major methodological flaws, mathematical errors, and unfounded claims, reviewers cannot always detect deliberate data falsification or subtle statistical anomalies. However, scientific publication encourages post-publication commentary, replication studies, and official retractions when subsequent investigators discover legitimate analytical mistakes.

How long does the peer review process usually take?

The entire process typically takes between three to twelve months, depending on the academic discipline and journal workflow. Finding qualified reviewers, conducting detailed manuscript critiques, performing requested laboratory revisions, and making final editorial decisions require substantial time. Certain urgent medical publications, however, use expedited fast-track reviews during public health emergencies.

CONCLUSION

Navigating modern information requires a clear understanding of empirical evidence and scientific validation. Peer-reviewed research remains the primary benchmark for distinguishing credible scientific facts from unverified opinions. By requiring independent subject specialists to scrutinize methodologies, evaluate statistical data, and challenge unsubstantiated conclusions, the academic publishing model ensures that published literature remains accurate, ethical, and dependable.

Throughout this guide, we explored how the review workflow functions, why systematic inquiry drives societal progress, and how to identify verified journals across academic databases. While the peer-review system is not entirely immune to human error, its multi-tiered evaluation structure provides the most reliable standard of truth available in modern science. Whether you are conducting academic research, designing corporate strategy, or evaluating everyday health advice, always prioritize vetted scientific literature. Applying these evaluation principles empowers you to reject sensational headlines and build your knowledge upon authentic, evidence-based discoveries.

How to Analyze Scientific Papers: A Step-by-Step Guide

How to Analyze Scientific Papers: A Step-by-Step Guide

Reading academic literature can feel like deciphering a complex foreign language. Dense terminology, technical data, and unfamiliar methods can quickly become overwhelming. However, learning to analyze scientific papers is essential for students, researchers, and anyone who wants to separate evidence from sensationalized claims.

A structured reading process can make scientific literature easier to understand. Research and guidance from the National Center for Biotechnology Information (NCBI) can help readers develop more systematic approaches to understanding scientific literature.

Instead, active reading helps you identify the research question, understand the evidence, and evaluate the authors’ conclusions. This approach also reduces wasted time on papers that are not relevant to your goals.

In this guide, you will learn how to break down a research paper, use the 5 C framework, find reliable scientific literature through resources such as PubMed and Google Scholar, and perform a critical analysis. These techniques can help you turn complex academic literature into clear, useful knowledge.

How do I analyze a research paper?

To systematically analyze scientific papers, use a multi-pass reading method instead of reading every section in order. Start by identifying your purpose. Decide what you need from the paper before examining its details.

First, read the title, abstract, and conclusion. These sections reveal the study’s purpose, main findings, and overall claims. Then scan the figures, tables, headings, and results to understand the evidence presented. This approach can help you decide whether the paper deserves deeper attention. For more context, see the levels of scientific evidence and how different types of evidence affect research conclusions.

Next, examine the methodology and results carefully. Ask whether the study design can answer the research question. Check how participants, measurements, controls, and statistical methods were selected.

Finally, compare the evidence with the authors’ interpretation. Take notes in your own words and record unanswered questions. This active process makes complex papers easier to evaluate and remember.

The Three-Pass Reading Strategy

The three-pass approach divides scientific paper analysis into three stages: scanning, understanding, and deep evaluation. Each pass has a different purpose, so you do not waste time trying to understand every detail immediately.

During the first pass, read the title, abstract, conclusion, headings, and figures. Identify the research question, main result, and general study design. Your goal is to understand the paper’s direction, not every technical detail.

During the second pass, examine the introduction, methods, results, and discussion. Focus on how the researchers designed the study and how the evidence connects to their conclusions. Compare figures and tables with the claims made in the text.

During the third pass, scrutinize the study’s assumptions, limitations, statistics, and interpretation. Ask whether alternative explanations exist and whether the evidence supports the conclusions. This stage turns ordinary reading into critical analysis.

You may also consult cited studies or supplemental material when important questions remain unanswered.

What are the 5 C’s in research?

The 5 C framework provides a simple way to organize your analysis of a scholarly publication. The five components are Category, Context, Correctness, Contributions, and Clarity. Together, they help you move beyond simply understanding what a paper says. It is also useful to understand the difference between research-based and evidence-based approaches when evaluating scholarly information.

Start with Category. Identify the type of study, such as an experiment, observational study, systematic review, or meta-analysis. The research design affects how you should interpret its evidence.

Next, examine Context. Determine what problem the study addresses and how it relates to previous research. Then evaluate Correctness by asking whether the methods, data, and statistical analysis support the conclusions.

Consider Contributions next. Identify what the research adds to existing knowledge and whether that contribution is meaningful. Finally, assess Clarity. Check whether the authors explain their methods, findings, limitations, and interpretations clearly.

This framework helps you organize questions while reading. It also makes it easier to compare multiple studies during literature reviews or research projects.

Applying the 5 Cs Systematically

Applying the 5 C framework works best when you record your observations while reading. Instead of relying on memory, create a simple note-taking system with one section for each category.

Under Category, record the study design and research type. Under Context, summarize the research problem and relevant background. For Correctness, note whether the methods and evidence support the conclusions.

Then record the study’s Contributions. Identify the new finding, method, dataset, or interpretation it provides. Finally, assess Clarity by noting confusing explanations, missing details, or unsupported claims.

A simple table or spreadsheet can make this process easier when reviewing many papers. You can also add columns for the research question, sample size, major findings, limitations, and follow-up questions. If you are balancing research with other coursework, learning how to study for multiple subjects can also help you organize your time effectively.

This method creates consistent literature notes. It also helps you compare studies without relying on vague impressions. Over time, your notes can become a useful reference for literature reviews, thesis writing, research planning, and academic discussions.

Where can I read scientific papers?

You can find scientific papers through academic databases, institutional libraries, open-access repositories, and scholarly search engines. The best source depends on your subject area and the type of research you need. When searching online, it is also important to know how to avoid misinformation while studying online so that unreliable sources do not influence your research.

Google Scholar is useful for discovering papers, citations, related studies, and versions available through different institutions. PubMed is particularly valuable for biomedical and health-related research. Europe PMC provides another useful resource for life sciences literature.

Preprint repositories can provide early access to research before formal peer review. Examples include arXiv, bioRxiv, and OSF. However, preprints should be interpreted carefully because they may not have completed peer review.

University libraries can also provide access to subscription journals through institutional credentials. When a paper is behind a paywall, services such as Unpaywall can help locate legally available versions.

When you analyze scientific papers, always consider the publication status, journal quality, study design, and source credibility. Access alone does not determine reliability.

Using Open-Access Tools Ethically

Open-access tools can help you find research legally without relying on unauthorized copies. Unpaywall can identify openly available versions of scholarly articles hosted by legitimate repositories or publishers.

If you cannot access a paper through an open repository, check your university or public library. Many institutions provide journal access through library databases. Interlibrary loan services can also help locate articles that are not immediately available.

Another option is contacting the corresponding author. Researchers often share their work through institutional repositories or personal academic pages. Some may also provide a copy when contacted directly for legitimate research purposes.

Always check the source before downloading a paper. A legitimate open-access copy may appear on a university repository, government archive, journal website, or recognized scholarly platform.

Ethical access matters because it supports researchers and publishers while still allowing readers to obtain scientific information. Once you have the paper, evaluate its methods, evidence, limitations, and conclusions rather than assuming accessibility guarantees quality.

How do I critically analyse a research paper?

To critically analyse a research paper, evaluate whether its research question, methodology, evidence, and conclusions align. A paper can appear convincing while still containing important limitations. Peer review improves scholarly work, but it does not make every conclusion automatically correct. Understanding different levels of scientific evidence can also help you judge how strongly a study’s findings should be interpreted.

Start by identifying the research question and hypothesis. Then examine whether the study design can actually answer that question. Check the sample size, participant selection, controls, measurements, and data collection procedures.

Next, examine the statistical analysis. Ask whether the selected tests suit the data and whether the reported results support the stated claims. Pay attention to effect sizes and confidence intervals, not only statistical significance.

Look for potential biases and confounding variables. Selection bias, measurement bias, missing data, weak controls, and unblinded procedures can affect results. Also consider whether the findings apply beyond the study population.

Finally, compare the discussion with the actual evidence. Watch for claims that go beyond what the data can establish. A strong analysis separates demonstrated findings from interpretation and speculation.

Identifying Methodological Flaws and Bias

Identifying methodological flaws requires more than checking whether a study produced statistically significant results. You need to determine whether the research process could reasonably produce trustworthy evidence.

Start with the study population. Ask whether participants were selected appropriately and whether the sample represents the population discussed in the conclusions. Small or highly selective samples can limit generalizability.

Examine the controls, randomization, blinding, and measurement procedures when applicable. Poor controls can create alternative explanations for observed effects. Missing data or inconsistent measurements can introduce additional uncertainty.

Also look for confounding variables. A relationship between two variables does not automatically prove that one caused the other. Observational studies can identify associations, but stronger causal claims usually require stronger designs and supporting evidence.

Review the statistical methods and reported uncertainty. Check whether the analysis matches the study design and whether the authors acknowledge important limitations.

Finally, consider funding sources and conflicts of interest. These factors do not automatically invalidate research, but they can provide useful context. A rigorous critique asks what the study demonstrates, what remains uncertain, and what evidence would strengthen the conclusion.

Frequently Asked Questions

What is the most important section to read first in a research paper?

Start with the abstract, then review the introduction and conclusion. The abstract gives you the research question, methods, and main findings. The introduction explains why the study matters, while the conclusion summarizes what the researchers believe the evidence shows. This first overview helps you analyze scientific papers efficiently before spending time on technical details. It also helps you decide whether the study is relevant to your research or specific question.

How long should it take to thoroughly review an academic study?

A thorough review can take one to two hours for an experienced reader. Beginners may need three hours or longer, especially when the paper contains complex statistics, unfamiliar terminology, or detailed methodology. When you analyze scientific papers, avoid rushing through every section in one sitting. Use multiple reading passes instead. Start with the main argument, then examine the methods, results, figures, and limitations. The time required also depends on the paper’s complexity and your familiarity with its subject.

What are the main signs of a low-quality research paper?

Several warning signs can indicate a weak research paper. Look for vague methodology, inadequate sample sizes, missing control groups, poor statistical reasoning, and conclusions that exceed the evidence. Unclear figures or unexplained data can also raise concerns. When you analyze scientific papers, check whether the authors clearly describe how they collected and analyzed their data. Consider whether important limitations are acknowledged. Funding sources and conflicts of interest should also be reviewed because they provide useful context when assessing potential bias.

How can I keep track of papers I have already analyzed?

Use a reference management tool such as Zotero, Mendeley, or another organized research system. These tools can help you save papers, add tags, organize studies into folders, and store notes alongside references. When you analyze scientific papers, create a consistent summary for each study. Record the research question, methodology, key findings, limitations, and your assessment of the evidence. You can also use the 5 C framework to structure your notes, making it easier to compare studies during literature reviews and research projects.

Conclusion

Learning to effectively analyze scientific papers is an indispensable skill that transforms how you consume and apply knowledge. While academic literature can appear intimidating initially, following a structured workflow simplifies even the most technical studies. By adopting a multi-pass reading method and applying the 5 C framework, you can rapidly unpack core concepts and gauge their relevance to your work.

Furthermore, knowing where to source open-access literature and maintaining a healthy sense of critical skepticism ensures that your research builds on solid, verifiable evidence. Always scrutinize methodologies, check data integrity, and identify potential biases before accepting conclusions at face value.

As you practice these steps, your reading speed, retention, and critical thinking will improve dramatically. Choose an intriguing paper from an open repository today, apply the strategies outlined in this guide, and experience how rewarding active scientific analysis can be.

Personal Loans vs Credit Cards: Which Option Is Better?

Personal Loans vs Credit Cards: How to Choose the Right Borrowing Option

Choosing between personal loans vs credit cards often comes down to your immediate cash requirements and your repayment discipline. According to consumer guidelines from the Consumer Financial Protection Bureau, understanding the true cost of credit helps borrowers avoid long-term debt traps. Both products provide access to borrowed funds, but they function differently in practice.

A personal loan offers a lump sum of money with a fixed repayment period and predictable monthly installments. In contrast, a credit card provides a revolving line of credit that you can draw from repeatedly. Using the wrong financing tool can lead to excessive interest charges or damaged credit scores.

This guide breaks down everything you need to know about these two common borrowing options. We answer essential questions about whether credit card loans beat installment loans, which option builds your credit profile faster, the hidden disadvantages of personal borrowing, and which product is simpler to obtain. You will also discover whether credit card EMIs or standard personal loans offer better value for your wallet.

Is a credit card loan better than a personal loan?

A credit card loan is not automatically better than a personal loan. The better option depends on the amount borrowed, repayment period, and total borrowing cost. Credit card borrowing can be convenient when you need funds quickly for a smaller expense. Some cards also offer pre-approved borrowing or instant access to funds.

However, convenience can come with higher interest costs. A personal loan may be more suitable when you need a larger amount or several months or years to repay it. Personal loans commonly offer fixed interest rates and predictable monthly payments, depending on the lender and product.

Consider a credit card when you can repay the balance quickly and avoid expensive revolving interest. Consider a personal loan when you need structured repayment for a larger planned expense. It is also useful to understand the difference between good debt and bad debt before taking on new borrowing.

Before choosing, compare the annual interest rate, processing fees, repayment period, and total amount payable. The lowest monthly payment is not always the cheapest option.

Total Cost and Interest Rate Comparison

Interest rates can make a major difference when comparing personal loans and credit card borrowing. Personal loans often have lower interest rates than standard credit card balances, especially for borrowers with strong credit profiles. They also usually provide a fixed repayment schedule, which makes the total cost easier to estimate.

Credit card borrowing can become expensive when you carry a balance from month to month. Interest may continue accumulating until the balance is repaid. Cash advances can also have separate fees and interest rules, depending on the card issuer.

A useful comparison should include more than the advertised interest rate. Check:

  • Interest rate and effective borrowing cost
  • Processing or origination fees
  • Late-payment charges
  • Prepayment or foreclosure charges
  • Repayment tenure
  • Total interest payable

If you need several years to repay a large balance, a personal loan may cost less overall. If you can repay quickly, a credit card may be more convenient. Always compare the complete cost before borrowing, especially if you are already working to pay off debt faster and reduce your outstanding balances.

Are credit cards or personal loans better for credit?

Neither credit cards nor personal loans is automatically better for your credit profile. Their impact depends mainly on how you manage the account. On-time payments are important for both types of borrowing and can support a healthy credit history. For more ways to strengthen your credit profile, see this guide to improving your credit score fast.

Credit cards can also affect your credit utilization ratio. This measures how much of your available revolving credit you are using. High utilization can negatively affect credit scores, while lower utilization is generally viewed more favorably.

Personal loans work differently because they are installment accounts. Regular payments can demonstrate responsible management of fixed-term debt. They may also contribute to your overall credit mix, although credit mix is only one part of a credit score.

Opening either account can temporarily affect your credit because lenders may perform a hard inquiry. Taking on debt you cannot comfortably repay can cause more serious problems.

For that reason, the best choice is the product you can manage responsibly. Payment history, debt levels, and responsible borrowing matter more than simply choosing one product over the other.

The Role of Credit Utilization

Credit utilization is particularly important when using credit cards. It compares your outstanding revolving balances with your available credit limits. For example, a $2,000 balance on a $10,000 limit represents 20% utilization. Understanding credit card tips and responsible usage can also help you manage revolving debt more effectively.

Lower utilization is generally better for credit health, although there is no universal percentage that guarantees a higher score. The often-mentioned 30% guideline is useful as a general reference, not a strict rule.

Personal loans do not normally count toward revolving credit utilization in the same way. Instead, they are installment accounts with a fixed balance that typically decreases as you make payments.

Credit cards can therefore have a more visible short-term effect on credit scores through utilization. However, this does not mean credit cards are inherently better for building credit.

To use a card responsibly:

  • Keep balances manageable.
  • Pay bills on time.
  • Avoid repeatedly reaching the credit limit.
  • Monitor your overall debt.
  • Pay more than the minimum when possible.

A personal loan can also support your credit history when you make every scheduled payment on time.

What are the disadvantages of a personal loan?

Personal loans offer predictable repayment, but they are not without drawbacks. One major disadvantage is the fixed repayment obligation. Once the loan is disbursed, you generally need to make the agreed monthly payment regardless of changes in your budget.

Personal loans can also include processing, origination, documentation, or other lender-specific charges. These costs reduce the amount you actually receive or increase the overall borrowing cost. Some loans may also have restrictions or charges related to early repayment, depending on the lender and local rules.

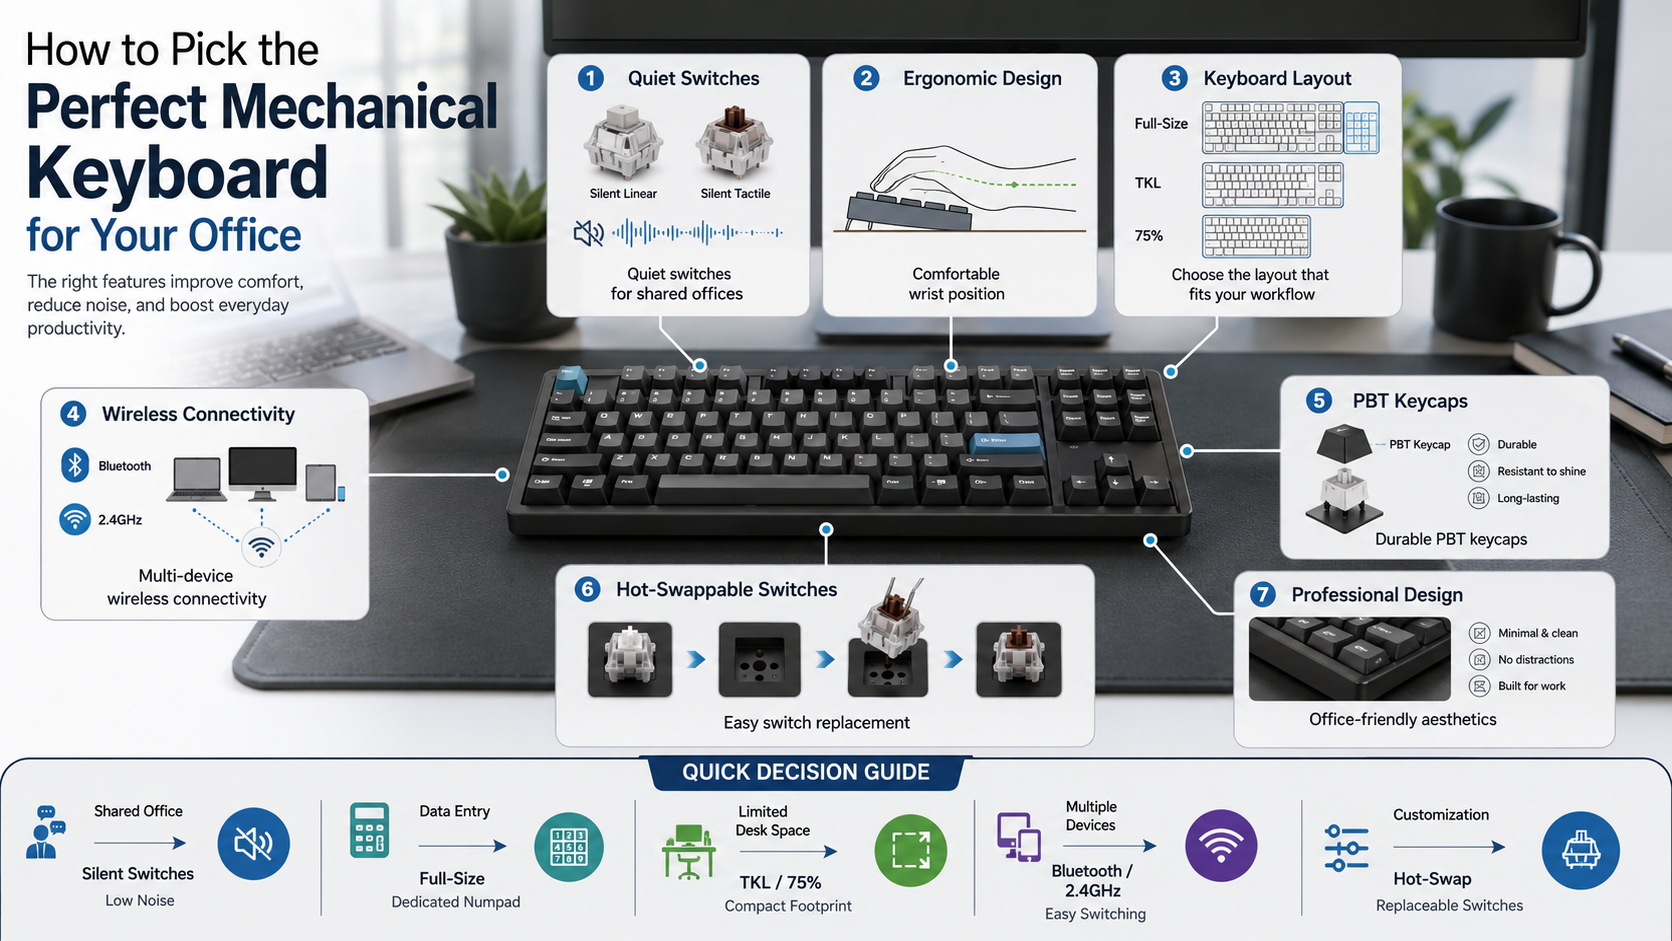
Another risk is borrowing more than you need. Because personal loans provide a lump sum, borrowers may spend surplus funds simply because the money is available.

The repayment structure can also become difficult if your income falls unexpectedly. Unlike revolving credit, you usually cannot reduce the scheduled installment without changing the loan arrangement. Maintaining an emergency fund can provide a financial buffer when unexpected expenses or income changes affect your ability to meet repayments.

Before applying, calculate whether the payment fits comfortably within your budget. Compare the total repayment amount, not just the monthly installment. A lower payment can still mean a higher total cost when the loan runs for longer. Creating a personal financial plan can help you assess whether new borrowing fits your wider financial goals.

Upfront Fees and Prepayment Penalties

Fees can change the true cost of a personal loan. Lenders may charge processing or origination fees before or when the loan is disbursed. The amount varies by lender, borrower, loan type, and market, so borrowers should never assume a standard percentage.

Some lenders may also charge fees for certain repayment actions. Depending on the loan agreement and applicable regulations, early repayment or foreclosure can sometimes involve additional costs.

These charges matter because a lower interest rate does not automatically make one loan cheaper. For example, a loan with a lower rate but substantial upfront fees may cost more than another loan with a slightly higher rate.

Before accepting an offer, review the complete fee schedule. Look for:

  • Processing or origination fees
  • Documentation charges
  • Late-payment fees
  • Early-repayment or foreclosure charges
  • Insurance or optional add-on costs

Ask the lender for the total amount payable over the full term. This provides a clearer comparison than looking at the advertised interest rate alone.

What is easier to get, a personal loan or a credit card?

A credit card can be easier to obtain than an unsecured personal loan in some situations, but approval is not guaranteed. Lenders assess your credit history, income, existing debt, and other eligibility factors for both products.

Some credit cards are designed for people with limited credit histories. Secured credit cards can also provide an alternative because they are backed by a refundable security deposit. However, applicants still need to meet the issuer’s requirements.

Personal loans usually involve a more detailed assessment because the lender is providing a lump sum that must be repaid over a fixed period. Approval may depend on income stability, credit history, existing obligations, and debt-to-income considerations.

A weaker credit profile can make either product more expensive or harder to obtain. Applying for several products at once may also result in multiple hard inquiries.

Instead of choosing based only on approval speed, compare the terms you qualify for. An easily approved credit card can become expensive if you carry a balance. A personal loan may offer better repayment terms when the lender’s offer is affordable.

Secured Cards for Fast Approvals

Secured credit cards can be useful for borrowers who have difficulty qualifying for traditional unsecured cards. They generally require a cash security deposit, which helps reduce the issuer’s lending risk. The credit limit may be linked to the deposited amount, depending on the issuer.

However, describing secured cards as having virtually guaranteed approval would be inaccurate. Approval still depends on the card provider’s eligibility rules and application assessment.

The main advantage is accessibility. A secured card can help establish or rebuild a credit history when used responsibly. Regular payments may be reported to credit bureaus, although reporting practices vary by issuer.

Before choosing a secured card, check whether it reports payments to the relevant credit bureaus. Also review annual fees, interest rates, deposit requirements, and other charges.

A secured card is not the same as borrowing a personal loan. The deposit provides security for the card issuer, while your spending remains subject to the card’s credit limit.

If your goal is to build credit, focus on consistent payments and controlled balances rather than simply obtaining an account quickly.

Personal Loan or Credit Card EMI: Which Is Better

Choosing between a personal loan and a credit card EMI depends on the expense, repayment period, and financing offer. When comparing personal loans vs credit cards, consider whether you need a lump-sum amount or want to convert a specific purchase into manageable monthly installments.

Credit card EMIs can be convenient for eligible purchases because they allow you to convert a transaction into fixed monthly installments. Some retailers and card issuers may also offer promotional or no-cost EMI plans on selected products. However, check processing fees, taxes, discounts, and the actual amount payable before accepting an offer.

A personal loan may be more suitable for larger expenses that are not linked to a particular merchant. Home repairs, education expenses, medical costs, or other planned expenditures may be financed through a personal loan, depending on lender eligibility and terms.

The repayment period also matters when evaluating personal loans vs credit card EMI. Personal loans may provide longer repayment tenures, whereas credit card EMI periods vary by issuer and transaction. A longer tenure can lower your monthly payment but may increase the total interest paid.

Do not choose an option simply because it has a smaller EMI. Compare the total repayment amount, interest rate, processing fees, tenure, and monthly payment. For personal loans vs credit cards, the better choice is ultimately the one that meets your funding requirement at a manageable overall cost without encouraging unnecessary borrowing.

Choosing Between Merchant Deals and Tenures

Credit card EMIs can make sense when a merchant or card issuer provides a genuine low-cost financing promotion. They may be particularly convenient for planned purchases such as electronics, appliances, or other eligible retail products.

However, the phrase “no-cost EMI” does not always mean the transaction has no additional costs. Check whether processing fees, taxes, or changes to an upfront discount affect the final amount you pay.

A personal loan may be more appropriate when you need a larger amount or a longer repayment period. It can provide a structured payment schedule without tying the borrowing to a particular purchase or merchant.

Compare these factors before choosing:

  • Total amount repayable
  • Interest rate or effective financing cost
  • Processing and other fees
  • Repayment tenure
  • Monthly installment
  • Prepayment terms

For a small purchase that you can repay within a short period, a credit card EMI may be convenient. For substantial expenses requiring longer repayment, a personal loan may provide better structure.

The key is to compare total cost rather than promotional wording. The cheapest-looking option is not always the cheapest one.

Frequently Asked Questions

Can I pay off a personal loan using a credit card?

Most lenders do not allow borrowers to make direct personal loan payments with a standard credit card. Some balance transfer cards or third-party services may provide alternatives, but fees can apply. Before choosing this route, compare the transfer costs, interest rate, and repayment period to determine whether it actually reduces your overall debt burden.

Does applying for both options hurt my credit score?

Applying for both a personal loan and a credit card can temporarily affect your credit score because lenders may perform hard credit inquiries. However, one or two inquiries generally have a limited impact. When comparing personal loans vs credit cards, use pre-qualification tools that rely on soft inquiries where available, and avoid submitting several applications in a short period.

What happens if I only pay the minimum on my credit card?

Paying only the minimum keeps your credit card account in good standing, but interest continues accumulating on the unpaid balance. Because credit card rates can be high, repayment may take much longer and cost substantially more. When comparing personal loans vs credit cards, remember that personal loans typically provide fixed payments and a defined payoff date.

Can I get a personal loan with a low credit score?

You may qualify for a personal loan with a low credit score, although your available terms may be less favorable. Some lenders charge higher interest rates or fees to offset increased lending risk. Comparing multiple offers, considering a secured loan, or applying with a qualified co-signer may improve your chances of obtaining more manageable terms.

Conclusion

Understanding personal loans vs credit cards can help you choose financing based on cost, flexibility, and repayment structure. Credit cards suit recurring purchases and short-term borrowing when balances are managed carefully, while personal loans can work better for larger, planned expenses and debt consolidation. Compare interest rates, fees, monthly payments, and your budget before choosing either option. For broader guidance, managing your finances wisely can help you make borrowing decisions that support your long-term financial goals.

Primary vs Secondary Sources: The Complete Research Guide

Primary vs. Secondary Sources: A Guide for Researchers

Every strong research paper begins with a reliable foundation of evidence. Understanding primary vs secondary sources helps researchers evaluate information and build stronger arguments. Without this distinction, you may misinterpret evidence, overlook context, or weaken your credibility.

Primary sources provide direct evidence, original data, and firsthand accounts. Secondary sources explain, analyze, compare, or interpret that evidence. Both source types have an important role in academic research.

According to the Library of Congress guide to primary sources, working with original materials helps researchers develop interpretations based on firsthand evidence.

Knowing how to use both sources can also improve your literature searches. Secondary materials can introduce important theories, terminology, and debates. Primary materials then allow you to examine the underlying evidence yourself, while digital literacy skills for students can help you evaluate and use online information effectively.

This guide explains the main differences between the two source types. It also covers examples, identification methods, literature reviews, and practical research strategies.

What is the difference between primary and secondary sources in research?

The main difference between primary vs secondary sources is their relationship to the original evidence. Primary sources provide direct or firsthand evidence from an event, study, person, or creative work. They may include original research data, legal records, interviews, photographs, diaries, or laboratory results.

Secondary sources examine or interpret primary evidence. Authors of secondary sources often compare several original materials and provide additional analysis. Examples include review articles, textbooks, biographies, and scholarly commentaries.

Primary sources therefore give researchers material to evaluate directly. Secondary sources help explain what that material means within a broader academic context.

However, classification depends on the research question. A historical textbook is usually secondary. Yet it could become a primary source when studying how people taught history during that period.

The distinction is not simply about publication date. Instead, consider the source’s purpose, creator, relationship to the evidence, and role in your research.

The Role of Analytical Distance

Analytical distance helps explain the difference between these source categories. A primary source usually sits closer to the original event, observation, experiment, or creative process. It gives researchers evidence without another scholar’s later interpretation.

For example, an interview transcript records what a participant said. A researcher’s article analyzing several interviews adds another layer of interpretation. The transcript is primary evidence, while the analytical article is secondary.

Secondary sources remain valuable because researchers rarely study evidence in isolation. They help identify patterns, competing interpretations, and established debates. They can also reveal how different scholars understand the same evidence.

However, secondary analysis should not automatically replace primary evidence. When a specific claim matters, return to the original material whenever possible.

Think of the two categories as different research tools. Primary sources provide evidence to examine, while secondary sources provide frameworks for understanding it. Using both can produce a more balanced and defensible argument.

What are 5 examples of primary sources and secondary sources?

Examples make the difference between source types easier to understand. Common primary sources include personal diaries, raw survey data, official census records, original laboratory results, and historical photographs. Each provides direct evidence created by participants, researchers, institutions, or observers.

Five common secondary sources include peer-reviewed review articles, academic history textbooks, analytical biographies, documentary films, and systematic literature reviews. These sources generally interpret, summarize, compare, or evaluate information from primary materials.

The distinction can vary by discipline. A laboratory notebook is primary evidence for a scientific investigation. A review article discussing that experiment is secondary. Similarly, Abraham Lincoln’s speech is a primary source. A historian’s later analysis of the speech is secondary.

Researchers should examine the source rather than relying only on its format. Some journal articles contain original research and therefore function as primary sources. Others summarize previous studies and function as secondary sources.

The research question also matters. Always consider how the source will be used before assigning its final classification.

Comparing Source Pairs in Practice

Source pairs can make primary vs secondary sources easier to recognize. Imagine a researcher studying scientific discoveries. The scientist’s original experiment results provide primary evidence. A later review article comparing those experiments is secondary.

The same pattern appears in historical research. A politician’s speech, personal letter, or government document can serve as primary evidence. A historian’s book explaining the document becomes secondary.

In journalism, an eyewitness interview may function as a primary source. A news analysis that compares several interviews can function as secondary material.

Creative fields follow similar patterns. An original painting, manuscript, or recording can provide primary evidence. A scholarly article interpreting that work is secondary.

These examples show why source classification depends on the relationship between the material and your research question.

A useful test is simple: Does the source provide original evidence, or does it analyze existing evidence? Original evidence usually points toward a primary source. Analysis and interpretation usually indicate a secondary source.

When uncertain, examine the author’s role, purpose, citations, and relationship to the subject.

How do I know if it’s a primary or secondary source?

Start by examining the source’s creator, purpose, and relationship to the subject. Ask whether the creator personally witnessed the event, conducted the research, produced the data, or created the original work. If so, the material is likely a primary source.

Next, determine whether the source mainly analyzes information created by someone else. If it compares studies, explains historical events, evaluates evidence, or summarizes previous research, it is generally secondary.

Your research question also affects classification. A 1950s science textbook is normally a secondary source for studying scientific facts. However, it could become a primary source when examining teaching practices during the 1950s.

Publication date can provide useful clues, but it does not determine classification by itself. A recent research paper may contain original experimental findings. An older scholarly article may still provide secondary analysis.

Always examine the content rather than relying on labels such as “journal article” or “book.” The author’s role and the source’s purpose provide stronger evidence.

Evaluating Author Intent and Timeframe

Author intent can reveal whether a source is primary or secondary. Look at why the material was created and what the author intended readers to understand.

A researcher presenting new experimental results is providing primary evidence. A scholar comparing results from several studies is providing secondary analysis.

Citations can also provide useful clues. Secondary sources often contain extensive references because they build arguments from earlier research. Primary sources may contain references too, especially in academic research. Therefore, citations alone cannot determine classification.

The timeframe also matters, particularly in historical research. A document created during an event may provide contemporary evidence. A later interpretation may place that evidence into a broader historical framework.

Ask these questions when evaluating a source:

  • Who created it?
  • When was it created?
  • Why was it created?
  • What evidence does it contain?
  • Does the author interpret other sources?
  • How does it relate to my research question?

These questions help prevent incorrect classification. They also encourage stronger source evaluation before you include evidence in your research and help you avoid misinformation while studying online.

What are the differences between primary and secondary sources in a literature review?

Primary and secondary sources serve different purposes within a literature review. Primary sources provide original evidence that you can examine directly. They may contain experimental results, survey findings, interviews, datasets, or original theoretical proposals.

Secondary sources help you understand the larger academic conversation surrounding that evidence. Review articles and scholarly analyses can reveal major themes, disagreements, research gaps, and methodological trends.

A strong literature review often needs both. Secondary sources can help you discover important studies and understand the field quickly. Primary studies then allow you to evaluate the actual methods, findings, and limitations behind those discussions.

This approach also reduces dependence on secondhand interpretations. If an important claim appears in a review article, trace it back to the original study when possible.

Using both source types creates stronger academic analysis. Secondary materials establish context and show how scholars have interpreted the topic. Primary materials support detailed evaluation of the evidence itself.

The goal is not to use one category more than the other. Instead, select sources based on the role each one plays in answering your research question.

Synthesizing Sources for Stronger Reviews

Effective synthesis requires more than summarizing one source after another. Start with secondary sources to understand the major theories, debates, and research gaps surrounding your topic.

Then examine relevant primary studies closely. Compare their research questions, methods, samples, findings, and limitations. This allows you to determine whether broad claims in secondary literature are supported by the underlying evidence.

For example, a review article may identify a trend across several studies. You can then examine those original studies to assess whether their findings genuinely support that trend.

This method strengthens your literature review because it connects broad scholarly interpretation with direct evidence.

A useful workflow is:

  1. Use secondary literature to map the research area.
  2. Identify influential primary studies.
  3. Read the most relevant primary sources closely.
  4. Compare findings and methodological differences.
  5. Use secondary sources to frame your interpretation.

This two-level approach demonstrates both breadth and depth. It shows that you understand the wider scholarly conversation while also evaluating the evidence behind it.

Most importantly, avoid treating secondary interpretations as unquestionable facts. Strong research checks important claims against original evidence whenever practical.

When should I use primary vs secondary?

The right choice between primary vs secondary sources depends on your research objective and stage of writing. Use primary sources when you need to analyze original evidence, test a hypothesis, evaluate research methods, or develop an original interpretation.

Primary materials are especially important when your argument depends on specific findings or firsthand evidence. They allow you to examine information directly rather than relying entirely on another author’s interpretation.

Secondary sources are especially useful during the early stages of research. They can introduce terminology, major scholars, important theories, historical background, and ongoing debates. They also help you locate relevant primary materials.

A balanced strategy often works best. Begin with reliable secondary sources to understand the subject and identify important questions. Then move toward primary evidence for detailed analysis.

This approach can also save time. You gain enough context to search effectively without spending excessive time reading irrelevant original materials.

Your discipline may also influence source preferences. Historical research often emphasizes original documents. Scientific research may require original studies and datasets. Always follow the evidence standards expected in your field.

Optimizing Your Research Strategy

A practical research strategy should move from broad understanding toward detailed evaluation. Start with high-quality secondary sources to establish key terminology, major theories, historical context, and important controversies.

Next, identify the primary sources behind the most relevant claims. Read those materials carefully and compare their evidence with the interpretations you found earlier.

Do not assume that a secondary source’s summary captures every important detail. Original studies may contain limitations, conflicting findings, or methodological choices that summaries overlook.

As you research, organize sources according to their purpose. Separate background material from evidence that directly supports your argument. This makes later writing and citation management easier.

You can also ask three questions throughout the process:

  • What does the original evidence show?
  • How have other scholars interpreted it?
  • What is my own evidence-based conclusion?

This workflow balances context with critical analysis. It also reduces the risk of building an argument entirely on secondhand information.

Ultimately, effective research does not depend on choosing primary or secondary sources exclusively. It depends on knowing when each source type provides the most useful evidence.

FAQ SECTION

Can a source be both primary and secondary?

Yes, a document’s classification depends directly on your specific research question and approach. For example, an encyclopedia published in 1920 is a secondary source if you use it to learn general historical facts. However, if your research project examines how historical encyclopedias framed gender roles in the early twentieth century, that exact same book becomes a primary source because it serves as direct cultural evidence from that era.

Are primary sources always more reliable than secondary sources?

Not necessarily, because primary sources can still contain personal biases, factual errors, or incomplete observations. A diary entry reflects only one person’s subjective perspective, while a single scientific trial might suffer from unrecognized procedural flaws. High-quality secondary sources often provide balanced reliability because expert scholars cross-examine multiple primary records, filter out individual biases, and corroborate findings against extensive data pools before publishing their analyses.

Where can researchers find verified primary sources online?

Researchers can access authentic primary materials through digital archives, government repositories, and university special collections. Renowned digital libraries such as the Library of Congress, the National Archives, and JSTOR provide direct access to scanned historical manuscripts, legal documents, and raw datasets. For scientific fields, databases like PubMed Central and open-science repositories host original laboratory studies, clinical trials, and reproducible datasets.

Why do professors require both source types in research papers?

Professors require both formats to ensure you develop comprehensive research, synthesis, and critical thinking skills. Reviewing secondary literature shows that you understand the established scholarly conversation, foundational theories, and existing academic consensus. Incorporating primary evidence demonstrates your ability to analyze raw data independently, evaluate unfiltered facts, and draw logical, original conclusions rather than merely summarizing other authors’ opinions.

CONCLUSION

Mastering the distinction between primary vs secondary sources is a vital skill for conducting credible, high-impact research. Primary materials give your work authenticity by anchoring your arguments in raw data, direct testimony, and original experimental findings. Secondary materials provide the necessary analytical scaffolding, helping you interpret complex ideas, identify research gaps, and connect your work to established scholarship. Building digital literacy skills for students can also help you evaluate online information and use research sources more effectively.

By applying the evaluation strategies outlined in this guide, you can confidently determine the classification of any document and structure your bibliography effectively. Remember to begin with secondary literature to gain a solid contextual overview, then dive into primary materials to perform your own rigorous analysis. Balancing both source types will elevate the academic rigor of your literature reviews, strengthen your empirical arguments, and ensure your final papers meet the highest scholarly standards. Apply these principles to your next research project to build well-supported, persuasive, and authoritative academic papers.

Effective Leadership Communication: Top Workplace Frameworks

Effective Leadership Communication in the Workplace

Strong organizations thrive on clarity, purpose, and mutual trust. Mastering effective leadership communication helps align teams, boost morale, and support organizational success. When workplace communication lacks clarity, misunderstandings can cause costly delays and employee disengagement. Research highlighted by Harvard Business Review also shows that transparent communication can strengthen employee retention and organizational resilience.

Modern professionals must understand practical leadership and communication models. These frameworks help leaders communicate expectations clearly and encourage genuine collaboration. They also make workplace conversations more structured and productive.

Navigating conversations across corporate hierarchies requires the right approach. This guide explains several practical frameworks, including the 7 C’s of leadership, the 5 C’s of effective communication, and the 5 P’s of effective leadership. It also covers practical techniques for communicating with senior leaders. Whether you lead a department or manage upward, these principles can help you communicate with greater clarity and confidence.

What are the 7 C’s of leadership?

The 7 C’s of leadership describe seven foundational qualities that support effective leadership: Character, Competence, Compassion, Courage, Clarity, Communication, and Commitment. Character builds ethical trust and establishes consistent leadership standards. Competence gives leaders the knowledge and credibility needed for sound decisions. Compassion helps managers understand employee concerns and provide meaningful support. Courage enables leaders to address difficult issues, make calculated decisions, and manage workplace conflict.

Clarity keeps priorities understandable and reduces confusion across teams. Communication connects leadership qualities with everyday workplace interactions. Finally, Commitment demonstrates persistence and accountability toward shared goals. These qualities work together rather than operating independently. A leader may have strong technical skills but still struggle without compassion or clear communication. By developing all seven qualities, managers can create a workplace culture built on accountability, trust, respect, and shared purpose. The framework also supports effective leadership communication because employees receive consistent messages from leaders who understand both business priorities and people.

Cultivating Everyday Executive Character

Character serves as the foundation of the 7 C’s leadership framework. Employees often judge leadership through everyday actions rather than formal statements. Leaders who consistently follow company values create stronger trust within their teams. This consistency becomes especially important when managers face pressure, mistakes, or difficult decisions. Understanding signs of a good company culture can also help leaders recognize how everyday values and behaviors shape employee trust.

Transparent leaders accept responsibility when outcomes fall short. They avoid shifting blame and explain decisions honestly. Such behavior shows employees that accountability applies at every level of the organization.

Character also influences how leaders handle confidential information, workplace disagreements, and competing priorities. Managers who act fairly can strengthen employee confidence in their decisions. They also create an environment where people feel comfortable raising concerns.

Building character does not require dramatic leadership gestures. It depends on consistent behavior over time. Leaders can demonstrate it by keeping commitments, admitting mistakes, treating employees respectfully, and applying standards fairly. These actions establish credibility that supports effective leadership communication. When employees trust the person delivering a message, they are more likely to listen, respond openly, and act on important instructions.

What are the 5 C’s of effective communication?

The 5 C’s of effective communication provide practical standards for delivering workplace messages: Clear, Concise, Concrete, Correct, and Courteous. Clear communication removes unnecessary jargon and makes the main purpose easy to understand. Concise communication respects employees’ time by removing unnecessary details and repetition. Concrete communication uses specific facts, figures, deadlines, and action items instead of vague expectations. These principles are also useful when creating better presentations for work, where clear and concise delivery can make complex information easier to understand.

Correct communication ensures that information is accurate, relevant, and presented using appropriate language. Courteous communication maintains a respectful and inclusive tone, even during difficult conversations. These principles can improve communication across departments, management levels, and professional backgrounds.

The 5 C’s also help leaders reduce preventable workplace errors. A message can fail even when the information itself is correct. For example, unclear responsibilities may leave employees unsure about who owns a task. Similarly, vague deadlines can create different expectations across teams. Applying the five principles makes messages easier to understand and act upon. They are especially useful for meetings, emails, performance discussions, project updates, and effective leadership communication with senior management.

Ensuring Concrete Workplace Messaging

Concrete communication removes uncertainty from workplace instructions. Leaders should replace broad statements with specific expectations that employees can understand and measure. For example, asking a team to “improve performance” provides little guidance. A stronger message could identify a specific target, deadline, and measurement method.

Specific communication gives employees a clearer path to execution. It can include project milestones, responsible team members, delivery dates, performance metrics, or required outcomes. These details reduce guesswork and help employees prioritize their work.

Concrete messaging is particularly valuable during cross-functional projects. Different teams may interpret general instructions in different ways. Specific information creates a shared understanding and reduces unnecessary revisions.

Leaders should also confirm important details after meetings. A short written summary can clarify responsibilities and deadlines. It gives everyone a reference point if questions arise later. Leaders can also use how to ask for feedback at work effectively to confirm whether expectations and communication were clear.

Concrete communication does not mean overwhelming employees with information. Leaders should provide the details necessary for action while removing irrelevant background. This balance improves effective leadership communication and helps teams move from discussion to execution with fewer misunderstandings.

What are the 5 P’s of effective leadership?

The 5 P’s of effective leadership provide a practical framework for connecting strategy with execution: Purpose, People, Process, Performance, and Passion. Purpose defines the mission behind organizational decisions and gives employees a clear reason for their work. People focuses on hiring, developing, supporting, and empowering the talent needed to achieve that mission. Process creates repeatable workflows that improve consistency and operational efficiency.

Performance measures progress through relevant goals, metrics, and outcomes. It helps leaders identify gaps and maintain accountability. Passion provides the energy and resilience needed to navigate challenges, maintain momentum, and encourage commitment.

These five elements should work together. A clear purpose can lose impact without capable people. Skilled employees may also struggle when processes are inefficient or performance expectations remain unclear. Likewise, passion cannot replace sound strategy or measurable results.

Leaders can use the 5 P’s when setting departmental priorities, managing projects, developing teams, or communicating strategic changes. The framework helps balance business performance with employee engagement. It also strengthens effective leadership communication by giving leaders a structured way to explain why goals matter and how teams can achieve them. These principles can also support building a high-performing team by connecting people, processes, goals, and performance.

Aligning People with Strategic Purpose

A clear organizational purpose becomes meaningful when employees understand how their work contributes to it. Leaders should connect daily responsibilities with broader business goals. This connection helps employees see more than individual tasks. They can understand the wider outcome their work supports.

For example, a customer service employee may view response times as a routine metric. A leader can connect that metric to customer satisfaction, retention, and business growth. This context gives the task greater relevance without changing its practical requirements.

Strategic alignment also helps teams make better decisions. When employees understand organizational priorities, they can evaluate competing tasks more effectively. They can identify which activities deserve immediate attention and which can wait.

Leaders should reinforce this connection during team meetings, performance discussions, and project updates. However, the message should remain specific and relevant to each role. Employees do not need repeated corporate slogans. They need a clear explanation of how their contribution affects measurable outcomes.

This approach strengthens engagement and supports effective leadership communication. When people understand the purpose behind their responsibilities, leaders can build stronger accountability, collaboration, and commitment across the department.

How to effectively communicate with leadership?

Practicing effective leadership communication when speaking upward requires preparation, professional judgment, and a solution-oriented approach. Start by understanding your manager’s priorities, preferred communication style, and available time. Frame updates around business impact before explaining operational details. This approach helps senior leaders quickly understand why an issue matters.

When raising a workplace problem, avoid presenting only the difficulty. Where appropriate, provide two or three practical options and explain the trade-offs. This shows that you have considered possible solutions rather than simply transferring the problem upward. Learning how to ask for feedback at work can also help employees refine their approach and communicate solutions more effectively.

Active listening is equally important. Pay attention during strategy discussions and clarify expectations when necessary. Acknowledge useful feedback and record agreed actions after important conversations.

Upward communication should also remain honest. Do not hide risks simply because they may reflect poorly on your team. Senior leaders need accurate information to make sound decisions. At the same time, avoid unnecessary detail that distracts from the main issue.

Consistent communication builds credibility over time. When leaders know they will receive clear updates, realistic assessments, and practical recommendations, trust improves. This makes effective leadership communication an important professional skill for employees at every management level.

Master the Executive Summary Approach

Executives manage multiple priorities and often have limited time for detailed operational explanations. The executive summary approach helps leaders communicate important information quickly. Begin meetings, emails, and presentations with the primary outcome, decision, or request. This same principle is useful when preparing for video interviews, where concise and structured answers can help communicate key points effectively.

For example, state the current situation before explaining its history. Identify the business impact, key risk, and recommended action. Supporting information can follow when the executive needs additional context.

A useful executive summary may include:

  • The situation: What is happening now?
  • The impact: Why does it matter to the business?
  • The recommendation: What action do you propose?
  • The decision needed: What do you need from leadership?
  • The timeline: When does action need to happen?

This structure makes complex information easier to process. It also prevents important requests from getting buried beneath background details. Maintaining psychological safety at work can further encourage employees to communicate concerns, ideas, and important information without hesitation.

The approach does not mean removing necessary context. Instead, it prioritizes information according to executive decision-making needs. Leaders can then ask for deeper details when required.

Using concise summaries consistently can strengthen effective leadership communication. It demonstrates preparation, respects executive time, and makes important business information easier to understand and act upon.

Frequently Asked Questions

Why is active listening vital for business leadership?

Active listening enables managers to understand underlying team concerns rather than just hearing surface words. Leaders who listen attentively validate employee experiences, capture critical operational feedback early, and make better decisions. This practice prevents costly strategic misunderstandings, reduces workplace friction, and fosters an inclusive environment where employees feel secure sharing ideas.

How does emotional intelligence enhance management communication?

Emotional intelligence allows managers to perceive, evaluate, and navigate workplace emotions effectively. Leaders with high emotional intelligence adapt their tone during high-stress situations, resolve peer disputes diplomatically, and provide constructive feedback without triggering defensive reactions. This emotional awareness maintains psychological safety and strengthens team loyalty across changing workplace environments.

What is the biggest barrier to workplace communication?

Information silos and ambiguous instructions represent the most severe communication barriers. When departments fail to share critical data or when managers issue vague assignments without context, project timelines stall. Removing these barriers requires transparent updates, standardized documentation, and regular cross-departmental strategy reviews to keep everyone aligned.

How often should managers hold one-on-one meetings?

Managers should schedule one-on-one meetings weekly or bi-weekly for optimal alignment. Consistent individual check-ins provide dedicated space to review current workloads, address personal blockers, and discuss long-term professional development. Regular one-on-ones build mutual trust and prevent minor misunderstandings from evolving into major operational setbacks.

Conclusion

Strong organizational success requires intentional, transparent, and structured dialogue at every level. By applying the 7 C’s of leadership, you build executive character, courage, and accountability. Implementing the 5 C’s of communication ensures your daily emails, meetings, and instructions remain clear, concise, and actionable. Meanwhile, leaning on the 5 P’s of leadership aligns your workforce, processes, and corporate purpose into an efficient operational engine.

Mastering effective leadership communication also means knowing how to present solutions confidently when collaborating upward with executive decision-makers. Developing these essential communication skills requires deliberate practice, self-awareness, and consistent execution.

Begin integrating these frameworks into your upcoming team meetings, strategy updates, and performance reviews. Focus on delivering concrete details, listening actively to your colleagues, and anchoring conversations around clear objectives. Over time, these communication habits will elevate your management capabilities, foster workplace trust, and drive lasting success throughout your organization.

How Many Subwoofers Should Your Home Theater Have?

How Many Subwoofers Do I Need for Home Theater?

How many subwoofers do I need for home theater? For most dedicated rooms, two subwoofers provide an excellent balance of bass consistency, output, and value. A single quality subwoofer can still work well, especially in a small room or with one primary listening position.

However, room acoustics can make bass difficult to manage. Standing waves, room modes, and bass nulls can create major differences between listening positions. One seat may sound powerful, while another sounds thin or almost silent.

According to established acoustic principles, low-frequency waves interact strongly with room boundaries. Reflections from walls, floors, and ceilings can reinforce some frequencies while cancelling others. This effect becomes especially noticeable with a single subwoofer.

So, how many subwoofers do you need for a home theater? For most dedicated rooms, two subwoofers offer the best balance of performance, consistency, and cost. This guide explains why dual subwoofers work so well, where to place them, and when adding a third unit makes sense.

How many subwoofers do I need for home theater?

For most dedicated home theater rooms, two subwoofers are the ideal starting point. A single quality subwoofer can deliver excellent output, especially in a small room. However, one bass source often creates uneven frequency response across multiple seats.

Room dimensions and boundaries create peaks and nulls at different listening positions. As a result, one chair may have powerful bass while another has noticeably weaker bass.

Adding a second subwoofer helps distribute low-frequency energy more evenly. The two sources excite the room differently, which can reduce large variations between seats. This benefit is often more important than simply adding more volume.

A single subwoofer may be enough if you have one primary listening position. However, multiple seats or seating rows make dual subwoofers more valuable.

For most home theaters, two matched subwoofers provide an excellent combination of bass consistency, headroom, and manageable calibration. Larger rooms may require more output, but two capable units remain a strong baseline.

The Role of Listening Positions

Your seating arrangement plays an important role when deciding how many subwoofers you need. A single subwoofer cannot produce identical bass at every listening position because low frequencies interact strongly with room boundaries.

Multiple seats can therefore experience different bass levels and frequency balances. One position may sit near a room-mode peak, while another may fall inside a bass null.

A second subwoofer helps by introducing another bass source at a different location. When properly positioned and calibrated, the sources can produce a more consistent response across the listening area, much like the principles discussed in How 8D Audio Works.

This does not mean the second subwoofer simply cancels reflections. Instead, it changes how bass energy interacts with the room. That difference can reduce large peaks and nulls.

Dual subwoofers are particularly useful for:

  • Multiple listening seats
  • Wide seating areas
  • Multiple rows of theater chairs
  • Rooms with difficult dimensions
  • Systems requiring greater dynamic headroom

For a dedicated cinema, consistent bass across the main seating area is often the biggest advantage of adding a second subwoofer.

What is the 83% rule for speakers?

The 83% rule is a practical speaker-placement guideline sometimes used to establish a balanced front soundstage. It describes a listening triangle where the spacing between the left and right speakers is roughly 83% of their distance from the primary listening position.

For example, if your listening position is 10 feet from each front speaker, the speakers would be approximately 8.3 feet apart.

This guideline can provide a useful starting point for positioning your left and right channels. However, it should not be treated as a universal acoustic law. Room dimensions, speaker design, listening distance, and personal preference can all affect the ideal arrangement.

The 83% rule also applies to main speaker geometry, not subwoofer placement. Subwoofers operate differently because very low frequencies are largely non-directional in typical rooms.

Therefore, use the rule to establish your front soundstage. Then optimize your subwoofer locations separately. Proper bass placement and room correction will have a much greater effect on low-frequency consistency, just as proper maintenance can preserve the performance of your audio equipment, as explained in How to Clean and Maintain Your Premium Headphones.

Enhancing Bass Integration with Front Channels

Good front-speaker placement helps create a coherent soundstage, but subwoofer integration requires additional attention. Your main speakers and subwoofers should work together smoothly around the crossover region.

An appropriate crossover prevents your main speakers from handling frequencies they cannot reproduce efficiently. It also allows the subwoofer to focus on deep bass.

An 80 Hz crossover is a common starting point for home theater systems. However, it is not mandatory for every setup. Speaker capabilities, room acoustics, and receiver settings can justify different crossover points.

The subwoofer should not sound like a separate source. Instead, bass should blend naturally with dialogue, music, and effects from the front speakers.

For the best integration:

  • Set appropriate speaker crossover points.
  • Confirm the subwoofer phase or polarity setting.
  • Run your receiver’s room-correction system.
  • Verify distances and levels after calibration.
  • Use measurements if you want to optimize performance further.

Good integration preserves clear dialogue and directional effects while allowing the subwoofer to provide deep, powerful bass, complementing the broader principles of Spatial Audio in Headphones.

Is 2 subwoofers overkill?

No. Two subwoofers are rarely overkill for a dedicated home theater, particularly when several people use the room. The main advantage is not simply louder bass.

A second subwoofer can improve bass consistency throughout the listening area. Different subwoofer locations interact with room modes differently. When properly positioned and calibrated, this can reduce major peaks and nulls.

Dual subwoofers can also provide additional headroom. Each unit shares the required acoustic output, so neither has to work as hard to reach the same overall level.

This can reduce driver excursion and distortion during demanding movie scenes. Explosions, soundtracks, and low-frequency effects can therefore remain cleaner at high playback levels.

The benefits become especially noticeable when:

  • The room has several listening seats.
  • The seating area is wide.
  • One subwoofer produces obvious bass differences between seats.
  • You want higher output without pushing one subwoofer to its limits.

For a single-seat system, the improvement may be less dramatic. For a multi-seat home theater, however, dual subwoofers are usually a practical upgrade rather than unnecessary excess.

Gaining Headroom Without Added Distortion

Adding a second subwoofer can provide more dynamic headroom, although the exact improvement depends on placement, subwoofer design, amplification, and room acoustics.

When two similar subwoofers share the workload, each driver may need less excursion to achieve a given sound-pressure level. Lower excursion can help reduce mechanical and distortion-related stress.

This becomes useful during demanding movie scenes. Deep explosions, special effects, and musical peaks can require substantial low-frequency output. A single subwoofer may approach its limits sooner than two capable units.

Dual subwoofers can therefore provide a cleaner presentation at high playback levels. They may also reduce the likelihood of audible compression when the system is pushed hard.

However, a second subwoofer does not automatically eliminate distortion. Poor placement, incorrect settings, or inadequate subwoofer capability can still limit performance.

For the best results, match the units as closely as practical. Then calibrate their levels, delays, and equalization together.

The goal is not simply to make bass louder. It is to create cleaner, more controlled bass with greater reserve capacity when movie soundtracks become demanding, much like the importance of preserving sound quality when choosing between modern audio platforms in Spotify vs. Apple Music: Which Service Wins the Audio Crown?

Is it better to have 2 or 3 subwoofers?

For most residential home theaters, two subwoofers provide the best balance between performance and complexity. A third subwoofer can offer additional benefits, but the improvements are usually smaller.

Three units may help in unusually large, irregular, or acoustically difficult rooms. They can provide additional placement flexibility and may improve consistency when two locations cannot adequately address the room’s modes.

However, adding another subwoofer also increases setup complexity. Each unit needs appropriate level, delay, polarity, and equalization settings. The more sources you add, the more important measurement-based calibration becomes.

Two matched subwoofers are usually easier to integrate. They can provide substantial improvements in seat-to-seat consistency without requiring an especially complicated system.

A third unit makes more sense when:

  • The room is unusually large.
  • Two subwoofers cannot provide adequate output.
  • The seating area is extensive.
  • You have measurement and calibration tools.
  • Your processor supports advanced multi-subwoofer control.

For most enthusiasts, however, two well-positioned and properly calibrated subwoofers are preferable to three poorly integrated units.

Calibration Challenges of Odd Subwoofer Layouts

Three subwoofers are not inherently difficult to use, but they can require more careful calibration. Each additional bass source creates another interaction with the room.

The goal is to align the subwoofers so they work together rather than create unnecessary cancellation. Their physical locations, distances, levels, polarity, and equalization can all affect the final response.

A capable home theater processor or digital signal processor can simplify this process. Measurement software can also reveal problems that are difficult to identify by ear.

With three units, independent adjustment becomes particularly valuable. You may need different delay or level settings for each subwoofer to achieve a smooth response across the seating area.

This does not mean three subwoofers always require professional installation. Modern room-correction systems can automate much of the process. However, manual measurement can still improve the final result.

For most users, two matched subwoofers remain easier to manage. They provide substantial room-response improvement without adding unnecessary calibration complexity.

If you choose three, focus on measurement and integration rather than simply adding another cabinet.

Will 2 subs be louder than 1?

Yes. Two subwoofers can produce more output than one, assuming the units have similar capabilities and are properly integrated. However, the exact increase varies with placement, frequency, room interaction, and available amplification.

A second identical subwoofer can provide meaningful additional output. Under favorable conditions, acoustic coupling can approach a 6 dB increase. In other situations, the gain may be closer to 3 dB.

That increase should not be confused with perceived loudness. Human hearing does not interpret a 3 dB increase as twice as loud. A much larger change is generally required for a dramatic subjective increase.

More importantly, dual subwoofers can provide greater dynamic headroom. Each unit shares the workload, allowing the system to reach demanding bass levels with less strain on each driver.

So, if your only goal is maximum volume, upgrading to a more powerful subwoofer may sometimes be more effective. If your goal is smoother bass across multiple seats, adding a second subwoofer is often the better solution, similar to how understanding How Noise Cancellation Works can help explain the interaction between sound and technology.

Understanding Acoustic Coupling Gains

When two subwoofers are positioned close enough to interact as a combined acoustic source, their outputs can reinforce each other. Under ideal conditions, this coupling can produce approximately 6 dB of additional acoustic output.

Placement matters, though. When subwoofers are deliberately separated to improve room coverage, their interaction becomes more complex. The goal then shifts from maximum coupling to smoother bass throughout the seating area.

Depending on the locations and frequencies involved, you may see different output gains. Room boundaries can also increase or reduce the measured response.

This explains why simply adding a second subwoofer does not guarantee a fixed 3 dB or 6 dB increase at every frequency.

The practical benefit is broader than output alone. Properly placed dual subwoofers can reduce large variations between seats while also providing more headroom.

Think of acoustic coupling as one part of the equation. Placement, room response, calibration, and subwoofer capability all influence the final result.

For most home theaters, optimizing these factors matters more than chasing a specific decibel figure.

Frequently Asked Questions

Can I mix different subwoofer brands or driver sizes?

Mixing different brands or driver sizes is generally discouraged for surround setups. Different models possess unique phase responses, frequency roll-offs, and port tunings that frequently clash. These physical differences can trigger destructive phase cancellations across your room. Using identical models guarantees uniform acoustic output and simplifies calibration.

Where is the best place to position two subwoofers?

The most effective placement strategy involves placing dual subwoofers at opposing mid-wall locations, such as centered along the front and rear walls. Alternatively, placing units in opposing diagonal corners yields exceptional boundary reinforcement. Always test locations using room measurement software to identify optimal response before permanently routing cables.

Do I need two subwoofers in a small room?

Dual subwoofers remain highly beneficial in small rooms because compact spaces suffer from severe, closely spaced room modes. While small rooms do not need massive output capacity, dual smaller units smooth out low-frequency standing waves. This results in fast, articulate bass without overwhelming the physical listening area.

What crossover frequency should I set for my subwoofers?

The standard recommendation across home audio is an 80 Hz crossover frequency. This standard setting routes directional frequencies above 80 Hz to your main speakers while directing omnidirectional low frequencies to your subwoofers. Always calibrate your speakers using your receiver’s automated room correction system first.

Conclusion

Determining how many subwoofers you need for a home theater depends on room size, seating, acoustics, and performance goals. Still, two subwoofers are the best choice for most dedicated rooms.

A single subwoofer can deliver impressive bass. However, room modes can create significant differences between listening positions. Some seats may experience strong peaks, while others fall into deep nulls.

Adding a second subwoofer gives you another source that interacts with the room differently. With careful placement and calibration, this can produce smoother bass across multiple seats.

Dual subwoofers can also provide additional headroom. Each unit shares the workload, which can help reduce strain and distortion during demanding movie scenes.

A third subwoofer can help in larger or unusually difficult rooms. However, the extra complexity often provides smaller returns for typical residential systems.

Before upgrading, optimize placement and calibration. If possible, measure your room response from several seats.

Ultimately, the answer to “how many subwoofers do I need for home theater?” is usually two. For the best results, prioritize proper placement, matched performance, and accurate calibration over simply adding more bass.

How 3D Printer Works: Beginners Guide to 3D Printing

How 3D Printer Works: The Complete Beginner’s Guide

Have you ever wondered what turns a digital file into a solid, usable object? Understanding how 3D printer works opens the door to rapid prototyping and personalized manufacturing.

According to standard definitions from the National Institute of Standards and Technology (NIST), additive manufacturing creates physical parts by joining materials layer by layer. Unlike traditional manufacturing, it does not usually remove material from a solid block.

This technology has evolved rapidly in recent years. What once belonged mainly to industrial labs is now accessible to hobbyists, educators, and small businesses.

However, getting started can feel overwhelming without a basic understanding of the process. Beginners often ask about printing methods, required equipment, learning time, and total costs.

This guide explains the 3D printing process in simple terms. It covers the complete workflow, common problems, computer requirements, materials, and startup costs.

How do 3D printers work step by step?

Learning how 3D printers work starts with a simple four-stage process. First, you create a digital model with 3D modeling software or download an existing design. Common file formats include STL and 3MF.

Next, you import the model into slicing software. The slicer divides the model into thin horizontal layers. It then creates machine instructions called G-code. These instructions control movement, temperature, speed, and material flow.

The printer follows that G-code to build the object. FDM printers melt plastic filament and deposit it layer by layer. Resin printers use light to cure liquid resin into solid layers.

Finally, you remove the finished print and complete any required post-processing. This may include removing supports, trimming excess material, washing resin prints, or sanding surfaces.

The basic workflow is:

  1. Create or download a 3D model.
  2. Slice the model and generate G-code.
  3. Print the object layer by layer.
  4. Remove and post-process the finished part.

Understanding these steps makes the entire 3D printer workflow much easier to follow.

The Role of Slicing Software

Slicing software acts as the bridge between your digital model and 3D printer. It converts a three-dimensional design into instructions that the machine can understand. Without this step, most consumer 3D printers cannot turn a raw model into a finished object.

The slicer divides your model into thin layers. It then calculates how the printer should move, where material should be deposited, and when temperatures should change. These instructions are usually exported as G-code.

Several settings have a major effect on print quality and speed:

  • Layer height controls vertical detail and print duration.
  • Print speed determines how quickly the printer moves.
  • Infill density controls the internal structure and material usage.
  • Wall thickness affects strength and durability.
  • Supports help the printer create overhangs and complex shapes.
  • Nozzle and bed temperatures affect material flow and adhesion.

Good slicer settings can reduce failed prints and material waste. Beginners should start with recommended profiles before changing advanced settings.

As you gain experience, adjusting these settings helps balance print quality, strength, speed, and cost.

What is the biggest problem with 3D printing?

One of the biggest problems with 3D printing is print failure caused by poor bed adhesion or calibration. When the first layer does not stick properly, the entire print can warp, shift, or detach from the build plate.

First-layer problems are especially common among beginners. An uneven print bed, incorrect Z-offset, dirty build surface, or unsuitable temperature can cause poor adhesion. If the nozzle sits too far from the bed, the material may not bond correctly.

Temperature changes can also create problems. Incorrect nozzle temperatures may affect extrusion, while poor bed temperatures can contribute to warping. Cooling settings can also influence how quickly printed layers contract.

To reduce common failures:

  • Clean the build surface regularly.
  • Check and adjust bed leveling.
  • Set the correct Z-offset.
  • Use suitable nozzle and bed temperatures.
  • Choose the correct material profile.
  • Keep the printer properly maintained.

Failed prints waste both material and machine time. They can also make the learning process frustrating.

Fortunately, most first-layer problems have straightforward solutions. Learning basic calibration is one of the most valuable skills for anyone starting with 3D printing at home.

Preventing First Layer Failures

A successful first layer provides the foundation for the entire print. If that layer fails, later layers usually cannot recover. Beginners should therefore spend time getting the first layer right before increasing print speed or using advanced settings.

Start by cleaning the build surface. Finger oils, dust, and leftover material can reduce adhesion. Isopropyl alcohol can help clean compatible surfaces, although manufacturers may recommend specific cleaning methods.

Next, check the printer’s bed leveling or automatic leveling system. The nozzle should maintain a consistent distance from the build plate. Adjusting the Z-offset can also improve the first layer when the nozzle height is incorrect.

Temperature matters as well. Use the manufacturer’s recommended settings for your filament or resin. A heated bed can help reduce warping with suitable materials.

For more reliable results:

  • Clean the build plate before printing.
  • Check bed leveling regularly.
  • Adjust the Z-offset when necessary.
  • Use recommended temperatures.
  • Avoid drafts and major temperature changes.
  • Inspect the first layer before leaving the printer unattended.

A few minutes of preparation can prevent hours of wasted printing. Good calibration also improves consistency across future projects.

Is it difficult to learn 3D printing?

Learning 3D printing is not inherently difficult, but beginners should expect an initial learning curve. Basic tasks are usually straightforward once you understand the printer’s controls and workflow.

Many beginners can learn to load filament, select a print, and use downloaded models within a few days. Modern machines often include automatic calibration and guided setup features. These improvements make the first experience much easier than it was with older printers.

The more challenging part is troubleshooting. Problems such as stringing, warping, layer shifting, under-extrusion, and poor surface quality can have several possible causes. Finding the right solution takes practice.

Learning CAD software can require additional time. Designing custom parts involves different skills from operating the printer itself. However, you can begin with ready-made models before learning advanced design techniques.

A simple learning path is:

  1. Start with pre-made models.
  2. Learn basic printer controls.
  3. Print calibration models.
  4. Study common print defects.
  5. Gradually experiment with slicer settings.
  6. Learn basic CAD when you are ready.

With regular practice, most beginners can build confidence quickly. Online maker communities also provide useful troubleshooting advice and practical examples.

Accelerating Your Learning Curve

The fastest way to learn 3D printing is to practice with simple, repeatable projects. Starting with complex models can create unnecessary problems. Instead, use standard calibration prints to understand how your machine behaves.

A calibration cube can reveal dimensional or extrusion issues. A Benchy boat can help you evaluate several aspects of print quality, including overhangs, bridges, and surface detail.

It also helps to change one setting at a time. If you adjust temperature, speed, and cooling together, it becomes difficult to identify which change solved the problem.

Keep simple notes about successful settings for each material. This creates a personal reference that becomes more useful with every project.

Helpful learning habits include:

  • Use the manufacturer’s recommended printer profile.
  • Start with simple models.
  • Print calibration tests regularly.
  • Change one setting at a time.
  • Record successful settings.
  • Ask experienced makers when troubleshooting gets difficult.

Community forums and maker groups can also shorten the learning process. Sharing photos of failed prints often makes troubleshooting easier.

Most importantly, treat failed prints as learning opportunities. Each failure can teach you something about temperature, calibration, materials, or printer settings.

Do I need a computer to use a 3D printer?

For most 3D printing workflows, a computer is highly useful and often necessary. You normally need a desktop or laptop to prepare models and generate the machine instructions required by your printer.

Modern 3D printers may include touchscreen controls, Wi-Fi connectivity, USB ports, or smartphone apps. These features can simplify printer control and job monitoring. However, the printer generally still needs a prepared file containing the required toolpaths.

A computer runs the slicing software that converts a 3D model into printer instructions. You can then transfer the finished file using an SD card, USB connection, or local wireless network, depending on the printer.

Some newer printers offer cloud-based workflows or built-in model libraries. These can reduce the need for traditional computer-based preparation. Even so, a computer remains valuable when you want to customize models or control advanced settings.

You do not need a powerful workstation for ordinary slicing. A modern computer with around 4 GB of RAM can handle basic slicing tasks. More demanding CAD applications may benefit from additional memory and graphics performance.

Therefore, a basic computer is enough for most beginners starting with home 3D printing.

Minimum Computer Hardware Requirements

You do not need an expensive workstation to run most standard slicing software. A modern Windows, macOS, or Linux computer can handle basic 3D printing preparation without difficulty.

For simple models, around 4 GB of RAM can be enough. However, more memory provides greater flexibility when working with large or detailed models. Storage requirements are usually modest unless you maintain a large design library.

CAD software can have higher hardware requirements than slicers. Complex models, assemblies, and detailed scenes may benefit from stronger processors and dedicated graphics hardware, and How to Get More Out Of Your GPU Without Overclocking can help you understand how to improve graphics performance without overclocking.

For a basic setup, focus on:

  • A modern desktop or laptop computer.
  • Around 4 GB of RAM for basic slicing.
  • Enough storage for models and slicer software.
  • A compatible operating system.
  • A stable USB, SD card, or wireless connection.
  • More powerful hardware for advanced CAD work.

You should also keep your printer firmware and slicing software updated when appropriate. Updates may improve compatibility, features, and reliability.

The important point is that 3D printing does not require an expensive computer. Beginners can start with an ordinary modern machine and upgrade later if their projects become more demanding.

If you mainly download existing models, your hardware requirements will usually remain modest. Designing complex parts is where additional computing power becomes more useful.

How much does a 3D printer cost?

The cost of a 3D printer varies widely based on its technology, features, build volume, speed, and intended use. For many beginners, a consumer 3D printer costs roughly $200 to $500.

Meanwhile, mid-range prosumer machines often cost between $600 and $1,500. These printers may offer larger build volumes, faster printing, enclosed designs, improved automation, or multi-material capabilities.

At the higher end, industrial 3D printers are considerably more expensive. Professional systems designed for demanding commercial production can cost $5,000 or more, depending on their technology and specifications.

However, the printer itself is only part of the overall budget. Beginners should also consider material and maintenance costs. For example, filament, resin, nozzles, build surfaces, tools, and replacement parts can increase the total cost.

Common ongoing expenses include:

  • Filament or resin for printing
  • Replacement nozzles and other wear parts
  • Build surfaces and adhesives
  • Cleaning and maintenance supplies
  • Basic tools and safety equipment

In addition, standard PLA and PETG filament can often cost around $15 to $25 per kilogram, depending on the brand and market.

Fortunately, electricity is usually a relatively small part of the running cost. Therefore, a sensible beginner budget should include some money for spare parts and maintenance rather than focusing only on the printer’s purchase price.

Factoring in Material and Running Costs

The purchase price does not represent the full cost of 3D printing. Over time, materials and maintenance can add up, especially if you print frequently or experiment with different materials.

For example, standard PLA and PETG filament often costs around $15 to $25 per kilogram. However, specialty filaments can cost considerably more. Your actual material cost also depends on print size, infill, wall thickness, supports, and failed prints.

Additionally, you should budget for replacement components. Nozzles, build surfaces, adhesives, and other consumables eventually wear out. Therefore, keeping basic tools and spare parts available can prevent small problems from stopping a project.

Electricity is generally a modest operating expense. For instance, consumer printers commonly draw around 100 to 250 watts while heating and printing. However, actual consumption varies by printer, material, ambient temperature, and heater operation.

A practical starter budget should account for:

  • The printer
  • Initial filament or resin
  • Basic maintenance tools
  • Spare wear parts
  • Build-surface supplies
  • Appropriate safety equipment

As a general allowance, setting aside around $50 for spare parts and basic safety equipment can provide a useful starting point. Nevertheless, your actual costs will vary by printer and material.

Ultimately, planning for these expenses helps you understand the real cost of 3D printing rather than focusing only on the initial machine price.

Frequently Asked Questions

What is the safest filament material for beginners to use at home?

Polylactic Acid, commonly known as PLA, is the safest and easiest filament material for beginners. Made from renewable resources like cornstarch, PLA melts at lower temperatures and produces minimal odor compared to petroleum-based plastics. It does not require an enclosed printer chamber, adheres easily to standard print beds, and rarely suffers from severe thermal warping during prints.

How long does an average 3D print take to finish?

Print duration varies significantly based on object dimensions, layer resolution, and infill density settings. A small decorative trinket or calibration piece might take thirty to forty-five minutes to finish. In contrast, larger, highly detailed models or functional mechanical parts often require anywhere from eight to twenty-four hours of continuous printing time.

Can a 3D printer make functional mechanical parts?

Yes, modern 3D printers can produce strong, fully functional mechanical parts. By using engineering-grade materials such as PETG, ABS, nylon, or carbon-fiber-reinforced blends, you can create durable gears, brackets, and replacement components. Optimizing wall thickness and internal infill patterns ensures these custom parts withstand substantial physical stress and thermal loads.

How much electricity does an average 3D printer consume?

Most consumer-grade 3D printers consume very little electricity during standard operation. An active machine typically draws between 100 and 250 watts while heating the nozzle and print bed. Once target temperatures stabilize, power draw drops significantly, making operational energy costs negligible—often just a few cents per print job.

Conclusion

Understanding how 3D printer works makes additive manufacturing much easier to understand. The process begins with a digital model and continues through slicing, machine instructions, layer-by-layer printing, and post-processing.

Each stage affects the final result. Good model preparation, suitable slicer settings, correct temperatures, and proper calibration can improve print quality and reliability.

Beginners may encounter problems such as poor first-layer adhesion, warping, or failed prints. These issues are normal parts of the learning process. Modern printers also provide automated calibration and user-friendly features that make getting started easier.

Entry-level hardware has made 3D printing at home accessible to hobbyists, students, educators, and small businesses. You do not need expensive equipment or a powerful computer to begin.

Start with simple models and recommended printer settings. Use calibration prints to learn how your machine behaves. As your confidence grows, experiment with different materials and learn basic CAD design.

With a reliable starter printer, suitable materials, and regular practice, you can turn digital ideas into physical objects and prototypes.

Is 5G Strong Enough For Streaming?

Is 5G Strong Enough For Streaming?

Streaming your favorite movies and shows requires a fast, dependable connection. A weak connection can cause buffering, lag, and pixelated playback. So, is 5G strong enough for streaming without interruptions? In most cases, yes. 5G networks offer higher bandwidth, lower latency, and greater capacity than older mobile technologies.

Your actual experience still depends on signal strength, network congestion, spectrum type, and your location. A strong 5G signal can easily support HD and 4K video streaming. A weak or congested connection may struggle, even when the network is labeled 5G.

According to technical specifications outlined by the Federal Communications Commission (FCC), modern mobile broadband networks deliver real-world performance that easily handles intensive data demands.

Whether you stream on a smartphone or use a 5G home router, connection stability matters. We will compare 5G with home Wi-Fi, examine Netflix requirements, and explain whether 5 Mbps is enough. We will also look at 6G and what future wireless networks could bring.

Is 5G faster than WiFi?

In many situations, 5G can deliver faster download speeds than older home Wi-Fi connections. Mid-band 5G can provide strong real-world performance, while high-band 5G can reach gigabit-class speeds in suitable locations. However, results vary by carrier, spectrum, coverage, and network congestion.

Modern fiber broadband paired with Wi-Fi 6 or Wi-Fi 7 can outperform many cellular connections. For readers considering newer Wi-Fi standards, Wi-Fi 6 vs Wi-Fi 7 provides a useful comparison. Fiber also provides a stable connection that does not depend on nearby cell towers or changing radio conditions. This makes it particularly useful for busy households.

Home Wi-Fi can also offer better indoor consistency. Walls, windows, and building materials can weaken cellular signals. For additional guidance on keeping a home connection protected, Secure Home Network Guide for Remote Engineers covers important home-network security considerations. High-frequency 5G signals can be especially sensitive to physical obstructions.

Therefore, 5G is not automatically faster than Wi-Fi. It can beat older broadband setups, but modern fiber remains highly competitive. Your actual speed test results matter more than the network label.

Real-World Consistency and Latency

Peak 5G speeds can exceed many residential broadband connections. However, peak performance does not always reflect everyday performance. Mobile networks share capacity among nearby users, so speeds can change throughout the day. Signal strength also affects throughput and connection stability.

Latency is another important factor. A strong 5G connection can provide low latency, which benefits live video, cloud gaming, and video calls. Still, a wired fiber connection usually offers more predictable performance.

Indoor coverage can create additional problems. High-frequency 5G signals may weaken when passing through walls or other dense materials. Your phone may also switch between spectrum bands as conditions change.

For streaming, consistency often matters more than maximum speed. A stable connection above the platform’s recommended threshold should provide smooth playback. If your 5G speed frequently drops, buffering may occur despite impressive peak speeds.

For demanding home use, fiber with modern Wi-Fi remains one of the most consistent options. However, strong 5G can provide excellent performance without a fixed broadband connection.

Can I watch Netflix with 5G?

Yes, you can watch Netflix using a 5G connection. Netflix recommends at least 3 Mbps for 720p HD, 5 Mbps for 1080p Full HD, and 15 Mbps for 4K Ultra HD.

That means most capable 5G connections can handle regular HD and 4K streaming. However, speed alone does not guarantee smooth playback. An unstable connection can reduce video quality or cause buffering.

Your signal strength, network congestion, and device also matter. A weak indoor signal may produce inconsistent speeds, even when your phone shows a 5G icon.

Your streaming plan and device capabilities can also limit video quality. Compatible devices and supported plans may be required for certain formats, including 4K and HDR.

Overall, 5G is more than capable of streaming Netflix. If your connection consistently exceeds the required speed, you should enjoy smooth playback. For the best results, test your connection where you normally watch.

Optimizing Netflix Playback on Mobile Networks

You can improve Netflix playback by checking both your connection and video settings. Netflix automatically adapts streaming quality to available network performance. A slow or unstable connection can cause the service to lower resolution temporarily.

On mobile devices, also check whether your app or device limits video quality over cellular data. Some settings prioritize lower data usage rather than maximum resolution. If your plan supports high-quality streaming, adjust the relevant settings when appropriate.

Before troubleshooting the app, test your actual connection speed. Netflix provides an internet speed test through its app on supported mobile devices. You can also use Fast.com in a browser to measure performance.

For the most reliable experience:

  • Use a strong 5G signal when possible.
  • Avoid heavily congested locations.
  • Keep your device software updated.
  • Check your Netflix video quality settings.
  • Monitor mobile data usage if your plan has limits.

Remember that a 5G label does not guarantee a fixed speed. Testing your connection during normal viewing hours gives you a better idea of real-world performance. When using public networks instead, Public Wi-Fi Risks: How to Stay Safe on Open Networks explains the security concerns to keep in mind.

Is 5 Mbps fast enough for Netflix?

Yes, 5 Mbps is enough for Netflix in Full HD at 1080p. Netflix recommends 3 Mbps or higher for 720p HD and 5 Mbps or higher for 1080p Full HD. It recommends 15 Mbps or higher for 4K Ultra HD.

However, 5 Mbps provides very little extra bandwidth. If you are the only person using the connection, it can support a suitable Netflix stream. Other activities may quickly consume the remaining capacity.

Background downloads, cloud backups, app updates, and video calls can compete with your stream. When available bandwidth falls, Netflix may reduce quality or buffering may occur.

For a single 1080p stream, 5 Mbps is a practical minimum. A faster connection provides more breathing room and better supports other devices.

If several people share the connection, consider a higher-speed plan. 15 Mbps or more is particularly important when 4K streaming is involved. Multiple simultaneous streams require additional bandwidth.

Limitations with Multiple Household Devices

A 5 Mbps connection can handle one Full HD Netflix stream under suitable conditions. It becomes restrictive when multiple devices compete for the same bandwidth. Phones, laptops, smart TVs, game consoles, and connected appliances can all consume network capacity.

For example, a household may stream Netflix while another device downloads a large update. Cloud backups may also run in the background. These activities can leave too little bandwidth for consistent video playback.

The problem becomes more obvious with 4K content. A single 4K Ultra HD stream generally requires around 15 Mbps. Multiple 4K streams therefore require substantially more available capacity.

A faster connection also provides useful headroom. You do not want your streaming service using nearly all available bandwidth.

For households with several users, consider your total usage rather than one stream’s requirement. Connection stability and available bandwidth both matter.

A 5 Mbps connection works for basic individual streaming. It is not a good choice for busy households. A higher-speed broadband or 5G home internet plan offers greater flexibility.

Is 5G the same as 300 Mbps?

No. 5G and 300 Mbps describe different things. 5G is a generation of wireless network technology. Mbps describes the speed at which data transfers over a connection.

A 5G connection can operate at many different speeds. Performance depends on spectrum, signal strength, network design, device capability, and congestion. Your location and network conditions can also affect performance.

Therefore, 300 Mbps is not a universal 5G speed. It is simply one possible result from a 5G connection. Some users may receive much less, while others may see considerably higher speeds.

This distinction matters when deciding whether 5G is strong enough for streaming. You should not judge streaming performance by the 5G label alone. Instead, test your connection where you plan to stream.

A consistent connection above your streaming platform’s recommended speed is usually more important than reaching a specific headline number. For 4K Netflix, 15 Mbps is a useful benchmark.

Understanding Diverse Cellular Spectrum Tiers

5G networks use different spectrum ranges to balance coverage, capacity, and speed. Low-band spectrum generally travels farther and penetrates buildings better. However, it typically offers less capacity than higher-frequency spectrum.

Mid-band spectrum provides a useful balance between coverage and performance. It is important for delivering strong everyday 5G speeds across populated areas. High-band millimeter-wave spectrum can deliver extremely high speeds under favorable conditions.

However, higher frequencies generally have shorter ranges and can be more affected by physical obstructions. This makes network design important for real-world performance.

Your phone may also move between spectrum layers as signal conditions change. A connection that performs well outdoors may behave differently inside a building.

For streaming, the exact spectrum band is less important than the speed and stability available at your location. If your connection remains comfortably above the platform’s requirements, you can stream without worrying about the specific band.

In short, 5G performance is not one fixed number. Coverage, spectrum, congestion, and signal quality all influence your actual experience.

How fast is 6G speed?

6G is expected to deliver significantly higher performance than current 5G networks. Proposed systems could eventually support extremely high peak data rates, potentially reaching hundreds of gigabits per second or more in specialized scenarios. However, 1 Tbps should not be treated as a guaranteed consumer speed.

6G remains a developing technology. Researchers are exploring sub-terahertz frequencies, advanced antennas, artificial intelligence, and new network architectures. For readers interested in the infrastructure behind modern connectivity, What Does a Data Center Do?  provides broader context on the systems that support digital services. Commercial specifications and real-world performance are still being established.

The goal extends beyond faster downloads. Future networks are expected to reduce latency and connect large numbers of devices with greater precision. These capabilities could support immersive communications, advanced robotics, spatial computing, and real-time digital systems.

Some industry projections place early commercial 6G deployments around 2030. The exact timeline will depend on standards, infrastructure, spectrum policy, and device development.

For streaming, however, 5G already provides more than enough bandwidth for mainstream HD and 4K video. 6G is unlikely to be necessary for ordinary streaming. Its value will come from applications that require extreme bandwidth, responsiveness, and connectivity.

Advancements in Sub-Terahertz Communication

Sub-terahertz communication is one area researchers are studying for future 6G networks. These frequencies could provide access to much wider channels than those commonly used by today’s cellular systems. That could support extremely high data rates in suitable environments.

Higher frequencies also introduce challenges. Signals can have shorter ranges and may be more sensitive to obstacles. Future networks will therefore need advanced antennas, beamforming, intelligent routing, and dense infrastructure.

6G development also focuses heavily on latency and network intelligence. Edge computing could process data closer to users and connected devices. Artificial intelligence could help networks manage traffic and allocate resources dynamically.

These capabilities could support applications such as spatial computing, autonomous systems, immersive communication, and real-time industrial monitoring.

For everyday video streaming, the benefits are less dramatic. 5G already handles the bandwidth required for modern streaming services. 6G would mainly improve the broader network ecosystem rather than solve a problem most viewers currently have.

As standards mature, researchers will determine how these technologies perform outside controlled environments. Until then, projected 6G speeds should be viewed as targets rather than guaranteed consumer performance.

Frequently Asked Questions

Does 5G use more data than 4G when streaming video?

5G does not consume more data simply by being a newer network. However, because 5G easily handles higher bandwidth, streaming platforms automatically serve the highest video quality available. Streaming a video in 4K resolution uses significantly more gigabytes per hour than an automated 720p stream on a slower connection.

Can 5G replace home broadband for multiple 4K video streams?

Yes, 5G home internet can replace traditional fixed-line broadband for multiple simultaneous 4K video streams. With average mid-band speeds ranging between 100 Mbps and 300 Mbps, a dedicated 5G home gateway provides more than enough sustained bandwidth to support three or four simultaneous 4K streams without buffering.

Why does my 5G connection buffer when watching live video?

Even when 5G is strong enough for streaming, live video can still buffer. Buffering usually happens because of weak indoor coverage, physical obstacles, or heavy network congestion during peak hours. A strong 5G label does not always mean you have a stable connection.

How much bandwidth do major streaming platforms require?

Most major streaming services require roughly 3 Mbps for standard definition, 5 Mbps for full HD (1080p), and 15 to 25 Mbps for 4K Ultra HD. Audio-only streaming platforms require less than 1 Mbps. A standard 5G connection comfortably exceeds all of these baseline bandwidth recommendations.

Conclusion

Understanding modern cellular network performance can help you choose the right streaming setup. 5G is strong enough for streaming in most everyday situations. A reliable 5G connection can easily support HD video and often provides enough bandwidth for 4K playback.

Netflix recommends 3 Mbps for 720p, 5 Mbps for 1080p, and 15 Mbps for 4K. These requirements are modest compared with the speeds available from many 5G networks.

Still, speed is only part of the equation. Signal strength, congestion, spectrum, device capability, and network stability can all affect playback. A strong and consistent connection usually delivers a better experience than a connection with impressive peak speeds.

If you want better streaming performance, test your connection where you normally watch. Check your carrier’s coverage, review your streaming quality settings, and position a 5G home router where it receives a strong signal.

As wireless networks evolve, 5G home internet will continue to compete with traditional broadband. For most viewers, today’s 5G technology already provides more than enough performance for smooth, high-quality streaming.

Simple Tricks for a Calmer Morning to Start Your Day

Simple Tricks for a Calmer Morning

Waking up in a rush can immediately make the day feel stressful. Learning simple tricks for a calmer morning can create a more peaceful start and improve your focus. Research published by the National Institutes of Health highlights the value of predictable routines for managing stress and supporting emotional well-being. A consistent morning routine can help you feel more prepared and in control.

Many people struggle with morning grogginess, rushed family schedules, and difficulty getting started. These problems can make even simple tasks feel overwhelming. The solution does not require a complicated lifestyle change.

This guide explores practical ways to wake up more easily, create a peaceful morning routine, and manage late-night energy. You will also learn how to build quick restorative rituals and reduce stressful family mornings.

Small changes can make your early hours more manageable. Preparing the night before, reducing distractions, and following a consistent schedule can create useful momentum. Over time, these habits can make calmer mornings feel more natural.

How to have a calm morning?

To have a calm morning, reduce unnecessary decisions and prepare as much as possible the night before. Lay out your clothes, pack bags, and prepare breakfast before going to bed. These simple steps remove common sources of morning stress and help you move through your routine more smoothly.

When you wake up, avoid checking your smartphone immediately. Notifications, messages, and social media can quickly pull your attention toward outside demands. Instead, drink some water and give yourself a few quiet minutes before checking your devices. Practicing a digital detox can also help reduce distractions and protect your attention.

Try spending five minutes on quiet reflection, breathing, or gentle stretching. You do not need an ambitious checklist. A simple routine that you can follow consistently is often easier to maintain.

The goal is to create breathing room before responsibilities begin. Move through your morning at a steady pace instead of rushing from one task to another. With practice, these simple tricks for a calmer morning can help you start the day feeling more focused and prepared.

Designing a Low-Stimulation Environment

Your surroundings can strongly influence how your morning feels. Keep your bedroom relatively quiet and use softer lighting during the first few minutes after waking. This creates a gentler transition from sleep to normal daytime activity.

Avoid starting the day with loud alarms, television, or constant phone notifications. These distractions can make your mind feel busy before you have even left the bedroom. If possible, use a gradually increasing alarm sound instead of an abrupt one. Exploring the screen-free tech trend can also offer ideas for reducing unnecessary digital stimulation.

You can also choose calming background sounds or complete silence. The best option depends on your personal preferences and environment. You could also use YouTube Music for calming background sounds if music helps create a more peaceful atmosphere. What matters most is limiting unnecessary stimulation.

A low-stimulation environment gives you time to become fully awake before dealing with work, school, or household responsibilities. Pairing this approach with simple morning habits can make your routine feel more intentional.

You do not need expensive products or a major bedroom makeover. Small changes, such as keeping your phone away from the bed, can make the first part of your morning noticeably calmer.

What is the 5 am rule?

The 5 AM rule is a personal-development method popularized by author Robin Sharma. It encourages waking at 5:00 AM and using the first hour for the 20/20/20 formula. The hour is divided into three 20-minute blocks.

The first block focuses on exercise or vigorous movement. The second is used for reflection, planning, or journaling. The final block is dedicated to learning, reading, or personal development.

The appeal of waking early is having uninterrupted time before work, school, messages, and other responsibilities begin. However, waking at 5 AM is not automatically better than waking later. The approach only works well if you still get enough quality sleep.

If an early wake-up forces you to sacrifice sleep, it can make mornings harder rather than calmer. Your ideal wake-up time should fit your natural sleep needs and daily schedule.

Used appropriately, the method can provide structure and protected personal time. It is best viewed as a framework rather than a rule that everyone must follow.

Applying the 20/20/20 Method Efficiently

The strength of the 20/20/20 method comes from giving each part of the morning a clear purpose. You begin with physical activity, move into reflection, and finish with learning. This creates a structured transition from waking up to beginning your day.

During the first 20 minutes, choose an exercise that matches your fitness level. A brisk walk, mobility routine, or workout can help increase alertness. You do not need to exercise intensely to benefit from movement.

Use the second block for journaling, planning, or quiet reflection. Write down your priorities and identify the tasks that matter most. This can reduce mental clutter and make your schedule easier to manage.

Spend the final 20 minutes reading, studying, or developing a useful skill. Choose material that supports your current goals rather than consuming random information.

If one hour feels unrealistic, shorten each block. The purpose is to create a repeatable routine, not to follow the formula perfectly. Consistency matters more than waking at exactly 5 AM.

What are some tricks for waking up in the morning?

Waking up more easily starts with building habits that support your sleep-wake cycle. One simple trick is placing your alarm away from the bed. This encourages you to stand up instead of repeatedly pressing snooze.

Morning light is another useful tool. Open your curtains soon after waking or spend a few minutes outside. Bright light helps regulate your circadian rhythm and signals that the day has begun.

Drinking water can also be part of your morning routine. Overnight, you naturally go several hours without fluids, so having water after waking can help you feel refreshed.

You can wash your face or take a shower if these actions help you become more alert. However, cold water is not necessary, and claims that it directly stimulates the vagus nerve should not be treated as a guaranteed effect.

Most importantly, maintain a consistent wake-up time. Going to bed and waking at similar times each day helps your body maintain a predictable rhythm. Combine this habit with adequate sleep, morning light, and fewer distractions for a smoother start.

Leveraging the Power of Immediate Natural Sunlight

Morning sunlight can play an important role in regulating your circadian rhythm. Light entering your eyes provides the brain with information about the time of day. Morning exposure can help reinforce the difference between daytime alertness and nighttime sleepiness.

Try opening the curtains soon after waking. If possible, spend some time outdoors in natural daylight. Outdoor light is generally much brighter than typical indoor lighting, even on cloudy days.

The timing matters because light exposure later in the evening can have a different effect. Bright light from screens and strong indoor lighting may delay sleepiness for some people.

Morning sunlight is not a magic solution for severe fatigue. If you regularly feel exhausted despite getting enough sleep, other factors may need attention.

For most people, however, making morning light part of a consistent routine is simple and practical. Combine it with a regular wake-up time and adequate nighttime sleep.

This approach supports healthier sleep timing and can make it easier to establish a predictable morning routine over time.

What is the 7 minute morning ritual?

The 7-minute morning ritual is a short routine designed for people who want a structured start without spending an hour on self-care. It divides seven minutes into several simple activities that encourage calm and focus.

Start with two minutes of slow, comfortable breathing. Focus on steady breaths rather than forcing deep breaths. Next, spend two minutes doing gentle mobility exercises or stretches to loosen your body after sleep.

Use another two minutes to write down three things you appreciate. These can be simple observations, personal experiences, or things you are looking forward to.

Use the final minute to identify and visualize your main priority for the day. Keep this goal specific and realistic.

The routine is intentionally short. Its purpose is to create a calm morning habit that feels achievable even on busy days.

You can adjust the activities to suit your needs. The exact seven-minute structure is less important than following a routine consistently. Small rituals can create a useful transition between sleep and the demands of the day.

Maximizing Micro-Habits for Rapid Daily Focus

The value of a short morning ritual comes from consistency rather than duration. A routine that takes seven minutes is easier to repeat than a complicated schedule requiring an hour.

Begin with a simple breathing exercise. Slow breathing can encourage relaxation and give you a short break from immediate thoughts about work or responsibilities. Follow it with gentle movement to wake your body gradually.

Writing down your priorities can also reduce mental clutter. Instead of creating a long task list, identify the one or two actions that deserve your attention first.

You can then spend a minute visualizing how you want to approach the day. Focus on the behavior you want to practice rather than imagining a perfect outcome.

These micro-habits work best when they fit naturally into your existing schedule. If seven minutes feels too long, shorten the routine rather than abandoning it.

The goal is not to create another demanding obligation. It is to establish a small, repeatable ritual that helps you begin the day with greater clarity and less reactivity.

Why am I tired in the morning and energetic at night

Feeling tired in the morning but energetic at night can have several causes. A disrupted circadian rhythm is one possibility. Some people naturally have later sleep preferences, while others develop delayed sleep patterns through irregular schedules or nighttime habits.

Bright light from phones, computers, televisions, and indoor lighting can also affect sleep timing. Exposure to stimulating content late at night may make it harder to wind down. Reducing this exposure is one reason disconnecting from digital devices can support healthier nighttime habits.

Going to bed late can create sleep inertia, which is the temporary grogginess many people experience after waking. If you then need to wake early, insufficient sleep can make morning fatigue worse.

Stress can also affect sleep quality and energy levels. However, it is too simplistic to assume that tired mornings always mean low morning cortisol or an inverted cortisol curve.

Start with the basics. Keep consistent sleep and wake times, reduce stimulating activities before bed, and aim for enough sleep. If persistent fatigue continues despite healthy sleep habits, consider discussing it with a healthcare professional.

Resetting Your Inverted Daily Cortisol Curve

Rather than trying to manipulate cortisol directly, focus on habits that support a stable sleep-wake rhythm. Your body naturally follows daily patterns in hormones, alertness, temperature, and sleepiness.

Start by maintaining consistent bedtimes and wake-up times. Try to keep the schedule similar on weekends, because large changes can make your body clock harder to regulate.

Morning light is another useful habit. Getting outside soon after waking can provide a strong daytime signal to your circadian system. Regular daytime activity can also support healthier sleep timing.

In the evening, reduce bright light and stimulating activities. Dim household lighting and limit demanding screen use before bed if these habits interfere with your ability to fall asleep. Replacing screen time with family activities you can enjoy at night can provide a more relaxing alternative.

Avoid treating cortisol as the only explanation for nighttime energy. Sleep debt, stress, caffeine, inconsistent schedules, and individual chronotypes can all contribute.

The aim is to create clear signals for daytime and nighttime. With consistent habits, your body can gradually develop a more predictable sleep and wake pattern.

Calm morning routine for kids

A calm morning routine for kids depends on predictability, preparation, and clear expectations. Children often respond better when they know what comes next instead of receiving repeated verbal instructions.

Create a simple visual routine that shows essential tasks. Include getting dressed, brushing teeth, eating breakfast, putting on shoes, and packing school items. Pictures can help younger children understand the sequence.

Prepare as much as possible the night before. Pack school bags, choose outfits, and organize lunches before bedtime. This removes several decisions from the busiest part of the morning.

Allow enough time so children do not feel constantly rushed. Waking them slightly earlier may help, but adding extra wake-up time should not reduce their sleep.

Your own behavior also matters. A calm voice and predictable instructions can help reduce unnecessary conflict. Learning how to be a relaxed, happy parent can also support a calmer approach to everyday family routines. Give children time to complete tasks instead of correcting every small mistake.

The goal is not a perfectly silent morning. It is a routine that feels predictable, manageable, and cooperative for the whole family.

Using Visual Task Checklists to Build Independence

Visual task checklists can help children understand their morning responsibilities without constant reminders. Instead of repeatedly saying what to do, parents can point to the next step on the schedule.

Keep the checklist short and age-appropriate. Younger children may benefit from pictures, while older children can use simple written instructions.

A basic sequence might include:

  • Get dressed
  • Brush teeth
  • Eat breakfast
  • Pack the school bag
  • Put on shoes
  • Leave for school

Let children move through the checklist independently whenever possible. Completing tasks without repeated prompting can build confidence and responsibility.

The system also helps parents identify where delays happen. If breakfast consistently takes too long, you can adjust preparation rather than simply rushing the child.

Avoid turning the checklist into another source of pressure. Give reasonable time limits and offer help when needed.

Over time, a visual morning routine for kids can reduce repeated instructions and prevent avoidable arguments. The objective is not perfect independence. It is creating enough structure for children to know what comes next and participate more confidently in the morning.

Frequently Asked Questions

How long does it take to establish a calm morning routine?

It often takes several weeks of consistent practice to make a new routine feel natural. Using simple tricks for a calmer morning works best when you introduce one or two habits at a time. This approach reduces overwhelm and makes your new routine easier to maintain consistently.

Should I exercise first thing in the morning?

Morning exercise can help you feel more alert and prepared for the day. As part of simple tricks for a calmer morning, try five to ten minutes of stretching, yoga, walking, or light movement. Choose an activity that increases energy without leaving you exhausted before work.

What should I eat for breakfast to stay calm and focused?

Choose a balanced breakfast that combines protein, complex carbohydrates, and healthy fats. For example, try eggs with avocado, oatmeal with nuts, or a protein-rich smoothie. Including balanced nutrition among your simple tricks for a calmer morning can help you stay satisfied and focused throughout the morning.

How do I stop checking my phone immediately after waking up?

Keep your smartphone outside the bedroom and use a separate alarm clock. This simple boundary removes the temptation to check notifications immediately. Avoiding your phone is one of the most practical simple tricks for a calmer morning, because it protects your attention from emails, social media, and outside demands.

Conclusion

A peaceful start does not require a perfect schedule or major lifestyle change. These simple tricks for a calmer morning can help you create more space, focus, and control before daily responsibilities begin. Prepare the night before, get some natural morning light, move your body, and delay phone use. Choose one or two habits first, then build gradually. With consistency, these simple tricks for a calmer morning can become a sustainable part of your daily routine and make your mornings feel more manageable.

How to Write a Resignation Letter: Step-by-Step Guide

How to Write a Resignation Letter

Leaving a job is a major career milestone that requires tact, clarity, and professionalism. Knowing how to write a resignation letter ensures you depart on positive terms while keeping your professional network intact. A formal written notice serves as an official company record, establishes your final working day, and details your transition timeline.

According to workplace guidelines from the U.S. Department of Labor, clear communication regarding your separation helps streamline final compensation, benefits continuation, and administrative handoffs. Mishandling this step can damage valuable relationships with managers, colleagues, and potential future references.

This comprehensive guide walks you through every stage of drafting your formal notice. You will learn how to write a resignation letter for your job, maintain professional grace, select essential details, adopt the proper 2026 format, and deliver your notice smoothly via email.

How do I write a resignation letter for my job?

Writing an effective resignation letter starts with directness and clarity. Begin by stating your formal intention to resign from your position. Include your job title and your expected final working day. This immediately tells your employer why you are writing and when the employment relationship will end.

Keep the tone courteous and professional throughout the letter. You can briefly thank your employer for the opportunities, skills, experience, or mentorship you received. You do not need to provide a detailed explanation for your decision. A resignation letter is an official notice, not a personal essay or complaint.

It is also useful to offer reasonable support during the transition. You might mention that you are willing to document processes, transfer knowledge, or help organize current projects. However, avoid promising more than you can realistically complete before leaving.

A strong resignation letter usually includes:

  • A clear statement of resignation
  • Your job title
  • Your final working date
  • A brief expression of appreciation
  • An offer to support the transition
  • Your professional sign-off

Keep the document concise. A short and focused letter is easier for your manager and human resources team to process. Most importantly, make sure your final date matches the notice period required by your employment agreement or workplace policy.

Key Details to Include

Your resignation letter should contain the information your employer needs to process your departure without confusion. Start with your name and contact information if you are submitting a formal business letter. Add the date of submission and the name and title of your manager or relevant recipient.

The most important detail is your final working day. State the date clearly instead of using vague phrases such as “two weeks from today.” This reduces the risk of misunderstandings between you, your manager, and human resources.

Your letter should also identify your current position. This is especially useful when an organization has multiple employees or departments. A brief statement offering transition assistance can also demonstrate professionalism.

Depending on your workplace, you may include:

  • Your full name and contact details
  • The submission date
  • Your manager’s name and title
  • Your job title or department
  • Your final employment date
  • A brief thank-you statement
  • An offer to assist with handover tasks
  • A professional closing and signature

Avoid adding unnecessary personal information. Your employer generally needs confirmation of your resignation and departure date, not extensive details about your future plans. Before sending the letter, check the spelling of names, dates, and job titles carefully.

How do I resign gracefully?

Resigning gracefully requires more than knowing how to write a resignation letter. The way you communicate your decision can influence your final weeks and your future professional relationships. Start by speaking privately with your direct supervisor when possible. Give them the news before announcing it broadly to colleagues or sending wider communications. If your departure involves a negotiated exit, understanding when and how to take a voluntary severance package can also help you evaluate your options.

During the conversation, stay calm and direct. You can explain that you have decided to move on without criticizing management, coworkers, or company policies. If you choose to share your reasons, keep the explanation professional and appropriate for the situation.

After the conversation, provide your written resignation notice. Continue handling your responsibilities carefully throughout the notice period. Complete important tasks, organize files, and document processes that someone else may need to manage.

A graceful resignation also involves protecting relationships. Avoid gossip, public complaints, or unnecessary arguments during your final days. Your current colleagues may become future managers, clients, references, or professional contacts.

Focus on making the transition easier rather than proving why you are leaving. Professionalism matters even when your experience with the organization has been difficult. Leaving with composure can preserve relationships that may benefit your career later.

Managing the Final Two Weeks

Your final two weeks should remain focused on completing responsibilities and supporting an orderly handover. Do not treat the notice period as time when normal standards no longer apply. Continue meeting deadlines where possible and communicate clearly when a task cannot be completed before your departure.

Create useful handover notes for recurring responsibilities, active projects, important contacts, and upcoming deadlines. If appropriate, help train the person taking over your duties. Keep the documentation practical and easy for another employee to follow. This is especially important when preparing for employment history and background verification, which may require accurate information about your previous role and dates of employment.

You should also maintain professional behavior around coworkers. Avoid office gossip, negative social media posts, or emotional conversations about workplace problems. Written comments can be shared long after you leave, so think carefully before putting criticism in writing.

Before your final day, consider sending personalized farewell messages to colleagues who supported you. A short note can express genuine appreciation without becoming overly emotional.

You may also provide personal contact information to people you want to remain connected with. This can help preserve valuable professional relationships after your employment ends.

Use your final days to leave organized files, clear instructions, and minimal unfinished work. A professional handover is one of the most practical ways to end your employment on good terms.

What should you write in a letter of resignation?

A formal resignation letter should contain precise information rather than a lengthy explanation. The first priority is to state clearly that you are resigning from your position. Include your exact job title and your intended final date of employment.

After stating your decision, add a brief expression of appreciation. You might thank your employer for the experience, professional development, training, or opportunities you received. Keep this section sincere and concise. You do not need to exaggerate your appreciation if your experience was mixed.

The final part should address the transition. Offer reasonable assistance with documenting responsibilities, transferring knowledge, or completing important handover tasks. This shows that you are considering the needs of the organization while preparing to leave.

You generally do not need to include details about your next employer. You also do not need to disclose your new salary, benefits, or personal reasons for leaving. These details are usually unnecessary for a formal resignation notice.

A professional resignation letter should therefore be:

  • Direct about your decision
  • Clear about your final working date
  • Courteous toward your employer
  • Brief and factual
  • Focused on transition support
  • Free from unnecessary personal information

The goal is simple: create a clear official record while maintaining professional goodwill.

What to Omit from Your Letter

A resignation letter is not the right place to document every frustration you experienced at work. Avoid emotional complaints, personal attacks, accusations, or detailed criticism of management. Even when your concerns are legitimate, a resignation letter may not be the appropriate channel for expressing them.

You should also avoid lengthy salary complaints or comparisons with your new employer. Your written notice should focus on your decision to leave and the practical details surrounding your departure.

Think carefully before including information about workplace conflicts. Written communication can be retained, forwarded, or reviewed later. Statements made during an emotional moment may create unnecessary professional problems.

Instead, keep the language neutral and constructive. If you need to provide formal feedback about your employment experience, consider whether your organization’s exit interview or human resources process is more appropriate.

Avoid including:

  • Angry or emotional language
  • Personal criticism
  • Accusations against coworkers
  • Detailed salary complaints
  • Information about your future compensation
  • Unnecessary details about your next employer
  • Threats or sarcastic comments

Your resignation letter should demonstrate composure. A concise, professional document is usually more useful than a detailed explanation of everything that went wrong. Keep sensitive discussions separate from the formal resignation notice whenever possible.

What is the format of a resignation letter in 2026?

The standard resignation letter format in 2026 remains simple, professional, and easy to scan. Digital workplaces have made resignation notices more flexible, but the basic business structure has not changed significantly.

For a formal letter, begin with your contact information and the submission date. Add your manager’s name, title, and relevant company information when appropriate. Follow this information with a professional salutation.

The body can usually be organized into three short sections. First, clearly state your resignation and final working date. Second, briefly express appreciation for your experience. Third, offer reasonable assistance with the transition.

Finish with a professional closing and your typed name. If you are submitting a physical letter, include your signature. For a PDF document, you can use an appropriate digital signature if your workplace accepts one.

Use clean formatting throughout. Standard fonts such as Arial or Calibri are easy to read. Keep the document single-spaced with clear paragraph breaks and consistent alignment.

A practical structure looks like this:

  1. Contact information
  2. Date
  3. Manager or recipient information
  4. Professional salutation
  5. Resignation statement
  6. Final working date
  7. Appreciation
  8. Transition offer
  9. Professional closing
  10. Signature and typed name

The format should support clarity rather than distract from the message.

Modern Hybrid Formatting Standards

Modern workplaces often combine office-based and remote communication. Your resignation letter should therefore work equally well as a printed document, PDF attachment, or email message.

If you submit a physical letter, use consistent margins, readable typography, and clean spacing. Avoid decorative fonts, graphics, colored backgrounds, or complicated layouts. A resignation notice should look like a professional business document.

A PDF can be useful when your employer requests a formal attachment. It helps preserve the document’s formatting across different devices and applications. It can also provide a convenient record when a signed document is required.

For digital submissions, check whether your employer has a specific resignation process. Some organizations require employees to submit notices through an internal human resources system. Others may request an email to a manager or HR representative.

Do not assume that a PDF or email automatically satisfies every workplace requirement. Review your employment agreement, company handbook, or internal instructions when available.

Your formatting priorities should be:

  • Clear headings and spacing
  • Consistent alignment
  • Readable font size
  • Professional typography
  • Accurate dates
  • Easy digital viewing
  • A clear signature when required

The document should look polished without appearing overly designed.

How to write a resignation letter by email

Learning how to write a resignation letter by email requires the same professional approach as a printed notice. The main difference is that your email must communicate its purpose immediately.

Start with a direct subject line. Include the word “Resignation” and, when useful, your name or job title. This helps your manager and human resources team identify and archive the message quickly.

Address your manager professionally. State your resignation and final working date near the beginning of the email. Do not bury the main information beneath several paragraphs of background.

Keep the body concise. Include a short thank-you statement and offer reasonable support during the transition. If your workplace requires a formal attachment, mention the attached resignation letter clearly.

You can include your personal email address or phone number if you want the company or colleagues to contact you after departure. However, avoid adding unnecessary personal information.

Before sending the email, check the recipient list carefully. Make sure your manager receives the notice before forwarding it to a wider group. If company policy requires HR to receive a copy, follow those instructions.

A professional resignation email should be:

  • Clear from the subject line
  • Direct in the opening paragraph
  • Specific about your final date
  • Courteous but concise
  • Focused on the transition
  • Carefully checked before sending

The email should function as an official notice, not an emotional farewell message.

Optimizing Your Email Subject Line

Your subject line should make the purpose of the email immediately obvious. Avoid vague subjects such as “Important Update,” “My Plans,” or “A Quick Note.” These phrases force the recipient to open the message before understanding its purpose.

A direct subject line is easier to process and archive. Simple options include “Resignation – Firstname Lastname” or “Formal Resignation – Firstname Lastname – Job Title.”

Choose the version that fits your workplace culture. A formal corporate environment may benefit from a more explicit subject line. A smaller workplace may only require your name and the word “Resignation.”

Keep the subject professional and neutral. Do not include emotional language, complaints, salary information, or details about your new employer.

Before sending, confirm that the name and job title are accurate. If your company’s HR process requires a particular subject format, follow that requirement instead.

Effective subject lines should:

  • Clearly identify the email as a resignation
  • Include your name when useful
  • Include your job title when relevant
  • Avoid emotional wording
  • Remain short and searchable
  • Match internal HR requirements when applicable

The subject line is a small part of the resignation process, but it establishes the tone immediately. A clear subject helps your manager understand the message without unnecessary effort.

Frequently Asked Questions

How much advance notice should I provide when resigning?

Standard professional etiquette requires two weeks of advance notice. However, you should always review your employment contract or employee handbook first. Some executive, specialized, or technical roles require thirty to sixty days to complete extensive knowledge transfers and recruit suitable replacements.

Should I tell my employer where I am going next?

You are not legally or professionally required to disclose your next company. If you prefer privacy, politely state that you are pursuing a new opportunity that aligns with your personal goals. Keeping your next move private prevents unnecessary workplace speculation and boundary crossing.

Can an employer terminate me immediately after I resign?

Yes, in at-will employment arrangements, an employer may accept your resignation effectively immediately. Prepare for this possibility by securing your personal files, organizing your contact lists, and reviewing company policies regarding unused paid time off compensation before submitting your formal letter.

Do I need to provide a reason for quitting my job?

No, you do not need to provide specific reasons for leaving in your formal letter. A simple, polite statement declaring your decision to step down from your role is sufficient for company records and protects your personal boundaries.

Conclusion

Mastering how to write a resignation letter allows you to navigate career changes smoothly while preserving valuable professional networks. A concise, well-structured letter confirms your departure date, expresses sincere gratitude, and outlines a practical handover strategy. Approaching this process with clarity, discretion, and composure ensures you leave a positive, lasting impression on management and colleagues alike.

Use the formatting guidelines and advice outlined above to craft a message tailored to your role. By handling your departure with dignity and organization, you reinforce your professional reputation and set a confident foundation for the next chapter of your career. If that next chapter involves building a professional presence without traditional experience, learning how to build a portfolio without work experience can be a useful next step.

Evening Routines for Restful Sleep: A Complete Guide

The Ultimate Guide to Evening Routines for Restful Sleep

Quality rest does not happen by accident. In our fast-paced modern world, deliberate evening routines for restful sleep bridge the gap between daily chaos and restorative recovery. When you prepare your body and mind before heading to bed, you signal to your internal clock that it is time to unwind. According to clinical guidance from the National Sleep Foundation, establishing consistent nightly patterns fundamentally strengthens circadian rhythms and improves sleep architecture.

A predictable wind-down ritual lowers physiological arousal, reduces lingering stress hormones, and encourages the natural release of melatonin. Without a structured buffer period, the nervous system remains in high gear, causing tossing, turning, and fragmented sleep cycles.

This comprehensive guide answers the most essential questions about optimizing your evening schedule. You will discover actionable frameworks like the 3-3-3 rule, grounding exercises like the 5-4-3-2-1 method, and evidence-based pediatric strategies like the 5-3-3 rule. We will also outline ten foundational sleep hygiene habits and walk you through designing an effective, sustainable adult bedtime routine for deeper nightly rejuvenation.

What is the 3-3-3 rule for sleep?

The 3-3-3 rule for sleep is a popular evening framework that divides the hours before bedtime into simple boundaries. It commonly suggests avoiding heavy meals for three hours before bed, limiting large amounts of liquid for two hours, and stopping screen use one hour before sleep. These habits can support a smoother transition into rest, although the 3-3-3 rule itself is not a universal medical standard.

Finishing large meals earlier may reduce discomfort, especially for people prone to reflux. Limiting fluids later may also reduce bathroom trips during the night. Reducing stimulating screen use can help create a calmer environment before bed.

The timing does not need to be exact. Your bedtime, meal schedule, medications, and personal needs should guide the routine.

Try using the rule as a flexible framework rather than a strict prescription. The goal is to create a predictable period with fewer physical and mental distractions.

Eliminating Late-Night Blue Light Disruption

Reducing phone, tablet, and television use before bed can make your evening less stimulating. Bright light, particularly when it reaches your eyes late at night, can affect the body’s circadian timing. Interactive content can also keep your brain engaged when it should be winding down, especially when studying late rather than following a consistent morning vs night study routine.

You do not necessarily need to avoid every screen for a full hour. Instead, focus on reducing bright light and mentally stimulating activities as bedtime approaches. Lowering screen brightness and using warmer display settings may also make evening use less disruptive.

Replace endless scrolling with activities that require less mental effort. Reading a physical book, listening to quiet music, writing in a journal, or doing gentle stretching can create a stronger transition toward sleep.

If you must use a device at night, keep the activity purposeful and brief. Avoid emotionally charged conversations, work messages, gaming, and fast-paced social media.

The goal is not perfection. It is to create a low-stimulation environment that helps your brain recognize that bedtime is approaching.

What is the 5 4 3 2 1 rule for sleep?

The 5-4-3-2-1 rule for sleep is a grounding exercise that can help redirect attention when your mind feels busy. It is commonly used as a mindfulness technique rather than a formal sleep treatment. The exercise asks you to notice five things you can see, four things you can feel, three things you can hear, two things you can smell, and one thing you can taste.

The technique gives your attention a specific task instead of allowing thoughts to keep looping. This can be useful when stress, worry, or bedtime rumination makes relaxation difficult.

Move through each sense slowly and without judging what you notice. You might observe the texture of your pillow, the sound of a fan, or the temperature of the room.

The exercise does not guarantee sleep, and it should not replace professional treatment for persistent insomnia. However, it can become a simple part of evening routines for restful sleep, especially when paired with slower breathing and reduced stimulation.

Calming Somatic Tension in Bed

Sensory grounding can become more effective when you combine it with slow, comfortable breathing. Instead of trying to force yourself to fall asleep, focus on relaxing your body and allowing your breathing to become steady.

Start by noticing physical sensations without trying to change them. Feel the mattress supporting your body. Notice the weight of your blanket and the temperature of the air. Then take several slow breaths without forcing unusually deep inhalations.

You can also gently release tension from your jaw, shoulders, hands, and legs. Avoid turning the exercise into another task that you must perform perfectly.

If your thoughts return, simply bring your attention back to a physical sensation or the sound of your breathing. This repeated redirection can reduce mental engagement with stressful thoughts.

Grounding works best when it feels simple. You do not need special equipment or advanced meditation skills. A few quiet minutes can provide a useful transition from mental activity to physical relaxation before sleep.

What is the 5-3-3 rule for sleep training?

The 5-3-3 rule for sleep training is sometimes used online to describe a structured approach to spacing infant night feedings. It generally means waiting five hours after bedtime before offering a feeding, then waiting three hours between later feeds. However, this is not a universal pediatric sleep-training standard, and feeding schedules should not be applied to every baby.

Infants have different nutritional needs based on age, growth, health, feeding method, and medical history. Some babies need frequent overnight feeds, particularly during early development. For that reason, parents should not use a fixed feeding interval simply to encourage longer sleep.

If a baby wakes before a planned interval, parents may sometimes use appropriate soothing methods when feeding is not required. These can include gentle patting, rocking, or other familiar comfort techniques.

Before changing overnight feeding patterns, discuss the plan with your pediatrician. A healthcare professional can determine whether longer intervals are appropriate for your baby’s development.

Treat the 5-3-3 approach as a parenting strategy discussed online, not a universal medical recommendation.

Building Predictable Nighttime Boundaries

Consistent nighttime responses can help families establish clearer sleep expectations. However, predictability should never override an infant’s nutritional or medical needs. Babies may wake because they are hungry, uncomfortable, sick, or seeking reassurance.

Parents can create boundaries by keeping nighttime interactions calm and predictable. Dim lighting, quiet voices, and minimal stimulation can help distinguish nighttime from daytime. When feeding is appropriate, keep the process simple before returning the baby to sleep.

As babies develop, their sleep patterns can change significantly. A strategy that works at one age may become unsuitable later. Growth spurts, illness, teething, and developmental changes can also temporarily affect sleep.

Rather than focusing only on longer sleep periods, look for a routine that supports safe sleep, adequate nutrition, and predictable caregiving. Follow your pediatrician’s recommendations for feeding and sleep practices.

If your baby has unusual waking patterns, poor weight gain, feeding difficulties, or other concerns, seek professional guidance. Consistency matters, but flexibility matters too.

What are 10 healthy sleep habits?

Healthy sleep depends on more than what you do during the final hour of the day. A consistent set of daytime and nighttime habits can make sleep easier and more predictable. These habits support your circadian rhythm while reducing common sources of nighttime disruption, including the need for better study tips for exam preparation when academic demands affect your daily schedule.

Ten useful habits include:

  • Keep a consistent sleep schedule, including weekends when practical.
  • Keep your bedroom dark, quiet, and comfortably cool.
  • Exercise regularly, preferably during the daytime.
  • Limit caffeine later in the day.
  • Avoid relying on alcohol as a sleep aid.
  • Get natural light exposure, especially earlier in the day.
  • Use your bed primarily for sleep and intimacy.
  • Create a relaxing wind-down period before bedtime.
  • Manage stress through journaling, relaxation, or mindfulness.
  • Avoid large or uncomfortable meals close to bedtime.

You do not need to change everything at once. Choose two or three habits that fit your lifestyle and maintain them consistently.

Over time, these habits can strengthen your evening routines for restful sleep and make bedtime feel more predictable.

Optimizing Your Bedroom Environment

Your bedroom can either support sleep or make it harder. A dark, quiet, and comfortable environment reduces common sources of nighttime stimulation. Creating a calm home environment can also make it easier to reduce distractions and support relaxation. Start by controlling the factors you can change most easily.

Use blackout curtains or an eye mask if outside light enters the room. Consider earplugs or steady background noise if unpredictable sounds regularly wake you. Keep the room comfortably cool rather than choosing a temperature simply because it is recommended online.

Around 65°F is often cited as a comfortable bedroom temperature, but individual preferences vary. You may sleep better slightly warmer or cooler. Focus on comfort rather than following one exact number.

Your mattress, pillow, bedding, and clothing also affect comfort. Choose options that help you maintain a comfortable temperature and sleeping position.

Remove unnecessary lights from electronic devices when possible. Keep work materials away from the bed if they encourage you to think about unfinished tasks.

A well-designed bedroom supports the rest of your evening routines for restful sleep by making relaxation easier and reducing avoidable disruptions.

Bedtime routine for adults

A bedtime routine for adults is a repeatable sequence of calming activities that helps separate daytime responsibilities from sleep. It does not need to last exactly 30 or 60 minutes. The ideal length depends on your schedule and how much time you need to transition comfortably.

Start by completing practical tasks such as washing up, preparing clothes, or setting an alarm. Then reduce stimulation by dimming lights and stepping away from demanding work. Choose one or two quiet activities that you genuinely enjoy.

Reading a physical book, listening to calm music, stretching gently, or writing tomorrow’s priorities can help create a clear stopping point for the day. Avoid turning the routine into another productivity project.

Keep your bedtime and wake time reasonably consistent. Repetition helps establish predictable cues around sleep, especially when your evening activities follow the same general order.

The most effective evening routines for restful sleep are realistic enough to maintain. A simple routine repeated most nights is usually more useful than an elaborate plan that lasts only a few days.

Crafting a Sustainable Wind-Down Ritual

A sustainable wind-down ritual should fit your actual life. If your routine requires too many steps, it becomes difficult to maintain during busy evenings. Start with two or three activities that feel calming rather than burdensome.

For example, you might spend ten minutes preparing for tomorrow, followed by ten minutes of reading. You could then dim the lights and complete your usual bedtime hygiene. The exact activities matter less than creating a consistent sequence.

Avoid judging the routine by how quickly you fall asleep. Sleep naturally varies from night to night. A useful routine should reduce stimulation and create favorable conditions for rest, not guarantee immediate sleep.

If you remain awake for a prolonged period, avoid repeatedly checking the clock. If you cannot sleep, a quiet activity outside bed may be more helpful than forcing sleep.

Review your routine after a few weeks. Keep activities that help and remove those that create stress.

The goal of evening routines for restful sleep is consistency without rigidity. A routine that works on ordinary days and busy nights has a better chance of becoming a lasting habit.

Frequently Asked Questions

How long should an ideal evening routine last?

An ideal evening routine lasts between 30 and 60 minutes. This provides sufficient time for your core body temperature to drop and your heart rate to slow down without feeling like an overwhelming chore. Consistency matters far more than duration, so choose a realistic timeframe you can maintain every night.

What is the best bedroom temperature for restful sleep?

Most sleep specialists recommend keeping your bedroom between 60 and 67 degrees Fahrenheit (15 to 19 degrees Celsius). Cooler ambient temperatures facilitate the natural drop in core body temperature that triggers sleepiness, helping you fall asleep faster and preventing disruptive micro-awakenings during deep sleep cycles.

Can taking a warm shower before bed help me sleep?

Yes, taking a warm shower or bath about 90 minutes before bed enhances sleep onset. Warm water dilates blood vessels near the skin’s surface. When you step out, that heat quickly dissipates, causing a rapid drop in core body temperature that signals to your brain it is time to rest.

Why do I wake up in the middle of the night?

Mid-night awakenings often stem from stress, blood sugar fluctuations, late-night alcohol, caffeine, or environmental disturbances like noise and light. Addressing sleep hygiene factors—such as maintaining a cool room, avoiding late meals, and managing daytime anxiety—greatly minimizes these nighttime disruptions and fosters continuous sleep.

Conclusion

Achieving deep, rejuvenating rest is well within your control when you prioritize intentional habits. By implementing proven time buffers like the 3-3-3 framework, applying the 5 4 3 2 1 sensory technique, and eliminating late-night screen time, you create an ideal physiological environment for rest. Tailoring structured pediatric strategies like the 5-3-3 method or building a personalized adult wind-down ritual provides the stability your nervous system craves. For students, combining these habits with best study tips for exam preparation can also help create a more balanced routine around academic demands.

Remember that optimizing your evening routines for restful sleep is a gradual process rather than an overnight fix. Choose one or two actionable adjustments from this guide to implement tonight. As these small habits become second nature, you will experience shorter sleep latency, fewer nighttime awakenings, and greater daytime vitality.

Best Breakfast for Mental Energy: Meals to Boost Focus

Breakfast for Mental Energy: Meals to Boost Focus

How you nourish your body in the morning sets the tone for your cognitive performance throughout the entire day. Choosing the right breakfast for mental energy prevents mid-morning brain fog and sharpens your attention span. When you consume refined carbohydrates and sugary pastries, rapid blood sugar spikes inevitably cause energy crashes. Conversely, combining complex carbohydrates with high-quality protein and essential fatty acids provides a steady stream of glucose to your brain. Research published by the Harvard T.H. Chan School of Public Health confirms that balanced macronutrients support sustained metabolic health and daily cognitive performance.

Understanding the relationship between nutrition and mental acuity enables you to design meals that optimize neurological function. This comprehensive guide answers practical questions regarding what to eat for morning alertness and how specific dietary choices increase mental focus. You will discover practical breakfast ideas tailored for ADHD management, identify proven super brain foods, and learn which nutrients actively protect your memory and concentration. Making intentional dietary upgrades transforms your morning routine into a reliable source of sustained mental clarity and productivity.

What to eat for breakfast for energy and focus?

To build a breakfast for mental energy and sharp focus, combine protein, fiber-rich carbohydrates, and healthy fats. This combination can support steady energy and reduce hunger during the morning. It also provides nutrients needed for normal brain function. For more practical meal inspiration, explore these easy and healthy breakfast ideas.

Consider scrambled eggs with spinach and a slice of whole-grain toast. Add avocado or a small serving of fruit for additional fiber and healthy fats. Another option is steel-cut oatmeal topped with walnuts, chia seeds, and fresh berries. Greek yogurt with berries, oats, and ground flaxseed also creates a balanced combination.

Protein helps maintain fullness and supplies amino acids needed for many body processes. Complex carbohydrates provide glucose, which the brain uses as an important energy source. Healthy fats contribute essential fatty acids and support overall dietary quality.

Rather than focusing on one ingredient, build breakfast around several food groups. This approach makes your morning meal more satisfying and nutritionally complete.

The Power of Macronutrient Pairing

Pairing protein with fiber-rich carbohydrates can make breakfast more satisfying and support steadier energy. Protein-rich foods include eggs, Greek yogurt, cottage cheese, tofu, and lean meats. Fiber-rich choices include oats, berries, whole-grain toast, chia seeds, and vegetables. Planning these combinations ahead can also make weekly activities more time-efficient.

For example, combine Greek yogurt with ground flaxseed, berries, and oats. The yogurt provides protein, while the seeds, fruit, and oats contribute fiber. Adding walnuts provides healthy fats and additional nutrients.

This type of meal can digest more slowly than a breakfast based mainly on refined carbohydrates. That may help you avoid becoming hungry again soon after eating. It also creates a more balanced nutritional profile.

The goal is not to eliminate carbohydrates. Your brain relies heavily on glucose for fuel. Instead, choose higher-fiber carbohydrate sources and pair them with protein and healthy fats.

A consistent combination of these macronutrients can make it easier to maintain energy during demanding morning activities.

What foods increase mental focus?

Several nutrient-dense foods can support the nutritional needs associated with normal brain function. Fatty fish such as salmon and sardines provide omega-3 fatty acids, including DHA. DHA is an important structural component of brain cell membranes and supports normal neurological function.

Dark leafy greens such as kale and spinach provide folate, vitamin K, carotenoids, and other micronutrients. Avocados contribute monounsaturated fats and fiber. Pumpkin seeds provide magnesium, zinc, protein, and other minerals.

Eggs are another useful breakfast food because they provide protein and choline. Choline supports the production of acetylcholine, a neurotransmitter involved in memory and learning.

Berries also add polyphenols and other plant compounds to breakfast. However, no single food guarantees better concentration. Overall dietary quality matters more than one ingredient.

For practical meals, combine several of these foods. Try eggs with spinach and avocado, oatmeal with berries and walnuts, or Greek yogurt with seeds and fruit. These combinations can provide a broad range of nutrients without making breakfast complicated.

Polyphenol Rich Additions for Clarity

Polyphenol-rich foods can add valuable plant compounds to a morning meal. Examples include blueberries, strawberries, unsweetened cocoa, green tea, and matcha. These foods contain different polyphenols with antioxidant properties.

Blueberries are particularly convenient because they work well in oatmeal, yogurt, smoothies, and chia pudding. Unsweetened cocoa can add a rich flavor to oats without relying on large amounts of added sugar. Matcha can provide caffeine along with plant compounds called catechins.

Some research suggests that certain polyphenols may influence vascular function and other processes involved in brain health. However, these foods should not be presented as instant cognitive enhancers.

Preparation also matters. Choose minimally processed versions whenever possible. For example, use unsweetened cocoa instead of heavily sweetened chocolate mixes.

A simple breakfast could combine oats, blueberries, walnuts, and a small amount of unsweetened cocoa. This creates a meal with fiber, healthy fats, plant compounds, and slow-digesting carbohydrates.

The broader goal is variety. Regularly eating different colorful plant foods can improve the overall nutrient quality of your diet.

What’s a good ADHD breakfast?

A good ADHD breakfast should focus on balanced nutrition rather than a special diet or single ingredient. Meals containing protein, fiber, and minimally processed carbohydrates can provide lasting fullness and help support consistent energy. Building this into a consistent routine can also be part of a broader strategy for starting your day well.

Eggs, Greek yogurt, cottage cheese, tofu, and lean meats are practical protein sources. Pair them with vegetables, berries, oats, or whole-grain toast. Avocado, nuts, and seeds can provide additional healthy fats.

For example, try a vegetable omelet with whole-grain toast and avocado. Another option is a smoothie made with Greek yogurt or protein powder, unsweetened milk, berries, spinach, and chia seeds.

Protein is important because it supplies amino acids used to produce neurotransmitters. However, breakfast alone does not treat ADHD or eliminate its symptoms. ADHD management usually involves a broader combination of strategies.

Avoiding excessive added sugar may also be useful for overall dietary quality. Yet there is no strong basis for claiming that sugar directly causes ADHD symptoms in everyone.

The most useful approach is simple: choose a filling, nutrient-dense breakfast that is easy to prepare and repeat consistently.

Strategic Morning Protein Distribution

Including a meaningful amount of protein at breakfast can help create a more filling and balanced meal. A practical target may be around 20–30 grams of protein, depending on individual needs, body size, activity level, and total daily intake.

Good options include eggs, Greek yogurt, cottage cheese, tofu, milk, protein-rich smoothies, and lean meats. Smoked salmon can also provide protein alongside omega-3 fatty acids.

Protein foods supply amino acids, including tyrosine. Tyrosine is involved in the body’s production of several neurotransmitters, including dopamine and norepinephrine. However, eating more tyrosine does not automatically increase neurotransmitter levels or improve ADHD symptoms.

For an easy breakfast, combine two eggs with Greek yogurt and berries. Another option is cottage cheese with fruit, chia seeds, and walnuts.

Spreading protein across meals may also make it easier to meet your daily requirements. The priority should be a sustainable eating pattern rather than hitting one exact number.

If ADHD symptoms significantly affect concentration or daily functioning, nutrition should complement evidence-based professional care rather than replace it.

What is a super brain food?

There is no single food that can reliably be called a super brain food. However, blueberries are a strong choice because they contain anthocyanins and other polyphenols. These plant compounds have antioxidant and anti-inflammatory properties.

Research on berries suggests that regular consumption may be associated with aspects of healthy cognitive aging. Some studies have also examined memory and executive function. However, results vary, and eating blueberries does not guarantee better concentration.

Wild blueberries can be an easy addition to breakfast. Add frozen berries to oatmeal, blend them into a smoothie, or mix them with Greek yogurt and chia seeds. Frozen fruit can be just as practical as fresh fruit for everyday meals.

Blueberries also provide fiber and vitamin C while adding natural sweetness. This makes them useful when you want to reduce reliance on heavily sweetened breakfast foods.

The larger principle matters more than the label “superfood.” A varied diet containing fruits, vegetables, whole grains, nuts, seeds, and protein sources provides a broader nutritional foundation.

Use blueberries as one part of a balanced breakfast for mental energy, not as a standalone solution for cognitive performance.

Protecting Neurons with Anthocyanins

Anthocyanins are natural pigments responsible for the deep red, purple, and blue colors found in many fruits. Blueberries contain several types of these compounds. They are studied for their potential antioxidant and anti-inflammatory effects.

Research has explored whether anthocyanin-rich foods may support vascular health and healthy cognitive aging. Some findings suggest potential benefits for memory and executive function. However, evidence does not support claiming that daily blueberries directly create measurable improvements in mental efficiency for everyone.

You can still make anthocyanin-rich foods part of a nutritious breakfast. Add blueberries to oatmeal, blend them with yogurt, or combine them with walnuts and chia seeds.

Other sources include blackberries, raspberries, cherries, and purple grapes. Eating a variety of colorful fruits provides different plant compounds and nutrients.

The best strategy is consistency and variety. Rather than relying on one food, build meals around minimally processed ingredients from several food groups.

This approach supports overall dietary quality while giving you regular exposure to beneficial plant compounds. It also makes breakfast more satisfying and easier to maintain over time.

Brain food for memory and concentration

Building meals around nutrient-dense brain foods for memory and concentration can support overall cognitive health. Useful nutrients include choline, omega-3 fatty acids, folate, magnesium, vitamin E, and various antioxidant compounds. Protecting cognitive health also depends on getting enough restorative sleep, making these scientific tips for sleeping better relevant to an overall approach.

Whole eggs are particularly useful because they provide protein and choline. Choline is needed to produce acetylcholine, a neurotransmitter involved in memory and other neurological functions. Walnuts provide alpha-linolenic acid, a plant-based omega-3 fatty acid, along with fiber and polyphenols.

Fatty fish such as salmon and sardines provide DHA and EPA. Leafy greens contribute folate and carotenoids. Berries add polyphenols and fiber.

Herbs and spices can also improve the nutritional variety of breakfast. Cinnamon, turmeric, and rosemary contain plant compounds that have been studied for potential health effects. However, they should complement the diet rather than be treated as memory-enhancing medicines.

A practical breakfast could include eggs with spinach, whole-grain toast, avocado, and berries. This combination provides protein, fiber, healthy fats, and several micronutrients.

Choline and Acetylcholine Production

Choline is an essential nutrient involved in cell structure, liver function, and neurotransmitter production. The body uses choline to produce acetylcholine, a neurotransmitter involved in memory, learning, muscle control, and other functions.

Eggs are one of the most convenient dietary sources of choline. The exact amount varies by egg size and preparation, but a typical large egg provides a meaningful contribution toward daily needs.

Other sources include beef, poultry, fish, dairy products, soybeans, and some legumes. This makes it possible to obtain choline even when eggs are not part of your diet.

However, more choline does not automatically mean better memory or sharper concentration. Adequate intake supports normal physiology, while excess supplementation is not a guaranteed cognitive strategy.

For breakfast, eggs can be combined with spinach, whole-grain toast, avocado, or berries. This creates a more complete meal than relying on eggs alone.

The broader objective is to meet nutrient needs consistently through a varied diet. If you have specific dietary restrictions, a qualified healthcare professional can help you identify appropriate choline-rich alternatives.

Frequently Asked Questions

Can drinking black coffee replace a balanced breakfast for mental focus?

Black coffee can temporarily increase alertness, but it cannot replace a balanced breakfast for mental energy. Caffeine blocks adenosine receptors, which can make you feel more awake. However, coffee provides little protein, fiber, healthy fat, or essential micronutrients. Pairing coffee with eggs, oats, yogurt, fruit, or nuts creates a more complete morning meal. This combination can support steadier energy and better fullness throughout the morning. If coffee makes you jittery or affects your appetite, avoid relying on it as your primary source of morning energy.

How does skipping breakfast affect cognitive performance at work?

Skipping breakfast does not automatically impair cognitive performance for everyone. However, some people may experience hunger, reduced energy, irritability, or difficulty concentrating when they delay their first meal. These effects can become more noticeable during demanding work tasks. A balanced breakfast for mental energy can provide protein, fiber, carbohydrates, and healthy fats to support sustained energy. If you regularly skip breakfast and feel focused, there may be no need to force an early meal. Instead, pay attention to your hunger, energy levels, and concentration. Choose a nutrient-dense meal when you do eat.

Are overnight oats beneficial for morning concentration?

Overnight oats can be a useful breakfast for mental energy because they combine complex carbohydrates, fiber, and convenient preparation. Rolled oats provide beta-glucan, a type of soluble fiber that supports digestion and can help moderate the rise in blood glucose after eating. Adding Greek yogurt, milk, or protein powder increases the protein content. Chia seeds, walnuts, or flaxseeds provide healthy fats and additional nutrients. Berries can add fiber and polyphenols without requiring much preparation. This balanced combination can provide lasting fullness and steady energy during the morning. However, overnight oats work best when they contain enough protein and minimal added sugar.

Does high sugar intake at breakfast worsen brain fog?

A high-sugar breakfast may contribute to energy fluctuations for some people, particularly when it contains little protein or fiber. Pastries, sweetened cereals, and sugary drinks can provide large amounts of rapidly digested carbohydrates. These foods may cause blood glucose to rise quickly and then fall as the body processes the meal. However, this does not mean everyone will experience reactive hypoglycemia or brain fog. A better approach is to build a breakfast for mental energy around whole grains, protein, fruit, vegetables, nuts, and seeds. Pairing carbohydrates with protein and fiber can make the meal more filling and nutritionally balanced. Reducing added sugar can also improve overall diet quality.

Conclusion

Elevating your cognitive function begins with intentional, nutrient-dense morning nutrition. Swapping refined carbohydrates and sugary foods for whole proteins, complex carbohydrates, and essential fats provides your brain with a continuous supply of clean energy. The meals you choose each morning directly dictate your ability to concentrate, retain complex information, and navigate stressful work demands without experiencing debilitating mental fatigue.

Prioritizing a wholesome breakfast for mental energy transforms your daily productivity and protects your long-term neurological health. Whether you choose a classic pasture-raised egg scramble, a protein-packed morning smoothie, or overnight oats enriched with wild blueberries and walnuts, consistency is key. Begin implementing these simple, science-backed nutritional strategies tomorrow morning to unlock sustained mental clarity, sharper focus, and peak cognitive vitality all day long.

How To Pick The Perfect Mechanical Keyboard For Your Office

How To Pick The Perfect Mechanical Keyboard For Your Office

Choosing the right mechanical keyboard for office use can improve typing comfort, accuracy, and everyday productivity. Unlike many membrane keyboards, mechanical keyboards provide consistent key feedback and a more defined typing feel.

For people who type for several hours each day, that consistency can make a noticeable difference. However, comfort depends on more than the switch type. Layout, keyboard height, wrist position, keycap material, and desk setup also matter.

Workplace ergonomics guidance from the Occupational Safety and Health Administration (OSHA) emphasizes neutral wrist positions and reduced strain at computer workstations. A suitable keyboard can support these principles when combined with good posture and regular breaks.

Noise is another major concern in shared offices. Clicky switches can become distracting, while silent mechanical switches offer a more considerate alternative.

This guide answers the most common questions about choosing a mechanical keyboard for office work, including:

  • What is a good mechanical keyboard for office use?
  • How do you choose a good mechanical keyboard?
  • Is a mechanical keyboard good for office work?
  • Which keyboard is best for office work?
  • Are mechanical keyboards too loud for an office?

What is a good mechanical keyboard for office use?

A good mechanical keyboard for office use should balance comfort, quiet operation, durability, and professional design. The best choice depends on your work habits, desk space, and preferred typing feel.

Models such as the Keychron V Max series, Logitech MX Mechanical, and Ducky One 3 can suit different office setups. However, switch choice matters more than the brand alone. Quiet linear or tactile switches are usually better for shared workspaces. For a broader look at keyboard choices for different uses, see Mechanical vs Membrane Keyboard for Gamers: Which Wins?

Wireless connectivity is also useful for modern offices. Bluetooth support can connect the keyboard to laptops, tablets, and other devices. Some keyboards also include a 2.4GHz receiver for a responsive wireless connection.

Look for features such as:

  • Quiet switches for shared environments
  • Comfortable key spacing for long typing sessions
  • PBT keycaps for improved durability
  • Wireless connectivity for a cleaner desk
  • Multi-device pairing for flexible workflows
  • A neutral design that fits professional spaces

A good office keyboard should feel practical rather than distracting.

Wireless Connectivity and Multi-Device Pairing

Wireless connectivity can make an office keyboard much easier to use. Instead of managing several cables, you can connect one keyboard to multiple devices.

Many modern mechanical keyboards support Bluetooth multi-device pairing. This lets you switch between a desktop, laptop, tablet, or phone with a shortcut. Some models also include a 2.4GHz USB receiver for a more responsive wireless connection.

This feature is particularly useful for professionals who move between devices during the workday. You can work on a desktop and then switch to a laptop without changing keyboards.

When comparing wireless office keyboards, consider:

  • Bluetooth support for laptops and mobile devices
  • 2.4GHz connectivity when low latency matters
  • Multi-device switching for flexible workflows
  • USB-C charging for convenient power management
  • Reliable battery life for fewer charging interruptions

A wireless mechanical keyboard can also reduce desk clutter. However, wired keyboards remain a strong option for users who prefer simplicity and uninterrupted connectivity. For another compact Logitech keyboard option, see the Logitech Combo Touch review.

How to choose a good mechanical keyboard?

Choosing a good mechanical keyboard starts with identifying how you use your computer. Your switch preference, layout, typing style, and desk space should guide the decision.

For an office, start with quiet mechanical switches. Silent linear switches are suitable for users who want smooth keystrokes. Silent tactile switches can provide more feedback without the sharp sound of clicky switches.

Next, consider the layout. A full-size keyboard includes a dedicated number pad. A Tenkeyless (TKL) model removes the number pad and saves desk space. A 75% keyboard keeps most important keys while using an even smaller footprint.

Build quality also matters. PBT keycaps generally resist shine and wear better than standard ABS keycaps. Hot-swappable sockets are another useful feature. They allow you to replace compatible switches without soldering.

Before buying, consider:

  • Your preferred switch feel
  • The amount of desk space available
  • Whether you need a number pad
  • Wired versus wireless connectivity
  • Keycap and case quality
  • Ease of future customization

Selecting Hot-Swappable Circuit Boards

A hot-swappable mechanical keyboard gives you more flexibility after purchase. Instead of permanently soldering switches to the circuit board, compatible switches can be removed and replaced manually.

This is useful when you want to experiment with different typing feels. You could start with tactile switches and later try quieter linear switches. You can also replace an individual faulty switch without replacing the entire keyboard.

Hot-swappable boards are especially practical for office users. Your preferred switch may change after several months of typing. Having replaceable switches lets you adjust the keyboard without buying a new model.

Before purchasing, check which switch types the keyboard supports. Most modern hot-swap boards work with common MX-style switches, but compatibility can vary.

Useful considerations include:

  • Hot-swap sockets for easy switch changes
  • Compatible switch standards before buying replacements
  • Spare switches for convenient repairs
  • Switch pullers for safe removal
  • Stabilizer quality for larger keys

Hot-swapping is not essential for every office worker. However, it provides useful flexibility for long-term keyboard ownership.

Is a mechanical keyboard good for office work?

Yes, a mechanical keyboard can be an excellent choice for office work. It provides consistent key feedback and can offer a more comfortable typing experience.

Mechanical switches do not require you to press every key with excessive force. However, the actual ergonomic benefit depends on the switch, typing technique, keyboard height, and overall workstation setup.

A lighter switch can encourage a gentler typing style. Tactile feedback can also help some users recognize key activation more clearly. These factors may reduce unnecessary force during long typing sessions.

Durability is another advantage. Many mechanical switches are rated for tens of millions of keystrokes. This can make a quality keyboard a long-term investment for frequent typists.

For office work, focus on practical features rather than gaming-focused specifications. Useful priorities include:

  • Comfortable switch resistance
  • Low operating noise
  • Appropriate keyboard height
  • Reliable connectivity
  • A suitable layout
  • Durable keycaps
  • Stable construction

Remember that no keyboard automatically prevents repetitive strain. Good posture, neutral wrist positioning, sensible desk height, and regular breaks remain important.

Ergonomic Support and Reduced Muscle Strain

Keyboard ergonomics depends on more than mechanical switches. A well-designed workstation should keep your wrists relatively neutral and your shoulders relaxed.

Mechanical keyboards can support comfortable typing when their switch resistance and height suit your hands. A lighter switch may reduce the force needed for each keystroke. However, forcing your fingers to bottom out every key can still create unnecessary impact.

Keyboard height also deserves attention. High-profile keyboards may benefit from a wrist rest for some users. Low-profile keyboards can reduce the overall height of the typing surface.

Consider these ergonomic adjustments:

  • Keep your wrists in a neutral position.
  • Avoid excessive upward wrist bending.
  • Keep your elbows comfortably supported.
  • Position the keyboard at a practical height.
  • Move the mouse closer to reduce shoulder reach.
  • Take regular breaks during long sessions.

A wrist rest can support the palms when used correctly. It should not force the wrists into an elevated position while typing.

Ergonomics is ultimately about the entire workstation, not just the keyboard.

Which keyboard is best for office work?

There is no single best keyboard for every office worker. The ideal choice depends on your layout needs, operating system, typing preferences, and workspace.

The Logitech MX Mechanical is a strong option for general office users. Its low-profile mechanical design provides a familiar laptop-style footprint with mechanical feedback. It also supports convenient wireless connectivity and multi-device workflows.

For users who want a more customizable keyboard, the Keychron Q Pro series offers a different approach. Its larger, sturdier construction and mechanical design appeal to users who value customization and a substantial typing feel.

When choosing the best mechanical keyboard for office work, consider:

  • Low-profile designs for a slimmer typing surface
  • Quiet switches for shared workspaces
  • Wireless connectivity for flexible setups
  • Multi-device support for modern workflows
  • Hot-swappable switches for customization
  • Compact layouts when desk space is limited
  • A number pad if your work involves frequent data entry

The best office keyboard is the one that matches your daily workflow. Features should support productivity rather than simply add complexity, especially when building a home office setup around the keyboard and other essential equipment.

Low-Profile Switches for Natural Alignment

Low-profile mechanical keyboards use shorter switches and a slimmer overall design. This creates a lower typing surface than many traditional mechanical keyboards.

For some users, the reduced height can make the keyboard feel more natural. It may also reduce the amount of wrist extension required when typing. However, individual comfort varies, so keyboard height should always be considered alongside desk and chair position.

Low-profile keyboards can also suit modern professional workspaces. Their slim appearance resembles many laptop keyboards while retaining mechanical switch feedback.

When considering a low-profile office keyboard, look for:

  • Shorter key travel for a faster, lighter feel
  • Slim chassis designs for reduced overall height
  • Quiet switch options for shared spaces
  • Comfortable key spacing for accurate typing
  • Wireless connectivity for a cleaner desk

Low-profile keyboards are not automatically more ergonomic. Your posture, desk height, chair position, and typing technique still matter.

If you prefer traditional mechanical switches and deeper key travel, a standard-height keyboard may feel more comfortable. Try to prioritize your actual typing experience over keyboard appearance.

Are mechanical keyboards too loud for an office?

Mechanical keyboards are not automatically too loud for office use. Noise depends heavily on the switch type, keycaps, case design, and typing technique.

Clicky switches, such as many blue-style switches, create a deliberate clicking sound. These can become distracting in quiet offices or shared workspaces. Linear switches are usually quieter because they lack a click mechanism.

For the quietest setup, consider dedicated silent switches. These switches use internal dampening components to reduce impact noise during key presses and releases.

Keyboard construction can also affect sound. Foam layers, dampening materials, thicker keycaps, and well-tuned stabilizers can reduce unwanted resonance.

If you work near other people, prioritize:

  • Silent linear or tactile switches
  • Internal acoustic dampening
  • Thick, well-fitted keycaps
  • Stable stabilizers
  • A desk mat that reduces vibration
  • A lighter typing technique

It is also worth remembering that no mechanical keyboard is completely silent. If absolute quiet is essential, test the keyboard before using it in a shared environment.

Sound Dampening Foam and Silent Switches

Sound dampening can make a noticeable difference when building a quieter office keyboard. Internal foam can reduce the hollow resonance created inside the keyboard case.

Silent switches address another source of noise. Their internal dampening components soften the impact created when the switch reaches the end of its travel.

Keycaps also influence the sound profile. Thicker PBT keycaps can create a deeper, less sharp sound than some thin keycaps. Stabilizers on larger keys can also produce unwanted rattle if they are poorly tuned.

For a quieter office setup, combine several small improvements:

  • Install silent switches where compatible.
  • Add suitable case or plate foam.
  • Use well-fitted keycaps.
  • Tune noisy stabilizers.
  • Place the keyboard on a padded desk mat.
  • Avoid aggressive bottom-out typing.

Silicone O-rings can reduce some keycap impact on compatible keyboards. However, they can also change key feel and travel. They are therefore optional rather than essential.

The most effective solution is usually a quiet switch combined with sensible keyboard dampening.

Frequently Asked Questions

What is the quietest mechanical switch type for an office?

Silent linear switches, such as Cherry MX Silent Red, Gateron Silent Yellow, and Outemu Silent Peach, are the quietest options for shared workspaces. These switches use built-in internal rubber dampeners on the stem rails to eliminate the sharp plastic-on-plastic impact sounds during key travel. As a result, they produce a soft, muted tapping sound that is quieter than most standard office membrane keyboards.

Do I need a full-size mechanical keyboard for office work?

You only need a full-size mechanical keyboard if your daily job duties involve intensive numerical data entry, accounting tasks, or specialized financial spreadsheets. If you rarely use a dedicated numeric keypad, a compact Tenkeyless (80%) or 75% layout is much better. Compact layouts bring your mouse closer to your body, promoting better shoulder ergonomics while freeing up valuable desk real estate.

Can I use a gaming mechanical keyboard in an office?

You can use a gaming mechanical keyboard in an office setting, provided you disable aggressive RGB lighting effects and avoid noisy clicky switch variants. However, dedicated office-oriented mechanical keyboards are generally a better choice. They offer cleaner aesthetics, quieter sound profiles, professional keycap fonts, and multi-device wireless Bluetooth pairing designed specifically to boost productivity across several office devices.

How do I make my current mechanical keyboard quieter for work?

You can quiet your mechanical keyboard by installing internal acoustic foam, fitting silicone O-rings onto the keycap stems, and lubricating the mechanical switches and stabilizers. Placing a thick, padded cloth desk mat beneath the keyboard also absorbs vibration sounds before they transfer to your desk, noticeably lowering the overall sound volume in shared office settings.

Conclusion

Choosing the right mechanical keyboard for office work can make everyday typing more comfortable and enjoyable. Mechanical switches provide consistent feedback and can offer a more satisfying typing experience than many membrane keyboards.

However, the best office keyboard is not necessarily the most expensive model. Focus on the features that support your actual workflow.

For shared environments, quiet switches should be a priority. Silent linear and tactile options can significantly reduce disruptive clicking. Acoustic dampening, stable keycaps, and a padded desk mat can further reduce unwanted noise.

Your keyboard layout also deserves careful consideration. A full-size model suits frequent numerical entry. TKL and 75% keyboards can save space for general office work.

Wireless connectivity and multi-device pairing can simplify modern workflows. Hot-swappable switches provide useful flexibility for users who enjoy customization.

Finally, remember that keyboard ergonomics depends on your complete workstation. Maintain a neutral wrist position, use a comfortable desk height, and take regular breaks.

Review your daily needs, choose a suitable layout, and prioritize comfort and quiet operation. A thoughtfully selected mechanical keyboard can be a practical upgrade for your office setup.

The article is now structured for publication, with shorter paragraphs, natural keyword placement, clearer subheadings, restrained bolding, and more cautious ergonomic claims.

Why Qualified People Struggle to Get Interviews

Why Qualified People Struggle to Get Interviews

Sending out dozens of tailored resumes without getting a callback is exhausting. You may match the job description closely, yet hiring teams still overlook your application. Understanding why qualified people struggle to get interviews helps you identify what is blocking your search.

Competitive openings can attract large applicant pools. U.S. Bureau of Labor Statistics provides labor-market data showing how employment conditions and competition vary across occupations and periods. In modern hiring, technical qualifications are only one part of the decision. Applicant volume, screening systems, referrals, recruiter priorities, and hiring timelines can all affect visibility.

Recruiters also look for evidence of business value. A resume that lists duties without outcomes can make strong experience appear ordinary. Your application must quickly show how you solve problems, improve results, reduce risk, or support growth.

This guide explains the most common reasons qualified candidates struggle. It also covers interview rejection, interviewer interest, networking, and seasonal hiring patterns.

Why can’t I get interviews for jobs I’m qualified for?

When you meet the requirements but receive no interviews, the problem may be how your experience is presented. Recruiters often scan for relevant achievements, skills, scope, and outcomes rather than matching job titles alone. A strong technical background can still be overlooked if its value is unclear.

Your resume should connect your experience to the employer’s needs. Listing responsibilities such as “managed projects” or “handled client accounts” provides limited evidence of performance. Specific results create a stronger case.

Applicant Tracking Systems can also influence visibility. Many systems help employers organize and search applications using job-related information. However, passing an ATS does not guarantee an interview. Human review, competition, timing, and role requirements still matter.

This presentation gap is a common part of why qualified people struggle to get interviews. Position your experience around problems solved and outcomes achieved. Make important qualifications easy to find, then support them with credible evidence.

Tailor Your Impact Over General Duties

Replace broad task descriptions with concise accomplishment statements. Your goal is to show what you changed, improved, delivered, or achieved. This gives hiring managers evidence of capability instead of asking them to infer your impact.

For example, “managed a sales team” describes responsibility but says little about performance. “Led an eight-person sales team that generated $1.2 million in annual revenue” adds scope and a measurable outcome. Use numbers when they are accurate and relevant.

Strengthen these statements by adding context. Explain the challenge, your action, and the result without turning each bullet into a long story. Metrics might include revenue, savings, conversion rates, productivity, retention, delivery time, or customer growth.

Place your strongest achievements near the top of each relevant role. Match them to the employer’s priorities without copying the job description. This makes your resume easier to scan and helps recruiters understand your value quickly.

Why do I keep getting rejected from jobs I am qualified for?

Repeated rejection does not always mean you lack the required skills. Qualified candidates can lose roles because of stronger competition, internal candidates, referrals, timing, compensation concerns, or differences in experience.

Some companies advertise positions while already considering internal employees or referrals. A public posting therefore does not guarantee equal visibility for every applicant. Hiring teams may also prioritize candidates whose experience closely matches immediate needs.

Overqualification can create another concern. An employer may wonder whether the position will provide enough challenge or whether you will expect compensation beyond the role’s range. These concerns can affect hiring decisions.

Cultural and strategic alignment can matter as well. Employers may choose someone whose working style, motivation, or experience better fits the team’s needs.

When examining why qualified people struggle to get interviews, look beyond basic qualifications. Compare your positioning, seniority, motivation, and evidence of fit with the specific role.

Overcoming the Overqualification Dilemma

If your background appears significantly more senior than the position, address the concern before the employer fills in the gaps. Explain why the role genuinely fits your goals.

Use your cover letter, application responses, or interview discussion to connect your experience with the position’s responsibilities. Explain why you want this scope and what attracts you to the company. Avoid vague statements about simply “wanting a change,” and avoid the common cover letter mistakes that can weaken an otherwise strong application.

Emphasize the value your experience brings. Show that you can contribute quickly, understand complex problems, and support the team without suggesting that the role is temporary.

Be realistic about compensation and career progression when the topic arises. If the position represents a deliberate shift, explain the reason clearly and consistently.

The strongest message is simple: your experience is an asset, and your interest is credible. That reduces uncertainty around retention and expectations. It also helps recruiters see fit rather than assuming you will leave quickly.

Why am I having a hard time getting an interview?

A difficult interview search may reflect an overreliance on cold online applications. Public job boards can expose your resume to large applicant pools, making it harder to stand out.

Warm introductions can add context that a resume cannot provide. Referrals, professional communities, former colleagues, recruiters, and industry contacts can help your application reach the right person. Networking also gives you information about teams and roles before you apply.

Your online presence matters too. Recruiters may review your LinkedIn profile during hiring. If your profile conflicts with your resume, lacks recent experience, or provides little evidence of expertise, it can weaken your application.

A focused search combines applications with relationship-building. Target companies where your experience solves a clear problem. Then contact relevant people with a concise message about your background.

This broader approach addresses why qualified people struggle to get interviews when online applications alone produce little traction.

Leverage Direct Networking and Referrals

Do not rely entirely on automated job portals. Build relationships with people connected to the teams you want to join.

Before contacting someone, understand the role and identify why your background is relevant. A short message works better when it focuses on shared professional context or a clear business problem. Avoid generic messages that immediately ask for a job.

Employee referrals can improve visibility, although they do not guarantee an interview. A referral is most useful when the employee understands your qualifications and can credibly explain your fit.

Strengthen this strategy by staying in touch with contacts before opportunities appear. Share useful industry insights and ask informed questions without making every interaction transactional.

Keep applying directly when appropriate. Networking should complement your application strategy, not replace it. The goal is to create more paths to consideration while making your qualifications easier to understand.

What are some reasons why I might not get selected in an interview?

Not being selected after an interview does not necessarily mean you lacked technical ability. Decisions can reflect communication, preparation, role fit, examples, compensation, competing candidates, and performance. If rejection happens, understanding how to deal with rejection after an interview can help you evaluate what happened without assuming you were unqualified.

A common weakness is answering questions by repeating the resume. Interviews let you explain how you think, make decisions, and deliver results. Your answers should connect your experience to the employer’s current challenges.

Unstructured answers can also weaken an otherwise strong candidacy. If examples lack a clear situation, action, and outcome, interviewers may struggle to understand your contribution. The STAR method can provide structure for behavioral interview questions and answers.

Low energy, poor listening, weak preparation, or generic questions can create concerns. So can answers that avoid responsibility or provide little evidence of learning. If nerves are affecting your preparation or delivery, learning how to overcome interview anxiety can help you present your qualifications more clearly.

When considering why qualified people struggle to get interviews and offers, separate skill from presentation. You may be capable of doing the job but fail to demonstrate that capability clearly.

Structure Every Answer with Tangible Results

Use the STAR framework to keep behavioral interview answers focused. Start with the Situation and briefly explain the context. Define the Task so the interviewer understands your responsibility. Then spend most of your time explaining the Action you personally took.

Finish with the Result. Whenever possible, quantify the outcome using accurate measures such as revenue, savings, delivery time, customer growth, quality, productivity, or risk reduction. If a result cannot be measured, explain the concrete change that followed.

Do not spend two minutes describing a project’s background. Give enough context to establish the problem, then explain your decisions and actions. Close by showing what happened and what you learned.

This structure makes answers easier to follow and assess.

Prepare several examples before the interview. Choose stories that demonstrate leadership, problem-solving, collaboration, and measurable results. Practice them enough to stay structured without sounding memorized, especially when preparing for top behavioral interview questions.

How to identify if an interviewer is interested or rejecting you?

You can look for signals during an interview, but no single behavior proves that an interviewer will advance you. People have different communication styles, and interviewers may remain neutral even when interested. Treat signals as clues rather than guarantees.

Potentially positive signs include detailed follow-up questions, practical discussion of your experience, explanations of team priorities, or clear information about the next stage.

Less encouraging signs can include a meeting that ends unusually early, limited engagement with your answers, or vague information about what happens next. However, these signals can also result from scheduling pressure or a standardized process.

The most useful indicator is concrete follow-up. If the interviewer explains the next step, identifies who you will meet, or provides a realistic timeline, you have clearer evidence of continued consideration.

Avoid reading body language too literally. Focus on the quality of the conversation and whether the employer gives you actionable information.

Watch for Future-Oriented Language

Listen for language that shows the interviewer is discussing your potential contribution beyond the interview. These comments can indicate that they are imagining how you might fit. However, they are not promises of an offer.

An interviewer who says you would work with a particular team may simply be describing the role. Treat that as context rather than proof of selection. Stronger evidence comes from specific next steps, such as another interview, a case exercise, reference checks, or a stated decision timeline.

Vague phrases such as “we will be in touch” provide little information. They may reflect a standard closing statement rather than rejection.

If the process remains unclear, ask a direct question before the meeting ends. Ask what the next stage involves and when candidates should expect an update.

This approach is more reliable than decoding every gesture or phrase. It keeps your attention on measurable signals.

What is the hardest month to get hired?

There is no single month that is universally the hardest time to get hired across every industry. Hiring patterns vary by sector, company, role, location, budgets, and economic conditions. However, December is often slower because many organizations face holiday absences, year-end planning, budget decisions, and reduced interview availability.

Hiring can slow when decision-makers are unavailable. Panel interviews become harder to coordinate, approvals may take longer, and some companies postpone non-urgent hiring until the new year.

January can bring renewed activity as teams receive new budgets and return from holiday schedules.

Rather than treating one month as a universal hiring rule, use seasonal patterns as planning information. Continue applying when relevant opportunities appear, especially for roles with urgent business needs.

Understanding timing can help explain why qualified people struggle to get interviews even when applications are strong. A delayed response may reflect the employer’s process rather than your qualifications.

Use Slow Hiring Months for Strategic Preparation

A slower hiring period is a reason to adjust your strategy, not abandon your search. Use quieter weeks to improve the materials and relationships that support your next applications.

Start with your resume. Remove weak bullets and strengthen measurable achievements. Then review LinkedIn for consistency.

Use the same period to build a focused target-company list. Identify organizations where your background matches current business needs. Research their teams and likely decision-makers before reaching out.

Networking can be useful when fewer active applications are competing for attention. Contact former colleagues or industry connections with genuine questions and useful context. These conversations can uncover opportunities before they become highly competitive.

Keep monitoring job postings during slower months. Some employers still hire because business needs do not follow seasonal patterns.

The goal is to enter busier hiring periods prepared. A stronger resume, clearer positioning, and warmer network can improve your odds.

Frequently Asked Questions

How many jobs should I apply for before expecting an interview?

Most job seekers submit between 20 to 50 targeted applications before landing a formal interview. In highly competitive fields, that number can rise significantly. To improve your odds, focus on submitting fewer, highly tailored applications backed by employee referrals rather than blasting hundreds of generic resumes across automated job boards.

Can an ATS reject my resume automatically without a human seeing it?

Yes, an Applicant Tracking System can filter out your resume if it lacks essential keywords, uses unreadable formatting, or fails basic knock-out questions. Recruiters set parameters to score incoming applications. To pass these automated filters, use standard section titles, clean layouts, and mirror the exact terminology found in the target job description.

How long should I wait to follow up after an interview?

You should send a personalized thank-you email within 24 hours of your interview. If the hiring team provided a specific decision date that has passed, wait one additional business day before sending a polite follow-up inquiry. If no timeline was given, waiting five to seven business days is standard professional etiquette.

Does being overqualified really hurt my chances of getting hired?

Yes, being overqualified can hurt your chances if employers fear you will quickly leave for a higher-paying position or demand compensation outside their budget. When applying for lower-level roles, tailor your resume to highlight relevant execution skills rather than senior leadership tasks, and clearly explain your career motivations in your cover letter.

Conclusion

Struggling to secure interviews when you possess the right skills is deeply frustrating, but it is rarely a reflection of your true worth. As we have explored, understanding why qualified people struggle to get interviews requires looking beyond basic job qualifications. Automated screening algorithms, high applicant volumes, vague application materials, and unoptimized interview techniques all create artificial barriers between talented professionals and hiring managers.

To turn the tide in your favor, shift your focus toward quality, precision, and networking. Tailor every resume to highlight quantifiable business impact rather than routine duties. Optimize your professional profiles for relevant keywords, reach out directly to decision-makers, and practice structured storytelling for your interviews. By treating your job search as a targeted marketing campaign rather than a numbers game, you will cut through the noise, capture recruiter attention, and secure the job offers you deserve.

Enterprise Software TCO: Guide to Managing Costs

Enterprise Software TCO: Complete Guide to Managing Costs

Software procurement often looks straightforward until unexpected operational expenses appear. Many organizations compare enterprise solutions using only sticker prices or baseline subscription rates. However, Enterprise Software TCO provides a more complete view of the financial commitment.

Total Cost of Ownership considers expenses across the software lifecycle. These expenses can include licensing, implementation, infrastructure, maintenance, training, support, integrations, and eventual replacement. Looking beyond the purchase price helps organizations avoid unrealistic budgets and costly procurement decisions.

According to financial guidance from the U.S. General Services Administration, evaluating end-to-end lifecycle costs provides a stronger basis for assessing technology investments.

Beyond licensing, ongoing operational expenses can quietly increase IT spending. Integration work may require additional technical resources. Training can also reduce productivity during adoption. Vendor price increases may further affect long-term budgets.

This guide explains how to measure and manage software costs. You will learn what TCO software means, how to calculate TCO, and how cloud computing changes ownership costs. You will also see how TCO applies to entrepreneurship and growing businesses.

What is TCO software?

TCO software refers to financial and analytical tools that help organizations calculate, track, and forecast the total cost of technology ownership. These platforms provide a structured alternative to basic spreadsheets. They can model expenses across deployment, daily operations, maintenance, upgrades, and eventual decommissioning.

A TCO platform typically combines direct expenses with less visible operational costs. Direct costs may include licensing, subscriptions, infrastructure, and implementation services. Indirect costs can include administration, integration work, downtime, training, and productivity losses.

This broader view helps procurement and finance teams compare technology investments more accurately. It can also reveal expenses that are easy to overlook during vendor selection.

Organizations can use TCO software to evaluate competing proposals and estimate future spending. Teams can also model different contract terms and usage scenarios. This makes it easier to identify potentially expensive assumptions before signing a long-term agreement.

Ultimately, TCO software supports more informed purchasing decisions. It connects technology spending with financial planning and helps organizations manage software costs throughout the ownership lifecycle.

Key Capabilities of Modern TCO Platforms

Modern TCO platforms can automate cost discovery by connecting with enterprise resource planning systems, financial platforms, and IT asset inventories. These integrations reduce the need for manual data collection and create a more consistent view of technology spending.

Many platforms also support predictive analytics and scenario modeling. Procurement teams can test different licensing structures, renewal assumptions, infrastructure requirements, and usage levels. This helps decision-makers understand how costs may change over several years and supports evidence-based decision making when comparing technology investments.

Benchmarking is another useful capability. Organizations can compare spending patterns against internal targets or relevant industry benchmarks. This can highlight unusual costs and identify opportunities for optimization.

Modern TCO tools can also support vendor evaluation. Teams may compare competing proposals using consistent cost categories instead of relying on headline pricing alone. This approach makes hidden implementation or operating expenses easier to identify.

Scenario analysis can be especially useful before contract negotiations. Teams can model price increases, user growth, infrastructure changes, and contract renewals.

By combining these capabilities, TCO platforms help organizations build clearer financial forecasts. They also give procurement, finance, and IT teams a shared framework for evaluating long-term technology investments.

What is the total cost of ownership (TCO)?

Total cost of ownership (TCO) is a financial metric that measures the complete direct and indirect costs associated with acquiring, deploying, operating, maintaining, and retiring an asset. In technology management, TCO goes beyond the initial purchase price.

Software ownership can involve many additional expenses. These may include implementation services, software updates, security requirements, employee training, technical support, integrations, and data migration. Some costs may also result from downtime or reduced productivity during system changes.

Calculating TCO gives decision-makers a broader financial picture. A software product with a low purchase price may become more expensive if it requires extensive customization or ongoing administration. Evaluating new technology before you buy can help identify these potential costs. Conversely, a higher initial investment may deliver lower operating costs over time.

TCO therefore helps organizations compare technology options using their full lifecycle costs. It also supports more realistic budgeting and financial forecasting, particularly when teams measure ROI before investing in new software.

For enterprise software, this approach is particularly important because contracts often extend across several years. Evaluating ownership costs before procurement can reduce budget surprises and improve long-term return on investment.

Direct Versus Indirect Ownership Costs

Direct ownership costs are expenses that organizations can usually identify and measure easily. These may include software licenses, subscription fees, implementation services, hardware, hosting, and vendor support contracts.

Indirect costs are less visible but can still materially affect Enterprise Software TCO. Examples include employee training time, productivity losses, system downtime, administrative work, and the effort required to maintain integrations.

Consider an enterprise platform that appears inexpensive based on its annual subscription. If employees require extensive training, internal teams may spend significant hours supporting implementation. Those labor costs form part of the broader ownership calculation.

Security and compliance work can also create indirect or operational expenses. Organizations may need additional processes, tools, or staff to maintain required controls.

Separating direct and indirect costs makes financial analysis more complete. It also helps procurement teams avoid comparing vendors using incomplete pricing information.

A useful TCO assessment should therefore capture both visible invoices and internal resource requirements. This approach gives leadership a clearer picture of the software’s real financial impact over its expected lifecycle.

How do I calculate the total cost of ownership (TCO)?

To calculate total cost of ownership, combine acquisition expenses with operating and maintenance costs across a defined period. Then subtract any applicable residual value. The timeframe should match the expected software lifecycle or contract period.

Start by identifying acquisition costs. These may include licensing, implementation consulting, configuration, migration, hardware, and integration work. For subscription software, initial setup and onboarding expenses should also be considered.

Next, estimate recurring operating costs. Include subscription renewals, technical support, cloud infrastructure, internal administration, security requirements, and employee training. If usage is expected to increase, model that growth rather than assuming costs remain constant.

Downtime and productivity impacts may also matter. These costs can be estimated when reliable historical or operational data exists.

Finally, combine the figures to create the total lifecycle estimate. Comparing this figure across vendors can reveal which solution offers the strongest financial value.

A consistent calculation method improves procurement decisions. It also gives finance and IT teams a baseline for monitoring actual spending after deployment. This makes it easier to identify cost overruns and optimize Enterprise Software TCO over time.

The Basic Lifecycle Formula

A basic TCO formula is: TCO = Acquisition Costs + Operating Costs + Maintenance Costs – Resale Value.

The formula provides a simple starting point for evaluating technology investments. However, organizations should define each category carefully. Otherwise, important expenses may remain outside the calculation.

Acquisition costs can include licenses, implementation, migration, hardware, configuration, and professional services. Operating costs may include subscriptions, hosting, administration, support, and infrastructure. Maintenance costs can cover upgrades, security work, troubleshooting, and ongoing technical resources.

For enterprise software, resale value may be limited or nonexistent. In such cases, organizations should avoid assigning an unrealistic residual value simply to reduce the calculated TCO.

The calculation becomes more useful when applied consistently across competing solutions. Teams can compare vendors using the same categories and time period.

Employee labor should also be included when internal staff spend significant time managing the platform. Hours devoted to maintenance, troubleshooting, administration, or training represent real organizational costs.

Applying the formula across multiple fiscal periods can reveal recurring expenses. This helps organizations distinguish between one-time implementation costs and long-term operational commitments.

What is the total cost of ownership (TCO) in cloud computing?

In cloud computing, total cost of ownership measures the complete expense of provisioning, operating, managing, and scaling cloud resources. It can also help organizations compare cloud environments with traditional on-premises infrastructure.

Cloud services can reduce the need for large upfront hardware purchases. However, they do not eliminate technology costs. Instead, spending often shifts toward recurring and usage-based expenses.

Cloud TCO may include compute resources, storage, network traffic, data egress, managed services, monitoring tools, security services, and technical labor. AI data centers and cloud storage data centers can have different infrastructure and cost considerations. Architecture and administration requirements can also affect the total cost.

Usage variability makes cloud TCO more dynamic than many traditional infrastructure models. A workload that grows unexpectedly can increase monthly spending. Poor resource management can also create unnecessary costs through idle instances or excessive storage.

Calculating cloud TCO helps organizations understand these trade-offs before migration or expansion. It can support decisions about workload placement, infrastructure design, and service selection.

For SaaS environments, organizations should also consider user growth, integrations, support requirements, and contract changes. A complete Enterprise Software TCO analysis therefore considers both technical consumption and organizational resources.

Managing Variable Cloud Cost Drivers

Cloud pricing can make technology spending more flexible, but flexibility can also create financial uncertainty. Organizations should monitor the resources that contribute most directly to monthly cloud bills.

Common cost drivers include compute usage, storage consumption, network traffic, data replication, and managed services. Idle virtual machines and unused storage can generate expenses without delivering meaningful business value.

Cloud cost management should begin with visibility. Teams need reliable information about which applications, departments, and workloads generate spending. Clear ownership also makes it easier to investigate unusual increases.

Rightsizing is another important practice. Organizations can adjust computing resources when workloads consistently use less capacity than provisioned. Automated scaling can help match resources more closely with demand.

Teams should also review storage policies and data retention practices. Keeping unnecessary data in expensive storage tiers can increase long-term costs.

Regular cost reviews can identify waste before it becomes significant. Forecasting can also help finance teams prepare for changes in usage.

These practices support better cloud TCO management. The goal is not simply to reduce cloud spending. It is to ensure that technology resources remain aligned with actual business requirements.

TCO in entrepreneurship

For entrepreneurs, total cost of ownership provides a practical framework for managing limited capital and protecting cash flow. Startups often prioritize low introductory prices because early budgets are tight. However, the cheapest subscription is not always the lowest-cost solution.

A platform can become expensive when onboarding requires substantial staff time. Integration limitations can create additional development work. Migration costs may also appear when a company eventually outgrows the platform.

Entrepreneurs should therefore evaluate software based on expected use over time. This includes subscription increases, additional users, storage requirements, support needs, and integration costs.

Productivity also matters. A complicated platform may consume valuable employee time during setup and daily operation. For a small company, those hours can represent a meaningful opportunity cost.

TCO analysis helps founders compare these trade-offs before committing to a technology stack. It can also support decisions between building software internally and purchasing an external solution, including whether AI chatbots can automate business processes without creating excessive operational costs.

The goal is not to select the cheapest tool. The goal is to select a solution that provides sustainable value without creating avoidable financial or operational burdens.

By evaluating full lifecycle costs, entrepreneurs can protect runway and make more informed technology decisions as the business grows.

Scalability and Opportunity Costs for Startups

For young companies, employee time can be one of the most important resources to consider when evaluating software. A platform that requires extensive configuration or maintenance may divert employees from higher-value activities.

This is where opportunity cost becomes part of the TCO discussion. Engineering hours spent maintaining internal tools cannot be used for product development. Operations staff supporting complicated systems may also have less time for customers and growth initiatives.

Startups should compare the total cost of buying software with the cost of building and maintaining an alternative internally. The comparison should include salaries, development time, maintenance, infrastructure, security, and future upgrades, especially as AI agents change how software tasks are automated.

Scalability is equally important. A platform that works well with ten users may become expensive at one hundred users. Pricing tiers, additional integrations, storage requirements, and support charges can change the economics as usage increases.

Founders should model realistic growth scenarios before selecting long-term platforms. They should also consider switching costs if the product becomes unsuitable later.

A thoughtful TCO analysis helps startups balance software affordability, scalability, and opportunity cost. This can preserve cash while allowing teams to focus scarce resources on product development and market growth.

Frequently Asked Questions

How does TCO differ from standard ROI calculations?

Total cost of ownership measures every direct and indirect expense incurred over an asset’s lifespan, whereas return on investment (ROI) measures the financial gain or revenue generated relative to that asset’s cost. TCO serves as the critical expense foundation needed to calculate accurate ROI figures.

What is the most overlooked expense in enterprise software?

Internal labor and employee training represent the most frequently overlooked costs. Systems requiring extensive workflow modifications drain hundreds of productive staff hours, creating significant indirect costs that frequently surpass initial software licensing or vendor implementation fees.

How many years should an enterprise software TCO model cover?

Most Enterprise Software TCO models should project costs over three to five years. This period captures implementation, operational maturity, renewal increases, and potential migration or upgrade expenses. A longer model may be useful for major enterprise investments.

Can SaaS models eliminate software maintenance overhead?

SaaS models eliminate physical hardware maintenance and server patching, but they do not remove all administrative overhead. Organizations must still allocate resources for user provisioning, security permissions, workflow integrations, continuous staff training, and ongoing vendor contract governance.

Conclusion

Managing software investments requires a complete understanding of long-term lifecycle expenditures. Focusing exclusively on upfront purchase prices exposes organizations to unexpected maintenance fees, costly integration hurdles, and operational inefficiencies. By establishing a rigorous approach to Enterprise Software TCO, procurement teams and executive leaders can accurately project financial commitments, evaluate cloud versus on-premises infrastructure, and safeguard corporate capital.

Whether you lead an established corporation or a growing venture, measuring direct and indirect expenses enables smarter technology choices. Taking the time to calculate real ownership expenses and focus on the next wave of AI and execution transforms software procurement from a reactive administrative chore into a proactive business strategy that delivers sustained commercial value.

Monitor Stuck in a Bright Room? Here’s How to Fix Sun Glare

If Your Monitor Is Stuck In A Bright Room, Try This

Working in a sunlit room can feel pleasant until sun glare on monitor screens makes your display difficult to see. Harsh daylight can wash out text, flatten colors, and cause you to squint. Poor screen visibility and excessive reflections can also contribute to eyestrain, headaches, and physical fatigue.

When moving your desk away from a window is not practical, you need to control the light around your display. Managing sun glare on monitor screens often requires a mix of positioning, display adjustments, and simple accessories.

According to ergonomics research from the Occupational Safety and Health Administration (OSHA), poor screen visibility and excessive reflections contribute directly to eyestrain, headaches, and physical fatigue.

If those changes are not enough, consider a matte anti-glare filter or monitor hood. Window treatments can reduce incoming sunlight before it reaches your workspace. These solutions work together to create a clearer and more comfortable viewing environment.

How to get rid of sun glare on monitor?

To get rid of sun glare on monitor displays, start with the physical setup. Tilt your screen slightly forward or downward. This can redirect incoming light toward the floor instead of your eyes. Avoid placing the monitor directly opposite a bright window.

Next, adjust your display brightness to match the room. A brighter screen can help overcome moderate daylight without making text difficult to read. Fine-tune contrast as well so letters and interface elements remain clear.

If reflections continue, add a matte anti-glare screen filter. These filters scatter incoming light across the panel. They reduce mirror-like reflections without requiring you to move your entire desk. If you are also choosing a new display, understanding how to choose the perfect gaming monitor can help you select a screen better suited to your environment.

A monitor hood offers another effective option. It creates a shaded area around the display and blocks light from several directions.

For persistent glare, combine these solutions. Proper positioning, suitable brightness, and physical glare protection usually provide better results than relying on one adjustment alone.

Install a Monitor Hood

A dedicated monitor hood works like a three-sided visor around your display. It blocks overhead light and reduces sunlight entering from angled directions. This makes it useful when your desk cannot move away from nearby windows.

Monitor hoods are especially helpful for people who work with detailed visuals. Designers, photographers, and video editors often need consistent screen visibility. A hood can reduce reflections without changing the monitor’s built-in display characteristics.

The biggest advantage is simplicity. You do not need to modify your operating system or replace your monitor. The hood physically limits how much ambient light reaches the panel.

Choose a hood that fits your monitor dimensions. It should sit securely without covering ventilation areas. Avoid models that interfere with buttons, ports, speakers, or adjustable stands.

For the best results, combine a monitor hood with proper screen positioning. Keep windows to the side whenever possible. This setup reduces both direct reflections and bright background contrast.

A hood will not remove every reflection, but it can significantly improve visibility in bright rooms.

How to stop sun glare on screen?

Stopping sun glare on screen displays starts with smart desk positioning. Avoid placing your monitor directly opposite a window. Direct sunlight can create strong reflections that make text and images difficult to see.

You should also avoid placing the display directly in front of bare glass. A bright window behind the monitor creates strong contrast between the screen and surrounding area. This can make your eyes work harder.

Instead, position your desk perpendicular to the window. Side lighting usually creates fewer direct reflections while still providing useful natural light.

A monitor light bar can also improve the workspace. Choose an asymmetric LED screen light bar that directs light toward your desk instead of the display. This provides task lighting without adding unnecessary reflections.

Keep overhead lights from shining directly onto the screen as well. Small changes to lamp positions can make a noticeable difference.

If glare remains severe, combine better positioning with curtains, blinds, or a matte screen filter. These measures address both the source and the reflection.

Optimize Windows with Polarized Films

A thin solar window film can reduce intense daylight before it reaches your workspace. These films are applied directly to window glass and can reduce the amount of harsh light entering the room.

Polarized or solar-control films can help manage excessive brightness while preserving your outdoor view. They are useful when curtains or blinds would make the room too dark. They also provide a more consistent solution throughout the day.

Window films are particularly helpful for desks located near large windows. They address the problem at its source instead of only treating reflections on the monitor.

However, the right film matters. Choose a product designed for glare and solar control rather than one intended only for privacy. Check the manufacturer’s specifications before installation.

You can also combine window film with sheer curtains or adjustable blinds. This gives you more control when sunlight becomes stronger during certain hours.

Reducing incoming sunlight can make other monitor adjustments more effective. Your display will not need to compete with extremely bright surroundings, making text and images easier to view.

What is glare in a monitor?

Glare on a computer monitor happens when external light interferes with the screen’s visibility. Light can reflect from the display surface or create excessive brightness around the screen. Both situations reduce perceived contrast and make content harder to read.

Specular glare creates sharp, mirror-like reflections. You may see windows, lamps, or bright skies reflected directly on the panel. These reflections can cover important parts of your display.

Diffuse glare is different. It creates a hazy or washed-out appearance across the screen. Colors can look weaker, while dark areas lose definition.

Both forms can make your eyes work harder. Your pupils must constantly adjust between bright surroundings and darker screen content. Long periods of visual effort may contribute to discomfort, tired eyes, or headaches.

Your monitor’s surface coating also affects glare. Glossy panels tend to reflect more light. Matte coatings scatter incoming light and usually perform better in bright workspaces. The choice of display technology can also influence how a screen looks and performs, making OLED vs QLED display technology worth considering when selecting a monitor.

Understanding the type of glare helps you choose the right solution.

The Impact of Display Coatings

Display coatings have a major effect on how your monitor handles bright rooms. Glossy screens can produce strong colors and deep blacks. However, their smooth surfaces can reflect windows, lamps, and other light sources.

Matte displays use microscopic surface textures to scatter incoming light. This reduces sharp reflections and generally improves visibility under strong ambient lighting. The trade-off can be slightly lower perceived contrast or image clarity.

Your ideal choice depends on your workspace and daily tasks. A glossy screen may work well in a controlled room with limited light. A matte screen is usually more practical when daylight changes throughout the day.

If you already own a glossy monitor, you do not necessarily need to replace it. A high-quality matte screen filter can reduce reflections and improve usability.

Keep in mind that some filters can slightly affect sharpness or color saturation. Choose a quality product designed for your display size.

For most bright rooms, controlling the surrounding light remains the most effective first step.

How do I reduce glare naturally?

You can reduce screen glare naturally by controlling how sunlight enters your room. You do not need to block every ray of daylight. Instead, aim to soften and redirect the incoming light.

Sheer curtains can diffuse strong sunlight while keeping your workspace bright. Light-filtering cellular shades provide another option. Adjustable Venetian blinds are useful when you need precise control.

Angle blind slats upward to direct sunlight toward the ceiling. This spreads daylight more evenly throughout the room. It also reduces the chance of direct beams reaching your monitor.

Large indoor plants can provide another natural layer of diffusion. Broad leaves can break up intense light near windows. They will not replace proper window treatments, but they can soften harsh lighting.

You should also avoid highly reflective surfaces around your desk. Glossy furniture, polished walls, and bright decorations can bounce light toward the screen.

These changes can reduce sun glare on monitor setups without making your workspace feel dark. The goal is balanced ambient lighting, not complete darkness.

Paint Walls with Matte Finishes

Wall surfaces can influence how much light reaches your monitor. Bright, glossy walls reflect incoming sunlight more strongly than softer, non-reflective finishes. This reflected light can increase overall room brightness and create secondary screen reflections.

If your workspace has highly reflective walls, consider using matte or eggshell paint. Neutral colors can also help create a more balanced lighting environment. They absorb or scatter some incoming light instead of reflecting it sharply.

You do not need to repaint an entire room to see an improvement. Focus on the wall directly behind or beside your monitor. These surfaces can have a noticeable effect when strong daylight enters nearby windows.

Avoid extremely glossy finishes around workstations. They can bounce light between windows, walls, and your display.

A matte wall finish works best when combined with other glare-reduction measures. Position your monitor away from direct sunlight and use adjustable window coverings when needed.

This approach creates softer ambient lighting without eliminating natural daylight. It can make your workspace more comfortable while also improving screen visibility during bright parts of the day.

How to protect a monitor from sunlight?

Protecting your monitor from direct sunlight is important because excessive heat can affect electronic components and display materials. Strong solar exposure can also contribute to discoloration and long-term wear.

Keep the monitor housing completely outside direct sunbeams whenever possible. Pay attention to changing sunlight throughout the day. A display that is shaded in the morning may receive direct afternoon sunlight later.

If sunlight moves across your desk, use a roller shade or adjust the monitor’s position. Window treatments can prevent repeated exposure without forcing you to work in darkness.

Direct heat is especially concerning when it warms the back of the monitor. Excessive temperatures can place additional stress on internal components. Good ventilation helps manage normal operating heat, just as proper laptop cooling can help prevent excessive heat buildup in other computer systems.

Do not place objects over ventilation openings. Leave enough clearance around the monitor housing for air to circulate.

Protecting the display from sunlight also helps maintain a consistent viewing environment. Less heat and fewer reflections can make the monitor more comfortable to use.

A simple combination of shading, positioning, and airflow can protect your screen without expensive equipment.

Maintain Proper Chassis Airflow

Proper airflow helps keep monitor electronics within their normal operating temperature range. Direct sunlight can add unwanted heat to the housing, especially when the display sits near a sunny window.

Start by keeping the monitor’s ventilation openings clear. Dust can restrict airflow and make heat management less effective. Clean the vents carefully according to the manufacturer’s recommendations.

Leave sufficient space behind and around the monitor. Avoid pushing the display tightly against a wall if its design requires rear ventilation.

You should also prevent sunlight from heating the chassis for long periods. Use blinds, curtains, or a monitor hood to reduce direct exposure. Moving the display slightly can also make a difference.

Good airflow does not eliminate glare, but it supports the monitor’s long-term operation. It becomes particularly important when the room itself becomes hot during sunny afternoons.

Combining ventilation with sunlight protection creates a safer setup. Keep the display shaded, maintain clear vents, and avoid unnecessary heat buildup.

These simple habits can help your monitor operate more comfortably. They also reduce the need to compensate for sunlight through excessive brightness.

Frequently Asked Questions

Do anti-glare screen protectors ruin display quality?

Modern matte protectors can slightly reduce sharpness or maximum saturation. However, high-quality filters can significantly reduce reflections while preserving good text clarity and color performance.

Is a curved monitor better for bright rooms?

Usually, no. Curved screens can catch light from wider angles. A flat monitor with a matte coating is often easier to manage in a bright workspace.

What monitor brightness level is best for bright spaces?

A display around 350 to 500 nits can work well in very bright rooms. Your ideal setting depends on the surrounding light and the monitor itself. Avoid brightness levels that cause eye discomfort.

Does dark mode help with screen glare?

Dark mode does not always help in bright rooms. Dark interfaces can make reflections more noticeable because the surrounding light stands out against darker areas.

The best approach is to balance screen brightness with ambient lighting. Positioning, window control, and a suitable display surface usually matter more than software settings alone.

Final Thoughts

Working in a bright room should not mean struggling with sun glare on monitor screens. Simple changes can make a major difference without requiring an expensive office makeover.

Start with your physical setup. Position your desk so windows sit to the side rather than directly behind or opposite the screen. Tilt the monitor slightly and adjust brightness until text looks clear.

If reflections remain strong, consider a matte anti-glare filter, monitor hood, or asymmetric light bar. Window films, sheer curtains, and angled blinds can further reduce harsh daylight.

Your surroundings matter too. Matte wall finishes and non-reflective surfaces can reduce secondary reflections. Keep direct sunlight away from the monitor housing to limit unnecessary heat exposure.

The key is to control both the light entering the room and the light reaching the display. With these practical adjustments, you can reduce sun glare on monitor screens, improve visibility, and create a more comfortable workspace.

How to Improve Audio Quality on Samsung Phone Instantly

How to Improve Audio Quality on Samsung Phone Instantly

How to improve audio quality on Samsung phone is easier than most users think. Samsung Galaxy phones include built-in sound tools that can improve clarity, bass, vocals, and overall listening quality. If you stream music, watch movies, or play mobile games, adjusting these settings can make a noticeable difference.

Learning how to improve audio quality on Samsung phone starts with the sound tools built into One UI. Depending on your Galaxy model, you may find features such as Dolby Atmos, Adapt Sound, an equalizer, and UHQ Upscaler.

According to the official Samsung Support documentation, enabling proprietary sound enhancements dramatically refines dynamic range and spatial separation.

This guide explains how to configure Samsung sound settings for better results. You will learn how to use Dolby Atmos, customize Adapt Sound, adjust the equalizer, and optimize Bluetooth playback. You will also learn when higher-quality source files can make a real difference.

How to improve audio quality on Samsung phone?

To improve audio quality on Samsung phone, open Settings > Sounds and vibration > Sound quality and effects. The exact menu names can vary by Galaxy model and One UI version. This section contains several useful tools for improving music, videos, calls, and games.

Start with Dolby Atmos if your device supports it. It can create a wider and more immersive soundstage, similar to the principles discussed in how 8D audio creates spatial sound. You can usually choose between modes such as Auto, Movie, Music, and Voice. The best option depends on what you are listening to.

The built-in Equalizer can also change the sound balance. Avoid extreme adjustments because they may introduce distortion or make certain frequencies sound unnatural. Small changes often produce better results.

For supported headphones, Adapt Sound can personalize audio based on your hearing profile. You can also improve playback by using quality source files and suitable Bluetooth codecs, while understanding how spatial audio works in headphones can help you get more from supported immersive sound features.

Calibrate Your Personalized Adapt Sound Profile

Adapt Sound is designed to personalize audio output for supported Samsung Galaxy devices. It uses a hearing test to identify frequencies that may be harder for you to hear. The phone can then adjust the sound profile accordingly.

To use it, connect compatible headphones and follow the hearing-test instructions. The process typically asks you to respond to different tones. Your responses help create a personalized listening profile.

This can be useful if certain voices, instruments, or high-frequency details sound less noticeable. It may also help create a more balanced listening experience at moderate volume levels.

Adapt Sound is different from simply selecting an age-based preset. A personalized test uses your responses instead of relying only on a general profile.

Keep in mind that results depend on your headphones, environment, and hearing. The feature also varies across Galaxy models and software versions. If you do not see Adapt Sound, your device may not support it or may place it elsewhere in Settings.

How to turn low quality audio into high quality?

Samsung offers UHQ Upscaler on some Galaxy devices, but availability and behavior vary by model. When supported, the feature is designed to enhance audio playback from certain compressed sources. It should not be viewed as a true conversion of low-quality audio into lossless audio.

Audio processing can improve perceived detail and smoothness. However, it cannot fully restore information that was removed during compression. The quality of the original recording still matters most.

On compatible devices, you may find UHQ Upscaler under Settings > Sounds and vibration > Sound quality and effects. Some versions offer options related to bit recovery or bandwidth scaling.

The available options can depend on your connected audio device. Some UHQ features are limited to wired connections or specific accessories. Bluetooth playback may not expose every option.

For the best results, combine moderate processing with a good source file. A high-quality recording and properly tuned headphones usually provide a larger improvement than aggressive software processing.

Connect Wired Gear for Full UHQ Bit Recovery

A wired connection can provide more predictable audio behavior on compatible Samsung devices. However, the exact benefits depend on your Galaxy model, USB-C audio equipment, and the UHQ features supported by your software.

If your phone has a 3.5mm headphone jack, compatible wired headphones can connect directly. Many newer Galaxy phones do not include this port. In that case, you can use compatible USB-C headphones or a USB-C DAC.

A good DAC can provide clean digital-to-analog conversion. It does not automatically make every recording sound better. The headphones, source quality, and overall tuning remain important factors.

UHQ Upscaler availability can also differ between devices. Some Samsung phones may disable certain options when using Bluetooth or internal speakers. Others may offer different processing controls depending on the connected hardware.

Before buying an external DAC, check your phone’s supported audio specifications. A simple USB-C audio adapter may be enough for everyday listening. More advanced equipment is useful when your headphones require additional power or you want more control.

Which sound setting is best?

There is no single Samsung sound setting that works perfectly for everyone. Your best configuration depends on your headphones, music preferences, and the type of content you consume.

For general use, start with Dolby Atmos in Auto mode if your Galaxy model supports it. This provides a convenient balance without requiring constant manual changes. You can then fine-tune the equalizer if the default sound does not suit you.

For music, avoid pushing bass and treble too far. A mild adjustment can add warmth or clarity without making the sound harsh. Podcasts and spoken content may benefit from settings that emphasize vocal clarity.

If you use headphones regularly, Adapt Sound can provide a more personalized result. Gaming can also benefit from a suitable Dolby Atmos mode when available, especially if you understand how noise cancellation works and how it affects what you hear.

Try one change at a time and listen to familiar tracks. This makes it easier to identify which setting actually improves the sound. Remember that aggressive processing can reduce natural dynamics rather than improve them.

Optimize Dolby Atmos for Dedicated Gaming Audio

If you play competitive mobile games, Dolby Atmos can make directional effects easier to notice on supported Samsung devices. Its spatial processing can create a wider presentation for compatible content. This may help you distinguish sounds such as footsteps, vehicles, or environmental effects.

Samsung provides different Dolby Atmos modes on some Galaxy models. Game mode is designed specifically for gaming audio. It can emphasize effects and create a more spacious presentation.

However, Dolby Atmos cannot guarantee a competitive advantage. Game design, headphones, volume levels, and the quality of the game’s audio mix all affect what you hear. Some players may also prefer a less processed sound.

For competitive gaming, avoid excessive bass. Heavy low frequencies can sometimes mask quieter directional details. A balanced profile may make footsteps and voice communication easier to distinguish.

You can test Game mode against Auto mode using the same title and headphones. Choose the option that makes important sounds easiest to identify. If your phone does not offer Game mode, use the standard Dolby Atmos controls available on your device.

How to increase audio quality on phone?

Increasing audio quality involves more than changing an equalizer. Your source file, headphones, Bluetooth connection, and Samsung sound settings all influence the final result.

For wireless headphones, check which Bluetooth audio codecs your phone and headphones support. Compatible Galaxy devices may offer Samsung Seamless Codec, while some third-party headphones support codecs such as LDAC or aptX. The available choices depend on both devices, and choosing and maintaining quality headphones can make a noticeable difference to the final listening experience.

Developer Options can expose Bluetooth settings on some Samsung phones. However, forcing a codec or sample rate does not always improve sound. The connected headphones must support the selected option, and the connection must remain stable.

You should also avoid stacking multiple equalizers or audio-enhancement apps. Several processing layers can cause clipping or unwanted coloration.

Finally, keep your Galaxy software updated. Samsung can change audio features and compatibility across One UI versions.

For the clearest playback, use quality headphones, a well-mastered source, and moderate system processing. These factors usually matter more than simply selecting the highest available setting.

Switch to High-Bitrate Bluetooth Streaming Codecs

Bluetooth audio quality depends on the codec used by both your Samsung phone and wireless headphones. Compatible Galaxy devices may support different codecs, including Samsung Seamless Codec and LDAC. Availability varies by model and accessory.

LDAC can support higher data rates than basic SBC under suitable conditions. Its maximum advertised bitrate can reach 990 kbps, but actual performance depends on connection quality and device settings. Higher bitrate does not automatically mean better sound.

Samsung Seamless Codec is optimized for supported Samsung devices and Galaxy Buds. Its capabilities also depend on the specific phone and earbuds.

You can check Bluetooth codec options through Developer Options on supported phones. If a setting is unavailable, your device or headphones may not support it. Android can also switch codecs automatically when necessary.

Do not assume that selecting 24-bit/96kHz always improves wireless playback. The source recording, headphones, codec, and connection quality all matter. A stable connection with sensible settings can sound better than an unstable high-bandwidth connection.

Can audio quality be improved?

Yes, audio quality can often be improved through careful equalization, audio processing, better source files, and suitable hardware. Samsung Galaxy phones include several tools that can change how audio is presented.

However, software cannot recreate information that was never recorded. Upscaling a compressed track does not make it equivalent to a true lossless master. Instead, processing can change its perceived clarity, balance, or spatial presentation.

Your headphones and phone speakers also have their own frequency characteristics. Equalization can compensate for some unwanted peaks or dips. It can also make vocals clearer or bass more noticeable.

For the biggest improvement, focus on the entire playback chain:

  • Use a high-quality recording or lossless source when available.
  • Choose headphones with a balanced sound signature.
  • Apply moderate equalizer adjustments.
  • Use Adapt Sound when supported and useful.
  • Select a suitable Bluetooth codec for compatible devices.
  • Keep the phone and audio accessories updated.

These changes can make music, movies, games, and spoken content sound clearer. The goal is not maximum processing. The goal is a balanced sound that suits your equipment and preferences.

Upgrade Source Media to Uncompressed Lossless Streams

The quality of your source audio has a major effect on the final result. If a recording is heavily compressed, Samsung’s audio enhancements cannot fully restore the missing information.

When available, choose lossless or high-quality streaming from services that offer those options. Apple Music, Tidal, and Amazon Music provide higher-quality audio tiers, although the exact formats and settings vary by service.

Lossless audio preserves more of the original recording than lossy compression. Hi-Res audio can provide additional resolution, but it does not automatically sound better. Your headphones, DAC, mastering quality, and listening environment still matter.

You should also avoid assuming that a larger file is always better. A well-mastered lossless recording can sound better than a poorly mastered high-resolution track.

For everyday listening, start by selecting the highest practical quality offered by your streaming service. Then adjust Samsung’s sound settings to suit your headphones.

If storage or mobile data is limited, standard high-quality streaming may be a better compromise. The important point is to improve the source before relying heavily on audio processing.

Frequently Asked Questions

Does enabling Dolby Atmos drain the phone battery faster?

Dolby Atmos requires minimal digital signal processing and consumes a negligible amount of battery. The background processor handles the real-time spatial calculations efficiently without straining the CPU. You can leave it running continuously for music, videos, and gaming without noticing any measurable drop in your daily battery life.

Why is the UHQ Upscaler setting grayed out on my device?

The UHQ Upscaler requires a physical, wired audio connection to function. It automatically disables itself when listening through the phone’s internal stereo speakers or standard Bluetooth connections. To unlock and configure UHQ Bit Recovery, plug in USB-C headphones or connect an external digital-to-analog converter.

Which Bluetooth codec provides the highest audio quality on Samsung?

Samsung Seamless Codec (SSC) and Sony’s LDAC offer the highest transmission bitrates on Galaxy devices. SSC dynamically scales up to 24-bit/48kHz for Galaxy Buds hardware, while LDAC transfers up to 990 kbps at 24-bit/96kHz on supported third-party wireless audiophile headphones.

What is the difference between Adapt Sound presets and custom profiles?

Pre-configured Adapt Sound presets apply generalized equalization curves based on broad demographic hearing trends across different age groups. In contrast, running the personalized hearing test creates a custom frequency map matched specifically to your unique left and right ear sensitivities for optimal acoustic balance.

Conclusion

You do not need expensive audio equipment to start improving your Galaxy phone’s sound. Samsung provides several built-in tools that can make a noticeable difference when configured correctly.

Start with Dolby Atmos if your device supports it. Then experiment with the Equalizer and Adapt Sound. Use moderate adjustments rather than extreme boosts, especially with bass and treble.

For wireless listening, check which Bluetooth codecs your phone and headphones support. Options such as LDAC or Samsung Seamless Codec can provide high-quality transmission on compatible devices. A stable connection is still more important than simply choosing the highest bitrate.

UHQ Upscaler can also be useful on supported Galaxy models. Remember that audio upscaling cannot recreate information lost from heavily compressed recordings.

Finally, use good-quality source files whenever possible. Your source, headphones, and listening environment have a major effect on the result.

Now that you know how to improve audio quality on Samsung phone, open your sound settings and test one change at a time. This approach makes it easier to find a profile that genuinely sounds better to you.

This version is structured for publication, keeps the original headings, reduces overlong sentences, and avoids presenting model-dependent Samsung features as universal.

Is It Safe To Keep Using A Cracked Screen Protector?

Is It Safe to Keep Using a Cracked Screen Protector?

Using a cracked screen protector may seem harmless when your phone’s actual display is still intact. However, a damaged protector can create sharp edges, reduce clarity, and provide less reliable protection. We have all experienced that dreaded moment when a smartphone slips from our fingers and hits the ground.

Using a cracked screen protector may seem harmless, especially when the phone’s actual display still works. However, damaged glass can create several practical problems. Cracks can expose your fingers to sharp edges and reduce the protector’s ability to handle another impact.

According to display safety guidelines documented by organizations like the National Safety Council, handling fractured consumer glass carries real cut and puncture risks during daily use.

A damaged protector can also affect touch response and display clarity. Dust may collect inside larger cracks and make the screen harder to clean. If moisture reaches the damaged area, it may also create problems for the phone beneath it.

This guide explains when a cracked protector should be replaced. It also covers safe removal, temporary protection, and alternatives to traditional tempered glass.

Is it bad if my screen protector is cracked?

Yes, a cracked screen protector should generally be replaced rather than used indefinitely. Tempered glass protectors are designed to absorb and distribute impact. Once the glass breaks, its protective performance becomes less predictable.

Cracks can also create sharp edges or loose fragments. These may scratch or irritate your fingertips during normal swiping. The risk is higher when the protector has chipped corners or larger broken areas.

A fractured protector can also affect your everyday experience. Cracks may scatter light and create distracting glare. Deep fractures can interfere with touch sensitivity in some areas. Dust and lint can also collect inside the damaged sections. If display visibility is a concern, privacy screen protectors offer another approach to managing what can be seen on your phone.

A cracked protector does not automatically mean your phone’s display is damaged. However, leaving it in place provides little benefit compared with installing a fresh protector.

For the best protection, replace the damaged layer when practical. If you notice exposed edges, loose pieces, or sharp fragments, remove it sooner.

Hidden Internal Hardware Hazards

A cracked screen protector does not automatically expose your phone to internal water damage. However, significant cracks, gaps, or lifted edges can allow moisture and debris to reach areas that were previously covered.

This matters most around damaged edges and open sections. Sweat, condensation, and small liquid spills can collect beneath a lifted protector. The underlying display may then become dirty or difficult to clean.

Moisture exposure can be especially concerning if the phone already has compromised seals. A cracked protector should not be treated as a reliable barrier against water. It also cannot restore the phone’s original water resistance.

There are other potential problems. Dust trapped beneath a damaged protector may rub against the display during use. This can contribute to scratches or surface wear if particles move between the layers.

For these reasons, replace a damaged protector instead of relying on it for long-term protection. If the phone itself has suffered a major impact, inspect the display carefully. Back up important data if you suspect any hardware damage.

Is it better to leave a cracked screen protector on or take it off?

In most cases, it is better to remove and replace a cracked screen protector. A broken protector may still hold some fragments together, but its protective performance is no longer reliable.

Leaving it temporarily in place can make sense if you cannot replace it immediately. This may help contain loose pieces and provide limited protection until you have a replacement. However, avoid continuing to use it for an extended period.

Check the protector before deciding what to do. If it has sharp edges, loose glass, major chips, or sections that are lifting, remove it carefully. Do not press hard on damaged areas while using the phone.

A new protector provides a cleaner surface and more predictable protection. It also restores the smooth touch response and clear viewing experience expected from an undamaged accessory.

If the phone’s actual display is cracked, the situation is different. A replacement protector can offer temporary protection, but it cannot repair the damaged screen underneath.

Safe Removal and Disposal Practices

Removing a cracked protector requires more care than removing an intact one. Broken tempered glass can have sharp edges, so avoid picking at the damaged surface with your fingernails.

Start by turning off the phone and cleaning your hands. If possible, work over a clean, stable surface. Look for a corner or edge where the protector has already started separating from the display.

Use a rigid plastic card to gently lift the protector. Slide the card beneath the edge rather than forcing it downward. Peel the protector away slowly at a shallow angle.

If the glass begins breaking into smaller pieces, stop pulling aggressively. Wrap the damaged protector in paper or place it inside suitable protective packaging. This helps prevent loose fragments from causing injuries in household waste.

After removal, inspect the phone’s actual display. Use a soft microfiber cloth to remove adhesive residue and dust. Avoid applying excessive pressure.

If the native screen is cracked, chipped, or lifting, consider professional inspection before installing another protector.

Is it a good idea to put a screen protector over a cracked screen?

Putting a new protector over a cracked phone screen can provide temporary protection. It may help hold loose fragments in place and reduce direct contact with sharp edges.

However, this approach does not repair the underlying display. A damaged OLED or LCD panel can continue developing problems after the new protector is installed. Touch issues, black spots, lines, and spreading cracks may still occur.

A new protector can also make an already damaged screen harder to inspect. Air gaps may form around existing cracks, creating bubbles or visible distortion. Touch sensitivity may also feel different across heavily damaged areas.

If you need temporary protection while arranging a repair, a new protector can be useful. Handle the phone carefully and avoid exposing it to additional impacts or moisture.

Before installing anything, back up important data. If the display has severe damage, professional repair is the safer long-term solution.

Most importantly, do not mistake a replacement protector for a screen repair. It protects the surface but cannot restore the structural integrity of the phone’s original glass.

Realistic Long-Term Expectations

A new screen protector can make a cracked display easier and safer to use temporarily. However, it cannot reverse structural damage in the phone’s original glass or display assembly.

Existing cracks may continue spreading when the phone experiences pressure or another impact. The damage can also affect touch performance, brightness, or image quality if it reaches the underlying display components.

For that reason, treat a new protector over a cracked screen as a temporary measure. It can help contain fragments while you arrange professional repair. It should not replace an assessment of serious display damage.

Before seeking repair, back up photographs, contacts, documents, and other important data. This is especially useful if the screen becomes difficult to operate later.

If the phone has exposed glass, display discoloration, touch failure, or signs of moisture, avoid unnecessary use. Contact a qualified repair provider for advice.

A proper screen replacement restores the damaged display assembly. The exact repair needed depends on the phone model and the severity of the damage.

Are phones better without a screen protector?

Using a phone without a screen protector can provide a smoother and more natural experience. You can feel the manufacturer’s original glass and use its full oleophobic coating without another layer between your finger and the display. For a closer look at this trade-off, see our guide on whether matte screen protectors can affect your phone’s display.

Modern smartphones also use increasingly durable cover glass. Technologies such as Ceramic Shield and Gorilla Armor can provide strong scratch and impact resistance. However, no smartphone glass is completely scratch-proof or shatter-proof.

Small particles can still damage an unprotected display. Sand and other abrasive materials are particularly capable of creating scratches. A drop onto concrete can also damage even advanced cover glass.

Going without a protector therefore involves a trade-off. You gain maximum clarity and tactile response, but you accept greater exposure to scratches and impact damage.

For people who handle their phones carefully, bare glass may be perfectly reasonable. Others may prefer the lower replacement cost offered by a quality screen protector.

Your choice should depend on how you carry, use, and protect your phone every day.

Weighing Tactile Feel Against Repair Costs

A bare smartphone display usually delivers the most natural touch experience. There is no additional layer affecting texture, reflections, or the feel of the original glass.

It can also preserve the manufacturer’s intended display appearance. Brightness, color, viewing angles, and surface smoothness remain unchanged when no protector covers the screen.

However, the financial risk is higher. A serious drop can damage the phone’s original display, and genuine screen repairs can be expensive. Repair costs vary considerably by manufacturer and model.

A good screen protector offers an inexpensive layer between everyday hazards and the phone’s native glass. It may absorb scratches, chips, and some impact damage before the phone itself is affected. Different materials perform differently, so comparing tempered glass and plastic screen protectors can help you choose the right option.

Consider a protector if you regularly carry your phone outdoors or place it in pockets with other objects. Keys and coins are less likely to cause serious damage, but abrasive particles can still scratch glass.

Ultimately, the choice depends on your priorities. Maximum tactile feel favors a bare screen, while lower replacement risk favors a protective layer.

What to use instead of a screen protector?

If you dislike thick tempered glass, several alternatives can provide different types of protection. Thin TPU film protectors are flexible and often work well on curved displays. They can provide scratch resistance while maintaining good touch sensitivity.

Some films also advertise self-healing properties. These materials may reduce the appearance of minor surface scratches, but they cannot repair deep cuts or structural damage. For another common type of screen protection, learn more about blue light screen protectors and whether they actually work.

Liquid screen coatings are another option. These products add a thin surface treatment designed primarily to improve scratch resistance and smoothness. They should not be considered equivalent to impact-resistant tempered glass.

You can also skip a screen protector altogether. Pairing a bare display with a durable case can still provide useful protection. Look for a case with raised bezels around the screen.

Other options include:

  • Thin film protectors for a barely noticeable layer.
  • TPU protectors for flexible coverage.
  • Protective cases with raised screen edges.
  • Folio cases that cover the display when closed.
  • Padded sleeves for extra protection during travel.

Choose based on your phone, lifestyle, and tolerance for scratches.

Folio Cases and Protective Sleeves

Folio cases offer a practical alternative for people who dislike traditional screen protectors. Their front covers shield the display when the phone is stored or carried. This can reduce exposure to scratches from objects inside bags and pockets.

A folio case also keeps the display covered when the phone is not being used. Depending on its construction, it may provide additional protection during minor drops. However, the quality and impact protection vary between cases.

Protective sleeves work differently. They are useful when you want to use the phone without a permanent screen covering. A padded microfiber sleeve can help protect the display while the phone travels inside a backpack, purse, or luggage.

These accessories can preserve the natural feel of bare glass. They also avoid some of the glare and touch changes that certain screen protectors introduce, which can be useful if you’re interested in reducing everyday screen exposure and screen fatigue.

However, neither option guarantees protection from every drop. A case with raised edges can help, while a sleeve mainly protects the phone during storage and transport.

For everyday protection, combine the accessory with sensible handling habits. Keep the phone away from abrasive debris and avoid placing it with hard objects.

FREQUENTLY ASKED QUESTIONS

Can a broken screen protector damage my phone’s camera?

Yes, fractures spreading across the upper display cutouts can degrade front camera performance. Light entering the lens scatters across the fractured edges, creating optical glare, blurry portrait shots, and washed-out video feeds. Furthermore, fractured glass can interfere with proximity sensors and facial recognition hardware, causing failed unlocks and erratic screen behavior during phone calls.

How often should you replace a screen protector?

You should replace your screen protector immediately once it develops cracks, deep scratches, or chipped corners. Even without physical drops, consider replacing standard films every twelve months. Regular friction degrades the original oleophobic coating over time, leading to stubborn fingerprint smudges, increased surface drag, reduced clarity, and poor touch accuracy during daily usage.

Does a damaged screen shield ruin phone trade-in value?

A damaged protective film will not directly reduce your phone trade-in valuation, provided you peel it off beforehand. However, leaving fractured glass attached might hide permanent scratches or micro-abrasions underneath. Inspectors will evaluate the bare native glass display, so removing the damaged layer and cleaning the front panel ensures you get an accurate quote.

Can hairline cracks on a screen protector heal themselves?

No, hairline cracks in tempered glass protectors cannot heal or mend themselves over time. Glass fractures are permanent structural failures caused by mechanical stress. Only specialized thermoplastic polyurethane (TPU) film protectors possess limited self-healing properties, which gradually close faint surface scratches through natural material expansion, but even TPU cannot fix deep physical tears.

Conclusion

Using a cracked screen protector may seem harmless when your phone’s display still works normally. However, damaged glass can create sharp edges, reduce clarity, and affect touch performance.

A cracked protector also provides less predictable impact protection. It should not be treated as a permanent solution after a drop. Replacing the damaged layer is usually the simplest and safest choice.

If the phone’s actual display is cracked, a new protector can provide temporary coverage. It may help contain loose fragments and reduce exposure to dust. However, it cannot repair the underlying display or prevent existing hardware problems.

You can choose from several alternatives to traditional tempered glass. TPU films, protective coatings, raised-edge cases, folio covers, and sleeves each offer different benefits.

The best option depends on your priorities and daily habits. Whatever you choose, replace severely damaged protection promptly and inspect the phone after significant impacts.

A clean, intact protective layer gives you better everyday protection without sacrificing usability.

This version keeps the original topics and headings while making the claims more defensible, improving keyword relevance, and breaking dense sections into shorter paragraphs. It is also structured for easier scanning and featured-snippet-style answers.

How to Explain Short-Term Jobs on Your Resume

How to Explain Short-Term Jobs on Your Resume

Short-term jobs can make your resume look inconsistent if you do not provide enough context. However, a brief position does not automatically damage your career story. The key is explaining short-term jobs on your resume honestly and clearly.

Employers may question brief tenures because they want candidates who can contribute and stay when the role is a good fit. Contract work, seasonal employment, project-based assignments, layoffs, and personal circumstances can all lead to short employment periods. For additional guidance on presenting brief employment periods, Zety’s resume advice offers useful context.

The best approach is simple: explain what happened without sounding defensive. Show what you learned, what you achieved, and why you are now seeking a longer-term opportunity.

This guide explains how to explain leaving a job after three months, identify short-term work, present temporary positions, add part-time jobs, and discuss leaving for personal reasons. These strategies can help you create a professional and trustworthy employment history.

How Do I Explain Why I Left a Job After 3 Months?

Leaving a position after three months can raise questions during the hiring process. Employers may wonder whether you resigned unexpectedly or had problems with the company. Your explanation should therefore be brief, factual, and professional. For more guidance, see how to explain employment gaps in an interview successfully.

Start by giving the actual reason without criticizing your former employer. If the company restructured, budgets changed, or the position was eliminated, state that clearly. If the role differed significantly from what you were promised, explain the mismatch without assigning blame.

For example, you could say, “The position changed significantly after I joined, so I decided to pursue a role that better matched my experience and long-term goals.” This answer provides context without sounding negative.

You should also mention something valuable from the experience. Discuss a skill, project, or achievement you gained during those three months.

Most importantly, focus on your current goals. Show that the short tenure was an isolated situation rather than a pattern.

Focusing on Cultural or Role Misalignment

Sometimes a short-term job ends because the actual role does not match the original description. The company may have different priorities, responsibilities, or working practices than you expected. This situation does not need to become a negative story during an interview.

Explain the mismatch using neutral language. Avoid saying that the company was disorganized, dishonest, or difficult to work with. Instead, describe the difference between the expected role and the actual responsibilities.

For example, you might say, “After joining, I discovered that the position focused more heavily on sales than the technical work discussed during the hiring process.”

Then explain what you want in your next position. Mention the type of responsibilities where your skills can create stronger long-term value.

This approach shows self-awareness and professionalism. It also helps recruiters understand that you made a considered career decision.

Avoid using cultural or role misalignment as an excuse for every short position. If the same explanation appears repeatedly across your resume, employers may question your judgment. Use it only when it accurately describes what happened.

What Is an Example of Short-Term Work?

Short-term work generally refers to employment designed to last for a limited period. The exact duration varies by employer and industry. Some temporary positions last a few weeks, while others continue for several months. Understanding how temporary employment differs from permanent work can also help when comparing internships and full-time jobs.

Common examples include freelance projects, fixed-term contracts, seasonal jobs, temporary agency assignments, internships, and project-based consulting work. Covering another employee during parental leave can also qualify as short-term employment.

For example, a company might hire a digital marketer for four months to manage a holiday campaign. Once the campaign ends, the contract naturally finishes. The short duration does not indicate poor performance or job instability.

Another example could involve working as a temporary administrative assistant during a company’s busy season. A six-month contract can demonstrate your ability to learn quickly and perform under pressure.

When listing these positions, clearly identify their temporary nature. Labels such as Contract, Temporary, Seasonal, or Freelance provide useful context.

Short-term employment can strengthen your resume when you connect each role to measurable achievements and relevant skills.

Recognizing Freelance and Contract Gigs

Freelance assignments and contract positions are common forms of short-term work. They can demonstrate independence, adaptability, client management, and the ability to deliver results without long-term supervision.

When adding these experiences to your resume, make their structure immediately clear. You can place Contract or Freelance beside the job title. Include the client or company name, dates, responsibilities, and major achievements.

For example:

Digital Marketing Specialist — Contract
ABC Company | January 2026–April 2026

  • Managed a seasonal campaign across multiple digital channels.
  • Increased qualified website traffic during the campaign period.
  • Prepared weekly performance reports for management.

This format makes the short duration understandable before a recruiter forms an assumption.

If you completed several small freelance projects, consider grouping them under one heading. A unified Freelance Consultant entry can make your experience easier to scan.

Do not exaggerate freelance work to make it appear longer. Accurate dates build credibility and make your professional history easier to verify.

How Do You Explain a Short-Term Job?

Explaining a short-term job requires a balance between transparency and brevity. Recruiters usually do not need a detailed personal history. They need enough information to understand why the position ended. These principles also fit into broader resume and interview tips for beginners when preparing for the hiring process.

Start by identifying the nature of the position. Add Temporary, Contract, Seasonal, or another accurate label beside the job title when appropriate.

During an interview, explain the reason in one or two sentences. Then connect the experience to something useful you gained. This keeps the conversation focused on your qualifications rather than the short tenure.

For example, you could say, “It was a six-month contract created for a specific software migration project. I helped complete the migration and strengthened my project coordination skills.”

If the position ended unexpectedly, explain the situation honestly. Avoid blaming your manager or former colleagues. Recruiters generally respond better to calm, factual explanations.

Practice your answer before interviews. Your goal is to sound prepared rather than rehearsed.

Do not apologize repeatedly for a short position. A brief job becomes more concerning when you appear uncomfortable discussing it. Confidence comes from presenting the facts clearly and moving toward your future goals.

Utilizing Parenthetical Labels for Clarity

Simple labels can provide valuable context on a resume. Adding (Contract), (Temporary), or (Seasonal) beside a job title tells recruiters why the position lasted for a limited period. Clear labeling is also one way to avoid resume mistakes recruiters notice immediately.

For example:

Software Developer (Contract)
XYZ Technologies | March 2025–August 2025

This format immediately separates intentional short-term employment from unexplained job hopping. It also reduces the chance that recruiters will misunderstand your employment history during an initial screening.

Use labels only when they accurately describe the position. Do not add “Contract” simply to make a permanent job appear more intentional.

You can also include a short explanation within the first bullet point when useful. For example, write, “Hired for a six-month system migration project.” This gives recruiters context while keeping the resume concise.

These labels are particularly useful for freelance work, seasonal employment, fixed-term contracts, internships, and temporary assignments.

Clear formatting cannot replace a strong explanation. However, it can prevent unnecessary confusion before an interview begins.

Keep the design consistent across your resume. Recruiters should understand your employment timeline without having to search for explanations.

How Do I Add a Part-Time Job on My Resume?

A part-time job belongs on your resume when it supports your target position, demonstrates transferable skills, or fills an important period in your employment history. You do not need to hide a part-time position simply because you worked fewer hours.

Place the role in your main Work Experience section if it is relevant. Follow the same basic format used for full-time positions. Include the employer, job title, location, dates, and several achievement-focused bullet points.

You can add “Part-Time” beside the job title when the distinction provides useful context.

For example:

Customer Service Associate (Part-Time)
ABC Retail | June 2025–December 2025

  • Assisted customers with product questions and purchases.
  • Resolved service issues while maintaining positive customer relationships.
  • Managed multiple customer requests during busy periods.

Focus on skills that transfer to your target role. These may include communication, teamwork, organization, problem-solving, customer service, or time management.

If the job is unrelated and you already have substantial relevant experience, you may leave it off. Resume space should support your current career objective.

Grouping Multiple Part-Time Roles Together

Several part-time jobs can make a resume look crowded when each position receives a separate entry. This becomes especially noticeable when you worked multiple freelance or temporary roles at the same time.

In that situation, consider grouping related work under a single heading. For example:

Freelance and Part-Time Experience
Various Clients | 2024–2026

Then list your strongest responsibilities and achievements beneath the heading.

This structure works particularly well for freelancers, consultants, tutors, designers, writers, developers, and other professionals who manage several small assignments.

However, do not group unrelated positions if doing so makes your experience unclear. A recruiter should still understand who employed you and what work you performed.

You can also group several assignments by function rather than by employer. For example, “Freelance Web Developer” can contain projects completed for multiple clients.

The goal is not to hide short-term work. The goal is to organize your experience clearly.

Use this approach when several brief roles represent a consistent pattern of intentional work. Keep individual entries when a particular employer or achievement is especially relevant to your target position.

How Do I Say I Left a Job for Personal Reasons?

You can explain leaving a job for personal reasons without revealing private details. Employers generally need to understand whether the situation affected your availability. They do not need your complete personal history. If the situation created a longer break between jobs, learn how to explain a gap year on your resume without oversharing.

Use a broad and truthful explanation. Depending on your situation, you might say that you left because of family responsibilities, relocation, or another personal matter.

For example, you could say, “I needed to step away from the position to handle an important family matter. The situation has now been resolved, and I am ready to focus fully on my next role.”

This answer provides enough context without oversharing sensitive information.

Avoid inventing a reason simply because it sounds more professional. Dishonesty can create bigger problems if an employer asks follow-up questions.

You also do not need to describe medical or family circumstances in detail. Keep the explanation focused on your availability and professional readiness.

After answering, redirect the conversation toward your skills and career goals. Explain why the new position interests you and how your experience matches its requirements.

A calm, concise explanation usually works better than a long defense of your decision.

Keeping Boundaries Firm and Professional

Personal circumstances can be difficult to discuss during a job interview. You can protect your privacy while still giving recruiters enough information to understand a career interruption. Preparing for other common questions can also help you approach the conversation with greater confidence, including top behavioral interview questions and answers.

Prepare a short statement before the interview. Keep it factual and avoid unnecessary details. For example, say, “I left the role to address a personal family matter. That situation has been resolved, and I am now available to commit fully to my career.”

If the interviewer asks for more information, you can politely maintain your boundary. You might say, “I prefer to keep the details private, but the situation is resolved and will not affect my ability to perform this role.”

Then move the conversation back to your qualifications. Discuss a recent project, relevant skill, or reason you are interested in the position.

This approach demonstrates professional judgment and confidence. You acknowledge the employment change without allowing personal information to dominate the interview.

Remember that your explanation should remain truthful. Avoid using vague personal reasons when a more accurate professional explanation exists.

Your objective is not to eliminate every question about a short-term job. Instead, provide enough context for the recruiter to understand your decision and evaluate your current suitability.

FREQUENTLY ASKED QUESTIONS

Should I Leave Short-Term Jobs Off My Resume Entirely?

Leaving Short-Term Jobs on Your Resume off completely can create larger questions if the omission produces an unexplained employment gap. If a role lasted only a few weeks and offered little relevant experience, omitting it may be reasonable. However, keep positions that lasted several months or developed useful skills. Clearly label contract or temporary work to provide context and maintain credibility.

How Do I Handle Multiple Very Short Jobs in a Row?

If you have several Short-Term Jobs on Your Resume, consider grouping them under one Freelance, Contract, or Project-Based Work heading. This approach creates a cleaner employment history and prevents excessive job-by-job detail. Focus on the combined skills, achievements, and responsibilities across those assignments. Clearly explain that you intentionally pursued project-based opportunities rather than frequently changing permanent jobs.

Will Short-Term Jobs Ruin My Chances of Getting Hired?

Short-Term Jobs on Your Resume will not automatically hurt your chances of getting hired. Recruiters understand that contracts, seasonal positions, temporary assignments, and project work are common. The bigger concern is an unexplained pattern of frequent departures. Provide honest context for each brief role and emphasize measurable achievements. Show how these experiences prepared you for the specific position.

How Detailed Should My Job Descriptions Be for Brief Roles?

Descriptions for Short-Term Jobs on Your Resume should remain concise and focused on results. Include two or three bullet points that highlight your strongest contributions. Avoid listing routine responsibilities unless they directly relate to your target position. Emphasize measurable achievements, important skills, and tools you learned quickly. For brief employment, relevant impact matters more than extensive descriptions.

Conclusion

Mastering how to explain short-term jobs on your resume gives you a distinct competitive edge. Brief tenures no longer need to be stressful mysteries during your job search. By providing clear context, labeling contract work accurately, and maintaining professional boundaries regarding personal reasons, you control your narrative. Focus heavily on the transferable skills and valuable lessons gained from every professional experience. Apply these strategic insights to your resume today to showcase your adaptability. Step into your next interview with complete confidence, knowing your career story is cohesive, honest, and compelling.

Activities That Make Geography Memorable: Fun Ideas & Facts

Activities That Make Geography Memorable: A Guide to Engaging Learning

Finding activities that make geography memorable can turn a dry subject into an exciting adventure. When learners interact with maps, cultures, and physical landscapes, abstract facts become lasting memories.

Geography is not only about memorizing capitals or tracing borders. It helps students understand our interconnected planet, diverse communities, and shared environments. The National Geographic Society highlights the importance of geographic literacy and spatial thinking.

Hands-on experiences can also make geography easier to understand. They give learners practical ways to explore ideas instead of simply reading about them.

This guide explores the five Ws, creative geography projects, key geographic concepts, fascinating facts, and activities for home learning. These approaches can help children and students develop curiosity, spatial awareness, and stronger connections with the world around them.

What are the 5 Ws in geography?

The 5 Ws in geography give learners a simple framework for investigating places, regions, and global events. The questions are who, what, where, when, and why. Together, they turn geography from memorization into active inquiry.

Who focuses on people, communities, cultures, and populations connected to a place. What examines physical features, ecosystems, resources, industries, and landmarks. Where identifies absolute and relative location through coordinates, hemispheres, borders, and nearby places.

When adds historical and seasonal context. It helps learners examine how landscapes and communities change over time. Why explores causes behind migration, settlement, climate patterns, resource use, and economic activity.

Using the five questions also strengthens observation and critical thinking. Students can apply them to a country, city, river, mountain, or current event. This approach makes geographic information easier to organize, compare, and remember. It is especially useful when studying unfamiliar places.

Applying the Five Questions to Daily Studies

Applying the five questions to daily studies can make ordinary geography lessons more active and meaningful. Instead of memorizing isolated facts, learners investigate places like young researchers.

Take a major river as an example. Ask who lives along its banks and what communities depend on it. Then ask where the river begins, where it flows, and which regions it crosses. The when question can reveal how settlements developed around the river over time, much like studying Asian history through geography and place.

Finally, ask why people chose that location and why the river matters today. The answers may involve farming, transportation, drinking water, trade, or industry. This process connects physical geography with human geography.

The same method works with mountains, deserts, cities, and countries. Learners can write five short answers for each topic. They can also discuss their answers with family members or classmates. Regular practice builds stronger observation, comparison, research, and regional awareness skills.

What are some creative ideas for a geography project?

Creative geography projects help students understand places through making, exploring, and presenting information. A strong project should involve more than copying facts from a textbook.

Students can build 3D topographic maps with salt dough, papier-mâché, cardboard, or recycled materials. These models can show mountains, valleys, rivers, plateaus, and coastlines. Another option is a travel vlog project, where students research a country and present its geography as a fictional journey, using ideas from places to visit around the world to make the project more engaging.

Cultural heritage boxes can include researched examples of food, music, clothing, crafts, languages, and currency. Students can also create digital maps that mark landmarks, cities, natural features, and travel routes. A food-based project can connect geography with agriculture, climate, trade, and culture.

The best project depends on the learner’s age and interests. Combining research with a physical or digital product gives students something concrete to remember. It also encourages creativity, communication, and independent learning.

Building 3D Topographic Relief Maps

Building a 3D topographic relief map gives students a hands-on way to understand elevation and landforms. Instead of seeing height only through contour lines, learners can physically see changes in the landscape.

Start with a simple outline of a selected region. Use flour dough, papier-mâché, cardboard, or air-dry materials to create raised mountains and lower valleys. Add rivers, lakes, and coastlines after the main terrain is complete.

Students can label major features and use different textures to show elevation levels. This makes contour maps easier to understand later. For deeper learning, discuss how terrain affects settlement, farming, transportation, rainfall, and natural hazards.

Ask why cities often develop near rivers or flatter land. Connecting physical features with human decisions makes the model more than an art project. It becomes a practical geography lesson that supports spatial thinking and long-term recall.

What are the 7 key points of geography?

The seven key points of geography provide a useful framework for studying how places, people, and environments connect. They are location, place, human-environment interaction, movement, region, scale, and spatial organization.

Location asks where something exists. It can use exact coordinates or describe a feature relative to another place. Place focuses on the physical and human characteristics that make an area unique.

Human-environment interaction examines how people depend on, adapt to, and change their surroundings. Movement explores how people, products, resources, and ideas travel between places. Region groups areas that share characteristics such as climate, culture, language, or politics, including topics explored through climate-smart agriculture.

Scale helps learners compare local, national, and global patterns. Spatial organization examines how geographic features and activities are arranged across space.

Using these seven concepts during lessons can make research more organized. Students can apply them to a city, country, ecosystem, or global issue. This approach builds a fuller geographic picture and can complement different school board approaches to learning and education.

Understanding Human-Environment Interaction

Understanding human-environment interaction helps students see how people and natural systems influence one another. Human societies depend on land, water, minerals, forests, and climate. At the same time, human decisions can change those environments.

Students can explore examples such as farming, dam construction, urban growth, mining, and forest management. Each example raises questions about benefits, risks, and long-term effects. For instance, a dam can support electricity generation and water storage while also changing river ecosystems. Exploring tidal energy and underwater turbines can provide another example of how people use natural systems for energy.

People also adapt their homes, crops, transportation, and work patterns to local conditions. Studying these relationships helps learners understand why lifestyles differ across regions.

This topic works well with simple case studies. Choose one local example and compare it with another region. Ask what resources people use, what changes they make, and what consequences follow.

These discussions build environmental awareness and make sustainability easier to understand. They also connect physical geography with everyday human decisions.

What are 5 interesting facts about geography?

Five interesting geography facts can turn a routine lesson into a memorable exploration. First, Earth is slightly wider around the equator than from pole to pole. Its rotation contributes to this shape.

Second, the Pacific Ocean covers an enormous area and is larger than all of Earth’s land area combined. Third, Angel Falls in Venezuela has a total height of about 979 meters, making it the world’s highest uninterrupted waterfall.

Fourth, the Dead Sea lies far below sea level and has extremely salty water. Its high salinity makes floating easier than in ordinary seawater. Fifth, Mount Everest continues to change because tectonic plates remain active beneath the region.

Students can investigate Earth’s shape, ocean geography, waterfalls, elevation, salinity, and plate tectonics. Ask learners to locate each feature on a map before researching it.

This small step connects fascinating trivia with spatial skills. The goal is to understand the geographic processes behind these memorable facts.

The Wonder of Extreme Elevations

Extreme elevations reveal how dramatically Earth’s surface can change over relatively short distances. High mountains, deep ocean trenches, plateaus, and low-lying basins all provide useful examples for geography learners.

The Himalayas show how tectonic movement can create enormous mountain ranges. In contrast, ocean trenches demonstrate how the seafloor can descend thousands of meters below the surrounding ocean. Comparing these extremes helps students visualize Earth’s vertical scale.

Learners can create an elevation chart or compare several locations using maps. They can also investigate how altitude affects temperature, vegetation, farming, transportation, and settlement. These connections show that elevation is not simply a number.

Extreme environments also provide opportunities to study adaptation. Communities living at high altitudes may adjust clothing, housing, farming methods, and daily routines. They can compare these adaptations with life in lowland or coastal areas.

When students connect elevation with climate, geology, and human activity, the topic becomes easier to remember. It also provides a clear introduction to plate tectonics and geological change.

Activities that make geography memorable at home

Activities that make geography memorable at home can turn everyday family time into practical learning. The key is to connect geographic ideas with activities involving movement, discussion, food, maps, or real-world choices.

Cooking international meals is one simple option. Choose a country, research its climate and agriculture, and prepare a traditional dish. Geography board games and family trivia can reinforce flags, landmarks, capitals, and locations without feeling like formal study.

A neighborhood scavenger hunt can introduce basic cartography. Give learners a simple map and ask them to locate roads, parks, shops, or landmarks. They can later create their own maps and add directions or symbols.

Families can also explore virtual maps, plan imaginary trips, or compare weather across countries. A pen pal relationship can add another layer through direct cultural exchange. Planning an imaginary journey can also introduce learners to travel in East India and the Seven Sisters.

These activities work because they connect information with memorable experiences. Short, regular activities are often easier to maintain than long study sessions. Even short activities can build curiosity and spatial awareness.

Cooking International Meals Together

Cooking international meals together turns geography into a sensory learning experience. Food provides a natural connection between climate, agriculture, trade, culture, and daily life.

Choose one country each week and begin with simple research. Find out which crops grow there and how the local climate supports them. Then explore how geography influences ingredients, cooking methods, and regional food traditions.

For example, learners can investigate whether a dish depends on rice, wheat, seafood, spices, dairy, or locally grown vegetables. They can locate the country on a map and identify nearby seas, mountains, rivers, or neighboring regions. This creates connections between physical and cultural geography and can introduce students to foods from medieval times and their geographic origins.

Ask children to prepare a small presentation while the meal is cooking. They can share the country’s location, climate, foods, and cultural background. Keep the activity focused on learning rather than treating one dish as representative of an entire country.

Repeating the activity with different regions helps learners notice similarities and differences. Food becomes a memorable entry point for understanding how people and places influence one another.

FAQ SECTION

How can I teach geography to young children without a map?

You can teach geography to young children without using a traditional map. Start with familiar spaces such as their bedroom, home, school, and neighborhood. Ask children to describe where objects are located and give simple directions. Building-block towns can also demonstrate roads, buildings, rivers, and parks. These Activities That Make Geography Memorable help children develop spatial awareness naturally before learning formal map skills.

What are some easy ways to practice map skills daily?

Easy map practice can become part of everyday routines. Ask children to follow directions during a family walk or identify landmarks along a familiar route. They can also plan a pretend vacation, trace a journey between two cities, or locate places mentioned in the news. These Activities That Make Geography Memorable build confidence with directions, distance, locations, and spatial relationships without making learning feel like homework.

Why is global geography important for students today?

Global geography helps students understand how people, places, economies, cultures, and environments are connected. It explains where resources come from and why countries depend on one another. Learning about different regions can also encourage cultural awareness and empathy. These Activities That Make Geography Memorable help students connect classroom knowledge with real-world issues, preparing them to understand an increasingly interconnected world.

Are digital tools effective for learning geography?

Digital tools can make geography more interactive when students use them alongside practical learning. Interactive maps, virtual tours, satellite imagery, and educational geography games allow learners to explore places that may be difficult to visit. However, technology should support rather than replace hands-on activities. Combining digital resources with Activities That Make Geography Memorable can strengthen visual learning, curiosity, spatial awareness, and geographic understanding.

Conclusion

Exploring the world around us through creative approaches ensures that learning remains an exciting, lifelong adventure. By integrating the 5 Ws, hands-on projects, key geographic points, fun facts, and home activities, we build deep global awareness. Activities that make geography memorable spark curiosity, encourage critical thinking, and foster genuine empathy for diverse cultures. Whether you are sculpting a mountain out of dough or cooking a foreign recipe, every small step matters. We encourage you to try out these engaging ideas in your home or classroom starting today. Embrace the wonder of our planet, ask questions fearlessly, and watch as the world opens up wonderfully.

Growing Responsible Children: Essential Tips & Duties

Growing Responsible Children: Essential Tips & Duties

Growing responsible children is one of the most rewarding goals for any parent or caregiver. It also requires patience, consistency, and realistic expectations. Parents want children who can manage tasks, make thoughtful decisions, and treat others with respect. These skills do not develop overnight. They grow through daily practice, clear expectations, and supportive guidance.

According to guidance from the American Academy of Pediatrics, children benefit from opportunities to develop independence and problem-solving skills. Parents can support this process by giving children age-appropriate responsibilities and allowing them to learn from mistakes. Responsibility should feel like a normal part of family life, not a punishment.

This guide explains practical ways of growing responsible children at different ages. It covers daily routines, household duties, independence, accountability, and positive habits. These simple strategies can help children become more capable and confident over time.

How to Raise Responsible Children?

Raising responsible children requires a balance between clear expectations and supportive guidance. Children need to understand what they are responsible for and why those duties matter. Simply giving instructions may not build lasting accountability.

Start with age-appropriate responsibilities. Younger children can put away toys or place clothes in a laundry basket. Older children can manage homework, organize belongings, or help with household tasks. Increase responsibilities gradually as children demonstrate readiness.

Parents should also avoid solving every problem for their children. When children make reasonable mistakes, allow them to experience natural consequences. This helps them understand how their choices affect themselves and others.

Positive reinforcement can also encourage responsible behavior. Recognize effort, reliability, and improvement instead of expecting perfection. Most importantly, remain consistent. Children learn responsibility when expectations stay clear and predictable.

Establishing Consistent Daily Routines

Consistent routines give children a clear framework for managing everyday responsibilities. When children know what happens next, they can gradually complete tasks without constant reminders. A predictable routine can also reduce arguments around homework, bedtime, meals, and personal care.

Create a simple schedule that matches your child’s age and abilities. Younger children may need pictures or a colorful checklist. Older children can use a planner or digital calendar, while families exploring different learning approaches can also consider types of alternative education.

Include responsibilities such as:

  • Getting dressed independently
  • Putting toys and belongings away
  • Completing homework
  • Preparing school materials
  • Helping with household chores
  • Following bedtime routines

Avoid making the schedule too complicated. The goal is to build independence, not create unnecessary pressure.

Parents can review the routine with children and make adjustments when needed. Over time, repeated practice helps children remember tasks without constant supervision. This approach makes responsibility part of everyday life rather than something parents have to enforce repeatedly.

How Can Children Be Responsible?

Children can demonstrate responsibility in many areas of daily life. Responsibility means taking ownership of actions, belongings, decisions, and commitments. It can begin with simple tasks and gradually develop into more complex responsibilities.

Young children can show responsibility by cleaning up toys, feeding a pet, or putting clothes away. School-age children can complete assignments, prepare their school bags, and follow agreed household rules. Teenagers may take responsibility for managing schedules, helping younger siblings, or handling part-time work.

Responsibility also involves social and emotional behavior. Children can learn to apologize when they hurt someone, manage frustration, and treat others respectfully. These skills are just as important as completing chores.

Parents should focus on progress rather than perfection. A child may forget a task or make a poor decision. Instead of immediately taking over, ask questions that encourage problem-solving. This helps children understand that responsible behavior involves both completing duties and learning from mistakes.

Taking Care of Personal Belongings

Taking care of personal belongings gives children a practical way to learn accountability. Start by teaching children that their possessions have a place and require care. This could include toys, books, clothing, school supplies, and electronic devices.

Younger children can learn to return toys after playing. School-age children can organize backpacks, sharpen pencils, and keep track of school materials. Teenagers can become responsible for maintaining their personal items and managing belongings needed for activities.

Parents should avoid replacing lost or damaged items immediately when doing so removes a useful learning opportunity. Instead, discuss what happened and ask the child how they can prevent it next time.

Children should also learn to respect items that belong to other people. Returning borrowed books, toys, or equipment in good condition teaches respect and accountability.

These habits may seem small, but they build important life skills. Children who learn to care for their belongings often become more organized and aware of their responsibilities. The goal is not perfect organization. It is helping children understand that their choices have consequences.

Is Raising Children Difficult?

Yes, raising children can be difficult, especially because their needs and abilities change as they grow. Parents often manage tiredness, disagreements, school demands, changing emotions, and competing responsibilities. There is no single parenting strategy that works for every child.

Children have different personalities, learning styles, and levels of independence. A method that works well for one child may need adjustment for another. Parents therefore need flexibility rather than a rigid formula.

Modern distractions can add another challenge. Digital devices, social media, gaming, and busy schedules can make routines harder to maintain. Setting reasonable boundaries and developing digital literacy skills for responsible technology use can help children balance responsibilities with recreation.

Despite these challenges, parenting can also be deeply rewarding. Seeing a child solve a problem independently or take responsibility for a mistake can show meaningful growth.

The goal is not to make parenting effortless. Instead, focus on building healthy habits and realistic expectations. When parents accept that mistakes are part of learning, they can guide children with greater patience and consistency.

Embracing Imperfection in Parenting

Embracing imperfection can make parenting more realistic and less stressful. Parents will sometimes lose patience, misunderstand a situation, or make decisions that do not work. These moments do not automatically make someone a bad parent.

What matters is how parents respond afterward. If you make a mistake, acknowledge it and apologize when appropriate. This shows children that responsible behavior applies to adults as well.

Avoid expecting children to perform every responsibility perfectly. Young people are still learning how to manage time, emotions, relationships, and consequences. Mistakes can become opportunities for discussion and problem-solving.

Parents can also model healthy responses to setbacks. Instead of saying, “I never make mistakes,” explain what went wrong and what you will do differently.

This approach teaches accountability through example. Children are more likely to accept responsibility when they see adults doing the same.

Give children room to learn while maintaining reasonable boundaries. The goal is not perfect parenting or perfect children. It is creating a home where mistakes can lead to learning, repair, and better choices.

What Are 5 Ways to Be Responsible?

Five practical habits can help children develop a stronger sense of responsibility. These habits apply to everyday situations and can be adjusted according to age.

1. Manage time effectively. Children can learn to prioritize homework, chores, activities, and relaxation. Simple schedules can make deadlines easier to understand.

2. Admit mistakes. Taking responsibility means acknowledging problems instead of blaming other people. Children should learn that mistakes can be corrected.

3. Keep commitments. Arriving on time, completing chores, and following through on promises help children become reliable.

4. Practice basic money management. Older children can learn to save part of their allowance or earnings. This introduces planning and delayed gratification.

5. Help others and the environment. Recycling, helping neighbors, or supporting family members can teach children that responsibility extends beyond themselves.

Parents should introduce these habits gradually. Children do not need to master everything at once. Consistent practice helps turn responsible choices into lasting habits.

Practicing Effective Time Management

Effective time management helps children balance responsibilities with play and relaxation. Without guidance, children may struggle to understand how long tasks take or why deadlines matter.

Begin with simple tools. A paper planner, wall calendar, timer, or age-appropriate digital calendar can help children visualize their schedules. Younger children may benefit from pictures that represent different activities.

Encourage children to divide larger tasks into smaller steps. For example, instead of saying “finish your project,” help them identify research, writing, checking, and preparation.

Avoid managing every minute of your child’s day. The goal is to teach children how to make reasonable choices independently. Allow them to experience small consequences when they misjudge how long something will take.

Praise planning and follow-through, not just perfect results. Over time, children become better at estimating time and prioritizing important tasks.

This skill becomes increasingly valuable during adolescence. Good time management can help teenagers balance schoolwork, extracurricular activities, family responsibilities, social time, and the importance of education for future career preparation.

How to Be a Responsible Child at Home

Being a responsible child at home means contributing to family life rather than expecting others to handle every task. Children can learn this through simple household responsibilities that match their age and abilities while developing an understanding of what homeownership involves.

Younger children can put away toys, help set the table, or place dirty clothes in the laundry basket. Older children can prepare simple meals, wash dishes, take out the trash, or help with younger siblings.

Responsibility also involves respecting family rules and shared spaces. Children should learn to communicate when they need help instead of ignoring a problem. They can also take responsibility for repairing mistakes, such as cleaning a spill they caused, while learning about the social benefits of homeownership and caring for shared spaces.

Parents should avoid assigning chores as punishment whenever possible. Household responsibilities are more effective when children understand that everyone contributes to a shared home.

Encourage children to notice what needs to be done. This helps them move from following instructions to showing initiative. Over time, these habits can prepare children for independent living and stronger relationships with others.

Pitching In With Unassigned Chores

Helping with unassigned chores can show that a child understands responsibility beyond a personal task list. Instead of waiting for instructions, children can learn to notice when someone needs help.

For example, a child might clear extra dishes from the table, pick up items in a shared room, or help carry groceries. These actions demonstrate awareness and consideration for other family members.

Parents can encourage this behavior by recognizing initiative without turning every helpful action into a reward. A simple acknowledgment can reinforce the idea that contributing to the household matters.

Children should still have clear assigned responsibilities. Unassigned help should complement those duties rather than replace them.

Avoid expecting young children to notice every household need. This skill develops gradually with age and experience. Parents can model it by explaining their own actions. For example, they might say, “I noticed the room was messy, so I decided to help clean it.”

This teaches children that responsibility includes initiative. They begin to understand that a supportive family works together rather than waiting for one person to handle everything.

How to Teach Someone to Be More Responsible?

Teaching someone to become more responsible requires consistency, patience, and gradual independence. Whether you are guiding a child, student, or younger sibling, avoid taking control of every task.

Start by defining the responsibility clearly. Explain what needs to be done, when it should be completed, and why it matters. Clear expectations make it easier for children to understand what success looks like.

Allow children to handle tasks they are capable of completing. You may need to accept slower results at first. Doing everything yourself may be faster, but it does not teach independence.

When mistakes happen, focus on solutions instead of criticism. Ask what went wrong and what could be done differently next time. This encourages problem-solving and accountability.

You can also increase freedom as children demonstrate reliability. More independence should come with appropriate boundaries and guidance.

The ultimate goal is internal motivation. Children should gradually learn to complete responsibilities because they understand their importance, not simply because an adult is watching. This shift takes time, but it creates stronger long-term habits.

Granting Gradual Independence and Trust

Gradual independence allows children to develop confidence while still having appropriate support. Giving too much freedom too quickly can overwhelm a child. Providing too little freedom can prevent them from developing essential skills.

Start with small responsibilities that match the child’s current abilities. Once the child handles them consistently, introduce a slightly more challenging task. This creates a natural progression toward greater independence.

For example, a young child might organize toys. Later, they can manage their school bag, prepare materials for the next day, or plan part of their routine. Teenagers may eventually manage appointments, schedules, money, or transportation with suitable parental guidance.

Trust should be connected to demonstrated responsibility. If a child repeatedly handles a task well, acknowledge that progress and provide more autonomy.

When mistakes occur, avoid immediately removing all independence. Discuss the problem and decide what support is needed.

This approach helps children develop confidence, judgment, and self-reliance. Over time, they learn that greater freedom comes with greater responsibility, preparing them for adulthood and independent decision-making.

FAQ SECTION

What Age Should Children Start Learning Responsibility?

Children can start learning responsibility as early as toddlerhood through simple, age-appropriate tasks. Putting toys away, carrying a small item, or placing clothes in a basket can introduce accountability. These early habits help children understand that everyone has responsibilities. As children grow, growing responsible children involves gradually increasing expectations based on their abilities, maturity, and independence.

How Do I Handle It When My Child Refuses to Do Chores?

When a child refuses to do chores, stay calm and avoid turning the situation into a power struggle. Remind them of the agreed expectation and apply a reasonable, logical consequence when necessary. Avoid completing the task for them every time. During a calm moment, discuss the reason for the refusal. This approach supports growing responsible children without relying on constant arguments or punishment.

Can Rewards Help in Teaching Responsibility to Kids?

Rewards can help children develop new habits, especially when they are learning responsibility for the first time. However, parents should avoid making every task dependent on a prize. Too many material rewards can reduce internal motivation. Instead, gradually shift toward praise, trust, and appropriate privileges. For parents focused on growing responsible children, the long-term goal should be helping children value responsibility itself.

What Is the Difference Between Obedience and Responsibility?

Obedience means following instructions or rules, while responsibility involves understanding expectations and taking ownership of choices. A child may obey because an adult is watching. A responsible child can make a good decision even without supervision. This distinction matters when growing responsible children because the goal is not simple compliance. Children should gradually develop judgment, accountability, and confidence in making appropriate decisions independently.

Conclusion

Growing responsible children is a gradual process that requires patience, consistency, and realistic expectations. Parents can begin with simple duties and increase responsibilities as children become more capable. Daily routines, household chores, personal organization, and opportunities to make decisions all provide valuable learning experiences.

Allow children to experience reasonable consequences instead of solving every problem for them. At the same time, provide guidance when a task is beyond their current abilities. This balance helps children develop independence without feeling overwhelmed.

The goal of growing responsible children is not perfection. Children will forget chores, make poor choices, and need reminders. What matters is helping them learn from those experiences and try again.

Use clear expectations, model responsible behavior, and recognize genuine progress. With consistent support, growing responsible children becomes a natural part of everyday family life. Small responsibilities introduced today can help children develop the confidence, judgment, and self-reliance they need for adulthood.

How School Friendships Shape Emotional and Academic Success

How School Friendships Shape Emotional and Academic Success

School friendships play an important role in a young person’s emotional development and academic experience. From kindergarten through university, students spend much of their lives interacting with peers. These relationships can shape how they handle challenges, communicate, learn, and view themselves.

Supportive friendships give students a sense of belonging. They can also make school feel safer and more enjoyable. When children have trusted companions, they often feel more comfortable participating in activities and trying unfamiliar experiences. These interactions also help them develop empathy, communication, cooperation, and conflict-resolution skills.

The American Psychological Association notes that positive peer relationships are associated with emotional well-being and better adjustment to school. However, friendship quality matters more than having a large social circle. Healthy connections should provide respect, encouragement, trust, and emotional support.

This article examines how friendships affect students at different educational stages. It also explores studying with friends, university relationships, and the connection between social interaction and academic performance.

Why Are Friendships Important in School Life?

Friendships provide an important source of emotional security during childhood and adolescence. Entering a busy classroom can feel stressful, especially for younger students. Having a trusted friend can reduce that anxiety and create a stronger sense of belonging.

School friendships also encourage students to participate more actively in school life. Children may feel more confident joining activities, answering questions, or trying something new when supportive peers surround them. This confidence can gradually strengthen their independence and communication skills. Learning more about building confidence in students can also help parents and educators support this development.

Friendships also teach practical social skills that students use throughout life. Children learn to listen, share, cooperate, compromise, and resolve disagreements. They also discover how their actions affect other people.

However, not every friendship is beneficial. Negative peer relationships can create stress, exclusion, or pressure. For this reason, parents and educators should help children recognize healthy relationships based on respect and trust.

When students feel accepted by their peers, school becomes more than a place for academic learning. It becomes an environment where they can develop socially and emotionally.

Building Resilience Through Peer Support

Trusted friends can make everyday school challenges easier to manage. Children experience disappointing grades, disagreements, difficult assignments, and moments of embarrassment. Having someone who listens can help them process these experiences without feeling alone.

Peer support can strengthen emotional resilience by giving students reassurance during stressful situations. A friend may offer encouragement after a disappointing result or help another student think through a difficult problem. These small interactions can make setbacks feel more manageable.

Friendships also teach children that challenges are normal. When students see their friends make mistakes and recover, they learn that failure does not define their abilities. This understanding can encourage a healthier response to academic and social setbacks.

At the same time, children need guidance when friendship problems become serious. Persistent exclusion, bullying, or unhealthy peer pressure should not be treated as ordinary friendship issues.

Healthy peer relationships therefore provide both comfort and learning opportunities. They help children develop emotional flexibility, confidence, and problem-solving skills. These qualities can support them as they face increasingly complex academic and social demands.

Why Are Friendships Important for High School Students?

High school brings academic pressure, changing expectations, and greater social independence. During this period, school friendships can provide teenagers with an important source of emotional stability. Students often face demanding coursework, examinations, preparing for college, and changing relationships at the same time.

Trusted friends give teenagers a place to discuss concerns without always feeling judged. They can share worries about grades, future careers, family expectations, and social situations. This communication can reduce feelings of isolation and help students manage everyday stress.

Peer relationships also influence identity development. Teenagers naturally compare ideas, interests, values, and goals with people their own age. Supportive friendships allow them to explore these changes while maintaining a sense of acceptance.

However, peer influence can work in harmful ways. Pressure to conform can affect academic choices, behavior, and emotional well-being. Teenagers therefore benefit from friendships that respect individual boundaries.

Strong friendships do not remove high school challenges. Instead, they can make those challenges easier to navigate. Supportive peers can help students remain connected, confident, and engaged during an important stage of personal and academic development.

Navigating Identity and Independence

Adolescence involves a gradual shift from family dependence toward greater independence. During this transition, friendships can provide a valuable space for teenagers to explore their developing identities.

Peers often share experiences that parents may not fully understand. Conversations about interests, goals, relationships, school pressures, and future plans can help teenagers understand their own preferences. Healthy friendships allow students to express different opinions without fearing rejection.

Friends can also provide constructive feedback. A trusted peer may challenge an unrealistic idea or encourage someone to pursue a meaningful goal. These interactions can strengthen decision-making and self-awareness.

Still, independence should not mean following every group expectation. Peer approval can sometimes encourage risky decisions or unhealthy behavior. Teenagers need enough confidence to maintain personal boundaries while remaining socially connected.

The strongest friendships support individuality rather than demanding conformity. They allow students to change their interests and opinions without losing their sense of belonging.

For high school students, this balance matters. Supportive peers can help teenagers become more independent while providing reassurance during a period of significant emotional, social, and academic change.

What Are the Benefits of Studying With Friends?

Studying with friends can turn individual academic work into a collaborative learning experience. When students review material together, they can explain difficult concepts using simpler language. Teaching a topic to another person can also reveal gaps in their own understanding.

Studying with friends can improve accountability. Students may be more likely to complete assignments when they have agreed to meet or review material together. Friends can also quiz each other, compare notes, and discuss difficult questions before examinations.

Study groups can make demanding subjects feel less overwhelming. Students may divide research tasks, share useful resources, or approach the same problem from different perspectives. These interactions can encourage critical thinking and deeper understanding.

However, group study does not automatically improve performance. Friends can easily become distractions when sessions lack structure. Effective study groups need clear goals, reasonable time limits, and focused activities.

The best approach depends on the student’s learning style and subject. Some tasks require quiet individual concentration. Others benefit from discussion and peer explanation.

Used intentionally, collaborative study can combine social support with academic accountability without replacing independent learning.

Boosting Accountability and Motivation

Motivation can decline when students study alone for long periods. A planned session with classmates can create a stronger sense of responsibility. Knowing that others are expecting participation can make it easier to begin difficult work.

Academic accountability works because students make their progress visible to others. A study partner might ask whether an assignment is finished or whether a student reviewed a particular chapter. These simple questions can discourage procrastination.

Friends can also provide encouragement when academic tasks become frustrating. A short discussion may help students approach a difficult problem from another angle. This support can prevent temporary frustration from turning into complete disengagement.

However, accountability works best when students choose realistic goals. A group that spends most of its time chatting will not improve productivity. Each session should have a clear purpose, such as completing practice questions or reviewing a specific topic.

Students can improve group sessions by setting a start time, choosing a topic, and removing unnecessary distractions. Short breaks can also maintain attention.

When structured properly, studying with friends combines motivation, social connection, and shared responsibility. These benefits can make consistent academic effort easier to maintain.

Why Are Friendships Important at University?

University introduces greater independence, demanding coursework, and unfamiliar social environments. For students living away from home, university friendships can provide valuable emotional support during this transition. A college survival guide for freshers can also help students manage the practical and social challenges of starting university.

Friends can help students manage homesickness, academic pressure, and changes in daily routines. A supportive peer group can make an unfamiliar campus feel more comfortable. Students may also rely on friends when adjusting to new responsibilities and expectations.

University friendships can provide academic benefits as well. Students often exchange notes, discuss assignments, form study groups, and share information about courses. Working with peers can expose students to different approaches and ideas.

These relationships can also extend beyond university. Classmates may eventually work in related industries or pursue similar career paths. Professional opportunities can emerge through collaboration, shared networks, and long-term connections.

Still, university students should maintain relationships beyond one social group. A balanced network can provide different perspectives and reduce dependence on a single friendship circle.

University friendships therefore serve several purposes. They can provide emotional support, academic collaboration, social belonging, and future professional connections. Their value often continues long after students leave campus.

Creating Professional and Personal Networks

The friendships students develop at university can become valuable personal and professional relationships. Working together on assignments, projects, clubs, or extracurricular activities allows students to understand each other’s strengths and interests.

These experiences can build professional trust over time. A classmate who demonstrates strong communication skills may later become a useful collaborator. Another peer may introduce a graduate to an employer, industry contact, or professional opportunity.

However, networking should not replace genuine friendship. Relationships built only around career benefits can feel transactional and may not provide meaningful long-term support. Strong professional networks usually grow from authentic connections and shared experiences.

University also exposes students to people from different backgrounds and academic disciplines. These interactions can broaden perspectives and introduce ideas that students might not encounter within their immediate circles.

Maintaining these relationships after graduation can be valuable. Alumni networks, professional communities, and former classmates can remain sources of advice and collaboration.

The most useful university networks therefore develop naturally. Students should focus first on building respectful relationships and contributing positively to their communities. Career opportunities can follow from those connections without becoming the sole purpose.

What Are Five Benefits of Friendship?

Friendship can influence emotional well-being, personal development, and everyday behavior. While every relationship differs, supportive friendships commonly provide several important benefits.

  1. Emotional support: Friends can provide encouragement during stressful or disappointing experiences.
  2. Reduced loneliness: Regular social connection can help people feel understood and included.
  3. Personal growth: Friends introduce different perspectives, interests, experiences, and ideas.
  4. Healthy habits: Supportive peers can encourage positive routines and shared activities.
  5. Accountability: Friends can encourage people to follow through on personal and academic goals.

These benefits depend on friendship quality. A large social circle does not automatically provide meaningful support. Relationships based on trust, respect, and mutual encouragement tend to be more valuable than connections based mainly on popularity.

For students, these benefits can influence school experiences in practical ways. Emotional support may improve confidence, while accountability can encourage better study habits. Social connection can also make difficult periods easier to manage.

Friendship should not replace professional or family support when serious problems arise. Instead, healthy friendships provide an additional layer of connection.

When students learn to build respectful relationships, they gain social resources that can support both present well-being and future development.

Enhancing Long-Term Well-Being

Supportive friendships can contribute to long-term emotional well-being by creating regular opportunities for connection, encouragement, and shared experiences. Strong relationships can help people feel valued during both successful and difficult periods.

For students, these benefits can begin with simple daily interactions. Talking with classmates, sharing activities, or helping a friend can create meaningful social bonds over time. These experiences can strengthen communication skills and emotional awareness.

Healthy social connections may also encourage positive behaviors. Friends can motivate one another to stay active, pursue goals, manage responsibilities, or seek help when needed. Such influence can become especially valuable during stressful educational transitions.

However, maintaining friendships requires effort from both sides. Listening, respecting boundaries, communicating honestly, and resolving disagreements are important parts of lasting relationships.

Students should also understand that friendships naturally change. People may move, choose different courses, develop new interests, or enter different life stages. A changing friendship does not necessarily represent failure.

The goal is not to maintain every relationship permanently. Instead, students can learn how to build connections that remain respectful and supportive.

These skills can strengthen relationships throughout adulthood and contribute to a healthier, more connected life.

Effects of Social Interaction on Academic Performance

Social interaction can influence how students participate in learning environments. Classroom discussions allow students to explain ideas, question assumptions, and consider different viewpoints. These activities can strengthen communication and critical-thinking skills.

Positive peer relationships may also improve classroom engagement. Students who feel accepted by classmates can become more comfortable asking questions or contributing to discussions. Feeling socially secure can make participation less intimidating.

The opposite can also occur. Bullying, exclusion, persistent conflict, or social isolation can interfere with concentration and school attendance. Students dealing with these problems may find it harder to focus on academic responsibilities.

However, social interaction alone does not guarantee higher grades. Academic performance depends on many factors, including teaching quality, study habits, motivation, resources, and individual learning needs.

Schools can support students by creating respectful and inclusive learning environments. Cooperative projects, peer learning, classroom discussions, and structured group activities can encourage healthy interaction.

Teachers should also monitor harmful peer dynamics. Students need opportunities to build friendships without experiencing exclusion or pressure.

When social and academic environments work together, students can benefit from both emotional security and intellectual engagement. Healthy peer relationships can therefore support learning without becoming a substitute for effective teaching or independent study.

Cultivating Active Classroom Participation

Students are more likely to participate when they feel comfortable expressing their ideas. A supportive peer environment can reduce the fear of making mistakes in front of classmates.

Active classroom participation helps students engage more deeply with lessons. Asking questions can clarify confusing concepts. Explaining an answer can strengthen understanding. Listening to different opinions can also expand a student’s perspective.

Friendships may make these behaviors easier because familiar peers can provide social confidence. A student who feels accepted may be more willing to volunteer an answer or contribute to group discussions.

Teachers can strengthen this environment by creating respectful classroom routines. They can encourage students to listen without interrupting and respond to different opinions constructively. Group activities can also give quieter students opportunities to participate.

Still, participation should not become a measure of intelligence or academic ability. Some students understand material well but prefer quieter forms of engagement. Teachers should provide different ways for students to demonstrate learning.

The goal is to create classrooms where students feel safe enough to contribute without pressure.

When social confidence and effective teaching work together, students can become more engaged learners. School friendships can support that confidence when they are respectful, inclusive, and emotionally healthy.

Frequently Asked Questions

How can parents help children make friends at school?

Parents can support school friendships by encouraging participation in extracurricular activities, organizing supervised playdates, and modeling healthy social behaviors. Teaching children active listening, empathy, and how to share also gives them the practical social tools needed to initiate and maintain positive peer relationships smoothly.

Do online friendships have the same impact as school friendships?

Online friendships offer valuable peer connection and shared interests, but they lack the immediate face-to-face interaction and shared physical environment of school friendships. In-person school friendships provide spontaneous social practice, nonverbal communication cues, and daily collaborative experiences that are difficult to replicate entirely online.

What should a student do if they feel excluded at school?

Students experiencing exclusion should communicate their feelings to a trusted teacher, school counselor, or parent. Joining structured clubs or interest-based school organizations can also help students find like-minded peers who share common passions, making it easier to form genuine, lasting friendships.

Can having too many friends hurt a student’s grades?

Maintaining an extremely large social circle can sometimes overwhelm a student and consume valuable study time. However, having a few close, supportive friendships usually enhances academic success by providing emotional stability and collaborative study partners rather than causing academic distraction.

Conclusion

School friendships do much more than simply make the school day more enjoyable; they are foundational pillars of both emotional maturity and academic achievement. Throughout this exploration, we have seen how meaningful peer connections reduce anxiety, build resilience, boost study motivation, and enhance long-term well-being. Whether navigating the halls of elementary school, the pressures of high school, or the independence of university, students thrive when surrounded by supportive companions. By recognizing the profound impact of these relationships, educators and families can better foster environments where positive connections flourish. Encourage the young people in your life to invest in genuine friendships, as these bonds ultimately shape a successful, well-rounded future.

Top STEM Tools Every Modern Classroom Needs for Success

STEM Tools Every Modern Classroom Needs for Future Success

Technology has become an important part of modern education. STEM tools every modern classroom needs can help students connect classroom concepts with practical experiences. These resources make lessons more interactive while encouraging students to explore, build, test, and solve problems.

Teachers also need reliable tools that support critical thinking, problem-solving, creativity, collaboration, and digital literacy. The right combination of hardware and software can turn abstract ideas into practical learning activities. It can also help students understand how science, technology, engineering, and mathematics connect in real situations.

Educational technology should support teaching rather than distract from it. Schools should therefore consider usability, durability, accessibility, cost, and learning value before purchasing new equipment. For broader information about educational technology and classroom priorities, educators can also explore resources from the U.S. Department of Education.

This guide covers effective STEM resources, essential classroom equipment, and practical technology tools. It also explains how these resources can support engaging and future-focused learning environments.

What are some effective STEM tools for the classroom?

Effective STEM tools help students turn theoretical concepts into practical learning experiences. Instead of only reading about science or mathematics, students can experiment with models, circuits, robots, and digital designs. This approach encourages curiosity and gives learners opportunities to understand concepts through direct experience.

Programmable robotics kits are useful for introducing coding, engineering, and logical thinking. Students can create commands, test their designs, identify errors, and improve their solutions. Affordable circuit boards also help learners understand electricity, sensors, and basic electronics.

3D design and printing tools provide another practical option. Students can design objects digitally before producing physical models. This process introduces concepts such as measurement, geometry, prototyping, and engineering design.

Teachers should select tools based on student age, curriculum goals, available space, and technical support. The most useful equipment is not always the most advanced. Simple tools can produce strong learning outcomes when teachers connect them to meaningful projects.

Hands-On Robotics Kits for Engagement

Hands-on robotics kits are among the most useful STEM resources for introducing students to programming and engineering. They combine physical construction with digital instructions, allowing learners to see how their decisions affect real-world outcomes.

Teachers can begin with block-based programming for younger students or beginners. Learners can arrange commands to control movement, lights, sensors, or other functions. This method introduces sequencing, logic, repetition, and basic problem-solving without requiring advanced coding knowledge.

As students become more confident, teachers can introduce increasingly complex challenges. For example, students might program a robot to follow a path, avoid obstacles, or transport an object. These activities encourage experimentation because students must test their solutions and correct errors.

Robotics also supports teamwork. Small groups can divide responsibilities between building, coding, testing, and documenting results. This structure develops communication and collaboration alongside technical skills.

The biggest benefit is immediate feedback. Students quickly see whether their instructions work. That connection between code, action, testing, and improvement makes robotics a practical tool for developing computational thinking.

What are the top 10 teaching tools for teachers?

Teachers need more than individual STEM devices. A modern classroom requires a balanced collection of digital platforms, instructional hardware, and practical organizational resources. The best tools should reduce unnecessary workload while improving student participation and learning. Teachers can also improve efficiency through optimized lesson planning strategies.

A useful collection of classroom teaching tools can include:

  1. Interactive flat panels for demonstrations and collaborative lessons.
  2. Learning management systems for organizing assignments and resources.
  3. Student response systems for quick participation and assessment.
  4. Document cameras for displaying physical materials and demonstrations.
  5. Collaborative whiteboard apps for group problem-solving.
  6. Tablets or laptops for research, coding, and digital projects.
  7. Noise-reduction headphones for focused independent activities.
  8. Assessment platforms for tracking student progress.
  9. Charging stations for keeping classroom devices ready.
  10. Organized storage systems for managing shared equipment.

Teachers should not purchase every available technology. Each tool should solve a specific instructional problem. A smaller collection of reliable resources often works better than a classroom filled with unused devices.

Interactive Flat Panels for Visual Learning

Interactive flat panels can make classroom instruction more visual and collaborative. Unlike traditional displays, these screens allow teachers and students to interact directly with digital content. Educators can annotate documents, highlight important information, display diagrams, and demonstrate scientific simulations.

These panels are especially useful for STEM instruction because many concepts benefit from visual explanations. Teachers can display mathematical models, engineering diagrams, coding exercises, scientific animations, and interactive data.

Student participation can also increase when learners can interact with the displayed material. A teacher might ask students to solve a problem on the screen or label parts of a scientific diagram. This creates opportunities for active participation instead of passive observation.

However, an interactive display does not automatically improve learning. Its value depends on how teachers use it. Simply replacing a projector with a touchscreen does not create better instruction.

Teachers should therefore connect interactive panels to purposeful activities. The technology works best when students use it to explore, explain, compare, solve, and demonstrate ideas.

A reliable panel should also offer good visibility, responsive touch controls, simple connectivity, and compatibility with existing classroom software.

What are 10 things a classroom must have?

A productive modern classroom needs dependable infrastructure before advanced technology can deliver value. Schools should first establish a comfortable, organized, and safe learning environment. Technology should then build on that foundation. Schools can also review essential requirements for modern student success when evaluating their classroom priorities.

Ten practical classroom essentials include:

  1. Reliable high-speed Wi-Fi for connected learning.
  2. Ergonomic seating that supports comfortable study.
  3. Flexible workspaces for individual and group activities.
  4. Safety kits for appropriate classroom emergencies.
  5. Storage cubbies for organizing student belongings.
  6. Visual reference materials for daily learning support.
  7. Interactive display equipment for demonstrations.
  8. Student devices for digital learning activities.
  9. Charging stations for classroom electronics.
  10. Basic science and creative supplies for hands-on projects.

These items serve different purposes, but they work together. Good storage reduces clutter. Comfortable furniture supports concentration. Reliable internet keeps digital lessons running. Safety equipment helps teachers respond appropriately when needed.

Schools should also consider accessibility when planning classroom equipment. Students have different learning needs, physical requirements, and levels of digital experience.

The goal is not to create the most expensive classroom. The goal is to create a functional learning environment where teachers can teach effectively and students can participate confidently.

High-Speed Wi-Fi and Charging Hubs

Reliable Wi-Fi is one of the most important foundations for technology-supported education. Modern classrooms often depend on online learning platforms, digital research, cloud documents, educational applications, and interactive resources. A weak connection can interrupt lessons and reduce productive learning time.

Schools should consider network capacity rather than focusing only on advertised internet speed. Many students may connect simultaneously, especially during assessments or collaborative digital projects. Network reliability and appropriate coverage across the classroom also matter.

Charging hubs solve another common classroom problem. Tablets and laptops become useless when batteries run low during an important activity. Centralized charging stations help teachers keep devices organized and ready for use.

Schools should choose charging equipment that fits their device types and classroom layout. Cable management is also important because poorly organized cables can create clutter and safety concerns.

Teachers can establish simple routines for device collection and charging. Students might return equipment to assigned slots after each activity. Clear routines reduce lost devices, missing chargers, and unnecessary setup time.

Together, dependable Wi-Fi and organized charging systems create the infrastructure needed for successful digital learning.

What are STEM learning tools?

STEM learning tools are physical or digital resources that support science, technology, engineering, and mathematics learning. Their main purpose is not simply to add technology to a lesson. Instead, they help students investigate questions, build solutions, analyze evidence, and apply concepts.

Examples include microscope sets, circuit boards, robotics kits, sensors, coding platforms, mathematical manipulatives, 3D printers, and virtual reality devices. Teachers can also incorporate educational apps for students alongside these resources. The appropriate tool depends on the subject, student age, learning objective, and available resources.

STEM tools can also support interdisciplinary learning. A single project might require students to use mathematics for measurements, science for testing, technology for programming, and engineering for design. Teachers can also supplement these activities with effective math learning platforms. This approach shows students how different subjects work together outside school.

Teachers should focus on learning outcomes when selecting STEM equipment. A sophisticated device is not automatically useful if students have limited opportunities to interact with it.

Effective STEM activities usually involve several stages. Students identify a problem, develop an idea, test it, study the results, and improve their solution. This process develops critical thinking, creativity, persistence, collaboration, and analytical skills.

The strongest STEM tools therefore create opportunities for students to learn through investigation rather than simply consume information.

Virtual Reality Headsets for Immersive Exploration

Virtual reality headsets can provide students with experiences that would otherwise be difficult, expensive, or impossible to create inside a classroom. Learners can explore virtual environments that support subjects such as biology, astronomy, geography, engineering, and history.

For example, students might explore the structure of a human cell, examine a virtual archaeological location, or investigate a simulated space environment. These experiences can provide visual context for concepts that are difficult to understand through textbooks alone.

However, VR should not become a novelty without an educational purpose. Students may remember an impressive experience without understanding the underlying concept. Teachers should therefore connect virtual activities to specific learning objectives and follow them with discussion or assessment.

Schools should also consider student comfort, accessibility, supervision, device management, and available software before adopting VR. Not every lesson requires immersive technology.

Used selectively, virtual reality can complement traditional instruction. It works particularly well when students need to visualize environments, processes, or structures that cannot be easily demonstrated in the physical classroom.

The technology is most valuable when it supports investigation, reflection, and meaningful classroom discussion.

Best classroom technology equipment

Choosing the best classroom technology equipment requires more than comparing technical specifications. Schools should consider durability, ease of use, compatibility, maintenance, accessibility, and educational value. Equipment should solve genuine classroom problems rather than exist simply because it is new.

Useful technology can include student laptops or Chromebooks, document cameras, wireless microphones, 3D printers, interactive displays, and classroom audio systems. Teachers can also use free student software for academic success alongside these devices. Each device supports different instructional needs.

Chromebooks can provide access to research, coding platforms, cloud-based applications, and collaborative documents. Document cameras help teachers demonstrate physical objects, handwritten work, experiments, and textbook materials. Wireless microphones can improve communication in larger learning spaces.

3D printers can support engineering and design projects by turning digital models into physical prototypes. They are particularly useful when students follow a design-and-test process.

Schools should also evaluate equipment based on its total cost. Purchase price is only one factor. Maintenance, replacement parts, software subscriptions, technical support, and training can affect long-term costs.

The best equipment is therefore not necessarily the most expensive option. Schools should prioritize reliable, useful, sustainable technology that teachers can confidently integrate into everyday instruction.

Durable Chromebooks for Everyday Learning

Durable Chromebooks can provide students with practical access to digital learning resources. They support web research, collaborative documents, educational platforms, coding activities, and other browser-based classroom tasks.

Their simple operating environment can make them easier to manage across large groups of students. Fast startup times and long battery life can also support short classroom activities without lengthy preparation.

Durability is especially important in schools. Student devices are moved between desks, carried in bags, and handled repeatedly throughout the academic year. Protective designs can reduce damage and extend the useful life of classroom equipment.

Teachers can also use individual devices to support personalized learning activities. Students might research a topic, complete an interactive exercise, write a report, or collaborate on a group project. This flexibility makes laptops useful across several subjects.

However, schools should avoid assuming that every student needs unrestricted device access. Excessive screen time can create distractions and reduce opportunities for hands-on learning.

The strongest approach combines digital devices with physical activities, teacher instruction, discussion, and collaborative projects. Chromebooks should function as learning tools rather than replace other classroom experiences.

When selected carefully, durable devices can provide consistent access to digital resources while supporting a flexible modern classroom.

Frequently Asked Questions

How do I choose the right technology for my classroom budget?

Start by identifying your classroom’s biggest instructional gaps and student needs. Then compare tools based on learning value, durability, versatility, and total cost. The STEM tools every modern classroom needs should solve genuine teaching problems rather than add unnecessary complexity. Prioritize equipment that supports multiple subjects or activities. Schools can also explore educational grants, district technology budgets, and community partnerships to reduce upfront costs.

Are expensive tech tools always better for student learning?

Expensive technology does not automatically produce better learning outcomes or higher student engagement. The STEM tools every modern classroom needs should be selected according to their educational purpose, not their price. Affordable resources can teach important concepts effectively when teachers use them well. Basic circuit kits, coding applications, robotics components, and mathematical manipulatives can support strong STEM learning. The quality of instruction matters more than having the latest equipment.

How can teachers manage digital distractions during lessons?

Teachers can reduce digital distractions by establishing clear device rules before activities begin. Students should understand when devices are required and when they should remain closed. The STEM tools every modern classroom needs should support learning rather than compete for attention. Teachers can use classroom management software when appropriate and keep student screens visible. Interactive activities, short tasks, and regular teacher check-ins can also help students remain focused during digital lessons.

What professional development is needed for new classroom tools?

Teachers need practical training before introducing unfamiliar technology into daily lessons. Professional development can include manufacturer tutorials, peer-led workshops, online courses, and hands-on training with school technology specialists. The STEM tools every modern classroom needs become more useful when educators understand their capabilities and limitations. Training should focus on classroom integration rather than technical features alone. Ongoing support also helps teachers develop better activities and use new equipment confidently.

Conclusion

Choosing the right classroom technology requires more than purchasing the newest devices. Educators should consider student needs, learning objectives, available budgets, accessibility, and long-term maintenance. The STEM tools every modern classroom needs should make learning more practical, collaborative, and engaging. Schools can begin with a few versatile resources before expanding their technology collection.

The most effective classrooms combine hands-on STEM activities, digital learning, teacher guidance, and student collaboration. Technology should strengthen these experiences rather than replace them. Whether you introduce robotics, coding platforms, interactive displays, or classroom devices, each investment should have a clear educational purpose.

Start by evaluating your current classroom setup and identifying one area that needs improvement. Then choose a practical tool that addresses that need. With thoughtful planning, even a modest technology budget can create meaningful learning opportunities and prepare students for future academic and career challenges.

The Best Drought-Tolerant Plants for Hot Climates

The Best Drought-Tolerant Plants for Hot Climates

Finding the right drought-tolerant plants for hot climates helps create a healthy landscape with less water. These plants can handle intense summer heat and periods of dry weather. They also reduce the need for frequent irrigation.

As temperatures rise and water restrictions become more common, climate-appropriate gardening matters more. Choosing resilient plants can turn a dry yard into a colorful and productive outdoor space. The Royal Horticultural Society recommends selecting plants suited to local growing conditions to reduce unnecessary watering and support biodiversity.

This guide covers some of the best choices for hot, dry landscapes. You will learn which plants tolerate extreme heat, full sun, dry air, and limited watering. You will also find practical tips for creating a low-maintenance drought-tolerant garden.

Which plants can survive in hot weather?

Plants that survive extreme heat often have adaptations that help them conserve water. These include deep root systems, waxy leaves, fine foliage, and reflective silver or gray surfaces. Many plants from Mediterranean and desert regions naturally develop these characteristics.

Lavender, Russian sage, and ornamental grasses are reliable choices for hot gardens. They can maintain attractive foliage when temperatures rise and rainfall becomes limited. Their natural adaptations also help reduce moisture loss during extended dry periods. For additional cooling benefits, consider incorporating best trees for natural cooling into the landscape.

For the best results, plant these species in well-draining soil. Avoid areas where water remains around the roots after irrigation. Good drainage encourages deeper root growth and reduces problems caused by excessive moisture.

When choosing drought-tolerant plants for hot climates, always consider your local conditions. Heat tolerance varies between species and cultivars. Check your plant’s recommended growing zone before planting.

Top Perennials for Extreme Temperatures

Lavender and Russian sage perform well in hot conditions once their roots become established. Their aromatic foliage also makes them less attractive to many common garden pests. Both plants prefer sunny locations and soil that drains quickly.

Lavender performs particularly well in dry, sunny beds. Avoid planting it in heavy, poorly drained soil. Too much moisture can damage its roots and reduce long-term performance.

Russian sage offers tall stems and soft, silvery foliage. Its appearance adds structure to borders without creating a high-maintenance planting. It also produces flowers that can attract pollinators during the growing season.

Ornamental grasses provide another useful option for hot landscapes. Many varieties tolerate heat and periods of limited rainfall after establishment. Their movement adds texture and visual interest to otherwise dry garden beds.

For stronger results, group plants with similar water needs together. This approach makes irrigation more efficient and prevents overwatering plants that prefer dry conditions.

What plants can tolerate full hot sun?

Full sun can create intense heat and rapid moisture loss, especially during summer afternoons. Plants growing in these locations need strong tolerance for sunlight and dry conditions. Drought-tolerant plants with thick leaves, protective coatings, or deep roots often perform well, while understanding the heat island effect in cities can provide useful context for why built-up areas experience additional heat.

Coneflowers, black-eyed Susans, and yarrow are useful choices for sunny flower beds. These plants can handle direct sunlight while producing attractive blooms. Their flowers also add seasonal color to landscapes exposed to strong solar radiation.

Before planting, check the soil and drainage of the selected area. Even sun-loving plants can struggle when their roots remain waterlogged. Well-draining soil helps roots access moisture without sitting in excess water.

Full sun does not mean plants should never receive water. Newly planted specimens need regular irrigation while their roots establish. Once established, many heat-tolerant varieties can tolerate longer periods between watering.

Choose plants according to your local climate rather than appearance alone. A plant that thrives in one hot region may need more water elsewhere. Matching plants to local conditions creates a stronger, more sustainable landscape.

Maximizing Solar Energy in Flower Beds

Coneflowers and yarrow can develop extensive root systems that help them access moisture below the soil surface. Their ability to tolerate sunny conditions makes them useful for exposed flower beds.

Position these plants where they receive several hours of direct sunlight. South-facing locations can work well when other site conditions are suitable. However, sunlight exposure should always match the plant’s specific requirements.

Prepare the soil before planting. Remove compacted areas and improve drainage when necessary. Good soil structure allows roots to move downward and access available moisture.

Mulching around plants can also reduce evaporation from the soil surface. Keep mulch slightly away from plant stems to reduce moisture-related problems. Organic mulch can gradually improve soil structure as it breaks down. For a broader approach to reducing heat around your property, explore ways to brighten and improve your garden.

Avoid assuming that established plants need no water. Even drought-tolerant species may require supplemental irrigation during extreme heat or prolonged drought. Deep, occasional watering is often more useful than frequent shallow watering.

What plant has the highest heat tolerance?

Agaves and many cacti rank among the most heat-tolerant plants available for dry landscapes. Their structures allow them to survive intense sunlight and extended periods with little rainfall. However, exact heat tolerance varies by species and growing conditions.

These plants use specialized adaptations to conserve water. Many succulents use crassulacean acid metabolism, or CAM photosynthesis. This process allows them to open their stomata mainly at night, reducing daytime water loss.

Cacti and agaves also store water in their fleshy tissues. Their thick leaves or stems act as reservoirs during dry periods. Waxy surfaces further reduce moisture loss from exposed plant tissues.

The saguaro cactus and century plant demonstrate these adaptations particularly well. However, they may not be suitable for every residential garden. Their mature size, climate requirements, and available space should be considered before planting.

For home landscapes, choose species that match your local conditions. Extreme heat tolerance does not automatically mean a plant will thrive in every garden. Drainage, sunlight, winter temperatures, and soil type still matter.

The Science of Succulent Heat Survival

Succulent plants survive harsh conditions by storing water inside specialized tissues. These tissues act as reservoirs that support the plant during periods of limited rainfall.

Their thick leaves and stems can hold substantial amounts of moisture. Many succulents also have waxy outer surfaces that reduce evaporation. These features help protect internal tissues from prolonged heat and intense sunlight.

CAM photosynthesis provides another important adaptation. Plants using this process generally open their stomata at night. This reduces water loss compared with opening them during hot daytime conditions.

However, succulents are not completely maintenance-free. Young plants need appropriate watering while their roots establish. Poor drainage can also cause root problems, even in species adapted to dry climates.

Use gritty, well-draining soil when growing suitable succulents. Containers should have drainage holes, and garden beds should not remain saturated after irrigation. With the right conditions, these plants can provide long-lasting structure and texture.

What plants do well in dry heat?

Dry heat combines high temperatures with low humidity, increasing moisture loss from plant tissues. Plants adapted to these conditions often have narrow, leathery, hairy, or wax-coated leaves. These characteristics help them reduce unnecessary water loss.

Rosemary and thyme are excellent examples of plants suited to dry conditions. Both are Mediterranean herbs that prefer sunlight and well-draining soil. Their compact foliage helps them tolerate periods of dry weather after establishment.

Oleander can also tolerate heat and drought in suitable climates. However, it is important to handle this plant carefully because all parts are toxic if eaten. It should not be planted where children or pets can easily access it.

When growing drought-tolerant plants in dry heat, soil preparation remains important. Avoid heavy soils that hold excessive moisture around roots. Instead, improve drainage where necessary and select plants suited to the existing soil.

Water newly planted specimens consistently until roots establish. After establishment, gradually reduce irrigation according to local rainfall and plant requirements. This encourages plants to develop stronger root systems.

Harnessing Arid-Adaptable Herb Varieties

Mediterranean herbs such as rosemary and thyme are naturally adapted to sunny, relatively dry environments. Their narrow leaves reduce the surface area exposed to dry air. This helps limit moisture loss during hot conditions.

These herbs generally perform best in loose, well-draining soil. Rocky or sandy soil can work well when it provides adequate drainage. Avoid planting them in areas that stay wet after irrigation or rainfall.

Rosemary can provide both culinary value and ornamental structure. Its evergreen foliage adds year-round interest in climates where it can survive winter temperatures. Thyme works well along pathways, borders, containers, and small garden beds.

Avoid frequent shallow watering once these plants become established. Instead, water deeply when conditions require it. Allowing the soil to dry between watering can better match their natural growing conditions.

Harvest herbs regularly to encourage useful growth. Avoid removing too much foliage at once. With proper sunlight, drainage, and watering, these herbs can remain productive with relatively little maintenance.

Flowering plants that like full sun and heat

A hot garden does not have to sacrifice color. Several flowering plants can tolerate intense sunlight while producing attractive blooms. Lantana, bougainvillea, and desert marigold are popular choices for warm landscapes. These ideas can also complement thoughtful backyard design for a more attractive outdoor space.

These plants can add strong visual interest to areas where more delicate flowers struggle. Their colorful blooms can also provide resources for pollinators during the growing season.

Lantana is especially useful for sunny beds and containers in suitable climates. Bougainvillea works well where winters remain mild enough for its growth requirements. Desert marigold offers bright flowers and suits dry, sunny environments.

Even heat-tolerant flowering plants need water during establishment. Newly planted specimens cannot immediately rely on drought adaptations. Provide appropriate irrigation until roots become established.

Once established, reduce unnecessary watering according to the plant’s needs. Grouping plants with similar requirements can make irrigation easier. Mulching can also reduce evaporation and help stabilize soil moisture.

Before planting, check whether each species is suitable for your region. Winter temperatures, soil drainage, and local rainfall can affect performance. Choosing the right plant for the site is more important than choosing the most drought-resistant species alone.

Attracting Pollinators with Sun-Loving Blooms

Many sun-loving flowering plants can support pollinators while adding color to hot landscapes. Lantana, coneflowers, and other suitable flowering species can provide nectar and pollen during their blooming periods.

Planting several flowering species can create a longer season of available resources. Choose varieties with different flowering times when possible. This approach can provide more consistent food sources for bees and butterflies.

Place flowering plants near patios, pathways, or garden entrances where their colors can be enjoyed. Avoid relying on a single plant species across the entire landscape. A mixture of plants creates greater structural and seasonal diversity.

Do not assume that every flowering plant has identical water needs. Some species may require more irrigation during prolonged drought. Group plants according to their moisture requirements for more efficient watering.

Avoid unnecessary pesticide use when supporting pollinators. Instead, focus on healthy plants and appropriate growing conditions. When pests do become a problem, consider how to make homemade insecticides for your plants before relying on unnecessary chemical treatments. Selecting locally adapted drought-tolerant flowering plants can help create attractive gardens while reducing irrigation demands.

Low-maintenance plants for hot dry areas

Busy homeowners often want attractive landscapes without constant watering, pruning, and fertilizing. Low-maintenance drought-tolerant plants can help meet that goal when they are matched to suitable growing conditions.

Succulents, sedums, and many ornamental grasses can perform well in hot, dry landscapes. Their different shapes and textures also make it easier to create visually interesting garden designs.

Sedums can spread across suitable areas and form dense ground cover. Their fleshy foliage helps them handle dry conditions. Ornamental grasses can add movement and height while requiring relatively little maintenance after establishment.

However, low maintenance does not mean zero maintenance. Newly planted specimens need appropriate care while roots develop. Occasional watering, pruning, and seasonal cleanup may still be necessary.

Avoid planting species with different water requirements together. Doing so can lead to overwatering some plants while leaving others too dry. Instead, create planting zones based on sunlight, soil, and moisture needs.

With careful plant selection, hot dry areas can remain attractive without demanding constant attention. The goal is not to eliminate maintenance completely. It is to reduce unnecessary work while choosing plants that naturally suit the environment.

Creating Effortless Ground Cover Solutions

Hardy sedums can provide useful ground cover in sunny, dry garden beds. Their low-growing habit allows them to spread across suitable spaces while their fleshy leaves store moisture.

Dense ground cover can also help shade the soil surface. This may reduce evaporation and keep soil conditions more stable during hot weather. A covered soil surface can also make open planting areas less attractive to some weeds.

Choose sedum varieties according to your climate and site conditions. Some types prefer dry, rocky locations, while others tolerate different moisture levels. Always check the growing requirements of the specific variety.

Prepare the planting area before installation. Remove persistent weeds and correct major drainage problems. Give new plants enough space to spread without overcrowding neighboring species.

Ground covers still need water during establishment. Gradually reduce irrigation as roots develop and plants begin spreading. Once established, suitable varieties can provide attractive coverage with relatively little ongoing care.

Combining sedums with ornamental grasses, stones, and other drought-tolerant plants can create a layered landscape. This approach adds texture while keeping irrigation needs relatively low.

FAQ SECTION

How often should newly planted drought-tolerant plants be watered?

Even drought-tolerant plants require regular watering during their first growing season to establish strong, deep root systems. Provide a deep soaking every week for the first month, gradually tapering off frequency as roots anchor into the surrounding soil. Once fully established after one year, most of these resilient species survive entirely on natural rainfall or minimal supplemental irrigation.

Can drought-tolerant plants survive in clay soil?

Many drought-tolerant plants originate from sandy or rocky environments and struggle in heavy, poorly draining clay soil. Excess moisture trapped around roots in winter causes fatal root rot. To fix this, amend your clay soil with coarse sand, organic compost, or expanded shale, or plant specimens on elevated mounds and raised garden beds to ensure proper drainage.

Do drought-tolerant plants require fertilizer?

Most drought-tolerant species prefer poor, nutrient-deficient soils and actually suffer when over-fertilized. Excessive nitrogen pushes fast, weak stem growth that requires more water and makes the plant vulnerable to pests and heat damage. A light layer of organic compost applied annually around the base provides all the slow-release nutrients these tough plants need.

Are all drought-tolerant plants also cold-hardy?

Drought tolerance and cold hardiness are completely separate botanical traits governed by different survival mechanisms. While plants like lavender and Russian sage tolerate freezing winter temperatures, tropical succulents like many agaves and bougainvilleas suffer severe frost damage. Always verify the USDA hardiness zone ratings of specific plants before adding them to your regional landscape.

Conclusion

Designing a resilient outdoor space begins with selecting the right drought-tolerant plants for hot climates. Throughout this article, we explored tough perennials, sun-worshipping bloomers, and hardy succulents that conquer blistering temperatures, full sun, and dry air effortlessly. Embracing these climate-smart choices lowers water bills, minimizes landscape maintenance, and ensures a stunning, vibrant yard all year long. Now is the perfect time to evaluate your landscape, replace thirsty turf with resilient alternatives, and enjoy a sustainable garden that thrives under the most demanding summer conditions.

Do Mini LED TVs Last Longer Than OLED TVs?

Do Mini LED TVs Last Longer Than OLED TVs?

Choosing a modern television is a major investment, so long-term durability matters. Many buyers ask whether Mini LED TVs last longer than OLED TVs. The answer depends on panel design, usage habits, brightness settings, and how each technology ages over time.

Mini LED TVs use an LCD panel with a dense array of small LED backlights. OLED TVs use self-emissive organic pixels that create their own light. These different designs affect brightness, burn-in risk, aging, and expected service life.

According to the Society for Information Display, understanding display technology helps explain how different panels perform over time. This guide compares Mini LED and OLED longevity, burn-in risks, LED and OLED lifespan, QLED durability, and the main disadvantages of Mini LED TVs.

Is a Mini LED TV Better Than an OLED?

Whether a Mini LED TV is better than an OLED TV depends on your room and viewing habits. Neither technology is the clear winner for every viewer. Mini LED usually has an advantage in bright rooms because its powerful backlight can reach very high brightness levels. That makes daytime viewing easier, especially when sunlight enters the room.

OLED has a different strength. Each pixel produces its own light and can switch off completely. This creates perfect blacks and extremely precise contrast. OLED can therefore look exceptional in dark rooms and home theaters.

Mini LED also has an important durability advantage. Its LCD panel and inorganic LED backlight do not have the same organic pixel wear found in OLED displays. It also has a much lower risk of permanent image retention.

Your priorities should guide the decision:

  • Choose Mini LED for high brightness, bright rooms, and heavy static-content use.
  • Choose OLED for perfect blacks, pixel-level contrast, and dark-room viewing.
  • Consider Mini LED if long-term burn-in concerns are a major factor.

Peak Brightness and Room Lighting Advantages

Mini LED technology is particularly strong in rooms with substantial ambient light. Its backlight uses many small LEDs and local dimming zones. These zones can produce very high brightness while controlling darker parts of the image. As a result, bright scenes remain easier to see during daytime viewing.

High brightness can also improve the experience when watching sports, movies, or TV shows in rooms with windows. Reflections and ambient light can reduce perceived contrast on any television. A brighter Mini LED screen can help overcome some of that effect.

OLED TVs can also become very bright, especially newer models. However, sustained full-screen brightness can be more limited than on many Mini LED models. OLED technology also manages brightness differently to protect the panel from excessive heat and power use.

Mini LED has another practical benefit for long-term ownership. Its inorganic backlight does not face the same organic emitter degradation found in OLED panels. However, that does not mean every Mini LED TV will outlast every OLED TV. Build quality, heat, electronics, and usage patterns also affect reliability.

For bright rooms and demanding everyday use, Mini LED often offers the more practical combination of brightness and durability.

Can OLED Last 20 Years?

An OLED TV can potentially remain functional for many years, but a 20-year lifespan should not be treated as a realistic guarantee. Television lifespan depends on usage, panel design, brightness levels, operating temperature, and other components. A screen may continue working while its picture quality gradually changes.

OLED panels use organic light-emitting materials. These materials gradually age as they produce light. Different colors can age at different rates, which may eventually affect brightness and color uniformity. Manufacturers use compensation systems to reduce these effects during normal use. For a broader look at display technologies, see AMOLED vs OLED vs LCD.

Burn-in is another consideration. Permanent image retention can occur when certain elements remain on the screen for long periods. Modern OLED TVs include protective features that reduce this risk. These features can include pixel shifting, screen refresh cycles, and brightness management.

Daily usage also matters. Five hours of viewing per day adds roughly 1,825 operating hours each year. Heavy use therefore accelerates cumulative panel aging compared with occasional viewing.

An OLED TV can still provide excellent picture quality for many years. However, buyers should not assume that every OLED panel will maintain its original brightness and uniformity for two decades. Long-term OLED performance varies considerably by model and usage pattern.

The Role of Pixel Wear and Blue Degradation

OLED pixels contain organic light-emitting materials that gradually lose efficiency with use. The aging process is not always uniform across the red, green, and blue components. Blue emitters have historically presented greater durability challenges than other colors.

Manufacturers have developed newer materials and compensation technologies to reduce these differences. Modern OLED panels can therefore manage aging much better than earlier generations. Still, organic materials remain subject to gradual wear.

When different subpixels age at different rates, color balance can change. Brightness can also decline over time. These changes are usually gradual rather than sudden. Heavy use at high brightness can increase the stress placed on the panel.

OLED televisions also perform compensation cycles. These processes help correct small differences in pixel performance and maintain image uniformity. Users should allow the TV to complete its automatic maintenance routines rather than repeatedly disconnecting it from power.

This does not mean OLED panels are inherently short-lived. Many owners use OLED TVs for years without serious problems. However, organic pixel aging is an important factor when comparing OLED longevity with Mini LED.

For buyers focused primarily on long-term durability, the inorganic backlight used by Mini LED provides a simpler aging profile.

Which TV Lasts Longer, LED or OLED?

In general, LED and Mini LED TVs can have a longevity advantage over OLED TVs. Standard LED TVs use inorganic LEDs as their primary light source. Mini LED models use the same basic principle but employ much smaller LEDs and more advanced local dimming. For another energy-efficient lighting option, explore energy-efficient LED bulbs.

Inorganic LEDs can operate for many thousands of hours. However, manufacturers may rate individual products differently, and the backlight is only one part of a television. Power supplies, processors, capacitors, LCD layers, and other components can fail before the LEDs reach their theoretical limit.

OLED TVs face a different aging process because their pixels generate light directly. Organic materials gradually lose efficiency, and static images can increase the risk of permanent image retention. Modern OLED models include protections, but the underlying technology still has this characteristic.

That makes Mini LED attractive for buyers who prioritize long-term reliability. It is especially useful for households that display static logos, news tickers, game interfaces, or computer content for extended periods.

Still, lifespan should not be judged by panel technology alone. Manufacturing quality, heat management, operating hours, and brightness settings all influence how long a television remains usable.

Inorganic Backlights Versus Organic Emissive Pixels

The key longevity difference comes from how these displays create light. Mini LED TVs use an LCD layer and an inorganic LED backlight. OLED TVs use organic materials within individual pixels to generate light directly.

Inorganic LED components generally resist the type of organic material degradation associated with OLED pixels. They can operate for very long periods before significant light-output decline occurs. However, this does not make Mini LED televisions immune to failure.

The television’s electronics can fail independently of the backlight. A power supply, mainboard, driver circuit, or display connection can become defective. Repairs can also become difficult when replacement parts are unavailable.

OLED has fewer separate backlight components because each pixel produces its own light. This helps OLED achieve perfect blacks and extremely precise contrast. However, the organic emitters gradually age with use.

The distinction is therefore important. Mini LED does not necessarily guarantee a longer overall television lifespan, but its backlight architecture generally creates fewer concerns about organic pixel degradation and burn-in.

For consumers who plan to keep a television for many years, that difference can make Mini LED a compelling choice. Actual durability still depends on the specific TV model and how it is used.

Does QLED or Mini LED Last Longer?

QLED and Mini LED televisions can have similar longevity because both commonly use inorganic LED backlights. However, QLED and Mini LED describe different parts of display technology.

A traditional QLED TV typically combines an LCD panel, LED backlight, and quantum-dot layer. Quantum dots improve color performance by converting portions of the backlight spectrum. Mini LED refers primarily to the size and arrangement of the LEDs used in the backlight.

A television can therefore combine both technologies. Many modern Mini LED QLED TVs use quantum dots alongside a Mini LED backlight. This combination can provide strong brightness, wide color volume, and improved local dimming.

Neither technology should be assigned a universal lifespan such as 60,000 or 100,000 hours. Manufacturers use different components and testing methods, and the useful life of a television depends on more than its backlight.

For longevity, QLED and Mini LED are generally closer to each other than either is to OLED. Both avoid the organic pixel structure that creates OLED’s unique aging characteristics.

If durability is your main concern, focus on the TV’s overall build quality, warranty, thermal management, and manufacturer reputation. The QLED or Mini LED label alone cannot guarantee a specific lifespan.

Quantum Dot Stability in Modern Displays

Quantum dots are semiconductor nanocrystals that help convert light into more precise colors. In modern QLED and Mini LED QLED televisions, they are typically integrated into a dedicated layer within the display system.

These materials are designed for long-term stability under normal operating conditions. Manufacturers also protect the quantum-dot layer from environmental factors that could reduce performance. As a result, quantum dots are not generally considered the main durability concern in modern QLED televisions.

The backlight and other television components remain more relevant when considering long-term reliability. LED performance can decline gradually, while electronic components can fail unexpectedly. Heat and prolonged operation can also influence component life.

Mini LED can combine quantum dots with a highly sophisticated backlight. This gives manufacturers more control over brightness and local dimming. It can also produce strong color performance without relying on OLED’s self-emissive pixel structure.

However, quantum dots do not make a television permanently immune to aging. Every display technology experiences some form of performance change over time. The goal is to minimize those changes and maintain consistent picture quality.

For buyers comparing QLED and Mini LED, longevity is unlikely to be the deciding factor. Both can offer strong long-term durability when built with quality components and used under normal conditions.

What Are the Disadvantages of a Mini LED TV?

Mini LED TVs offer impressive brightness and strong durability, but they also have drawbacks. The most noticeable is blooming, sometimes called the halo effect. This happens when a bright object appears against a dark background. If you are considering a new streaming-focused television, you may also want to see whether the Apple TV 4K is still worth buying.

Mini LED screens use local dimming zones rather than controlling each pixel individually. A zone may need to illuminate several pixels around a bright object. Some light can therefore reach nearby dark areas.

Premium Mini LED TVs use more dimming zones and advanced processing to reduce blooming. Even so, OLED can control each pixel independently. OLED therefore has an advantage when displaying small bright objects against nearly black backgrounds.

Mini LED TVs can also be thicker than OLED models. Their backlight requires additional layers and physical space. Viewing angles may also vary by LCD panel type, with some models losing contrast or color accuracy when viewed from the side.

Other potential disadvantages include:

  • Blooming around bright objects.
  • Greater thickness than many OLED televisions.
  • Potentially weaker off-axis performance.
  • More complex backlight systems.
  • Picture quality that depends heavily on local-dimming processing.

Despite these drawbacks, Mini LED remains an excellent choice for many households. Its high brightness and low burn-in risk make it particularly appealing for bright rooms, sports, gaming, and general everyday viewing.

Understanding the Blooming Effect

Blooming occurs when a local dimming zone becomes bright while nearby zones remain dark. Because each zone controls multiple LCD pixels, light can spread beyond the intended bright object.

The effect is easiest to notice in dark scenes. White subtitles, stars, streetlights, or bright logos can sometimes appear surrounded by a faint glow. The size and visibility of this effect vary greatly between Mini LED televisions.

Several factors influence blooming:

  • The number of local dimming zones.
  • The size of individual zones.
  • The LCD panel’s native contrast.
  • The TV’s image-processing algorithms.
  • Your viewing angle and room lighting.

More advanced Mini LED models usually manage blooming better. However, increasing the number of LEDs does not automatically eliminate the problem. Software and LCD performance remain important.

OLED has an inherent advantage because each pixel can turn completely off. There is no conventional backlight to illuminate neighboring pixels. This allows OLED to produce cleaner dark scenes and more precise highlights.

For most viewers, blooming is a minor compromise rather than a deal-breaker. Mini LED remains a strong option when brightness and long-term durability matter more than perfect pixel-level contrast.

Frequently Asked Questions

Is burn-in a real concern for Mini-LED televisions?

No, burn-in is not a concern for Mini-LED televisions. Because Mini-LED displays use inorganic LED backlights shining through an LCD panel, they do not suffer from the permanent image retention that affects organic pixels. You can safely watch news channels with static banners or play video games for hours without worrying about damaging the display hardware.

How many hours of use can a Mini-LED TV handle?

A typical Mini-LED television is rated to last between 60,000 and 100,000 hours of use. If you watch television for five hours every day, this translates to roughly thirty to fifty years of theoretical panel operation. Most users will choose to upgrade long before the backlight components fail or burn out.

Do Mini-LED TVs consume more electricity than OLEDs?

Mini-LED TVs often consume slightly more power than OLED models when displaying very bright, white scenes because the entire backlight must illuminate. However, power consumption varies depending on picture settings and content. OLEDs can be more efficient during dark scenes, but draw more power when displaying full-screen bright images due to current limiters. You can also explore ways to use your TV’s USB ports to get more functionality from your television.

Can you replace the backlight on a Mini-LED television?

Technically, component-level repairs are possible, but replacing a Mini-LED backlight is rarely practical or cost-effective for consumers. Modern televisions are engineered as sealed, integrated units. If a major hardware failure occurs outside of the standard warranty period, purchasing a brand-new television is usually cheaper than paying for professional component repair labor.

Conclusion

So, do Mini LED TVs last longer than OLED TVs? In many cases, Mini LED has a durability advantage. Its inorganic LED backlight avoids the organic pixel aging associated with OLED technology. It also has a much lower risk of permanent image retention.

OLED remains an excellent choice for viewers who value perfect blacks, pixel-level contrast, and a cinematic viewing experience. Modern OLED televisions also include technologies designed to reduce image retention and manage panel aging.

Mini LED is often the better fit for bright rooms and heavy everyday use. It is also attractive for gamers, sports fans, and users who display static content frequently. However, overall television lifespan depends on more than the display panel.

Build quality, heat management, electronics, usage patterns, and manufacturer support all matter. A high-quality OLED can last many years, just as a poorly built Mini LED TV can fail prematurely.

For buyers focused on long-term durability, high brightness, and low burn-in risk, Mini LED is a strong choice. For viewers who prioritize perfect blacks and cinematic contrast, OLED may still be worth the trade-offs.

OLED vs QLED 2026: Which Display Technology Wins?

OLED vs QLED: Which Display Technology Wins in 2026?

Choosing a new TV can feel overwhelming with so many display technologies available. The OLED vs QLED debate remains especially important for movie fans, gamers, and everyday viewers.

OLED uses self-lit pixels that can switch off completely. QLED uses an LCD panel with a backlight and a quantum-dot layer. This fundamental difference affects contrast, brightness, viewing comfort, and price. For a broader look at panel technologies, see the AMOLED vs OLED vs LCD comparison.

Industry research from the Society for Information Display reflects the rapid development of modern display technology. Manufacturers continue improving brightness, color accuracy, efficiency, and image processing.

This guide compares OLED vs QLED for picture quality, brightness, eye comfort, gaming, durability, and value. It also explains whether OLED is still worth buying in 2026 and when QLED makes more sense.

Which TV Technology Is Best in 2026?

There is no single winner for every viewer. The best TV depends on your room, viewing habits, content, and budget. In the OLED vs QLED comparison, OLED has a major advantage for contrast and dark-room viewing. Its self-emissive pixels can switch off individually, creating extremely deep blacks and precise highlights.

QLED takes a different approach. It combines an LCD panel, LED backlight, and quantum-dot technology. Many premium QLED TVs also use Mini LED backlighting. This can improve local dimming, brightness, and contrast.

For bright rooms, a high-end QLED or Mini LED TV can have a practical advantage. Strong brightness helps HDR highlights remain visible despite sunlight and reflections. OLED TVs have also become brighter, but room conditions still matter.

Consider these priorities:

  • Choose OLED for movies, deep blacks, and dark-room viewing.
  • Choose QLED or Mini LED for bright rooms and high sustained brightness.
  • Choose either when gaming features are your main concern.

The best choice depends on which strengths matter most to you.

Balancing Peak Brightness and Ambient Light Control

Peak brightness matters most when watching HDR content in a bright room. Stronger brightness helps highlights remain visible when sunlight or room lighting reaches the screen. QLED and Mini LED TVs often perform particularly well in these conditions.

OLED TVs have improved significantly in brightness. Premium models can produce impressive HDR highlights while maintaining excellent contrast. However, brightness varies between models, panel generations, and picture modes.

Room lighting should therefore influence your decision. A TV opposite large windows has different requirements from one in a dark media room. Reflection handling is also important because a bright panel cannot fully solve distracting reflections.

For bright living rooms, look for strong measured brightness, effective local dimming, and good reflection handling. For dark rooms, OLED’s pixel-level control becomes more valuable.

It is also important to understand the difference between QLED and Mini LED. QLED describes quantum-dot technology, while Mini LED describes the backlight. A TV can use both technologies together.

Before buying, consider:

  • How much natural light reaches the screen.
  • Whether you watch mostly during the day or night.
  • How important HDR brightness is.
  • Whether reflections are a major issue.

Is OLED Still Worth It in 2026?

Yes, OLED remains an excellent choice in 2026. It is particularly appealing to movie lovers and gamers who value contrast and motion clarity. Its biggest advantage is pixel-level light control. Each pixel produces its own light and can switch off completely.

This creates exceptional contrast and minimizes blooming around bright objects. Dark movie scenes can therefore look clean and immersive. OLED also offers extremely fast pixel response, which benefits gaming and fast-moving content.

OLED prices have become more competitive across several screen sizes. Premium models can now combine excellent contrast with impressive brightness and advanced gaming features. Newer panels also include technologies designed to manage heat and pixel wear.

However, OLED is not completely immune to burn-in. Persistent static images can still cause permanent image retention under demanding conditions. This is an important consideration when comparing OLED vs QLED for specialized uses.

For typical mixed-content viewing, the risk is considerably lower. Buyers who regularly display static logos, news tickers, or desktop interfaces should still consider the potential risk.

Overall, OLED remains worth considering if picture quality is your top priority.

Long-Term Panel Reliability and Burn-In Protection

Modern OLED TVs include several features designed to reduce uneven pixel wear. These can include pixel shifting, panel maintenance cycles, brightness management, and thermal controls.

These technologies can reduce burn-in risk, but they cannot guarantee that permanent image retention will never occur. Usage patterns remain important.

The key distinction is between normal mixed viewing and prolonged static display. Watching different movies, shows, sports events, and games generally places less stress on the same pixels.

If your TV will display the same news channel for many hours each day, consider an LCD-based QLED or Mini LED model. It does not use OLED’s organic self-emissive pixels. For another practical way to use a TV beyond standard viewing, see these ways to use TV USB ports.

For most households, OLED can provide many years of excellent performance. Still, burn-in should be viewed as a managed risk, rather than a completely solved issue.

Before purchasing, check the manufacturer’s warranty terms. Coverage for burn-in can vary by brand, model, region, and warranty plan.

When comparing OLED vs QLED for long-term ownership, also consider your daily content. A mixed viewing routine favors OLED, while heavy static content may favor QLED.

Is QLED Good in 2026?

QLED remains a strong TV choice in 2026. It offers bright images, vivid colors, and options across many price ranges. Unlike OLED, conventional QLED TVs use an LCD panel with an LED backlight and quantum-dot layer.

Quantum dots can improve color performance while maintaining strong brightness. Premium models can also combine QLED with Mini LED backlighting. This provides more precise local dimming and can improve contrast.

This combination makes premium QLED TVs especially attractive for bright living rooms. Sports, daytime television, and HDR content can benefit from their strong brightness.

QLED also avoids the specific OLED burn-in mechanism because it does not use organic self-emissive pixels. However, LCD TVs can still experience other forms of panel or backlight degradation over time.

Price is another advantage. QLED TVs are available in many screen sizes and price categories. Large models can offer strong value for family rooms, sports viewing, and gaming.

For shoppers comparing OLED vs QLED, QLED is especially appealing when brightness and value matter most. It may also suit households that display static content regularly.

If you want vivid color, strong brightness, large screens, and flexible pricing, QLED remains highly competitive.

The Impact of Mini LED Backlighting Advancements

Mini LED has significantly improved the performance of premium LCD televisions. It uses much smaller LEDs than traditional backlights. This allows manufacturers to place more LEDs behind the display.

More LEDs can support more precise local-dimming control. Darker areas can receive less backlight, while bright areas receive more. This improves contrast and HDR performance compared with basic LED-backlit LCD designs.

Mini LED does not make an LCD panel identical to OLED. OLED controls individual pixels, while Mini LED controls groups of backlight zones. Bright objects can therefore still produce some blooming against very dark backgrounds.

The quality of implementation also matters. The number of dimming zones, processing algorithms, panel characteristics, and viewing angle can affect real-world performance.

For many buyers, premium Mini LED QLED TVs offer an excellent middle ground. They can deliver very high brightness while providing much stronger contrast than conventional LCD televisions.

When comparing OLED vs QLED, do not judge a TV by its label alone. Check whether it uses Mini LED, how well its local dimming performs, and how it handles HDR.

Mini LED has narrowed the performance gap, but OLED still has the advantage in pixel-level black control.

Which TV Is Better for Eyes, OLED or QLED?

Neither OLED nor QLED is automatically better for everyone’s eyes. Viewing comfort depends on brightness, room lighting, viewing distance, flicker behavior, and individual sensitivity.

OLED can feel comfortable in dark rooms because its pixels produce only the light required by the image. It also provides excellent contrast without a full-screen backlight.

QLED can work well in brighter rooms because its higher brightness can better overcome ambient light. However, excessive brightness can also cause discomfort. The best approach is to adjust the TV to match your environment.

There is no universal rule that one panel type prevents eye strain. Features such as reduced-blue-light modes and flicker-control options also vary by manufacturer and model.

For comfortable viewing, avoid setting brightness higher than necessary. Watching a very bright screen in a completely dark room can make the image feel more intense.

A small amount of ambient or bias lighting can also reduce the perceived contrast between the screen and surrounding wall.

When considering OLED vs QLED for eye comfort, focus on your actual viewing environment. Proper brightness and room lighting usually matter more than the panel label itself.

Managing Blue Light and Room Lighting for Eye Comfort

Blue light is one factor that can affect nighttime viewing comfort and sleep patterns. Modern TVs often include picture modes that create a warmer image or reduce blue-heavy output.

These settings can be useful during late-night viewing. However, they should not be treated as a guarantee against eye strain. Comfort depends on brightness, contrast, room lighting, viewing distance, and viewing duration.

Room lighting is particularly important. Watching a bright TV in complete darkness can make the screen feel more intense. Adding soft ambient lighting behind or around the TV can create a more comfortable viewing environment.

You should also avoid using maximum brightness simply because the TV can produce it. Set brightness according to the room and content.

For longer viewing sessions, consider these habits:

  • Match screen brightness to the room.
  • Reduce brightness during nighttime viewing.
  • Use a warmer picture mode when preferred.
  • Maintain a comfortable viewing distance.
  • Take regular breaks during long gaming sessions.
  • Reduce distracting reflections from windows and lamps.

These adjustments can improve comfort with either technology. In the OLED vs QLED discussion, there is no universal eye-comfort winner.

Your viewing habits and display settings remain the most important factors.

Is It Better to Buy QLED or OLED?

The better purchase depends on how and where you watch TV. OLED is usually the better choice for cinematic picture quality. Its self-lit pixels provide exceptional black levels, precise contrast, and minimal blooming. If you’re also considering a streaming device for your TV setup, see whether the Apple TV 4K is still worth buying.

QLED becomes more attractive when brightness, room lighting, and value are bigger priorities. A premium Mini LED QLED can produce powerful HDR highlights and strong contrast while offering large screen sizes.

Your content also matters. Movie enthusiasts who watch mostly at night may appreciate OLED’s pixel-level control. Sports fans watching during the day may prefer the brightness of a QLED or Mini LED model.

Gaming is more balanced. Both technologies can offer high refresh rates, low input lag, variable refresh rate support, and HDMI 2.1. The specific TV model matters more than the panel label.

Use this simple guide:

  • OLED: Best for dark rooms and cinematic viewing.
  • QLED: Best for bright rooms and strong value.
  • Mini LED QLED: Best for high brightness and improved LCD contrast.
  • Either: Excellent for modern gaming when the model has the right features.

Ultimately, the best choice in the OLED vs QLED comparison is the TV that matches your room, viewing habits, and budget.

Matching Display Choice to Your Daily Viewing Habits

Your daily routine is one of the easiest ways to choose between OLED and QLED. Start by considering when and where you watch television.

If you mostly watch movies at night, OLED offers a major advantage. Its self-emissive pixels create deep blacks and precise highlights. This makes dark scenes look more natural and immersive.

If your TV sits in a bright living room, QLED can make more sense. High-brightness models can maintain a punchy image despite strong ambient light. Mini LED models can also provide better local dimming than conventional QLED TVs.

Think about static content too. Heavy use of news channels, sports scoreboards, or fixed game interfaces can make QLED a safer choice if you want to avoid OLED burn-in concerns.

Budget should be your final consideration. Compare complete TVs rather than judging only by panel type. Processing, brightness, local dimming, reflection handling, gaming features, and warranty terms can vary significantly.

When making an OLED vs QLED decision, also consider your screen size. QLED often offers attractive pricing for very large displays.

The right choice is the TV that fits your actual viewing habits.

Frequently Asked Questions About OLED vs QLED

Does OLED burn in easily with modern models?

Burn-in is rarely an issue with modern organic panels due to advanced preventive software, pixel-shifting, and thermal management. Manufacturers have successfully mitigated the risks of static image retention for normal daily use. You can safely watch news broadcasts or play video games without worrying about permanent damage during standard viewing intervals.

Can QLED match the black levels of OLED?

Quantum dot displays with mini-LED backlighting achieve impressive black levels that come remarkably close to self-emissive panels. However, they cannot completely eliminate minor blooming around bright objects on pitch-black backgrounds. Organic screens still hold the crown for absolute darkness because individual pixels turn completely off.

Which display type lasts longer over time?

Quantum dot televisions generally offer a longer lifespan because their inorganic LED backlights degrade much slower than organic compounds. That said, modern organic panels easily last for a decade or more under normal household usage conditions. Both technologies will likely outlive your desire to upgrade to newer screen resolutions.

Are QLED TVs better for competitive gaming?

Quantum dot screens excel at competitive gaming due to exceptionally high peak brightness and zero risk of temporary image retention. They also feature lightning-fast response times, variable refresh rates, and HDMI 2.1 support for modern consoles. Many models also offer lower price points for ultra-large screen sizes, maximizing your immersive gaming field of view.

Conclusion

The OLED vs QLED debate has no universal winner. Both technologies deliver excellent picture quality, but they excel in different situations.

OLED remains the standout choice for cinematic viewing. Its self-lit pixels provide exceptional black levels, precise contrast, and minimal blooming. These qualities make it particularly impressive in dark rooms.

QLED remains a strong alternative for bright living spaces. It can deliver high brightness, vivid colors, and excellent value. When combined with Mini LED backlighting, it can also provide much stronger contrast than traditional LCD televisions.

Your viewing habits should guide the final decision. Choose OLED if deep blacks and movie performance are your top priorities. Choose QLED or Mini LED if brightness, large screen sizes, and static-content durability matter more.

Before buying, compare the complete TV rather than the panel technology alone. Brightness, local dimming, processing, gaming features, reflections, warranty coverage, and price can all change the value of a model. If gaming is a major priority, consider these tips on how to choose the perfect gaming monitor.

In 2026, both OLED and QLED are excellent choices. The best TV is the one that fits your room, content, and budget.