All posts by The Perfect Blogger

6 Things Your GPU Can Do Besides Play Games

6 Things Your GPU Can Do Besides Play Games

Most PC builders invest hundreds of dollars in a graphics card for gaming performance. However, gaming is only one of the many workloads a modern GPU can handle. Understanding what your GPU can do besides play games can help you get more value from your hardware.

GPUs are designed for parallel processing. They can perform many similar calculations at the same time. This makes them useful for workloads involving images, video, simulations, artificial intelligence, and large datasets.

Whether you use a dedicated graphics card or integrated graphics, your GPU can accelerate several everyday tasks. Content creators, developers, researchers, and digital artists often use graphics hardware for productivity rather than gaming.

This guide explains the most useful non-gaming GPU applications. It also covers GPU utilization, thermal behavior, integrated graphics, and how GTA 5 divides workloads between your CPU and GPU.

1. Video Encoding, Transcoding, and Effects

One of the most practical answers to what your GPU can do besides play games is video processing. Modern GPUs can accelerate many video tasks beyond simply displaying footage. Supported applications can use dedicated hardware encoders and GPU processing to make encoding and transcoding faster.

This is useful when converting large video files between formats or preparing content for different devices and platforms. GPU acceleration can reduce processing time and leave more CPU resources available for other background tasks.

Video editing software can also use the GPU for effects, color processing, transitions, scaling, and other supported operations. These capabilities show what your GPU can do besides play games when you work with demanding media projects.

For creators working with 4K or higher-resolution footage, getting more out of your GPU without overclocking can make editing and exporting more responsive. However, not every video task becomes faster with a powerful graphics card.

The software must support the GPU’s acceleration features. Dedicated hardware encoders can also differ between GPU generations, so results depend on the specific graphics card, codec, and application.

2. 3D Rendering and Animation

Another important example of what your GPU can do besides play games is 3D rendering and animation. A compatible GPU can accelerate complex scenes for artists, designers, architects, animators, and content creators.

Rendering involves calculating lighting, shadows, textures, reflections, and other visual elements. GPUs are well suited to these workloads because they can perform many calculations in parallel.

A powerful graphics card can reduce rendering times when the selected rendering engine supports GPU acceleration. This becomes particularly useful when producing high-resolution images, animations, visual effects, or complex 3D scenes.

GPU rendering can also improve viewport interaction. Artists can move through detailed environments and preview changes with less waiting. This can make creative workflows more efficient during long production sessions.

However, GPU rendering is not automatically faster for every project. Performance depends on the software, rendering engine, scene complexity, available VRAM, and GPU architecture.

If a project exceeds available graphics memory, performance can drop sharply. Some applications may also need to rely on slower system memory.

Applications such as Blender and other professional 3D tools can use compatible graphics hardware to process complex scenes. Blender GPU Rendering Documentation

3. AI Image Generation

AI image generation is another powerful example of what your GPU can do besides play games. Local image-generation tools use graphics hardware to perform the large number of calculations needed to create images from text prompts or other inputs, much like AI-generated video tools rely on substantial computational resources for processing visual content.

Modern GPUs can be especially useful for AI workloads. Some graphics cards include specialized hardware designed to accelerate machine-learning calculations. More VRAM can also help when running larger models or generating higher-resolution images.

Local AI image generation can provide an alternative to relying entirely on cloud services. Your files and prompts can remain on your computer, depending on the software you use.

Performance varies significantly between graphics cards. VRAM capacity, memory bandwidth, GPU architecture, software support, and model size all affect generation speed.

A high-end GPU is not required for every AI image-generation workflow. Smaller models and optimized applications can run on more modest hardware, although generation may take longer.

This makes AI image generation a useful non-gaming workload for users who want to get more value from their existing graphics hardware.

4. Local AI Models and Machine Learning

Running local AI models and machine-learning workloads is another major answer to the question of what your GPU can do besides play games. Instead of sending every task to a cloud server, compatible software can use your graphics card for local AI inference.

This can include text-generation models, image-processing tools, speech applications, and other machine-learning workloads. GPUs are well suited to these tasks because many AI operations involve large numbers of parallel calculations, whether you use open-source AI models and tools locally or other machine-learning frameworks.

Dedicated AI hardware can provide additional acceleration on supported graphics cards. VRAM is also important because larger models can require substantial memory during operation.

Local AI does not automatically mean faster AI. Performance depends on the model, framework, quantization, GPU architecture, and available memory. Some workloads may still run better through cloud infrastructure.

For users who frequently experiment with AI tools, a capable GPU can turn a normal desktop into a useful local AI workstation.

The biggest limitation is usually memory. If a model cannot fit comfortably into available VRAM, performance may decline. Additional system memory may also be required.

5. Upscaling and Enhancing Old Video

Your GPU can also help with upscaling and enhancing old video, which is another practical example of what your graphics hardware can handle. Supported image-processing and AI enhancement tools can increase resolution, reduce visible noise, sharpen details, and improve older footage.

This is particularly useful for recordings captured at lower resolutions. AI-powered enhancement software can analyze individual frames and estimate additional visual detail.

GPU acceleration helps process these calculations more efficiently. Without hardware acceleration, processing a large collection of video can take considerably longer.

However, upscaling cannot recreate information that was never captured. The final result depends heavily on the original footage and the enhancement algorithm.

Some tools can also introduce artifacts when sharpening or AI reconstruction is pushed too far. Higher resolution therefore does not always mean better visual quality.

A capable GPU makes experimentation easier because you can process footage faster. You can also compare different enhancement settings without waiting as long for every result.

This is especially useful for creators working with archives, old recordings, or lower-quality source material.

6. GPU-Accelerated Productivity and Everyday Computing

The sixth example of what your GPU can do besides play games involves everyday computing and productivity. Modern operating systems and applications can use hardware acceleration for desktop composition, browser rendering, video playback, visual effects, and other supported tasks.

Web browsers can use the GPU for certain graphical operations and video decoding. Video-conferencing applications may also use hardware acceleration for supported video processing and visual effects.

These workloads usually do not require an expensive dedicated graphics card. Integrated and discrete graphics are suited to different workloads, with integrated graphics often being sufficient for browsing, office applications, streaming, and general desktop use.

The benefits become more noticeable when multiple graphical workloads run together. For example, you might use a high-resolution display while running several browser windows, playing video, and using a creative application, making choosing the right gaming monitor an important consideration when getting the most from your GPU.

However, GPU acceleration does not make every productivity application faster. Traditional CPU-based tasks, such as basic text editing and many spreadsheet operations, still depend primarily on processor performance.

The GPU is therefore best viewed as a specialized accelerator, not a replacement for the CPU. Understanding these everyday uses can help you better appreciate the full capabilities of your graphics hardware.

What can I use my GPU for other than gaming?

Modern graphics cards can handle many demanding workloads beyond gaming. Their parallel-processing architecture makes them particularly useful for tasks that can be divided into many smaller calculations. This includes video editing, 3D rendering, artificial intelligence, scientific computing, and visual effects.

Video editing applications can use GPU acceleration for effects, color processing, encoding, and timeline playback. Programs such as Blender can also use supported GPUs to accelerate 3D rendering. AI applications may use specialized GPU hardware for model inference and other machine-learning workloads.

Other uses depend on your software and hardware. Some distributed-computing projects use GPUs for scientific calculations. Cryptocurrency mining can also use graphics processors, although profitability depends heavily on electricity costs and market conditions.

The key benefit is flexibility. Instead of leaving your graphics hardware idle outside gaming sessions, you can use supported applications to accelerate creative and computational tasks.

Is 98% GPU usage bad?

No. 98% GPU usage is not automatically bad. During demanding games, rendering jobs, AI workloads, or other intensive tasks, high utilization is often completely normal. It usually means the application is keeping the graphics processor busy.

However, GPU utilization should not be viewed in isolation. High usage can indicate that the GPU is the performance limit, but it does not prove that your system has no CPU bottleneck. Performance depends on the workload, frame rate target, application settings, and other system components.

Modern graphics cards continuously monitor factors such as temperature, voltage, and power consumption. They also use protective mechanisms when operating conditions become excessive. You should therefore focus on the complete performance picture rather than one utilization percentage.

If a demanding application keeps the GPU near full utilization while temperatures and clock speeds remain normal, there is usually no reason for concern. In fact, high utilization can mean the GPU is being used efficiently.

Is GPU only for gaming?

A GPU is not only for gaming. Graphics processors were designed to accelerate parallel workloads, and modern operating systems use them for many everyday graphical tasks. Web browsers, video players, creative applications, and desktop environments can use hardware acceleration when supported.

For example, a browser may use the GPU to render certain graphical elements and decode supported video formats. Operating systems can also use graphics hardware for desktop composition, animations, and multi-monitor output.

Professional workloads can require much more GPU power. Engineers may use GPUs for simulations, while designers use them for visualization and 3D modeling. Scientific and medical applications can also use GPU acceleration for specialized calculations and image processing.

Still, not every task benefits from a powerful graphics card. Web browsing, writing documents, and basic office work generally do not require a high-end dedicated GPU. The benefit depends on the software and workload.

The important distinction is that gaming is only one application of GPU computing. The same hardware can accelerate many other workloads when compatible software supports it.

Can I play GTA 5 without a GPU?

You can play Grand Theft Auto V without a dedicated GPU if your computer has integrated graphics that meet the game’s requirements. Integrated graphics are built into many modern processors and use system memory rather than having their own dedicated VRAM.

The experience depends heavily on the specific integrated GPU. Older or weaker integrated graphics may struggle, while newer solutions can provide playable performance with reduced settings. You should therefore avoid assuming that every Intel or AMD integrated GPU will deliver the same results.

Lowering the resolution can significantly reduce the graphics workload. Settings such as shadows, reflections, population density, and advanced graphics options can also affect performance.

For weaker systems, 720p and low settings may provide a more practical target than higher resolutions. However, the exact frame rate will depend on your processor, memory configuration, drivers, and game version.

If you want smoother gameplay, dual-channel memory can also help many integrated graphics systems. This is because integrated GPUs share system memory bandwidth with the CPU.

Is GTA 5 CPU or GPU heavy?

GTA 5 can stress both the CPU and GPU, and the limiting component depends on your settings and hardware. At lower resolutions and settings, the CPU can become more important. At higher resolutions and graphical settings, the GPU generally has to process significantly more visual data.

The CPU handles many simulation tasks. These include artificial intelligence, traffic, pedestrians, physics, game logic, and other world calculations. Areas with heavy activity can therefore place greater demands on the processor.

The GPU handles visual workloads such as resolution, textures, lighting, shadows, anti-aliasing, and other rendering effects. Ray tracing is another GPU-intensive graphics technology that can significantly affect rendering performance, while increasing resolution from 1080p to 1440p or 4K can also substantially increase the GPU workload.

This means there is no single answer for every PC. A system with a weak CPU can experience stuttering even with a powerful graphics card. A weaker GPU can become the limitation when graphical settings are increased.

Understanding this balance helps you tune GTA 5 more effectively. Instead of lowering every setting, identify which component is limiting performance first.

Frequently Asked Questions

Does hardware acceleration shorten the lifespan of my graphics card?

Hardware acceleration will not shorten your graphics card’s functional lifespan when temperatures remain within safe operating parameters. Manufacturers engineer silicon chips to handle consistent thermal cycles across several years of daily operation. Maintaining clean cooling fans and replacing dried thermal paste prevents excessive heat buildup, ensuring your card remains fully functional throughout its intended operational lifecycle.

Why does my GPU make a buzzing noise under full load?

A faint buzzing noise during heavy utilization is usually coil whine, an entirely harmless physical phenomenon. When internal electrical components handle heavy currents, tiny inductors vibrate rapidly against electromagnetic fields. Coil whine does not indicate impending hardware failure, though capping maximum frame rates often reduces the noise immediately.

What is the difference between integrated and dedicated graphics?

Integrated graphics reside directly on the processor die and share system RAM for rendering tasks. Dedicated graphics cards feature discrete circuit boards equipped with dedicated cooling, higher power limits, and ultra-fast video memory. Consequently, dedicated cards deliver substantially higher performance for 3D modeling, high-resolution rendering, and intensive compute workloads.

How do I check what is currently using my GPU?

Open Windows Task Manager using the shortcut Ctrl + Shift + Esc and click the Processes tab. Click the GPU column header to sort running software by active hardware utilization. The Performance tab also provides detailed graphs tracking active 3D engines, video decoding chips, and dedicated video memory usage.

Conclusion

Understanding what your GPU can do besides play games can help you get more value from your PC hardware. Modern graphics processors can accelerate many workloads, including video editing, 3D rendering, AI applications, visual effects, and supported computational tasks.

The biggest benefit comes from matching the GPU to software that can actually use it. A powerful graphics card does not automatically speed up every application. Software support, VRAM, memory bandwidth, CPU performance, and thermal behavior all influence real-world results.

GPU utilization also needs context. A reading near 98% is often normal during demanding workloads, provided temperatures and other operating conditions remain appropriate. High utilization alone does not prove that a system is free from CPU limitations.

GTA 5 provides another useful example. Its performance can depend on both the CPU and GPU, with the limiting component changing according to resolution and settings.

Instead of viewing your graphics card as gaming-only hardware, treat it as a specialized parallel-processing device. The right applications can turn unused GPU capacity into faster creative and computational workflows.


5 Drawbacks of Using Ethernet Cables for Home Internet

5 Drawbacks of Using Ethernet Cables for Home Internet

Most tech enthusiasts praise hardwired connections for speed, stability, and low latency. However, understanding the drawbacks of using Ethernet cables matters before installing permanent wiring around your home. Ethernet provides a direct connection between a device and your network. Yet, that reliability comes with physical and practical limitations.

Unlike WiFi, Ethernet requires a cable to reach every connected device. This can create clutter, restrict device placement, and make installation difficult in larger homes. Modern laptops, tablets, and smartphones also prioritize wireless connectivity. Many no longer include a built-in RJ45 Ethernet port.

These limitations do not make Ethernet a poor choice. They simply mean wired and wireless networks solve different problems. Ethernet works particularly well for stationary devices that need consistent performance. WiFi remains more convenient for portable devices.

Understanding physical network limitations helps you build a balanced home setup. Standard standards maintained by the Institute of Electrical and Electronics Engineers (IEEE) define these physical media constraints.

In this guide, we examine the main Ethernet disadvantages, installation challenges, costs, and compatibility issues. We will also compare Ethernet with WiFi to help you choose the right connection for your home.

1. You Lose Out on Portability

One of the biggest drawbacks of using Ethernet cables is reduced portability. Ethernet ties your device to a physical network connection. A desktop computer can stay connected easily, but portable devices become less convenient when they require an Ethernet cable.

Laptops are designed to move between rooms, desks, and workspaces. An Ethernet cable limits that flexibility because the device must remain within reach of a router, switch, or wall outlet, unlike the mobility offered by a Chromebook vs Laptop: Which Is Better for You? setup.

This limitation becomes even more noticeable with modern thin laptops. Many models no longer include a built-in RJ45 Ethernet port. Users may need a USB-to-Ethernet adapter, which adds another accessory to carry.

WiFi avoids this restriction. You can move around your home while maintaining a network connection without dragging a cable behind you.

Ethernet therefore makes the most sense for devices that rarely move. Desktop PCs, televisions, consoles, and home servers are good examples of devices that benefit from Ethernet.

For laptops and other portable hardware, WiFi provides a more convenient experience. This is one of the clearest disadvantages of using Ethernet for everyday home networking, particularly when considering Wi-Fi 6 vs Wi-Fi 7: Is It Time to Upgrade Your Home Network?

2. Cable Installation Can Be Difficult and Expensive

Another important drawback of using Ethernet cables is the installation process. Installing Ethernet throughout a home requires more work than simply connecting a device to WiFi. The difficulty increases when the router and connected devices are located in different rooms.

A temporary Ethernet cable can run along a wall or floor, but this may look untidy. Long Ethernet cables can also cross walking areas and create potential tripping hazards.

A cleaner solution involves routing Ethernet cables through walls, ceilings, baseboards, or dedicated cable channels. This can require drilling, measuring cable lengths, installing wall outlets, and using additional networking hardware.

Professional Ethernet installation can increase the cost further. You may need wall plates, keystone jacks, patch panels, switches, connectors, and installation labor.

Apartment residents may face additional restrictions. Drilling through walls or permanently modifying rooms may not always be practical.

Wireless networking avoids most of these installation challenges. A properly positioned router or access point can connect many devices without running individual Ethernet cables, and understanding 5 Cool Things You Didn’t Know Your Wi-Fi Router Can Do can help you get more from that wireless setup.

Therefore, installation cost and complexity are major drawbacks of using Ethernet cables when several rooms need wired connections. The performance benefits can justify the effort, but permanent Ethernet cabling is not necessary for every household.

3. Ethernet Cables Create Clutter Around Your Home

Physical cable clutter is another noticeable drawback of using Ethernet cables. A single Ethernet connection is usually easy to hide. However, multiple wired devices can create a much larger cable-management problem.

Consider a home office with a desktop computer, printer, network storage device, and other equipment. Each wired device may require its own Ethernet connection to a switch or wall outlet.

Entertainment areas can face the same problem. Televisions, gaming consoles, streaming devices, and other hardware may require several Ethernet cables.

Loose Ethernet cables can make a room look messy. Cables running across floors can also become obstacles for people and pets.

Cable clips, raceways, sleeves, and wall-mounted network outlets can improve the appearance. However, these solutions require additional planning and installation.

Wireless devices avoid most of this visible cabling. A single WiFi connection can serve multiple devices without requiring a separate Ethernet cable for each one.

This makes cable clutter one of the most obvious Ethernet disadvantages in homes where appearance and flexible furniture placement matter. For homeowners considering the drawbacks of using Ethernet cables, cable management is an important factor to consider before installation.

4. Many Modern Devices Lack Ethernet Ports

Device compatibility is another drawback of using Ethernet cables in modern homes. Many desktop computers and gaming systems still include RJ45 ports, but several portable devices now prioritize wireless connectivity.

Thin laptops and tablets are common examples. Manufacturers often remove Ethernet ports to reduce device thickness and save internal space.

When a device lacks an Ethernet port, you need an adapter. USB-to-Ethernet adapters can restore wired connectivity, but they add another piece of hardware to the setup.

Adapters can also occupy a USB port that you may need for other accessories. Some users may need a USB hub when several peripherals are connected.

Smartphones and many tablets are even less practical to connect through traditional Ethernet. Wired networking may require additional adapters and accessories.

This does not make Ethernet obsolete. It simply means device compatibility is an important consideration before planning a wired Ethernet network.

Before buying Ethernet cables or installing wall outlets, check which devices actually support Ethernet. For many households, a combination of Ethernet and WiFi provides better compatibility than relying entirely on wired connections.

This is an important point when comparing the drawbacks of using Ethernet cables with the convenience of modern WiFi networks.

5. Ethernet Limits Where You Can Place Your Devices

Limited placement is another practical drawback of using Ethernet cables. Every wired device needs a physical path back to the network. This limitation becomes more obvious when furniture layouts change.

You may initially install a desktop computer beside a wall outlet. Later, you might move the desk to another part of the room. The existing Ethernet connection may no longer reach comfortably.

Longer Ethernet cables can solve the problem, but they can also introduce more visible wiring. Routing an Ethernet cable around furniture may create additional clutter.

This limitation can also affect televisions and gaming setups. A device may perform better through Ethernet, but the ideal location may not be close to the router or network outlet.

WiFi provides much greater flexibility. You can rearrange furniture and move devices without planning a new Ethernet cable route, although knowing What Happens If You Never Restart Your Router? can help keep that wireless setup running reliably.

For this reason, Ethernet works best when device locations are relatively permanent. If your home layout changes frequently, wireless networking can be more practical.

The key tradeoff is performance versus flexibility. Ethernet gives stationary devices a dependable connection, while WiFi makes changing your setup much easier.

When evaluating the drawbacks of using Ethernet cables, consider where each device sits today and where it may move later. This can prevent unnecessary wiring and installation costs.

What are the drawbacks of Ethernet?

The primary drawbacks of Ethernet include physical cabling, limited mobility, installation effort, and device compatibility. Unlike WiFi, Ethernet requires a physical connection between your device and network equipment. This becomes inconvenient when devices are located far from the router or network switch.

Long cables can also create visual clutter. Running them across floors, hallways, or doorways can create tripping hazards. Hiding cables inside walls looks cleaner, but it requires planning and additional installation work.

Ethernet also limits where you can use a device. A desktop computer can remain connected easily, but moving it to another room may require another cable. Portable devices create an even bigger problem because many modern laptops and tablets lack Ethernet ports.

There are also hardware limitations. The cable, connectors, network ports, and switches must support the desired speed. Older equipment can prevent a modern connection from reaching its full potential.

Overall, Ethernet delivers excellent reliability, but convenience and flexibility are its biggest weaknesses.

Does Ethernet make your WiFi bill go up?

No. Using Ethernet does not normally increase your monthly WiFi or internet bill. Your internet provider generally charges according to your selected service plan, such as its speed tier or applicable data allowance. The connection method inside your home does not normally create an additional charge.

Your router can provide internet access through both Ethernet and WiFi. Connecting a computer with a cable simply changes how that device communicates with the router. It does not create a separate internet subscription.

There is one indirect consideration. Ethernet can make high-speed activities more convenient. You may download large games, transfer files, or stream high-resolution video more frequently. If your broadband plan includes a monthly data cap, increased usage could eventually result in overage charges.

That issue comes from data consumption, not from Ethernet itself. The same usage would count against your allowance whether the device used WiFi or a wired connection.

Therefore, Ethernet should not increase your ISP bill by itself. If your household has a strict data allowance, monitor total usage rather than worrying about the type of connection.

Do Ethernet cables affect WiFi?

Ethernet cables do not normally weaken or interfere with your WiFi signal. In many homes, connecting stationary devices through Ethernet can actually improve the wireless experience for other devices.

WiFi uses shared radio spectrum. Multiple wireless devices compete for available airtime, especially on busy networks. A gaming console, desktop computer, or smart TV can generate substantial traffic while connected wirelessly, which makes Is 5G Strong Enough For Streaming? relevant when considering other connectivity options for bandwidth-heavy activities.

Moving those devices to Ethernet removes their wireless traffic from the WiFi connection. This can reduce congestion and leave more wireless airtime available for phones, tablets, laptops, and smart-home devices.

Ethernet also avoids problems associated with wireless interference and signal strength. A wired device does not need to maintain a radio connection with the router or access point.

However, Ethernet does not magically increase the internet speed supplied by your ISP. Your broadband connection remains the main limit for internet activities.

The main benefit is better local connection stability and reduced WiFi airtime usage. For crowded households, wiring high-bandwidth stationary devices can therefore make the entire network feel more responsive.

What are the pros and cons of using an Ethernet cable?

The pros and cons of using an Ethernet cable depend heavily on how you use your home network. Ethernet’s biggest advantage is consistency. A wired connection generally provides predictable latency and avoids wireless signal fluctuations caused by distance, obstacles, and radio interference.

Ethernet can also deliver high local-network speeds when the cable, network ports, and switch support them. This makes it useful for gaming, large file transfers, desktop computers, network-attached storage, and other demanding workloads.

The disadvantages are mostly physical. Cables must reach the device, which can restrict placement and create clutter. Permanent installations can also require drilling, cable management, and additional hardware.

Ethernet is less convenient for portable devices. Carrying a laptop around the house becomes awkward when it must remain connected to a network cable.

The practical choice is therefore not simply wired versus wireless. Ethernet prioritizes reliability and performance, while WiFi prioritizes mobility and convenience. Most homes benefit from using both technologies.

Is using Ethernet better than WiFi?

Ethernet is not universally better than WiFi. It is usually better for stationary devices that need consistent performance and low latency. WiFi is often better for portable devices that need freedom of movement.

Gaming PCs and consoles can benefit from Ethernet because a wired connection avoids wireless signal fluctuations. Desktop workstations can also benefit when they regularly transfer large files or connect to network storage.

However, smartphones, tablets, smartwatches, and many modern laptops are designed around wireless connectivity. Connecting these devices by cable can be inconvenient or impractical.

WiFi has also improved significantly with newer standards and better router technology. A well-designed WiFi network can provide fast speeds throughout a home without requiring extensive cabling.

The best approach for most households is a hybrid network. Connect demanding stationary devices through Ethernet where practical. Use WiFi for mobile devices and locations where running cables would be inconvenient.

This strategy provides reliable wired performance without sacrificing the flexibility of wireless networking. The right choice depends on the device, network layout, required performance, and how frequently the device moves.

Frequently Asked Questions

Can an Ethernet cable cause internet drops?

Yes, a damaged Ethernet cable can cause random disconnections and packet loss. Damaged internal copper twisted pairs, broken connector retention clips, or severe bends can disrupt signal transmission. These are possible drawbacks of using Ethernet cables, especially when cables are poorly installed or physically damaged.

If your wired connection drops intermittently, replace the physical patch cable first. You should also verify that the RJ45 connector sits firmly in the network port. If the problem continues, test another router or switch port to rule out hardware issues.

Does the length of an Ethernet cable reduce speed?

Standard twisted-pair Ethernet connections are designed to support cable runs of up to 100 meters (328 feet) under appropriate conditions. Staying within the supported distance helps maintain the cable’s rated performance.

Exceeding the recommended distance can cause signal problems, connection errors, or reduced performance. A network switch can be used to create another Ethernet segment when longer distances are required.

Cable length is therefore another factor to consider when evaluating the drawbacks of using Ethernet cables. For most homes, however, standard cable lengths are more than sufficient.

Are all Ethernet cables the same speed?

No. Ethernet cables have different category ratings that affect their supported bandwidth and network speeds. Older Cat5 cables were commonly used for Fast Ethernet, while Cat5e supports Gigabit Ethernet. Cat6 and Cat6a can support 10Gbps Ethernet under the appropriate conditions, with Cat6 having distance limitations for 10Gbps operation.

Your cable is only one part of the connection. The router, switch, network adapter, and connected devices must also support the desired speed.

Using an older cable with newer networking hardware can therefore limit your local network performance. Check the cable category before upgrading your equipment.

Do Ethernet cables present any safety hazards?

Yes, loose Ethernet cables running across floors, doorways, or stairs can create clear tripping hazards. Cables pinched inside closed doors can also damage their protective jackets and eventually affect network performance.

Proper cable management can reduce these risks. Secure long runs along baseboards with suitable cable clips, raceways, or cable-management channels. For permanent installations, use cabling rated for the intended in-wall environment and follow applicable local building requirements.

These physical concerns are among the drawbacks of using Ethernet cables that homeowners should consider before installing a wired network throughout the house. Proper installation keeps the cables organized, protected, and safer to use.

Conclusion

Understanding the drawbacks of using Ethernet cables helps you make a better decision before wiring your home. Ethernet provides reliable performance, consistent latency, and freedom from wireless signal fluctuations. However, those advantages come with physical limitations.

Cable installation can create clutter and restrict where devices can sit. Permanent wiring may also require additional hardware, tools, and professional labor. Portable devices create another limitation because many modern laptops and mobile devices do not include Ethernet ports.

Ethernet does not normally increase your internet bill. It also does not damage your WiFi signal. In fact, moving stationary, high-bandwidth devices to Ethernet can reduce WiFi airtime usage and improve network capacity for other devices.

For most households, the best solution is not choosing Ethernet or WiFi exclusively. Use Ethernet for stationary devices that benefit from stable, low-latency connections. Keep smartphones, tablets, laptops, and other mobile devices on WiFi.

A hybrid network gives you the reliability of wired connections while preserving the flexibility of wireless networking.

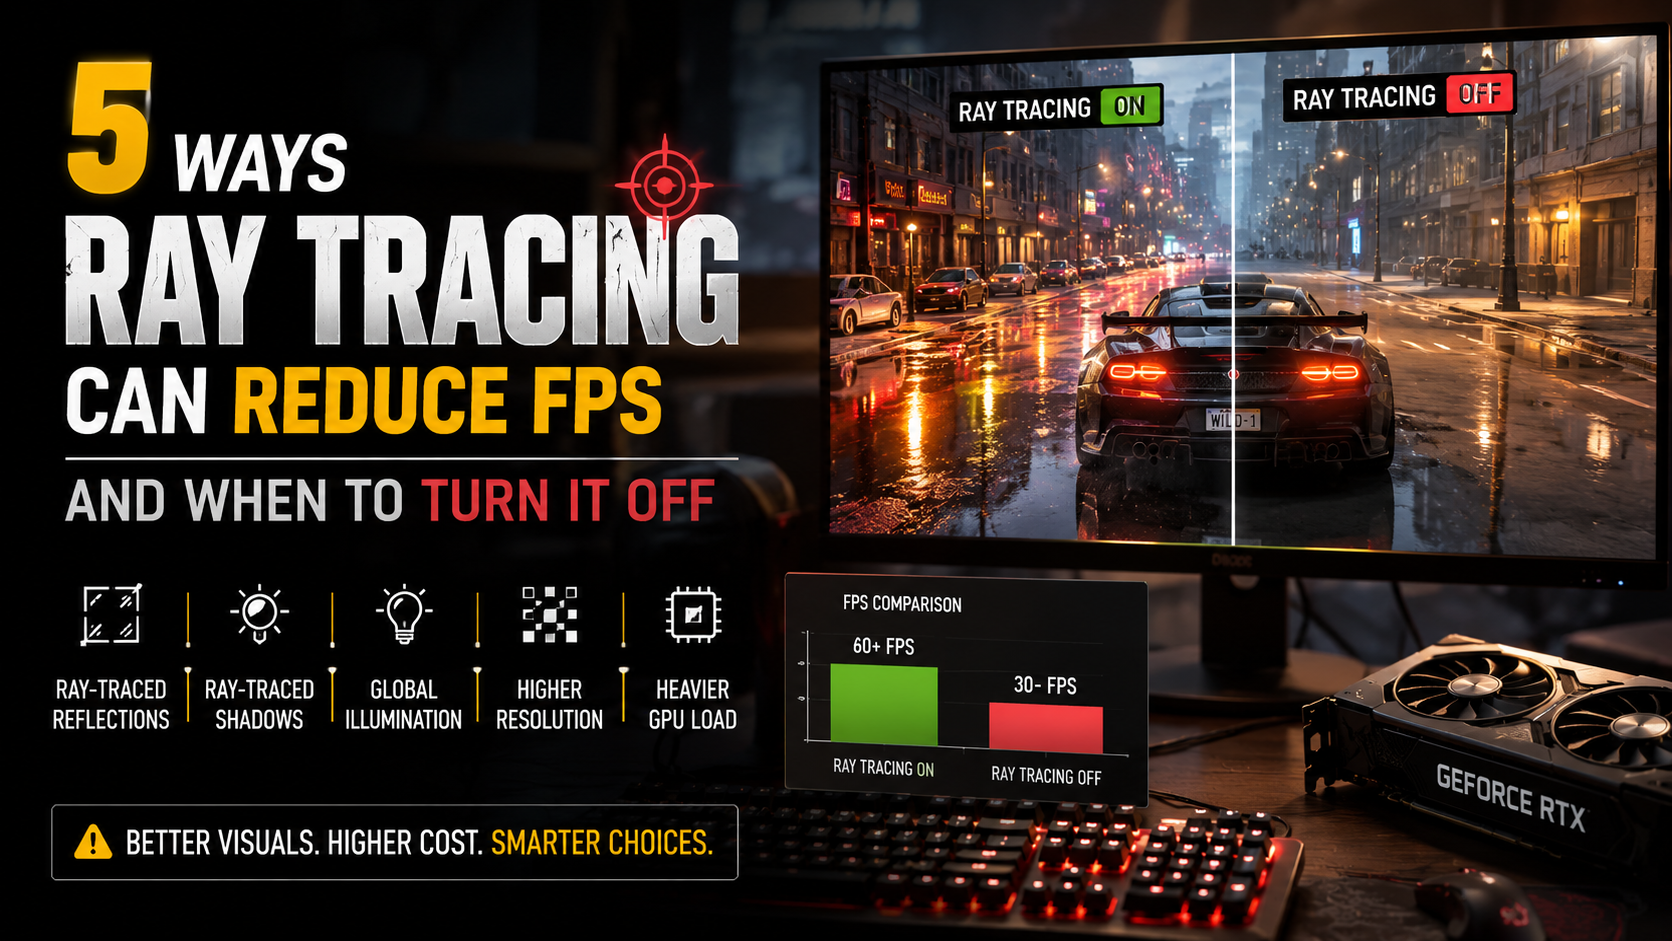
5 Ways Ray Tracing Can Reduce FPS and When to Turn It Off

5 Ways Ray Tracing Can Reduce FPS and When to Turn It Off

Ray tracing can make games look more realistic by simulating how light behaves in a 3D environment. It can improve reflections, shadows, global illumination, and other lighting effects. However, these visual improvements require additional GPU processing. As a result, ray tracing can reduce FPS compared with traditional rasterized rendering. For a deeper explanation of the technology, see What Is Ray Tracing & What Does It Do? Complete Guide.

The performance impact depends on the game, ray tracing quality, resolution, GPU, and other graphics settings. Some effects are relatively affordable, while full ray-traced lighting can be extremely demanding. The difference can become especially noticeable at higher resolutions. Your choice of graphics hardware also matters, particularly when comparing Integrated and Discrete Graphics: Best for Content Creation?.

When your GPU has more work to complete for each frame, render times increase. Higher render times mean fewer frames can be produced each second. This can also affect frame-time consistency and make gameplay feel less responsive.

According to architectural whitepapers from NVIDIA, processing millions of light rays per frame creates an immense workload for dedicated RT cores and standard shader pipelines alike.

Understanding this performance trade-off helps you choose better graphics settings. This guide explains why ray tracing affects FPS, whether 40 FPS is playable, and when disabling ray tracing makes sense. It also covers frame caps, upscaling, GPU temperatures, and practical ways to balance visual quality with smooth gameplay.

1. Ray-Traced Reflections Increase GPU Workload

Ray-traced reflections can be one of the most demanding effects in a modern game. Traditional rendering methods often use screen-space reflections, reflection probes, or precomputed data. These techniques provide convincing results without tracing large numbers of light rays.

Ray tracing takes a different approach. The GPU traces rays to determine what objects and surfaces should appear in reflections. This becomes especially demanding when a scene contains water, glass, polished floors, vehicles, or other highly reflective materials.

The workload also increases when developers use higher-quality reflection settings. More rays and greater reflection distances require additional calculations. At higher resolutions, the GPU must also process more pixels that can contain ray-traced information.

If ray-traced reflections cause a noticeable FPS drop, you can lower their quality before disabling ray tracing completely. This can preserve some of the visual improvement while reducing the performance cost.

For competitive games, however, reflections rarely justify sacrificing responsiveness. Turning off ray-traced reflections can be an easy way to recover performance when every frame matters.

2. Ray-Traced Shadows Can Lower Frame Rates

Ray-traced shadows provide more realistic shadow edges and lighting behavior than many traditional shadow techniques. Instead of relying only on conventional shadow maps, the game can trace rays to determine whether light reaches different areas of the scene.

This additional calculation increases GPU workload. The impact becomes more noticeable when several light sources affect the scene simultaneously. Dynamic environments with moving characters, vehicles, foliage, and changing lighting can create even more work.

Shadow quality also affects performance. Higher-quality ray-traced shadows can require more calculations and greater ray-tracing resources. The difference may be small in some games but substantial in demanding scenes.

If your FPS drops after enabling ray-traced shadows, try reducing the quality level first. You may be able to keep the effect enabled without taking the full performance hit.

However, shadows are usually less important than frame-rate stability in competitive games. If you need higher FPS and lower latency, disabling ray-traced shadows can provide a practical performance improvement without affecting core gameplay mechanics.

3. Ray-Traced Global Illumination Is Extremely Demanding

Ray-traced global illumination can create some of the most realistic lighting effects in modern games. It attempts to simulate how light behaves after interacting with surfaces. This can produce more natural indirect lighting, reflections, and changes in brightness.

The problem is that these calculations are expensive. A single light source can interact with multiple objects and surfaces throughout a scene. The GPU must process additional ray-tracing operations while continuing to handle standard rendering tasks.

Large open-world environments can make the workload even heavier. Buildings, vegetation, interiors, reflective materials, and multiple light sources can all contribute to the overall rendering cost.

This is one reason ray-traced global illumination can reduce FPS significantly in demanding games. The effect can also become more expensive at higher resolutions.

If your game offers multiple ray-tracing options, global illumination deserves special attention. Lowering this setting may recover more performance than changing less demanding effects.

For players who prioritize smooth gameplay over lighting accuracy, turning off ray-traced global illumination can be one of the most effective ways to increase FPS.

4. Higher Ray-Tracing Quality Requires More GPU Resources

Ray tracing is not a single performance setting. Many games provide multiple quality levels, such as Low, Medium, High, and Ultra. Higher presets generally increase the complexity or number of ray-traced calculations performed during rendering.

Higher settings can increase ray count, reflection distance, lighting quality, shadow accuracy, or other rendering parameters. Each additional calculation adds work for the GPU.

Resolution also matters. Rendering at 1440p or 4K requires the GPU to process far more pixels than 1080p. Combining high resolution with demanding ray-tracing settings can therefore create a significant performance burden.

This does not mean you must choose between maximum ray tracing and completely disabling it. A medium ray-tracing preset can sometimes provide most of the visual benefit while costing much less performance than an Ultra setting.

If your FPS is too low, reduce ray-tracing quality before changing other settings that have a smaller visual impact. This approach can help maintain image quality while giving your GPU more room to maintain consistent frame rates.

5. Ray Tracing Can Push Your GPU to Its Limits

Ray tracing can increase overall GPU utilization because the graphics card must perform additional rendering work. When the GPU is already close to its performance limit, enabling demanding ray-tracing effects can push frame rates below a comfortable level.

The result depends heavily on your graphics card. Modern GPUs include dedicated hardware for accelerating ray-tracing operations, but this does not make ray tracing free. Other parts of the rendering pipeline still need to process shaders, textures, geometry, memory operations, and lighting data.

You may notice the biggest performance difference in demanding scenes. Large environments, heavy effects, dense geometry, and multiple light sources can increase the workload further.

If your GPU consistently struggles with ray tracing, turning it off can provide a more stable gaming experience. You can also combine lower ray-tracing settings with DLSS, FSR, or XeSS to recover performance.

The goal should not be to maximize every graphics setting. Instead, aim for a stable frame rate that matches your monitor and the type of game you play. For competitive gaming, higher FPS often matters more than advanced lighting effects.

Does turning on ray tracing reduce FPS?

Yes, turning on ray tracing can reduce FPS, sometimes substantially. The exact performance loss depends on the game, GPU, resolution, ray tracing effect, and quality preset. Traditional rasterization uses approximations to determine how objects appear on screen. Ray tracing instead performs additional calculations to simulate how light interacts with objects and surfaces.

Those calculations increase the workload placed on the GPU. Effects such as ray-traced reflections, shadows, ambient lighting, and global illumination can each add rendering overhead. Using several ray-traced effects together can create a much larger performance hit.

The impact also varies between graphics cards. Modern GPUs include dedicated hardware designed to accelerate ray-tracing operations. However, dedicated acceleration does not make ray tracing free. The GPU still has to process the resulting lighting information alongside normal rendering tasks. If you’re comparing different graphics hardware, Which Nvidia GPU Is Equivalent To The PlayStation 5? provides a useful point of reference.

At higher resolutions, the performance cost can become more noticeable. Upscaling technologies such as DLSS, FSR, and XeSS can help recover some lost FPS. Therefore, the best approach is to test ray tracing at your target resolution and adjust individual effects rather than assuming every ray-tracing setting has the same cost.

How do I decrease my FPS?

If your goal is actually to decrease FPS, rather than fix a ray-tracing performance problem, the simplest solution is to use a frame-rate limit. Most modern games include an FPS cap inside their graphics or display settings. You can select a lower target that matches your preferred performance level.

You can also use V-Sync to synchronize frame delivery with your monitor’s refresh rate. However, V-Sync does not simply provide an arbitrary FPS limit. Its behavior depends on the game’s rendering performance and your display’s refresh rate.

GPU driver software can provide additional frame-rate controls. NVIDIA Control Panel and similar graphics utilities can apply limits outside individual games. Tools such as RivaTuner Statistics Server can also provide detailed frame-rate and frame-time controls.

Lowering FPS intentionally can reduce GPU power consumption and heat when maximum performance is unnecessary. It can also make frame delivery more consistent when the GPU is capable of producing significantly more frames than your display requires.

If you actually meant “How do I increase my FPS?”, the better approach is to reduce demanding settings, lower resolution, enable upscaling, or disable ray tracing.

Is 40 FPS bad for gaming?

40 FPS is not automatically bad for gaming. Whether it feels acceptable depends on the game, display, input requirements, and player’s expectations. A stable 40 FPS can work reasonably well in slower single-player games, strategy titles, simulation games, and other experiences where rapid reactions are less important.

The situation changes in competitive games. First-person shooters, racing games, fighting games, and other fast-paced titles generally benefit from higher frame rates. Higher FPS can reduce frame-to-frame latency and make motion appear more responsive. If you’re choosing a system for gaming performance, Gaming Laptop: How to Choose the Best One in 2026 can help you evaluate the hardware that matters.

Frame consistency also matters. A stable 40 FPS experience can feel smoother than one that repeatedly jumps between 30 and 50 FPS. Variable refresh rate technology can further improve the experience by allowing the display to better match the GPU’s frame delivery.

However, 40 FPS should not be treated as a universal target. Some players find it perfectly comfortable, while others notice the reduced responsiveness immediately. Your monitor’s refresh rate and synchronization technology also influence how 40 FPS appears.

If ray tracing pushes a fast-paced game below your preferred frame rate, reducing or disabling ray tracing can be a practical solution. You can also lower individual ray-tracing settings or enable upscaling before disabling the feature completely.

Can I turn off ray tracing?

Yes, you can usually turn off ray tracing through a game’s graphics or video settings. The exact location varies between games. Some titles provide a single ray-tracing switch, while others separate effects such as ray-traced reflections, shadows, ambient occlusion, and global illumination.

Open the game’s graphics settings and look for options containing terms such as Ray Tracing, RT, Ray-Traced Reflections, or Ray-Traced Lighting. Set the relevant option to Off and apply the changes. Some games may require a restart before certain rendering changes take effect.

Disabling ray tracing reduces the additional workload associated with those effects. The game will generally rely more heavily on traditional rasterized techniques and other non-ray-traced methods. This can increase FPS and improve frame-time consistency, particularly on GPUs that struggle with the selected ray-tracing settings.

The improvement will not be identical in every game. If ray tracing was already using a relatively small amount of GPU resources, the FPS gain may be limited.

Before disabling everything, consider reducing individual ray-tracing effects. Lowering reflection quality or global illumination can sometimes preserve much of the visual improvement while reducing the performance cost. You can also explore How To Get More Out Of Your GPU Without Overclocking for other ways to improve graphics performance without overclocking.

Is ray tracing good on or off?

There is no universally correct ray-tracing setting. The better choice depends on your hardware, game, resolution, refresh rate, and priorities. Ray tracing can add more realistic reflections, shadows, and lighting. However, those improvements come with additional GPU workload.

For a slower single-player game, the visual improvement may be worth the performance cost. If your GPU can maintain a comfortable frame rate, keeping ray tracing enabled can improve the overall visual presentation. This is especially relevant in games designed around ray-traced lighting.

Competitive players usually have different priorities. Lower latency, higher FPS, and consistent frame pacing often matter more than realistic reflections or shadows. In these situations, disabling ray tracing can be the more practical choice.

You also do not have to choose between maximum ray tracing and completely disabling it. Many games allow individual effects to be adjusted. You could keep lower-cost ray-traced shadows while disabling expensive reflections, for example.

Upscaling technologies can provide another compromise. DLSS, FSR, and XeSS can render the game internally at a lower resolution and reconstruct the final image. This can recover performance while allowing some demanding effects to remain enabled.

The best setting is therefore the one that delivers acceptable image quality without pushing your FPS below your preferred target.

FREQUENTLY ASKED QUESTIONS

What hardware component handles real-time ray calculations?

Modern GPUs use dedicated hardware to accelerate real-time ray-tracing operations. NVIDIA graphics cards use RT Cores, while AMD GPUs use Ray Accelerators within their compute units. These components accelerate operations such as bounding-box and ray-triangle intersection testing. However, ray tracing still involves other GPU resources, including shaders and memory systems.

Does upscaling technology compensate for the performance loss?

Upscaling can significantly reduce the performance impact of demanding graphics settings, including ray tracing. Technologies such as NVIDIA DLSS, AMD FSR, and Intel XeSS render frames at a lower internal resolution and reconstruct them for the target output. The performance improvement varies by game, resolution, and implementation. Upscaling does not remove the cost of ray tracing, but it can make the overall workload easier for the GPU to handle.

Does enabling real-time reflections increase GPU operating temperatures?

It can. Ray-traced reflections add GPU workload, which may increase power consumption and heat output. The temperature increase depends on the GPU, game, cooling system, frame rate, and other graphics settings. If the GPU already operates near its power or thermal limits, enabling demanding ray-traced effects may cause higher temperatures and fan speeds. Good case airflow and an appropriate fan curve can help maintain stable operating conditions.

Why do ray-traced shadows cause sudden stuttering?

Ray-traced shadows can contribute to stuttering, but VRAM exhaustion is not the only possible cause. Stutters can also result from shader compilation, asset streaming, CPU limitations, background applications, or inconsistent frame times. If VRAM becomes heavily constrained, the GPU may need to manage memory more aggressively, which can worsen performance. Lowering ray-tracing quality, reducing texture settings, or disabling the most demanding effects can help identify the source of the problem.

Conclusion

Ray tracing can make modern games look significantly more realistic, but the additional rendering workload can reduce FPS. The size of the performance penalty depends on the specific game, GPU, resolution, ray-tracing effects, and graphics settings. Some implementations have a modest impact, while demanding ray-traced global illumination or reflections can reduce performance considerably.

You do not need to disable ray tracing automatically. If your GPU maintains a stable frame rate that matches your expectations, the visual improvements may be worth keeping. If performance falls below your preferred target, reduce the most demanding ray-tracing effects first.

Upscaling technologies can provide another way to balance image quality and performance. A suitable frame-rate limit can also improve consistency and reduce unnecessary GPU workload.

For competitive games, prioritizing higher FPS and lower latency often makes more sense. For slower single-player experiences, lower frame rates may be acceptable if they remain stable.

The best configuration comes from testing your own hardware. Compare ray tracing on and off, monitor frame times, and adjust individual settings. Aim for the combination that gives you the visual quality and responsiveness you actually want.

Why Does My Laptop Battery Drain So Fast?

Why Does My Laptop Battery Drain So Fast?

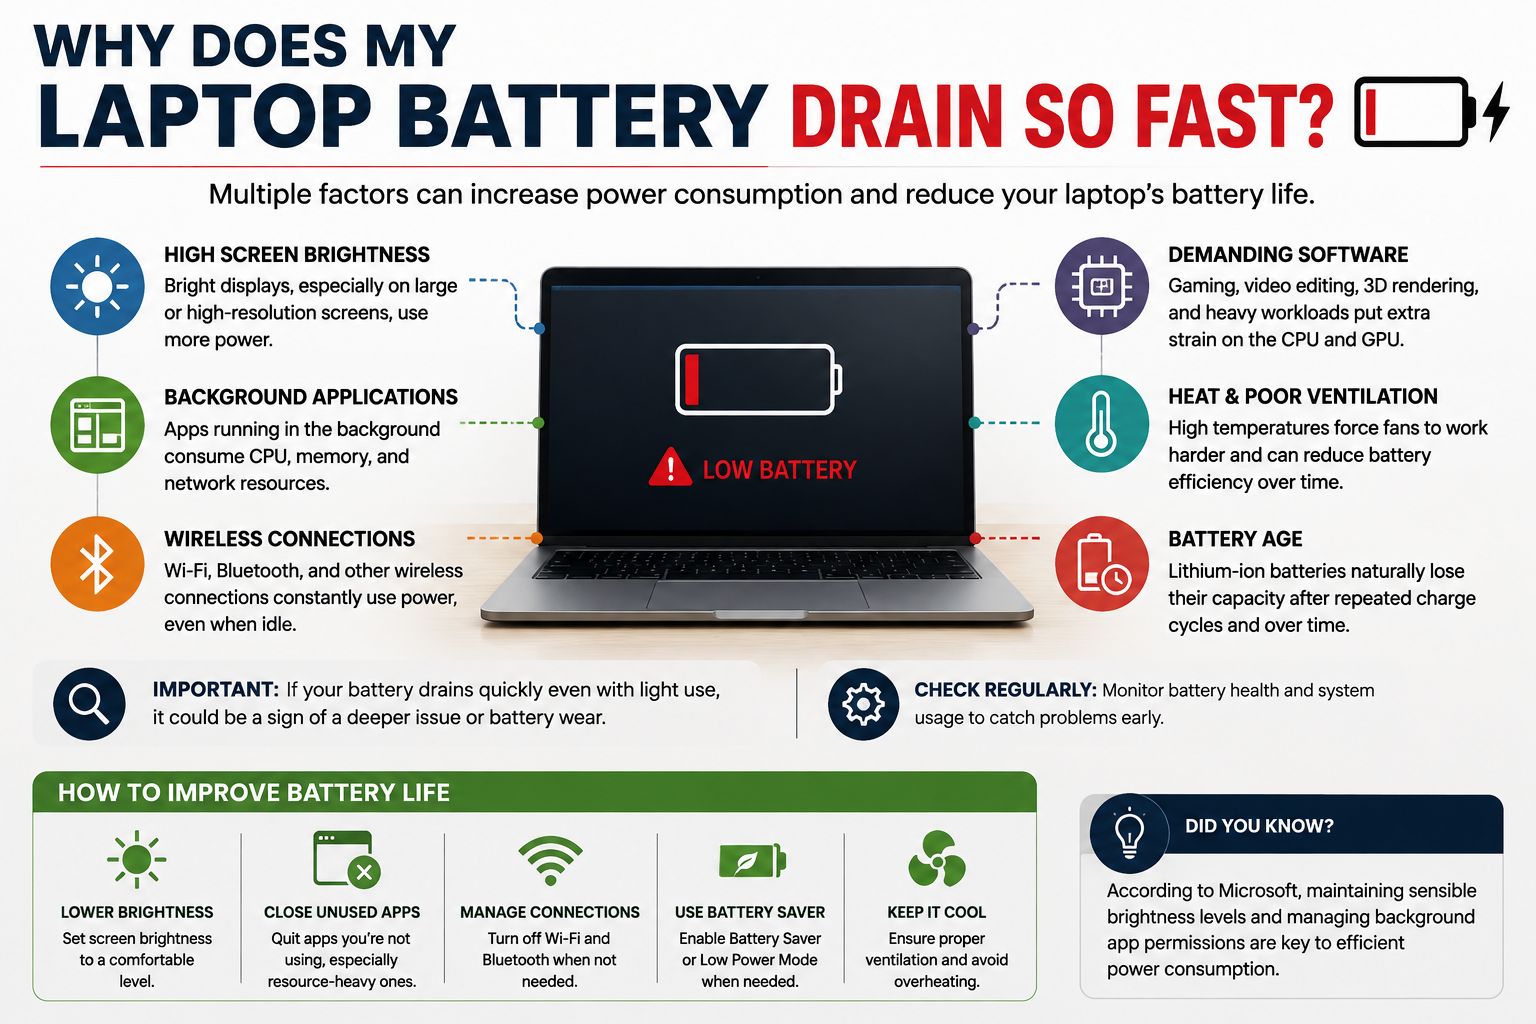
Few things disrupt a productive workday faster than a laptop that suddenly runs out of power. If you are searching for laptop battery drain so fast, several factors could be responsible. High screen brightness, background applications, wireless connections, demanding software, and battery age can all increase power consumption. Understanding the cause can help you improve battery life without immediately replacing the battery.

High screen brightness can increase power use, especially on larger or high-resolution displays. Background applications, Bluetooth connections, keyboard lighting, and demanding software can also reduce battery life. Gaming, video editing, and other intensive workloads place additional demands on the processor and graphics hardware.

Battery age also matters. Lithium-ion batteries gradually lose their ability to hold a full charge after repeated use. Heat can accelerate this chemical aging and reduce long-term battery health.

According to official performance guidelines from Microsoft Support, maintaining sensible brightness levels and actively managing background application permissions form the foundation of efficient power consumption.

Understanding these factors helps separate normal power consumption from genuine battery problems. This guide explains the common causes of rapid battery drain, practical ways to improve runtime, and signs that your battery may need replacement.

How do I stop my laptop battery from draining so fast?

If you are dealing with laptop battery drain so fast, start by identifying which settings, applications, or hardware components consume the most power. Lower your display brightness to a comfortable level first. High brightness can increase power consumption, especially on larger or high-refresh-rate displays.

Next, check your system’s battery or power settings. Windows and macOS provide tools that can show battery usage and help identify applications using excessive power. Close programs that you are not using, particularly those performing continuous synchronization or demanding background tasks.

You can also reduce power use by disconnecting unnecessary peripherals. Turn off Bluetooth when you do not need it and reduce keyboard backlighting when possible. Battery saver or low-power modes can further reduce background activity.

For the best results, focus on the activities that actually consume the most energy on your laptop. This approach is more effective than changing every power setting without identifying the real source of the drain.

Optimize App Startup Permissions

Startup applications can quietly consume resources whenever your laptop is running. Messaging programs, cloud-storage clients, update services, and game launchers may continue working in the background even when you are not actively using them.

Open Task Manager in Windows or the relevant startup and login settings in macOS. Review which applications launch automatically and disable programs that you do not need immediately after startup.

Pay particular attention to applications with frequent synchronization, notifications, or background processing. These activities can keep the processor active and increase network usage.

However, do not disable essential system services simply because they appear unfamiliar. Removing critical startup components can cause stability or security problems.

Instead, focus on optional applications that you recognize and rarely use. Reducing unnecessary startup activity can lower background workload and may improve battery efficiency.

If you notice laptop battery drain so fast after installing a particular application, check whether that application runs continuously in the background.

Is 2 hours of battery life good for a laptop?

Two hours of battery life is usually short for a modern laptop performing light everyday tasks. However, there is no universal runtime that applies to every laptop. Battery life depends on the processor, display, battery capacity, operating system settings, and workload.

A lightweight productivity laptop may provide many hours of browsing or document work under controlled conditions. A gaming laptop can last much less because its processor and dedicated GPU consume substantially more power.

High refresh rates, bright displays, demanding applications, and poor thermal conditions can reduce runtime further. Your usage pattern also matters. Streaming video, gaming, video editing, and running virtual machines require more power than reading documents or writing notes.

Therefore, a two-hour runtime does not automatically prove that your battery is defective. Compare the result with the manufacturer’s expected runtime and your laptop’s previous performance.

If runtime has dropped sharply, check battery health before assuming the hardware has failed. This is especially important when investigating laptop battery drain so fast during normal daily use.

Consider Your Hardware Specifications

Laptop hardware strongly affects how long a battery can last. A thin productivity laptop with an efficient processor usually consumes less power than a gaming laptop with a dedicated graphics processor.

Discrete GPUs are particularly important during demanding workloads. Gaming, 3D rendering, and GPU-accelerated applications can increase power consumption significantly. Some laptops can switch between integrated and dedicated graphics to improve efficiency during lighter tasks.

The display also affects battery life. High-resolution OLED panels, high refresh rates, and high brightness settings can require more power than simpler displays.

Processor performance settings matter as well. Performance modes may increase clock speeds and fan activity, which can shorten unplugged runtime.

When evaluating a two-hour battery result, consider the complete hardware configuration. Do not judge battery health from runtime alone.

A gaming laptop delivering two hours during demanding gameplay should not be compared directly with an ultrabook performing basic web browsing. The workload and hardware class are fundamentally different, much like the differences between a Chromebook and a traditional laptop.

Why does my laptop battery only last 1 hour?

A laptop that lasts only one hour may have a heavily degraded battery, unusually demanding software, or a combination of both. Start by checking whether the short runtime occurs during light tasks or heavy workloads.

If the laptop is several years old, battery aging becomes a stronger possibility. Lithium-ion batteries gradually lose capacity as they experience charging and discharging cycles. A battery that once stored substantial energy may eventually hold much less.

Software can also create unusually high power consumption. A background application may keep the processor busy, while a demanding program can activate the dedicated GPU. High brightness, maximum refresh rates, wireless activity, and external devices can add further load.

Thermal problems may contribute indirectly. Dust buildup can restrict airflow and increase fan activity, although heat alone does not explain every rapid-drain problem.

If the laptop still lasts only about an hour during light use, check its reported battery capacity. This can help determine whether laptop battery drain so fast is caused by battery wear or excessive system power consumption.

Generate a System Battery Report

A battery report can provide useful evidence before you replace the battery. On supported Windows systems, the built-in battery report shows information such as the original design capacity and current full-charge capacity.

Compare these figures to understand how much capacity the battery has lost. A substantial reduction points toward battery degradation rather than a simple software setting.

You should also review recent battery usage when available. This can reveal whether specific applications are consuming unusually large amounts of energy.

macOS provides battery health information through its system settings. The exact information available depends on the Mac model and operating system version.

A diagnostic report cannot repair a physically degraded battery. It can, however, prevent unnecessary replacement when software or workload is responsible for the problem.

If the reported capacity is severely reduced and runtime remains poor during light use, professional battery replacement may be appropriate.

A battery report is especially useful when laptop battery drain so fast continues despite reducing brightness and background activity.

What kills a laptop battery the fastest?

Excessive heat is one of the most important factors that can accelerate lithium-ion battery aging. High temperatures increase chemical stress inside battery cells and can reduce long-term capacity. Learning how to cool your laptop effectively can help manage these thermal issues.

Using a laptop on beds, blankets, or other soft surfaces can restrict airflow. This may raise operating temperatures, particularly when the processor or GPU is already under heavy load.

Heavy workloads also increase power consumption. Gaming, rendering, and other demanding tasks can produce substantial heat while the laptop operates on battery power.

Deep discharges are another factor worth managing. Modern lithium-ion batteries do not need to reach zero percent before charging. Repeated deep discharges can contribute to additional battery wear over time.

Keeping the laptop permanently connected to power does not automatically mean the battery is being overcharged. Modern charging systems manage charging electronically. However, maintaining a high charge level while the battery remains hot can contribute to faster aging.

For long-term health, prioritize reasonable temperatures and avoid unnecessary deep discharges. Use the manufacturer’s battery-management features when available.

Avoid Full Discharge Cycles

Modern lithium-ion batteries generally do not need to be completely discharged before charging. Repeatedly running the battery to zero can increase battery wear over time.

Instead of waiting until the laptop shuts down, connect the charger when the battery reaches a reasonable low level. The exact percentage does not need to be treated as a strict rule.

20–80% charging range for rechargeable batteries is often recommended as a practical strategy for reducing time spent at extreme charge levels. However, you do not need to follow this range perfectly during every charging session.

Modern laptops also include charging controls designed to manage battery behavior. Some manufacturers provide battery-protection features that limit maximum charging when the computer remains connected to power for long periods.

The most important factors are avoiding excessive heat and unnecessary deep discharge cycles. Occasional charging to 100% is normal when you need maximum unplugged runtime.

If laptop battery drain so fast is becoming a regular problem, examine your overall charging habits rather than focusing on one specific percentage.

What is the average lifespan of a laptop battery?

Laptop batteries do not have one universal lifespan. Battery longevity depends on cell quality, charging patterns, operating temperature, workload, and the laptop’s battery-management system.

Many lithium-ion laptop batteries remain useful for several years, but their capacity gradually declines during normal use. Manufacturers often specify a cycle rating for a particular battery model rather than guaranteeing a fixed number of years.

A battery cycle generally represents cumulative discharge equal to 100% of the battery’s capacity. It does not necessarily mean one charge from 100% to 0%. For example, two separate 50% discharges can collectively represent approximately one full cycle. Understanding battery health versus cycle count can make this distinction easier to evaluate.

As batteries age, their full-charge capacity decreases. The laptop may still operate normally, but it will provide less runtime between charges.

There is no universal point where every battery suddenly becomes unusable. Some batteries remain practical after significant capacity loss, while others become inconvenient much earlier.

Instead of relying only on age, monitor actual runtime and battery-health information. A major decline compared with the original performance is a stronger replacement signal, especially when you know the warning signs that indicate a laptop may have a serious problem.

Monitor Battery Charge Cycles

Monitoring charge cycles can help you understand how heavily a battery has been used. Many laptops and operating systems report cycle information through system diagnostics or battery-health settings.

A cycle represents cumulative battery usage rather than simply plugging the charger in once. This distinction matters because frequent partial discharges do not each count as a complete cycle.

Battery cycle ratings vary by manufacturer and battery design. Therefore, there is no universal number at which every laptop battery suddenly needs replacement.

Instead, use cycle count alongside other indicators. Look at the battery’s full-charge capacity, reported health condition, and actual runtime during normal tasks.

A high cycle count combined with substantially reduced capacity provides stronger evidence of battery aging. A high cycle count alone does not necessarily mean the battery needs immediate replacement.

If the laptop reports unusually low capacity, frequent shutdowns, swelling, or other physical battery problems, stop using the device and seek qualified service.

For routine maintenance, checking battery information periodically can help identify gradual degradation before it becomes a major productivity problem.

Frequently Asked Questions

Does keeping my laptop plugged in constantly ruin the battery?

Modern laptops feature smart charging circuits that stop charging once capacity reaches one hundred percent, preventing direct overcharging. However, keeping the battery permanently full while the system operates at elevated temperatures can accelerate chemical aging. If your laptop supports battery-limiting software, cap the maximum charge level at eighty percent to extend long-term cell health.

Why does my laptop battery drain quickly when turned off?

A laptop draining power while turned off is usually resting in Sleep or Modern Standby mode rather than shutting down completely. In these states, the machine continues refreshing RAM and checking for background system updates. To prevent this parasitic drain, turn off Fast Startup in system settings or use complete manual shutdowns.

Can cold weather make my laptop battery deplete faster?

Yes, extreme cold temporarily slows down the chemical reactions inside lithium-ion batteries, causing internal resistance to rise sharply. Your operating system may misinterpret this drop in voltage as a depleted battery, resulting in sudden shutdowns. Once the device warms back up to normal room temperature, standard runtime capacity generally restores itself.

How much does it cost to replace an internal laptop battery?

A standard manufacturer battery replacement generally costs between $50 and $150 for parts, depending on your device brand and model. If you use professional repair services, labor fees can add another $40 to $100. Ultra-thin laptops with glued-in batteries usually incur higher service costs than modular business laptops with accessible screws.

Conclusion

Understanding laptop battery drain so fast requires looking at both software and hardware. High brightness, demanding applications, background processes, wireless connections, and inefficient power settings can all reduce daily runtime.

Battery aging is another major factor. Lithium-ion cells gradually lose capacity through normal use, and excessive heat can accelerate this process. A laptop that once lasted many hours may eventually provide much less runtime.

Start with the simplest checks. Review battery usage, reduce unnecessary background activity, adjust display settings, and use your laptop’s available battery-saving features.

Keep airflow unobstructed and avoid exposing the device to excessive heat. If runtime remains extremely short, check the battery’s reported capacity and health.

If you still cannot determine the cause of laptop battery drain so fast, compare battery health with actual power consumption. This helps separate a worn battery from software or workload problems.

The goal is not to follow one perfect charging rule. Instead, combine sensible power settings, reasonable temperature control, and periodic battery-health checks. These steps can help you get more useful runtime while extending the practical life of your laptop battery.

5 Useful Accessories Every OnePlus Owner Needs IN 2026

5 Useful Accessories Every OnePlus Owner Needs IN 2026

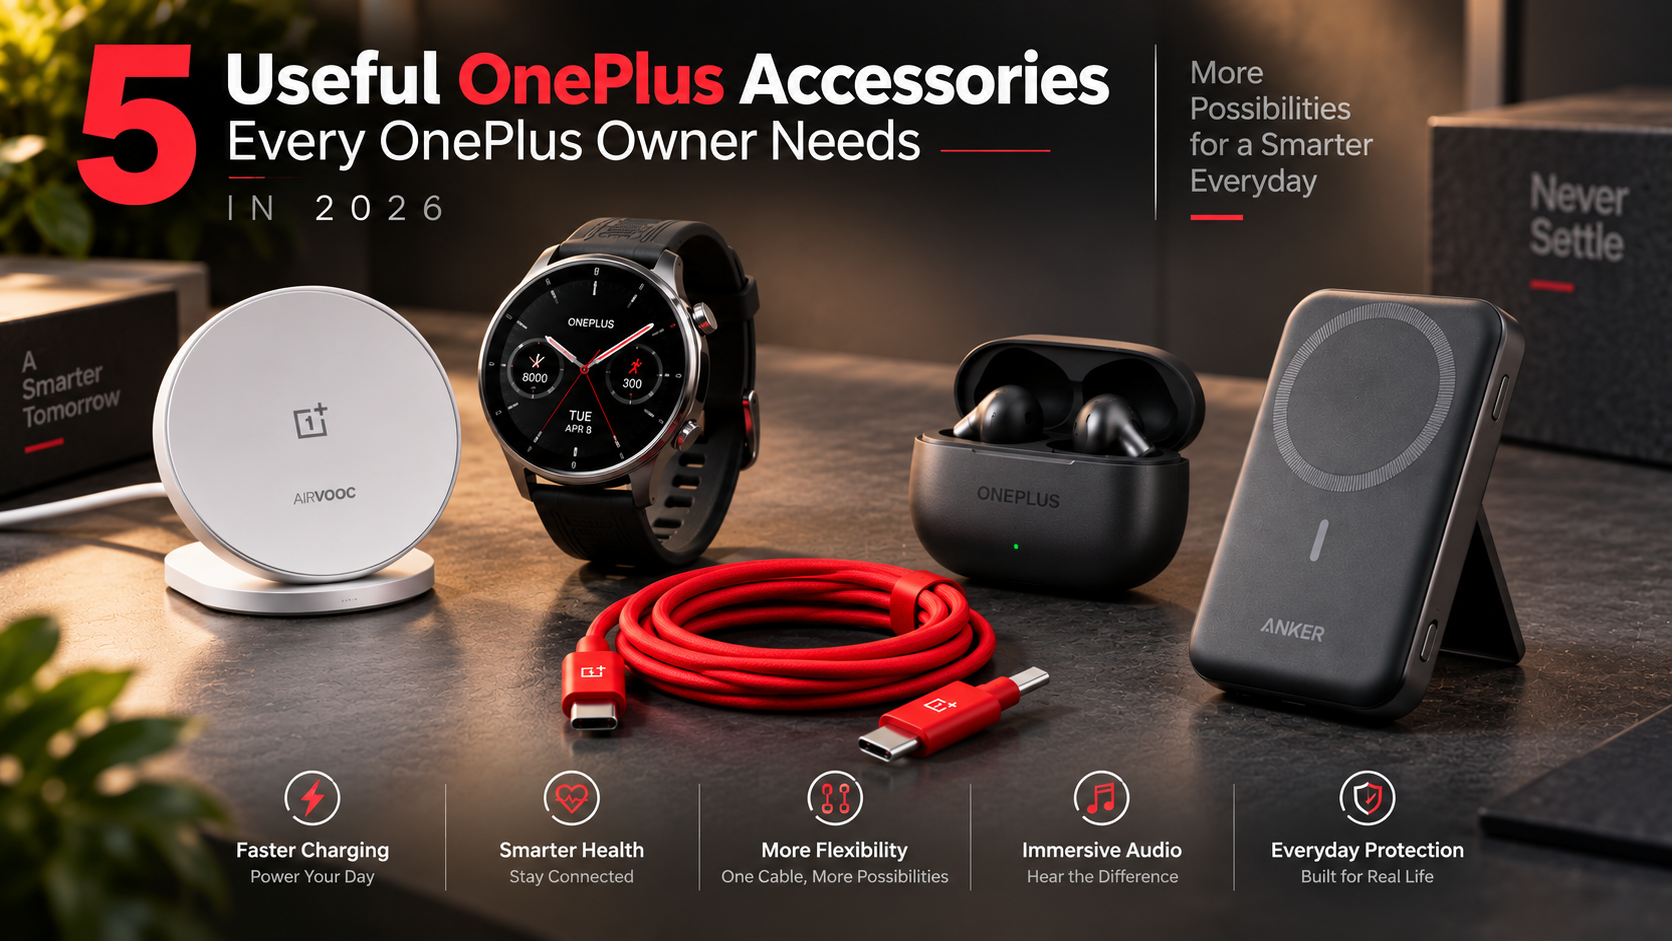
Getting the most from your smartphone requires the right accessories. The best OnePlus accessories can improve charging, audio, protection, and everyday convenience. Choosing compatible hardware also helps you use your phone as intended. However, not every accessory delivers the same benefits.

Many users wonder which add-ons offer real value. Others simply want reliable replacements for worn-out cables or cases. This guide focuses on five practical accessories worth considering in 2026. The exact charging speed and compatibility can vary by OnePlus model and region.

These accessories can improve convenience without creating unnecessary clutter. They also help protect the phone during everyday use. Before buying, always check your model’s specifications and the accessory’s supported standards.

1. OnePlus AirVOOC 50W Magnetic Charger

The OnePlus AirVOOC 50W Magnetic Charger is a useful addition for compatible OnePlus devices and other supported Qi-based phones. It combines wireless charging convenience with a magnetic attachment design. This makes it easier to keep your phone aligned while charging at a desk or bedside.

For users who prefer wireless charging, the charger can reduce cable clutter. The magnetic connection also helps keep the phone positioned correctly during charging. However, charging speed depends on device compatibility and the supported wireless charging standard.

Before buying, check whether your specific OnePlus phone supports the required wireless charging features. Not every OnePlus model supports wireless charging, and some may have different power limits.

The charger is especially useful for people who frequently charge their phone during work or overnight. It can also complement a compatible magnetic case or accessory.

If wireless charging is part of your daily routine, this accessory offers a convenient alternative to repeatedly connecting a USB-C cable.

2. OnePlus Watch 4

The OnePlus Watch 4 extends the OnePlus experience beyond the smartphone. It is designed for users who want quick access to notifications, calls, fitness information, and other everyday functions from their wrist.

A smartwatch can reduce the need to check your phone repeatedly. You can view notifications, monitor activity, and access supported features without reaching for your handset. This makes the watch particularly useful during workouts, commutes, or busy workdays.

Its value also depends on how deeply you use the wider OnePlus ecosystem. Users who already own a OnePlus smartphone may appreciate the connected experience between compatible devices.

Before purchasing, check compatibility with your phone and the availability of specific features in your region. Smartwatch functions can vary depending on the connected device and software version.

For OnePlus owners who want more than traditional phone accessories, the Watch 4 provides a practical way to expand their connected setup. It turns the smartphone experience into something that is more accessible throughout the day.

3. OnePlus 2-in-1 SuperVOOC Cable

The OnePlus 2-in-1 SuperVOOC Cable is designed for users who want more flexibility when charging compatible devices. Instead of carrying multiple separate cables, a two-in-one design can simplify your everyday setup.

This can be particularly useful if you regularly charge more than one compatible device. Keeping one versatile cable in your office, travel bag, or car can reduce cable clutter. It can also make packing easier when travelling.

However, cable compatibility is important. The maximum charging performance depends on the connected devices, charger, and supported charging protocol. A cable cannot increase the maximum charging capability of a phone beyond what the device supports.

Users should also check connector compatibility before purchasing. Different OnePlus generations may support different charging requirements.

For people who rely heavily on fast charging, choosing the correct cable is just as important as choosing the right power adapter. A suitable SuperVOOC cable helps ensure that compatible devices can take advantage of their supported charging performance while keeping your setup simple.

4. OnePlus Buds 4

The OnePlus Buds 4 are a natural companion for users who want wireless audio alongside their OnePlus smartphone. They provide a convenient way to listen to music, podcasts, videos, and calls without dealing with a wired connection.

Wireless earbuds are particularly useful for commuting, exercising, and working. A compact charging case also makes them easy to carry throughout the day. When paired with a compatible OnePlus phone, users can benefit from ecosystem-focused features and streamlined connectivity.

Audio features can vary depending on the connected phone, software version, and region. It is therefore worth checking the specifications before purchase, especially if features such as advanced noise cancellation or spatial audio are important to you.

The Buds 4 also complement the broader OnePlus ecosystem. They give users a simple audio solution without requiring a separate brand ecosystem.

If you frequently use your phone for calls or entertainment, wireless earbuds can be one of the most practical OnePlus accessories to add to your daily setup.

5. Anker MagGo Power Bank

The Anker MagGo power bank is a useful option for OnePlus users who need extra battery capacity while travelling or away from a wall outlet. Its magnetic design can make portable charging more convenient on compatible devices and cases.

A power bank is particularly valuable during long journeys, busy workdays, or outdoor activities. Instead of searching for a charging socket, you can carry additional power with you.

However, compatibility should be checked carefully before buying. Magnetic attachment and wireless charging depend on the phone, case, alignment, and supported standards. Some OnePlus models may require a compatible magnetic case or accessory for the best experience.

The power bank can also serve as a backup charging solution when fast wired charging is unavailable. For users who spend long periods away from home, that extra battery capacity can provide useful peace of mind.

When choosing an Anker MagGo power bank, check its capacity, charging output, physical size, and compatibility with your specific OnePlus phone. This ensures you get a practical portable power solution without unnecessary bulk.


What are must-have OnePlus accessories?

The most useful OnePlus accessories focus on charging, protection, audio, and display safety. Start with a compatible SUPERVOOC charger if your phone supports the standard. A suitable charger can unlock the phone’s advertised fast-charging capability when paired with the correct cable.

A protective case is another practical purchase. OnePlus offers model-specific cases designed around the camera module, buttons, ports, and Alert Slider. A good case should provide grip without making the phone unnecessarily bulky.

A high-quality USB-C cable is equally important. For fast charging, choose a cable rated for the required current and charging standard. Generic cables may charge normally but may not support your phone’s maximum charging rate.

Wireless earbuds can also improve daily convenience. OnePlus Buds models offer features such as quick pairing and spatial audio on supported devices. A screen protector is another useful addition. It can reduce everyday scratches and help preserve the display’s appearance.

When choosing OnePlus accessories, focus on compatibility rather than simply buying the most expensive option. Your phone model determines which charging speeds, cases, cables, and wireless features will work correctly.

Prioritizing Authentic SuperVOOC Hardware

Fast charging is one of OnePlus’s most recognizable strengths. However, charging performance depends on the phone, charger, cable, region, and supported charging protocol. A third-party USB-C charger can safely charge many OnePlus phones. It may not, however, deliver the same proprietary charging speed.

For supported models, an official or properly compatible SUPERVOOC charger is the better choice when maximum charging performance matters. The charger and cable work with the phone’s charging system to deliver the supported power level. Always check your exact model’s specifications before purchasing an adapter.

Avoid assuming that a higher-wattage charger automatically means faster charging. The phone controls how much power it accepts. Heat, battery level, software settings, and charging conditions can also affect real-world speeds.

A certified, compatible charger is therefore more important than simply choosing the highest wattage. The same principle applies when buying OnePlus charging accessories. Choose a cable that supports your phone and charger.

It also makes sense to replace damaged cables promptly. Frayed cables can create unreliable connections and should not be used for high-power charging.

Why is OnePlus falling?

The idea that OnePlus is simply “falling” oversimplifies the company’s position. The brand has changed considerably since its early “flagship killer” era. Its first phones attracted enthusiasts with premium specifications, aggressive pricing, and a strong community focus.

As the brand matured, its flagship phones moved into higher price categories. That placed OnePlus in more direct competition with established premium brands. At the same time, the smartphone market became increasingly crowded, especially in the value and upper-mid-range segments.

Software strategy also changed. OxygenOS became more closely aligned with Oppo’s software foundation. That shift disappointed some long-time enthusiasts who preferred the earlier, lighter OxygenOS experience.

However, OnePlus continues to release premium phones, tablets, wearables, and audio products. Its current lineup still emphasizes performance, fast charging, displays, and design, with new devices such as the OnePlus N6x adding to the company’s evolving product range.

Therefore, brand evolution provides a better explanation than a simple decline. OnePlus has broadened its product range and target audience. Its accessories ecosystem has expanded as well, covering chargers, watches, earbuds, cases, and other connected products.

For buyers, the key question is whether the current OnePlus experience matches their needs. Older brand perceptions should not replace comparisons of current hardware, software, pricing, and the best budget smartphones under ₹30,000.

The Impact of Unified Software

The closer relationship between OxygenOS and ColorOS remains an important part of OnePlus’s software history. Earlier OxygenOS versions were known for a relatively clean Android experience. They also developed a strong following among users who wanted speed without excessive customization.

The later software consolidation created criticism among some enthusiasts. Users pointed to changes in menus, interface design, preinstalled applications, and the overall look and feel. These changes made the software feel less distinct from Oppo’s ColorOS.

That criticism does not mean modern OxygenOS is inherently poor. The software continues to evolve and includes features designed around multitasking, customization, performance, and device connectivity. OnePlus now positions newer OxygenOS releases around a broader ecosystem experience.

The important distinction is between software identity and software quality. Some users may prefer the older OxygenOS philosophy. Others may value the newer feature set and closer ecosystem integration.

The same ecosystem approach extends beyond phones. OnePlus accessories such as earbuds, watches, and chargers can add convenience for users with compatible devices. For buyers, the best approach is to test the current software experience rather than judge the phone only by its historical reputation.

What are some unique features of the OnePlus phone?

OnePlus phones combine several hardware and software features that help distinguish them from other Android devices. One of the most recognizable is the three-position Alert Slider. On supported models, it provides quick access to Ring, Vibrate, and Silent modes without opening the Settings menu. You can also explore hidden OnePlus features and settings to get more from supported devices.

Another notable feature is Open Canvas, which improves multitasking on supported OnePlus devices. It lets users work with multiple applications in a more flexible split-screen layout. Availability can vary by device and software version.

Some newer OnePlus phones also use Aqua Touch technology. This feature is designed to improve touchscreen responsiveness when the display is wet. It can be particularly useful when using the phone in light rain or with damp fingers.

Other OnePlus strengths include high-refresh-rate displays, advanced cooling systems, large batteries, and fast charging. Exact specifications differ between models.

The broader ecosystem also adds value. Compatible OnePlus accessories can extend the phone’s functionality through wireless audio, wearable devices, fast charging, and portable power.

Therefore, users should check their specific phone’s specifications before assuming a feature is available. Compatibility remains important when choosing accessories for a particular OnePlus model.

Mastering the Physical Alert Slider

The Alert Slider remains one of OnePlus’s most recognizable hardware features. It provides a physical way to change the phone’s sound profile without opening the display. This can be especially useful when entering meetings, classrooms, theaters, or other quiet environments.

Its simplicity is the main advantage. Instead of unlocking the phone and navigating quick settings, you can move the slider directly. The three positions typically correspond to Ring, Vibrate, and Silent modes on supported devices.

The physical control can also be useful when the phone is in a pocket or bag. Its position allows many users to adjust it by touch alone. That makes it faster than navigating an on-screen control in some situations.

The exact behavior can vary with software settings and device generation. Some versions may offer additional sound or notification controls through OxygenOS.

If your slider feels stiff, avoid forcing it. Keep the surrounding area clean and use only gentle cleaning methods recommended for the device.

For many OnePlus owners, the Alert Slider remains a practical feature that separates the brand from many competitors. It also works well alongside other OnePlus accessories, particularly cases designed specifically around the slider’s placement.

What is the OnePlus secret code?

OnePlus phones support several dialer codes, but their availability can vary by model, software version, and region. One commonly reported code is *#899#, which can open a service or diagnostic interface on supported devices. It can provide access to hardware tests and device checks.

Available options may include touchscreen, display, camera, speaker, microphone, sensor, and connectivity tests. However, users should not assume every test will appear on every OnePlus phone. Older models can use different codes or diagnostic menus.

The *#06# code is more widely used. It displays the device’s IMEI information on compatible phones. Unlike service menus, it is primarily an identification tool.

Older OnePlus devices have also used codes such as *#808# for factory or hardware testing. These codes are not universal across the OnePlus lineup.

If a code does not work, do not attempt to bypass security protections or modify system parameters. Diagnostic menus should be treated as testing tools rather than performance-tuning utilities.

For routine troubleshooting, the phone’s built-in Settings and official support resources remain the safest options. Your choice of OnePlus accessories will not affect whether these codes work. Their availability depends mainly on the phone’s software and hardware configuration.

Safe Navigation in EngineerMode Menus

Diagnostic menus can help identify hardware problems, but they are not designed for casual experimentation. If your OnePlus phone supports *#899# or another service code, use the available testing options carefully.

The safest approach is to run passive tests. Check the touchscreen, speakers, microphone, cameras, sensors, or other components when troubleshooting a specific problem. Avoid changing calibration values or engineering parameters unless you have the required technical knowledge and service documentation.

Incorrect changes can affect hardware behavior or system stability. Some menus may also contain options intended for technicians rather than regular users. A setting that appears harmless can have unexpected consequences.

For this reason, follow these simple rules:

  • Use diagnostic menus only when you understand the test.
  • Avoid changing factory calibration values.
  • Do not alter network or radio parameters without proper guidance.
  • Exit the menu after completing your checks.
  • Contact official OnePlus support if a hardware problem continues.

The diagnostic menu can be useful, but it should not replace professional service. If your phone has serious charging, display, battery, or network problems, official support is the better route.

Likewise, do not assume that replacing OnePlus accessories will solve an internal hardware fault. Test chargers, cables, and other external components first, then seek professional assistance if the problem remains.

Who is the CEO of OnePlus?

Pete Lau is the founder of OnePlus and remains one of the company’s key executives. He helped launch OnePlus in 2013 after working at Oppo. The brand quickly gained attention through online sales, competitive pricing, enthusiast marketing, and its “Never Settle” philosophy.

Lau became closely associated with the company’s early identity. Under his leadership, OnePlus focused heavily on performance, design, community feedback, and value. Those priorities helped the company establish itself in the global smartphone market.

His responsibilities later expanded within the wider OPlus structure. That broader role connected OnePlus more closely with related businesses and product planning. The company’s current strategy reflects a larger ecosystem that includes smartphones, tablets, wearables, and audio products, including newer tablet offerings that can be compared with alternatives such as the OnePlus Pad Lite and iPad Air.

OnePlus has therefore evolved beyond its original startup image. It now competes across several product categories and price segments. That broader strategy is also visible in its accessories lineup, which includes chargers, earbuds, watches, and other connected products.

For readers researching the company, it is useful to separate Pete Lau’s role as OnePlus founder and executive from the company’s broader corporate structure. Leadership responsibilities can change, so current company information should always be checked against official sources.

The Pete Lau Product Philosophy

Pete Lau’s influence is closely linked to the “Never Settle” philosophy that helped define OnePlus. The idea emphasizes continuous improvement rather than accepting average results. It became a central part of the brand’s identity during its early years.

The company’s product approach has often focused on performance, smooth software, fast charging, display quality, and practical design. These priorities helped OnePlus appeal to users who cared about specifications without wanting to compromise on everyday usability.

Lau has also emphasized details beyond raw specifications. Build quality, materials, ergonomics, weight, and the overall feel of a device can strongly affect how people use it. That approach helped OnePlus develop a recognizable product identity.

The philosophy has evolved as the company has expanded. Modern OnePlus products target a broader audience and form part of a wider device ecosystem. Even so, performance remains a major part of the brand’s positioning.

This philosophy also influences the company’s OnePlus accessories. Chargers, earbuds, watches, cables, and cases are designed to complement the broader device experience.

For consumers, the useful takeaway is simple: OnePlus continues to balance hardware performance and user experience. The exact priorities differ between models, so buyers should compare features rather than rely solely on the brand’s historical reputation.


Frequently Asked Questions

Can I charge my phone using third-party USB-C adapters?

Yes, you can charge your device with standard third-party USB-C power bricks. However, charging speeds will stay limited to basic USB Power Delivery standards, typically between 15W and 30W. To access rapid SuperVOOC fast charging up to 80W or 100W, you must use proprietary charging adapters and original high-amperage cables. Standard plugs charge the device safely, but they cannot replicate brand speeds.

Do older Dash Charge cables work on modern devices?

Older Dash Charge and Warp Charge cables will supply power safely, but they cannot achieve modern peak SuperVOOC speeds. Recent models require specialized high-current cables rated for higher amperage to negotiate maximum wattage. While legacy cables work fine for overnight top-ups, upgrading your physical cords ensures your device charges from empty to full in under thirty minutes.

Does the Alert Slider wear out over years of use?

The physical Alert Slider features durable mechanical switches tested for hundreds of thousands of actuation cycles. Regular pocket lint or dust can occasionally accumulate within the slider track, preventing complete mechanical clicks into silent mode. Cleaning the groove gently with a wooden toothpick or compressed air quickly restores original click action and smooth physical travel.

Are original protective cases worth the premium price?

Original cases provide superior cutouts tailored precisely around the camera housing and Alert Slider. Generic third-party alternatives often feature overly thick borders that make sliding the physical toggle difficult. Original sandstone and aramid fiber options offer slim profiles, integrated internal shock absorption, and secure textured grip without adding unnecessary bulk to your daily carry.


Conclusion

The right accessories can make a OnePlus phone more convenient, durable, and enjoyable to use. The most useful upgrades usually involve charging, protection, audio, and display care. Instead of buying every available add-on, focus on accessories that can deliver useful features without Apple’s premium pricing, where compatible alternatives make sense.

A compatible SUPERVOOC charger and suitable USB-C cable can help supported phones achieve their intended charging performance. A well-designed case protects the phone while preserving access to essential controls. Wireless earbuds can improve everyday audio, while a quality screen protector helps reduce cosmetic damage.

It is also useful to understand the phone itself. Features such as the Alert Slider and Open Canvas can improve everyday productivity. Diagnostic codes may help with basic hardware testing, but they should be used carefully.

Finally, remember that OnePlus has changed considerably since its early “flagship killer” days. Its modern product range serves a broader market while retaining a strong focus on performance.

Before buying new OnePlus accessories, check your exact model and supported specifications. That simple step helps you avoid incompatible products and get more value from your setup.

This version keeps your original H2/H3 hierarchy and topic coverage, while making model-dependent claims more precise and improving scanability, keyword placement, and sentence length.

5 Reasons Your Bluetooth Keeps Disconnecting

5 Reasons Your Bluetooth Keeps Disconnecting

Few tech problems are more frustrating than audio cutting out during a favorite song or a call dropping mid-sentence. If your Bluetooth keeps disconnecting, the problem is usually caused by interference, power settings, software issues, or pairing conflicts.

Bluetooth uses short-range radio communication in the 2.4 GHz frequency band. Physical barriers, nearby wireless devices, and other signals can affect connection stability. The Bluetooth SIG guide to Bluetooth reliability explains how interference from technologies such as Wi-Fi can affect wireless communication.

The good news is that frequent Bluetooth disconnects do not always mean your headphones, speaker, or phone is damaged. In many cases, a few simple changes can restore a reliable wireless connection.

Below are the five most common reasons your Bluetooth keeps disconnecting, followed by practical steps to diagnose and fix each problem.

1. Your Bluetooth Device Is Too Far Away

Bluetooth works best when the connected devices stay within a reasonable range. Many consumer Bluetooth devices can work across a typical room, but actual range varies by device, antenna design, Bluetooth class, and surroundings.

Distance becomes a bigger problem when walls or other obstacles sit between the devices. Concrete walls, metal objects, and dense materials can weaken Bluetooth signals. Even your body can affect the connection when your phone is buried inside a pocket or bag.

Try moving your phone, tablet, or computer closer to the Bluetooth accessory. Keep both devices in the same room while troubleshooting. If the connection becomes stable at close range, distance or physical obstruction is likely contributing to the problem.

You should also avoid placing Bluetooth accessories behind televisions, inside cabinets, or beside large metal objects. These locations can reduce signal strength.

If your Bluetooth connection drops only when you move away from the host device, range is one of the first things to investigate.

2. Other Wireless Devices Are Causing Interference

Bluetooth shares the 2.4 GHz spectrum with several other wireless technologies. Nearby Wi-Fi networks, wireless peripherals, smart devices, and other electronics can create a crowded radio environment.

This issue is especially noticeable in busy offices, apartments, gyms, airports, and other public places. When many wireless devices operate nearby, Bluetooth may experience more interference. You may notice audio stuttering, delayed responses, or brief connection drops.

Your Wi-Fi router can also contribute to local congestion. If your router supports 5 GHz Wi-Fi, move compatible devices to that band. This can reduce activity in the 2.4 GHz spectrum used by Bluetooth. For more context, see our guide on 4 Disadvantages Of Using Bluetooth For Everything.

You should also keep Bluetooth accessories away from routers and other wireless equipment where possible. Test the connection in a quieter location to determine whether interference is responsible.

If your headphones work perfectly at home but disconnect frequently in crowded areas, wireless interference is a strong possibility.

3. Your Battery Is Running Low

A low battery can cause Bluetooth accessories to become unstable. This is particularly common with wireless earbuds, headphones, speakers, keyboards, mice, and game controllers.

As battery levels fall, some devices activate power-saving features. Depending on the hardware, these features may reduce wireless performance or eventually shut down the Bluetooth radio.

A low battery can also make troubleshooting confusing. Your device may appear connected for several minutes before suddenly disconnecting.

The easiest test is to fully charge both devices. Charge your phone, tablet, or computer if its battery is also low. Then reconnect the Bluetooth accessory and test it again.

If the connection becomes stable after charging, power management was likely contributing to the problem.

However, repeated disconnects after a full charge can indicate another issue. An aging battery may also struggle to maintain normal operation even when the battery indicator shows a reasonable charge.

If your accessory disconnects regularly despite being fully charged, continue troubleshooting distance, interference, pairing settings, software, and firmware.

4. Your Bluetooth Pairing or Software Is Causing Problems

Bluetooth connections can become unreliable when saved pairing information becomes outdated or inconsistent. This can happen after operating system updates, device changes, or repeated failed connection attempts.

Your accessory may also be trying to connect automatically to another device. For example, your earbuds could connect to a tablet while you are trying to use them with your phone.

Start by checking your saved Bluetooth devices. Remove accessories you no longer use. Also turn off Bluetooth on nearby phones, tablets, laptops, and other devices that may automatically connect.

For the problematic accessory, select Forget This DeviceRemove Device, or Unpair. Put the accessory back into pairing mode and connect it again.

You should also check for available operating system, Bluetooth driver, and firmware updates. Manufacturers often release updates that improve compatibility and connection stability. Keeping your wireless accessories properly maintained can also help, as explained in our guide on how to clean and maintain your premium headphones.

If the accessory works correctly with another phone or computer, the problem may be related to your original device’s software or Bluetooth configuration.

5. Your Bluetooth Device or Driver Needs an Update

Outdated Bluetooth software can cause compatibility and connection problems. This is particularly important after upgrading your phone, tablet, or computer to a newer operating system.

Your Bluetooth accessory has firmware, while your computer may use a dedicated Bluetooth driver. If either component is outdated, communication between the devices may become unreliable.

Start by checking your device for available system updates. On Windows, open Device Manager, locate the Bluetooth adapter, and check for driver updates. You should also check the accessory manufacturer’s app or support page for firmware updates.

Updating the accessory can improve compatibility with newer phones and computers. It may also fix known bugs that cause random disconnects, audio stuttering, or failed reconnections.

If your Bluetooth keeps disconnecting after every other basic fix, outdated software is worth investigating.

Do not immediately assume that the accessory is defective. Test it with another compatible device after installing updates. If it remains unstable across multiple devices, the hardware itself may need further inspection.


Why does my Bluetooth keep disconnecting for no reason?

A Bluetooth connection usually drops because something interrupts communication between the two devices. The most common causes include distance, interference, low battery, software problems, and outdated firmware.

Bluetooth uses short-range radio signals, so physical obstacles can weaken the connection. Concrete walls, metal surfaces, and other dense materials may reduce effective range. Nearby Wi-Fi networks and other 2.4 GHz devices can also create interference.

Battery level matters as well. Some devices reduce wireless performance when power becomes low. Others may shut down their Bluetooth radio to preserve battery life.

Software can cause problems too. An outdated operating system, Bluetooth driver, or accessory firmware may create compatibility issues. Saved pairing information can also become corrupted after updates or repeated connection attempts.

Before replacing your headphones or speaker, check these common causes:

  • Move the devices closer together.
  • Charge both devices fully.
  • Reduce nearby wireless interference.
  • Remove unused Bluetooth pairings.
  • Install available system and firmware updates.

How do I clear my Bluetooth cache?

Clearing Bluetooth cache data can help when temporary system information becomes corrupted. The exact process depends on your operating system and device manufacturer.

On many Android phones, open Settings > Apps and enable system apps if necessary. Find the Bluetooth system service, open its storage settings, and select Clear Cache. Menu names can vary between Android versions.

Restart your phone after clearing the cache. This allows the system to rebuild temporary Bluetooth data.

On Windows, Bluetooth problems are usually addressed through driver troubleshooting rather than a traditional cache-clearing option. Open Device Manager, find your Bluetooth adapter, and check for driver updates. You can also uninstall the adapter and restart Windows so it can reinstall the driver.

On macOS, Bluetooth troubleshooting options vary between macOS versions. Use the built-in wireless troubleshooting tools available on your system.

Be careful with reset options. Some procedures can remove saved Bluetooth pairings or network settings.

Clearing temporary data is useful when connections became unstable after an update or repeated pairing attempts. Try it before performing a complete network reset.

How to fix a disconnected Bluetooth?

When Bluetooth keeps disconnecting, start with the simplest troubleshooting steps. First, check that both devices have enough battery. Then move them closer together and remove obvious sources of interference.

Turn Bluetooth off on the host device. Wait several seconds, then turn it back on. If the accessory does not reconnect, restart both devices. This simple step can often restore a temporary Bluetooth connection problem.

If Bluetooth keeps disconnecting after restarting, remove the existing pairing. Select Forget This Device or Unpair in your Bluetooth settings. Put the accessory into pairing mode and search for it again.

Also check whether another phone, tablet, or computer is connecting to the accessory. Temporarily disable Bluetooth on those devices during testing. This prevents another paired device from taking over the connection.

Install available operating system and accessory firmware updates. These updates can resolve Bluetooth compatibility and stability problems.

You can also test the accessory with another compatible device. If it disconnects everywhere, the accessory may have a hardware or firmware problem. If it works normally elsewhere, focus on the original host device.

Working through these steps in order can help identify why Bluetooth keeps disconnecting without immediately resetting everything.

How to fix an unstable Bluetooth connection?

An unstable Bluetooth connection usually involves interference, power management, software, or device settings. If Bluetooth keeps disconnecting, start by reducing wireless congestion around your devices.

If possible, connect compatible Wi-Fi devices to the 5 GHz band. This can reduce competition in the 2.4 GHz spectrum. Keep your Bluetooth accessory away from routers, wireless hubs, and other sources of radio interference.

Next, review your phone or computer’s battery settings. Aggressive power-saving features can restrict background activity for some companion applications. Disabling unnecessary battery restrictions may help maintain a stable connection.

On computers, confirm that the correct Bluetooth audio output and microphone are selected. Calls require two-way audio and may change the Bluetooth audio profile.

Install pending operating system, driver, and firmware updates. These updates can resolve known Bluetooth connection problems and improve compatibility.

If audio continues to stutter, try a lower-bandwidth Bluetooth codec when your device provides that option. Higher-quality codecs can be more sensitive to interference. If you’re comparing wireless and wired listening more broadly, our guide to Wired vs Wireless Audio can help explain the trade-offs.

Finally, test the accessory in another location. A stable connection elsewhere suggests environmental interference. A problem across multiple locations points toward software, firmware, battery, or hardware issues.

If Bluetooth keeps disconnecting despite these changes, move on to resetting the Bluetooth or network settings.

How do I reset my Bluetooth?

A complete Bluetooth or network reset can help when standard troubleshooting fails. However, it should be one of your final steps because it can remove saved connections.

On an iPhone or iPad, go to Settings > General > Transfer or Reset [Device] > Reset > Reset Network Settings. This removes saved Wi-Fi networks and related network settings.

Android devices vary by manufacturer. Many provide an option such as Reset Wi-Fi, mobile & Bluetooth under System or Reset Options. Check your phone’s exact menu before confirming the reset.

Windows includes a Network reset feature under network settings. This reinstalls network adapters and returns network settings to their default state.

Bluetooth accessories can also have their own factory-reset procedures. The button combination varies by manufacturer and model. Always follow the instructions for your specific accessory. If you’re troubleshooting headphones specifically, you may also find our guide on how noise cancellation works useful for understanding related wireless audio features.

Before performing a reset, make sure you know your Wi-Fi passwords. You should also be prepared to pair your Bluetooth accessories again.

A reset can resolve persistent configuration problems when Bluetooth keeps disconnecting despite normal troubleshooting. However, it will not fix a physically damaged Bluetooth radio, faulty battery, or defective accessory.

If the problem continues after a complete reset, test the accessory with another compatible device. This can help determine whether the issue is with your device or the Bluetooth accessory itself.

Frequently Asked Questions

Why does my connection drop only in crowded places?

Public spaces like transit hubs, shopping malls, and gym floors contain hundreds of competing active signals. Smartphones, smartwatches, and public Wi-Fi routers transmit across identical 2.4 GHz frequency bands. This intense RF congestion causes severe packet collisions, overwhelming your device’s error-correction buffers and forcing your hardware to disconnect briefly until cleaner frequencies become available.

Can a dying battery cause connection drops?

Yes, low battery levels directly disrupt signal stability. When your headphones, controller, or phone battery falls below twenty percent, onboard microcontrollers trigger aggressive power-saving protocols. The device reduces radio transmission strength to conserve power, drastically shortening signal range. Consequently, even minor physical movements can sever the weak, low-power link entirely.

Does turning off Wi-Fi improve connection stability?

Disabling Wi-Fi or moving your router onto a 5 GHz network significantly improves peripheral stability. Both Wi-Fi and Bluetooth share the 2.4 GHz radio frequency spectrum. When Wi-Fi transfers high-bandwidth data like 4K video streams on that same channel, it creates transmission collisions that disrupt continuous audio streaming.

Why do my wireless headphones disconnect during calls?

Phone calls require two-way audio transmission, forcing your device to switch codecs into Hands-Free Profile (HFP) or Headset Profile (HSP). These legacy communication protocols operate at lower bandwidths with strict latency controls. If your hardware encounters brief driver conflicts or poor cellular signal handshakes, the operating system drops the peripheral link completely.

Conclusion

If your Bluetooth keeps disconnecting, the cause is usually something you can identify and fix. Distance, wireless interference, low battery levels, pairing conflicts, and outdated software are among the most common reasons.

Start with the basics. Move your devices closer together and charge both batteries. Then remove unnecessary pairings and restart the host device.

Next, reduce 2.4 GHz interference where possible. Move compatible Wi-Fi devices to 5 GHz and keep Bluetooth accessories away from routers and other wireless equipment.

Check for operating system, driver, and firmware updates as well. If you experience audio stuttering, testing a different Bluetooth codec may improve stability on supported devices.

Use a network or Bluetooth reset only when simpler fixes fail. Remember that resets can remove saved Wi-Fi networks and Bluetooth pairings.

By working through these solutions systematically, you can identify why your Bluetooth keeps disconnecting. In most cases, a few configuration changes can restore a stable connection without replacing your hardware.

By working through these solutions systematically, you can identify why your Bluetooth keeps disconnecting. In most cases, a few configuration changes can restore a stable connection without replacing your hardware. If you’re considering switching away from wireless audio, Why Is Gen Z Using Wired Headphones? The Retro Trend offers a look at the growing preference for wired headphones.

Why Is My Internet Fast but Downloads Are Slow?

Why Is My Internet Fast but Downloads Are Slow?

Few internet problems feel more frustrating than paying for fast broadband and watching a download crawl. A speed test may show excellent performance, yet a game update or large video file can take hours. If you’re wondering, “Why is my internet fast but downloads are slow?”, the answer usually involves more than your advertised internet speed.

According to networking benchmarks published by the Federal Communications Commission, advertised broadband tiers reflect maximum capacity under optimal circumstances rather than guaranteed individual server transfers.

Your broadband plan describes the connection capacity between your home and your internet service provider. It does not guarantee a specific download speed from every website or server. Remote servers may limit transfer rates, especially during busy periods. Your router, Wi-Fi signal, device, storage drive, and background applications can also affect performance.

Another common source of confusion is Mbps versus MBps. Internet plans use megabits per second, while many download tools use megabytes per second. Since one byte equals eight bits, an 80 Mbps connection has a theoretical maximum of 10 MBps.

Why Is My Internet Fast but Downloads Are Slow?

When a speed test looks excellent but downloads remain slow, you may wonder, “Why is my internet fast but downloads are slow?” The problem may sit outside your broadband connection. The remote server hosting the file can limit how quickly data reaches your device. Some websites also use busy servers or content delivery networks that affect download performance.

Your own network can create another bottleneck. Cloud backups, software updates, streaming services, and connected devices may consume bandwidth without obvious warnings. A weak Wi-Fi signal can also reduce throughput, even when your internet plan is fast.

It is also important to understand the difference between Mbps and MBps. An 80 Mbps connection theoretically provides up to 10 MBps. Real-world speeds are usually lower because of network overhead and other limitations.

Try downloading the same file from another trusted source. If other downloads are fast, the original server may be the bottleneck. If every download is slow, investigate your Wi-Fi, router, device, or ISP connection.

Server Throttling and Hardware Limitations

A fast internet plan cannot overcome a slow remote server. Websites and download platforms may limit individual connections to manage server capacity. Heavy traffic can also reduce available bandwidth, especially when many users request the same large files.

Your home hardware can create similar limitations. Older routers may struggle with high-throughput connections when many devices connect simultaneously. You can also learn more about what your Wi-Fi router can do to improve performance and manage your home network. Wi-Fi performance can also fall because of distance, walls, interference, or congestion on nearby wireless channels.

Your computer can become a bottleneck too. An older storage drive may struggle while receiving and writing large amounts of data. Heavy CPU usage, security scans, or other demanding processes can also affect download performance.

If you are asking why your internet is fast but downloads are slow, check the entire connection path before upgrading your plan:

  • Test the download over Ethernet.
  • Close bandwidth-heavy applications.
  • Restart your router and device.
  • Try another download server.
  • Check whether your storage drive is busy.

These simple checks can help identify the source of the slowdown.

Is 40 Mbps very slow?

40 Mbps internet connection is not very slow for basic household use. It provides a theoretical maximum of about 5 MBps, although actual download speeds are usually lower. For one or two users, this speed can comfortably handle web browsing, email, video calls, music streaming, and everyday online activities.

The main limitation appears when several demanding activities happen simultaneously. Video streaming, large downloads, cloud backups, and gaming updates can quickly consume available bandwidth. A large game can therefore take several hours to download at 40 Mbps.

For example, a 100 GB download would require roughly 5.6 hours under ideal conditions at a sustained 40 Mbps. Real-world performance may take longer because of server limits and network overhead.

Forty Mbps can work well for:

  • Individuals and couples with moderate usage.
  • Web browsing and remote work.
  • HD video streaming.
  • Music and cloud applications.
  • Several lightweight connected devices.

However, larger households may benefit from a faster plan. The right speed depends on simultaneous usage, not simply the number of connected devices.

Ideal Use Cases for 40 Mbps Plans

A 40 Mbps plan can suit individuals, couples, and small households with moderate internet needs. It provides enough bandwidth for everyday browsing, music streaming, video calls, cloud documents, and standard entertainment. Several devices can remain connected without automatically creating a problem.

The biggest challenge is simultaneous heavy usage. A large game download can consume much of the available bandwidth while another person streams video or joins a video conference. Users may then notice slower downloads or increased latency.

Forty Mbps is particularly practical when most household activities are relatively light. It can support:

  • Remote work and online meetings.
  • Web browsing and social media.
  • Music and video streaming.
  • Smart home devices.
  • Regular file transfers.

Heavy downloaders may prefer a faster connection. Competitive gamers should also consider latency, packet loss, and server quality rather than bandwidth alone. A faster plan does not automatically reduce gaming ping.

If you are wondering why your internet is fast but downloads are slow on a 40 Mbps connection, test downloads through Ethernet. Also check background applications and compare different download sources.

Is 20 Mbps a slow download speed?

20 Mbps connection is relatively modest by current broadband standards, but it can still handle basic internet activities. It provides a theoretical maximum of about 2.5 MBps. Actual download speeds depend on the server, network conditions, and your equipment.

For a single user, 20 Mbps can support web browsing, email, social media, video calls, and some video streaming. Problems become more noticeable when several demanding activities run together. Multiple streams, large downloads, cloud backups, and software updates can quickly consume available bandwidth.

A 20 Mbps connection may therefore feel slow when several people share it. Downloading a large game or operating-system update can also take many hours.

To get better performance from a 20 Mbps plan:

  • Use Ethernet for important downloads.
  • Pause unnecessary cloud backups.
  • Limit simultaneous high-bandwidth activities.
  • Schedule large updates for quieter periods.
  • Disconnect devices that are not being used.

For a single light user, 20 Mbps can remain practical. For a busy family, however, a faster connection provides more useful headroom.

Managing Constraints on a 20 Mbps Connection

Managing bandwidth becomes important when your connection provides only 20 Mbps. Because available capacity is limited, several simultaneous activities can quickly cause congestion. This may lead to slower downloads, buffering, or higher latency during busy periods.

Start by identifying which devices use the most bandwidth. Video streaming, cloud synchronization, game downloads, and automatic software updates can consume substantial capacity. Pause non-essential transfers when you need stable performance for work or calls.

Using an Ethernet connection can also improve consistency. Ethernet avoids many interference and signal-strength problems associated with Wi-Fi. It cannot increase your plan’s maximum speed, but it can help your device use the available connection more reliably.

If you are asking why your internet is fast but downloads are slow, check whether another device is consuming bandwidth. Other useful steps include:

  • Schedule large downloads overnight.
  • Stop unnecessary cloud synchronization.
  • Reduce simultaneous streaming.
  • Keep your router firmware updated.
  • Monitor connected devices regularly.

These changes can make 20 Mbps feel more responsive. If several household members regularly perform demanding tasks, upgrading your plan may be more practical.

Is 30 Mbps fast or slow internet?

30 Mbps connection sits between basic and moderate broadband speeds. It provides a theoretical maximum of about 3.75 MBps. For one or two users, that can be enough for browsing, video calls, social media, music, and regular streaming.

The experience changes when several high-bandwidth activities happen at once. A large game update can use much of the available capacity. Someone else streaming video or backing up files may then notice reduced performance.

Large downloads will also take time. Under ideal conditions, a 100 GB file would take around 7.4 hours at 30 Mbps. Real-world downloads can take longer because servers may limit speeds and network overhead reduces usable throughput.

A 30 Mbps connection generally works well for:

  • Basic home browsing.
  • Remote work and video meetings.
  • HD entertainment.
  • Music streaming.
  • Light smart-home usage.

It is less suitable for households with frequent large downloads or many simultaneous high-bandwidth activities. If you are asking why your internet is fast but downloads are slow despite a good speed-test result, investigate the download server, Wi-Fi, router, and device before assuming the plan is the problem.

Realistic Expectations for 30 Mbps Speeds

A 30 Mbps connection can reliably support many everyday online activities. Browsing, email, video conferencing, music streaming, and HD entertainment should generally work well for a small household.

However, available bandwidth matters when several activities run simultaneously. Suppose one person downloads a large game while another streams video. A third person may then experience slower browsing or increased latency.

Peak-hour congestion can also affect performance. Your ISP may experience heavier network demand, while the remote server may have its own capacity limits. This means a speed test and an individual download can produce very different results.

If you are trying to understand why your internet is fast but downloads are slow, consider these practical steps:

  • Connect important devices through Ethernet.
  • Pause large downloads during video calls.
  • Limit unnecessary background synchronization.
  • Check which devices consume the most bandwidth.
  • Compare downloads from different servers.

Thirty Mbps is neither universally fast nor slow. It depends on household size and usage patterns. Households that regularly transfer large files may benefit from a faster plan.

Is 100 Mbps too slow?

100 Mbps connection is not too slow for most households. It provides a theoretical maximum of 12.5 MBps. That is enough bandwidth for several common activities to run simultaneously under normal conditions.

A household can stream video, browse the web, attend video meetings, use cloud services, and download files without constantly competing for bandwidth. Large downloads will still take time, however. A 100 GB file would take roughly 2.2 hours under ideal conditions at a sustained 100 Mbps.

Actual download performance may be lower. Remote servers can impose speed limits, while Wi-Fi, router performance, network congestion, and device hardware can reduce throughput.

A 100 Mbps plan is particularly suitable for:

  • Families with several connected devices.
  • Remote workers and students.
  • Multiple simultaneous video streams.
  • Regular gaming and large updates.
  • Cloud storage and everyday file transfers.

Users who frequently transfer enormous media files may benefit from faster service. Even then, server speed and upload capacity can matter more than the advertised download tier.

Why 100 Mbps Satisfies Most Homes

A 100 Mbps connection offers a useful balance between performance and capacity for many modern households. It provides substantially more headroom than 20, 30, or 40 Mbps plans when several devices operate simultaneously.

That extra capacity helps prevent one activity from dominating the connection. For example, a large download is less likely to interfere with ordinary browsing or a video call when the network has sufficient spare bandwidth.

However, 100 Mbps does not guarantee 100 Mbps downloads from every website. The remote server must also provide enough bandwidth. Your router, Wi-Fi setup, Ethernet adapter, and computer can create additional limits. If your wireless equipment is older, comparing Wi-Fi 6 and Wi-Fi 7 can also help you decide whether an upgrade is worthwhile.

If you are still wondering why your internet is fast but downloads are slow, check the complete connection path before buying a faster plan. To make the most of 100 Mbps:

  • Use a modern router that supports your broadband speed.
  • Prefer Ethernet for large transfers.
  • Position your Wi-Fi router centrally.
  • Reduce unnecessary background traffic.
  • Keep network equipment updated.

For most everyday households, 100 Mbps provides comfortable bandwidth. Persistent slow downloads usually require troubleshooting rather than an immediate plan upgrade.

Frequently Asked Questions

What is the difference between Mbps and MBps?

Internet service providers advertise network bandwidth in Megabits per second (Mbps), whereas file transfer managers and operating systems measure downloaded data in Megabytes per second (MBps). Because there are eight bits in every byte, you must divide your advertised Mbps rating by eight to calculate your actual maximum download speed. A 100 Mbps broadband tier therefore delivers a theoretical peak transfer speed of 12.5 MBps under optimal conditions.

Can a slow hard drive cause slow download speeds?

Yes, your local storage drive can act as a direct hardware bottleneck during downloads. When you download files, your computer receives packets across the network and writes that information onto your internal storage. If you use an older mechanical hard disk drive (HDD) or a drive executing heavy background read-write tasks, the drive cannot commit data fast enough. The downloader intentionally throttles data intake to prevent data corruption.

Why does Wi-Fi make my downloads slower than Ethernet?

Wi-Fi connections rely on radio frequencies that are inherently vulnerable to physical obstruction, radio interference, and signal degradation over distance. Solid walls, nearby electronic devices, and competing network channels add packet loss and latency. An Ethernet cable provides an insulated, physical pathway directly to your router, eliminating external interference and providing significantly faster, more consistent throughput for hefty digital downloads.

Does a VPN slow down my download speed?

Yes, using a Virtual Private Network (VPN) almost always reduces your download speeds to some degree. If you are unfamiliar with how this technology works, what a VPN is and why you need one provides useful background. A VPN routes all inbound and outbound web traffic through an encrypted tunnel to a remote proxy server before reaching your computer. The cryptographic overhead, combined with the extra physical distance your data travels through intermediary servers, naturally adds latency and reduces your maximum available transfer rates.

Conclusion

Slow downloads can be frustrating, especially when your internet speed test reports excellent performance. If you keep asking, “Why is my internet fast but downloads are slow?”, remember that your broadband plan is only one part of the equation.

The remote server, Wi-Fi connection, router, storage drive, background applications, and VPN can all affect download performance. Unit confusion can also create unrealistic expectations. For example, 100 Mbps equals a theoretical maximum of 12.5 MBps, not 100 MBps.

Different broadband tiers also suit different usage patterns. A 20 Mbps plan can work for light individual use. Thirty or 40 Mbps offers more flexibility for small households. A 100 Mbps connection provides substantially more headroom for families and multiple simultaneous activities.

Before upgrading your plan, troubleshoot the existing setup. Try Ethernet, pause background transfers, restart your router, and test another download source. These simple checks can reveal the real bottleneck and help you get the performance your connection can actually provide. If you use a VPN, also consider the disadvantages of using a VPN, as it can affect download performance.

What’s the Minimum Size a QR Code Can Be and Still Work?

What’s the Minimum Size a QR Code Can Be and Still Work?

Printing a matrix barcode on compact packaging, business cards, or event wristbands often raises one critical question: what is the minimum size a QR code can be before it stops working reliably? A code that looks neat but fails to scan can frustrate users and waste valuable print space.

QR codes rely on precise module patterns, sufficient contrast, and a clear quiet zone around the symbol. The technical requirements are defined by QR Code specifications and standards. When you shrink a code too far, its individual modules become difficult for smartphone cameras to distinguish.

This guide explains practical QR code size limits for everyday use. It covers minimum dimensions, scanning distance, data density, error correction, print quality, and common design mistakes. It also explains why a code that works in testing may fail in real-world conditions.

For most printed materials, the goal should not be the smallest possible code. Instead, choose the smallest reliable size for your specific use case.

How small can you make a QR code and it still work?

A QR code can sometimes work at around 1 × 1 centimeter (0.4 × 0.4 inches) under controlled conditions. However, this is better treated as a lower practical limit than a universal guarantee. Scan reliability depends on the code version, data density, printing method, camera quality, lighting, and scanning distance.

A small QR code works best when it contains limited data. A short URL creates fewer modules than a long URL or detailed text. Larger modules remain easier for smartphone cameras to distinguish, which is part of understanding mobile apps and how their data is encoded.

For compact designs, follow these practices:

  • Use a short URL whenever possible.
  • Print from a sharp vector or high-resolution source.
  • Maintain strong contrast between the code and background.
  • Keep the required quiet zone clear.
  • Test the printed code on multiple smartphones.

For general consumer applications, a larger size provides more tolerance for printing imperfections, glare, movement, and poor lighting. A 2 × 2 centimeter code is often a safer practical starting point for printed materials.

Keep Data Density Minimal

Data density directly affects the physical size required for a reliable QR code. A QR code does not simply scale its appearance when you add more information. More encoded data can require a larger QR version, which contains more rows and columns of modules.

For example, a short URL can produce a relatively simple matrix. A long URL, contact card, or large block of text may create a much denser pattern. If both codes occupy the same physical area, the denser code has smaller individual modules. Those modules become harder for cameras to resolve.

If space is limited, reduce the amount of encoded data where practical. A short, clean URL is usually preferable to embedding unnecessary text directly in the QR code.

You can also use a short branded domain or URL redirection service. This keeps the QR pattern simpler while allowing the destination to change later.

However, shortening the data does not eliminate other size requirements. You must still preserve contrast, print quality, quiet-zone spacing, and sufficient size for the intended scanning distance.

What is the smallest size for a QR code?

The theoretical minimum QR Code symbol is based on its module structure, not simply its physical dimensions. A Version 1 QR Code contains 21 × 21 modules, plus the required quiet zone. Its physical size can therefore vary depending on how large each module is printed.

In controlled environments, specialized equipment can read extremely small symbols. Industrial marking systems may use methods such as laser etching and high-resolution imaging. These applications are different from consumer scanning with ordinary smartphones.

For everyday public use, there is no single universal minimum size that guarantees every phone will scan successfully. A 1 × 1 centimeter code may work in favorable conditions, but it provides little tolerance for errors.

For printed business materials, packaging, posters, and similar applications, 2 × 2 centimeters (0.8 × 0.8 inches) is a more conservative starting point. Larger codes become increasingly useful when users scan from farther away or under inconsistent lighting.

High-Resolution Printing Is Non-Negotiable

Print quality becomes increasingly important as a QR code gets smaller. Fine module boundaries can disappear when a low-resolution image is enlarged, compressed, or reproduced using an unsuitable printing process.

For professional print work, create the QR code as a vector graphic whenever possible. Formats such as SVG, EPS, or print-ready PDF can preserve sharp module edges during production. If you must use a raster image, use a sufficiently high-resolution source and avoid repeated resizing.

A common print target is 300 DPI or higher, although the appropriate resolution depends on the printing process and physical QR code size. Higher resolution alone cannot fix a code that is too small or poorly designed.

Also consider the material. Absorbent paper can allow ink to spread slightly, while glossy surfaces can create reflections. Curved packaging may distort the symbol from certain viewing angles.

Before approving a large print run, test an actual physical sample. Scan it using several smartphones under realistic lighting and viewing conditions.

Does a QR code need to be a certain size to work?

Yes. A QR code needs sufficient physical size for the camera to resolve its individual modules. However, the required size depends heavily on scanning distance.

A useful practical guideline is the 10:1 scanning ratio. Under this rule, a QR code viewed from approximately 20 inches away would be around 2 inches wide. This is a guideline rather than a strict technical requirement, because camera resolution, focus, module size, lighting, and code density also affect performance.

For close-range materials such as business cards, a smaller code may work well. Signs, posters, displays, and product labels often need larger codes because users naturally scan them from farther away.

Before choosing a final dimension, consider:

  • How far users will stand from the code.
  • How much data the code contains.
  • Whether the surface is flat or curved.
  • The expected lighting conditions.
  • The likely quality of users’ smartphone cameras.

Designing around the actual scanning environment is more reliable than choosing one universal size.

Always Preserve the Quiet Zone

The quiet zone is the blank space surrounding a QR code. It helps scanning software distinguish the functional symbol from nearby text, graphics, borders, and other visual elements.

QR Code specifications call for a quiet zone of four modules on each side of the symbol. This space should remain clear and should not contain logos, text, decorative patterns, or colored backgrounds that reduce separation.

The quiet zone becomes especially important when you use a small QR code. At compact dimensions, surrounding graphics can interfere with the camera’s ability to identify the symbol’s boundaries.

Do not treat the quiet zone as optional design space. Removing it can reduce scan reliability even when the QR pattern itself remains sharp.

When placing a QR code on packaging or marketing material, leave visible white or otherwise clean space around all four edges. Avoid placing it directly against a border or photograph.

If a design requires a frame, ensure the frame sits outside the required quiet zone. Test the finished design at its actual printed size before production. A code that scans perfectly on a computer screen may behave differently once printed, resized, or surrounded by other design elements.

Can a small QR code be scanned?

Yes, small QR codes can be scanned successfully when their modules remain clear and the scanning conditions are favorable. Modern smartphones use autofocus, image processing, and QR recognition software to identify relatively small symbols.

However, smaller does not always mean better. Scan performance can decline when the code has weak contrast, excessive visual noise, poor printing, glare, or insufficient focus. Pale gray on white, for example, provides less contrast than dark modules on a light background.

For reliable results, use a strong contrast ratio between the QR modules and background. Traditional black-on-white designs remain one of the safest choices.

Users also need enough space to position their phones comfortably. If they must hold the device at an awkward angle or move extremely close to the code, scanning becomes less convenient.

Small QR codes are therefore most suitable for short-range applications. For posters, signs, menus, and displays viewed from several feet away, use a larger code. Always test the finished physical version rather than relying only on an on-screen preview.

Choose Lower Error Correction Levels

QR Codes support four error correction levels: L, M, Q, and H. These provide approximately 7%, 15%, 25%, and 30% recovery capacity, respectively.

Higher error correction can help a QR code survive damage, dirt, or partial obstruction. However, it also requires additional data modules. That can make the overall matrix denser and increase the physical size needed for reliable scanning.

If you are creating a very small QR code for a clean, controlled environment, Level L may be appropriate. It uses the least redundancy and can help keep the pattern less dense.

That does not mean Level L is always the best choice. Packaging, outdoor signs, industrial labels, and frequently handled materials may benefit from higher error correction.

Choose the lowest level that still suits the expected conditions. Do not reduce error correction simply to make an already unsuitable QR code smaller.

Most importantly, test the final code at its actual physical dimensions. A small code with Level L may work well on a clean business card but fail on a scratched product label. Reliability should always take priority over saving a few millimeters of space.

How small is too small for QR code?

There is no single physical dimension that makes every QR code unreadable. The minimum size a QR code can be depends on module size, data density, print quality, scanning distance, camera capabilities, and environmental conditions.

A code around 1 × 1 centimeter can work in favorable conditions, but it offers little tolerance for imperfections. Below that size, reliable consumer scanning becomes increasingly difficult, especially when the code contains substantial data.

A better approach is to treat extremely small dimensions as specialized rather than standard. If the code is intended for everyday smartphone users, prioritize a size that provides a comfortable scanning experience.

You should also consider the distance between the camera and the printed symbol. A tiny code may work at close range but become difficult to scan from across a room.

Before reducing the dimensions, check the complete design. Confirm that the modules remain sharp, the quiet zone is intact, and the contrast is strong. Then test the physical result with multiple phones.

Rather than chasing an absolute minimum, choose the smallest practical size that remains consistently scannable in the conditions your audience will encounter.

Watch for Camera Focal Failures

Camera focus is another important limitation when QR codes become very small. Smartphone cameras need enough distance to focus clearly on the printed symbol. If users move extremely close to fill the camera frame, the lens may struggle to focus.

Minimum focusing distance varies between smartphone models. Some modern devices can focus quite close, while others need more working distance. Because of this variation, a fixed distance such as 8 or 10 centimeters should not be treated as a universal limit.

The better strategy is to make the QR code large enough that users can scan it comfortably from a reasonable distance. The code should occupy enough of the camera view without forcing users to press their phone close to the surface.

Focus problems are more likely when the code is tiny, the lighting is poor, or the camera struggles with movement.

During testing, observe how easily users can acquire the code. If they repeatedly move closer, reposition the phone, or wait for autofocus, the QR code may be too small for the application.

Convenience matters. A technically scannable code can still provide a poor user experience if it requires awkward positioning.

Frequently Asked Questions

What happens if you print a QR code too small?

When you print a QR code too small, smartphone cameras may struggle to distinguish its individual modules. The minimum size a QR code can be depends on factors such as print quality, data density, contrast, and scanning distance.

If the modules blur together, scanning software may fail to identify the finder patterns and calculate the correct grid. Ink spread, low-resolution printing, and poor lighting can make the problem worse.

A QR code that looks sharp on screen may also lose clarity after printing. If you are approaching the minimum size a QR code can be, always test the physical version.

Increasing the code size, improving contrast, or reducing encoded data can improve scanning reliability.

Does the amount of data affect how small a QR code can be?

Yes. The amount of information stored in a QR code can affect the minimum size a QR code can be. A short URL usually creates a simpler matrix than a long URL, contact card, or large text string.

More data can require more modules within the QR code. When those modules are packed into a small area, each individual square becomes smaller and harder for smartphone cameras to resolve.

If you have limited space, consider using a short URL. This can reduce matrix density and make a smaller code easier to scan.

However, data density is not the only factor. Print quality, contrast, scanning distance, and the quiet zone also affect the minimum size a QR code can be for reliable everyday use.

What is the recommended size for business cards?

For standard business cards, a QR code between 2 × 2 centimeters (0.8 × 0.8 inches) and 2.5 × 2.5 centimeters (1 × 1 inch) is a practical range.

The minimum size a QR code can be depends on the amount of data, printing quality, and how users will scan it. A simple code containing a short URL may work at the smaller end of this range.

Keep the required quiet zone clear around all four sides. Avoid placing text, logos, or decorative elements too close to the code.

Use strong contrast and a sharp, high-quality source file. Before printing in bulk, test the physical business card with several smartphones.

If you want to use the minimum size a QR code can be, physical testing is essential for reliable results.

Can colored QR codes be printed smaller than black-and-white ones?

Generally, colored QR codes should not be assumed to work at smaller sizes than black-and-white designs. The minimum size a QR code can be depends partly on the contrast between the QR modules and their background.

Black modules on a bright white background provide strong contrast. This gives smartphone cameras a clearer distinction between the different areas of the code.

Colored QR codes can still work well when designed carefully. Choose dark colors against light backgrounds, and avoid gradients, transparency, or busy images behind the symbol.

If you are testing the minimum size a QR code can be, check the finished printed design rather than relying only on a screen preview.

For very small applications, black-and-white remains the safer choice. Strong contrast provides more tolerance when lighting, printing, or camera conditions are less than ideal.

Conclusion

Determining the right QR code dimensions requires a balance between design requirements and optical performance. There is no single universal minimum size that guarantees scanning on every smartphone and in every environment.

A QR code around 1 × 1 centimeter may work under favorable conditions, especially when it contains limited data and has excellent print quality. However, 2 × 2 centimeters is a more conservative starting point for many consumer-facing printed materials.

Always consider the factors that affect scan reliability:

  • Data density: Shorter data can produce simpler QR patterns.
  • Scanning distance: Codes viewed from farther away generally need to be larger.
  • Print quality: Sharp module edges improve recognition.
  • Contrast: Strong dark-on-light designs provide greater tolerance.
  • Quiet zone: Keep four modules of clear space around the symbol.
  • Surface: Avoid excessive glare, distortion, and texture.
  • Testing: Check the finished physical code on several smartphones.

Before a commercial print run, test actual samples in realistic conditions. A QR code should scan quickly without requiring precise positioning.

The goal is not to create the smallest possible QR code. It is to create the smallest reliable QR code that gives every intended user a smooth experience.

If you want to understand how smartphone environments can be tested on a computer, you can also explore how mobile emulators work on desktop computers. This can provide useful context when evaluating mobile-based experiences and testing how digital content behaves across different devices.

Why Did Tech Companies Stop Using Removable Batteries?

Why Did Tech Companies Stop Using Removable Batteries?

Removable batteries were once a standard feature in mobile phones, making it easy to replace a dead battery in seconds. Remember when you could remove your phone’s back cover and swap in a fresh battery? That simple design made long trips and busy workdays much easier.

Today, most flagship smartphones and many thin laptops use sealed battery designs. This shift was not caused by one decision. It followed changes in industrial design, consumer expectations, and hardware engineering.

Manufacturers moved away from removable batteries to improve water resistance, reduce device thickness, and use internal space more efficiently. Modern phones also need room for larger camera systems, wireless charging coils, speakers, antennas, cooling hardware, and bigger battery cells.

Sealed construction also makes it easier to create consistent dust and water protection. IP ratings, defined under IEC 60529, measure this protection. They do not require a sealed battery design, but sealed construction can make those designs easier to engineer.

This guide explains why removable batteries disappeared, what EU rules could change in 2027, and how to protect your battery today.

Why did phone companies get rid of removable batteries?

Phone companies largely abandoned removable batteries because modern smartphones demanded better water resistance, thinner designs, and more internal space. A user-swappable battery usually needs a removable rear panel and additional mechanical components.

Those parts take up space and add potential points for dust or moisture to enter. Modern phones instead use tightly fitted frames, adhesives, seals, and internal brackets.

Removing the battery door also gives engineers greater freedom when arranging internal components. That space can support larger camera sensors, wireless charging coils, speakers, haptic motors, and cooling systems.

Battery design has changed as well. Manufacturers can fit larger custom-shaped lithium-ion or lithium-polymer packs into available space. These packs do not need to follow the standard shapes once common with removable batteries.

Consumers also began expecting premium materials such as glass and aluminum. Those materials pair naturally with sealed construction and help manufacturers create thinner, more rigid devices.

The result is a tradeoff: better integration and durability, but less user access.

The Tradeoff for IP68 Water and Dust Resistance

Removable batteries made water resistance more difficult, although they did not make it impossible. A removable back cover needs seals, clips, or gaskets that must maintain their fit over time.

Every opening also creates another potential entry point for moisture and dust. Manufacturers therefore gained an engineering advantage by using permanently assembled frames and carefully controlled seals.

This approach can support high IP ratings, including IP68 on some smartphones. However, an IP68 rating does not mean a phone is permanently waterproof. Protection depends on the specific device, test conditions, and condition of its seals.

Sealed construction also helps manufacturers control the tolerances between the display, frame, rear panel, and internal components. That consistency can simplify assembly and improve resistance to everyday exposure.

Still, water resistance is only one reason removable batteries disappeared. Space efficiency, aesthetics, structural design, wireless charging, and larger battery capacities also played important roles.

The tradeoff is clear. Consumers gained slimmer, better-protected devices but lost the convenience of carrying spare removable batteries.

Will phones in 2027 have replaceable batteries?

Many portable electronic products sold in the European Union will face stronger battery-replacement requirements from February 18, 2027. Covered portable batteries will generally need to be readily removable and replaceable by the end user during the product’s lifetime.

That does not necessarily mean phones will return to old-style snap-off battery covers. The rules focus on practical removability and replacement rather than recreating older phone designs.

The regulation requires batteries to be removable using commercially available tools. Users should not normally need specialized tools, thermal energy, or solvents to disassemble the product, subject to specific requirements and exemptions.

Manufacturers must also provide instructions and safety information covering battery removal and replacement. Spare batteries must generally remain available for the required period.

There are exemptions for certain products and specific circumstances. Therefore, not every portable electronic device will necessarily follow the exact same requirements.

The important point is that battery repairability is becoming a legal requirement in the EU. Manufacturers will need to rethink how they install batteries in many covered products.

So, replaceable batteries are returning to the regulatory conversation. However, the classic removable-back phone design is not guaranteed to return.

How Brands Are Adapting to New EU Regulations

Manufacturers have several ways to improve battery serviceability without returning to old plastic back covers. One approach is to redesign internal assemblies so users or technicians can access the battery without destructive disassembly.

Pull-tab adhesives are one example already used in some electronics. They can allow a battery to separate from its mounting surface without applying the intense heat sometimes needed with conventional adhesive.

The new rules do not require every manufacturer to use one specific adhesive or removal method. Instead, they establish requirements for readily removable and replaceable batteries.

This gives manufacturers flexibility when developing compliant hardware. They can redesign battery mounts, adhesives, brackets, connectors, and internal layouts.

Safety is another major consideration. Battery removal should not damage the battery or device unnecessarily. This matters because damaged lithium batteries can overheat and create serious fire hazards.

The likely result is not a return to older smartphones with simple plastic backs. Instead, manufacturers may create devices that combine premium external materials with easier battery replacement.

Some designs could use accessible battery tabs, improved mounting systems, or modular internal components. These solutions could make repairs easier while preserving modern phone features.

The future of smartphone repair may therefore focus on better serviceability rather than traditional removable batteries.

Will removable batteries come back?

Removable batteries may return in some form, but the classic pop-out battery is unlikely to become universal again. Modern smartphones have very different hardware requirements from older models.

Today’s devices combine large displays, multiple cameras, wireless charging, advanced antennas, powerful processors, and larger battery packs. Manufacturers need to use internal space efficiently.

That makes a fully enclosed battery compartment less attractive from a design perspective. It also explains why repairability can be improved without recreating the thick plastic backs of older phones.

Brands such as Fairphone have already shown that modular and repairable smartphones can work in the consumer market. Their designs demonstrate that battery replacement does not require sacrificing every modern feature.

The bigger industry trend is therefore likely to be serviceable batteries rather than traditional removable batteries. Devices may use easier-to-remove adhesives, accessible connectors, replaceable modules, and better repair documentation.

External accessories will also remain important. Power banks and magnetic battery packs offer extra runtime without requiring users to carry a spare internal battery.

The future could therefore combine the best parts of both approaches. Phones may remain slim and water-resistant while offering safer and easier battery replacement.

The Rise of High-Speed Charging and Modular Hardware

Fast charging changed how people think about battery replacement. Instead of carrying a spare internal battery, users can often restore a meaningful amount of charge during a short break. For everyday charging, chargers with multiple ports can also make it easier to power several devices from one adapter.

Power banks provide another alternative. They can add hours of runtime without requiring the device to be opened.

Magnetic charging accessories have also made external battery packs easier to use with compatible smartphones. They attach directly to the device and can provide power while the phone remains in use.

These solutions do not make removable batteries unnecessary for everyone. Field workers, travelers, photographers, and emergency users may still value instant battery swaps.

However, mainstream consumers often prioritize convenience, thinness, water resistance, and premium construction. Those preferences helped drive the move toward sealed designs.

Fast charging also reduces the need to carry spare internal batteries for many everyday users. A short charging session can provide enough power to finish a commute, meeting, or workday.

Future hardware may therefore combine both approaches. A phone could remain slim and water-resistant while still allowing safer battery replacement.

That would create a middle ground between traditional removable batteries and today’s highly sealed devices.

What is the 40-80 rule for laptop batteries?

The 40–80 rule for rechargeable batteries is a battery-care habit that recommends keeping a lithium-ion battery roughly between 40% and 80% when practical. It is not a mandatory rule, and you do not need to follow it perfectly.

Lithium-ion batteries generally experience more chemical stress at high charge levels and high temperatures. Battery health and cycle count both provide useful context for understanding how batteries age, but keeping a battery away from extremes can help reduce long-term aging.

However, there is no universal rule saying that charging below 20% is inherently damaging. Modern battery-management systems monitor voltage, temperature, and charging conditions to protect the cells.

Likewise, occasionally charging to 100% is normal. You should do it when you need maximum runtime, especially before travel or long periods away from an outlet.

The most useful habits are simple:

  • Avoid prolonged exposure to high temperatures.
  • Use the manufacturer’s charging and battery-health features.
  • Avoid regularly keeping the battery at 100% for extended periods.
  • Do not deliberately drain the battery to 0% as a routine habit.
  • Use a charge limit when your device provides one.
    For more practical advice, see smartphone mistakes that reduce battery life.

These practices can reduce battery aging, but no charging routine can double battery life for every device.

Managing Battery Health Through Operating System Thresholds

Modern operating systems increasingly include tools that reduce unnecessary battery stress. These features can be more useful than manually watching the battery percentage all day. They are also part of the broader set of ways to improve iPhone battery life in 2026, even though specific settings vary between devices.

Windows Smart Charging can limit charging on supported devices when keeping the battery at 100% could accelerate deterioration. Manufacturers may implement this feature differently across devices.

Some Windows laptops can limit charging to around 80% in certain situations. Users can usually charge to 100% when they need the extra capacity.

Mac laptops also include battery-health features. Optimized Battery Charging can delay charging beyond 80% when the system expects the Mac to remain connected to power.

Some compatible Macs also provide a configurable charge limit. These tools can help reduce the time the battery spends at a high charge level.

These features are useful because they automate battery care. Instead of constantly unplugging your laptop, let the operating system manage charging when possible.

The exact settings vary by manufacturer and model. Always check your device’s battery settings before changing charging behavior.

Using built-in battery management is usually more practical than following a strict percentage target every day. Consistency matters more than perfection when maintaining lithium-ion battery health.

Is a 1% battery drain in 3 minutes normal?

1% battery drop every three minutes equals about 20% per hour. That can happen during demanding smartphone use, but it should not automatically be considered normal.

Screen brightness, cellular reception, camera use, gaming, navigation, video streaming, and high-refresh-rate displays can all increase power consumption. Background synchronization and location services can also contribute.

For example, a phone running a demanding game may lose battery much faster than one displaying a static webpage. Battery age also matters because an older battery may provide less usable capacity than when it was new.

The situation is more concerning when the same drain occurs while the phone is idle. A screen-off device that loses 1% every three minutes deserves investigation.

Check your phone’s battery settings first. Look for apps consuming unusual amounts of power, weak network conditions, excessive background activity, or recent software changes.

Also consider battery health. If the battery is significantly degraded, replacing it may restore much of the device’s original runtime.

There is no single percentage-per-minute figure that defines healthy battery performance. Usage conditions matter more than a simple drain-rate calculation.

Diagnosing Standby Power Drains Versus Active Screen Use

Start by separating active use from standby drain. A phone can consume significant power while the screen is on, especially during gaming, navigation, video recording, or high-resolution streaming.

Standby drain is different. If the screen remains off and the battery still falls rapidly, investigate background activity.

Open your device’s battery or power-management settings. Most modern phones show which apps and services have used the most energy.

Look for unexpected activity from:

  • Location services
  • Cloud synchronization
  • Social media apps
  • Video or music services
  • Poor cellular connections
  • Recently installed applications
  • Background refresh processes

A weak cellular signal can be especially important. The phone may use more power while repeatedly searching for or maintaining a network connection.

Software updates can also temporarily change battery behavior. After a major update, background indexing or synchronization may increase consumption for a short period. If unusual battery drain continues, it is also worth checking what happens if you don’t update apps, since outdated apps can sometimes contribute to performance or battery problems.

If standby drain remains unusually high after basic troubleshooting, restart the device and check for system updates. Persistent problems may indicate an app issue or an aging battery.

The goal is to compare screen-on consumption with idle consumption, rather than judging battery health from one percentage reading.

Frequently Asked Questions

Can I replace a sealed phone battery myself at home?

Yes, you can replace a sealed battery at home, but it requires patience, safety gear, and specialized tools. Modern phones use heavy industrial adhesives that require controlled heat guns or isopropyl alcohol to loosen safely. Puncturing a soft lithium pouch during removal can cause chemical fires. If you lack experience with delicate ribbon cables, hire a certified technician or use an official manufacturer self-repair program.

Why do modern phone batteries degrade after two years?

Lithium-ion cells degrade naturally due to chemical wear from routine charge-discharge cycles. Each full cycle causes microscopic physical cracking within internal electrodes, reducing energy retention capacity. Fast charging speeds and ambient thermal heat accelerate this loss over time. Most consumer phone batteries are chemically rated for 500 to 800 full cycles before their original capacity drops below 80%.

Does fast charging damage a non-removable battery?

Fast charging generates extra ambient heat, which is the primary driver of chemical degradation in mobile lithium cells. However, modern smartphone motherboards include integrated thermal sensors and smart charge controllers. These safety chips throttle incoming wattages as the battery fills up or temperatures rise. Using an official, manufacturer-certified power adapter keeps charging safe and prevents dangerous thermal runaway.

What is the best way to store a device you don’t use?

Store idle mobile devices and laptops in a cool, dry environment with the battery charged to roughly 50%. Leaving a stored lithium battery sitting completely empty causes it to drop into a permanent deep-discharge state, rendering it unchargeable. Storing it fully charged at 100% accelerates internal capacity loss over time. Check and recharge idle equipment back to 50% every six months.

Conclusion

The disappearance of removable batteries was driven by several changes in modern electronics. Manufacturers wanted thinner devices, better water resistance, efficient internal layouts, and premium materials.

Sealed designs helped engineers integrate larger batteries, complex cameras, wireless charging systems, speakers, antennas, and other components. Consumers also became accustomed to slimmer devices with fewer external openings.

The tradeoff was clear. Users lost the ability to swap a depleted battery in seconds, while manufacturers gained more freedom over industrial design.

That balance may now begin to change. New European battery rules are pushing manufacturers toward easier battery removal and replacement for covered portable products from February 18, 2027.

The future is unlikely to look exactly like the past. Instead of snap-off covers, manufacturers may develop easier and safer battery-replacement systems.

The result could be a new generation of devices that combine premium construction with better repairability.

Until then, good battery care still matters. Avoid excessive heat, use built-in charging limits when available, and monitor unusual power consumption.

A well-maintained battery can help your modern device remain useful for longer.

Do Headphone Splitters Hurt Audio Quality?

Do Headphone Splitters Hurt Audio Quality?

Sharing a playlist or watching a movie with a friend often requires an audio splitter. However, many listeners wonder, do headphone splitters hurt audio quality when they share one output? The short answer is: sometimes, but not always.

A passive splitter connects two headphone loads to one audio output. This changes the electrical load that the source must drive. The result depends on headphone impedance, source power, cable quality, and splitter construction. High-fidelity audio requires consistent voltage and low interference, as documented by the Audio Engineering Society. When you route an analog audio stream into two paths, you change how that signal behaves.

With suitable equipment, a basic splitter can work without noticeable sound degradation. Problems become more likely when two headphones create a difficult load. You may then notice lower volume, distortion, or channel imbalance.

An active headphone amplifier can provide a better solution for demanding headphones. It gives each output a stronger and more controlled signal.

This guide explains how headphone splitters affect audio quality. It also covers 3.5mm adapters, RCA cables, aux splitters, impedance, crosstalk, and active amplifiers.

What are the disadvantages of audio splitters?

Passive audio splitters can create several electrical challenges. If you wonder, do headphone splitters hurt audio quality, the answer depends largely on the source and connected headphones. The biggest issue is the additional load placed on the source device.

Two headphones connected in parallel can reduce the overall impedance seen by the headphone amplifier. A lower impedance load may require more current. Some smartphones, laptops, and portable players can handle this easily. Others may produce lower volume or more distortion.

The effect also depends on the headphones themselves. Two similar low-impedance headphones may work well together. Mixing headphones with very different electrical characteristics can produce less predictable results.

Cheap splitters can introduce physical problems too. Poor connectors may cause crackling, intermittent sound, or channel dropouts. Weak shielding can also increase susceptibility to electrical noise.

Common disadvantages include:

  • Lower available volume from a limited headphone output.
  • Higher distortion when the source struggles with the load.
  • Channel imbalance from poor connections or mismatched equipment.
  • Crosstalk or noise from poorly designed cables and connectors.

For casual listening, these problems are often minor. A quality splitter should work well when the source can comfortably drive both headphones.

Signal Loss and Impedance Drops

Connecting two headphones to one output places their impedances in parallel. If both headphones have the same impedance, the combined load is roughly half the impedance of either pair alone.

For example, two 32-ohm headphones create an approximately 16-ohm load. That can demand substantially more current from the source. Whether this causes audible problems depends on the source amplifier and its output capability.

A strong headphone amplifier may handle the lower load without difficulty. A weaker portable device may reach its current limit sooner. This can reduce maximum volume or increase distortion.

It is important to avoid assuming that a splitter automatically causes a fixed volume loss. A passive splitter does not inherently reduce voltage by half. The actual change depends on the source output impedance and connected headphone loads.

If the source cannot comfortably drive both headphones, demanding passages may sound compressed or distorted. Bass performance can also suffer when the amplifier lacks sufficient control.

For demanding headphones, an active headphone amplifier is usually the safer choice. It provides greater current capability and better control over each output.

Do headphone jack adapters affect sound quality?

Basic headphone jack adapters usually have little effect on sound quality. A passive adapter simply changes the physical connector format. It does not normally process or alter the audio signal.

For example, a suitable 6.35mm-to-3.5mm adapter can connect compatible headphones to different output sizes. The adapter itself should not noticeably change frequency response when its contacts are clean and properly connected. If you are also comparing different connection types, wired vs wireless audio can help clarify the broader differences between the two approaches.

However, build quality still matters for reliability. Poorly manufactured adapters can create intermittent connections, crackling, or channel loss. Damaged contacts can also increase resistance or cause unstable connections.

Connector material is less important than many marketing claims suggest. Gold plating can help resist corrosion, but it does not automatically improve sound quality. Proper contact pressure, construction, and compatibility matter more.

A good adapter should provide:

  • Secure electrical contact
  • Correct TRS or TRRS wiring
  • Durable mechanical construction
  • Low contact resistance
  • Good compatibility with the connected equipment

If an adapter causes audible buzzing or dropouts, replacing it can solve the problem. Under normal conditions, however, a correctly wired passive adapter should not noticeably color the sound.

How Dirt and Corrosion Degrade Jack Adapters

Dirt, oxidation, and pocket lint can interfere with headphone connections. These contaminants can prevent the plug from making consistent electrical contact with the jack.

A poor connection may produce crackling when the plug moves. It can also cause one channel to become intermittent or disappear completely. In some cases, the connection may create audible noise or distortion.

These problems are different from normal signal degradation. A clean, properly functioning connector does not normally reduce audio quality simply because it is an adapter.

Regular maintenance can help prevent connection problems. Keep headphone plugs clean and avoid storing exposed connectors in dusty environments. If a jack becomes dirty, use an appropriate electronics-safe cleaning method.

Avoid applying unsuitable household chemicals or excessive liquid. Some cleaners can damage plastics, coatings, or electronic components.

Gold-plated contacts can provide useful corrosion resistance. However, they do not guarantee better sound.

If you hear crackling or channel loss, check the physical connection first. Test the headphones directly with the source. Then test the adapter separately. This helps identify whether the adapter, headphone jack, or cable is responsible.

Does 3.5 mm to RCA lose quality?

A properly made passive 3.5mm-to-RCA cable does not inherently reduce audio quality. If you wonder, do headphone splitters hurt audio quality, the same principle applies here. A simple connector change does not automatically damage an analog audio signal.

Both connectors can carry the same two-channel analog audio signal. The cable simply routes the left and right channels to separate RCA connectors. The conversion itself does not compress or digitally alter the music.

Audio performance instead depends on the source, receiving equipment, cable construction, connection quality, and cable length. Long unbalanced cable runs can be more vulnerable to electromagnetic interference. Poor shielding can make this problem worse.

Ground-loop issues can also create audible hum between separate powered devices. Cable material is often overstated in consumer audio marketing. A properly designed copper cable with suitable shielding can provide excellent results.

For most home setups, focus on:

  • Proper shielding
  • Secure connectors
  • Sensible cable length
  • Correct wiring
  • Compatible audio equipment

Potential problems are more likely when the cable is damaged, unusually long, poorly shielded, or exposed to interference. Therefore, do headphone splitters hurt audio quality is a different question from whether 3.5mm-to-RCA cables reduce fidelity. A properly made cable should remain transparent.

Choosing Shielded Cables for Pure Signal Transfer

Shielding becomes increasingly useful as an unbalanced audio cable gets longer. A shield helps reduce interference from nearby electrical equipment, power cables, and radio-frequency sources.

This matters because 3.5mm and RCA connections are generally unbalanced analog connections. They can be more susceptible to interference than balanced professional connections. However, a short, well-built cable usually performs very well in everyday systems.

You do not need an expensive audiophile cable to maintain good signal quality. If you are comparing cables while asking, do headphone splitters hurt audio quality, remember that cable shielding and splitter design address different issues.

When choosing a 3.5mm-to-RCA cable, look for:

  • Adequate shielding
  • Secure connectors
  • Flexible but durable construction
  • Correct left and right channel wiring
  • A length suitable for your setup

Oxygen-free copper can be used in quality cables, but it does not automatically produce better sound. Connector quality and shielding are generally more relevant to reliability and noise performance.

Avoid unnecessarily long cables when a shorter option works. Keep audio cables away from power adapters and other potential noise sources where practical.

For studio or professional environments, balanced connections can offer better noise rejection over long distances. Good cable design matters more than expensive materials.

Can you split 3.5 mm?

Yes, you can split a 3.5mm audio connection with a passive Y-splitter. These adapters typically duplicate the stereo signal so two pairs of headphones can receive it.

A passive splitter requires no battery or external power. It is convenient for casual listening on compatible phones, laptops, tablets, and media players. For many users, this is the easiest way to share music or movie audio. However, if you are considering Bluetooth as an alternative to physical connections, 4 disadvantages of using Bluetooth for everything are worth understanding.

The main limitation is the source’s ability to drive both headphones. Connecting two headphones lowers the combined impedance presented to the output. If the source amplifier has limited current capability, volume and distortion can become issues.

The headphones themselves also matter. Two similar pairs with moderate impedance are often easier to drive together. Two demanding, high-impedance headphones may require more power than a portable device can provide.

If you are asking, do headphone splitters hurt audio quality, the answer depends on this electrical load. A suitable source may handle the splitter without noticeable changes.

For frequent sharing or professional use, an active headphone distribution amplifier is a better option. It can provide stronger output and separate volume controls.

Before buying a splitter, check whether your device uses TRS or TRRS connections. Headset microphone compatibility can require a different wiring arrangement.

Passive Adapters Versus Active Headphone Amplifiers

Passive Y-splitters are simple and affordable. They work well when the source can comfortably drive both connected headphones.

They do not amplify the signal. Instead, both headphones share the output of the same headphone amplifier. This means the source remains responsible for supplying the required voltage and current.

An active headphone amplifier uses powered electronics to drive the connected headphones. Distribution amplifiers may also provide separate outputs and individual volume controls.

This approach is useful when multiple headphones are difficult to drive. It can prevent the source from being overloaded and provide more consistent output.

A simple comparison looks like this:

Feature Passive Splitter Active Amplifier
External power Not required Required
Amplification No Yes
Multiple outputs Usually limited Multiple options
Individual volume Usually no Often available
Demanding headphones Less suitable Better suited

For casual movie sharing, a passive splitter is often enough. For high-impedance headphones, studio monitoring, or multiple users, an active amplifier provides greater flexibility. When choosing headphones for these setups, understanding how noise cancellation works can also help when evaluating the listening experience.

The best choice depends on the source and headphones.

Do aux splitters reduce quality?

Aux splitters do not automatically reduce audio fidelity. If you are asking, do headphone splitters hurt audio quality when used with an aux connection, the answer depends on the source and headphone load.

With two headphones connected in parallel, the source sees a lower combined impedance. A weak output stage may then struggle to provide enough current. This can reduce maximum volume or increase distortion.

It is not accurate to say that every passive splitter causes a fixed 3 dB loss. The actual level change depends on the source’s output impedance and the connected loads. With a low output impedance, voltage loss may be very small.

Problems can also arise from poor splitter construction. Weak connectors may create crackling or channel interruptions. Poor shielding can increase unwanted noise in some environments.

For better results, choose a splitter with:

  • Secure, properly wired connectors
  • Durable strain relief
  • Adequate shielding
  • Compatibility with your device
  • Suitable impedance loads

If both headphones are easy to drive, you may hear little or no difference. If the source is already near its limits, an active amplifier can provide a cleaner solution.

Preventing Crosstalk in Budget Auxiliary Cables

Crosstalk occurs when part of one audio channel leaks into another. Poor cable design can increase this effect, although it is not always audible in ordinary consumer equipment.

Cheap auxiliary cables may use minimal shielding and less robust construction. However, cable thickness alone does not determine crosstalk or sound quality.

Good cable design separates and protects signal paths appropriately. Proper grounding and shielding can help maintain channel separation and reduce interference.

When choosing an aux splitter, consider the following:

  • Reliable connector construction
  • Proper stereo wiring
  • Adequate shielding
  • Strong strain relief
  • A sensible cable length

Shorter cables can also reduce opportunities for external interference. Keep them away from power cables and noisy electronic equipment when possible.

If you hear noticeable channel bleed, buzzing, or static, test the headphones without the splitter. Then try another splitter or cable. This quickly identifies whether the accessory is causing the problem.

For normal consumer listening, a competent splitter should provide transparent performance. You generally do not need premium materials or exotic cable designs.

The key is correct wiring and solid construction, not marketing claims about expensive conductors.

Frequently Asked Questions

Will a headphone splitter drain my device battery faster?

Possibly. Two headphones can require more current than one, especially when their combined impedance is low. The additional power demand may increase battery consumption. The actual effect depends on the device, headphone sensitivity, volume level, and amplifier design.

Can I plug a microphone and headphones into one splitter?

A standard stereo splitter usually duplicates headphone output. It does not separate microphone input. For a headset with a microphone, use a compatible TRRS splitter designed to separate headphone and microphone connections.

Why does one side sound quieter on my splitter?

Check the headphones, plugs, and splitter first. A poor connection can cause one channel to become quieter. Different headphone sensitivities can also make two pairs appear uneven. Impedance differences alone do not necessarily explain a left-right imbalance within one headphone.

Do digital splitters perform better than analog splitters?

Digital distribution can avoid the analog loading problem when the signal remains digital. However, the system still depends on the splitter, digital interface, and downstream DACs. A digital splitter is not automatically higher quality, but it can preserve the digital data without sharing one analog headphone output.

Conclusion

So, do headphone splitters hurt audio quality? In most everyday situations, a good passive splitter will not dramatically degrade sound. The main concern is the additional electrical load placed on the source.

Two headphones connected in parallel can lower the combined impedance. A weak headphone output may then deliver less volume or produce more distortion. Poor connectors and cables can also cause noise, crackling, or channel dropouts.

For casual listening, a quality 3.5mm splitter is usually sufficient. Using two similar headphones can make the electrical load more predictable. Keep cables reasonably short and choose products with reliable connectors and proper shielding.

If you regularly drive demanding headphones, consider an active headphone amplifier or distribution amplifier. It can provide greater current capability and independent volume control.

Remember that expensive cables do not automatically improve sound. Proper compatibility, clean connections, sensible cable lengths, and adequate amplifier power matter more.

With the right equipment, you can share audio conveniently while maintaining clear, balanced, and enjoyable sound.

Types of Learners: How Different Minds Absorb Info

Understanding the Diverse Types of Learners

Every person processes and understands information differently. That makes understanding the different types of learners useful for teachers, students, and educators. However, learners should not be treated as permanently fixed into one category. People often use different approaches depending on the subject, task, environment, and learning goal.

Several educational frameworks describe how people may prefer to receive, process, or demonstrate information. These include Gardner’s theory of multiple intelligences, sensory learning-style models, the VAK framework, and the VARK model. Each framework uses different categories and serves a different purpose.

This difference can create confusion. Some sources discuss four learning styles, while others mention seven or eight categories. These numbers do not necessarily contradict one another. They usually come from different educational models. Research has found little evidence that matching teaching methods to a student’s preferred learning style improves learning outcomes, so these models are better viewed as frameworks for exploring learning preferences rather than strict classifications. See the Education Endowment Foundation’s guidance on learning styles for a research-based overview.

This guide explains the major types of learners, including eight multiple-intelligence categories, seven commonly discussed learning styles, three classroom categories, four VARK categories, and ten practical learning methods. Understanding these frameworks can help students choose more effective study strategies without assuming that one method works for everyone.

What are the 8 types of learners?

Howard Gardner’s theory of multiple intelligences describes eight areas in which people can demonstrate strengths. These are often discussed as different types of learners, although Gardner’s theory was designed to describe forms of intelligence rather than fixed learning styles.

The eight categories are:

  • Visual-spatial: Understands information through images, maps, diagrams, and spatial relationships.
  • Linguistic-verbal: Shows strength with reading, writing, speaking, and language.
  • Logical-mathematical: Enjoys patterns, calculations, reasoning, and problem-solving.
  • Bodily-kinesthetic: Learns or demonstrates understanding through movement and physical activity.
  • Musical: Responds strongly to rhythm, sound, melody, and musical patterns.
  • Interpersonal: Understands ideas through communication, cooperation, and interaction with others.
  • Intrapersonal: Benefits from reflection, independent thinking, and self-awareness.
  • Naturalistic: Connects information with nature, living systems, and the physical environment.

These categories can help educators recognize different strengths without labeling students permanently.

Tailoring Study Habits to Gardner’s Model

Students can use Gardner’s categories as a starting point for exploring different study habits and productivity systems for students. The goal should not be to identify one permanent learning type. Instead, students can test strategies that match their strengths and the demands of a particular subject.

For example, someone who enjoys music could use rhythm or verbal patterns to remember information. A student with strong visual-spatial abilities might organize concepts with diagrams, timelines, or mind maps. A learner who enjoys interpersonal activities could discuss difficult ideas with classmates.

The important point is flexibility. A student may prefer independent reflection for one task but benefit from collaboration during another. Similarly, visual materials can help with science while practice and discussion may work better for language learning.

Gardner’s framework can therefore encourage students to explore multiple ways of understanding information. It should complement evidence-based techniques such as active recall, practice testing, and spaced repetition, rather than replace them. Students can also strengthen their study habits by focusing on critical thinking rather than memorization when appropriate.

What are the 7 types of learning styles?

The seven commonly discussed learning styles describe different ways people may prefer to interact with information. They are usually identified as visual, auditory, verbal, kinesthetic, logical, social, and solitary styles.

Visual learners often prefer diagrams, images, charts, and demonstrations. Auditory learners may enjoy spoken explanations, discussions, and recorded material. Verbal learners tend to engage with reading, writing, and language-based activities. Kinesthetic learners may prefer practical activities and real-world examples.

Logical learners often look for patterns, systems, and clear relationships. Social learners may enjoy collaboration and discussion, while solitary learners often prefer quiet, independent study.

However, these categories should not be treated as strict scientific classifications. Learning preferences can change with the subject and situation. A student might prefer diagrams for mathematics but discussion for history.

Using several approaches can therefore be more useful than trying to identify one permanent style. Students should experiment with different methods and judge them by actual learning and retention.

Blending Multiple Sensory Pathways for Retention

Combining different ways of interacting with information can make studying more active and engaging. Instead of relying on a single preferred style, students can connect several useful activities around the same concept.

For example, a student studying biology could read a short explanation, examine a labeled diagram, explain the process aloud, and complete practice questions. These activities require different forms of attention and processing. More importantly, they encourage the learner to actively work with the information.

Handwritten notes can also be combined with diagrams, questions, examples, and short explanations. However, simply adding more sensory inputs does not automatically improve memory. The quality of the learning activity matters more than the number of senses involved.

For stronger information retention, students should combine multimodal resources with proven techniques. Active recall requires retrieving information from memory. Spaced repetition revisits material over increasing intervals. Practice testing checks whether knowledge can actually be retrieved.

The best approach is therefore not to force every lesson into a learning-style category. Instead, use different methods when they make the information clearer, easier to practice, or easier to retrieve.

What are the three main categories of learners in the classroom?

The classic VAK framework groups learners into three broad categories: visual, auditory, and kinesthetic. These categories are commonly used in classroom discussions about learning preferences.

Visual learners may respond well to diagrams, demonstrations, charts, written examples, and organized visual information. Auditory learners may prefer spoken explanations, discussions, questions, and verbal instructions. Kinesthetic learners may engage more readily with practical activities, demonstrations, experiments, and physical tasks.

These categories can provide teachers with simple ideas for varying classroom instruction. However, they should not be used to label students permanently or assume that a student can learn only through one format. Understanding educational psychology theories can provide teachers with broader perspectives on how students learn and develop.

A single lesson can include several forms of instruction. A teacher could introduce a science concept with a diagram, explain the process verbally, and then demonstrate it through an experiment. Students can also answer questions or solve problems afterward.

This approach creates variety while keeping the focus on understanding. Effective teaching should consider the learning objective, subject matter, student needs, and evidence-based instructional practices, rather than relying entirely on VAK labels.

Managing Classroom Diversity Through Varied Delivery

Teachers can support classroom diversity by presenting important concepts in more than one useful format. This does not require creating a separate lesson for every student. Instead, teachers can build reasonable variety into the same lesson, much as modern classrooms use varied teaching styles to support different learning needs.

For example, a science lesson could begin with a visual representation of a process. The teacher could then explain the process and invite students to discuss it. A short practical demonstration could follow. Students could finish by answering questions or completing an application task.

This structure gives students several opportunities to interact with the material. It also helps teachers determine whether students actually understand the concept.

However, variety alone does not guarantee better learning. A visually attractive presentation can still be ineffective if students remain passive. Likewise, a practical activity may create engagement without producing meaningful understanding, which is why teachers should use student engagement strategies alongside varied instruction.

Teachers should therefore connect each activity to a clear learning objective. Retrieval questions, worked examples, guided practice, feedback, and application tasks can make lessons more effective.

The purpose of varied delivery should be to improve access and engagement while maintaining instructional quality. It should not be to place every student into a fixed classroom category.

What are the four major types of learning?

The VARK model identifies four commonly discussed learning preferences: visual, auditory, reading/writing, and kinesthetic. Unlike the three-category VAK framework, VARK separates reading and writing from visual information.

Visual learners may prefer charts, diagrams, graphs, symbols, and other visual representations. Auditory learners may prefer lectures, conversations, explanations, and discussions. Reading/writing learners often engage with written instructions, articles, notes, lists, and definitions. Kinesthetic learners may prefer demonstrations, practical activities, examples, and real-world applications.

These categories are useful for describing preferences, but they should not be interpreted as proof that each person learns best only through one mode. Research has not established strong evidence for matching instruction to a person’s supposed learning style.

Instead, students can use the VARK categories to explore different ways of studying. The most effective method depends on the material and the task. For example, a graph may be appropriate for interpreting data, while practice questions may be better for testing mathematical knowledge.

The model is therefore best treated as a planning and reflection tool, not a rigid classification system.

Why Reading and Writing Deserves Separation

VARK separates reading and writing from visual learning because written language and visual representations communicate information differently. A paragraph presents information through words and sequential reading. A diagram can show relationships, structures, or spatial information at a glance.

This distinction can help teachers think more carefully about how information is presented. For example, a lesson about a complex process might include a written explanation alongside a labeled diagram. Students could then summarize the process using their own words.

However, separating these preferences does not mean that every student has one permanent reading/writing or visual learning style. People regularly use both written language and visual information when studying.

A student may read an explanation, examine a chart, write notes, and complete practice questions during the same study session. These activities can complement one another.

For effective learning, the important question is not simply which category a student belongs to. The better question is which representation or activity helps the student understand and retrieve the target information.

Reading, writing, diagrams, examples, and practice can all have value when they serve a clear instructional purpose.

What are the 10 methods of learning?

Students can use many evidence-informed learning methods to understand, practice, and retain information. Ten commonly discussed approaches include spaced repetition, active recall, dual coding, elaborative interrogation, interleaving, self-explanation, the Feynman technique, practice testing, project-based learning, and peer teaching.

Spaced repetition revisits information over time. Active recall requires students to retrieve information without simply rereading their notes. Dual coding combines words with useful visual representations. Elaborative interrogation encourages learners to ask why information is true.

Interleaving mixes related topics or problem types instead of practicing one type continuously. Self-explanation requires learners to explain their reasoning. The Feynman technique encourages simple explanations that expose knowledge gaps. Practice testing measures whether information can be retrieved.

Project-based learning applies knowledge to practical tasks. Peer teaching requires students to explain concepts to others. This approach can give learners opportunities to apply knowledge through meaningful projects rather than relying only on traditional study activities.

These methods are not equally useful for every task. Students should choose techniques based on the subject, learning objective, and stage of study.

Selecting the Right Method for Difficult Concepts

Choosing a learning method should begin with the type of knowledge being learned. Memorizing vocabulary, solving equations, understanding scientific concepts, and building practical skills require different forms of practice.

For factual information, active recall and spaced repetition can provide a structured way to review important details. Students can use flashcards, practice questions, or short self-tests. For problem-solving subjects, worked examples, deliberate practice, and interleaving can help learners recognize different problem types.

Self-explanation can be useful when students need to understand how or why something works. The Feynman technique can expose gaps by forcing learners to explain a difficult idea in simple language. Project-based tasks are useful when students need to apply knowledge to realistic problems.

Students should also measure results instead of relying on comfort. A method that feels easy may not produce strong retention. Practice questions can reveal whether information can actually be recalled and applied.

The best learning strategy is therefore the one that supports the specific goal and produces measurable improvement. Combining several methods can create a more flexible and effective study system.

Frequently Asked Questions

Can an individual possess more than one learning style?

Yes, individuals can demonstrate characteristics associated with multiple types of learners. A student may prefer diagrams for mathematics but discussions for history. Preferences can change with context, subject, and learning goals.

Does matching teaching styles to learning styles guarantee better test scores?

No, matching teaching styles with preferred types of learners does not guarantee higher test scores. Learning outcomes depend on content, practice, feedback, retrieval, and instructional quality, not preference alone.

How does the VARK framework differ from Gardner’s multiple intelligences?

VARK categorizes preferred ways of interacting with information, while Gardner’s model describes broader intellectual abilities. Therefore, these frameworks classify types of learners differently and should not be treated as identical systems.

How do I identify which learning method works best for me?

Experiment with different methods and measure your results. Compare recall after practice questions, diagrams, explanations, or summaries. This helps identify which approaches work best for your types of learners.

Conclusion

Understanding the diverse types of learners shifts education away from rigid instruction toward dynamic, personal growth. Whether you examine Gardner’s eight intelligences, explore the VARK model, or use the ten proven study techniques, these frameworks show that no single learning path fits everyone. This idea also connects closely with personalized learning in education, which emphasizes adapting learning experiences to individual needs and circumstances.

When educators respect these differences, classrooms become engaging spaces where every student can thrive. Similarly, independent learners gain an edge by identifying their cognitive habits and adopting compatible study methods. Instead of forcing yourself into frustrating study routines, embrace your natural tendencies. Experiment with active recall, combine visuals with text, and build a personalized system that turns complex information into lasting knowledge.

Classification of Human Brain: Structure & Stages

Classification of Human Brain: Structure, Stages, and Biology

Have you ever wondered how the brain controls your body every day? Understanding the classification of human brain anatomy makes this complex organ easier to study. Millions of neurons work together to control memory, movement, emotions, thinking, and vital body functions.

Neuroscientists classify the brain using structural, functional, and developmental models. These systems help researchers understand how different regions work together. They also support the diagnosis and treatment of neurological disorders. For a reliable introduction to brain structure and function, explore the National Institute of Neurological Disorders and Stroke (NINDS) Brain Basics.

The brain can be studied in several ways. We can examine its major anatomical divisions, follow its development from early embryonic stages, or study the functions of individual regions. We can also place humans within the broader biological classification system. For students, educational psychology theories can also provide useful context for understanding how learning and cognitive processes relate to education.

This guide explains the major approaches to brain classification. It also covers the seven stages of brain development, the three major brain divisions, seven important brain parts, and the biological classification of humans. This makes the topic useful for students, exam preparation, and anyone interested in basic neuroscience.

What is classification in the brain?

Classification in the brain means organizing neural structures according to their location, development, structure, and function. Instead of treating the brain as one uniform organ, scientists divide it into related regions. Each region performs specific tasks while working with other areas.

The main structural classification of human brain anatomy commonly includes the forebrain, midbrain, and hindbrain. These divisions help students understand the broad organization of the central nervous system.

Scientists can also classify brain regions by their functions. Some areas process sensory information, while others control movement, emotions, memory, or higher cognitive activities. Developmental classification examines how these structures form during embryonic growth.

These classification systems are useful in medicine and research. Doctors use brain anatomy to interpret imaging results and understand injuries. Researchers also use these divisions to study neurological conditions and changes in brain function.

Anatomical Versus Functional Categorization

Anatomical classification organizes brain structures according to their physical location, shape, and relationships with nearby regions. Important anatomical divisions include the cerebral hemispheres, lobes, brainstem, cerebellum, and other internal structures.

Functional classification focuses on what each region does. For example, the occipital lobe is strongly associated with visual processing, while the frontal lobe supports planning, decision-making, and voluntary movement.

These approaches are not separate in practice. Structure and function are closely connected. A particular brain region has physical features that support its specialized activities.

Understanding both systems also helps explain the effects of brain damage. Injury to one area may affect movement, speech, memory, vision, or other abilities. However, brain functions often involve networks rather than a single isolated region. Therefore, modern neuroscience combines anatomical and functional information when studying brain organization.

What are the 7 stages of the brain?

The seven stages of brain development describe major biological processes involved in building and refining the nervous system. These stages include neurogenesis, cell migration, differentiation, synaptogenesis, synaptic pruning, myelination, and structural maturation.

Neurogenesis produces new neurons from developing neural cells. During cell migration, immature neurons move toward their appropriate locations. Differentiation then allows these cells to develop specialized characteristics and functions.

Synaptogenesis creates connections between neurons. The developing brain initially forms many connections, creating flexible neural networks. Synaptic pruning later removes weaker or less-used connections. This process helps make neural communication more efficient.

Myelination adds protective myelin around many nerve fibers. This insulation improves the speed and efficiency of electrical signaling. Finally, structural maturation continues as brain networks become more organized and specialized.

These processes do not occur as perfectly separate steps. They overlap and continue at different rates across brain regions. Brain development also continues beyond childhood, particularly in areas involved in planning, decision-making, and self-control. These differences also help explain why personalized learning in education can account for variations in how individuals learn and develop.

Synaptic Pruning and Efficient Cognition

During childhood and adolescence, the developing brain creates many more synaptic connections than it eventually needs. Synapses are communication points where neurons exchange signals. This early abundance gives the brain flexibility while neural circuits develop.

Synaptic pruning removes connections that are weak, inefficient, or used less frequently. At the same time, frequently used pathways can become stronger and more efficient. This process helps refine neural networks as a person gains experience.

Pruning does not simply mean that the brain loses connections. Instead, it helps organize existing networks and improve communication between neurons. This refinement supports increasingly complex cognitive abilities.

The process continues throughout development, although its timing differs across brain regions. Areas involved in higher-level functions can mature later than some sensory and motor regions.

For students, the key idea is simple: synaptic pruning helps the developing brain become more efficient. Experience, learning, and repeated activity can influence which neural pathways become stronger and which connections are reduced. Applying this understanding to best study techniques backed by science can help students connect repeated learning activities with effective study habits.

What are the 3 major parts of the brain and their functions class 10?

For Class 10 biology, the brain is commonly divided into three major regions: the forebrain, midbrain, and hindbrain. This simple classification helps students understand the basic organization and functions of the human nervous system.

The forebrain is involved in conscious activities, sensory interpretation, memory, thinking, and voluntary actions. Its largest structure is the cerebrum, which supports many higher mental functions.

The midbrain connects parts of the brain and participates in important reflex responses. It helps coordinate certain visual and auditory reflexes.

The hindbrain includes the cerebellum, pons, and medulla oblongata. The cerebellum helps coordinate movement, posture, and balance. The pons participates in communication between brain regions and contributes to breathing regulation. The medulla controls several involuntary functions, including breathing, heart activity, and blood pressure.

For Class 10 exams, remember the basic division and the major functions of each region. This provides a clear foundation for understanding the classification of human brain. Students can also strengthen their preparation by using study tips for exam preparation alongside this foundational biology knowledge.

Key Examination Takeaways for Forebrain and Hindbrain

For examinations, focus on the major differences between the forebrain and hindbrain. The forebrain is strongly associated with conscious activities, sensory interpretation, thinking, memory, and voluntary actions.

The cerebrum forms the largest part of the forebrain. It receives and interprets sensory information and supports complex activities such as reasoning, learning, and decision-making.

The hindbrain performs several essential coordination and automatic functions. Its cerebellum helps maintain balance, posture, and coordination during movement. The medulla oblongata controls important involuntary activities, including breathing, heart rate, and blood pressure.

A simple way to remember the difference is to connect the forebrain with higher mental and voluntary functions. Associate the hindbrain with coordination and vital automatic functions.

Students should also avoid treating every brain function as belonging to only one structure. Many activities involve several connected regions. For school-level questions, however, learning the primary functions of each division provides a useful and accurate framework.

What are the 7 parts of the brain and their functions?

A useful overview of brain anatomy identifies seven major structures: the cerebrum, cerebellum, diencephalon, midbrain, pons, medulla oblongata, and limbic system. Each contributes to different aspects of nervous system activity.

The cerebrum supports conscious thought, sensory processing, memory, language, and voluntary movement. The cerebellum helps coordinate movement, balance, posture, and motor learning.

The diencephalon contains structures such as the thalamus and hypothalamus. The thalamus relays much sensory information, while the hypothalamus helps regulate temperature, hunger, thirst, and endocrine activity.

The midbrain participates in visual and auditory reflexes. The pons helps connect different brain regions and contributes to breathing and sleep-related functions. The medulla oblongata controls several essential automatic processes, including breathing and cardiovascular regulation.

The limbic system includes interconnected structures involved in emotion, motivation, learning, and memory. These seven categories provide a practical overview, although modern neuroscience recognizes many additional structures and functional networks.

The Diencephalon’s Critical Role as Relay Station

The diencephalon is an important region located deep within the brain. It includes the thalamus, hypothalamus, and several other structures. Two of its best-known components have especially important roles in sensory processing and internal regulation.

The thalamus acts as a major relay center for sensory information. It receives signals from many parts of the nervous system and sends much of that information toward appropriate areas of the cerebral cortex. This helps the brain organize and interpret incoming sensory information.

The hypothalamus has a different but equally important role. It helps maintain homeostasis, which means keeping internal conditions within suitable ranges. It contributes to temperature regulation, hunger, thirst, sleep, and hormonal control.

The hypothalamus also communicates closely with the endocrine system through its relationship with the pituitary gland. This allows the nervous and hormonal systems to coordinate many body processes.

Therefore, the diencephalon is more than a simple relay station. It connects sensory processing with essential systems that maintain the body’s internal balance.

What are the 7 biological classifications?

The seven traditional biological classifications are Kingdom, Phylum, Class, Order, Family, Genus, and Species. These taxonomic ranks organize living organisms from broad groups to increasingly specific categories.

Kingdom represents a broad biological grouping. Phylum divides organisms according to major structural and evolutionary characteristics. Class provides a more specific grouping, followed by Order and Family. Genus groups closely related organisms, while Species represents the most specific standard rank in this seven-level system.

Humans can be classified as follows:

  • Kingdom: Animalia
  • Phylum: Chordata
  • Class: Mammalia
  • Order: Primates
  • Family: Hominidae
  • Genus: Homo
  • Species: Homo sapiens

This classification places humans within the animal kingdom and shows their evolutionary relationships with other organisms. It is important to distinguish this biological taxonomy from the anatomical classification of human brain. One classifies organisms, while the other organizes brain structures.

Modern biology may also use additional ranks and molecular evidence. Therefore, the seven-rank system is best understood as a traditional framework for organizing biological diversity.

Evolutionary Context of Human Taxonomy

Human taxonomy places our species within Kingdom Animalia, Phylum Chordata, Class Mammalia, and Order Primates. This classification reflects shared evolutionary characteristics with other animals and, more specifically, with other primates.

Humans belong to the family Hominidae and the genus Homo. Our species is Homo sapiens. These categories help scientists describe evolutionary relationships using a standardized biological system.

Humans share many characteristics with mammals, including specialized nervous systems, internal temperature regulation, and particular reproductive features. Our placement within Primates reflects shared traits with other primates, including grasping hands and complex social behavior.

Over evolutionary time, the human nervous system developed increasingly complex structures and networks. The cerebral cortex became highly developed, supporting advanced communication, planning, learning, and flexible problem-solving.

However, human evolution should not be described as a simple progression from a primitive brain to a perfect one. Evolution produces adaptations in response to changing environments and pressures. Understanding human taxonomy therefore provides context for studying how our distinctive brain features developed within the broader history of life.

Frequently Asked Questions

What is the difference between grey matter and white matter?

Grey matter contains neuronal cell bodies, dendrites, and synapses that process information. White matter contains myelinated axons that transmit signals between brain regions. Both are essential to the classification of human brain structures.

Which part of the brain controls voluntary movement?

The primary motor cortex in the frontal lobe controls voluntary movement. It sends signals through spinal pathways to skeletal muscles. The cerebellum and basal ganglia help refine and coordinate these movements.

How does the nervous system protect the brain from injury?

The brain is protected by the skull, three layers of meninges, and cerebrospinal fluid. The blood-brain barrier also limits harmful substances and pathogens from reaching sensitive neural tissue.

Why is the human cerebral cortex so heavily folded?

The cerebral cortex contains folds called sulci and gyri that increase its surface area within the limited skull space. This arrangement supports more neurons and complex functions such as reasoning, language, and memory.

Conclusion

Mastering the classification of human brain structures clarifies how biological form directly supports neurological function. By studying the brain through anatomical divisions, embryonic stages, and vital regional responsibilities, we transform an intimidating organ into an accessible biological network. From the reflex coordination managed by the hindbrain to the abstract deliberations housed in the cerebral cortex, every neural division performs a specialized job that sustains our daily lives. Furthermore, framing this neurological marvel within the broader tree of biological taxonomy reminds us of our evolutionary roots.

As modern neuroimaging advances, these anatomical boundaries become even more valuable for diagnosing cognitive illnesses and developing targeted brain therapies. Whether you are analyzing these concepts for an upcoming academic exam or enriching your personal understanding of human physiology, this foundational knowledge highlights how dynamic our central control center truly is. Continue exploring neuroscience literature, test your recall on these major structural divisions, and apply these valuable insights to your ongoing scientific studies.

Are Old Apple Watches Worth Buying in 2026?

Are Old Apple Watches Worth Buying in 2026?

Smartwatches evolve quickly, but premium hardware can remain useful for several years. If you want wearable convenience without paying flagship prices, you may wonder, are old Apple Watches worth buying in 2026?

The answer depends on several factors. Battery health, software support, hardware condition, and iPhone compatibility all affect the value of an older model.

Budget-conscious shoppers often consider older Apple Watch generations for fitness tracking, notifications, alarms, workouts, and music controls. Newer models offer advanced sensors and improved performance. However, older models can still handle many everyday tasks.

This guide explains what you should know before buying an old Apple Watch. You will learn about battery lifespan, resale value, software support, iPhone compatibility, and practical ways to reuse older models.

We will also explain which older Apple Watch models still receive current software support. By the end, you should have a clearer idea of whether an older Apple Watch fits your needs and budget.

What is the typical lifespan of an Apple Watch?

An Apple Watch can remain useful for several years, but its practical lifespan depends on more than physical condition. The case may survive for much longer than the internal battery and software support.

For many owners, three to five years is a reasonable planning range for reliable everyday use. This does not mean the watch stops working after five years. An older Apple Watch can continue performing basic functions even after major software updates end.

Battery health becomes increasingly important as the device ages. Lithium-ion batteries naturally lose capacity through normal use and charging cycles. A heavily used watch may require more frequent charging as its battery gets older.

Software support is another major factor. Each Apple Watch generation has a specific watchOS limit. Once a model reaches that limit, it cannot install newer features or future operating system releases.

Physical wear also affects longevity. Scratches, damaged displays, worn buttons, and water-resistance issues can reduce practical value.

Therefore, when evaluating an older Apple Watch, consider battery health, software compatibility, physical condition, and your intended use. A well-maintained older model can still provide excellent everyday value.

If you are asking are old Apple Watches worth buying, lifespan is one of the first things to consider. A cheaper watch can still be a good purchase when its battery and software remain suitable for your needs.

The Impact of Battery Health on Device Longevity

Battery health can determine whether an older Apple Watch remains practical for everyday use. Lithium-ion batteries naturally lose capacity as they age and complete more charging cycles.

Apple designs its Apple Watch batteries to retain up to 80% of their original capacity after 1,000 complete charge cycles. Actual battery performance can vary based on usage, charging habits, temperature, and age. For a broader look at battery aging, see What Is the 80-20 Rule for Rechargeable Batteries?

A worn battery can shorten daily runtime and force you to charge the watch more frequently. This becomes especially noticeable when using workouts, cellular connectivity, sleep tracking, or other battery-intensive features.

When buying a used Apple Watch, check its battery health whenever possible. A lower percentage does not automatically make the watch unusable. However, it should affect the price you are willing to pay.

Battery replacement costs should also be included in your buying calculation. A very cheap Apple Watch may become expensive if it immediately needs professional service. Understanding AppleCare Guide: Coverage, Cost, and Plans in India can also help you evaluate potential service and repair costs.

For example, paying more for a newer model with stronger battery health may provide better value over time. The cheapest used Apple Watch is not always the best deal.

Always compare the purchase price, battery condition, expected lifespan, and repair costs before making your final decision.

Is an old Apple Watch worth anything?

Yes, an old Apple Watch can still have resale value. However, its actual worth depends on the generation, condition, battery health, storage, connectivity, and included accessories.

Newer generations generally retain more value because they offer better hardware and longer software support. Older models can still attract buyers who want affordable fitness tracking, notifications, alarms, workouts, and basic smartwatch functions.

Cellular models may also be more appealing because they can provide greater independence from an iPhone. However, cellular compatibility depends on the carrier and region.

Physical condition is another important factor. A watch with a clean display, healthy battery, working buttons, and minimal scratches usually has stronger resale appeal.

Accessories can also influence buyer interest. An original Apple Watch charger and box may make a used listing more attractive, although they do not guarantee a higher selling price.

If you want to estimate your watch’s current value, compare listings for the exact Apple Watch model. Prices can change quickly based on demand and condition.

Broken watches may still have some value for parts. However, Activation Lock, severe screen damage, battery problems, and missing accessories can significantly reduce what buyers are willing to pay.

This resale value can also help answer are old Apple Watches worth buying. A model that retains reasonable value can be easier to resell later if you decide to upgrade.

Resale Value Factors That Determine True Secondary Pricing

Several factors determine how much an old Apple Watch is worth on the secondhand market. The exact generation is usually the first thing buyers consider.

Newer models tend to attract higher prices because they offer better performance and longer software support. However, condition can make a major difference between two watches from the same generation.

Battery health is particularly important. Buyers may avoid older watches with heavily degraded batteries because replacement service can add to the total cost.

The type of connectivity also matters. Cellular models can attract buyers who want more independence from an iPhone. However, cellular functionality depends on carrier support and an eligible plan.

Other factors include:

  • Display condition
  • Battery health
  • Case condition
  • GPS or cellular connectivity
  • Original charger and accessories
  • Storage capacity
  • Software compatibility
  • Activation Lock status

Before selling, properly erase and unpair your Apple Watch. This removes your personal information and helps the next owner activate the device.

Before buying, make sure Activation Lock has been removed. A locked Apple Watch can be extremely difficult for a new owner to use.

Ultimately, resale value depends on both demand and condition. Research comparable listings before setting your price.

Will older Apple Watches still work?

Older Apple Watches can continue working after they stop receiving major software updates. However, their usefulness depends on the specific model, battery condition, and paired iPhone.

Basic functions can remain available for years. These may include activity tracking, workouts, heart-rate monitoring, alarms, timers, and certain music features.

The biggest limitations usually involve software and compatibility. Older models cannot install newer watchOS versions once they reach their maximum supported release. Similar compatibility concerns can arise with other Apple devices, as discussed in 5 Disadvantages Of Using A Tablet As A Laptop Replacement.

This can affect access to newer features and third-party applications. Some apps eventually require newer versions of watchOS, leaving older devices with fewer options.

Pairing can also become complicated. Apple Watch models have specific iPhone and operating system requirements. An extremely old watch may not pair directly with a modern iPhone if its software is too outdated.

This is one of the most important things to check before buying a used Apple Watch. A device can be in excellent physical condition and still be difficult to use with your current phone.

Older watches can still provide excellent value when your needs are simple. If you mainly want fitness tracking, alarms, notifications, or workouts, an older model may be enough.

However, buyers who want the latest apps and features should choose a newer generation.

So, are old Apple Watches worth buying if they still work? They can be, especially when the price is low and your needs are basic. Just make sure the watch works with your current iPhone.

Pairing Limitations Between Outdated watchOS and Modern iOS

Apple Watch pairing depends on compatibility between watchOS and the iPhone’s iOS version. This creates problems when using very old Apple Watch models with newer iPhones.

An older watch may still turn on and perform basic functions. However, its outdated software can prevent successful setup with a newer iPhone.

Different Apple Watch generations have different software limits. For example, Series 3 cannot run the same watchOS versions as Series 4 or Series 5.

This means you should never assume that every Apple Watch works with every iPhone. Always check the exact model before purchasing a used device.

This issue is particularly important when shopping through online marketplaces. A seller may describe an Apple Watch as fully functional because it turns on. That does not necessarily mean it can pair with your current iPhone.

If you already own an older iPhone, it may sometimes help with setup. However, relying on another outdated device is not an ideal long-term solution.

For the safest purchase, choose an Apple Watch with recent software support and broad iPhone compatibility.

Checking compatibility before paying can prevent a frustrating and expensive mistake. A slightly newer Apple Watch is often worth the additional cost if it provides easier setup and longer usability.

Can you do anything with an old Apple Watch?

Absolutely. An old Apple Watch can remain useful even after you replace it with a newer model.

One simple option is using it as a dedicated bedside alarm and timer. This can reduce the need to keep your phone beside your bed.

Older Apple Watches can also work well as secondary fitness trackers. You might use one during gardening, home improvement, outdoor activities, or workouts where your newer watch could become damaged.

Another option is using the watch for music controls and basic media functions. Keeping an older device near your home audio setup can provide convenient access without constantly using your phone. For more on choosing the right audio setup, see Wired vs Wireless Audio: Which Option Is Right For You?

You can also keep the watch as a backup. This can be useful during travel, exercise, or situations where you do not want to risk damaging your primary smartwatch.

Older models may also work well for simple household tasks. Timers, alarms, workouts, and activity tracking can remain useful even when the device no longer receives major software updates.

The key is to avoid expecting an old Apple Watch to perform like a current model. Instead, give it a specific purpose that matches its remaining capabilities.

With the right use, an older Apple Watch can still provide practical value long after its original upgrade cycle.

Repurposing Obsolete Smartwatches for Dedicated Household Utility

Repurposing an old Apple Watch can extend its useful life and reduce electronic waste. Instead of expecting the device to perform every modern smartwatch function, give it one dedicated job.

For example, you can keep it in the kitchen for timers and alarms. This can be useful when cooking, baking, or managing several tasks at once.

You can also use an older watch as a secondary workout device. It can track exercise without exposing your newer Apple Watch to unnecessary scratches or damage.

Another practical use is keeping the device as a backup. A charged spare watch can be useful during travel or when your primary device needs charging or repair.

Older Apple Watches can also provide quick access to music controls, timers, alarms, and basic activity information.

However, outdated software can limit access to newer applications. Some third-party apps may eventually require newer watchOS versions.

The best approach is therefore simple. Focus on features that already work reliably instead of trying to turn obsolete hardware into a modern smartwatch.

A dedicated purpose can make an old Apple Watch surprisingly useful. Simple tasks often provide the best value from aging technology.

What is the oldest Apple Watch that is still supported?

As of watchOS 26, the Apple Watch Series 6 and Apple Watch SE (2nd generation) are among the oldest Apple Watch models compatible with the current major watchOS release.

This makes them important options for shoppers looking for affordable used Apple Watch models with current software support.

Older models, including Series 4 and Series 5, have reached earlier software limits. They can still function, but they do not support the latest watchOS features.

Series 3 is even more limited because it stopped receiving major software updates earlier. While it can still perform basic tasks, its age creates greater compatibility and application concerns.

If software longevity matters to you, buying a Series 6 or newer is generally a safer choice than choosing a much older model.

The Series 7 and newer models may provide even more value when their secondhand prices are close to Series 6 pricing. They offer newer hardware and can provide additional features depending on the generation.

Before buying any used Apple Watch, check the latest software compatibility information. Apple’s supported models can change with each major watchOS release.

For buyers focused on longevity, paying slightly more for a newer used model can make sense. It may provide better software support, compatibility, and overall value.

If you are still asking are old Apple Watches worth buying in 2026, the Series 6 and newer models are generally more attractive choices for buyers who want longer software support.

The Security and Application Risks of Unsupported Software

Unsupported software does not automatically make an old Apple Watch useless. However, it can create important limitations over time.

Once a model reaches its final supported watchOS version, it cannot install newer operating system features. This means you may miss new health tools, interface improvements, performance updates, and other features.

Third-party applications can also become a problem. Developers may eventually require newer watchOS versions to support updated features or security standards.

This can affect apps used for communication, fitness, navigation, productivity, and other everyday tasks.

Built-in functions may continue working normally. However, the overall experience can become less flexible as the software becomes increasingly outdated.

Security is another consideration. Newer operating systems generally receive ongoing improvements and fixes. Older devices have fewer opportunities to receive those updates.

That does not mean you must immediately discard an unsupported Apple Watch. It simply means you should understand its limitations before relying on it for important tasks.

If you want the longest possible useful life, choose a model with current software support. A slightly newer used Apple Watch can reduce compatibility concerns and provide access to newer applications for longer.

Ultimately, are old Apple Watches worth buying depends on what you expect from the device. For basic features and a low purchase price, an older model can still make sense. For long-term software support, newer used models are the better choice.

Frequently Asked Questions

Can an older Apple Watch track sleep accurately?

Yes, older models from the Series 3 onward track essential sleep metrics through Apple’s native sleep architecture or third-party applications. However, advanced sleep stage analysis, which breaks down REM, Core, and Deep cycles, requires hardware capable of running modern watchOS versions. Furthermore, degraded battery health in older units often makes overnight tracking impractical without charging right before bed.

How much does it cost to replace an Apple Watch battery?

Official out-of-warranty battery service through Apple typically costs between seventy-nine and ninety-nine dollars, depending on your specific hardware model. Third-party repair shops occasionally offer lower rates, but unauthorized repairs can compromise the watch’s factory water resistance seals. If an older watch costs fifty dollars, replacing the battery through official channels rarely makes financial sense.

Do older Apple Watches work without an iPhone nearby?

Older GPS-only models rely heavily on a paired iPhone for data connectivity, notifications, incoming calls, and messaging. However, standalone offline tasks like step tracking, heart rate monitoring, stored music playback via Bluetooth headphones, and local timers function without a phone. Cellular-capable models handle calls independently, provided you maintain an active carrier subscription plan.

Can an old Apple Watch be used as a standalone device for children?

Yes, models from the Apple Watch Series 4 (Cellular) and newer can be set up via Apple’s Family Setup feature. This allows a parent to configure the watch using their own iPhone without the child needing a separate phone. It offers location tracking and communication tools, making older cellular units cost-effective trackers for kids. For additional guidance on managing unwanted calls on connected devices, see How to Block Spam Calls: Fast & Easy Step-by-Step Guide.

Conclusion

So, are old Apple Watches worth buying? In many cases, yes. Older models can offer excellent value when you mainly need fitness tracking, workouts, notifications, alarms, timers, and basic smartwatch features.

The important thing is choosing the right generation. Do not judge a used Apple Watch only by its appearance or low asking price.

Check its battery health, software support, iPhone compatibility, physical condition, and total ownership cost before buying.

Very old models may look attractive because they are inexpensive. However, limited software support can create pairing problems and reduce access to newer applications.

A slightly newer used Apple Watch can often provide much better long-term value. Models such as the Series 6, Series 7, and newer generations are worth considering when their prices fit your budget.

If you only need basic functions, an older Apple Watch can still be a smart purchase. If you want the latest features, apps, and longer support, spending more on a newer generation makes more sense.

Ultimately, the best used Apple Watch is not necessarily the cheapest one. It is the model that offers the right balance of price, battery health, compatibility, features, and software support for your needs.

Use Wired Headphones Without Losing Charging Port

You Can Use Wired Headphones Without Losing Your Phone’s Charging Port – Here’s How

You can use wired headphones without losing your phone’s charging port, even if your smartphone has no 3.5mm headphone jack. Many modern phones use one USB-C or Lightning port for both charging and wired audio. This can make listening while charging seem impossible.

Fortunately, a compatible dual-port adapter can solve the problem. These accessories connect to your phone’s charging port and provide separate connections for power and audio. Depending on your phone and headphones, you may need a USB-C or Lightning adapter with built-in audio support.

Major device manufacturers like Apple Support now rely entirely on unified ports for both power delivery and media playback. Because of this design, millions of users assume they must choose between wired audio and keeping their battery full.

Using wired headphones without losing your phone’s charging port is useful during long calls, gaming sessions, commutes, and streaming. The right setup lets you charge your phone while keeping your wired headphones connected.

This guide explains how audio and charging splitters work. We will also cover Gen Z’s renewed interest in wired headphones, their disadvantages, iPhone solutions, sound quality, and battery consumption.

Can we use wired headphones while charging a phone?

Yes, you can use wired headphones without losing your phone’s charging port with a compatible dual-port adapter. The adapter connects to your phone’s USB-C or Lightning port. It then provides separate connections for charging and wired audio.

For USB-C phones, choose an adapter that supports both audio and power delivery. Some models include a 3.5mm headphone jack. Others provide an additional USB-C audio connection.

For Lightning iPhones, you need a compatible Lightning audio and charging adapter. Compatibility is important because not every splitter supports audio and charging at the same time.

Before buying an adapter, check for:

  • USB Power Delivery (USB-PD) support for fast charging.
  • Built-in DAC support for traditional 3.5mm headphones.
  • Compatibility with your specific phone model.
  • Support for your headphone connector.
  • Simultaneous charging and audio support.

A suitable adapter makes it easy to use wired headphones without losing your phone’s charging port while keeping your device charged.

Choosing the Right Dual Adapter

Choosing the right adapter matters because USB-C and Lightning accessories can work differently. A good audio and charging splitter should clearly support simultaneous charging and audio output.

If you use 3.5mm headphones with a USB-C phone, the adapter generally needs a digital-to-analog converter (DAC). USB-C sends digital audio, while traditional 3.5mm headphones use an analog signal. The DAC converts the signal for your headphones.

If fast charging matters, look for USB Power Delivery (USB-PD) support. Also check the adapter’s maximum supported wattage. This helps ensure that charging performance meets your needs, especially when considering Are Chargers With Multiple Ports Slower Than Normal Ones?

Avoid accessories with unclear specifications. Poorly designed adapters may cause audio noise, connection problems, or slower charging.

Before purchasing, verify your phone model, headphone type, charging standard, and adapter specifications. These simple checks can help you choose a reliable adapter.

Why are Gen Z wearing wired headphones?

Gen Z’s renewed interest in wired headphones combines fashion, convenience, affordability, and a preference for simpler technology. Corded earbuds can create a Y2K or retro-inspired appearance. They also offer a noticeable alternative to today’s popular wireless earbuds, as explored in Why Is Gen Z Using Wired Headphones? The Retro Trend.

Social media has helped bring wired earphones back into the spotlight. Creators and influencers often feature them with casual, vintage, or alternative outfits. The visible cable can become part of the overall look.

There are practical reasons for the trend as well. Wired headphones do not need a separate battery, charging case, or Bluetooth connection. They are often affordable and easy to replace.

Many listeners also like their reliable connection. Wired headphones do not depend on Bluetooth pairing or wireless signal stability.

The cable can also provide a simple social signal. Someone wearing wired earbuds may appear clearly occupied and less open to casual conversation.

For people who prefer fewer connected devices, wired audio can feel refreshingly simple. It provides reliable listening without another battery-powered accessory.

Escaping Constant Device Management

One reason wired earbuds appeal to younger listeners is their simplicity. Wireless earbuds require charging, Bluetooth pairing, and sometimes companion apps or software updates. Wired models remove many of those extra steps.

A wired pair works whenever you plug it in. There is no charging case to remember and no separate earbud battery to monitor. This can be convenient during travel, school, work, and daily commutes.

Wired headphones can also create a sense of digital separation. You can listen without managing another wireless device or checking its battery level. For people seeking less technology in their routines, that simplicity can be appealing.

The visible cable may also help signal that you are listening to something. This can discourage casual interruptions in shared spaces or public areas.

Wired headphones are not completely maintenance-free, however. Cables can tangle, connectors can wear, and newer phones may require adapters.

Even so, their plug-and-play design remains attractive. Users can connect them and start listening without worrying about another device’s battery.

What are the disadvantages of using wired headphones?

The biggest disadvantage of wired headphones is the physical cable. It can catch on clothing, furniture, bags, and other objects. This can make wired listening less convenient during exercise or other active tasks.

Cable durability is another concern. Repeated bending near the connector can eventually damage internal wires. This may lead to intermittent audio, channel dropouts, or complete failure.

Modern smartphones can create another inconvenience. Many devices no longer include a dedicated 3.5mm headphone jack. Users may therefore need a USB-C or Lightning adapter for traditional headphones. The broader differences between these two listening methods are covered in Wired vs Wireless Audio: Which Option Is Right For You?

Adapters also add another accessory to carry. A connected adapter can experience extra physical stress if the headphone cable gets pulled sharply.

Wired headphones can also restrict movement. Your phone needs to stay within the cable’s reach unless you use an extension.

Despite these drawbacks, many users still prefer wired audio. The reliable connection, lack of headphone batteries, and affordable pricing can outweigh the inconvenience. For a broader comparison of wireless limitations, see 4 Disadvantages Of Using Bluetooth For Everything.

Choosing a durable cable and compatible adapter can reduce many common problems. Proper storage and careful handling can also extend the life of your headphones.

Physical Snags and Jack Wear

Cable tangling and connector wear are common problems with wired headphones. Keeping a cable in a pocket or bag can create repeated bends and knots. Over time, this can weaken the internal wiring.

The connector is especially vulnerable. Pulling the cable instead of the plug places additional stress on the connection. Repeated bending near the connector can eventually cause intermittent or one-sided audio.

Adapters create another consideration for modern smartphones. A USB-C or Lightning adapter extends the connection away from the phone. A sudden pull can place additional leverage on the phone’s port.

You can reduce these risks with a few simple habits:

  • Store headphones loosely instead of tightly wrapping them.
  • Disconnect them by holding the plug.
  • Avoid placing heavy objects on the cable.
  • Choose cables with reinforced strain relief.
  • Remove adapters carefully instead of pulling the cable.

These habits can help extend the life of both your headphones and adapter. They can also reduce unnecessary stress on your phone’s charging port.

When handled carefully, wired headphones can remain reliable for years. Good storage and a durable cable make a noticeable difference. For more detailed maintenance advice, see How to Clean and Maintain Your Premium Headphones.

Can I charge my iPhone while using wired headphones?

Yes, you can charge an iPhone while using wired headphones. The best solution depends on your iPhone model and the type of headphones you use.

USB-C iPhones can work with compatible USB-C audio and charging adapters. These accessories provide separate connections for power and wired audio. If you use 3.5mm headphones, choose an adapter with the required DAC.

Older Lightning iPhones require compatible Lightning accessories. Not every Lightning adapter supports simultaneous charging and audio, so check the product specifications before buying.

Another option is wireless charging. You can connect wired headphones to the iPhone’s physical port while charging the device with a compatible wireless charging pad.

This approach can be useful if you already own a Qi or MagSafe charger. It avoids the need for a charging splitter and leaves the physical connector available for your headphones.

For people who frequently charge while listening, a dual-port adapter can be convenient. Wireless charging may be better for stationary use.

The best choice depends on your phone, headphones, charging habits, and preferred setup.

Using MFi Certified iPhone Adapters

When choosing an adapter for an older Lightning iPhone, MFi certification can provide additional assurance. It indicates that the accessory is part of Apple’s certified accessory ecosystem.

MFi is mainly relevant to Lightning accessories. It does not apply to USB-C accessories in the same way. For USB-C iPhones, focus instead on the adapter’s published audio, charging, and compatibility specifications.

If you use 3.5mm headphones, make sure the adapter supports the required audio conversion. A charging-only adapter will not automatically provide analog headphone output.

You should also check the adapter’s charging capabilities. If you want fast charging, verify its supported power-delivery standard and maximum wattage.

Avoid choosing an adapter based only on price. Poorly designed accessories can cause audio interruptions, charging limitations, or compatibility problems.

Before purchasing, confirm:

  • Your iPhone model and port.
  • Your headphone connector.
  • Simultaneous audio and charging support.
  • Required charging speed.
  • DAC support for 3.5mm headphones.

These checks can make your wired headphone setup more reliable and easier to use.

Do wired headphones drain an iPhone battery?

Yes, wired headphones use some iPhone power, but their energy requirements are generally modest. Traditional wired headphones do not have their own rechargeable battery. Instead, the phone provides the electrical signal needed to produce sound.

The exact power consumption varies by headphone design, listening volume, impedance, and the phone’s audio hardware. For this reason, there is no single power figure that applies to every pair of wired headphones.

Bluetooth headphones also require the iPhone to maintain a wireless connection. However, the difference in battery use varies between phones, headphones, codecs, and listening conditions.

Other phone activities often have a much greater effect on battery life. Screen brightness, gaming, video playback, cellular reception, and background activity can all consume significant power.

Wired headphones can still be useful when you want to avoid charging another device. They are particularly convenient during long listening sessions when paired with a suitable charging adapter.

For most users, the battery difference between wired and Bluetooth audio is relatively small compared with the phone’s overall workload.

Negligible Power Draw in Practice

Ordinary wired earbuds generally require a modest amount of power to produce audio. The exact amount depends on their electrical characteristics and the volume you choose.

Your phone may consume considerably more energy through its display, processor, cellular connection, GPS, or demanding applications. As a result, wired audio usually represents only a small part of total battery consumption.

That does not mean wired headphones use zero power. The phone still needs to generate and amplify the audio signal. Headphones with higher impedance can also require more output power than basic earbuds.

High-impedance studio headphones are a different situation. Some models benefit from a dedicated headphone amplifier. A phone may not provide enough output for the desired volume or performance.

For typical earbuds and portable headphones, this is rarely an issue. Their power requirements are generally low enough for everyday listening.

If battery life is your priority, focus on larger sources of consumption:

  • Lower unnecessary screen brightness.
  • Limit demanding background applications.
  • Use Wi-Fi when practical.
  • Avoid poor cellular reception when possible.
  • Reduce unnecessary location activity.

Wired headphones remain a simple, low-maintenance option for everyday audio.

Frequently Asked Questions

Does using an audio and charging splitter reduce sound quality?

No, a high-quality splitter will not reduce your sound quality. Premium splitters feature isolated circuitry that keeps electrical current from bleeding into the audio pathway. As long as the adapter contains a clean digital-to-analog converter (DAC), your audio remains crisp, dynamic, and completely free of background hum or distortion.

Can I charge my phone wirelessly while using wired headphones?

Yes, wireless charging works perfectly while using wired headphones. You can simply rest your smartphone on any standard Qi or MagSafe charging pad while your wired earbuds remain plugged into the bottom USB-C or Lightning port. This hands-free approach bypasses the need for dual-adapter splitters entirely.

Why does my audio crackle when I plug in the charger?

Audio crackling usually occurs due to ground loop interference or cheap, unshielded internal adapter wiring. Low-cost splitters frequently lack proper electrical insulation, allowing high-frequency current from the charging brick to leak into sensitive audio lines. Switching to a certified, well-shielded adapter immediately resolves this irritating buzzing sound.

Can fast charging damage wired headphones plugged into a splitter?

Fast charging will not damage your wired headphones when using a certified splitter. High-end splitters feature dedicated power management chips that negotiate safe charging rates with your phone. These chips isolate high voltage, sending pure power straight to the battery while routing safe, low-power audio signals directly to your ears.

Conclusion

Losing the 3.5mm headphone jack does not mean you must abandon wired audio. With the right adapter, you can use wired headphones without losing your phone’s charging port.

USB-C and Lightning accessories can provide separate connections for charging and audio. The best option depends on your phone, headphone connector, and charging requirements.

Wired headphones still offer several practical benefits. They do not require a separate battery, avoid Bluetooth pairing issues, and can provide a consistent connection. They can also be more affordable than many wireless alternatives.

There are drawbacks, including tangled cables, limited movement, and connector wear. Modern phones may also require an additional adapter.

For frequent charging, choose a compatible dual-port audio adapter with appropriate charging support. If you prefer fewer accessories, wireless charging can keep the physical port available for headphones.

Ultimately, the right setup lets you enjoy the simplicity and reliability of wired audio without constantly choosing between listening and charging. With a compatible adapter or wireless charger, both can work together.

5 Disadvantages Of Using A Mechanical Keyboard

5 Disadvantages Of Using A Mechanical Keyboard

Enthusiasts often praise mechanical keyboards for their tactile feedback, durability, and customization. However, there are also several disadvantages of using a mechanical keyboard that buyers should consider before making a purchase.

Mechanical keyboards can provide an enjoyable typing experience, but they are not ideal for everyone. Their switches can produce significant noise, their taller designs may feel uncomfortable, and their prices can be higher than standard keyboards.

The sheer number of switches, layouts, keycaps, and customization options can also make choosing one surprisingly complicated. What starts as a simple keyboard purchase can quickly become a deep dive into specifications and upgrades.

According to ergonomics research from the Occupational Safety and Health Administration, proper input device selection is critical for preventing cumulative trauma disorders during long typing sessions.

Before choosing a mechanical keyboard, consider how it will fit your workspace, budget, and daily typing habits. The following five disadvantages can help you decide whether a mechanical keyboard is right for you.

1. They can be noisy propositions

One of the most noticeable disadvantages of mechanical keyboards is their noise. Clicky mechanical switches produce an audible click with every keypress. Even tactile and linear switches can create noticeable sounds when the key reaches the bottom of its travel.

The noise may not matter when you work alone. However, it can become distracting in shared offices, classrooms, libraries, or homes. Coworkers and family members may find constant key sounds irritating, especially during long typing sessions. If you primarily type in a shared workspace, learning how to pick the perfect mechanical keyboard for your office can help you choose a quieter and more suitable model.

The keyboard’s construction also affects its overall sound. Keycap material, case design, mounting style, and internal dampening can all change the acoustic profile.

Some options can reduce the noise:

  • Silent mechanical switches produce less sound.
  • Desk mats can reduce vibrations.
  • Dampening materials can soften case resonance.
  • Lighter typing can reduce bottom-out noise.
  • Low-profile designs can offer a quieter experience.

However, these solutions may increase the keyboard’s overall cost. If a quiet workspace is your priority, a membrane or low-profile keyboard may be a better fit.

2. The typing experience can be a tiring one

Mechanical keyboards are often praised for their satisfying typing feel. However, that same tactile experience can become tiring for some users. The resistance and travel distance of certain switches may require more effort during long typing sessions.

Switch choice makes a significant difference. Heavy tactile or clicky switches can require more force than lighter linear options. Users who type for several hours each day may notice finger fatigue if they choose a switch that feels too stiff.

Keyboard height can also affect comfort. Many mechanical keyboards have taller cases than standard membrane models. This can place the wrists at an awkward angle when the desk setup is not properly adjusted.

Your typing technique matters, too. Pressing every key forcefully can increase fatigue over time. A lighter touch and suitable ergonomic positioning can make mechanical keyboards more comfortable.

Before buying, consider:

  • Switch weight and actuation force.
  • Total key travel.
  • Keyboard height.
  • Your typical daily typing time.
  • Wrist and hand positioning.

Testing different switches can help you find a more comfortable typing experience.

3. They tend to cost more

Another major disadvantage of using a mechanical keyboard is the price. Basic mechanical keyboards can be affordable, but quality models often cost considerably more than standard membrane keyboards. Comparing mechanical vs membrane keyboards for gamers can also help illustrate why buyers may choose one design over another based on features, performance, and budget.

The higher price comes from the additional components used in mechanical designs. Each key has an individual mechanical switch with springs, housings, and electrical contacts. Premium keyboards may also use stronger cases, better keycaps, metal plates, and programmable controllers.

Customization can increase the cost even further. Enthusiasts may purchase separate switches, keycap sets, cables, stabilizers, and sound-dampening materials. A keyboard that begins as a simple purchase can eventually become a much larger investment.

Mechanical keyboards can still provide good long-term value. Their switches are often designed to withstand millions of keystrokes. Hot-swappable models can also make replacing individual switches easier.

However, you should consider whether you need those additional features.

For basic typing, a cheaper membrane keyboard may provide everything you need. If you value durability and customization, the higher price may be easier to justify.

4. A rabbit hole of options

The huge variety of mechanical keyboard options can be both an advantage and a disadvantage. Beginners may feel overwhelmed by the number of choices available. Selecting the right keyboard can involve much more research than expected.

You must first choose between different mechanical switch types. Linear, tactile, and clicky switches each provide different levels of resistance, feedback, and sound. There are also countless variations within each category.

Then come keyboard layouts and sizes. Full-size, TKL, 75%, 65%, and 60% keyboards all arrange their keys differently. Keycaps, mounting systems, firmware, connectivity, and case materials add even more variables.

Customization can make the process even deeper. Enthusiasts can spend hours comparing switches, keycap profiles, stabilizers, and sound modifications.

For beginners, this can create decision fatigue. It becomes easy to spend more money than originally planned.

A simple buying process can help:

  • Decide your preferred keyboard size.
  • Choose a suitable switch type.
  • Set a firm budget.
  • Identify essential features.
  • Ignore upgrades you do not actually need.

More options do not always mean a better buying experience.

5. They can be bulky

Mechanical keyboards can be significantly bulkier than standard or low-profile keyboards. Their individual switches, internal plates, cases, and other components require additional space. This can make them less convenient for compact desks or frequent travel.

Many mechanical keyboards are also heavier. Models with aluminum cases and metal plates can feel particularly substantial. While this weight can make the keyboard feel stable and premium, it can also make transportation inconvenient.

Height is another concern. A taller keyboard can raise your hands and wrists higher from the desk surface. Without suitable positioning, this may contribute to wrist discomfort during extended typing.

Compact mechanical keyboards solve some space problems. However, smaller layouts can remove dedicated keys or change familiar key positions. A 75% or 65% keyboard may save desk space while requiring an adjustment period.

If portability and desk space are important, consider:

  • Low-profile mechanical keyboards.
  • Lightweight plastic cases.
  • Compact layouts.
  • Detachable USB cables.
  • Smaller accessories and wrist rests.

Mechanical keyboards are not necessarily too large for everyday use. However, their size and weight are worth considering before buying.

What are the disadvantages of a keyboard?

Understanding the disadvantages of using a mechanical keyboard starts with looking at general keyboard-related drawbacks. Traditional keyboards can force your hands and wrists into fixed positions. Long typing sessions may cause muscle fatigue, wrist discomfort, and repetitive strain.

Fixed key spacing can also feel awkward for users with different hand sizes. Membrane and scissor keyboards present their own maintenance challenges. Dust and spilled liquids can collect beneath their thin layers, making deep cleaning difficult.

These limitations can affect comfort, maintenance, and long-term value. However, the disadvantages of using a mechanical keyboard are different from those of traditional membrane designs. Mechanical models offer more customization but can introduce higher costs, noise, and maintenance requirements.

Common keyboard disadvantages include:

  • Fixed layouts that may not suit every user.
  • Limited repairability on many budget models.
  • Difficult cleaning beneath membrane layers.
  • Potential wrist strain during poorly positioned typing.
  • Whole-unit replacement when individual components fail.
  • Higher costs when choosing premium mechanical models.

Choosing the right keyboard can reduce many of these problems. Your typing habits, workspace, and daily workload should guide your decision.

The Hidden Risk of Repetitive Strain Injuries

One of the important disadvantages of using a mechanical keyboard can involve its height and typing position. Long typing sessions may increase fatigue when your wrists remain bent or your forearms stay fixed. Poor desk height can make this problem worse.

Mechanical keyboards often have taller cases than low-profile alternatives. This added height may encourage greater wrist extension when the keyboard sits directly on the desk. The effect varies between users and depends heavily on overall desk ergonomics.

Repetitive movements can also irritate muscles, tendons, and nerves. However, keyboard type is only one possible factor. Typing speed, posture, break frequency, desk height, and hand position all influence comfort.

To reduce potential strain from a mechanical keyboard, consider:

  • Keeping your wrists in a neutral position.
  • Adjusting your desk and chair height.
  • Taking regular breaks during long sessions.
  • Using a suitable wrist rest when helpful.
  • Considering an ergonomic or split keyboard.

Good ergonomics can reduce several disadvantages of using a mechanical keyboard. A comfortable setup matters more than the keyboard technology alone.

What are the disadvantages of using a 75% keyboard?

A 75% keyboard is popular because it saves desk space without removing as many keys as smaller layouts. However, the layout can create specific disadvantages of using a mechanical keyboard for certain users.

The biggest issue is the missing dedicated numeric keypad. Finance professionals, accountants, and spreadsheet users may find numeric data entry slower. They must rely on the horizontal number row instead of a dedicated number pad.

The compact design also places navigation keys closer to the main typing area. This reduced spacing can cause accidental keystrokes while users develop new muscle memory. Some 75% keyboards also use non-standard key sizes, which can make replacement keycaps harder to find.

Key limitations may include:

  • No dedicated numeric keypad.
  • Tighter spacing around navigation keys.
  • Less familiar positioning for some commands.
  • Limited compatibility with certain keycap sets.
  • A learning curve for full-size keyboard users.

These disadvantages of using a mechanical keyboard in a 75% layout may not affect everyone. Compact designs can work well for gaming, coding, and general typing. However, users who enter numbers frequently may prefer a full-size keyboard.

Navigating Layer Keys and Compact Function Clusters

Another potential disadvantage of using a mechanical keyboard with a compact layout is the reliance on function layers. Smaller keyboards often move navigation and secondary commands closer together. This saves space but can reduce the familiar separation found on full-size models.

Some compact keyboards require function-layer shortcuts for commands such as Print Screen, Home, and End. Users may need to press two or more keys to access functions that have dedicated keys on larger keyboards.

This can interrupt workflow when those commands are used frequently. New users may also need time to develop reliable muscle memory. Experienced compact-keyboard users may adapt much faster.

Before choosing a 75% mechanical keyboard, consider how often you use navigation and function keys. A compact layout can improve desk space without creating problems for general typing.

However, the disadvantages of using a mechanical keyboard become more noticeable when your workflow depends on many dedicated keys. Testing the layout before buying can help you determine whether the space savings are worth the adjustment.

What are some common problems with mechanical keyboards?

Mechanical keyboards offer individual switches, tactile feedback, and extensive customization. However, these features can also introduce hardware problems. Understanding these issues is essential when considering the disadvantages of using a mechanical keyboard.

One common problem is key chatter. This occurs when one physical keypress registers multiple inputs. Worn switches, contamination, or electrical contact problems can cause this behavior.

Dust and spilled liquids can also enter exposed switch areas. This may result in sticky keys, inconsistent presses, or switch failure. Larger keys can develop stabilizer rattle, creating unwanted sounds during typing.

Budget mechanical keyboards may experience firmware or USB connection problems. These issues can cause temporary disconnections or inconsistent operation.

Common mechanical keyboard problems include:

  • Key chatter from worn or faulty switches.
  • Dust buildup around mechanical switches.
  • Sticky or inconsistent key presses.
  • Stabilizer rattle on larger keys.
  • Firmware or connection issues.
  • Difficult repairs on non-hot-swappable models.

These issues do not affect every mechanical keyboard. Build quality, component selection, and maintenance all influence reliability. Still, they represent important disadvantages of using a mechanical keyboard to consider before buying.

Persistent Switch Chattering and Connector Solder Wear

Key chatter is one of the more frustrating disadvantages of using a mechanical keyboard. It happens when a switch registers multiple inputs from a single physical press. This can produce duplicated letters, repeated commands, or inconsistent input.

Switch wear, contamination, and electrical contact problems can contribute to chatter. In many cases, replacing the affected switch provides the most reliable solution.

Repair difficulty depends on the keyboard design. Hot-swappable keyboards allow compatible switches to be removed without soldering. This makes switch replacement much easier for beginners.

Non-hot-swappable keyboards require more technical work. Replacing a switch usually involves desoldering its electrical contacts. Poor technique or excessive heat can damage the circuit board.

If repairability matters, look for:

  • Hot-swap sockets for easier switch replacement.
  • Replaceable USB cables where available.
  • Reliable PCB construction.
  • Accessible firmware support.
  • Compatible replacement switches.

These features can reduce some disadvantages of using a mechanical keyboard over the long term. They can also make maintenance easier and extend the keyboard’s useful life.

What are the advantages of using a mechanical keyboard?

Although this article focuses on the disadvantages of using a mechanical keyboard, mechanical models also offer several important benefits. Their individual switches provide distinct tactile, linear, or clicky feedback. Many users prefer this experience over the softer feel of membrane keyboards.

Mechanical switches can also offer different actuation characteristics. Depending on the switch, users may register a key without fully bottoming it out. This can support lighter typing for users who prefer shorter or smoother presses.

Durability is another major advantage. Many mechanical switches are rated for tens of millions of keystrokes. Some premium switches have ratings approaching or exceeding 100 million presses. Proper habits can further extend keyboard longevity, including the kind of maintenance discussed in boost your wireless keyboard’s lifespan with one easy habit.

Customization is equally important. Compatible keyboards can support different keycaps, switches, stabilizers, and layouts. Programmable firmware can also provide custom shortcuts and remapping.

Key advantages include:

  • Strong tactile or linear feedback.
  • Extensive switch variety.
  • High switch durability.
  • Customizable keycaps and layouts.
  • Repairable components on suitable models.
  • Programmable shortcuts and controls.

These benefits explain why mechanical keyboards remain popular among gamers, programmers, writers, and enthusiasts. However, weighing these benefits against the disadvantages of using a mechanical keyboard helps you make a more informed purchase.

Unmatched Durability and Custom Hardware Swapping

Durability is one area where mechanical keyboards can offset some disadvantages of using a mechanical keyboard. Individual switches are designed for repeated use, and many have high keystroke ratings. This makes them appealing to people who type heavily every day.

Hot-swappable keyboards add another practical benefit. They allow compatible switches to be removed without soldering. Users can replace worn switches or test different switch types with less technical work.

Customization extends beyond switches. Many mechanical keyboards support replacement keycaps, stabilizers, cables, and other components. Programmable firmware can provide additional control over shortcuts and layouts.

However, not every mechanical keyboard offers the same modularity. Some models use soldered switches or proprietary components. Buyers should always check compatibility before purchasing replacement parts.

For better long-term value, consider:

  • Hot-swap switch sockets.
  • Standard switch compatibility.
  • Replaceable keycaps.
  • Accessible firmware.
  • Durable construction.
  • Readily available replacement parts.

This modular design can reduce the impact of certain disadvantages of using a mechanical keyboard. It may also prevent one failed switch from making the entire keyboard unusable.

What are the disadvantages of a mechanical keyboard?

The most obvious disadvantages of using a mechanical keyboard include noise, price, height, weight, and maintenance. These drawbacks vary depending on the model, switch type, and construction.

Noise is often the first concern. Clicky switches can produce sharp sounds with every press. Even linear and tactile switches can create bottom-out noise against the keyboard’s plate and case.

Price can also be higher than standard membrane keyboards. Premium switches, keycaps, cases, controllers, and other components can increase the total cost. Customization can make the final investment even larger.

Height is another consideration. Many mechanical keyboards have taller cases than low-profile alternatives. Users may need a wrist rest or different desk position for comfortable typing.

Portability can also be an issue. Some mechanical keyboards use heavy metal plates and dense cases. These models can feel cumbersome when carried between home, work, or gaming locations. Users who prioritize portability may also want to consider why gamers prefer wired keyboards over wireless ones when evaluating different keyboard setups.

The main disadvantages of using a mechanical keyboard include:

  • Higher purchase costs.
  • Noticeable typing noise.
  • Taller keyboard profiles.
  • Greater weight on some models.
  • More maintenance and customization complexity.
  • Potential switch and stabilizer problems.

These drawbacks do not make mechanical keyboards unsuitable. They simply highlight why your environment and workflow should guide your choice.

Excessive Desk Height and Inevitable Acoustic Intrusions

Keyboard height is another important point when considering the disadvantages of using a mechanical keyboard. Many mechanical models sit higher than thin membrane or low-profile keyboards. This can increase wrist extension if your desk and chair are not properly adjusted.

A suitable wrist rest may help some users maintain a more comfortable position. However, the goal should be a neutral wrist posture rather than simply raising the hands higher.

Noise can create an even bigger problem in shared environments. Clicky switches produce distinct clicks, while tactile and linear switches can still create bottom-out sounds. The keyboard case and mounting system also influence the final acoustic profile.

Loud typing can distract coworkers in open offices. It may also disturb family members at home, particularly during quiet hours. Keyboard noise can even enter microphones during meetings, streaming, and voice calls.

Noise can be reduced with:

  • Silent mechanical switches.
  • Desk mats and case dampening.
  • Suitable foam or acoustic modifications.
  • A lighter typing technique.
  • Lower-profile keyboard designs.

These changes can reduce some disadvantages of using a mechanical keyboard, but they may not eliminate noise completely. If quiet operation is essential, a low-profile membrane keyboard may be the better choice.

Frequently Asked Questions

Can mechanical keyboards damage your wrists over time?

Yes, mechanical keyboards can increase wrist strain if used without proper ergonomic support. Because switch housings and backplates sit substantially higher off the desk than thin membrane alternatives, they bend your wrists upward into uncomfortable extension. Without a dedicated wrist rest or floating arm technique, this awkward angle strains forearm tendons and may contribute to repetitive motion injuries during lengthy typing sessions.

Are mechanical keyboards too loud for typical office use?

Most standard mechanical keyboards generate noticeable acoustic distractions in quiet office spaces. Clicky switches produce sharp noises with every actuation, while linear variants still generate loud bottom-out clatter against metal plates. While adding sound-dampening foam, rubber O-rings, and specialized silent switches helps quiet the deck, these boards generally stay louder than standard low-profile membrane keyboards.

Why are mechanical keyboards more expensive than membrane models?

Mechanical keyboards cost substantially more because each key operates via an independent switch built from internal springs, metal contacts, and molded plastic housings. Membrane boards use single molded silicone sheets across printed circuit traces, slashing production expenses. Mechanical designs also feature sturdier materials like thick ABS or PBT plastics, aircraft-grade aluminum plates, and sophisticated programmable controllers.

Is gaming on a membrane keyboard worse than using mechanical switches?

Gaming on a membrane board is not necessarily worse, but it lacks the exact actuation points and responsiveness of mechanical switches. Mechanical keys register inputs halfway through the press, allowing faster reactions and distinct physical feedback. Membrane keyboards require pressing keys all the way down, which can slow response times and cause tactile inconsistency during competitive play.

Conclusion

Understanding the disadvantages of using a mechanical keyboard can help you choose a setup that matches your actual needs. Mechanical keyboards offer excellent tactile feedback, durability, and customization. However, they also come with practical trade-offs that should not be ignored.

Common disadvantages include typing noise, higher prices, taller profiles, added weight, and maintenance requirements. Compact layouts can create additional limitations. A 75% keyboard saves desk space but removes the dedicated numeric keypad. This can affect spreadsheet and data-entry workflows.

Mechanical switches can also experience issues such as chatter, dust buildup, and stabilizer noise. Hot-swappable models can make repairs easier, but not every keyboard offers this feature.

Ultimately, the right keyboard depends on your priorities. A quiet, low-profile membrane keyboard may suit shared offices and minimalist setups. A mechanical keyboard may be better if you value tactile feedback, customization, and long-term repairability.

Before buying, consider your daily tasks, budget, workspace, and typing habits. If possible, test different switch types and keyboard profiles in person. The best keyboard is the one that supports comfortable, productive typing every day.

4 Unexpected Uses for Google Sheets You Should Try

4 Unexpected Uses for Google Sheets You Should Try

Spreadsheets usually bring to mind accounting ledgers, repetitive administration, and routine data entry. However, exploring unexpected uses for Google Sheets reveals a surprisingly versatile creative workspace. With formulas, formatting tools, and built-in functions, Google Sheets can do far more than basic calculations.

Instead of relying on separate apps for every small project, you can turn a spreadsheet into a useful creative tool. You can even use its grid to create games, drawings, floor plans, and home improvement layouts.

Below are four unexpected Google Sheets uses that show just how flexible the platform can be. These ideas are practical, creative, and surprisingly easy to explore.

Turn Google Sheets into an Etch A Sketch

Remember feeling like an artist while drawing pictures on an Etch A Sketch? You can recreate that experience in Google Sheets without buying the classic toy. All you need is a blank spreadsheet and a little creativity.

Google Sheets enthusiast Ben Collins created an Etch A Sketch-inspired project called Etch A Sheet. He developed the idea after watching one of his children use the real toy to draw a treasure map. Instead of physical knobs, the spreadsheet uses five checkboxes as controls.

The Left and Right checkboxes create horizontal lines. The Up and Down checkboxes create vertical lines. The Reset checkbox clears the entire drawing. Unlike a traditional Etch A Sketch, each new drawing starts from the bottom-left corner.

The project uses built-in Google Sheets features rather than external software. These include the IF function, iterative calculations, and a SPARKLINE formula for drawing lines.

You can recreate the project yourself or use a template. It is a fun example of how Google Sheets formulas can become interactive tools.

Play Tetris on Google Sheets

Tetris is available on phones, browsers, and gaming consoles, so Google Sheets may be one of the last places you expect to find it. However, software engineer Tyler Robertson created a playable Tetris-style game using only native Google Sheets functions.

The game looks similar to a traditional Tetris board. Different-shaped blocks appear at the top of the grid and eventually become fixed pieces. However, the blocks do not automatically fall. Instead, you press a button to move them downward.

This makes the game more relaxed, but it still requires strategy. You can move the pieces left or right, although you cannot rotate them. A red line near the top of the grid also marks the game-over point.

Clearing a complete line earns one point. Once your blocks cross the red line, you must reset the game.

The impressive part is that the project does not rely on external scripts or embedded applications. It uses native functions such as AND, COUNTIF, and IF.

If Tetris is not your favorite, similar Google Sheets projects include Chess, Sheetle, Minesweeper, and even an escape room.

Make a Digital Advent Calendar in Sheets

Advent calendars are a popular holiday tradition, with a new surprise waiting behind each door. But you do not need a physical calendar to enjoy the experience. One of the more creative unexpected uses for Google Sheets is turning a simple spreadsheet into a digital advent calendar.

Google Sheets enthusiast and Google Developer Expert Ben Collins created a digital advent calendar that works much like a traditional version. It features 24 windows, with each one hiding a Christmas-themed image. Examples include Rudolph the red-nosed reindeer, candy canes, Santa Claus, and mistletoe.

Each window opens when you click the checkmark above it. However, the calendar prevents users from opening future windows early. An IF function checks the current date against the appropriate opening date.

The calendar can use November 30 as its trigger date. For example, the third window becomes available on December 3. Before then, the hidden image remains locked.

Simple borders, fill colors, and an IF-based snowfall effect complete the festive design. This project shows how Google Sheets can become an interactive holiday tool.

Plan your tile placement in Google Sheets

Google Sheets can also help plan tile layouts for bathrooms, kitchens, and other home improvement projects. This can be especially useful when you want to create a custom pattern with different tile colors or designs.

You do not need to draw the layout on traditional graph paper. Instead, adjust the spreadsheet cells to match the general shape of your tiles. Unlike a floor plan, the cells do not necessarily need to be square.

Start by measuring the exact length and width of the area you want to cover. Then measure the length and width of your chosen tiles. Include an allowance for grout spacing when calculating how many tiles will fit.

Divide the space dimensions by the corresponding tile dimensions. The resulting numbers help determine how many cells you need across each row and column.

Create a border around the planned area to keep the layout organized. Then, use different cell colors to represent different tile designs.

This approach makes it easy to test patterns before installation. You can experiment with alternating colors, decorative tiles, borders, and repeating designs.

Google Sheets therefore works as a simple tile layout planner, helping you visualize your design before purchasing materials.


What are some cool things I can do with Google Sheets?

Beyond budgeting, unexpected uses for Google Sheets include media tracking, website monitoring, language learning, and creative projects. Built-in functions let you create useful workflows without constantly switching between applications.

For example, GOOGLETRANSLATE can generate multilingual glossaries directly inside a spreadsheet. You can organize vocabulary, phrases, and translations in one convenient place.

Google Sheets can also work with publicly accessible web data. Functions such as IMPORTXML and IMPORTHTML can retrieve compatible information from websites.

Creative users can explore even more unexpected uses for Google Sheets. You can build habit trackers, study flashcards, interactive checklists, dashboards, and simple games.

Some useful Google Sheets ideas include:

  • Creating automated content trackers
  • Building personal budgeting systems
  • Organizing study materials
  • Monitoring selected website information
  • Creating interactive project dashboards
  • Translating words or phrases in bulk

These examples show how ordinary spreadsheet cells can become practical personal tools. With the right formulas, Google Sheets can handle tasks that normally require separate applications.

Automated Website Uptime Monitoring

One of the more useful unexpected uses for Google Sheets is basic website uptime monitoring. You can use Google Apps Script to create a lightweight system that checks whether a website responds successfully.

When a check fails, the script can send an email notification. You can also record the website address, check time, response status, and response code inside your spreadsheet.

A monitoring sheet might include:

  • Website URL
  • Check time
  • Response status
  • Response code
  • Notes or alerts

The script can update these details automatically during scheduled checks. You can also configure alerts for failures or repeated problems.

This approach provides a simple monitoring solution without requiring another desktop application. However, dedicated uptime services usually offer more advanced reporting and monitoring features.

For small projects, personal websites, or learning exercises, Google Sheets and Apps Script remain useful. This is another example of how unexpected Google Sheets uses can extend beyond ordinary data entry.

What are the main uses of Google Sheets?

The main uses of Google Sheets include collaboration, reporting, record-keeping, budgeting, project management, and data analysis. However, many unexpected uses for Google Sheets come from combining these basic features with formulas and automation.

Individuals and organizations can use shared workbooks while multiple people work on the same file. Changes are saved to the cloud, reducing problems caused by outdated spreadsheet versions.

Google Sheets also supports comments, filters, charts, pivot tables, and conditional formatting. These tools can turn large datasets into clearer reports and interactive dashboards.

Common Google Sheets applications include:

  • Project and task tracking
  • Monthly budgets
  • Expense management
  • Sales pipeline reporting
  • Inventory records
  • Customer databases
  • Performance dashboards
  • Team schedules

The platform balances accessibility with powerful spreadsheet functionality. Students, freelancers, small businesses, and remote teams can all use it as a central workspace.

Exploring less obvious features can reveal even more creative uses for Google Sheets. The same spreadsheet can manage information, analyze data, automate tasks, and present results.

Collaborative Financial Modeling

Collaborative financial modeling is another practical use of Google Sheets. Teams can create revenue forecasts, expense plans, budgets, and financial scenarios in one shared workbook.

Instead of passing spreadsheet files between users, everyone can work from the same cloud-based document. Team members can review assumptions, add comments, and adjust figures together.

A collaborative financial model might include:

  • Revenue assumptions
  • Operating expenses
  • Monthly forecasts
  • Cash-flow estimates
  • Scenario comparisons
  • Budget versus actual results

Conditional formatting can highlight important changes. Charts can make financial trends easier to understand, while pivot tables can summarize larger datasets.

This setup can make financial planning more organized and easier to review. It also demonstrates one of the more useful unexpected uses for Google Sheets for small teams.

However, financial models still require careful review. Incorrect formulas or assumptions can produce misleading results.

Larger organizations may need specialized financial planning software with stronger controls. For smaller teams and straightforward forecasting, Google Sheets remains an accessible and flexible option.

Is there a random function in Google Sheets?

Yes. Google Sheets includes native functions for generating random numbers. The two most useful options are RAND() and RANDBETWEEN().

The RAND function returns a random decimal number greater than or equal to zero and less than one. It can help with simulations, randomized selections, and basic probability experiments.

If you need whole numbers, RANDBETWEEN is more convenient. Its syntax is RANDBETWEEN(low, high). For example, RANDBETWEEN(1,30) can generate an integer between 1 and 30.

These formulas can recalculate when the spreadsheet updates. Therefore, they work well for temporary randomization but may not suit situations requiring a permanently fixed result.

You can use random functions to:

  • Select random participants
  • Create simple simulations
  • Shuffle data
  • Generate sample values
  • Randomize practice questions
  • Assign groups

Randomization is another example of unexpected uses for Google Sheets. If you need to preserve a generated result, copy it and paste it as a static value.

Shuffling Data Lists with SORT and RANDARRAY

You can combine SORT and RANDARRAY to create a dynamic way to randomize lists. This can help rearrange names, survey responses, study questions, or other datasets without manually moving rows.
The basic approach involves generating random values alongside your data. Google Sheets can then sort the dataset according to those values.

Each recalculation can produce a different order. This makes the method useful for several unexpected uses for Google Sheets, especially when you need quick randomization.

You can use it to:

  • Shuffle a classroom roster
  • Randomize survey responses
  • Create practice-question orders
  • Assign participants to groups
  • Mix items in a content list

The main advantage is convenience. You do not need to repeatedly drag rows into different positions.

However, random formulas can recalculate and change the order unexpectedly. If you need to preserve a particular shuffle, copy the results and paste them as values.

This method works well for ordinary spreadsheet tasks. It should not be treated as a security-grade random number generator.

Used correctly, SORT and RANDARRAY provide a quick way to create dynamic randomized lists.

What are the 10 Google tricks?

Google offers many small features that can save time during everyday searches and spreadsheet tasks. Some are browser techniques, while others highlight unexpected uses for Google Sheets through formulas and built-in tools.

Useful Google tricks include:

  1. Use conversion queries directly in Google Search.
  2. Put quotation marks around phrases for exact searches.
  3. Use the filetype: operator to find specific documents.
  4. Use GOOGLEFINANCE for supported financial information.
  5. Use IMPORTHTML to import compatible web tables.
  6. Use GOOGLETRANSLATE for spreadsheet translation.
  7. Add checkboxes for task and status tracking.
  8. Use dropdown menus to standardize entries.
  9. Apply conditional formatting to highlight important values.
  10. Use voice typing when supported by your device and browser.

These tricks can reduce repetitive work and make information easier to manage. They also show that Google Sheets is not limited to traditional calculations.

Some features depend on external websites, data availability, account settings, or device support. Results can therefore vary between users.

The best approach is to choose tricks that solve a real problem. A small automation or shortcut can often save more time than learning dozens of advanced features.

Instant Stock Tracking with GOOGLEFINANCE

The GOOGLEFINANCE function can bring supported financial information into a Google Sheets workbook. This makes it useful for people who want to organize investment information without manually copying every value.

Depending on the supported security and attribute, the function can return prices, historical information, or other available market data. You can combine these values with formulas to create a simple portfolio tracker.

A basic investment sheet might include:

  • Ticker symbols
  • Current or recent prices
  • Number of shares
  • Purchase prices
  • Portfolio values
  • Gain or loss calculations

Charts can help visualize changes over time. Conditional formatting can highlight gains, losses, or selected thresholds.

This function represents another practical example of unexpected uses for Google Sheets. It can reduce manual data entry and organize financial information in one place.

However, financial data can have delays or limitations. Google Sheets should not be treated as a professional trading platform.

For personal portfolio monitoring, combining GOOGLEFINANCE with standard spreadsheet formulas can create a useful and customizable financial dashboard.

What is the hidden Google 67 trick?

The phrase “Google 67 trick” refers to an internet rumor involving the number 67. Some online discussions suggest that searching for this number activates a hidden Google Easter egg or special animation.

However, there is no established Google feature that makes the number 67 trigger a unique spreadsheet function or secret browser command. Unlike recognized Google Easter eggs, the supposed trick appears mainly connected to viral posts, jokes, memes, and online speculation.

Google has included many playful features throughout its search history. Some have involved animations, games, or unusual search behaviors. These features can change or disappear over time.

It is useful to separate confirmed Google features from internet rumors. A viral claim does not necessarily mean that a feature exists.

The Google 67 trick is therefore best treated as an entertaining search myth rather than a useful Google Sheets feature. If you want genuine tricks, Google Search and Google Sheets offer many documented tools worth exploring.

Understanding real formulas and automation features will provide more practical value. These unexpected uses for Google Sheets can improve everyday workflows without relying on unverified tricks.

Unlocking Authentic Google Easter Eggs

If you enjoy Google Easter eggs, there are genuine examples worth exploring. Google Search has historically included playful features that respond to certain queries with animations, games, or unusual page behavior.

For example, searches associated with Pac-Man have provided interactive game experiences. Other classic Easter eggs have produced visual effects or changed how search results appear.

These features are separate from Google Sheets. They do not provide spreadsheet functionality, but they demonstrate Google’s playful approach to user interaction.

Google Easter eggs can include:

  • Interactive games
  • Animated search results
  • Visual effects
  • Special search responses
  • References to technology or popular culture

Availability can change because Google occasionally removes, updates, or replaces older Easter eggs. Some features may also behave differently across devices and browsers.

If you encounter a supposed Google trick online, check whether it still works before assuming it is official. Viral claims can spread quickly without reliable confirmation.

Exploring genuine Easter eggs can be fun. However, practical unexpected uses for Google Sheets offer greater productivity value. Formulas, Apps Script, automation, and formatting tools can turn a simple spreadsheet into a useful custom workspace.


Frequently Asked Questions

Can Google Sheets send automatic email notifications?

Yes. You can configure email notifications through Google Sheets features and Google Apps Script. Apps Script provides more control when you need customized alerts based on specific events or conditions.

For example, a script can send an email after a form submission or when a workflow reaches a certain stage. Native notification settings can also provide simpler alerts without custom code.

Is Google Sheets safe for storing sensitive personal information?

Google provides security features for its cloud services. However, that does not make every spreadsheet suitable for sensitive information.

Avoid storing passwords, credit card numbers, or highly sensitive credentials in ordinary spreadsheet cells. Use strong account security, review sharing permissions, and avoid public links when handling confidential information.

How do I pull live cryptocurrency prices into Google Sheets?

You can connect Google Sheets to external cryptocurrency data sources through APIs or compatible import methods. The exact approach depends on the data provider and its access requirements.

Import functions can work with publicly accessible data, but they may not provide reliable real-time pricing. API-based integrations are often better for structured financial data.

Can I build an interactive dashboard using Google Sheets?

Yes. You can combine pivot tables, charts, slicers, filters, and conditional formatting to build interactive dashboards.

These features allow users to explore metrics without changing the underlying dataset. For many small teams and personal projects, Google Sheets can provide a practical alternative to specialized dashboard tools.


Conclusion

Exploring unexpected uses for Google Sheets reveals how much functionality exists beyond ordinary calculations. The platform can support web-data imports, translation workflows, randomization, financial tracking, dashboards, and lightweight automation.

Google Sheets can also replace some simple standalone tools. You can create project trackers, study systems, content databases, games, floor plans, and tile layouts within one cloud-based workspace.

Some of the most useful features include:

  • GOOGLETRANSLATE for multilingual spreadsheets
  • GOOGLEFINANCE for supported financial information
  • RAND and RANDBETWEEN for randomization
  • SORT and RANDARRAY for dynamic list shuffling
  • Apps Script for custom automation
  • Charts, slicers, and pivot tables for interactive reporting

The four creative uses in this guide show another side of Google Sheets. You can turn the grid into an Etch A Sketch, play Tetris, design a floor plan, or plan a tile pattern.

It is also important to separate genuine features from internet myths. The rumored Google 67 trick is not a practical spreadsheet feature.

Start with one idea that matches your needs. Build a tracker, test a formula, or experiment with the spreadsheet grid. With some creativity, Google Sheets can become a surprisingly powerful everyday tool. You can also explore cool things your Wi-Fi router can do to discover more useful technology features around your home.

What Is Laboratory? Definition, Types, Rules, and Meaning

What Is Laboratory Work? Definition, Purpose, and Safety Rules

Step inside almost any research center, hospital, or academic department, and you will find a dedicated space for testing ideas. To understand scientific progress, it helps to ask, what is laboratory infrastructure designed to achieve? At its core, a laboratory provides a controlled environment where researchers can test theories, analyze materials, and produce measurable results.

Modern society depends on laboratories for healthcare, scientific research, environmental testing, and technological development. Precise measurements and controlled conditions help researchers produce reliable and repeatable results. The National Institute of Standards and Technology (NIST) highlights the importance of accurate measurement across science, industry, and everyday life. National Institute of Standards and Technology

Whether you are a student entering a laboratory for the first time or simply curious about scientific work, understanding these spaces is useful. This guide explains laboratory definitions, chemistry laboratories, common equipment, safety rules, terminology, and the history of the word.


What is the definition of a laboratory?

A laboratory is a controlled facility designed for scientific research, experiments, testing, analysis, and measurement. It provides specialized equipment and working conditions that help researchers study materials, organisms, chemicals, and physical processes. Laboratories operate across many fields, including biology, chemistry, physics, medicine, engineering, and environmental science. Understanding peer-reviewed research and how it works also helps explain how laboratory findings are evaluated and validated.

The main purpose of a laboratory is to create conditions where observations can be measured and repeated. Researchers follow established procedures to reduce contamination, measurement errors, and unwanted variables. These practices make experimental results more reliable and easier to verify.

A laboratory can range from a school science room to a highly specialized medical or industrial facility. Its design depends on the work performed inside it. Some laboratories require sterile environments, while others need advanced ventilation or temperature control.

Ultimately, a laboratory connects scientific ideas with practical evidence. It gives researchers a structured setting for testing hypotheses, collecting data, and developing useful applications.

Primary Purpose of Controlled Scientific Spaces

The primary purpose of controlled scientific spaces is to create consistent and reproducible conditions for research and testing. Researchers need to control relevant environmental factors because unexpected changes can affect experimental results. These practices are particularly important when researchers evaluate primary and secondary sources in research and determine how evidence should be interpreted.

Depending on the work, a laboratory may regulate temperature, humidity, air quality, lighting, pressure, or cleanliness. These controls help protect samples and reduce outside influences that could affect measurements. However, not every laboratory requires the same level of environmental control.

Controlled conditions are especially important in clinical testing, pharmaceutical research, microbiology, and materials science. Even small changes can influence sensitive samples or experimental reactions.

Laboratories also rely on standardized procedures and calibrated instruments. These practices help researchers compare results across different experiments and locations. Proper documentation further improves reproducibility and helps researchers assess findings within established levels of scientific evidence.

The goal is not simply to make a laboratory look controlled. It is to create conditions that support accurate measurements and dependable observations. By reducing unnecessary variables, researchers can better determine whether an observed result comes from the factor being studied.

What is a laboratory in chemistry?

A chemistry laboratory is a specialized facility designed for chemical experiments, synthesis, analysis, and testing. Its equipment and layout support activities that involve chemicals, reactions, heat, gases, and potentially hazardous substances.

Chemistry laboratories commonly use chemical-resistant work surfaces, sinks, ventilation systems, storage cabinets, and specialized instruments. Many also contain fume hoods that help control exposure to hazardous vapors and airborne contaminants.

Inside a chemistry laboratory, scientists may mix substances, measure reactions, identify compounds, determine concentrations, or create new materials. Different experiments require different equipment and safety controls. A teaching laboratory may have basic glassware, while a research facility may use sophisticated analytical instruments.

Safety is especially important because chemical reactions can produce toxic fumes, heat, pressure, corrosive materials, or reactive byproducts. Proper storage and handling reduce these risks.

A well-designed chemistry laboratory therefore combines practical workspace with engineering controls. These features allow researchers to perform chemical work while protecting people, samples, equipment, and the surrounding environment.

Essential Ventilation and Hazard Containment Systems

Ventilation and hazard containment systems are essential in many chemistry laboratories. Their purpose is to reduce exposure to hazardous vapors, fumes, aerosols, and airborne contaminants generated during laboratory work.

A fume hood is one of the most important engineering controls. It draws air away from the user’s breathing zone and directs contaminated air through an appropriate exhaust system. Fume hoods should not be treated as a substitute for proper chemical handling or personal protective equipment.

Laboratories may also use specialized cabinets for storing flammable, corrosive, or otherwise hazardous chemicals. Proper segregation helps prevent incompatible substances from reacting accidentally.

Other containment measures can include sealed equipment, local exhaust ventilation, spill-control materials, and designated waste containers. The exact system depends on the chemicals and procedures involved.

Effective containment follows a broader principle: control hazards at their source whenever possible. Combining engineering controls with safe procedures, training, and appropriate protective equipment creates a safer working environment for laboratory personnel.

What is lab full form?

The word “lab” does not have a full form in the acronym sense. It is simply a shortened form of the word “laboratory.” Unlike terms created from initial letters, “lab” comes from shortening the original word for everyday use.

People commonly use “lab” in schools, universities, hospitals, research institutions, and workplaces. For example, someone might say “chemistry lab,” “medical lab,” or “research lab.” In each case, the shortened word refers to a laboratory.

The complete term is generally preferred in formal documents, scientific writing, regulations, institutional names, and official records. The shorter version is more common in conversation and informal communication.

It is also important not to confuse “lab” with a technical abbreviation that has a separate meaning. Its meaning depends on context, but when discussing scientific facilities, it simply means laboratory.

So, if you are searching for the “lab full form,” the simplest answer is that lab is an abbreviation or shortened form, not an acronym. Understanding this distinction helps avoid a common terminology mistake.

Truncation and Common Usage in Modern English

The shortened form “lab” developed through ordinary language use rather than from a set of initial letters. English frequently shortens longer words when speakers need faster and easier forms for everyday communication.

Laboratory is a relatively long word, so “lab” became a convenient alternative in educational, scientific, medical, and professional settings. Today, the shortened term is widely understood and rarely causes confusion when the context is clear.

You may encounter expressions such as “lab test,” “lab equipment,” “lab report,” and “lab technician.” These phrases are common in both professional and everyday communication.

However, formal writing may still require the complete word. Scientific publications, institutional documents, legal materials, and official policies often use laboratory for clarity and consistency.

The important distinction is simple: “lab” is a shortened form, not a letter-based full form. Its widespread use reflects normal English word formation rather than a separate technical definition.

Understanding this usage also makes it easier to recognize related terms across medical, academic, industrial, and research environments.

What’s in a laboratory?

A laboratory contains equipment, work surfaces, storage systems, safety devices, and instruments suited to its specific purpose. The exact contents vary widely between facilities. A school laboratory may have basic glassware, while a medical or research laboratory can contain highly specialized equipment.

Common laboratory items include beakers, test tubes, measuring cylinders, flasks, pipettes, balances, and centrifuges. Other facilities may use microscopes, incubators, spectrophotometers, chromatography systems, or specialized testing machines.

Safety equipment is equally important. Depending on the laboratory, this may include eyewash stations, safety showers, fire extinguishers, spill kits, emergency alarms, and appropriate personal protective equipment.

Storage areas also require careful organization. Chemicals, biological samples, instruments, and waste should be stored according to their hazards and intended use.

A laboratory is therefore more than a room containing scientific equipment. Its layout supports safe workflows, accurate measurements, contamination control, and efficient research.

The equipment selected should always match the laboratory’s purpose. A chemistry laboratory, clinical laboratory, microbiology facility, and engineering laboratory will have very different setups.

Essential Analytical Instrumentation and Glassware

Glassware and analytical instruments form an important part of many laboratories. Common glassware includes beakers, Erlenmeyer flasks, test tubes, pipettes, volumetric flasks, and graduated cylinders. Each item has a specific purpose and level of measurement accuracy.

Borosilicate glass is widely used because it offers good resistance to thermal shock and many chemicals. However, it is not suitable for every substance or situation. Laboratory users must select materials according to the procedure being performed.

Analytical balances provide highly precise mass measurements. Other instruments can measure properties such as absorbance, temperature, pressure, concentration, or molecular composition.

For example, spectrophotometers can measure how samples interact with light, while chromatography systems help separate and analyze mixtures. Centrifuges separate materials based on differences in density and sedimentation behavior.

Correct use matters as much as equipment quality. Instruments may require calibration, maintenance, cleaning, and proper operating procedures. Accurate results depend on both suitable equipment and careful technique.

Together, laboratory glassware and analytical instruments allow researchers to prepare samples, perform experiments, and collect dependable measurements.

What are 5 laboratory rules?

Laboratory safety depends on consistent behavior, proper training, and appropriate procedures. While individual facilities may have additional requirements, five basic rules apply broadly to many laboratory environments.

  1. Wear appropriate personal protective equipment. Safety glasses, gloves, lab coats, or other protection should match the hazards involved.
  2. Do not eat, drink, or apply cosmetics in the laboratory. These activities can increase the risk of accidental exposure or contamination.
  3. Know the location of emergency equipment. Users should understand how to access eyewash stations, safety showers, fire equipment, and emergency exits.
  4. Label containers correctly. Chemicals and samples should have clear identification and relevant hazard information.
  5. Dispose of waste properly. Chemical, biological, sharps, and other hazardous waste require appropriate disposal methods.

These rules provide a basic foundation, but they do not replace laboratory-specific training. Always follow the facility’s written procedures and safety instructions.

Proper Disposal of Hazardous Chemical Waste

Proper chemical waste disposal prevents accidental exposure, environmental contamination, fires, and unwanted chemical reactions. Laboratory waste should never be handled casually or mixed without knowing whether the substances are compatible. Proper procedures are especially important when learning how to dispose of medical waste items appropriately.

Different waste streams may require separate containers. For example, certain solvents, corrosive chemicals, reactive materials, and heavy-metal-containing waste may require specialized collection methods. Facilities should follow applicable regulations and their own waste-management procedures.

Laboratory personnel should never assume that a chemical can be poured down a sink. Disposal requirements depend on the substance, concentration, local regulations, and laboratory policy.

Waste containers should remain clearly labeled and compatible with their contents. They should also be kept closed when not actively receiving waste, where the applicable procedure requires it.

Sharps and contaminated materials require separate handling as well. Biological or infectious waste follows additional controls.

The safest approach is to identify the waste before disposal and follow the laboratory’s approved procedure. When uncertain, personnel should consult the laboratory supervisor or designated safety officer rather than making assumptions.

Why is it called a laboratory?

The word laboratory comes from the Medieval Latin laboratorium, meaning a place for work. The term is related to the Latin verb laborare, meaning “to work” or “to labor.”

The original meaning reflects the practical nature of early scientific and technical work. Before modern laboratories existed, activities such as metalworking, medicine, pharmacy, and alchemy often required dedicated spaces for experimentation and preparation.

Over time, the meaning of laboratory became more closely associated with systematic scientific investigation. The word eventually came to describe facilities where researchers conduct controlled experiments, perform measurements, and analyze materials.

The history of the term therefore connects scientific investigation with practical work. Laboratories are places where ideas are tested through observation, measurement, and experimentation.

Today, the word applies to many specialized environments. These include medical laboratories, chemistry laboratories, biology laboratories, engineering laboratories, research laboratories, and industrial testing facilities.

Although laboratory technology has changed dramatically, the central idea remains similar. It is a dedicated place where organized work produces knowledge, measurements, or practical results.

Historical Evolution from Alchemical Workshops

The modern laboratory developed gradually from earlier spaces used for practical experimentation. Alchemists, pharmacists, metallurgists, and other practitioners worked with materials, heat, tools, and chemical processes long before modern scientific laboratories emerged.

These early workplaces could involve furnaces, grinding equipment, distillation vessels, storage containers, and other specialized tools. Their practices differed significantly from modern science, but they contributed to the broader tradition of experimental investigation.

During the development of modern science, experimental spaces became increasingly organized. Researchers began emphasizing controlled procedures, measurement, documentation, and repeatability. This shift helped transform practical workshops into more recognizable scientific laboratories.

The meaning of the word also evolved with this change. Laboratory eventually became associated less with manual labor alone and more with systematic research and scientific analysis.

Today, laboratories support fields that early experimenters could not have imagined. Researchers work with molecular biology, advanced materials, electronics, medicine, environmental science, and many other disciplines.

The history of the laboratory therefore reflects a broader change in science: practical experimentation gradually became a structured process based on measurement, evidence, documentation, and reproducibility.

Frequently Asked Questions

What are the main types of scientific laboratories?

The primary types include clinical and medical testing facilities, chemical synthesis suites, biosafety suites, research spaces, and industrial quality-assurance testing rooms. Each variety operates under specific environmental controls and regulatory guidelines. For example, clinical facilities focus directly on diagnosing human diseases through tissue analysis, whereas industrial testing rooms evaluate manufactured commercial products to ensure consumer durability.

What is the difference between a dry lab and a wet lab?

A wet lab processes biological fluids, chemicals, and reactive liquids using non-porous benches, sinks, and chemical hoods. In contrast, a dry lab focuses exclusively on computational modeling, mathematical simulations, electronics fabrication, or data analysis. Dry spaces rely on computer equipment, specialized software packages, and electronic hardware rather than chemical sinks and specialized ventilation systems.

What does Biosafety Level mean in research facilities?

Biosafety Levels, designated from BSL-1 through BSL-4, define specific biological containment safeguards required when handling infectious microbes. A standard BSL-1 suite handles well-characterized, harmless agents using basic precautions. Conversely, a maximum-containment BSL-4 facility isolates dangerous, life-threatening airborne pathogens through positive-pressure personnel suits, full-facility air filtration, and strict security isolation protocols.

Who works inside an analytical testing facility?

These specialized workspaces employ cross-disciplinary professionals, including research scientists, laboratory technicians, medical laboratory scientists, safety compliance officers, and quality assurance analysts. Principal investigators guide scientific strategy, while certified technicians manage complex instrumentation, process experimental samples, record results, calibrate sensitive sensors, and enforce strict adherence to standard operating procedures.

Conclusion

Understanding what is laboratory infrastructure reveals the meticulous planning behind every scientific and medical breakthrough. These controlled settings transform abstract concepts into proven discoveries through rigorous physical containment, precise instrumentation, and disciplined methods. As demonstrated across chemistry and medical diagnostics, these rooms offer the safe environment necessary to test hazardous materials without endangering researchers or the public.

Furthermore, the evolution of the term highlights how physical toil transformed into intellectual and systematic inquiry over the centuries. Whether enforcing the five essential safety rules or using specialized glassware, researchers follow protocols that protect integrity and safety.

Whenever you encounter new medicines, durable consumer goods, or verified scientific discoveries, remember the specialized facilities that validated them. Respecting basic protocols, appreciating rigorous work, and understanding standard equipment prepares anyone to enter these environments confidently.

Should You Add USB-C Ports To Your Desktop PC?

Should You Add USB-C Ports To Your Desktop PC?

Modern computing continues to evolve, and older peripheral ports are slowly giving way to smaller, more versatile connections. If your computer feels outdated, choosing to add USB-C ports to your desktop PC can be a practical hardware upgrade. The USB Implementers Forum introduced the reversible Type-C physical connector to simplify data, video, and charging through one connection.

Today, external SSDs, smartphones, webcams, and audio interfaces commonly use USB-C. Relying only on older Type-A ports can limit compatibility and increase cable clutter.

Universal Serial Bus technology has grown rapidly since the USB Implementers Forum introduced the reversible Type-C physical specification to streamline data, video, and charging.

Adding USB-C ports can improve everyday convenience. You gain access to newer peripherals, faster data transfers, and more flexible charging options. Reversible cables also make connecting devices easier.

However, opening your desktop case may feel intimidating. Fortunately, the upgrade is usually straightforward with compatible hardware.

This guide explains how to add USB-C ports to your desktop PC. It covers expansion cards, internal headers, DisplayPort compatibility, USB-C adoption, and solutions for older computers. You will also learn what to check before buying upgrade hardware.

Can I add a USB-C port to my desktop?

Yes, you can add USB-C ports to your desktop PC without replacing the entire computer. The most reliable option is a PCIe USB-C expansion card. This card installs into an available PCIe slot on your motherboard and provides one or more external USB-C ports. Some models also connect to your power supply for additional power delivery.

Another option is a front-panel USB-C bracket. This works when your motherboard has an available internal 20-pin Type-E USB-C header. The bracket connects the motherboard header to a compatible opening on your PC case.

Before choosing either method, check your motherboard, case, and available PCIe slots. Also confirm the expansion card’s power requirements.

Installation usually requires only a screwdriver and basic hardware knowledge. A PCIe card can provide much better performance than a simple adapter.

If you want to add USB-C ports to your desktop PC, a dedicated expansion card is usually the most flexible choice.

Choosing the Right PCIe Expansion Card

When selecting a PCIe USB-C expansion card, first check the available slots on your motherboard. Many cards use PCIe x4 or x16-sized connectors, although the electrical lane configuration can vary. Make sure the card matches an available slot and fits inside your case.

Power requirements are another important consideration. Some expansion cards draw enough power directly from the PCIe slot. Others use a SATA power connector or auxiliary PCIe power connection for additional power delivery.

Check the card’s advertised data-transfer speed before purchasing. Depending on the controller and USB standard, supported speeds can reach 20Gbps or higher on suitable hardware.

You should also consider the number of ports, operating-system support, and internal header requirements. Some cards include USB-A ports alongside USB-C ports, which can improve flexibility.

For demanding external SSDs and modern peripherals, choose a card with a reputable controller and adequate power support. This approach gives your desktop a reliable long-term connectivity upgrade.

Is USB-C better than DisplayPort?

USB-C and DisplayPort are not direct competitors because they serve different purposes. DisplayPort is primarily designed for transmitting video and remains a strong choice for desktop monitors, especially gaming displays. It can support high resolutions and refresh rates without requiring additional functionality from the physical connector.

USB-C focuses on versatility. When the port and connected devices support DisplayPort Alternate Mode, a USB-C connection can carry DisplayPort video signals. It can also handle USB data and, with suitable hardware, power delivery through the same cable.

This makes USB-C particularly useful for docking stations, portable monitors, and streamlined workstation setups. A single cable can connect compatible displays and peripherals while reducing desk clutter.

For a dedicated gaming monitor, native DisplayPort may still be the simpler choice. For flexible connectivity, USB-C offers more functions through one compact connector.

The best option depends on your hardware and needs. Neither connector is universally better. They simply prioritize different types of connectivity.

Understanding DisplayPort Alternate Mode Benefits

DisplayPort Alternate Mode allows compatible USB-C connections to carry DisplayPort video signals. This feature makes USB-C useful for monitors, docking stations, and modern laptops or desktop systems with suitable hardware. For more details on video support, see whether all USB-C ports support video.

With a compatible setup, one USB-C cable can transmit video while also carrying USB data. Depending on the device, it may support power delivery as well. This reduces the number of cables required for a workstation and creates a cleaner desk.

For example, a compatible monitor can connect to a computer through USB-C and provide additional USB ports for peripherals. This arrangement is especially useful for keyboards, webcams, storage devices, and other accessories.

However, not every USB-C port supports DisplayPort Alternate Mode. The port, computer hardware, cable, and display must all support the required features.

Before purchasing a USB-C expansion card for video use, check whether it supports DisplayPort Alternate Mode or requires a DisplayPort passthrough connection. Data-only USB-C ports cannot automatically provide video output.

Why is everyone switching to USB-C?

USB-C has become increasingly common because it combines several connectivity functions into one compact, reversible connector. Older setups often require separate cables for charging, data transfer, and video. USB-C can potentially handle all three when the connected hardware supports the necessary standards.

The connector also works across a wide range of devices. Modern smartphones, tablets, laptops, storage devices, monitors, and accessories increasingly use USB-C. This broad adoption reduces the number of specialized cables consumers need.

Regulatory changes have also encouraged USB-C adoption. The European Union introduced requirements that push manufacturers toward common charging standards for certain electronic devices. These rules have further increased the connector’s visibility among consumers.

For desktop users, this shift matters because newer peripherals increasingly arrive with USB-C connections. External SSDs, creator equipment, smartphones, and docking accessories may all benefit from native USB-C support.

Adding USB-C to an older desktop helps bridge that compatibility gap. Instead of replacing a working computer, you can upgrade its connectivity and continue using existing hardware.

Reversible Design and High Power Delivery

One of USB-C’s biggest advantages is its reversible connector design. Unlike traditional USB-A connectors, USB-C cables can be inserted in either orientation. This small change makes everyday connections faster and less frustrating.

USB-C also supports USB Power Delivery, or USB PD. The current USB PD specification can support power levels up to 240 watts when compatible devices, cables, and chargers support the required Extended Power Range capabilities. When comparing charging setups, it is also useful to understand whether chargers with multiple ports are slower than normal ones.

That does not mean every USB-C port can provide 240 watts. Actual charging power depends on the computer, port controller, power source, cable, and connected device.

For desktop upgrades, power delivery can be useful for compatible phones, accessories, storage devices, and other peripherals. Expansion cards with dedicated power connections can provide more power than basic motherboard adapters.

The combination of reversible connections, high-speed data, and flexible power delivery makes USB-C attractive for modern computing. However, users should always verify the specifications of individual ports rather than assuming every USB-C connection offers identical capabilities.

Do most desktops have USB-C?

Many newer desktops and motherboards now include at least one USB-C connection, but coverage varies by model and price. Premium gaming PCs and workstations may offer several high-speed ports. Some newer systems also support technologies such as USB4 or Thunderbolt, depending on the motherboard and platform.

Budget desktops and older computers are more likely to rely primarily on USB-A ports. Manufacturers may omit USB-C to reduce costs or because the system targets basic office use.

Front-panel USB-C availability also depends on the computer case and motherboard. A desktop may have a rear USB-C port but lack the internal header required for a front-panel connection.

This means you should not assume that every modern-looking desktop includes the same USB-C features. Check the motherboard specifications and case documentation before buying accessories.

If your computer lacks native USB-C, you do not necessarily need a new PC. A suitable PCIe expansion card can add modern ports and extend the useful life of your existing system.

Motherboard Generation and Case Compatibility Factors

Motherboard and case compatibility are important when adding USB-C to a desktop. Some newer cases include a front-panel USB-C port, but that port requires a compatible internal motherboard header to function.

Many modern motherboards use a 20-pin Type-E internal connector for front-panel USB-C. Older motherboards may lack this header entirely. In that situation, the case’s front USB-C port cannot connect directly without another solution.

Before buying a new case or motherboard, check the specifications for internal USB-C support. Also confirm that the motherboard provides the desired USB standard and transfer speed.

If your motherboard lacks a Type-E header, you can still add USB-C through a PCIe expansion card. Some cards provide external ports, while others include internal connections for compatible case ports.

Older 19-pin USB 3.0 headers can also work with certain internal adapters. However, the connection remains limited by the capabilities of the original USB interface.

Checking these details first prevents compatibility problems and helps you choose the right upgrade path.

What do I do if my PC doesn’t have USB-C?

If your desktop has no USB-C ports, you have several ways to add them. The simplest solution is a USB-A to USB-C adapter. These small adapters can connect USB-C accessories to existing USB-A ports for basic data or charging.

However, an adapter does not upgrade the capabilities of the original port. If your USB-A connection supports only older USB speeds, the connected USB-C device remains limited by that connection.

For a permanent upgrade, a PCIe USB-C expansion card is usually the better option. It provides dedicated USB-C ports and can offer faster transfer speeds when your motherboard and peripherals support them.

You can also use an external USB hub. A powered hub can expand an existing USB-A connection and provide several ports, although the upstream connection still determines overall performance.

Your choice depends on your needs. Adapters are inexpensive and convenient for occasional use. Expansion cards make more sense for frequent use, high-speed storage, and modern peripherals.

Either approach can add USB-C ports to your desktop PC without replacing an otherwise functional computer.

Passive Adapters Versus Active Expansion Cards

Passive adapters and PCIe expansion cards solve different connectivity problems. A basic USB-A to USB-C adapter changes the physical connector but does not create new USB capabilities. Your device remains limited by the speed, power, and features of the original USB-A port.

A PCIe expansion card provides a more complete hardware upgrade. The card includes its own USB controller and connects directly to the motherboard. Some models also connect to the power supply to support higher power requirements.

This makes expansion cards better suited to demanding devices such as external SSDs and other high-speed peripherals. They can support newer USB standards when the card and connected device are compatible.

Passive adapters are still useful for simple accessories. They are inexpensive, easy to install, and require no internal hardware changes.

Choose an adapter when you only need connector compatibility. Choose an expansion card when you want higher performance, additional ports, or improved power delivery.

Understanding this distinction prevents unrealistic expectations from inexpensive adapters.

Frequently Asked Questions

Can I charge my phone quickly using an added desktop port?

Yes, but charging speed depends strictly on your hardware setup. Basic passive adapters only supply standard legacy power levels around 4.5 to 7.5 watts. To unlock modern fast-charging protocols, install a dedicated PCIe expansion card wired directly to your power supply via a SATA or auxiliary PCIe power cable.

Will a basic adapter let me connect a portable monitor?

No, standard rectangular Type-A ports lack the native hardware pathways to carry DisplayPort Alternate Mode video signals. Passive adapters only convert data lines. To run a portable external monitor, you must use a dedicated graphics card video output or specialized PCIe cards supporting internal DisplayPort passthrough.

Does adding an expansion card slow down my graphics card?

Generally, no. Most consumer desktop motherboards route secondary PCIe slots through the motherboard chipset rather than using primary CPU lanes reserved for graphics cards. As long as you install the expansion card into an open secondary slot, your dedicated GPU will maintain its full x16 lane bandwidth and graphical performance.

Can I convert an older internal motherboard header to USB-C?

Yes, you can purchase internal adapter cables that convert older 19-pin USB 3.0 motherboard headers into modern 20-pin Type-E internal connectors. While this enables your front-panel port to function physically, your maximum transmission speeds will stay capped at the older 5Gbps transfer ceiling of your original motherboard.

Conclusion

Adding USB-C to an older desktop can extend the computer’s useful life without requiring a complete system replacement. If your current PC works well but lacks modern connectivity, this upgrade can provide meaningful everyday benefits.

PCIe USB-C expansion card is generally the most flexible option. It can provide additional ports, faster data transfers, and better support for modern peripherals. A compatible internal Type-E header can also provide a clean front-panel connection.

Simple USB-A to USB-C adapters remain useful when you only need basic connector compatibility. However, they cannot increase the speed or functionality of the original USB-A port.

Before purchasing hardware, check your motherboard’s available PCIe slots, internal headers, and power connections. Also confirm your case’s front-panel requirements and the USB standards supported by your peripherals.

With the right hardware, you can add USB-C ports to your desktop PC and keep using your existing computer with newer storage devices, smartphones, monitors, and accessories. It is a practical upgrade that improves compatibility while reducing unnecessary hardware costs.

Basic Laboratory Glassware and Uses: A Practical Lab Guide

Basic Laboratory Glassware and Uses: The Essential Science Guide

Working safely and efficiently in any scientific environment starts with selecting the right equipment. Understanding basic laboratory glassware and uses helps researchers, students, and technicians perform accurate measurements, manage chemical reactions, and reduce contamination risks. Each vessel has a specific purpose, and choosing the wrong one can affect experimental results.

Precision instruments also depend on recognized measurement standards. Organizations such as the National Institute of Standards and Technology support measurement practices that help laboratories maintain reliable and traceable results.

Selecting an unsuitable vessel can cause volume errors, contamination, chemical damage, or thermal failure. Glassware must therefore match the chemical, temperature, pressure, and procedure involved.

This practical guide explains common laboratory glassware, its uses, and the differences between major glass types. It covers ten essential vessels, expands the list to fifteen common items, and introduces twenty laboratory apparatus and their functions. You will also learn why laboratories commonly use borosilicate glass and how different technical glass categories serve different applications.

What are 10 common laboratory glassware items?

Ten basic glassware items appear regularly in chemistry, biology, educational, and analytical laboratories. Each item supports a different stage of preparation, measurement, transfer, heating, or observation. Understanding these differences is essential for safe and accurate laboratory work and supports peer-reviewed research.

The ten common items are:

  • Beakers for mixing, holding, and heating liquids.
  • Erlenmeyer flasks for mixing solutions and reducing splashing.
  • Graduated cylinders for measuring approximate liquid volumes.
  • Volumetric flasks for preparing solutions to precise volumes.
  • Test tubes for small-scale reactions and sample handling.
  • Pipettes for transferring measured liquid volumes.
  • Burettes for controlled liquid delivery during titrations.
  • Watch glasses for covering containers or holding small samples.
  • Glass funnels for transferring liquids or filtering mixtures.
  • Stirring rods for manually mixing liquids and guiding transfers.

These vessels form the foundation of many routine laboratory procedures. However, their accuracy varies. Beakers are suitable for general handling, while volumetric flasks, pipettes, and burettes support more precise measurements.

Primary Functions of Core Lab Vessels

The primary function of laboratory glassware depends on its shape, calibration, and construction. Beakers and Erlenmeyer flasks are mainly used for holding, mixing, dissolving, and heating liquids. Their graduations provide useful estimates, but they are not designed for highly accurate volume measurements. Understanding primary vs secondary sources can also help researchers evaluate information used alongside laboratory work.

Graduated cylinders provide better volume measurements for routine work. Volumetric flasks are designed to contain one specific volume at a defined temperature. They are therefore preferred when preparing solutions with accurately known concentrations.

Pipettes transfer measured quantities of liquid, while burettes deliver controlled volumes during titrations. Their graduations allow technicians to determine how much liquid has been transferred.

Choosing the correct vessel improves repeatability and reduces experimental error. For quantitative procedures, technicians should use calibrated glassware rather than relying on general-purpose containers.

Glassware also requires appropriate handling. Inspect vessels for chips, cracks, or scratches before use. Damaged glass can fail during heating, mixing, or pressure changes.

What are 15 common glassware items used in a laboratory?

Fifteen common laboratory glassware items cover a wider range of preparation, measurement, separation, heating, and storage tasks. The first group includes beakers, Erlenmeyer flasks, volumetric flasks, graduated cylinders, test tubes, pipettes, burettes, watch glasses, and funnels.

Several specialized items extend these capabilities. Florence flasks, also called boiling flasks, have rounded bodies that support more uniform heating. Separatory funnels separate immiscible liquids based on differences in density. Condensers cool vapors and convert them back into liquids during distillation or reflux.

Other useful items include:

  • Petri dishes for culturing microorganisms or holding samples.
  • Desiccators for protecting materials from atmospheric moisture.
  • Weighing bottles for storing and weighing small solid samples.
  • Dropping bottles for controlled dispensing of small liquid quantities.
  • Reagent bottles for storing laboratory chemicals.

Each vessel serves a defined purpose. Using specialized glassware correctly can improve efficiency, reduce contamination, and support safer experimental procedures.

Advanced Analytical Applications

Specialized laboratory glassware becomes important when basic vessels cannot provide the required separation, purification, or environmental control. Separatory funnels are widely used during liquid-liquid extraction. They allow two immiscible liquid phases to separate before each layer is collected independently.

Condensers perform another important function. During reflux, they cool rising vapors and return condensed liquid to the reaction vessel. This allows reactions to continue at elevated temperatures while limiting solvent loss. Condensers are also used in distillation systems to collect purified liquid.

Desiccators provide a controlled, low-moisture environment for samples and chemicals that can absorb water from the air. Some designs use drying agents, while vacuum desiccators reduce pressure to accelerate drying.

These applications demonstrate why glassware selection matters. Specialized vessels improve separation, purification, drying, and solvent recovery. However, users must still check chemical compatibility and inspect joints, stopcocks, and seals before beginning a procedure. Understanding levels of scientific evidence can also help when interpreting findings produced through laboratory procedures.

What are the 20 common laboratory apparatus and their uses?

A working laboratory combines glassware with mechanical and electrical apparatus. Together, these tools support heating, measurement, sample preparation, handling, and separation.

Common laboratory apparatus include:

  • Beakers for general liquid handling and mixing.
  • Erlenmeyer flasks for mixing and reaction work.
  • Graduated cylinders for routine volume measurements.
  • Volumetric flasks for precise solution preparation.
  • Test tubes for small reactions.
  • Burettes for controlled titration delivery.
  • Pipettes for measured liquid transfer.
  • Separatory funnels for liquid-liquid separation.
  • Condensers for cooling vapors.
  • Watch glasses for covering or holding samples.
  • Bunsen burners for direct heating.
  • Ring stands and clamps for supporting apparatus.
  • Wire gauze for distributing heat under vessels.
  • Thermometers for measuring temperature.
  • Analytical balances for precise mass measurements.
  • Tongs for handling hot equipment.
  • Spatulas for transferring solid materials.
  • Test tube racks for organizing tubes.
  • Wash bottles for dispensing purified water or solvents.
  • Centrifuges for separating suspended materials.

The correct apparatus depends on the procedure, material, and required accuracy.

Integrating Glassware with Supporting Hardware

Laboratory glassware often requires supporting hardware to remain stable during use. Ring stands, clamps, and wire gauze help position vessels safely during heating, filtration, and other procedures. Proper support is especially important when working with flasks, condensers, and distillation assemblies. Safe laboratory practices also include proper handling and medical waste disposal when applicable.

Wire gauze distributes heat from a burner across the base of suitable glassware. However, not every glass vessel should be heated directly. Users must check the manufacturer’s specifications and the procedure before applying heat.

Clamps should hold apparatus firmly without placing excessive pressure on glass. Overtightening can create stress points that may lead to cracking. Condensers and distillation flasks should also be supported at appropriate points to prevent strain on joints.

Direct flame, rapid temperature changes, and damaged glass can increase failure risks. Thermal shock is especially dangerous because even apparently intact glass can fracture suddenly.

Safe laboratory setups therefore combine suitable glassware with stable supports, controlled heating, and regular equipment inspection.

Which type of glass is used in laboratories?

Borosilicate glass is one of the most widely used materials for laboratory glassware. It contains a high proportion of silica and boric oxide, giving it a relatively low coefficient of thermal expansion. This property helps it resist cracking when exposed to temperature changes.

Borosilicate glass also offers good chemical durability against many common laboratory substances. It is therefore used for beakers, Erlenmeyer flasks, test tubes, bottles, condensers, and other laboratory equipment used across healthcare careers and scientific settings.

However, borosilicate glass is not resistant to every chemical or condition. Strong alkalis and certain aggressive reagents can attack glass surfaces. Users should always check compatibility before selecting a vessel.

For applications involving extremely high temperatures or ultraviolet transmission, fused silica or fused quartz may be more appropriate. These materials contain very high levels of silicon dioxide and offer excellent thermal and optical properties.

Soda-lime glass may also appear in laboratories, particularly for general-purpose bottles and containers that do not face significant thermal stress.

The best glass depends on the required temperature resistance, chemical durability, optical properties, and mechanical conditions.

Superior Thermal Properties of Borosilicate

Borosilicate glass offers low thermal expansion and strong resistance to thermal shock. These properties make it suitable for laboratory procedures involving controlled heating and moderate temperature changes.

When you heat glass, different parts of the vessel can expand at different rates. Large temperature differences create internal stresses. Glass with a lower coefficient of thermal expansion generally experiences less stress during heating and cooling.

This property helps borosilicate glass perform well with hot plates, water baths, heating mantles, and other controlled heating methods. However, no glass vessel remains completely safe from breakage.

Rapid heating, rapid cooling, uneven heating, and existing scratches can cause failure. Never place a hot glass vessel directly on a cold or wet surface unless the equipment specifically supports that procedure.

Glass formulations and manufacturers may specify different temperature limits. Always follow the manufacturer’s operating limits instead of assuming that every borosilicate vessel has the same maximum temperature.

Good laboratory practice combines suitable glass with gradual heating, controlled cooling, and regular inspection for chips or cracks.

What are the 7 types of glass and their uses?

Material scientists classify glass into several families according to composition and performance. Seven commonly discussed categories include soda-lime, borosilicate, lead glass, aluminosilicate, fused silica, high-silica glass, and glass-ceramics.

Manufacturers use soda-lime glass for windows, bottles, and general containers because it offers economical production. Borosilicate glass provides better thermal and chemical resistance, making it common in laboratory equipment and cookware.

Specialized manufacturers use lead glass for optical and radiation-shielding applications. Safety requirements and regulations determine where technicians can use it. Aluminosilicate glass provides strong mechanical and thermal performance for demanding applications.

Fused silica contains very high-purity silicon dioxide. Its excellent thermal stability and ultraviolet transmission make it valuable for optics and scientific instruments.

Manufacturers develop high-silica glasses for demanding thermal environments. Glass-ceramics combine glass processing with controlled crystallization to produce very low thermal expansion.

The correct material depends on temperature, chemical exposure, mechanical stress, optical requirements, and cost.

Industrial Applications Across Glass Categories

Manufacturers select different glass compositions according to the conditions each material must withstand. Soda-lime glass remains common in packaging because it offers acceptable performance at relatively low production costs. However, laboratories generally avoid it for repeated high-temperature heating.

Borosilicate glass provides better performance for laboratory vessels and industrial equipment exposed to thermal cycling. Its resistance to thermal shock makes it useful in chemical processing, scientific instruments, and cookware.

Aluminosilicate glass combines high strength with good temperature resistance. These properties support demanding technical and consumer applications.

Engineers choose fused silica when applications require exceptional thermal stability or ultraviolet transmission. Laboratories may use it in optical systems, semiconductor processing equipment, and specialized scientific instruments.

Glass-ceramics provide extremely low thermal expansion. They can tolerate substantial temperature changes while maintaining greater dimensional stability than ordinary glass.

No single glass type suits every application. Choose glass according to the operating environment, including temperature, pressure, chemical exposure, mechanical loading, and optical requirements.

What is Type 2 glass?

Type 2 glass is a pharmaceutical glass classification for soda-lime-silica glass with improved hydrolytic resistance. Manufacturers treat the glass surface to reduce the release of soluble glass components into aqueous products.

This treatment creates a more chemically resistant inner layer. As a result, Type 2 glass offers better protection for aqueous pharmaceutical preparations than untreated soda-lime glass.

Manufacturers can use Type 2 containers for certain pharmaceutical products, including many neutral and acidic aqueous preparations. These containers provide a practical alternative when the formulation does not require the higher chemical resistance of Type 1 borosilicate glass.

The classification does not indicate that one glass type is simply “better” than another. Manufacturers select glass according to the product and its storage conditions.

Pharmaceutical packaging standards distinguish Type 1, Type 2, and Type 3 glass according to hydrolytic resistance and composition. Factors such as pH, formulation, sterilization, storage duration, and regulatory requirements influence the appropriate choice.

Therefore, Type 2 glass refers to treated soda-lime glass that provides improved chemical durability for suitable pharmaceutical applications.

Pharmaceutical Role and Limitations

Type 2 glass is useful when pharmaceutical products require better hydrolytic resistance than ordinary soda-lime containers can provide. Its treated internal surface helps reduce the interaction between the container and aqueous contents.

This makes Type 2 glass suitable for many neutral or acidic aqueous preparations. It can provide a cost-effective packaging option when the formulation does not require the higher resistance associated with Type 1 glass.

However, Type 2 glass is not universally suitable for pharmaceutical products. Strongly alkaline formulations can attack the protective surface and may require a different container material.

Compatibility also depends on the formulation, storage period, temperature, sterilization process, and regulatory requirements. Container selection should therefore follow validated pharmaceutical packaging standards rather than relying only on glass classification.

Type 2 glass should also not be treated as equivalent to laboratory borosilicate glass simply because both provide improved chemical resistance.

In practice, manufacturers evaluate the glass-container interaction before selecting packaging. Proper classification helps protect product stability, reduce contamination risks, and maintain compliance throughout the intended shelf life.

Frequently Asked Questions

Why is borosilicate glass preferred over soda-lime glass in laboratories?

Borosilicate glass offers better thermal shock resistance and chemical durability than soda-lime glass. Understanding basic laboratory glassware and uses helps technicians choose safer vessels for heating, mixing, and chemical reactions.

How should volumetric glassware be properly cleaned to preserve accuracy?

Clean volumetric glassware with mild laboratory detergent and warm water. Rinse thoroughly with deionized water and avoid abrasive materials. Proper basic laboratory glassware and uses knowledge also helps preserve calibration and measurement accuracy.

What is the difference between TD and TC markings on laboratory glassware?

TC (To Contain) glassware holds its marked volume, while TD (To Deliver) glassware delivers its marked volume under specified conditions. Knowing basic laboratory glassware and uses helps users select the correct vessel for precise measurements.

Can laboratory glassware withstand strong alkaline solutions?

Glass generally handles acidic and neutral solutions well, but concentrated alkaline solutions can gradually damage silicate glass. Knowledge of basic laboratory glassware and uses helps technicians choose suitable plastic or specialized containers for strong bases.

Conclusion

Understanding basic laboratory glassware and uses is essential for safe and accurate scientific work. From beakers and test tubes to condensers and volumetric flasks, each item has a specific purpose. Knowing basic laboratory glassware and uses helps prevent measurement errors and equipment damage. Proper handling, cleaning, and storage also improve laboratory safety. By choosing the right glassware for each procedure, researchers can achieve reliable, consistent, and reproducible results and better understand scientific research methods.

Is a Third-Party Charger Safe?

Using A Third-Party Charger Can Have An Unexpected Effect On Your Devices

We all reach for convenience when our phone battery hits a critical level. A third-party charger from a gas station or bedside drawer may seem harmless. However, charging involves sensitive electronics that need stable and properly regulated power. Modern smartphones use power management circuits to control charging and protect the battery from unsafe conditions.

The real concern is not whether a charger is third-party. A reputable third-party charger can be safe and reliable when it meets appropriate standards. The bigger risks come from counterfeit adapters, damaged cables, poor-quality components, and unsafe charging environments.

A high-wattage charger does not automatically damage a lower-wattage phone. Likewise, borrowing a charger is usually safe when the accessory is genuine, undamaged, and compatible. Understanding these differences can help you choose a safe third-party charger without paying for unnecessary accessories.

For USB products, you can also check the official USB-IF certified product search to see products that have passed its applicable compliance program.

Can using a wrong charger mess up your phone?

Yes, a faulty or incompatible charger can damage your smartphone. However, the main concern is not simply using a charger with a higher current rating. Modern phones regulate the power they accept based on their charging system and supported protocols.

A quality third-party charger should provide stable output within the ranges your device supports. Problems can occur when a cheap or defective adapter has poor voltage regulation. Electrical faults can increase heat and place unnecessary stress on charging components. For more information about common charging misconceptions, see Stop Believing These 5 Myths About Charging Your Phone.

In severe cases, a faulty charger may damage the charging circuit, battery, or other internal components. Your phone includes protection systems, but those systems cannot compensate for every defect inside an unsafe adapter.

That makes charger quality, compatibility, and certification important when choosing a replacement.

Watch for unusual heat, charging interruptions, buzzing, burning smells, or repeated disconnections. If these symptoms appear, stop using the accessory. Replace it with a reputable third-party charger designed for your device and charging standard.

Recognizing Dirty Power Symptoms

“Dirty power” generally describes unstable or poorly regulated electrical output. A phone may not always show obvious symptoms when connected to a low-quality charger. Still, unusual behavior deserves attention, especially when it happens only during charging.

A charger should not become excessively hot during normal operation. Some warmth is expected, particularly during fast charging. However, extreme heat, burning smells, crackling sounds, or visible damage can indicate a serious electrical problem.

You may also notice intermittent charging, repeated connection and disconnection, or unexpected charging slowdowns. These symptoms do not automatically prove unstable voltage. The cable, charging port, battery, or phone software could also be responsible.

If your phone becomes unusually hot while charging, disconnect it and let it cool. Do not continue using an adapter with damaged insulation or exposed wiring.

For safer charging, replace questionable accessories with reputable equipment. A properly designed third-party charger should have clear specifications and appropriate safety protections.

Can I use an 80W charger for a 25W phone?

Yes, an 80W charger can generally charge a phone rated for 25W. The charger must support compatible charging standards and provide appropriate voltage profiles. The wattage printed on an adapter represents its maximum output capability. It does not mean the charger automatically forces that amount into every device. For a closer look at charging power, see 5V 1A Vs. 5V 2A: Which Is Better For Charging?

With standards such as USB Power Delivery, compatible devices and chargers negotiate an appropriate charging mode. A 25W phone can request a suitable power level instead of automatically receiving the charger’s full 80W capacity.

Using a higher-rated charger can therefore be perfectly normal. The important factors are charger quality, compatibility, and supported charging protocols.

A reputable high-wattage third-party charger may also support several devices with different power requirements. However, not every fast-charging technology is universal. Some manufacturers use proprietary systems.

Before buying an 80W adapter, check your phone manufacturer’s specifications. Choose a charger that supports the required USB-C, USB Power Delivery, or proprietary charging standard.

The wattage number alone does not determine safety. A quality 80W charger can safely charge a compatible 25W phone when the charging system negotiates correctly.

The Role of Power Delivery Handshakes

Modern charging systems use communication between the charger and device to determine an appropriate power level. USB Power Delivery, for example, allows compatible devices and chargers to negotiate supported voltage and current combinations.

This process prevents a compatible charger from simply delivering its maximum advertised wattage to every device. The phone determines how much power it can accept within the supported charging profile.

If the phone and charger do not support the same fast-charging profile, charging may fall back to a slower compatible mode. The exact behavior depends on the device, charger, cable, and charging standard.

This means an 80W third-party charger does not automatically push 80W into a 25W phone. The device controls the power it accepts.

However, power negotiation does not make every adapter safe. A poorly manufactured charger can still have inadequate insulation, thermal protection, or voltage regulation.

For reliable results, choose a quality third-party charger and suitable cable from a reputable manufacturer. Check that both support your phone’s charging protocol.

Can fake chargers damage an iPhone?

Yes, counterfeit or poorly manufactured chargers can damage an iPhone and create electrical safety risks. The problem is not simply that an accessory is third-party. The real concern is whether the accessory meets appropriate electrical and compatibility requirements.

Low-quality adapters may use inadequate insulation, poor voltage regulation, or insufficient protection against overheating and short circuits. These faults can potentially damage charging components or create fire and shock hazards.

Older iPhones and accessories also used different charging and authentication technologies. Newer iPhone models use USB-C, while many older models use Lightning. Compatibility therefore depends on both the iPhone and accessory.

A counterfeit product may imitate Apple’s branding or certification claims without meeting the relevant requirements. Do not assume expensive packaging proves authenticity.

For safer iPhone charging, buy from reputable manufacturers and established retailers. Look for appropriate safety certifications and compatibility information. You can also learn more about extending battery longevity in How to Improve iPhone Battery Life in 2026: The Ultimate Guide.

For Lightning accessories, MFi certification can also help identify licensed products. For USB-C charging accessories, MFi is not required simply because the product works with an iPhone.

The Importance of MFi Certification

Apple’s Made for iPhone (MFi) program covers third-party accessories that use Apple’s licensed technologies. MFi certification can be particularly relevant when buying Lightning accessories. It helps identify accessories that have gone through Apple’s licensing and certification process.

However, not every third-party charger needs an MFi logo. USB-C charging accessories that do not use MFi-licensed technologies are outside the MFi program.

Therefore, do not treat MFi branding as the only measure of charger safety. For USB-C products, consider the manufacturer’s reputation, electrical specifications, charging compatibility, and applicable safety certifications.

When buying a Lightning accessory, check the manufacturer’s MFi claims and purchase through a trustworthy retailer. Be cautious of products using vague claims, copied Apple branding, or unclear specifications.

The safest approach is to consider the complete accessory rather than relying on one logo. A reputable manufacturer, clear electrical specifications, suitable protection features, and trustworthy sourcing provide stronger evidence of quality. Battery performance also depends on everyday charging habits, as explained in Battery Health Vs. Cycle Count: Which Matters More?

If a product makes unrealistic performance claims or appears counterfeit, choose another option.

Is it safe to use someone else’s phone charger?

Yes, borrowing someone else’s phone charger is usually safe when the charger and cable are genuine, undamaged, and compatible with your device. Modern charging standards are designed to manage power between different devices and adapters.

For example, a quality USB-C power adapter can often charge phones from different manufacturers. The phone and charger determine an appropriate charging mode based on supported standards and power requirements. If you use several devices, understanding Are Chargers With Multiple Ports Slower Than Normal Ones? can also help you choose the right charging setup.

The bigger concern is the condition and quality of the borrowed accessory. Avoid chargers with frayed cables, cracked housings, bent connectors, exposed wires, or signs of overheating.

Unbranded adapters with unclear specifications are also best avoided. If you are unsure about a borrowed third-party charger, check its manufacturer and electrical ratings before using it.

Public USB charging ports create another concern because they can support data connections as well as power. A compromised port could potentially create privacy or security risks.

For everyday charging, using a wall outlet with your own reputable adapter is the simplest option. If you must use a public USB port, consider a charge-only cable or suitable USB data blocker.

Mitigating Public and Shared Hardware Risks

Shared charging equipment deserves more caution than a trusted wall adapter. Public USB ports can potentially establish a data connection between your phone and an unknown device. This has contributed to concerns about “juice jacking,” although the practical risk varies by device and setup.

A safer option is to use your own wall adapter and connect it directly to a power outlet. If you need a public USB charging point, a charge-only cable can reduce the possibility of unwanted data communication.

Always inspect borrowed cables before use. Look for cracked insulation, bent connectors, loose housings, or exposed wiring. Do not use a cable that feels excessively hot during charging.

You should also avoid connecting your phone to unknown computers simply to charge it. If you regularly carry a third-party charger, keep your own trusted adapter and cable available for travel.

These precautions are simple but effective. Power from a trusted wall adapter is generally preferable to connecting directly to an unknown USB port.

The goal is not to avoid all shared charging equipment. Instead, choose accessories and charging methods that minimize unnecessary electrical and data risks.

Are 3rd party chargers safe?

Yes, a third-party charger can be completely safe when it comes from a reputable manufacturer and meets appropriate electrical and charging standards. Many established accessory brands produce reliable chargers for smartphones, tablets, laptops, and other devices.

Modern chargers may use technologies such as gallium nitride (GaN) to reduce size and improve efficiency. They can also include protection against overcurrent, overvoltage, overheating, and short circuits.

These features matter more than whether the charger carries the phone manufacturer’s logo. The greatest risks come from counterfeit and poorly manufactured products.

Extremely cheap adapters may cut corners on insulation, components, thermal management, or quality control. That does not mean every inexpensive charger is unsafe. It means buyers should evaluate the manufacturer and product carefully.

Before purchasing a third-party charger, check the manufacturer’s reputation and technical specifications. Make sure it supports your device’s charging standard and required power range.

Do not assume every third-party product is unsafe. Likewise, do not assume every expensive charger is automatically safe. Build quality, compatibility, compliance, and trustworthy sourcing matter most.

Verifying Essential Electrical Safety Marks

Safety markings can help you evaluate a charger, but not every logo means the same thing. In the United States, UL certification can indicate that a product has been evaluated against applicable safety requirements. TÜV certifications can provide similar evidence in relevant markets.

CE marking indicates a manufacturer’s declaration of conformity with applicable European Union requirements. FCC requirements primarily concern electromagnetic compatibility and emissions. Therefore, an FCC mark should not be treated as a general electrical safety certification.

USB-IF certification can also be useful for compatible USB products. It relates to compliance with applicable USB specifications and certification requirements.

When shopping for a third-party charger, check the manufacturer name, model number, electrical ratings, and relevant compliance information. Avoid products with misspelled branding, copied logos, missing specifications, or suspicious packaging. Understanding charger design can also help, including Why Do Laptop Chargers Have A Box In The Middle Of The Cable?

Buy from reputable retailers whenever possible. A legitimate safety mark is more useful when you can verify the manufacturer and product.

If a charger becomes unusually hot, makes abnormal noises, smells burnt, or shows physical damage, stop using it immediately.

Frequently Asked Questions

Can slow charging damage your smartphone battery?

No, slow charging does not damage your smartphone battery. In fact, charging at slower speeds generates significantly less internal heat compared to fast charging. Reduced thermal stress preserves the lithium-ion chemistry, prolonging overall battery health over time. The only downside is waiting longer for your device to reach full capacity.

Why do cheap charging cables get hot during use?

Cheap cables use extremely thin, low-grade copper wires that create excessive electrical resistance under load. As current pushes through insufficient wiring, the resistance converts electrical energy into dangerous heat. This thermal buildup degrades the internal wire insulation and increases the likelihood of melted connectors, short circuits, and residential fire hazards.

Does fast charging degrade your phone’s battery faster?

Fast charging produces higher internal temperatures, which can slightly accelerate chemical wear on lithium-ion batteries. However, modern smartphones use dual-phase charging routines to manage this wear. They pull maximum wattage up to roughly 80 percent, then taper the power to trickle charging to keep heat levels low and preserve long-term battery longevity.

How can you tell if a phone charger is counterfeit?

Counterfeit chargers typically feel unusually lightweight, use cheap plastics, and feature blurry, misspelled certification logos. Genuine chargers feature clean, laser-etched typography and solid, balanced weight from internal heat sinks. If the price appears too good to be true or the adapter emits a faint buzzing noise, it is likely counterfeit.

Conclusion

Charging your phone should never feel like a gamble. Modern smartphones include sophisticated power management systems, but they still depend on safe and properly regulated electrical power. Choosing a reliable third-party charger can provide excellent performance without compromising device safety.

The biggest risks come from counterfeit adapters, damaged cables, poorly manufactured accessories, and unsafe charging ports. These products may lack adequate insulation, thermal protection, or voltage regulation. In severe cases, faulty charging equipment can damage internal components or create a fire and shock hazard.

A higher-wattage charger is not automatically dangerous. Compatible phones generally control how much power they draw. The key is using a reputable adapter that supports the required charging standard.

Take a moment to inspect the accessories you currently use. Replace frayed cables and questionable adapters. Buy from trusted manufacturers and retailers, and check specifications before connecting unfamiliar equipment.

A small investment in quality charging hardware can protect your phone, battery, and personal data while providing safer, more reliable everyday charging.

Should Your Physical Keyboard Be Flat Or Tilted?

Should Your Physical Keyboard Be Flat Or Tilted?

When deciding whether your keyboard should be flat or tilted, the small plastic feet underneath matter more than you might expect. Many people flip them up automatically without considering how the angle affects their typing posture. After several hours, an unsuitable keyboard position can contribute to wrist and forearm discomfort.

OSHA recommends maintaining a neutral wrist position when working at a computer, making keyboard height and positioning important parts of an ergonomic workstation.

So, should your keyboard be flat or tilted for better ergonomics? For most users, a flat keyboard or slight negative tilt provides a comfortable starting point. Raising the rear edge can increase wrist extension, especially when combined with a tall keyboard and high desk.

Your desk height, chair position, keyboard thickness, and typing style also influence comfort. There is no single angle that works for everyone.

This guide explains keyboard flat or tilted setups, positive and negative tilt, 96% layouts, gaming positions, and QWERTY. You will learn how keyboard angle affects posture and how to create a more comfortable workspace.

Is it better to have my keyboard angled or flat?

For most users, a flat keyboard or slight negative tilt provides a comfortable starting point. If you are choosing a new board for work, learning how to pick the perfect mechanical keyboard for your office can also help you find a comfortable design. Raising the rear edge can increase wrist extension, especially when combined with a tall keyboard and high desk.

A flat keyboard allows your hands to approach the keys with less upward bending. That can reduce unnecessary tension during long typing sessions. However, there is no single keyboard angle that works perfectly for everyone.

Your desk height, chair position, keyboard thickness, and forearm posture all matter. A flat keyboard may feel ideal for one person but uncomfortable for another. The goal is not simply to achieve zero degrees. Instead, aim for a position that keeps your wrists relaxed and your forearms supported.

If your wrists bend upward, lower the keyboard or remove its rear feet. Then adjust your chair and desk height until your hands feel naturally aligned.

The Problem With Positive Tilt

Raising the rear feet creates a positive keyboard tilt. This design is common on traditional keyboards because it can make the keys easier to see and reach. However, it also encourages your wrists to bend backward during typing.

That position may become uncomfortable during long work sessions. The issue is especially noticeable when a tall keyboard already sits high on the desk. Adding more rear elevation can increase the amount of wrist extension required to reach the keys.

Positive tilt is not automatically harmful for everyone. Short sessions may cause no problems at all. Comfort depends on your individual posture, keyboard height, and typing technique.

If the raised feet make your wrists feel tense, try folding them down. A lower keyboard can provide a more neutral hand position. You can also adjust your chair or desk height to improve alignment.

The best keyboard flat or tilted setup is the one that keeps your hands relaxed without forcing your wrists into an extreme angle.

Is it better to tilt your keyboard?

Whether it is better to tilt your keyboard depends on which direction you tilt it. A positive tilt raises the rear edge and can increase wrist extension. A negative tilt does the opposite by raising the front edge slightly.

For many seated users, a gentle negative angle can feel more natural. It lets the forearms slope downward toward the keyboard while keeping the wrists closer to neutral. This can also reduce the need to rest your wrists against the desk while typing.

Still, negative tilt is not an automatic solution. The correct position depends on your keyboard height, desk depth, chair setup, and personal comfort. Some users prefer a completely flat board, while others benefit from a slight negative angle.

The important point is to avoid forcing your hands into an awkward position. Try several keyboard flat or tilted positions and pay attention to wrist tension during longer sessions.

Adopting a Negative Incline

negative keyboard tilt raises the front edge slightly while lowering the rear edge. This position can help keep your wrists closer to neutral when your forearms slope downward toward the desk.

It can be particularly useful for users who experience discomfort with traditional positive-tilt keyboards. Instead of bending your hands upward to reach the keys, your fingers can approach from a more natural angle.

You do not need an aggressive slope. A small adjustment is often enough to determine whether negative tilt feels better. An adjustable keyboard tray can make experimentation easier. You can also use a suitable desk surface or keyboard support designed for angle adjustment.

Pay attention to your entire posture rather than your wrists alone. Your shoulders should remain relaxed, and your elbows should stay in a comfortable position. Avoid reaching too far forward.

If a negative incline increases discomfort, return to a flat position. The ideal keyboard flat or tilted angle should support your natural posture rather than force your hands into one fixed position.

What is a 96% keyboard missing?

96% keyboard keeps most of the functionality of a full-size keyboard while using less space. Its main difference is the compressed layout. Unlike a traditional full-size board, it removes much of the empty spacing between key groups.

A typical 96% keyboard still includes a number pad, function row, arrow keys, and most navigation functions. However, keys such as Insert, Home, End, Page Up, Page Down, and Delete may be repositioned. Some layouts also remove less frequently used keys or place them behind function layers.

The exact key count varies between manufacturers, so there is no universal 96% layout. That makes checking the specific keyboard layout important before buying one.

The main benefit is desk space. You get much of the functionality of a full-size board without its wider footprint. This can leave more room for a mouse or other accessories while preserving familiar productivity features.

Whether you choose a 96% keyboard or another layout, your keyboard flat or tilted position should still allow comfortable access to every key.

Compressed Layout Trade-offs

The biggest advantage of a 96% keyboard layout is also its main compromise. Manufacturers compress the keys to reduce the board’s overall footprint. This leaves less visual and physical separation between different key groups.

Users who regularly work with spreadsheets may appreciate keeping a dedicated number pad. Programmers and office workers can also retain many familiar navigation functions. However, relocated keys may require an adjustment period.

The exact experience depends on the keyboard design. Some models use a compact navigation column, while others move several keys into unfamiliar positions. Secondary function layers can also change how frequently used commands are accessed.

Before switching, check the board’s layout carefully. A few minutes of research can prevent frustration later.

Once you adapt to the spacing, a 96% keyboard can offer an effective balance between functionality and desk efficiency. It is especially useful when you want more mouse space without giving up the number pad or function row.

Regardless of layout, remember that keyboard angle and wrist position remain important for comfortable daily use.

Why do pro gamers tilt their keyboard?

Professional gamers often rotate their keyboards sideways to create more room for mouse movement. This is especially common in competitive first-person shooters. Players may also consider why gamers prefer wired keyboards over wireless ones when building a competitive setup. Low mouse sensitivity can require broad arm movements for precise aiming.

Turning the keyboard frees valuable desk space beside the mousepad. Instead of allowing the keyboard to occupy the area needed for large swipes, players move it toward the monitor or side of the desk.

The angle also reflects individual preference. Some players find that a rotated keyboard gives their left arm a more comfortable position. Others simply prefer the extra mouse clearance.

There is no universal gaming angle. Some players use a slight rotation, while others position the keyboard at 45 degrees or more. Extreme angles are usually based on personal setup requirements rather than a proven ergonomic rule.

For competitive gaming, the best keyboard flat or tilted orientation is the one that allows comfortable movement, reliable key access, and enough space for accurate mouse control.

Competitive Ergonomics and Comfort

Competitive gaming setups often prioritize mouse movement and desk space. A sideways keyboard can prevent the keyboard from interfering with broad mouse swipes. For players using wireless peripherals, how to boost your wireless keyboard’s lifespan with one easy habit can also be useful when maintaining a gaming setup.

Tournament desks can also be cramped. Rotating the board gives players more control over how their limited surface area is used. It may also let the left arm sit closer to the body’s natural position.

However, a dramatic keyboard angle is not automatically more ergonomic. A 45- to 90-degree rotation can work well for some players but feel awkward for others. The position should not force excessive wrist bending or shoulder rotation.

Comfort remains important during long gaming sessions. Players should keep their shoulders relaxed and avoid excessive reaching. The keyboard, mouse, chair, and monitor should work together as one setup.

Competitive habits often develop from personal preference and available desk space. What works for a professional player may not suit your workstation.

Your preferred keyboard flat or tilted setup should always support comfortable movement rather than copy another player’s exact position.

Why are we still using QWERTY?

We still use QWERTY because of history, compatibility, familiarity, and established standards. Christopher Sholes developed the early QWERTY arrangement for mechanical typewriters in the nineteenth century. Its design was influenced by the mechanical limitations of early typewriters.

As typewriters became widespread, large numbers of people learned QWERTY. Businesses, schools, manufacturers, and publishers gradually built systems around it. Later, computers adopted the familiar layout instead of forcing users to learn an entirely new system.

Alternative layouts, including Dvorak and Colemak, can reduce finger movement for some typing patterns. Yet changing layouts comes with a significant learning cost. Users must develop new muscle memory and may temporarily lose typing speed.

Modern devices also reinforce QWERTY through compatibility. The same basic arrangement appears across laptops, desktop keyboards, phones, and public computers.

QWERTY therefore survives for practical reasons. Its dominance does not necessarily mean it is the most efficient layout. It means the world has invested heavily in keeping the existing standard.

The Power of Muscle Memory

Muscle memory plays a major role in keeping QWERTY popular. Experienced typists can enter words without consciously thinking about each individual key. Years of repetition make the layout automatic.

Switching to another arrangement can temporarily disrupt that ability. Even if an alternative layout offers potential efficiency benefits, users must spend time rebuilding their typing habits.

This creates a practical barrier for individuals and organizations. A person who types quickly on QWERTY may not want to sacrifice productivity while learning another system. Businesses also benefit from maintaining a familiar keyboard standard across employees and devices.

QWERTY’s widespread availability creates another advantage. You can sit at almost any computer and immediately understand the basic layout. That consistency matters in schools, workplaces, libraries, and shared environments.

Alternative layouts remain useful for people who want to experiment with typing efficiency or comfort. However, their smaller user base means they require more personal commitment.

Just as keyboard flat or tilted choices depend on personal comfort, keyboard layouts also involve individual preferences. QWERTY remains popular because familiarity and compatibility are difficult to replace.

Frequently Asked Questions

What is the most ergonomic typing angle for your hands?

The most ergonomic angle is a neutral or slight negative tilt where your wrists remain completely straight. Your forearms should angle slightly downward toward the floor, allowing your hands to float naturally above the keys without resting hard on the desk. This orientation minimizes internal tendon friction and eliminates pressure on the median nerve during long shifts.

Should I use a wrist rest while typing at my desk?

You should only use a wrist rest to support your palms between typing bouts, never while actively striking keys. Resting your wrists while typing creates contact pressure on vulnerable soft tissues and restricts natural side-to-side arm movements. Instead, let your arms float while working, then rest your lower palm on the pad during pauses.

Does a flat keyboard improve your typing speed?

A flat keyboard improves typing speed indirectly by lowering muscular fatigue and strain over time. While the layout angle does not instantly boost words per minute, it keeps your fingers closer to home position without straining forearm extensors. Reduced fatigue allows you to maintain peak typing accuracy and consistent speed across full workdays.

How do low-profile keyboards compare to tilted mechanical boards?

Traditional mechanical keyboards stand tall, frequently tempting users to flip out the kickstands or bend their wrists backward to reach top rows. If you are comparing keyboard types for different uses, mechanical vs membrane keyboards for gamers offers another useful perspective. A low-profile board reduces the need for steep angles or bulky wrist pads.
Conclusion

Optimizing your workstation is one of the simplest ways to improve everyday typing comfort. As we have explored, choosing whether your keyboard is flat or tilted can affect wrist position and overall posture.

For many users, a flat keyboard is an effective starting point. A gentle negative incline may also feel comfortable. By contrast, raising the rear edge can increase wrist extension, especially when combined with a tall keyboard and high desk.

Your setup should also reflect how you use your keyboard. A 96% layout can save desk space while retaining many full-size features. Competitive gamers may rotate their boards to create more room for large mouse movements. Meanwhile, QWERTY remains dominant because familiarity and compatibility are difficult to replace.

Take a moment to inspect your workstation. Fold down the kickstands if they make your wrists bend upward. Then adjust your chair, desk, keyboard, and mouse until your arms feel relaxed.

Ultimately, there is no universal answer to the keyboard flat or tilted question. Start flat, experiment with a slight negative angle, and choose the position that feels natural during extended use.

Small changes can make long typing sessions more comfortable and sustainable.

Which Music Streaming Service Has The Best Sound Quality?

Which Music Streaming Service Has the Best Sound Quality?

Finding a music platform with the best sound quality can transform how you experience your favorite songs. Everyday listeners often accept compressed audio without realizing how much detail can be lost. Subtle acoustic textures, dynamic changes, and vocal nuances may become less distinct.

The final result depends on more than the streaming service. File quality, codecs, headphones, speakers, DACs, and wired vs wireless audio equipment all influence what you hear. A premium stream cannot compensate for poor playback equipment.

Today, major services offer lossless audio, high-resolution formats, and spatial audio. These options give listeners more ways to enjoy recordings at higher quality.

This guide compares the leading platforms and explains what actually affects sound quality. We explore whether 320kbps is enough, whether Tidal beats Spotify, and how Apple Music compares. You will also learn when hi-res audio makes a meaningful difference and which setup can deliver the best sound quality for your needs.

Which audio streaming service has the best sound quality?

Tidal, Qobuz, Apple Music, and Amazon Music offer some of the highest-quality streaming options available. Several support lossless and high-resolution audio, although their catalogs, formats, and playback features differ. For listeners seeking the best sound quality, these services are stronger choices than platforms limited to lossy streaming.

Tidal and Qobuz are particularly popular among dedicated listeners. Both provide high-resolution FLAC options on supported tracks. Apple Music also offers lossless ALAC and Dolby Atmos content without requiring a separate high-resolution tier.

However, maximum specifications do not guarantee better sound. The master recording, DAC, headphones, speakers, and listening environment all matter.

Your ideal service therefore depends on your equipment and priorities. If you use wired audiophile equipment, lossless streaming can be worthwhile. With basic wireless earbuds, differences may be much harder to notice.

For pure technical quality, choose a service offering lossless or high-resolution files. Then focus on the rest of your listening chain.

Dedicated Bit-Perfect Streaming Hardware Support

Tidal Connect can provide a convenient way to send music directly to compatible hardware. This feature can reduce unnecessary handling between the streaming app and supported playback equipment.

With compatible devices, the receiving hardware manages playback directly. This can help preserve the original stream without unwanted software processing or operating-system mixing. The result depends on the connected equipment and its configuration.

For audiophiles, this approach can be useful because it simplifies the signal path. A compatible network streamer or DAC can handle the incoming audio without relying entirely on a computer’s standard audio output.

However, bit-perfect playback does not automatically make every recording sound better. The quality of the original master remains crucial. Your amplifier, headphones, speakers, and room also influence the final result.

If you want the best sound quality, look beyond the streaming app. Check whether your hardware supports the service’s highest-resolution formats. Then configure output settings correctly.

The goal is a clean digital path from the streaming service to your playback equipment.

Which music streaming app has the best quality audio?

Tidal is one of the strongest choices for listeners seeking an app focused on high-fidelity playback. Its supported tracks can include lossless FLAC and high-resolution content. The exact quality depends on the recording and selected playback settings.

The app also displays information about available audio quality. This helps listeners identify whether a track is playing in standard, lossless, or higher-resolution quality.

Apple Music is another strong option. It supports lossless ALAC and Dolby Atmos on compatible tracks. Spotify vs. Apple Music is also worth considering if you want to compare audio quality, features, and overall listening experience. Qobuz also appeals to listeners who prioritize high-resolution music and detailed album information.

The best sound quality does not come from an app alone. Playback hardware and settings have a major effect. Wired headphones and a capable DAC can reveal more detail than basic Bluetooth earbuds, while learning how to improve audio quality on a phone can also help mobile listeners.

Desktop listeners may also benefit from advanced output configurations. However, most users do not need complicated settings to enjoy excellent audio.

Choose the app that combines high-quality streams with hardware compatibility, an interface you enjoy, and a catalog that matches your listening habits.

Pristine Dynamic Playback Without Volume Normalization Compression

Volume normalization changes playback levels so different songs sound more consistent. This feature can be convenient when playlists contain recordings with very different mastering levels.

However, normalization settings can involve additional processing. Some listeners prefer disabling normalization during critical listening because they want the original mastering and dynamics preserved as closely as possible.

Turning normalization off does not magically improve the underlying recording. It simply prevents the service from applying its chosen loudness adjustment. The actual effect depends on the platform and its implementation.

For listeners chasing the best sound quality, checking playback settings is still worthwhile. Make sure you understand whether normalization, equalization, crossfade, or other processing features are active.

A clean playback configuration lets your headphones or speakers reproduce the recording without unnecessary changes.

That does not mean everyone should disable normalization. It can make everyday listening more comfortable, especially when switching between albums with different mastering levels.

For critical listening, however, many audiophiles prefer fewer processing steps. This approach makes it easier to evaluate the recording itself rather than the platform’s playback adjustments.

Is 320kbps the highest quality audio?

No. 320kbps is not the highest quality audio available. It represents a high-quality level for lossy compression, but lossless formats preserve the original audio data more completely.

A 320kbps MP3 or similar lossy file removes information through perceptual compression. The encoder attempts to discard details that listeners are less likely to notice. Lossless formats instead preserve the source data while reducing file size efficiently.

CD-quality audio typically uses 16-bit depth and a 44.1kHz sample rate. High-resolution formats can use higher bit depths and sample rates, such as 24-bit/96kHz or 24-bit/192kHz.

However, higher numbers do not automatically mean better sound. The quality of the original master matters greatly. Your headphones, speakers, amplifier, and DAC also affect what you hear.

For casual listening, 320kbps can sound excellent. For listeners seeking the best sound quality, lossless streaming provides a more faithful source and avoids another layer of lossy compression.

Real Audible Differences on Analytical Audio Hardware

Lossless audio preserves the complete digital information from the source file. Whether you can hear a meaningful difference depends on your equipment, hearing, listening environment, and the recording itself.

High-quality headphones and studio monitors can reveal subtle details that may be harder to notice on basic earbuds. Instrument separation, reverb tails, and quieter background elements can become easier to evaluate, especially when exploring spatial audio in headphones.

However, claims that every listener can easily hear lossless advantages should be treated cautiously. Well-encoded 320kbps audio can sound extremely close to lossless in many listening situations.

The difference becomes more relevant when using transparent equipment and carefully comparing the same master. Even then, the result varies between listeners.

If your goal is the best sound quality, lossless files are a sensible starting point. They preserve the source without lossy compression. You can then evaluate whether your equipment and ears reveal a noticeable improvement.

Ultimately, better equipment and better recordings may provide larger improvements than simply moving from one high-quality format to another.

Is Tidal better than Spotify?

Tidal can be the better choice if your main priority is high-fidelity audio. It offers lossless and high-resolution music on supported tracks, while Spotify has historically focused on lossy streaming quality.

Spotify remains highly competitive in other areas. Its recommendation system, playlists, social features, and broad device support make it extremely convenient. Features such as Discover Weekly can also help users find new music, while YouTube Music provides another alternative for listeners who value broad music discovery and streaming convenience.

For listeners focused specifically on the best sound quality, Tidal has an advantage when its higher-resolution and lossless options are used with suitable equipment. Spotify can still sound excellent, especially for everyday listening.

The difference becomes less important with basic Bluetooth headphones. Wireless codecs can introduce their own compression, which is an important consideration when comparing the disadvantages of Bluetooth audio and the theoretical advantage of a lossless source.

Your choice should therefore depend on your priorities. Choose Tidal if audio fidelity is central to your subscription. Choose Spotify if discovery, social features, and convenience matter more.

Neither service is universally better. The right option depends on how and where you listen.

Curated Editorial Discovery Versus Machine Learning Algorithms

Spotify and Tidal take different approaches to music discovery. Spotify is particularly well known for personalized recommendations powered by listening data and machine-learning systems.

Features such as Discover Weekly and Release Radar help users find artists and tracks based on their listening habits. This makes Spotify appealing to listeners who enjoy constant recommendations.

Tidal places greater emphasis on editorial curation and music-focused presentation. Its service has historically highlighted genres, artists, albums, and curated playlists through human editorial input.

The difference is not directly related to the best sound quality. Instead, it affects how easily you discover music that you enjoy.

Spotify may appeal to listeners who want automated recommendations and social sharing. Tidal can be attractive to users who prefer album-focused listening and detailed music presentation.

Your ideal service may even change depending on how you listen. Someone who discovers music through playlists may prefer Spotify. An album-focused listener may prefer Tidal or Qobuz.

Audio quality should remain one factor among several. Catalog depth, discovery tools, device compatibility, and subscription cost can all influence your final decision.

Which is cheaper, Spotify or Tidal?

The price difference between Spotify and Tidal can change as both companies update their plans. Subscription pricing also varies by country, promotional offers, taxes, and plan type.

For that reason, it is better to compare the current individual and family plans before subscribing. More importantly, compare what each plan includes rather than looking only at the monthly price.

Tidal has focused its subscription offering around lossless and high-resolution music. Spotify offers a broad Premium experience centered on music discovery, playlists, podcasts, and convenience. Availability of specific audio features can vary by market and plan.

If your priority is the best sound quality, a slightly higher subscription price may be worthwhile if you have equipment capable of revealing the difference. If you mostly use basic wireless earbuds, paying more for higher-resolution files may provide limited audible benefit.

Spotify’s free tier can also make it more accessible for casual listeners, although it does not provide the same Premium experience.

Before choosing, compare current pricing, supported formats, catalog features, and device compatibility. The cheapest service is not necessarily the best value for every listener.

Maximum Acoustic Value Without Premium Tier Surcharges

High-resolution audio used to be associated with expensive premium tiers. Today, several major services include lossless or high-resolution formats within their standard paid offerings.

That makes comparing subscription value more important than simply comparing headline prices. A service that includes high-resolution playback can offer strong value for listeners with capable wired equipment.

However, paying for a high-resolution tier does not guarantee a dramatic improvement. The original recording must support the format, and your playback equipment must reproduce it accurately.

For listeners chasing the best sound quality, the strongest value usually comes from a complete listening chain. That includes a high-quality source, suitable DAC, capable amplifier, and revealing headphones or speakers.

Casual listeners may get more value from a platform with better recommendations or a larger selection of their favorite content.

Consider how you actually listen before upgrading. If you use Bluetooth earbuds most of the time, higher-resolution files may not be the most important investment.

If you use wired audiophile equipment, however, a lossless or high-resolution subscription can make more sense.

Frequently Asked Questions

Can you hear the difference between Spotify and Tidal on AirPods?

Most listeners cannot hear a significant difference between Spotify and Tidal when using standard AirPods. Bluetooth wireless transmission compresses audio using codecs such as AAC or SBC before sound reaches your ears. Because Bluetooth bandwidth cannot transmit full lossless data streams, both services sound relatively similar over standard wireless connections.

Do I need an external DAC to listen to hi-res audio?

Yes, you need a dedicated external Digital-to-Analog Converter (DAC) to listen to hi-res audio above 24-bit/48kHz. Standard smartphone and laptop headphone outputs downsample audio files to standard definition. An asynchronous USB DAC correctly decodes 24-bit/96kHz and 24-bit/192kHz FLAC streams, preserving original studio resolution for your wired headphones.

Does lossless audio consume more mobile data?

Lossless audio consumes significantly more cellular data than standard compressed streams. A standard 320kbps track uses approximately 2.4 megabytes of data per minute of playback. In contrast, a 24-bit/192kHz hi-res FLAC track can consume up to 40 megabytes per minute, rapidly exhausting limited mobile bandwidth allowances.

Does Apple Music offer the same audio quality as Tidal?

Apple Music offers audio quality comparable to Tidal, supporting ALAC lossless streaming up to 24-bit/192kHz alongside Dolby Atmos and spatial audio. Both services deliver identical theoretical resolution. However, Tidal remains preferred by many desktop audiophiles due to exclusive driver support and third-party music management software integrations like Roon.

Conclusion

Choosing the streaming platform with the best sound quality depends on your equipment, listening habits, and priorities. Tidal, Qobuz, Apple Music, and Amazon Music all provide strong options for lossless and high-resolution listening.

For wired audiophile headphones, a capable DAC, or a quality home stereo, lossless streaming can provide an excellent source. Tidal and Qobuz are particularly attractive to dedicated listeners, while Apple Music combines lossless audio with a broad ecosystem and spatial audio support.

Spotify remains a strong choice for everyday listeners. Its discovery features, playlists, social tools, and convenience can outweigh differences in source quality for many people.

Remember that higher resolution does not automatically mean better sound. The recording master and playback equipment often matter more than sample-rate numbers.

If you want to experience the best sound quality, start with a well-mastered recording. Use lossless playback where practical, disable unnecessary processing, and connect quality wired equipment when possible.

The best streaming service is ultimately the one that delivers the right balance of audio quality, features, price, and convenience for your listening style.

Why Routers Have External Antennas (Unlike Mesh)

Why Routers Have External Antennas (And Mesh Doesn’t)

Walk into any electronics store, and traditional Wi-Fi routers often look like futuristic spacecraft. They usually have several adjustable external antennas. Modern mesh nodes, however, tend to have smooth, minimalist designs. So, why routers have external antennas while mesh systems hide theirs is a common question.

The answer comes down to radio-frequency engineering, antenna placement, and network design. Wi-Fi antennas convert electrical signals into electromagnetic waves. The technology follows wireless networking standards developed by organizations such as the IEEE. You can explore the current IEEE 802.11 wireless LAN standard for more technical details.

Traditional routers concentrate their processing power and radio hardware in one central device. External antennas help that device manage wireless coverage from a single location. Mesh systems take a different approach by spreading smaller wireless nodes throughout the home.

Each mesh node works with the others to create one connected network. This distributed design reduces the need for large external antennas. It also lets manufacturers hide carefully tuned antenna arrays inside compact enclosures.

Understanding why routers have external antennas can help you choose the right Wi-Fi setup. Your home’s size, layout, wall materials, and performance needs all matter.

Are mesh systems better than routers?

Mesh systems are not automatically better than traditional standalone routers. Both technologies solve different home networking problems. A standalone Wi-Fi router concentrates processing power, radio hardware, and coverage in one location.

This design works well in apartments and compact single-story homes. A properly positioned router can deliver strong speeds with low latency. It also costs less and requires fewer devices to maintain.

Mesh Wi-Fi becomes more useful in larger homes. It can also help when multiple floors or thick walls create difficult dead zones. Instead of relying on one transmitter, a mesh system uses several coordinated nodes. These nodes create a unified network across multiple areas.

This difference also explains why routers have external antennas while mesh products often use internal antennas. Traditional routers need to maximize coverage from one location. Mesh systems distribute that responsibility across several nodes.

Your choice should depend on your floor plan. Consider these factors before buying:

  • Home size: Larger properties benefit more from distributed coverage.
  • Wall construction: Concrete and brick can weaken wireless signals.
  • Performance needs: Gaming may favor a direct router connection.
  • Budget: A standalone router usually costs less.

For smaller homes, a quality router may provide everything you need. For complex layouts, mesh can offer more consistent whole-home coverage.

Matching Hardware to Your Floor Plan

Choosing between a standalone router and mesh Wi-Fi starts with your home’s physical layout. A single router often works well in an open floor plan below about 2,000 square feet. It can provide strong coverage without the extra cost or power consumption of multiple nodes. Before upgrading, it is also worth checking whether a simple restart can resolve temporary performance issues. See What Happens If You Never Restart Your Router? for more information.

Mesh Wi-Fi becomes more attractive as distance and physical barriers increase. Homes above roughly 2,500 square feet may benefit from multiple access points. Multi-story properties can also be difficult for one centrally placed router to cover evenly.

Consider where your router or mesh nodes will sit. A central, open location usually provides better coverage than a closed cabinet or distant corner. This placement principle also helps explain why routers have external antennas. A central router must serve devices across the entire home.

Mesh systems can reduce dead zones when nodes are positioned correctly. Your devices can move between nodes while staying on the same network.

Before choosing hardware, evaluate:

  • Square footage
  • Number of floors
  • Wall materials
  • Internet speed
  • Gaming or streaming requirements
  • Ethernet availability

The best Wi-Fi setup matches your home’s structure. More hardware does not automatically mean better performance.

Why Do Wi-Fi Routers Have Antennas While Mesh Systems Don’t?

The main reason why routers have external antennas is their single-point coverage design. Traditional routers must provide wireless coverage from one central location. External antennas give manufacturers flexibility when designing that coverage.

Many standalone routers use dipole-style antennas that users can position. Adjusting their orientation can help optimize coverage for a particular environment. However, antenna direction does not work like a simple spotlight. Modern routers also include other useful networking features beyond antenna design. See 5 Cool Things You Didn’t Know Your Wi-Fi Router Can Do for more examples.

Wi-Fi radiation patterns depend on antenna design, frequency, orientation, and surrounding materials. This is an important part of understanding why routers have external antennas.

Mesh systems use a different strategy. Instead of depending on one central transmitter, they distribute wireless coverage across several nodes. Manufacturers can therefore place multiple internal antennas inside each compact enclosure.

These internal antenna arrays can support several radio bands and spatial streams. They also help mesh nodes maintain a clean appearance. When comparing newer routers and mesh systems, Wi-Fi standards also matter. Wi-Fi 6 vs Wi-Fi 7: Is It Time to Upgrade Your Home Network? explains the key differences between these generations.

The design offers practical benefits:

  • External antennas: Easier to access and sometimes adjustable.
  • Internal antennas: Better suited to compact hardware.
  • Mesh nodes: Use multiple locations to extend coverage.
  • Standalone routers: Concentrate coverage around one central device.

So, visible antennas are not simply a sign of better Wi-Fi. They reflect a different approach to wireless network design.

Form Factor Meets Distributed Radio Engineering

Internal antennas help mesh nodes blend into modern home environments. Their compact appearance can also encourage users to place them in open locations. That placement often helps wireless performance because antennas work poorly when surrounded by dense materials.

Mesh systems do not need one large antenna system to cover an entire property. Instead, several nodes work together. Each node maintains connections with nearby devices and other mesh nodes.

This distributed approach is another reason why routers have external antennas while mesh units usually do not. A standalone router needs strong centralized coverage. A mesh system divides coverage between multiple locations.

Manufacturers can build multi-antenna internal arrays into relatively small enclosures. These arrays can support multiple spatial streams and frequency bands.

The enclosure also protects the antenna hardware from everyday contact. Users cannot accidentally bend or reposition an internal antenna.

However, appearance is not the main technical reason for the design. Antenna placement must match the radio circuitry and enclosure. Manufacturers tune internal antennas for each specific hardware design.

That tuning helps maintain predictable coverage without external rods.

The result is a balance between performance and design. Standalone routers emphasize centralized radio coverage. Mesh nodes emphasize distributed coverage from several coordinated locations.

What is a major disadvantage of a mesh network?

One major disadvantage of a wireless mesh network is potential speed loss over wireless backhaul connections. A mesh satellite may need to communicate with client devices while also sending traffic back to the primary node.

In a dual-band system, both connections can compete for available wireless airtime. This can reduce throughput, especially when a satellite is far from the main router. Performance also depends on signal quality, interference, node placement, and system design. If your network becomes slow or unstable, restarting the router may also help resolve temporary issues. Learn more about What Happens If You Never Restart Your Router?

Wireless mesh systems can also add some latency. Each additional wireless hop requires the network to process and relay traffic. The difference may be small for browsing and streaming. Competitive gamers may prefer the consistency of a direct wired connection.

Mesh networks also cost more when multiple nodes are required. Each unit consumes electricity and adds another device to manage.

These limitations highlight another important point about why routers have external antennas. Traditional routers can concentrate wireless resources in one location. Mesh systems trade some centralized performance for broader distributed coverage.

Common disadvantages include:

  • Reduced wireless backhaul capacity
  • Additional latency between nodes
  • Higher equipment costs
  • Greater power consumption
  • More complicated placement requirements

These limitations do not make mesh systems poor choices. They show why mesh performance depends heavily on network design.

Mitigating the Wireless Throughput Penalty

You can reduce wireless mesh performance losses by choosing the right backhaul design. A tri-band mesh system can dedicate one radio band to communication between nodes. This leaves other bands available for connected devices.

Wired Ethernet backhaul can provide an even stronger solution. Instead of sending inter-node traffic over Wi-Fi, Ethernet carries that traffic through a physical cable. This reduces wireless congestion and can improve speed and latency.

If your home already has Ethernet cabling, wired backhaul is often the best option. It lets mesh nodes act more like coordinated wired access points.

This approach also changes the performance equation behind why routers have external antennas. A standalone router depends heavily on centralized wireless coverage. Wired mesh nodes can distribute access without relying on a wireless link between every node.

When selecting a mesh system, consider:

  • Tri-band or quad-band radios
  • Dedicated wireless backhaul
  • Ethernet backhaul support
  • Available Ethernet cabling
  • Distance between nodes
  • Expected client traffic

Placement still matters, even with advanced hardware. A satellite should receive a strong connection from the main node.

A well-designed mesh system can avoid much of the throughput penalty associated with basic dual-band wireless backhaul.

Is mesh WiFi overkill?

Mesh Wi-Fi can be overkill for small homes, apartments, and open-plan spaces. If a single router already provides strong coverage, adding multiple nodes may offer little benefit.

For homes below roughly 1,500 square feet, a well-positioned router can often provide excellent performance. A standalone router also uses less electricity because only one primary device needs to remain powered.

Adding unnecessary mesh nodes can sometimes create new problems. Nodes placed too close together may increase wireless interference. Devices may also have more opportunities to roam between access points when they do not need to.

That does not mean mesh systems are unsuitable for smaller properties. Thick concrete walls, unusual floor plans, and difficult signal paths can still justify multiple nodes.

Before buying mesh hardware, check whether your current router actually has dead zones. Test different router locations first. Moving the router into a central, elevated, open position can sometimes solve coverage problems without additional equipment.

This also helps explain why routers have external antennas. A single router must serve the whole coverage area. Mesh hardware only needs each node to cover its surrounding area.

For small homes, consider:

  • Router placement
  • Wall construction
  • Coverage requirements
  • Internet speed
  • Number of connected devices
  • Current Wi-Fi dead zones

If one router already covers your home reliably, mesh may simply add unnecessary cost and complexity.

When Single-Point Hardware Wins Out

A standalone router often makes more sense when your home has an open layout. It can also be the better choice when devices remain relatively close to the router.

Central placement is important. Avoid putting the router inside cabinets, behind large appliances, or near dense obstructions. A central and elevated position usually provides a better starting point for whole-home coverage.

Standalone hardware also benefits users who prioritize low latency and peak single-device speeds. A direct connection to one powerful router avoids wireless mesh hops between nodes.

This centralized design is also central to understanding why routers have external antennas. External antennas can help manufacturers optimize coverage from one location. Mesh systems distribute that task across multiple devices instead.

A standalone router can also simplify troubleshooting. There is only one primary wireless device to configure and maintain.

Choose a standalone router when:

  • Your home has few or no dead zones.
  • Most rooms are reasonably close to the router.
  • You want lower equipment costs.
  • You prioritize simple network management.
  • You need strong gaming performance.

Mesh becomes more valuable when physical barriers prevent one router from reaching important areas.

The key point is simple: buy for the problem you actually have. If coverage is already strong, additional nodes may not improve your experience.

Does mesh WiFi penetrate walls?

Mesh Wi-Fi does not magically penetrate walls better than a traditional router. Both systems use the same basic radio-frequency principles. Signal strength decreases as wireless waves pass through physical obstacles.

Materials such as concrete, brick, plaster, metal, and reinforced structures can weaken Wi-Fi signals. Higher-frequency bands, including 5 GHz and 6 GHz, generally have shorter effective ranges than lower-frequency bands.

Mesh systems solve this problem differently. They do not need one transmitter to cross every wall in the home. Instead, you can place nodes closer to the areas where coverage is needed.

A well-positioned node can receive a stronger signal from another node. It can then provide a fresh wireless connection to nearby devices.

This approach helps explain why routers have external antennas. A standalone router must push coverage from one location. Mesh systems can place another radio closer to a weak area.

For better wall coverage:

  • Place nodes in open areas.
  • Keep them away from thick concrete walls.
  • Avoid closed metal cabinets.
  • Use hallways and doorways when practical.
  • Maintain a strong connection between nodes.

Mesh therefore works around difficult structures. It does not give Wi-Fi special wall-penetrating abilities.

Strategic Node Placement Around Dense Barriers

Node placement can have a greater impact on mesh performance than simply adding more hardware. A satellite should receive a strong signal from the primary router or another suitable node.

Avoid placing a mesh unit directly behind a thick concrete wall. Do not hide it inside a metal utility cabinet. These locations can weaken the connection before the node serves nearby devices.

Open spaces usually provide better conditions for wireless communication. Hallways, shelves, and areas near interior doorways can be useful positions.

Try to maintain a clear path between neighboring nodes where possible. Fewer dense obstacles mean less signal loss and a stronger wireless backhaul.

This placement strategy contrasts with why routers have external antennas. A standalone router often relies on antenna positioning from one central location. Mesh systems instead rely on several strategically placed nodes.

Also avoid placing nodes too far apart. A satellite with a weak connection cannot provide strong coverage simply because it sits closer to a dead zone.

For best results:

  • Start with the primary node in a central location.
  • Place satellites between the router and weak areas.
  • Avoid dense construction and metal enclosures.
  • Check the connection quality between nodes.
  • Move nodes before buying additional units.

Good placement lets mesh systems use their distributed design effectively.

Frequently Asked Questions

Do external antennas make a router faster than mesh?

External antennas do not directly increase internet bandwidth, but they provide higher antenna gain and manual adjustability. This design helps push stronger signal margins over longer straight-line distances from a single hub. Mesh nodes compensate for compact internal antennas by distributing multiple physical broadcast stations closer to your end devices, balancing overall throughput across the entire house.

Can you add external antennas to a mesh node?

Almost all commercial mesh nodes lack external antenna ports, making aftermarket antenna upgrades impossible. Manufacturers tune the internal antenna patterns to specific internal printed circuit boards and housing acoustics. If you need adjustable high-gain antennas for external outbuildings, use a dedicated outdoor access point or a standalone router equipped with detachable SMA connectors.

Do mesh networks use more electricity than single routers?

Yes, a complete mesh network draws more electricity simply because you must power two, three, or more independent computing units around the clock. While an individual mesh pod consumes roughly 5 to 10 watts, running multiple units cumulatively increases household power draw compared to running one standalone, high-performance router.

Will switching to mesh improve my ping in games?

Switching to a wireless mesh network rarely improves gaming ping and often makes it slightly worse. Each wireless hop between mesh nodes adds processing time and potential radio interference. For the lowest, most consistent gaming latency, plug your PC or console directly into your primary router via an Ethernet patch cable.

Conclusion

Understanding why routers have external antennas reveals two different approaches to home Wi-Fi design. Traditional routers concentrate radio hardware in one central location. External antennas support that centralized coverage strategy and can provide useful positioning flexibility.

Mesh systems distribute wireless coverage across several coordinated nodes. Their internal antenna arrays allow manufacturers to keep each unit compact and visually discreet. The network then relies on node placement rather than one powerful transmitter covering every room.

Neither design is automatically better. Standalone routers often suit smaller homes, open layouts, and users who want simple management and strong peak performance. Mesh systems are more useful when large floor plans, multiple levels, or dense walls create persistent dead zones.

Before choosing, consider your home’s size, construction, device locations, and performance requirements. Also think about whether Ethernet backhaul is available.

The best Wi-Fi setup is not necessarily the one with the most antennas or nodes. It is the system that provides reliable coverage where you actually need it.

How Long Do Web Cookies Last? The Truth About Session Safety

How Long Do Web Cookies Last? Why Simply Logging Out Is No Longer Safe

Most internet users assume clicking “Log Out” ends their online session immediately. In reality, logout behavior depends on how each website manages authentication. If you ask how long do web cookies last, the answer depends on the cookie type, website settings, and browser rules.

Some cookies last only for a browser session. Others can remain stored for months or longer. Cookies help websites remember logins, shopping carts, preferences, and other information. Their lifetime often depends on attributes such as Max-Age and Expires.

According to official web standards maintained by the World Wide Web Consortium (W3C), cookies function as the stateful backbone of the stateless HTTP protocol. They quietly track your logins, shopping carts, and behavioral profiles across every tab you open.

Cybercriminals may also target stolen session cookies instead of cracking passwords. Infostealer malware can extract browser data and authentication tokens from infected devices. A stolen authentication token may remain useful until the website invalidates the related server-side session.

This guide explains how long do web cookies last, how cookie expiration works, and what happens after deletion. It also explains whether blocking cookies improves security. Understanding how long do web cookies last in a browser can help you make smarter privacy and security decisions.

How long should a web cookie last?

A web cookie should last only as long as necessary for its intended purpose. There is no universal answer to how long do web cookies last because different cookies perform different jobs. A temporary session cookie may disappear when the browser session ends. A persistent preference cookie may remain for months.

Authentication cookies need greater security controls. Websites handling sensitive information should use appropriate expiration periods and server-side session timeouts. High-risk services may also require reauthentication after periods of inactivity.

When considering how long do web cookies last, developers should avoid unnecessarily long lifetimes for sensitive authentication tokens. A stolen token could allow unauthorized access without exposing the user’s password.

Cookie duration should therefore match the level of risk. A simple preference cookie can have a longer lifetime. An authentication cookie protecting sensitive information should receive stricter controls.

Good cookie management considers both convenience and security. The goal is to provide a smooth experience without leaving sensitive sessions active longer than necessary.

Balancing User Experience With Session Security

Website operators must balance convenience with session security when deciding how long cookies should last. Long-lived cookies reduce repeated login prompts. However, they can increase exposure if a device or authentication token becomes compromised.

Shorter cookie lifetimes reduce that exposure. They can also create more login requests for users. The right balance depends on the website, account type, and potential impact of unauthorized access.

When deciding how long do web cookies last, administrators should consider several safeguards:

  • Use short idle timeouts for sensitive sessions.
  • Invalidate server-side sessions after logout.
  • Use Secure and HttpOnly where appropriate.
  • Apply suitable SameSite settings.
  • Rotate authentication tokens after important events.
  • Require reauthentication for high-risk actions.

A critical distinction remains between browser cookies and server sessions. Deleting a cookie does not automatically guarantee that the server session has ended.

Understanding how long do web cookies last therefore requires looking beyond browser storage. Strong session security combines appropriate cookie settings with proper server-side controls.

What will I lose if I delete cookies?

Deleting browser cookies removes stored cookie data for the affected websites. In many cases, this signs you out and requires you to enter your credentials again. You may also lose preferences stored inside cookies.

Those preferences can include language choices, themes, regional settings, and other customization options. Guest shopping carts may also disappear when a website stores cart information in cookies.

However, deleting cookies does not normally delete your online accounts. It also does not remove server-side files, browser bookmarks, or passwords stored separately in a password manager.

The exact effect depends on the website. Some information may be stored through local storage or other browser technologies instead of cookies. If you are clearing browser data, understanding the difference between clearing cache and clearing data can help you avoid removing more information than necessary.

Knowing how long do web cookies last also helps explain why deleting them can affect your browsing experience. Removing a persistent cookie breaks the local connection between your browser and the website.

Cookie deletion can improve privacy on shared devices. However, it is not a complete cybersecurity solution. Malware, server-side sessions, browser fingerprints, and previously collected data can remain unaffected.

The Immediate Privacy Benefits of Clearing Local Storage

Clearing cookies and other site data can reduce information stored locally on your device. It may remove persistent identifiers, saved preferences, and certain tracking data associated with websites.

This can be particularly useful after using a shared or public computer. Removing stored data reduces the chance that another person can access an existing browser session.

Understanding how long do web cookies last makes this benefit easier to understand. Persistent cookies can remain available across browser restarts. Clearing them removes those locally stored identifiers before their normal expiration.

However, clearing local storage does not erase information already stored on a website’s servers. It also cannot remove data that third parties collected before deletion.

For stronger privacy, combine cookie cleanup with broader security practices. If you use public networks, also learn about public Wi-Fi risks and how to protect your connection:

  • Sign out of important accounts after use.
  • Clear site data on shared devices.
  • Review active account sessions regularly.
  • Enable multi-factor authentication.
  • Keep your browser and operating system updated.

These steps provide broader protection than cookie deletion alone. They also help reduce the risks associated with stolen or forgotten browser sessions.

How long do cookies last in a browser?

If you wonder how long do web cookies last in a browser, the answer depends on their expiration settings. A session cookie generally remains available during a browser session. A persistent cookie includes an expiration time through Max-Age or Expires.

There is no single standard duration for every persistent cookie. Some cookies expire within minutes. Others can remain stored for months or longer. Browser privacy controls can also affect how long certain cookies remain available.

The browser may remove cookies because of user settings, privacy protections, storage management, or manual deletion. Websites can also replace or remove cookies through new Set-Cookie instructions.

Therefore, how long do web cookies last depends on several factors. These include the website’s configuration, cookie type, browser behavior, and privacy settings.

A cookie’s intended lifetime is not always its actual lifetime. Browser policies can limit certain tracking technologies. Users can also manually clear cookies whenever they choose.

Understanding these differences helps explain why cookie expiration varies between websites and browsers.

How Modern Browsers Enforce Strict Storage Limits

Modern browsers increasingly use privacy protections that affect how websites and third parties use cookies. These protections can include third-party cookie restrictions, storage partitioning, and other anti-tracking measures.

This means a website cannot always assume that a cookie will remain available for its requested lifetime. Browser policies may restrict or remove certain third-party cookies earlier than expected.

These controls are especially important when considering how long do web cookies last for advertising and cross-site tracking. Partitioning can limit how third parties connect identifiers across unrelated websites.

However, privacy protections do not eliminate every form of tracking. First-party cookies can still support legitimate functions such as authentication, preferences, and shopping carts.

Users should therefore focus on selective privacy controls rather than assuming every cookie is harmful. Essential cookies can remain available while unnecessary tracking can be restricted.

Browser privacy settings can help create this balance. They can reduce unwanted tracking while preserving important website functions.

Ultimately, how long do web cookies last depends partly on browser policies. The server sets cookie instructions, but the browser controls how those instructions are handled locally.

Is blocking all cookies a good idea?

Blocking every cookie may sound like the strongest privacy option. However, completely blocking cookies can break many modern website functions. Websites often use first-party cookies to manage login sessions, shopping carts, preferences, and other essential features.

Without these cookies, websites may repeatedly forget your settings. Some services may also prevent you from staying logged in or completing certain transactions.

Understanding how long do web cookies last is more useful than simply blocking all cookies. Cookie duration, purpose, and source all matter when evaluating privacy risks.

A practical approach is to distinguish between essential first-party cookies and third-party tracking cookies. First-party cookies often support functions you intentionally request. Third-party cookies may support advertising, analytics, and cross-site tracking. You can also learn more about VPNs and why you may need one when protecting your privacy online.

Instead of blocking everything, consider using:

  • Built-in browser tracking protection.
  • Third-party cookie restrictions.
  • Site-specific cookie permissions.
  • Automatic deletion of selected site data.
  • Separate browser profiles for sensitive activities.

These controls can improve privacy without breaking essential website features. They also give users more control over how long do web cookies last on their devices.

Choosing Granular Partitioning Over Total Cookie Rejection

Cookie partitioning provides a more targeted alternative to completely blocking cookies. It can isolate stored data based on the website context where the data was created.

This limits the ability of third parties to connect activity across unrelated websites. It can therefore reduce the usefulness of cross-site identifiers while allowing necessary website functions to continue.

When considering how long do web cookies last, partitioning adds another important layer. A cookie may still have an expiration date, but its accessibility can be restricted by the browser’s storage rules.

Users can combine partitioning with tracking protection and sensible cookie controls. Private browsing can also provide temporary isolation for specific browsing sessions.

However, partitioning does not make you anonymous. Websites can still collect information through account activity, network requests, and other technologies.

The goal should be controlled cookie storage, rather than simply deleting everything. Keep cookies that support trusted services while limiting unnecessary tracking.

This approach provides a practical balance between privacy, usability, and security. It also makes cookie management more effective than blanket blocking.

How quickly do cookies expire?

Cookies can expire almost immediately or remain stored for a long time. If you ask how long do web cookies last, their expiration depends mainly on the instructions provided by the website and the browser’s handling of those instructions.

The Max-Age attribute specifies how many seconds a cookie should remain valid. The Expires attribute provides a specific expiration date and time.

If a cookie does not include either attribute, it is generally treated as a session cookie. Such cookies are intended to remain available during the browser session.

Websites can also remove cookies by sending a new Set-Cookie response with an appropriate expiration value. Server-side authentication sessions may follow completely separate expiration rules.

This creates an important distinction. Cookie expiration does not always equal session expiration. A browser can remove a cookie while a server-side session remains active.

Conversely, a server can invalidate a session while the browser still stores the related cookie.

Understanding how long do web cookies last therefore requires looking at both browser storage and server-side session management.

Understanding Server Max-Age Directives and Expiration Headers

Websites send cookie instructions through the HTTP Set-Cookie response header. Two important attributes control cookie persistence: Max-Age and Expires.

Max-Age specifies how long the cookie should remain valid in seconds. When the specified period ends, the browser treats the cookie as expired.

Expires specifies a particular date and time for expiration. A website can use either attribute according to its implementation needs.

When considering how long do web cookies last, these attributes provide the basic answer for persistent cookies. However, browser privacy policies and user settings can also affect actual storage.

Developers should also configure security attributes such as SecureHttpOnly, and appropriate SameSite values. These settings do not determine cookie lifetime. They can, however, reduce certain security risks.

Most importantly, authentication should be controlled on the server. Expiring a browser cookie alone should not be considered equivalent to invalidating an account session.

A secure application should combine proper cookie expiration with server-side session controls. This approach provides stronger protection against stolen authentication tokens.

Frequently Asked Questions

Can hackers steal my cookies even after I log out?

Yes, attackers can abuse stolen cookies if the host application fails to invalidate the session token on the server side. Poorly designed websites simply delete the cookie from your local browser when you click log out, while leaving the backend authorization active. If spyware extracted the token prior to logout, that stolen string can grant unauthorized access until the server session officially expires.

What is the difference between session cookies and persistent cookies?

Session cookies exist temporarily in your computer’s random-access memory and disappear automatically whenever you exit your web browser. Persistent cookies write directly to your local drive and remain intact across multiple browsing sessions until reaching their predetermined expiration date. Persistent tokens remember recurring logins and custom configurations, whereas session cookies manage immediate tasks like keeping items in a checkout cart.

How often should I manually clear my browser cookies?

Clearing your browser cookies once every month strikes an ideal balance between convenience and proactive security hygiene. However, you should immediately purge local storage after using shared computers, public Wi-Fi networks, or resolving suspicious browser redirects. Regularly emptying this local data limits the damage of infostealer malware and forces servers to issue fresh, uncompromised authentication identifiers.

Do private browsing or incognito windows save cookies?

Incognito and private browsing windows isolate cookies within a temporary holding container that operates separately from your standard profiles. While websites can read and store cookies during your private session, the browser permanently destroys that entire temporary storage vault the instant you close the window. No persistent trackers, login records, or browsing history survive after window termination.

Conclusion

Understanding how long do web cookies last reveals an important point about modern browser security: logging out does not always tell the whole story. Cookies are not inherently malicious. They help websites manage authentication, preferences, shopping carts, and other essential functions.

The security risk depends on how cookies and server-side sessions are designed. Long-lived authentication tokens can increase exposure if attackers steal them. Poor logout implementations can also leave server sessions active after a browser cookie disappears.

Protecting your online accounts requires more than regularly deleting cookies. Review active sessions, clear site data on shared devices, and use browser privacy controls to limit unnecessary tracking. Enable multi-factor authentication on important accounts and keep your browser and operating system updated.

Cookie technology will continue to evolve as browsers strengthen privacy protections. By understanding cookie expiration, session security, and browser storage, you can make better choices about your digital privacy without sacrificing everyday web functionality.

Should You Accept Or Reject Cookies From A Website?

Should You Accept or Reject Cookies From a Website?

Every time you visit a new website, a cookie banner may ask for your consent. Deciding whether to accept or reject cookies has become a routine part of browsing. Cookies are small data files that websites use to remember sessions, preferences, and other information.

Some cookies keep shopping carts active or remember your preferred language. Others support analytics, advertising, personalization, or cross-site tracking. The main privacy concern usually involves non-essential cookies, especially those used for advertising and tracking.

While some files simply keep items in your shopping cart, others follow you across the internet to build marketing profiles. Privacy watchdogs like the Federal Trade Commission have established consumer guidance to help users navigate tracking technologies and digital privacy.

Many users click “Accept All” simply to remove the banner. Others block every cookie and discover that important website features stop working. Neither approach is ideal for every situation.

Before you accept or reject cookies, check what each category actually does. Necessary cookies often support core functions, while optional cookies may collect additional browsing information.

This guide explains what happens when you accept or reject cookies, what clearing cookies removes, and how cookie settings affect your online privacy.

Is it better to accept cookies or reject them?

In most situations, it is better to reject non-essential cookies while allowing necessary ones. Essential cookies support secure logins, shopping carts, session management, and other basic website functions.

When deciding whether to accept or reject cookies, consider what the website needs to operate. Necessary cookies can improve functionality, while optional cookies may support advertising, analytics, and personalization.

Rejecting optional cookies can reduce unnecessary data collection. It may limit how advertising companies track your browsing activity across different websites.

However, rejecting every cookie can make some websites less convenient. You might need to sign in again or reset certain preferences during future visits.

The best approach is selective rather than absolute. Review the consent choices provided by each website and disable categories you do not need.

For trusted websites, accepting functional cookies can improve convenience. For unfamiliar websites, rejecting optional tracking is usually a sensible privacy choice.

Ultimately, learning when to accept or reject cookies helps you balance privacy, security, and everyday browsing convenience.

Choosing Custom Preferences on Consent Banners

When a cookie banner appears, look for options such as “Customize,” “Preferences,” or “Manage Choices.” These settings give you more control than simply clicking “Accept All.”

Before you accept or reject cookies, review the categories listed in the consent window. Keep strictly necessary cookies enabled when they support security, authentication, and essential website functions.

You can often disable optional categories, including advertising, personalization, and certain analytics cookies. The available choices vary between websites, so read each description carefully.

This process takes slightly longer than accepting everything. However, it gives you greater control over the information websites and their partners can collect.

A cookie banner does not mean that every cookie is dangerous. Many cookies have legitimate purposes and help websites provide useful services.

The important point is understanding what you are allowing. If you are unsure whether to accept or reject cookies, choose custom preferences and allow only the categories you need.

This approach provides a practical balance between online privacy, website functionality, and convenience. It also reduces unnecessary tracking without forcing you to block useful features.

What happens if I reject cookies on a website?

When you reject optional cookies, the website should prevent those non-essential cookies from being stored. Depending on the site’s consent system, related tracking technologies may also be restricted.

Strictly necessary cookies can still operate when they are required for essential functions. These may support secure sessions, account access, shopping carts, or other basic features.

If you choose to accept or reject cookies based on privacy concerns, rejecting optional categories can reduce personalized advertising. You may see more generic advertisements instead of products related to previous browsing activity. You should also understand the risks of using public Wi-Fi when browsing on unfamiliar networks.

Some personalization features may also change. A website might not remember your language, theme, location, or other preferences.

Your experience depends on the website. Some pages work normally without optional cookies, while others may provide fewer features.

You may also see the consent banner again after clearing browser data.

Rejecting cookies does not automatically make a website unusable. If a useful feature stops working, review the site’s settings and allow only the permissions needed.

Understanding these effects makes it easier to decide whether to accept or reject cookies on different websites.

Dealing With Broken Features on Complex Websites

Some modern websites rely on cookies and other browser storage technologies for interactive features. These technologies can support account sessions, shopping carts, personalization, embedded services, and security functions.

After rejecting optional cookies, certain features may behave differently. A video player, live chat widget, embedded service, or personalized dashboard may require additional permissions.

However, cookies are not always responsible for broken features. Browser settings, content blockers, JavaScript restrictions, network problems, and website errors can also cause issues.

If a trusted website needs additional permissions, review its consent settings first. Avoid changing your global browser privacy settings just to fix one website.

When deciding whether to accept or reject cookies, allow the minimum categories required for the feature you need. This site-by-site approach provides stronger privacy than disabling every protection.

Separate browser profiles can also help with different activities. They reduce the need to repeatedly change privacy settings.

You do not have to choose between complete functionality and complete privacy. Instead, identify which permissions are necessary.

This makes it easier to accept or reject cookies without weakening your privacy protections across the entire internet.

What will I lose if I clear cookies?

Clearing cookies removes stored information that websites use to recognize your browser. The most noticeable result is usually being signed out of websites that rely on cookies for login sessions.

You may also lose saved website preferences. A site might forget your selected language, region, theme, or other customized settings.

Cookie-based shopping carts can also be affected. Items stored for guest users may disappear after cookies are removed.

After clearing cookies, websites may treat you like a first-time visitor. Consent banners can appear again because your previous choices may no longer be stored.

However, clearing cookies does not normally delete bookmarks, browsing history, or downloaded files. Those are controlled separately by most browsers.

Cookies are also different from cached files. Understanding the difference between clearing cache and clearing data can help you choose the right cleanup option. Check the browser’s cleanup settings before confirming the deletion.

If you are unsure whether to accept or reject cookies, clearing them gives you a fresh starting point. Just remember that you may need to sign back into your accounts afterward.

Why Periodic Browser Cleanouts Protect Your Privacy

Regularly reviewing browser data can improve privacy, particularly on shared or frequently used devices. Removing old cookies prevents websites from continuing to recognize your browser through those stored files.

However, clearing cookies does not eliminate every form of online tracking. Websites can also use account information, IP addresses, browser characteristics, and other technologies.

Browser cleanup still offers practical benefits. It can remove outdated session information, reset unwanted preferences, and sometimes resolve website problems. Regular browser maintenance can also help speed up your iPhone when performance issues appear.

You do not necessarily need to clear everything every month. A better approach is to review your browser’s privacy controls and remove stored data when necessary.

If clearing cookies signs you out of several accounts, a password manager can make signing back in easier. It securely stores login credentials and reduces the inconvenience of regular browser cleanup.

When deciding whether to accept or reject cookies, remember that cookie deletion is only one part of online privacy.

For stronger protection, combine browser cleanup with tracker blocking and careful consent choices. These habits can reduce unnecessary data collection without making everyday browsing difficult.

A thoughtful approach to browser privacy helps you stay in control of stored information and tracking technologies.

Is it safe to accept cookies from a website?

Accepting cookies from a legitimate website is generally safe from a traditional malware perspective. Cookies are small pieces of stored data, not executable computer programs.

They cannot normally install viruses on your computer by themselves. The bigger concern when you accept or reject cookies is usually privacy rather than malware.

Some cookies help websites and advertising partners understand your browsing activity. Depending on the technology used, this information may contribute to personalized advertising or broader behavioral profiles.

Security is another consideration. A poorly secured website could expose session information through other vulnerabilities. For this reason, use reputable websites and learn how a VPN can protect your online activity before choosing additional privacy tools.

It is also important to distinguish between necessary and optional cookies. Necessary cookies often support authentication, security, and core functionality. Optional cookies may support advertising, analytics, or personalization.

If you trust the website, accepting necessary cookies is generally reasonable. You can still reject optional tracking categories when privacy is your priority.

Before you accept or reject cookies, consider both the website’s reputation and the purpose of its cookies.

The safest everyday habit is to make an informed choice instead of automatically accepting everything.

Spotting Red Flags Before Consenting to Storage

Before accepting cookies, check whether the website appears legitimate. Look carefully at the domain name because fraudulent websites sometimes imitate trusted brands with slightly altered addresses.

HTTPS is also important. A secure connection helps protect information while it travels between your browser and the website. However, HTTPS alone does not prove that a website is trustworthy.

Watch for aggressive pop-ups, unusual domain names, misleading buttons, suspicious downloads, or requests for unrelated personal information.

A legitimate cookie banner should explain its categories or provide access to privacy settings. Be cautious when a banner makes “Accept All” highly visible while hiding the rejection option.

When deciding whether to accept or reject cookies, you do not need to grant unnecessary permissions simply because a banner appears.

If a website looks suspicious, leave the page. Never enter passwords, payment information, or other sensitive details on questionable websites.

Good browser security also includes keeping your browser, operating system, and security software updated.

These precautions work alongside sensible cookie choices. They help reduce privacy and security risks while browsing.

If you are uncertain whether to accept or reject cookies, prioritize the website’s legitimacy and only allow permissions that serve a clear purpose.

Should I accept cookies or not?

Whether you should accept cookies depends on the website, the cookie category, and your privacy preferences. There is no single rule that works perfectly for every website.

For trusted services such as online banking, workplace portals, and account platforms, necessary cookies are often important. They can maintain secure sessions and support normal functionality.

For unfamiliar websites, blogs, news pages, and stores you rarely visit, rejecting optional cookies is often a sensible privacy choice. This can limit advertising and analytics tracking.

You do not have to choose between accepting everything and blocking everything. Most modern consent banners provide more specific controls.

A practical rule is to accept necessary cookies and question optional ones. Review what each category does before granting permission.

Your decision can also change over time. A website you trust today may introduce new tracking technologies later.

Taking a few seconds to review cookie settings gives you greater control over your personal information.

If you are asking whether to accept or reject cookies, focus on necessity rather than convenience alone. Allow useful functions while limiting unnecessary tracking.

This balanced approach supports both privacy and a smoother browsing experience.

Adopting a Hybrid Strategy With Browser Extensions

A hybrid privacy strategy combines sensible cookie choices with browser-level tracking protection. Modern privacy-focused browsers can block many third-party trackers while allowing necessary website functions to continue working.

Privacy extensions can add another layer of protection. They may block known trackers, advertising scripts, and other technologies used to monitor browsing activity.

However, choose extensions carefully. Install tools from reputable developers and review the permissions they request. A privacy extension should not create a separate privacy risk.

This approach reduces the need to manually adjust every consent banner. You can maintain stronger default protections while making exceptions for websites you trust.

The goal is not to block every technology a website uses. Some cookies and storage methods provide genuine functionality and security benefits.

When deciding whether to accept or reject cookies, focus on minimizing unnecessary tracking while preserving services you actually need.

A combination of browser privacy settings, tracker protection, and selective cookie consent can provide a practical balance.

This hybrid strategy gives you greater control without making everyday browsing unnecessarily difficult. It also helps you accept or reject cookies with more confidence and fewer repeated decisions.

FREQUENTLY ASKED QUESTIONS

What is the difference between first-party and third-party cookies?

First-party cookies come directly from the website you are visiting. They handle critical tasks like keeping you logged in and remembering items in your cart. Third-party cookies belong to outside advertisers and analytics companies embedded on that site. They monitor your activity across completely different domains to deliver targeted promotions and build comprehensive advertising profiles.

Do cookies slow down my computer or internet connection?

Cookies do not noticeably reduce internet speeds because they are minuscule text files. However, having thousands of stored tracking files can slow down your web browser over time. Stale cache files and bloated tracking scripts consume browser memory, which leads to sluggish tab switching. Cleaning your browser cache periodically helps restore smooth, responsive navigation.

Can cookies reveal my real name and personal identity?

Cookies cannot independently extract your legal name, physical address, or private documents from your hard drive. They only record details that you voluntarily submit to a web form, along with technical device metrics. However, advertising networks can piece together your browsing patterns, IP address, and location data to profile you with remarkable, unsettling accuracy.

Can modern websites work normally without any cookies enabled?

Basic informational websites with static articles load perfectly fine without cookies. However, dynamic platforms will struggle or fail entirely. Without basic functional data, websites cannot keep you signed in, remember your preferences, or save items inside a checkout basket. Completely disabling all cookies in your browser settings will break most modern e-commerce stores and web portals.

Conclusion

Navigating the decision to accept or reject cookies does not need to be complicated. You do not have to choose between protecting your privacy and using modern websites comfortably.

A practical approach is to allow necessary cookies when they support legitimate functions. At the same time, treat optional advertising and tracking cookies with greater caution.

Rejecting unnecessary trackers can reduce data collection without preventing essential website features. For trusted websites, you can make exceptions when a particular function requires additional storage or permissions.

Your browser also provides important privacy controls. Review its cookie settings, enable available tracking protection, and consider using reputable privacy tools when appropriate.

Before accepting a consent request, take a moment to check the available categories. Choose custom preferences when you want more control instead of automatically selecting “Accept All.”

The goal is not to eliminate every cookie. It is to understand what you are allowing and limit unnecessary tracking.

With a selective approach, you can maintain useful website features while reducing your digital footprint and making more informed privacy decisions.

Government vs Private School: Which Option Is Better?

Government vs Private School: Choosing the Right Education Path

Choosing where to send your child is one of the most important decisions a parent can make. The debate over government vs private school education often involves affordability, teaching quality, infrastructure, and future opportunities. Some parents prioritize modern facilities and English-language instruction. Others value lower costs, standardized curricula, and wider social representation.

According to education policies outlined by the Ministry of Education, schooling should support universal access and foundational learning across different socioeconomic groups.

Both systems have strengths and limitations. Factors such as student-teacher ratios, classroom facilities, extracurricular activities, teacher qualifications, and school accountability can affect a child’s experience.

This guide compares government and private schools using practical considerations rather than common assumptions. It also explains the disadvantages of both systems, examines Class 8 detention rules under the amended Right to Education framework, and explores the financial pressures associated with private education. Understanding these differences can help parents make a more informed decision.

Is government school better than private?

A government school can be a better choice than a private school when affordability, regulated recruitment, and accessibility are the main priorities. Government schools generally charge little or no tuition and may provide benefits such as textbooks, uniforms, or meals under applicable government schemes. This can significantly reduce the financial burden on families.

Government teachers are recruited through state or central processes that usually require prescribed educational qualifications and eligibility requirements. Parents interested in education careers can learn more about how to become a teacher and the steps involved. However, recruitment standards vary between states and school systems. Passing CTET, for example, is relevant to specific central and state recruitment processes, rather than being a requirement for every government teacher.

Public schools also bring together students from varied social and economic backgrounds. This can encourage interaction with children from different circumstances. However, school quality varies considerably by location. Parents should therefore compare the specific school’s teaching quality, facilities, attendance, results, and support services rather than assuming every government school offers the same experience.

Qualified Faculty and National Standards

Government schools generally follow formal teacher recruitment and qualification requirements established by the relevant education authorities. Depending on the school and recruitment process, teachers may need qualifications such as a B.Ed. or other prescribed training. Eligibility tests such as the CTET or state TET can also form part of teacher recruitment requirements.

Teachers may receive professional development through government training programs. They also work within prescribed curricula and educational frameworks. These requirements provide a level of institutional oversight that parents may value.

However, qualifications alone do not guarantee effective teaching. Classroom management, teacher attendance, school leadership, and local resources can influence learning outcomes just as strongly. Parents should therefore look beyond certificates when comparing schools.

The strongest government schools can provide qualified teachers and structured academic programs at a relatively low cost. Yet the experience can differ between districts and states. Checking teacher availability, classroom conditions, academic results, and student support can provide a more accurate picture than judging the entire government sector as a single system.

Is private school better than government school?

A private school can offer advantages over a government school in areas such as infrastructure, classroom technology, communication, and extracurricular exposure. Many private schools invest heavily in computer facilities, activity rooms, sports programs, and digital learning tools. Some also maintain smaller classes, although student-teacher ratios vary widely between institutions.

Private schools may provide more frequent parent communication and structured academic reporting. English-medium instruction is also common, which can benefit students who need regular exposure to spoken and written English.

However, these advantages do not automatically make private schools academically superior. Quality varies significantly between schools, and higher fees do not guarantee better teaching or stronger outcomes. Some budget private schools may have limited facilities and frequent teacher turnover.

Parents should compare schools based on actual teaching quality, teacher stability, curriculum, fees, academic support, safety, and student well-being. Before making a decision, families can also review questions to ask before taking admission to evaluate a school more carefully. A well-managed government school can outperform a poorly managed private school. The right choice depends on the individual school’s quality and the child’s specific needs.

Modern Amenities and Global Exposure

Private schools often have greater flexibility to invest in modern facilities and extracurricular programs. Depending on the institution, students may have access to computer labs, smart classrooms, sports coaching, language programs, robotics activities, debates, and academic competitions.

These opportunities can help students build communication, teamwork, presentation, and digital skills. Regular exposure to English can also improve confidence for students who plan to study or work in environments where English is widely used.

However, the term “global exposure” can be misleading when applied broadly to private education. Not every private school offers international programs or advanced facilities. Some focus mainly on examination performance and traditional classroom instruction.

Parents should therefore examine what a school actually provides. Ask about laboratory access, extracurricular participation, language instruction, student projects, and technology use. It is also useful to check whether students receive meaningful opportunities or simply have access to expensive facilities.

Modern infrastructure can support learning, but good teachers and effective teaching methods remain more important than appearance alone.

What are the disadvantages of government school?

Government schools can face challenges involving infrastructure, overcrowded classrooms, staffing, and administrative responsibilities. The severity of these problems differs significantly between states, districts, and individual schools. Some campuses have strong facilities and effective leadership, while others operate with limited resources.

Large classes can make it harder for teachers to provide individual attention. Schools may also face shortages of subject-specific staff or support personnel. Government teachers can have administrative responsibilities in addition to teaching, although the extent varies by role and location.

Infrastructure can also affect the learning environment. Issues may include inadequate sanitation, limited digital equipment, insufficient classroom maintenance, or restricted access to laboratories and sports facilities.

English-language exposure is another concern for some parents. Students in certain government schools may have fewer opportunities to practice conversational English outside formal lessons. However, this varies considerably by school and region.

The key disadvantage is therefore uneven quality rather than a universal lack of quality. Parents should inspect the specific school, speak with teachers, review attendance and results, and assess facilities before making a decision.

Administrative Burdens and Learning Deficits

Government teachers can sometimes be assigned administrative responsibilities alongside their teaching duties. These may include election-related work, surveys, census activities, or other government assignments. Such duties can place additional demands on staff, although the extent and frequency vary by state and assignment.

When schools face teacher shortages or large classes, maintaining consistent individual attention becomes more difficult. Students who struggle with reading, mathematics, or other foundational skills may then need additional support.

Learning gaps can become more difficult to address when they continue across several academic years. However, it would be inaccurate to assume that every government school suffers from weak accountability or poor learning outcomes. Many schools have active leadership, dedicated teachers, and effective remedial programs.

Parents should focus on measurable indicators instead. Useful factors include student attendance, teacher availability, learning assessments, academic results, remedial support, and classroom conditions. These provide a more reliable basis for comparison than broad assumptions about public education.

Can a private school fail a student of class 8?

Yes, a Class 8 student can potentially be detained under the amended Right to Education (RTE) framework, but the rules depend on the applicable government notification and school system. The original RTE framework introduced a no-detention approach that generally prevented children from being held back until completing elementary education.

The RTE Act was later amended to allow the appropriate government to permit regular examinations in Classes 5 and 8. Where such examinations are implemented, a student who fails must receive additional instruction and an opportunity to take a re-examination.

If the student fails the re-examination, the applicable rules can allow the school to hold the student back. This does not mean every private school can automatically fail a Class 8 student whenever it chooses.

Parents should check the rules issued by their state or Union Territory education authority, along with the school’s board and applicable regulations. The exact procedure can differ depending on the jurisdiction and school category.

State Regulations and Re-Examination Procedures

Under the amended RTE framework, where Class 5 or Class 8 examinations are permitted, students who fail must receive additional instruction and an opportunity for a re-examination. The law provides for the re-examination to take place within two months from the declaration of the result.

During this period, schools are expected to provide additional instruction and guidance to help students address learning gaps. The purpose is to give the child another opportunity rather than immediately imposing detention.

If the student fails the re-examination, the applicable government rules may permit the school to hold the child back in the same class. However, the exact implementation depends on the rules adopted by the relevant government.

This distinction is important because Class 8 detention is not governed by one identical procedure across every Indian school. Parents should verify the current state rules and the school’s affiliation before assuming that a child can or cannot be detained.

What are the disadvantages of private schools in India?

The main disadvantages of private schools in India include higher fees, additional charges, academic pressure, and varying teaching quality. Tuition is often only one part of the total cost. Families may also pay for transportation, uniforms, books, activities, technology, examinations, and other services.

Fee structures can create significant financial pressure, particularly when charges increase over time. Parents should examine the complete annual cost rather than comparing monthly tuition alone. Learning about managing education expenses wisely can also help families plan for tuition and other schooling-related costs more realistically.

Academic pressure can also become a concern. Some schools place strong emphasis on examinations, rankings, homework, and competitive performance. This environment can motivate certain students but may create stress for others when expectations become excessive.

Teacher quality also varies. A private school may have excellent faculty, while another may experience high turnover or rely on less experienced staff. Higher fees do not automatically guarantee stronger instruction.

Parents should therefore evaluate the total cost, teaching stability, workload, academic expectations, student support, and school policies. A private school is valuable only when its educational benefits justify its financial and academic demands for the individual child.

Hidden Commercialization and Financial Stress

Private education can involve expenses beyond the advertised tuition fee. Families may need to budget for admission charges, annual fees, transportation, uniforms, textbooks, activities, technology, and extracurricular programs. These costs can substantially increase the real price of schooling.

Parents should request a complete fee structure before admission. They should also ask which expenses are compulsory and which services are optional. This helps prevent unexpected costs during the academic year.

Another concern is excessive commercialization. Some schools may place strong emphasis on branded products, paid activities, or technology-based services. However, this is not universal, and schools operate under different regulatory requirements.

Financial pressure can become particularly difficult when families choose a school based on reputation or facilities without assessing their long-term affordability. A school should remain financially sustainable for the entire period of enrollment.

Before choosing a private school, parents should compare the total annual cost with actual educational benefits. Families can also explore best child education plan strategies and options in India when planning for long-term schooling expenses. Facilities, technology, and branding should support learning rather than become substitutes for qualified teachers, effective instruction, and student well-being.

Frequently Asked Questions

Which board is better for competitive exams like JEE or NEET?

CBSE is often a practical choice for students preparing for JEE or NEET because its curriculum closely follows NCERT content. However, success depends more on conceptual understanding, preparation, and practice than on the school board. In the government vs private school comparison, both types of schools can follow CBSE and support competitive exam preparation.

Do government school students qualify for elite colleges?

Yes, government school students regularly qualify for JEE, NEET, and other competitive entrance exams. A student’s school type does not determine admission to an elite college. Preparation, conceptual understanding, self-study, coaching, and exam performance matter more. This is an important point when comparing government vs private school education for long-term academic goals.

Why do many parents prefer private schools despite high fees?

Many parents prefer private schools because they may offer English-medium instruction, modern facilities, smaller classes, extracurricular activities, and regular parent communication. These advantages can make private education more attractive. However, higher fees do not guarantee better academic outcomes. When comparing government vs private school options, parents should evaluate the individual school’s teaching quality and overall value.

What is the pupil-teacher ratio in public schools?

Under the Right to Education Act, prescribed pupil-teacher ratios vary by school level. For primary classes, the norm is generally up to 30 students per teacher, while upper-primary requirements follow prescribed staffing norms. Actual ratios can differ because of vacancies and enrollment. Therefore, when comparing government vs private school education, parents should check the specific school’s class sizes rather than rely only on national figures.

Conclusion

Deciding between a government vs private school ultimately depends on your family’s financial reality, geographic location, and long-term educational goals. Public institutions provide unparalleled financial relief, verified instructors, and an inclusive social environment that protects families from exploitative educational commercialization. Conversely, private institutions offer modern infrastructure, immersive spoken-English exposure, and strong individual accountability that modern corporate careers often demand.

Neither framework holds a total monopoly on your child’s ultimate success. While a private campus eases early conversational development, a self-motivated student in a public institution can achieve equal or greater academic heights without saddling the household with debt. Look beyond polished marketing materials and scrutinize classroom discipline, faculty retention, and community values. Choose an educational setting that respects your budget while giving your child the emotional stability, conceptual clarity, and curiosity needed to thrive.

Solar System Planets: 8 or 9 Worlds Explained

Solar System Planets: The Definitive Guide to Our Cosmic Neighborhood

Looking up at the night sky often sparks curiosity about our cosmic neighborhood. It contains diverse worlds, from scorching rocky planets to enormous, freezing ice giants. Understanding the solar system planets helps us appreciate Earth’s unique environment and the space around it.

Planetary science continues to develop as spacecraft and telescopes reveal new details. According to mission archives from NASA, studying planetary formation and evolution can help scientists understand how planetary systems develop across the cosmos.

Many people still wonder about the changing planetary count and unusual orbital behavior. Older textbooks often listed nine planets because Pluto once held full planetary status. Modern astronomy uses a different classification based on specific scientific criteria.

This guide answers common questions about the solar system planets. We will examine the current planet count, Uranus’s extreme seasons, massive exoplanets, Pluto’s classification, and its formal designation. Together, these topics explain how scientists define and study planetary worlds.

What are the 8 or 9 planets?

The official count includes eight solar system planets: Mercury, Venus, Earth, Mars, Jupiter, Saturn, Uranus, and Neptune. Pluto was traditionally counted as the ninth planet after its discovery in 1930. However, the International Astronomical Union reclassified Pluto as a dwarf planet in 2006.

The eight major planets follow a clear order from the Sun. Mercury is closest, followed by Venus, Earth, and Mars. Jupiter and Saturn are gas giants, while Uranus and Neptune are classified as ice giants. The asteroid belt separates the inner rocky planets from the outer giant planets.

People may still describe Pluto as the ninth planet when discussing historical astronomy. That wording reflects its former classification rather than the current scientific definition. Today, the solar system planets officially number eight.

This distinction helps separate major planets from dwarf planets and other smaller objects.

The Clear Line Between Major and Dwarf Worlds

Astronomers distinguish planets from dwarf planets using specific criteria. The International Astronomical Union defines a planet as a body that orbits the Sun, has enough gravity to become nearly round, and has cleared its orbital neighborhood.

Dwarf planets meet the first two conditions but do not dominate their orbital regions. Pluto is the best-known example. It travels through the Kuiper Belt, where many other icy objects occupy nearby space.

The difference is therefore not simply about size. A body’s gravitational influence within its orbital zone also matters. Earth, for example, dominates the region around its orbit far more strongly than Pluto does.

This classification helps scientists organize the many objects found throughout our planetary system. It also explains why the list of solar system planets contains eight major worlds.

The distinction does not make dwarf planets unimportant. They provide valuable evidence about the formation and evolution of the outer solar system.

Which planet is dark for 42 years?

Uranus experiences an unusual polar cycle in which each pole can remain in continuous darkness for about 42 Earth years. This happens because Uranus has an extreme axial tilt of roughly 98 degrees. Its rotation axis is therefore oriented almost sideways compared with its orbital plane. Such unusual planetary behavior connects with major predictions in the field of physics about how physical systems behave under extreme conditions.

Uranus takes about 84 Earth years to complete one orbit around the Sun. During that journey, its poles experience dramatically changing sunlight conditions. For roughly half of its orbit, one pole can face the Sun while the other faces away.

As a result, one polar region can experience decades of continuous daylight. The opposite pole experiences a similarly long period of darkness. The situation later reverses as Uranus continues around the Sun.

Among the solar system planets, Uranus therefore has some of the most extreme seasonal patterns. Its unusual orientation makes its climate and atmosphere especially interesting to planetary scientists.

Surviving an Extreme 98-Degree Planetary Tilt

The extreme tilt of Uranus probably resulted from a major event early in the planet’s history. One leading explanation suggests that a massive collision altered its rotation axis billions of years ago.

Scientists continue to study how such an event could have produced Uranus’s unusual orientation. The planet’s sideways rotation strongly affects its seasonal cycle and atmospheric behavior.

When sunlight eventually reaches a previously dark hemisphere, atmospheric activity can change. Telescopes and spacecraft have observed cloud structures and storms within Uranus’s atmosphere. These observations help researchers understand how sunlight influences a planet with such an unusual orientation.

Uranus also has a faint ring system and numerous moons. These features provide additional clues about its formation and evolution.

For the solar system planets, axial tilt plays an important role in determining seasons. However, Uranus stands apart because its nearly sideways orientation creates seasonal conditions unlike those experienced on Earth.

Its long seasons demonstrate how differently planetary climates can develop across the solar system.

What is the biggest planet in the universe?

Jupiter is the largest planet in our solar system. However, identifying the largest planet in the entire universe is much more difficult. Astronomers have discovered thousands of exoplanets, but there is no definitive, universally accepted record holder for the largest planet in the universe.

One notable object is ROXs 42Bb, a young gas giant located roughly 450 light-years from Earth. Estimates place its mass at several times that of Jupiter, although its exact properties remain uncertain. Its large size and unusual characteristics have led to discussion about exoplanets and their potential to host alien life and where planets end and brown dwarfs begin.

This uncertainty matters because extremely massive objects can overlap with the lower mass range of brown dwarfs. Scientists therefore consider both mass and formation history when studying unusual exoplanets.

Among the solar system planets, Jupiter remains the clear largest. Outside our system, however, comparisons are less straightforward because exoplanet measurements can carry significant uncertainties.

How Astronomers Measure Distant Cosmic Giants

Astronomers use several techniques to estimate the properties of distant planets. Transit photometry is one of the most important methods. When a planet passes in front of its host star, it causes a small dip in the star’s observed brightness. These observations depend on advanced instruments such as the world’s biggest telescopes.

The depth of that dip can help researchers estimate the planet’s radius. Scientists can then combine radius measurements with other observations to study the planet’s atmosphere and structure.

The radial velocity method provides another important measurement. A planet’s gravity causes its host star to move slightly. Measuring this motion can help estimate the planet’s mass.

Direct imaging can also reveal young, massive planets under favorable conditions. This method is particularly useful for planets located far from their stars.

These techniques show why comparing distant worlds with the solar system planets requires caution. Measurements can vary depending on the observation method and available data. Astronomers therefore combine multiple observations whenever possible, especially when studying the wildest planets in the Milky Way.

Why is Pluto not considered a planet?

Pluto is not classified as a major planet because it does not satisfy all three criteria established by the International Astronomical Union in 2006. A planet must orbit the Sun, have enough gravity to become nearly round, and clear its orbital neighborhood.

Pluto satisfies the first two requirements. Its orbit takes it around the Sun, and its gravity gives it a rounded shape. However, it does not dominate its orbital region.

Pluto travels through the Kuiper Belt, a distant region containing many icy bodies beyond Neptune. Its gravitational influence is not sufficient to clear most objects from this region.

The 2006 decision therefore placed Pluto in the dwarf planet category. The change also created a clearer scientific distinction between major planets and smaller rounded bodies.

The eight solar system planets remain Mercury, Venus, Earth, Mars, Jupiter, Saturn, Uranus, and Neptune. Pluto remains scientifically important despite its different classification.

Understanding Orbital Clearing in Planetary Science

Orbital clearing describes a planet’s ability to become the dominant gravitational body in its orbital neighborhood. It does not mean that every asteroid or object disappears completely from the region.

Instead, a dominant planet controls nearby material through its gravitational influence. It may absorb objects, eject them, capture them, or place them into stable orbital relationships.

Earth provides a useful example. Its mass allows it to dominate its orbital neighborhood compared with smaller nearby objects. Pluto has far less mass relative to the other bodies sharing its region of the Kuiper Belt.

This distinction was central to Pluto’s 2006 reclassification. Size alone does not determine whether an object qualifies as one of the solar system planets.

Orbital dynamics therefore provide an important scientific basis for planetary classification. They also help researchers understand how planets interact with asteroids, comets, moons, and other objects.

Studying orbital clearing gives scientists insight into how planetary systems develop and how larger bodies shape their surrounding environments.

What is Pluto’s new name?

Pluto did not receive a completely new everyday name after its reclassification. Its official name remains Pluto. However, it was assigned the minor-planet designation (134340) Pluto after the 2006 decision.

The number 134340 identifies Pluto within the Minor Planet Center’s cataloging system. This system helps astronomers organize observations of asteroids, dwarf planets, and other minor bodies.

Pluto was originally discovered in 1930 and was treated as the ninth major planet for decades. After its reclassification, it received its minor-planet number while retaining the name Pluto.

Scientists also classify Pluto as a plutoid. This term refers to dwarf planets that orbit beyond Neptune. Pluto is the prototype of this category.

The change in designation did not reduce Pluto’s scientific importance. Researchers continue to study its surface, atmosphere, interior, moons, and geological history. NASA’s New Horizons mission provided detailed observations of Pluto during its 2015 flyby.

For people learning about the solar system planets, Pluto remains an important example of how scientific classifications can change with new knowledge.

Cataloging Worlds Beyond the Classical Boundary

Cataloging systems allow astronomers to track the enormous number of objects found beyond the traditional planets. The Minor Planet Center maintains identification and observational information for many asteroids, comets, and trans-Neptunian objects.

Assigning a unique number helps researchers distinguish one object from another. It also makes long-term observation and orbital calculations easier.

Pluto’s designation as 134340 reflects this broader cataloging system. It does not mean that Pluto became less significant scientifically. Instead, the designation places it within a larger population of minor bodies.

The Kuiper Belt contains many objects that formed from leftover material in the outer solar system. Studying these bodies can reveal conditions that existed during planetary formation.

This work also helps scientists understand the boundary between major planets, dwarf planets, and smaller icy objects. The classification of Pluto therefore connects directly with broader research into the solar system planets and their origins.

As telescopes improve, astronomers continue discovering distant objects. Better observations may further refine our understanding of how these populations formed and evolved, revealing more scary and surprising facts about the universe.

Which planet has 42 years?

Uranus is associated with the 42-year milestone because its seasons can last about 21 Earth years each, while its polar daylight or darkness can persist for roughly 42 years. Uranus takes approximately 84 Earth years to orbit the Sun.

Its extreme axial tilt of about 98 degrees creates this unusual seasonal pattern. When one pole points toward the Sun, that region can experience continuous daylight for roughly half of the planet’s orbital journey. The opposite pole experiences prolonged darkness.

As Uranus moves around the Sun, the illumination gradually changes. Eventually, the opposite pole receives extended sunlight while the first pole enters a long winter period.

This makes Uranus one of the most unusual solar system planets. Earth experiences seasons because of its 23.5-degree tilt, but its seasonal changes are much shorter.

The Uranian cycle shows how orbital period and axial tilt can combine to produce extreme planetary seasons.

Why Planetary Seasons Vary Across Space

Planetary seasons depend largely on axial tilt, orbital period, and distance from the Sun. A planet’s tilt determines how directly sunlight reaches different regions during its orbit.

Earth has an axial tilt of about 23.5 degrees. As Earth travels around the Sun, this tilt produces familiar seasonal changes. Each season generally lasts about three months.

Uranus has a dramatically different configuration. Its nearly 98-degree tilt causes its poles to experience extraordinary changes in sunlight. Combined with its 84-year orbital period, this produces seasons lasting about 21 Earth years.

The solar system planets therefore demonstrate a wide range of seasonal behavior. Mercury has a very different environment from Earth, while Uranus experiences decades-long seasonal cycles.

These differences show why scientists cannot use Earth’s climate as a universal model for planetary environments. Every planet has its own combination of rotation, tilt, orbit, atmosphere, and surface conditions.

Studying these differences helps planetary scientists understand how worlds evolve under very different physical conditions.

Frequently Asked Questions

How many moons does Jupiter have?

Jupiter has a massive system of natural satellites, with over ninety officially recognized moons orbiting the gas giant. These include the four large Galilean moons discovered by Galileo Galilei: Io, Europa, Ganymede, and Callisto. Each of these major moons displays distinct geological features, ranging from active volcanic vents on Io to subsurface oceans hidden beneath the icy crust of Europa.

What is the hottest planet in the solar system?

Venus holds the title of the hottest planet in our solar system, with surface temperatures scorching enough to melt lead. Even though Mercury is closer to the Sun, Venus features a runaway greenhouse effect driven by its thick carbon dioxide atmosphere and dense clouds of sulfuric acid that trap solar heat effectively.

Can humans ever visit Mars?

Space agencies and private aerospace companies are actively developing technologies with the goal of sending human explorers to Mars in the coming decades. Overcoming major challenges like cosmic radiation, long transit times, and life support systems remains essential before permanent or semi-permanent human settlements can be established on the Martian surface.

What is the smallest planet in the solar system?

Mercury is the smallest planet in our solar system, with a radius measuring roughly one-third that of Earth. Due to its small size and weak gravity, Mercury cannot hold onto a substantial atmosphere, leaving its rocky surface heavily cratered from billions of years of asteroid and meteorite impacts.

Conclusion

Exploring the wonders of solar system planets reveals the incredible diversity and complexity of our cosmic neighborhood. From the scorching rocky landscapes of Mercury to the tilted, dark winters of Uranus, each world offers unique lessons about planetary formation and evolution. Understanding these celestial bodies deepens our appreciation for space science and inspires future generations to look up and question what lies beyond our skies. By keeping up with modern astronomical discoveries, we continue to refine our knowledge of the universe and our unique place within it. Take time to observe the night sky, study planetary movements, and share your newfound astronomical insights with fellow space enthusiasts.

Ages of Human History: Complete Timeline and Eras Explained

Ages of Human History: The Essential Guide to Our Civilizational Timeline

Have you ever wondered how our ancestors moved from simple stone tools to complex digital networks? Understanding the ages of human history helps us appreciate the scale of human resilience, cultural development, and technological change. Without clear historical divisions, thousands of years of human experience can become difficult to understand.

Archaeologists and historians use different frameworks to organize humanity’s past. The Smithsonian Institution’s Human Origins Program documents major developments in human evolution, technology, and behavior. Archaeological systems also help researchers identify important changes in tools, settlement, agriculture, and social organization.

These divisions are not always universal. Different regions developed at different times and followed different historical paths. Still, broad historical ages provide a useful way to understand major transitions.

In this guide, you will explore the chronological ages of human history, from prehistory to the contemporary world. You will also learn how historians divide the past, when written history began, and why periods such as the Renaissance remain culturally influential.

What is the order of ages in human history?

The chronological progression of human development is often explained through the archaeological Three-Age System. This framework divides early technological development into the Stone Age, Bronze Age, and Iron Age. These periods are based mainly on dominant tool and material technologies. For readers exploring historical chronology in more detail, the timeline of human history provides another useful way to understand major periods and transitions.

The Stone Age covers the longest period and includes the Paleolithic, Mesolithic, and Neolithic periods. The Bronze Age followed in different regions as people developed copper-alloy technologies. The Iron Age came later as ironworking became increasingly widespread.

After these broad prehistoric stages, historians often use periods such as Classical Antiquity, the Middle Ages, the Early Modern period, and the Modern or Contemporary era. However, these divisions vary by region.

For example, societies in Africa, Asia, Europe, and the Americas did not experience these transitions at identical times. The ages of human history therefore work best as broad analytical tools rather than rigid global boundaries.

The Breakthrough of Metallurgical Transitions

The development of metallurgy transformed many aspects of human society. Early metalworkers first used naturally occurring metals before learning to extract metals from ores. Copper technology eventually developed into bronze production, while ironworking became important in later societies.

Metal tools could offer advantages over many stone tools. They supported farming, woodworking, construction, warfare, and specialized craftsmanship. Metallurgy also encouraged new forms of trade because communities needed access to specific ores and other materials.

These changes affected more than technology. Skilled metalworkers became important members of many communities. Long-distance exchange networks expanded as societies traded metals, finished objects, and other valuable goods.

However, metallurgy did not automatically create cities or powerful states. Urbanization had many causes, including agriculture, population growth, trade, political organization, and access to resources. The relationship between technology and social development was complex.

Even so, the transition from stone to metal remains an important part of understanding the ages of human history and humanity’s changing ability to transform natural resources.

What is the age of human history?

The answer depends on what we mean by “history.” If we mean the existence of our species, human history extends back roughly 300,000 years, when anatomically modern humans emerged in Africa. If we mean written records, the timeline is much shorter.

The earliest known writing systems appeared in Mesopotamia during the late fourth millennium BCE. Cuneiform developed among early urban societies in southern Mesopotamia, including Sumerian communities. This development created durable written evidence of economic activity, administration, and other aspects of organized society.

Before writing, researchers rely on archaeology, fossils, artifacts, environmental evidence, oral traditions, and other sources to reconstruct the human past. This period is generally called prehistory. Readers interested in going deeper can also explore resources for researching world history and evaluating different types of historical evidence.

Written history therefore represents only a small portion of humanity’s existence. The vast majority of human experience occurred before surviving written records.

Understanding this distinction is essential when studying the ages of human history. Human societies existed long before they began documenting events in writing.

The Role of Cuneiform and Written Evidence

Cuneiform represents one of humanity’s earliest known writing systems. It developed in ancient Mesopotamia during the late fourth millennium BCE. Early examples were used mainly for administrative and economic purposes rather than historical storytelling.

Writing changed how societies preserved and transmitted information. Officials could record goods, transactions, taxes, laws, and other details without depending entirely on oral memory.

Over time, written systems became more sophisticated. They were used for literature, royal inscriptions, religious texts, legal documents, and correspondence. This created a much richer body of evidence for later historians.

However, writing did not create history itself. People had already experienced complex social, political, and cultural change for thousands of years. Instead, writing created a new type of surviving evidence.

Researchers can therefore combine written sources with archaeological evidence to reconstruct ancient societies more accurately. Written records also have limitations because they often represent rulers, officials, or literate groups.

Cuneiform is important within the ages of human history because it marks a major transition toward societies with extensive written documentation.


What are the five eras of human history?

A common broad framework divides human history into Prehistory, Classical Antiquity, the Middle Ages, Early Modernity, and Late Modernity. This five-era structure is useful for organizing large historical developments, although historians do not universally use the same divisions.

Prehistory covers human life before surviving written records. Classical Antiquity generally focuses on ancient civilizations and cultures, including Greece, Rome, and Han China. The Middle Ages traditionally describe the period between classical antiquity and early modern developments, especially in European history. Exploring the most famous civilizations throughout history can provide additional context for understanding these broad historical periods.

Early Modernity is associated with major changes in trade, exploration, political organization, science, and intellectual life. Late Modernity includes industrialization, mass politics, modern states, and rapid technological development.

These periods overlap and differ across regions. For example, developments in China, India, Africa, the Islamic world, Europe, and the Americas followed distinct timelines.

The five-era model is therefore best viewed as a broad educational framework. It simplifies an enormous subject while helping readers understand major transitions across the ages of human history.

Why the Five-Era Framework Matters

The five-era framework helps organize thousands of years of human development into recognizable periods. It allows readers to identify major changes without studying every individual kingdom, dynasty, or civilization separately.

The model can highlight broad developments such as the rise of agriculture, urban societies, long-distance trade, scientific inquiry, industrialization, and modern communications. These themes connect societies across different geographical regions.

However, the framework has limitations. Historical periods were not experienced uniformly around the world. A transition that happened in one region could occur centuries earlier or later elsewhere.

For this reason, historians often combine broad periodization with regional approaches. They may study South Asian, Chinese, African, European, Islamic, or American history using frameworks suited to those regions. Readers interested in developing a more focused approach can explore different history niches effectively to better understand specialized areas of the past.

The value of the model lies in its simplicity. It provides a starting point for understanding the ages of human history without suggesting that every society followed the same path.

Used carefully, it helps readers connect major developments while recognizing the diversity of human historical experience.

What are the four ages of history?

A widely used Western historical framework divides history into four major periods: Ancient, Medieval, Modern, and Contemporary. This model is common in educational settings, but it does not represent a universal division of world history.

The Ancient period generally begins with early literate civilizations and includes societies such as ancient Egypt, Greece, Rome, Persia, India, and China. The Medieval period traditionally follows antiquity and extends into the late medieval era. Understanding human civilization and its development can help place these societies within the broader story of the ages of human history.

The Modern period is often associated with developments from around the late fifteenth century onward. These include expanding global trade, European overseas expansion, the Scientific Revolution, the Enlightenment, and industrialization.

The Contemporary period generally refers to the nineteenth or twentieth century through the present, depending on the framework being used. It includes industrial society, mass politics, world wars, globalization, digital technology, and space exploration.

These boundaries vary among historians. Still, the four-part model remains one of the most recognizable ways to organize the ages of human history.

The Legacy of the Quadripartite Model

The four-period model has deep roots in European historical writing. Renaissance scholars developed distinctions between ancient, medieval, and their own contemporary world. Later historians expanded this framework into the familiar Ancient, Medieval, Modern, and Contemporary sequence.

Its main strength is accessibility. Large stretches of history can be grouped around major political, cultural, and economic transformations. This makes the framework useful for introductory education.

The model also reflects a particular European intellectual tradition. It should not be treated as a neutral timeline that applies equally to every society.

Many regions have their own historical periodizations. South Asian, Chinese, African, Islamic, and Indigenous histories often use different turning points and categories. Learning how to become a good historian can help readers evaluate these different approaches and understand why historical frameworks vary across regions.

Despite these limitations, the quadripartite model remains useful when presented as one framework among several. It helps readers establish a basic chronological structure before exploring regional histories in greater depth.

Understanding its origins also makes the ages of human history easier to interpret. Historical categories are tools created by scholars, not fixed divisions that existed naturally throughout the past.

What is the most famous era in history?

There is no objectively “most famous” era in world history because fame depends on culture, education, geography, and individual interests. However, the European Renaissance is among the most widely recognized historical periods in popular culture and Western education.

The Renaissance developed in parts of Europe from roughly the fourteenth to seventeenth centuries. It began particularly strongly in Italian city-states such as Florence and later influenced other parts of Europe. Studying the most influential leaders in history also provides useful context for understanding the political and cultural forces that shaped major historical periods.

The movement encouraged renewed interest in classical Greek and Roman literature, philosophy, art, and architecture. Artists developed new approaches to perspective, anatomy, and realistic representation. Thinkers also promoted forms of humanism that emphasized classical learning and human potential.

Leonardo da Vinci and Michelangelo became enduring symbols of Renaissance creativity. Galileo Galilei later contributed to major changes in European scientific thought.

The Renaissance was not simply a sudden break from the Middle Ages. Many Renaissance developments built on earlier medieval achievements.

Its lasting cultural influence nevertheless makes it one of the most prominent periods within discussions of the ages of human history.

The Enduring Global Fascination with the Renaissance

The Renaissance continues to attract attention because its artistic and intellectual achievements remain highly visible. Paintings, sculptures, buildings, books, and scientific ideas from the period still influence modern culture.

Works associated with Leonardo da Vinci and Michelangelo have become internationally recognized symbols of artistic achievement. Renaissance architecture also shaped later European design and influenced architectural traditions beyond Europe.

The period’s emphasis on classical learning and humanist scholarship also left a lasting intellectual legacy. At the same time, the Renaissance was not an isolated movement. It developed through interactions among European, Byzantine, Islamic, and other intellectual traditions.

Its scientific achievements should also be understood within a longer history of knowledge. Many Renaissance thinkers built upon ideas preserved and developed by earlier scholars.

This broader context makes the Renaissance more historically meaningful than simply calling it an era of artistic genius. Its importance comes from the combination of cultural, intellectual, scientific, and social changes that shaped later European history.

For that reason, the Renaissance remains one of the most recognizable periods when exploring the ages of human history.

FREQUENTLY ASKED QUESTIONS

What is the Three-Age System in archaeology?

The Three-Age System is an archaeological framework developed by Christian Jürgensen Thomsen in the early nineteenth century. It categorizes prehistoric and early civilizational artifacts into three sequential technological periods: the Stone Age, the Bronze Age, and the Iron Age. This model allowed early researchers to systematically date excavated materials based on manufacturing complexity and available raw materials. It remains foundational for classifying prehistoric human cultures today.

Which epoch was the longest in human history?

The Stone Age, specifically the Paleolithic period, is by far the longest epoch in human history. Lasting roughly 2.5 to 3 million years, it represents more than 95 percent of all human technological and biological existence. During this extensive era, early humans perfected chipped stone tools, discovered fire management, formed initial family clans, and migrated out of Africa into global ecosystems.

What caused the Bronze Age Collapse?

The Bronze Age Collapse occurred around 1200 BCE, bringing sudden destruction to advanced eastern Mediterranean civilizations, including the Mycenaeans, Hittites, and New Kingdom Egypt. Historians attribute this rapid disruption to a devastating confluence of factors: catastrophic drought, volcanic events, widespread famine, internal political rebellions, technological supply chain failures, and aggressive invasions by mysterious maritime raiders broadly known as the Sea Peoples.

When did the modern historical era officially begin?

Historians generally date the beginning of the early modern historical era to the mid-to-late fifteenth century. Key landmark events include the fall of Constantinople to the Ottoman Empire in 1453, Johannes Gutenberg’s perfection of the movable-type printing press around 1440, and Christopher Columbus’s transatlantic voyage in 1492. These developments rapidly dismantled feudalism, expanded international commerce, and transformed global information exchange.

CONCLUSION

Tracing the vast chronological arc of our past illuminates how inventiveness, adaptability, and cultural exchange formed modern society. From the flint-striking hunter-gatherers of deep prehistory to the daring thinkers of the Renaissance, every distinct epoch solved critical survival challenges while establishing structural systems for future generations. As we have seen, the ages of human history are not merely sterile dates on a museum wall; they represent real human journeys marked by continuous reinvention, hard-won discoveries, and civilizational resilience.

Understanding these foundational periods provides essential perspective on the rapid transformations occurring today. The emergence of automated computing, space exploration, and instant global communication confirms that our contemporary era is writing humanity’s next major technological chapter. By examining past transitions—such as the transformative leap from bronze to iron metallurgy—we can navigate our own emerging era with clarity, wisdom, and foresight. Apply this historical lens to current events, explore primary archaeological records, and observe how our collective past continually shapes every facet of our shared modern landscape.

Stages of digestive system: Complete Guide to Digestion

Understanding the Complete Stages of Digestive System and How Digestion Works

Understanding the stages of digestive system function helps explain how the body turns food into usable nutrients. Every day, your digestive system moves food through a coordinated series of mechanical and chemical processes. These processes allow the body to obtain nutrients needed for energy, growth, and cell repair. For a detailed overview, the National Institute of Diabetes and Digestive and Kidney Diseases (NIDDK) explains how the digestive system breaks down food and absorbs nutrients.

The digestive system includes the gastrointestinal tract, along with organs such as the liver, pancreas, and gallbladder. Food moves from the mouth through the esophagus, stomach, small intestine, and large intestine before waste leaves the body.

In this guide, we will explore several common ways of describing the digestive process. These include what are the 5 stages of the digestive system, what are the 7 steps of digestion, what are the 10 steps of digestion, what are the six stages of digestion, and what are the 7 digestive system functions.

These classifications can vary between educational sources. However, they all describe the same essential journey of food through the digestive tract.


What are the 5 stages of the digestive system?

The five stages of the digestive system can be described as ingestion, digestion, absorption, nutrient use, and elimination. These terms provide a simple way to understand how food moves from intake to waste removal. However, this is a simplified educational model rather than a single universal medical classification.

The first stage is ingestion, which begins when you place food in your mouth. Chewing breaks food into smaller pieces, while saliva starts the chemical digestion of carbohydrates. Food then moves through the esophagus by swallowing and peristalsis.

The second stage is digestion. Mechanical movements and digestive juices break food into smaller molecules. The stomach mixes food with acid and enzymes, while the small intestine receives digestive juices from the pancreas and bile from the liver.

The third stage is absorption, which occurs mainly in the small intestine. Nutrients cross the intestinal lining and enter the blood or lymphatic system.

The final stages involve nutrient use and elimination. The body uses absorbed nutrients for energy, growth, and cell repair. The large intestine absorbs water, forms stool, and the rectum stores it until elimination.

Core Processing Phases of Food Breakdown

The five-phase model provides a straightforward overview of the digestive process. It shows how food enters the body, gets broken down, provides usable nutrients, and eventually becomes waste. This sequence also explains why different digestive organs perform different jobs.

The main phases can be summarized as:

  • Ingestion: Food enters through the mouth.
  • Digestion: Mechanical and chemical processes break food down.
  • Absorption: Nutrients pass through the intestinal lining.
  • Nutrient use: Cells use absorbed nutrients for energy, growth, and repair.
  • Elimination: Remaining waste leaves the body as stool.

Chewing supports digestion by reducing food size and mixing it with saliva. Peristalsis then moves food through the gastrointestinal tract. The stomach continues mechanical mixing and chemical digestion before releasing chyme into the small intestine.

The small intestine performs most nutrient absorption. The large intestine then removes additional water and helps form stool. This simplified model makes the stages of digestive system function easier to understand without treating one classification as the only correct version.

What are the 7 steps of digestion?

The seven steps of digestion can be organized as ingestion, propulsion, mechanical digestion, chemical digestion, absorption, nutrient use, and elimination. This model provides more detail than the five-stage approach. It separates physical movement and food breakdown into distinct processes.

The first step is ingestion, when food enters the mouth. The second is propulsion, which moves food through the gastrointestinal tract. Swallowing starts this movement, while peristalsis pushes food through the esophagus and intestines.

The third step is mechanical digestion. Chewing, stomach contractions, and intestinal movements physically reduce and mix food. The fourth step is chemical digestion, where acids, bile, and enzymes break nutrients into smaller molecules.

The fifth step is absorption. Most nutrient absorption takes place in the small intestine. Nutrients then enter the bloodstream or lymphatic system and travel to tissues throughout the body.

The sixth step can be described as nutrient use or assimilation. Cells use absorbed nutrients for energy, growth, and repair. The seventh step is elimination, when undigested material becomes stool and leaves through the anus.

Sequential Mechanical and Chemical Actions

These seven steps show that digestion involves more than simply breaking food apart. The digestive system must also move food, add digestive secretions, absorb nutrients, and remove waste.

Each process supports the next one. Chewing creates smaller food particles, while saliva begins carbohydrate digestion. Swallowing and peristalsis then move the food toward the stomach.

Inside the stomach, muscular contractions mix food with acid and digestive enzymes. This produces a semi-liquid substance called chyme, which gradually enters the small intestine.

The small intestine is especially important because it completes much of the chemical digestion and absorbs most nutrients. Pancreatic enzymes help digest carbohydrates, fats, and proteins. Bile from the liver helps with fat digestion.

After absorption, the body distributes nutrients for use or storage. Remaining material enters the large intestine, where water is absorbed and stool forms. Peristalsis moves the stool toward the rectum for elimination.

This sequence explains how the major stages of digestive system activity work together as one coordinated process.

What are the 10 steps of digestion?

A more detailed 10-step digestion process breaks the journey into smaller actions. Unlike the core digestive functions described by medical organizations, this ten-step model is mainly useful for educational purposes. It helps students follow food as it travels through different parts of the gastrointestinal tract.

The first step is ingestion, when food enters the mouth. Second is mastication, when the teeth break food into smaller pieces. Third is swallowing, which moves the food from the mouth toward the esophagus.

Fourth is esophageal transport. Peristalsis pushes the swallowed food toward the stomach. Fifth is gastric mixing, where stomach muscles combine food with acid and digestive enzymes. Sixth is chemical digestion in the stomach, particularly the breakdown of proteins.

Seventh is the release of chyme into the small intestine. Eighth is continued digestion with pancreatic enzymes, intestinal juices, and bile. Bile helps the body process fats, while pancreatic enzymes digest carbohydrates, fats, and proteins.

Ninth is nutrient absorption, which occurs mainly in the small intestine. Tenth is water absorption and stool formation in the large intestine. The resulting stool eventually moves into the rectum before elimination.

Micro-Steps of Gastrointestinal Processing

Breaking digestion into ten steps provides a closer look at how different organs contribute to the overall process. It also shows why digestion depends on coordinated muscular activity and chemical secretions.

The process begins with chewing and saliva. Saliva moistens food and contains enzymes that begin breaking down starches. After swallowing, peristalsis moves the food through the esophagus.

The stomach then mixes the food with digestive juices. Its acid and enzymes support protein digestion. The stomach gradually releases chyme into the small intestine, where most chemical digestion and nutrient absorption occur.

The pancreas supplies enzymes that digest major nutrients. The liver produces bile, while the gallbladder stores and releases bile into the small intestine. These secretions support the digestion of fats and other nutrients.

The small intestine absorbs nutrients through its lining. Some nutrients enter the bloodstream, while many dietary fats enter the lymphatic system before reaching the bloodstream.

Finally, the large intestine absorbs water and converts remaining material into stool. This detailed model makes the stages of digestive system activity easier to follow from eating through elimination.

What are the six stages of digestion?

The six stages of digestion can be grouped as ingestion, secretion, mixing and movement, digestion, absorption, and defecation. This classification focuses on the major physiological activities performed by the digestive system. It is another educational framework rather than a universally fixed medical sequence.

The first stage is ingestion, which occurs when food enters the mouth. The second stage is secretion. During digestion, the stomach, pancreas, liver, and other digestive tissues provide substances such as acid, enzymes, bile, and mucus.

The third stage combines mixing and movement. Chewing, stomach contractions, intestinal movements, and peristalsis help mix food with digestive juices. These movements also push digestive contents forward through the gastrointestinal tract.

The fourth stage is digestion. Mechanical actions reduce food size, while enzymes and acids break complex nutrients into smaller molecules. The fifth stage is absorption, which occurs mainly in the small intestine. Nutrients cross the intestinal lining and enter circulation.

The sixth stage is defecation, which removes stool from the body. Before this happens, the large intestine absorbs water and forms the remaining waste into stool. The rectum stores stool until a bowel movement occurs.

Textbook Classification of Gut Stages

This six-stage model is useful because it groups related digestive activities into broader categories. It also emphasizes that digestion involves movement and secretion, not just the breakdown of food.

Ingestion starts the process. Once food enters the mouth, chewing and saliva begin mechanical and chemical processing. The digestive tract then releases secretions that support digestion and protect its lining.

Movement is controlled by muscular activity throughout the gastrointestinal tract. Peristalsis pushes contents forward, while other contractions mix food with digestive fluids. These actions help expose food to enzymes and improve digestion.

Chemical digestion then converts large food molecules into smaller components. Carbohydrates become simple sugars, proteins become amino acids, and fats are broken into smaller components that the body can absorb.

Most nutrient absorption takes place in the small intestine. The absorbed nutrients then travel through the blood or lymphatic system for processing and use.

Finally, the large intestine absorbs water and helps form stool. The rectum stores the stool before defecation. Together, these stages explain the major activities involved in the stages of digestive system function.

What are the 7 digestive system functions?

The seven digestive system functions can be described as ingestion, mechanical processing, chemical digestion, secretion, movement, absorption, and elimination. Some educational models combine or rename these functions, so the exact number can vary. Still, these categories cover the major jobs performed by the digestive system.

Ingestion brings food and liquids into the body. Mechanical processing then breaks food into smaller pieces through chewing and muscular contractions. Chemical digestion uses enzymes, stomach acid, bile, and other digestive secretions to reduce nutrients into absorbable components.

Secretion is another important function. Digestive organs release substances that help break down food and support movement through the tract. Peristalsis and other muscular actions then transport and mix digestive contents.

Absorption allows nutrients and water to cross the intestinal lining. Most nutrient absorption occurs in the small intestine, while the large intestine absorbs additional water.

The final function is elimination. Undigested material and other waste become stool and leave the body through the anus. The digestive system also contributes to immune protection through tissues and microorganisms associated with the gastrointestinal tract.

Essential Physiological Roles of the Gut

The digestive system does far more than simply break food apart. It coordinates movement, chemical processing, nutrient absorption, water balance, and waste removal. These functions allow the body to obtain useful materials from food while disposing of material it cannot use. Maintaining overall wellness also involves habits such as healthy eating and fitness at home.

The digestive tract also works closely with the nervous system and hormones. Signals within the gastrointestinal tract help regulate movement and digestive secretions. The enteric nervous system can control many digestive activities within the gut itself.

The liver, pancreas, and gallbladder also support digestion even though food does not pass directly through them. The pancreas produces digestive enzymes, while the liver produces bile. The gallbladder stores and releases bile when needed.

The small intestine performs most nutrient absorption. Its lining allows nutrients to enter circulation, where they can be transported to tissues throughout the body. The large intestine then absorbs water and helps convert remaining waste into stool. Including a variety of fruits and vegetables in your diet is one way to obtain important nutrients and dietary fiber.

Understanding these functions makes the stages of digestive system activity easier to connect. Each function contributes to a larger process that supports nutrition, energy production, growth, repair, and waste elimination. Choosing nutritious meals, including easy and healthy breakfast ideas, can also support a balanced approach to nutrition.

Frequently Asked Questions

How long does food take to pass through all stages of digestion?

Food typically takes between twenty-four to seventy-two hours to pass completely through the human digestive tract, depending on the composition of your meals, hydration levels, and individual metabolic rate. High-fiber plant foods move faster, while heavy, protein-rich or fatty meals require more time for thorough enzymatic breakdown and nutrient extraction in the stomach and small intestines.

What is the primary organ responsible for nutrient absorption?

The small intestine is the primary organ responsible for absorbing nutrients into your bloodstream. Its interior lining features millions of tiny, finger-like projections called villi and microvilli, which dramatically increase the surface area available for capturing amino acids, simple sugars, fatty acids, vitamins, and minerals before waste moves onward to the large intestine.

Why is chewing considered the most crucial initial step?

Chewing is vital because it initiates mechanical digestion and mixes food with salivary amylase enzymes that begin breaking down carbohydrates immediately. Thoroughly chewed food reduces the workload on your stomach and small intestine, prevents choking hazards, and ensures that digestive juices can easily penetrate food particles for maximum nutrient extraction.

Can stress negatively impact the stages of digestion?

Stress can significantly disrupt digestive stages by activating the sympathetic nervous system, often called the fight-or-flight response. This physiological shift diverts blood flow away from the gastrointestinal tract, reduces enzyme and acid production, and alters gut motility, frequently leading to symptoms like cramping, bloating, indigestion, or irregular bowel movements.

Conclusion

Mastering the intricacies of the stages of digestive system functions gives you a profound appreciation for how hard your body works behind the scenes. From initial ingestion and thorough chewing down to final absorption and waste elimination, every phase plays a vital role in maintaining your overall health and energy levels. By understanding these sequential processes, you can make better dietary choices, support your gut microbiome, and recognize when something requires medical attention. Remember to eat mindfully, stay well-hydrated, and provide your body with nutrient-dense foods to keep your gastrointestinal tract running efficiently. Building an organic garden from scratch can also make it easier to incorporate fresh produce into your meals. Applying these simple wellness habits will help ensure your digestive system continues to support your vitality and longevity for years to come.