
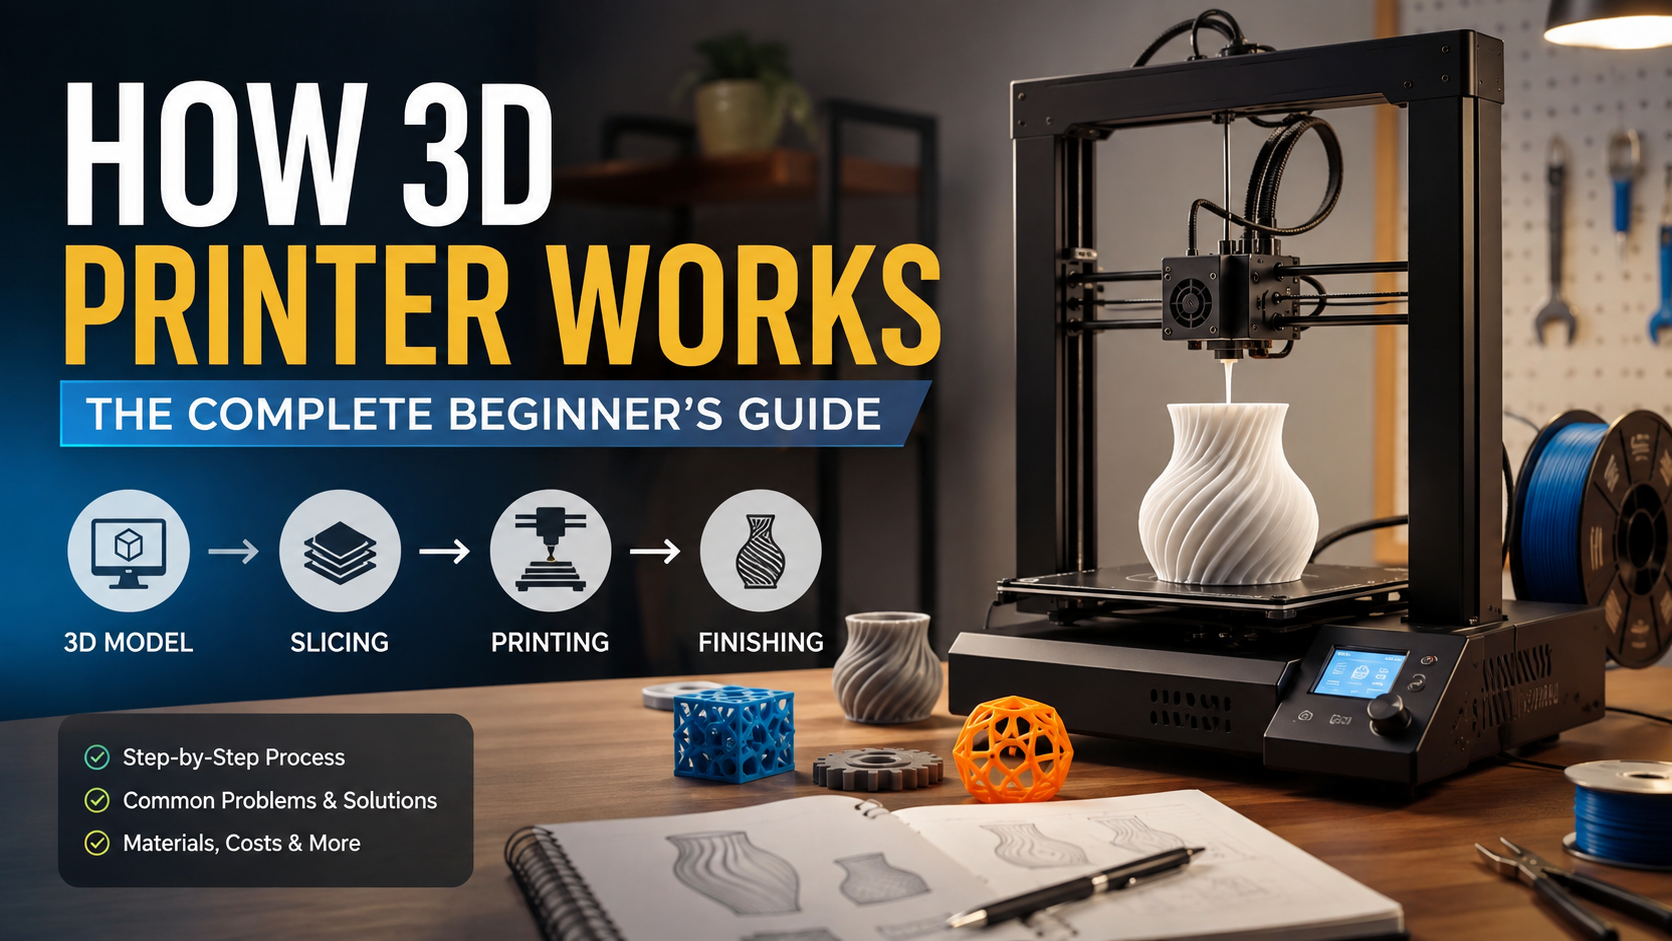
How 3D Printer Works: The Complete Beginner’s Guide
Have you ever wondered what turns a digital file into a solid, usable object? Understanding how 3D printer works opens the door to rapid prototyping and personalized manufacturing.
According to standard definitions from the National Institute of Standards and Technology (NIST), additive manufacturing creates physical parts by joining materials layer by layer. Unlike traditional manufacturing, it does not usually remove material from a solid block.
This technology has evolved rapidly in recent years. What once belonged mainly to industrial labs is now accessible to hobbyists, educators, and small businesses.
However, getting started can feel overwhelming without a basic understanding of the process. Beginners often ask about printing methods, required equipment, learning time, and total costs.
This guide explains the 3D printing process in simple terms. It covers the complete workflow, common problems, computer requirements, materials, and startup costs.
How do 3D printers work step by step?
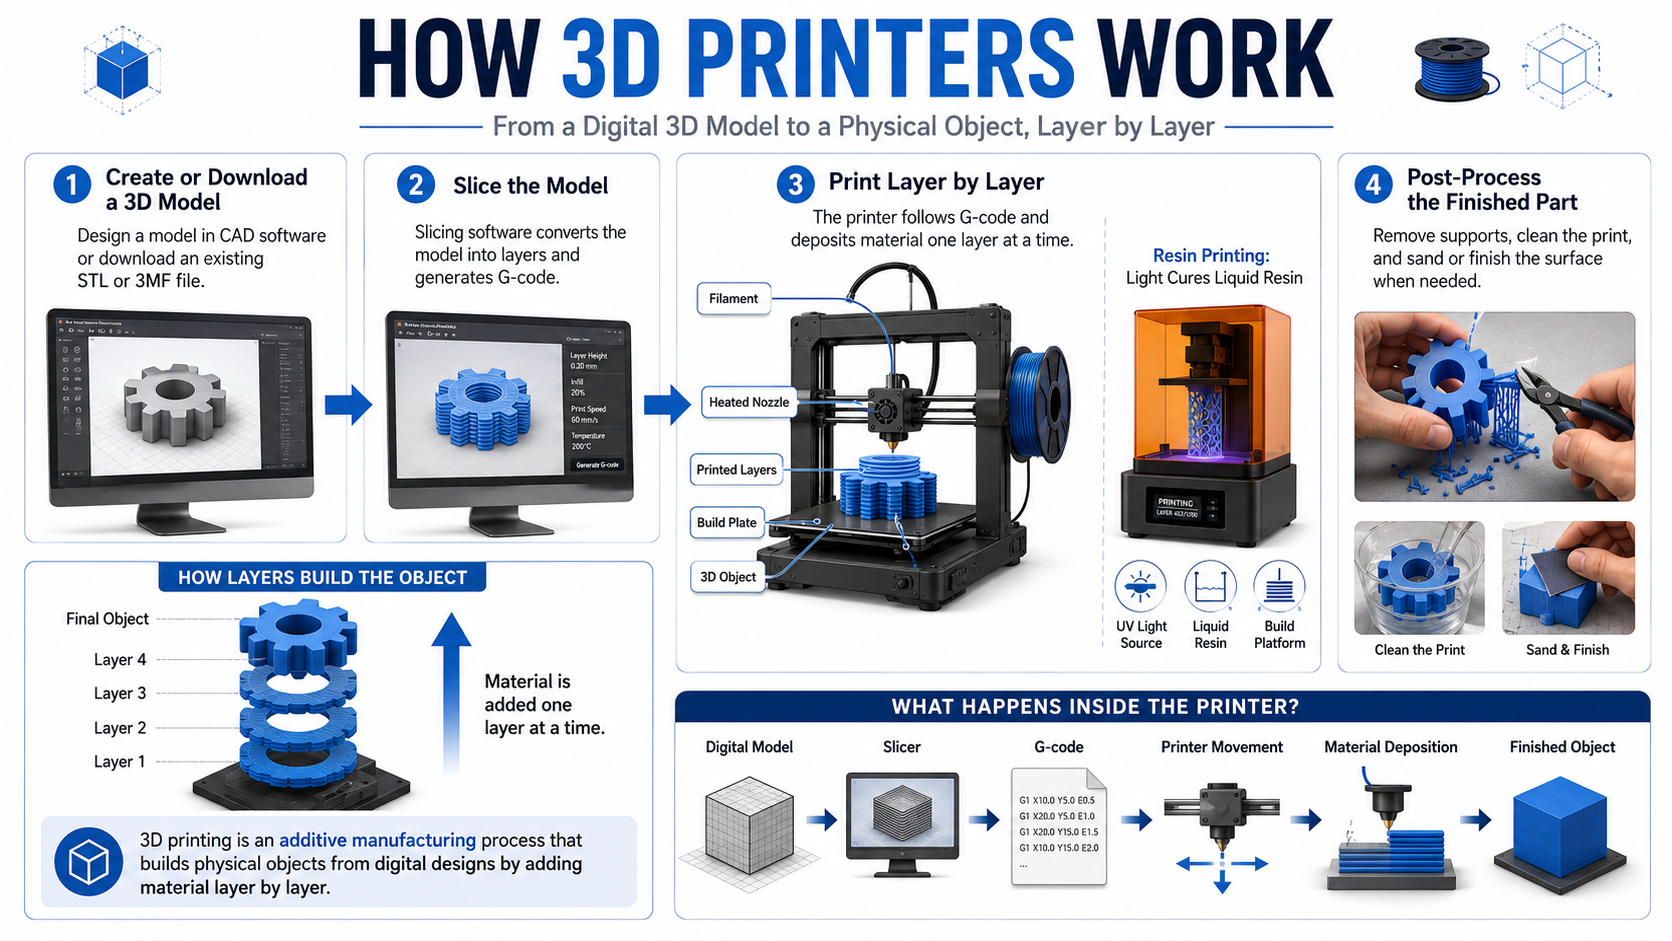
Learning how 3D printers work starts with a simple four-stage process. First, you create a digital model with 3D modeling software or download an existing design. Common file formats include STL and 3MF.
Next, you import the model into slicing software. The slicer divides the model into thin horizontal layers. It then creates machine instructions called G-code. These instructions control movement, temperature, speed, and material flow.
The printer follows that G-code to build the object. FDM printers melt plastic filament and deposit it layer by layer. Resin printers use light to cure liquid resin into solid layers.
Finally, you remove the finished print and complete any required post-processing. This may include removing supports, trimming excess material, washing resin prints, or sanding surfaces.
The basic workflow is:
- Create or download a 3D model.
- Slice the model and generate G-code.
- Print the object layer by layer.
- Remove and post-process the finished part.
Understanding these steps makes the entire 3D printer workflow much easier to follow.

The Role of Slicing Software
Slicing software acts as the bridge between your digital model and 3D printer. It converts a three-dimensional design into instructions that the machine can understand. Without this step, most consumer 3D printers cannot turn a raw model into a finished object.
The slicer divides your model into thin layers. It then calculates how the printer should move, where material should be deposited, and when temperatures should change. These instructions are usually exported as G-code.
Several settings have a major effect on print quality and speed:
- Layer height controls vertical detail and print duration.
- Print speed determines how quickly the printer moves.
- Infill density controls the internal structure and material usage.
- Wall thickness affects strength and durability.
- Supports help the printer create overhangs and complex shapes.
- Nozzle and bed temperatures affect material flow and adhesion.
Good slicer settings can reduce failed prints and material waste. Beginners should start with recommended profiles before changing advanced settings.
As you gain experience, adjusting these settings helps balance print quality, strength, speed, and cost.
What is the biggest problem with 3D printing?
One of the biggest problems with 3D printing is print failure caused by poor bed adhesion or calibration. When the first layer does not stick properly, the entire print can warp, shift, or detach from the build plate.
First-layer problems are especially common among beginners. An uneven print bed, incorrect Z-offset, dirty build surface, or unsuitable temperature can cause poor adhesion. If the nozzle sits too far from the bed, the material may not bond correctly.
Temperature changes can also create problems. Incorrect nozzle temperatures may affect extrusion, while poor bed temperatures can contribute to warping. Cooling settings can also influence how quickly printed layers contract.
To reduce common failures:
- Clean the build surface regularly.
- Check and adjust bed leveling.
- Set the correct Z-offset.
- Use suitable nozzle and bed temperatures.
- Choose the correct material profile.
- Keep the printer properly maintained.
Failed prints waste both material and machine time. They can also make the learning process frustrating.
Fortunately, most first-layer problems have straightforward solutions. Learning basic calibration is one of the most valuable skills for anyone starting with 3D printing at home.
Preventing First Layer Failures
A successful first layer provides the foundation for the entire print. If that layer fails, later layers usually cannot recover. Beginners should therefore spend time getting the first layer right before increasing print speed or using advanced settings.
Start by cleaning the build surface. Finger oils, dust, and leftover material can reduce adhesion. Isopropyl alcohol can help clean compatible surfaces, although manufacturers may recommend specific cleaning methods.
Next, check the printer’s bed leveling or automatic leveling system. The nozzle should maintain a consistent distance from the build plate. Adjusting the Z-offset can also improve the first layer when the nozzle height is incorrect.
Temperature matters as well. Use the manufacturer’s recommended settings for your filament or resin. A heated bed can help reduce warping with suitable materials.
For more reliable results:
- Clean the build plate before printing.
- Check bed leveling regularly.
- Adjust the Z-offset when necessary.
- Use recommended temperatures.
- Avoid drafts and major temperature changes.
- Inspect the first layer before leaving the printer unattended.
A few minutes of preparation can prevent hours of wasted printing. Good calibration also improves consistency across future projects.
Is it difficult to learn 3D printing?
Learning 3D printing is not inherently difficult, but beginners should expect an initial learning curve. Basic tasks are usually straightforward once you understand the printer’s controls and workflow.
Many beginners can learn to load filament, select a print, and use downloaded models within a few days. Modern machines often include automatic calibration and guided setup features. These improvements make the first experience much easier than it was with older printers.
The more challenging part is troubleshooting. Problems such as stringing, warping, layer shifting, under-extrusion, and poor surface quality can have several possible causes. Finding the right solution takes practice.
Learning CAD software can require additional time. Designing custom parts involves different skills from operating the printer itself. However, you can begin with ready-made models before learning advanced design techniques.
A simple learning path is:
- Start with pre-made models.
- Learn basic printer controls.
- Print calibration models.
- Study common print defects.
- Gradually experiment with slicer settings.
- Learn basic CAD when you are ready.
With regular practice, most beginners can build confidence quickly. Online maker communities also provide useful troubleshooting advice and practical examples.
Accelerating Your Learning Curve
The fastest way to learn 3D printing is to practice with simple, repeatable projects. Starting with complex models can create unnecessary problems. Instead, use standard calibration prints to understand how your machine behaves.
A calibration cube can reveal dimensional or extrusion issues. A Benchy boat can help you evaluate several aspects of print quality, including overhangs, bridges, and surface detail.
It also helps to change one setting at a time. If you adjust temperature, speed, and cooling together, it becomes difficult to identify which change solved the problem.
Keep simple notes about successful settings for each material. This creates a personal reference that becomes more useful with every project.
Helpful learning habits include:
- Use the manufacturer’s recommended printer profile.
- Start with simple models.
- Print calibration tests regularly.
- Change one setting at a time.
- Record successful settings.
- Ask experienced makers when troubleshooting gets difficult.
Community forums and maker groups can also shorten the learning process. Sharing photos of failed prints often makes troubleshooting easier.
Most importantly, treat failed prints as learning opportunities. Each failure can teach you something about temperature, calibration, materials, or printer settings.
Do I need a computer to use a 3D printer?
For most 3D printing workflows, a computer is highly useful and often necessary. You normally need a desktop or laptop to prepare models and generate the machine instructions required by your printer.
Modern 3D printers may include touchscreen controls, Wi-Fi connectivity, USB ports, or smartphone apps. These features can simplify printer control and job monitoring. However, the printer generally still needs a prepared file containing the required toolpaths.
A computer runs the slicing software that converts a 3D model into printer instructions. You can then transfer the finished file using an SD card, USB connection, or local wireless network, depending on the printer.
Some newer printers offer cloud-based workflows or built-in model libraries. These can reduce the need for traditional computer-based preparation. Even so, a computer remains valuable when you want to customize models or control advanced settings.
You do not need a powerful workstation for ordinary slicing. A modern computer with around 4 GB of RAM can handle basic slicing tasks. More demanding CAD applications may benefit from additional memory and graphics performance.
Therefore, a basic computer is enough for most beginners starting with home 3D printing.
Minimum Computer Hardware Requirements
You do not need an expensive workstation to run most standard slicing software. A modern Windows, macOS, or Linux computer can handle basic 3D printing preparation without difficulty.
For simple models, around 4 GB of RAM can be enough. However, more memory provides greater flexibility when working with large or detailed models. Storage requirements are usually modest unless you maintain a large design library.
CAD software can have higher hardware requirements than slicers. Complex models, assemblies, and detailed scenes may benefit from stronger processors and dedicated graphics hardware, and How to Get More Out Of Your GPU Without Overclocking can help you understand how to improve graphics performance without overclocking.
For a basic setup, focus on:
- A modern desktop or laptop computer.
- Around 4 GB of RAM for basic slicing.
- Enough storage for models and slicer software.
- A compatible operating system.
- A stable USB, SD card, or wireless connection.
- More powerful hardware for advanced CAD work.
You should also keep your printer firmware and slicing software updated when appropriate. Updates may improve compatibility, features, and reliability.
The important point is that 3D printing does not require an expensive computer. Beginners can start with an ordinary modern machine and upgrade later if their projects become more demanding.
If you mainly download existing models, your hardware requirements will usually remain modest. Designing complex parts is where additional computing power becomes more useful.
How much does a 3D printer cost?
The cost of a 3D printer varies widely based on its technology, features, build volume, speed, and intended use. For many beginners, a consumer 3D printer costs roughly $200 to $500.
Meanwhile, mid-range prosumer machines often cost between $600 and $1,500. These printers may offer larger build volumes, faster printing, enclosed designs, improved automation, or multi-material capabilities.
At the higher end, industrial 3D printers are considerably more expensive. Professional systems designed for demanding commercial production can cost $5,000 or more, depending on their technology and specifications.
However, the printer itself is only part of the overall budget. Beginners should also consider material and maintenance costs. For example, filament, resin, nozzles, build surfaces, tools, and replacement parts can increase the total cost.
Common ongoing expenses include:
- Filament or resin for printing
- Replacement nozzles and other wear parts
- Build surfaces and adhesives
- Cleaning and maintenance supplies
- Basic tools and safety equipment
In addition, standard PLA and PETG filament can often cost around $15 to $25 per kilogram, depending on the brand and market.
Fortunately, electricity is usually a relatively small part of the running cost. Therefore, a sensible beginner budget should include some money for spare parts and maintenance rather than focusing only on the printer’s purchase price.
Factoring in Material and Running Costs
The purchase price does not represent the full cost of 3D printing. Over time, materials and maintenance can add up, especially if you print frequently or experiment with different materials.
For example, standard PLA and PETG filament often costs around $15 to $25 per kilogram. However, specialty filaments can cost considerably more. Your actual material cost also depends on print size, infill, wall thickness, supports, and failed prints.
Additionally, you should budget for replacement components. Nozzles, build surfaces, adhesives, and other consumables eventually wear out. Therefore, keeping basic tools and spare parts available can prevent small problems from stopping a project.
Electricity is generally a modest operating expense. For instance, consumer printers commonly draw around 100 to 250 watts while heating and printing. However, actual consumption varies by printer, material, ambient temperature, and heater operation.
A practical starter budget should account for:
- The printer
- Initial filament or resin
- Basic maintenance tools
- Spare wear parts
- Build-surface supplies
- Appropriate safety equipment
As a general allowance, setting aside around $50 for spare parts and basic safety equipment can provide a useful starting point. Nevertheless, your actual costs will vary by printer and material.
Ultimately, planning for these expenses helps you understand the real cost of 3D printing rather than focusing only on the initial machine price.
Frequently Asked Questions
What is the safest filament material for beginners to use at home?
Polylactic Acid, commonly known as PLA, is the safest and easiest filament material for beginners. Made from renewable resources like cornstarch, PLA melts at lower temperatures and produces minimal odor compared to petroleum-based plastics. It does not require an enclosed printer chamber, adheres easily to standard print beds, and rarely suffers from severe thermal warping during prints.
How long does an average 3D print take to finish?
Print duration varies significantly based on object dimensions, layer resolution, and infill density settings. A small decorative trinket or calibration piece might take thirty to forty-five minutes to finish. In contrast, larger, highly detailed models or functional mechanical parts often require anywhere from eight to twenty-four hours of continuous printing time.
Can a 3D printer make functional mechanical parts?
Yes, modern 3D printers can produce strong, fully functional mechanical parts. By using engineering-grade materials such as PETG, ABS, nylon, or carbon-fiber-reinforced blends, you can create durable gears, brackets, and replacement components. Optimizing wall thickness and internal infill patterns ensures these custom parts withstand substantial physical stress and thermal loads.
How much electricity does an average 3D printer consume?
Most consumer-grade 3D printers consume very little electricity during standard operation. An active machine typically draws between 100 and 250 watts while heating the nozzle and print bed. Once target temperatures stabilize, power draw drops significantly, making operational energy costs negligible—often just a few cents per print job.
Conclusion
Understanding how 3D printer works makes additive manufacturing much easier to understand. The process begins with a digital model and continues through slicing, machine instructions, layer-by-layer printing, and post-processing.
Each stage affects the final result. Good model preparation, suitable slicer settings, correct temperatures, and proper calibration can improve print quality and reliability.
Beginners may encounter problems such as poor first-layer adhesion, warping, or failed prints. These issues are normal parts of the learning process. Modern printers also provide automated calibration and user-friendly features that make getting started easier.
Entry-level hardware has made 3D printing at home accessible to hobbyists, students, educators, and small businesses. You do not need expensive equipment or a powerful computer to begin.
Start with simple models and recommended printer settings. Use calibration prints to learn how your machine behaves. As your confidence grows, experiment with different materials and learn basic CAD design.
With a reliable starter printer, suitable materials, and regular practice, you can turn digital ideas into physical objects and prototypes.