All posts by The Perfect Blogger

How to Cool Your Laptop Without a Cooling Pad

How to Cool Your Laptop Without a Cooling Pad

Modern laptops deliver impressive performance, but heavy workloads can create significant heat. Poor thermal management may cause thermal throttling, reduced performance, or unexpected shutdowns. Fortunately, you can cool your laptop without a cooling pad by improving airflow, changing usage habits, and managing system load.

You do not always need expensive accessories to control laptop temperatures. Simple steps can make a noticeable difference. These include using a hard surface, elevating the laptop, cleaning blocked vents, and reducing unnecessary background activity.

According to Intel’s processor documentation, managing operating heat is important for reliable processor operation. If you want to cool your laptop without a cooling pad, start with airflow and surface placement.

This guide answers common questions about laptop cooling, safe CPU temperatures, cooling pads, and extreme heat. It also explains practical ways to improve airflow and protect your hardware during demanding tasks.

How Can I Physically Cool Down My Laptop Without a Cooling Pad?

The easiest way to cool your laptop without a cooling pad is to improve airflow around its vents. Laptop cooling systems need clear intake and exhaust paths to move heat away. Using your device on a bed, blanket, sofa, or carpet can block those openings.

Place your laptop on a hard, flat surface instead. A desk or sturdy table gives the cooling system enough room to breathe. You can also raise the rear slightly to create more space beneath the chassis.

A small lift can improve airflow without requiring powered accessories. Use a stable laptop stand designed to support your device safely. For a more organized and ergonomic workspace, you can also explore a minimalist study desk setup. Avoid unstable household objects that could make the laptop slip or fall.

Other simple cooling steps include:

  • Keep the laptop away from direct sunlight.
  • Work in a cool, well-ventilated room.
  • Keep vents clear of walls and other objects.
  • Close demanding applications when they are not needed.
  • Avoid using the laptop on soft surfaces.

These changes can reduce heat buildup and help maintain stable performance during everyday use.

Clean Internal Dust Buildup Regularly

Dust can accumulate around fans, vents, and heatsinks over time. This buildup restricts airflow and reduces the cooling system’s ability to remove heat. Pet hair and other debris can make the problem worse.

If your laptop allows safe access, clean its vents and fans periodically. Use compressed air carefully and follow the manufacturer’s maintenance instructions. Do not force debris deeper into the laptop.

When using compressed air, prevent the fan from spinning freely. Excessive fan movement can potentially damage the fan mechanism. If you are uncomfortable opening the laptop, consider professional cleaning instead.

Regular maintenance is especially important in dusty environments. Cleaning every six to twelve months is a useful general guideline. You may need to clean more often if your surroundings contain significant dust or pet hair.

Is 70°C Hot for a Laptop? Understanding Safe Temperatures

A laptop reaching 70°C is not automatically a sign of overheating. Modern processors can operate safely at temperatures above this level. The acceptable range depends on the CPU, GPU, workload, laptop design, and manufacturer specifications.

During demanding activities, temperatures around 70°C can be completely normal. Gaming, video editing, rendering, and compiling software can generate substantial heat. Some systems may reach 80°C or higher during sustained workloads.

Idle temperatures are different. A laptop that consistently sits around 70°C during light browsing may need investigation. High idle temperatures can indicate restricted airflow, heavy background processes, high ambient temperatures, or another cooling issue.

Rather than focusing on one number, watch for patterns such as:

  • Unusually high temperatures during light workloads.
  • Frequent thermal throttling.
  • Sudden temperature increases without heavier workloads.
  • Fans running loudly for extended periods.
  • Performance drops during sustained tasks.

Always check the CPU and GPU temperature limits provided by the manufacturer. These specifications are more useful than a universal temperature threshold.

Monitor Your Thermal Metrics Accurately

Temperature monitoring can help identify laptop overheating before it affects performance. Reliable hardware-monitoring software can show CPU and GPU temperatures in real time.

Watch temperatures while performing different tasks. Compare idle readings with temperatures during gaming, rendering, or other demanding workloads. This gives you a clearer picture of your laptop’s normal thermal behavior, especially when using systems with integrated and discrete graphics that can produce different thermal loads.

Sudden spikes are not always a problem. Short bursts of high temperature can occur when the processor temporarily boosts performance. Consistently high readings deserve more attention.

If temperatures remain unusually high at idle, check background processes first. Then inspect the vents and airflow around the laptop. Persistent overheating may require professional servicing.

Do I Really Need a Laptop Cooling Pad for Better Cooling?

You do not necessarily need a laptop cooling pad to keep your computer at a safe temperature. Many laptops can manage normal workloads effectively with their built-in fans and heatsinks.

A cooling pad can sometimes reduce temperatures, but its effectiveness varies by laptop design. Results depend on vent placement and the amount of airflow the pad provides. Some laptops may see only a modest improvement.

Passive elevation can also help. Raising the rear of the laptop creates additional space beneath the chassis. This can improve airflow without adding another fan, cable, or powered accessory.

If your goal is to cool your laptop without a cooling pad, address basic cooling problems first. Check the following before buying additional hardware:

  • Use a hard, flat surface.
  • Keep intake and exhaust vents unobstructed.
  • Clean accumulated dust.
  • Reduce unnecessary background workloads.
  • Keep the room reasonably cool.
  • Elevate the laptop when appropriate.

A cooling pad can still help some gamers and users with sustained heavy workloads. However, it should complement good airflow rather than replace basic maintenance.

Optimize Airflow Through Elevation

Elevating the rear of your laptop is one of the simplest ways to improve airflow. A small increase in clearance can give bottom-mounted intake vents more room to draw in air.

A stable stand is ideal because it keeps the laptop secure. It can also improve keyboard positioning and make long typing sessions more comfortable. Choose a stand that does not block the laptop’s vents.

Avoid placing the laptop on unstable household objects. A fall can cause far more damage than a few degrees of additional heat. Stability and ventilation should always come first.

For a simple DIY laptop cooling approach, combine elevation with good desk placement. Keep the laptop away from walls, direct sunlight, and other heat sources. This passive approach requires no USB power and adds little bulk.

Will 100°C Damage a Laptop CPU? Understanding Extreme Heat

A CPU reaching 100°C is much more concerning than one operating at 70°C. However, a brief spike to a high temperature does not necessarily mean the processor has suffered permanent damage.

Modern processors include built-in thermal protection. As temperatures approach their specified limits, the system can reduce clock speeds and voltage. This process, called thermal throttling, lowers performance and helps control heat.

If temperatures continue rising, the laptop may shut down automatically. This protects the processor and other components from excessive thermal stress. Exact temperature limits vary between processors, so manufacturer specifications matter. If your laptop also shows other symptoms of hardware trouble, review these warning signs for your laptop.

Running close to the thermal limit repeatedly is still undesirable. It can cause sustained performance problems and may indicate an underlying cooling issue. Do not treat thermal protection as a reason to ignore persistent overheating.

If your laptop frequently reaches extreme temperatures, investigate the cause. Check airflow, dust buildup, background workloads, fan behavior, and ambient temperature.

Address Extreme Heat Immediately

Repeated temperatures near 100°C deserve attention. Start by checking whether the laptop sits on a surface that blocks its vents. Then inspect the vents for visible dust and make sure the fans operate normally.

Older laptops can also develop problems with degraded thermal interface material. Thermal paste transfers heat between the processor and heatsink. When it deteriorates, cooling performance can decline.

Replacing thermal paste can help some older laptops, but it is not a universal fix. The procedure requires opening the device and handling delicate components. Follow the manufacturer’s service guidance or use a qualified technician.

Do not assume that every high temperature requires new thermal paste. First rule out blocked airflow, excessive workloads, and dust. Those issues are often easier and safer to address.

If the laptop repeatedly throttles or shuts down, professional diagnosis may be appropriate.

How Hot Do Laptops Get During Normal and Heavy Use?

Laptop temperatures vary widely depending on hardware, workload, cooling design, and room temperature. A system performing light tasks may remain relatively cool. Demanding workloads can produce substantially more heat.

Gaming, video rendering, 3D work, and other intensive tasks can push internal components into higher temperature ranges. Some laptops may reach the 85–95°C range during sustained workloads. Whether that is acceptable depends on the processor and manufacturer’s limits. For users who regularly game on a laptop, choosing hardware with appropriate cooling is also important, as explained in this guide to gaming laptops.

The outside of the laptop can also become noticeably warm. Chassis temperatures may feel uncomfortable even when internal components remain within their designed operating range. Metal surfaces can transfer internal heat to the exterior.

Ambient conditions also matter. A laptop used in a hot room or direct sunlight has less opportunity to dissipate heat. Good ventilation around the device becomes even more important in these conditions.

Instead of relying on one universal temperature target, monitor your system under typical workloads. Compare those readings with the manufacturer’s specifications. Understanding the processor inside your system can also provide useful context, particularly with Intel Core Ultra processors.

Understand the Role of Thermal Throttling

Thermal throttling is a protective feature that reduces processor performance when temperatures become too high. The CPU may lower its clock speed to generate less heat.

You may notice symptoms such as lag, stuttering, slower application performance, or reduced gaming frame rates. These symptoms can become more obvious during long, demanding sessions.

Thermal throttling does not always mean the hardware is failing. It can occur when a laptop reaches its designed thermal limits during heavy workloads. However, frequent throttling can signal that cooling performance needs attention.

Improving airflow is a good first step. Clean the vents, elevate the laptop, reduce unnecessary workloads, and keep the surrounding area cool.

If throttling continues despite these changes, investigate fan operation and internal cooling. Persistent problems may require professional maintenance.

Frequently Asked Questions

Can I Use My Laptop on a Bed or Carpet?

Using a laptop directly on a bed, blanket, sofa, or carpet can block its bottom vents. Restricted airflow makes it harder for the cooling system to remove heat.

Use a hard, flat surface whenever possible. If you need to use the laptop in bed, place it on a rigid tray or suitable laptop board.

Does Closing Background Apps Lower Temperature?

Yes. Closing unnecessary, resource-heavy applications can reduce CPU and GPU activity. Lower workloads generally produce less heat.

Use Task Manager or your operating system’s equivalent tool to identify demanding background processes. Avoid closing essential system processes unless you know what they do.

How Often Should I Clean My Laptop Fans?

Inspect your vents and fans every six to twelve months as a general guideline. Dusty homes and homes with pets may require more frequent cleaning.

Always follow the manufacturer’s maintenance instructions. If accessing the internal fan requires significant disassembly, professional cleaning may be safer.

Does Changing Thermal Paste Help With Cooling?

Replacing degraded thermal paste can improve heat transfer between a processor and its heatsink. It can be particularly helpful on older laptops with aging thermal material.

However, results vary by device and condition. Do not replace thermal paste solely because your laptop feels warm. Check airflow, dust, workload, and manufacturer temperature limits first.

Can I Cool My Laptop Without a Cooling Pad?

Yes, you can cool your laptop without a cooling pad by improving airflow and reducing unnecessary workloads. Start by placing the laptop on a hard, flat surface.

You can also elevate the rear slightly, clean blocked vents, close demanding background applications, and keep the room cool. These steps can improve the laptop’s built-in cooling system without additional hardware.

Conclusion

You can cool your laptop without a cooling pad by improving airflow and reducing unnecessary heat. Start with simple changes before buying additional cooling accessories.

Use your laptop on a hard surface and keep its vents unobstructed. Elevating the rear can also improve airflow around bottom-mounted intake vents. Regular cleaning helps prevent dust from restricting the cooling system.

Monitor CPU and GPU temperatures during both light and demanding workloads. Remember that temperature limits vary by processor and laptop model.

If your laptop repeatedly approaches its thermal limits, investigate the cause instead of ignoring the warning signs. Persistent throttling, unusually high idle temperatures, or automatic shutdowns may require professional service.

With proper airflow, regular maintenance, and sensible workload management, you can cool your laptop without a cooling pad while maintaining stable performance.


5 Ways To Preserve Your DVDs And Blu-Rays For Years To Come

5 Ways To Preserve Your DVDs And Blu-Rays For Years To Come

In a digital age dominated by streaming and cloud storage, many collectors still value physical media. Learning how to preserve your DVDs and Blu-Rays can help protect your collection for decades.

Streaming libraries can change without notice. Titles may disappear because of licensing deals, platform decisions, or service closures. Physical discs give you continued access to content you legally own without depending on a particular subscription.

For additional guidance on preserving optical media, see the Library of Congress preservation guidance. Its preservation resources explain how environmental conditions and proper handling affect the long-term survival of collection materials.

However, discs are not indestructible. Scratches, heat, humidity, sunlight, manufacturing defects, and chemical deterioration can all affect optical media. Proper storage and careful handling can greatly reduce these risks.

This guide covers five practical ways to protect DVDs and Blu-rays. You will learn how to store, clean, inspect, and handle your discs correctly.

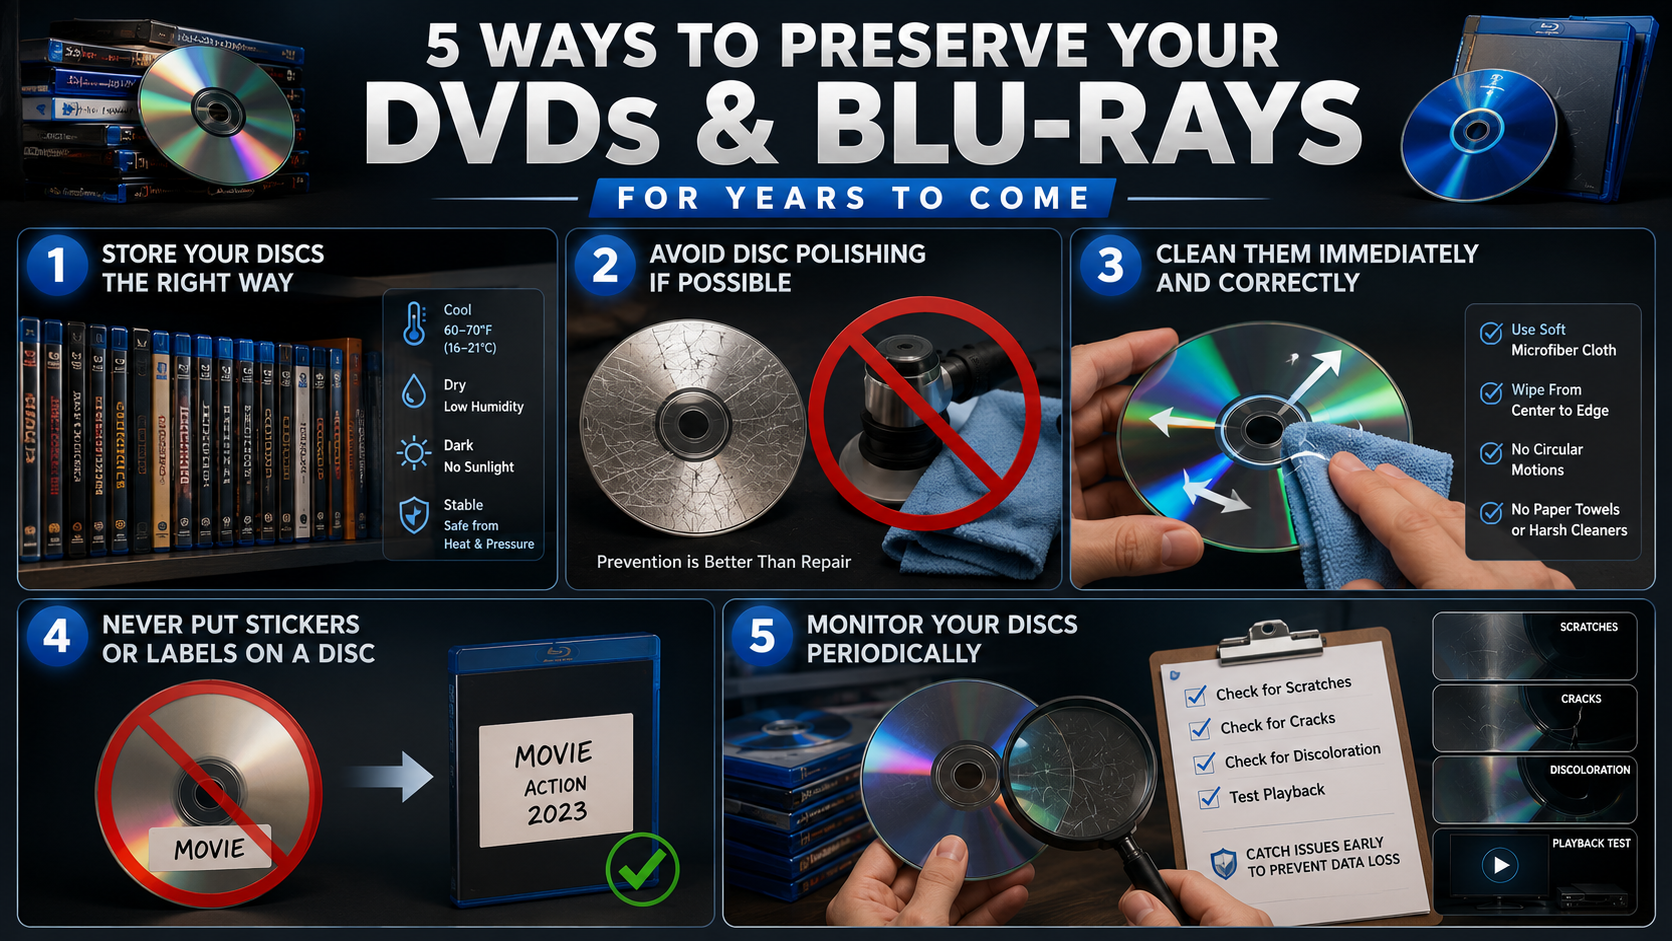
1. Store Your Discs the Right Way

Proper storage is one of the easiest ways to extend the life of your DVD and Blu-ray collection. Optical discs can deteriorate when exposed to excessive heat, moisture, sunlight, or physical pressure. A stable indoor environment is therefore essential for long-term preservation.

Keep your discs in their original cases whenever possible. These cases protect the playing surface from dust, fingerprints, scratches, and unnecessary contact. If the original case is damaged, replace it with a quality case designed for optical media.

Store cases vertically on sturdy shelving. Avoid stacking heavy objects on top of discs or leaving loose discs in piles. Long-term pressure can damage cases and increase the risk of physical problems.

Choose a location that is cool, dark, dry, and stable. Around 60–70°F (16–21°C) is a practical temperature range for home storage. Keeping humidity moderate also helps reduce moisture-related risks.

Avoid attics, garages, sheds, and damp basements. These locations can experience extreme temperature and humidity changes.

Finally, keep your collection away from windows, radiators, vents, and other heat sources. Good storage protects your discs before damage starts.

2. Avoid Disc Polishing If Possible

Polishing can sometimes improve a scratched DVD, but it should not be your first solution. Every polishing process removes or alters some of the disc’s surface material. Incorrect techniques can therefore make an already damaged disc worse.

Blu-rays require particular care because they use a protective hard coating over the reading surface. Aggressive polishing can damage this coating and create additional problems.

Avoid household remedies such as toothpaste, abrasive cleaners, or rough polishing compounds. These methods are difficult to control and may leave additional scratches or damage the protective surface.

If a disc has only light scratches, first check whether it still plays correctly. A minor cosmetic mark does not always affect playback. In that situation, there may be no reason to polish the disc at all.

For an important or rare DVD, professional resurfacing may be safer than attempting a DIY repair. However, even professional repair has limits. Deep damage or damage to critical disc layers may be permanent.

The best approach is prevention rather than repair. Store discs in protective cases and handle them by their edges or center holes.

If polishing becomes necessary, identify the disc format first. A method that may work for a DVD may not be appropriate for a Blu-ray.

3. Clean Them Immediately and Correctly

Cleaning your discs properly can prevent fingerprints, dust, and other debris from interfering with playback. However, cleaning should be gentle. Using the wrong material or technique can create scratches that are harder to remove.

If you notice fingerprints or dirt, clean the disc as soon as practical. Hold it by the outer edge or center hole. Avoid touching the playing surface with your fingers.

Use a soft, clean microfiber cloth designed for delicate surfaces. Gently wipe from the center of the disc toward the outer edge. Do not rub in circular motions around the disc.

Radial cleaning is preferable because circular scratches can follow the same path as the laser’s reading process. This can potentially make read errors more difficult to correct.

Avoid paper towels, tissues, rough fabrics, and abrasive cleaning products. These materials can leave scratches or residue behind.

For stubborn marks, follow the disc manufacturer’s recommended cleaning method. Do not soak discs or expose them to harsh chemicals.

After cleaning, allow the disc to dry completely if any suitable cleaning solution was used. Then return it to its case.

Regular gentle cleaning helps maintain your collection without unnecessary physical wear. Clean discs carefully, not aggressively, and avoid polishing unless there is a genuine need.

4. Never Put Stickers or Labels on a Disc

Adding stickers or adhesive labels to DVDs and Blu-rays may seem like an easy way to organize a collection. However, labels can create problems over time. Adhesive can deteriorate, become difficult to remove, or leave residue on the disc.

Labels can also affect the disc’s balance. Optical drives spin discs at high speeds, so uneven weight distribution may cause vibration during playback. In some cases, poorly applied labels can even become detached inside a drive.

Write-on labels can also create risks if they use unsuitable inks or place pressure on the disc surface. For valuable collections, it is safer to avoid writing directly on discs whenever possible.

Instead, identify your discs using their cases, inserts, or storage system. You can add catalog numbers to cases without changing the physical disc itself.

If you need additional information, create a separate inventory. Record the movie title, edition, purchase date, and condition in a spreadsheet or cataloging app.

Avoid removing old adhesive labels aggressively. Pulling or scraping them can damage the disc or leave residue behind.

For long-term preservation, the simplest rule is clear: keep the disc surface free from unnecessary stickers, labels, and adhesives. Your storage system should provide organization without modifying the media itself.

5. Monitor Your Discs Periodically

Long-term preservation does not end once your discs are placed on a shelf. Periodically inspecting your collection can help you identify problems before they become serious.

Check older DVDs and Blu-rays for visible scratches, cracks, discoloration, residue, or other unusual changes. Pay particular attention to discs that have been stored in less-than-ideal conditions.

You should also watch for playback problems. Skipping, freezing, slow loading, or repeated read errors can indicate that a disc needs closer inspection.

If a valuable disc becomes difficult to read, consider creating a legal backup where permitted. This provides additional protection if the physical disc eventually fails.

Recordable discs deserve extra attention. Their recording layers can have more variable lifespans than factory-pressed media. Check important CD-R, DVD-R, and Blu-ray recordable discs periodically.

Keep an inventory of rare or irreplaceable titles. Knowing which discs are most valuable helps you prioritize inspections and backups.

You do not need to examine every disc every week. A periodic review is enough for most home collections.

During each inspection, confirm that discs remain in their cases and that storage conditions are still suitable. This simple habit can catch problems early and help you preserve your DVDs and Blu-Rays for years to come.


Can DVDs Last 100 Years?

Factory-pressed DVDs can potentially last for several decades under suitable storage conditions. Some may remain readable for 100 years or longer, but no manufacturer can guarantee that lifespan for every disc.

If you want to preserve your DVDs and Blu-Rays for as long as possible, focus on stable storage conditions rather than relying on a specific lifespan estimate.

Disc rot is one possible cause of deterioration. It can occur when moisture, oxidation, manufacturing defects, or other chemical changes damage a disc’s reflective or data layers.

Recordable DVDs can be more vulnerable because they use organic dye layers. Their lifespan varies widely according to disc quality, recording method, and storage conditions.

For the best results, keep DVDs:

  • In their original cases or quality archival cases.
  • Away from direct sunlight and heat.
  • In a cool, stable, and dry environment.
  • Upright rather than under heavy pressure.
  • Clean and free from fingerprints and scratches.

Good storage cannot guarantee a century of life. It can, however, significantly improve your chances of long-term readability.

How to Store DVDs Long Term

Long-term optical media storage starts with a stable environment. Anyone trying to preserve their DVDs and Blu-rays should avoid attics, garages, sheds, and damp basements.

These areas can experience extreme temperatures and humidity changes that damage discs and their cases.

A practical target is a cool room with moderate, stable humidity. Around 60–70°F (16–21°C) is a reasonable storage range for home collections.

Store discs vertically in protective cases. Avoid placing heavy objects on top of cases for long periods.

Handle every disc carefully. Touch only the outer edge or center hole. Never place fingers directly on the optical surface.

Regular cleaning also helps. Use a soft, clean microfiber cloth and wipe gently from the center toward the outer edge.

For valuable collections, consider a digital backup strategy where legally permitted. A backup provides another layer of protection if a physical disc becomes damaged or unreadable.

How Long Will a Blu-ray Last?

Factory-pressed Blu-ray discs can potentially remain readable for many decades when stored correctly. Their hard protective coating can help collectors preserve their DVDs and Blu-Rays against everyday surface damage.

Some industry estimates suggest lifespans extending well beyond 50 years. However, these figures are estimates rather than guarantees.

Blu-ray discs have an important advantage over DVDs: their hard-coat surface protection. This coating helps protect the disc against fingerprints and everyday scratches.

However, Blu-rays are not immune to damage. Heat, humidity, sunlight, manufacturing defects, and physical damage can still affect longevity.

For long-term preservation, treat Blu-rays much like DVDs. Keep them in cases, store them vertically, avoid harsh environments, and handle them by the edges.

A quality pressed Blu-ray stored under stable conditions can therefore be a strong option for long-term physical media preservation.

Is It Worth Keeping DVDs Anymore?

For many collectors, keeping DVDs remains worthwhile. Physical media provides access to movies and shows without depending on a streaming service’s current catalog.

If your goal is to preserve your DVDs and Blu-Rays, keeping rare or difficult-to-replace releases can make particular sense.

Streaming platforms can remove titles when licensing agreements expire. Movies can also move between services, become unavailable in certain regions, or disappear when a platform changes its business strategy.

Physical discs can also contain material that is unavailable on streaming platforms. Depending on the release, you may find commentaries, deleted scenes, documentaries, alternate versions, trailers, and other special features.

DVDs also work without an internet connection. Once you own a compatible player and a readable disc, you do not need a monthly subscription to watch your collection.

For many people, the best approach is selective collecting. Keep rare, favorite, or difficult-to-replace titles while reconsidering duplicates and releases you no longer want.

Is Gen Z Buying DVDs?

Interest in physical media is not limited to older collectors. Younger consumers have also shown interest in tangible entertainment formats, including vinyl records, CDs, DVDs, and Blu-rays.

Several factors can make physical media appealing. Streaming requires ongoing access to services, while a physical collection creates something people can own, display, and revisit.

Younger collectors may also discover DVDs through thrift stores, secondhand shops, family collections, and online marketplaces.

Social media has helped make physical collections more visible. Shelves filled with movies can become part of a person’s room design and online identity.

However, interest varies widely among individuals. It would be inaccurate to suggest that all Gen Z consumers are returning to DVDs.

The broader trend is better understood as renewed interest in physical ownership and collecting.

For collectors who want to preserve their DVDs and Blu-Rays, this renewed interest can make maintaining older collections even more rewarding.

Physical media therefore continues to have cultural value, even as most everyday viewing moves toward digital services.


FAQ: Preserving DVDs and Blu-Rays

What is the best temperature for storing optical discs?

The ideal storage temperature for DVDs and Blu-rays ranges between 60 and 70 degrees Fahrenheit. Extreme heat causes the plastic layers to warp and degrades the internal reflective data surfaces. Avoid storing your collection in unconditioned attics or garages where temperatures fluctuate wildly throughout changing seasonal weather patterns.

Can you repair scratched DVDs and Blu-rays?

Surface scratches on standard DVDs can often be repaired using professional disc resurfacing machines or gentle polishing methods. However, deep scratches on the label side usually cause permanent data loss. Blu-rays are much harder to scratch, but their protective coating makes DIY polishing paste ineffective if deep damage penetrates the hard layer.

Should I rip my DVDs to a hard drive for backup?

Backing up your physical DVD collection onto a digital hard drive or home server provides excellent insurance against physical loss. Digital backups let you enjoy instant streaming access across home networks while keeping delicate original discs safely stored away in long-term archive boxes.

Do burned CDR and DVDR discs last as long as pressed discs?

Home-burned recordable discs have significantly shorter lifespans than factory-pressed media, often lasting only 2 to 10 years. Burned discs rely on organic dye layers that degrade quickly when exposed to indoor lighting and ultraviolet rays. Always use high-quality archival-grade media if you plan on burning home videos.


Conclusion: Preserve Your DVDs and Blu-Rays for the Future

Learning how to preserve your DVDs and Blu-Rays can help protect your collection for decades. Good storage reduces the risks created by heat, humidity, sunlight, scratches, and careless handling.

Pressed DVDs and Blu-rays can have long lifespans, but no disc is guaranteed to last forever. Recordable media requires even more careful attention because its recording layers can deteriorate over time.

For the best results, keep discs in protective cases. Store them vertically in a cool, dark, and stable environment. Handle them by the edges and clean them gently when necessary. If you also collect premium audio equipment, you may find these headphone cleaning and maintenance tips useful for keeping your other physical entertainment gear in good condition.

Consider creating legal digital backups of especially important content. Maintain more than one copy and periodically check that your archived files remain accessible.

Physical media also offers benefits beyond durability. It can preserve special features, collector editions, artwork, and access to titles that may disappear from streaming services.

You do not need to keep every disc. Focus on the movies and shows that matter most to you.

With thoughtful storage and regular care, your physical media collection can remain a valuable part of your entertainment library for many years.

How 8D Audio Works: The Science and Making of Spatial Sound

Understanding How 8D Audio Works and Transforms Music Listening

Music technology has changed how people experience their favorite songs. If you have wondered how 8D audio works, the answer involves clever audio processing. This popular effect creates the illusion that music moves around your head while you listen through headphones.

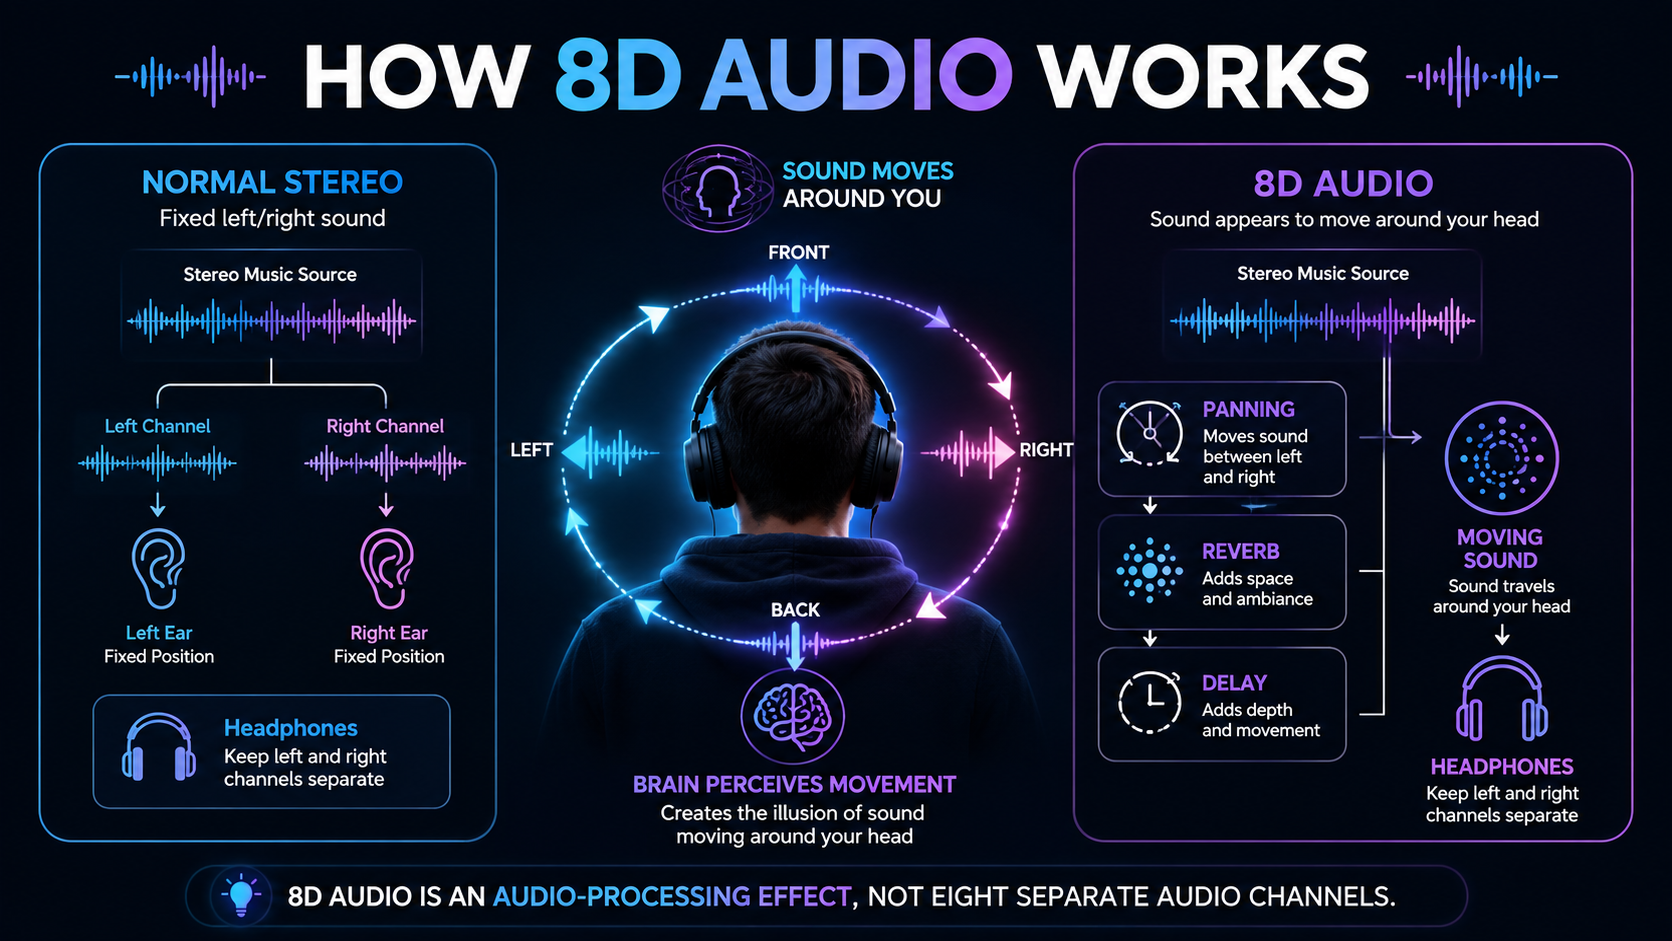
8D audio does not use eight separate audio channels. Instead, producers manipulate stereo signals with panning, reverb, delay, equalization, and phase-related techniques. These changes influence how your brain interprets the location and movement of sound.

According to Sound On Sound, spatial audio processing techniques manipulate phase and equalization to trick the human brain.

Audio engineering techniques can create convincing spatial effects by changing timing, volume, and frequency between your ears. This article explains whether 8D audio is good or bad and how producers create it. We also cover its possible relationship with ADHD, how to hear it correctly, and how to convert music on your phone.

Is 8D Audio Good or Bad for Your Listening Experience?

Whether 8D audio is good or bad depends largely on personal preference. Many listeners enjoy the effect because it makes familiar songs feel new. The moving sound can create an immersive experience that resembles music traveling around your head. For more on how sound can affect the mind and body, explore music therapy and how sound heals.

However, the effect can also have drawbacks. Heavy reverb, aggressive panning, or poor processing may reduce clarity. Vocals can sound distant, while instruments may lose their original balance. Some listeners may also experience dizziness or discomfort after extended sessions.

A well-produced track should preserve musical detail while creating movement. Poor conversions often prioritize dramatic effects over sound quality.

Balancing Immersion and Audio Quality

8D audio works best as an alternative listening experience rather than a replacement for stereo music. Its exaggerated movement can become tiring when used for long periods. If you are interested in getting more from your listening setup, learn how to choose the right noise-cancelling headphones.

For a better experience:

  • Keep the listening volume moderate.
  • Take regular breaks during longer sessions.
  • Choose well-produced 8D mixes.
  • Stop listening if you feel dizzy or uncomfortable.
  • Compare the 8D version with the original stereo mix.

The best choice ultimately depends on your ears, preferences, and listening environment.

How Do They Make 8D Music?

Creating 8D music starts with a normal stereo recording. Producers then use a digital audio workstation and spatial processing tools to create the impression of movement. The process does not actually place music in eight physical directions. These techniques are part of the broader world of spatial listening, similar to how noise cancellation works to shape what you hear.

Instead, producers automate changes between the left and right channels. They may also adjust volume, timing, equalization, reverb, and delay. These changes affect the cues your brain uses to locate sounds.

When these effects change smoothly, a sound can appear to move around your head. Reverb can add a sense of space, while volume changes can suggest distance. Producers may process vocals, instruments, or complete mixes separately.

Essential Tools for Spatial Production

Professional producers can use binaural panning tools, automation, and spatial audio plugins. These tools provide control over movement, timing, and perceived position. For listeners rather than producers, how to clean and maintain premium headphones is also important for preserving a quality listening experience.

A typical workflow may include:

  • Starting with a clean stereo mix or available stems.
  • Automating left-to-right and right-to-left movement.
  • Adding controlled reverb and delay.
  • Adjusting equalization to preserve clarity.
  • Testing the finished mix on several headphones.

Careful monitoring matters because headphones reproduce spatial effects differently. Good production keeps the movement noticeable without overwhelming the original music.

Is 8D Audio Real for ADHD and Focus?

Claims about 8D audio for ADHD have become common across social media. Some listeners say moving sounds help them stay engaged while studying or working. The changing soundstage may provide stimulation that makes background listening more interesting.

However, this does not mean 8D audio treats ADHD. There is not enough evidence to establish 8D audio as an ADHD treatment. Individual responses can also vary considerably.

Some people may find moving audio helpful because it provides a consistent sensory stimulus. Others may find the constant movement distracting or overwhelming. Personal sensory preferences can strongly influence the experience.

Finding Focus Through Novelty Soundscapes

If you want to test 8D audio while working, treat it as a personal listening experiment. Do not consider it a medical intervention.

You can compare it with other background sounds, such as music that uses rhythm to improve memory and focus:

  • Standard instrumental music
  • White or brown noise
  • Ambient soundscapes
  • Nature recordings
  • Traditional stereo music

Notice whether the sound helps you maintain attention or creates distraction. If movement becomes tiring, switch to a simpler audio format. Focus depends on many factors, so no single sound works for everyone.

How to Hear 8D Audio Correctly

Learning how to hear 8D audio is simple. You mainly need headphones that keep the left and right channels separate. The effect depends on delivering different signals to each ear.

Over-ear and in-ear headphones can both work well. Regular speakers are less effective because sound from each speaker reaches both ears. That acoustic crossover can weaken the intended spatial illusion.

Before listening, check your device’s audio settings. Make sure mono audio is disabled. Mono playback combines the channels and can significantly reduce the effect.

Optimizing Your Listening Environment

A quiet environment can make subtle movement easier to notice. Closing your eyes may also help you concentrate on changes in sound direction.

For the best experience:

  • Use comfortable stereo headphones or earphones.
  • Keep mono audio turned off.
  • Choose a quiet listening space.
  • Keep the volume at a comfortable level.
  • Avoid extended listening without breaks.

You can find 8D versions of songs on popular music platforms. Search for the song title followed by “8D audio.” The exact quality will vary between different uploads and producers.

Can I Convert Music to 8D on My Phone?

Yes, you can convert music to 8D audio on your phone. Mobile apps and web-based audio tools can apply panning, reverb, delay, and other effects automatically. This makes experimenting with how 8D audio works simple, even without professional audio software. Once you’re exploring different ways to listen to music, you can also compare Spotify and Apple Music to see which service better suits your listening habits.

Some tools let you upload an audio file or choose music stored on your device. Others provide controls for movement speed, reverb strength, and spatial intensity. The available features depend on the specific app or service.

Automated conversion is convenient, but it may not produce professional results. Simple algorithms can apply too much reverb or create unnatural movement. They may also reduce vocal clarity or affect the original frequency balance.

Choosing the Right Mobile Conversion Tools

When choosing a conversion tool, consider its controls, supported formats, and privacy practices. Avoid uploading personal recordings to services you do not trust.

Useful features can include:

  • Adjustable panning speed
  • Reverb intensity controls
  • Export options for common audio formats
  • Preview functions
  • Clear privacy information

Mobile conversion is useful for experimenting with spatial sound. Professional producers usually have greater control because they can process individual stems and automate effects more precisely.

Frequently Asked Questions

What Is the Difference Between 8D Audio and Normal Stereo?

Normal stereo uses left and right channels to create a fixed sense of width and placement. 8D audio changes those signals over time to create the impression of movement.

The sound may appear to travel from one side to another or circle around your head. Producers create this effect through panning and other spatial processing techniques.

Does 8D Audio Damage Your Hearing?

8D audio is not inherently more damaging than ordinary music at the same volume. Hearing damage mainly depends on factors such as loudness and listening duration.

Because spatial effects can make sounds seem distant, some listeners may increase the volume unnecessarily. Keep playback at a comfortable level and take regular breaks.

Why Do Some Songs Sound Worse in 8D?

Poor conversions can use excessive reverb, extreme panning, or unsuitable processing. These choices may make vocals sound muddy and reduce instrumental detail.

Professional spatial mixing requires careful control of the original recording. Not every song benefits from heavy spatial effects.

Can You Listen to 8D Audio Without Headphones?

You can play an 8D track through speakers, but the intended effect may be greatly reduced. Headphones provide better channel separation, which helps preserve the spatial illusion.

For the clearest experience, use stereo headphones or earphones.

Conclusion

Understanding how 8D audio works reveals how simple stereo recordings can create convincing spatial movement. The effect relies on audio processing rather than eight separate sound channels.

Producers use panning, reverb, delay, equalization, and automation to influence how the brain perceives sound. Headphones make the effect easier to experience because they provide stronger separation between the two channels.

8D audio can make familiar music feel fresh and immersive. However, it does not suit everyone, and it should not be treated as an ADHD treatment. Its benefits are mainly subjective and depend on individual preferences.

If you want to explore spatial music, try a few well-produced tracks with comfortable headphones. Keep the volume moderate and take breaks during longer sessions. With safe listening habits, 8D audio can offer a fun and unusual way to experience your favorite music.

Spatial Audio in Headphones: Evolution & Technology Guide

The Evolution of Spatial Audio in Modern Headphone Technology

The evolution of spatial audio in headphones is one of the biggest changes in personal listening. Modern headphones do more than separate sound between the left and right channels. They can create a three-dimensional sound field that feels closer to real-world hearing.

As noted by the Audio Engineering Society, advanced psychoacoustic rendering now allows personal devices to replicate complex speaker arrays.

This technology can make music, movies, and games feel more immersive. Sounds can appear to come from different directions, including above or behind you. Some systems also use head tracking to keep sounds anchored in virtual space. Learn how noise cancellation works

As audio engineering has advanced, digital processing can now simulate complex speaker arrangements through headphones. This guide explains what spatial audio is, how headphones evolved, and how modern systems create immersive sound. It also explores head tracking, personalized audio, object-based mixing, and Dolby Atmos vs. spatial audio.

What Is Spatial Audio in Headphones and How Does It Create a 3D Soundstage?

Spatial audio in headphones is a technology that creates the impression of sound coming from different positions around you. Traditional stereo mainly separates audio into left and right channels. Spatial audio adds directional cues that can make sounds seem to come from the front, sides, rear, or above.

Your brain uses small differences in timing, volume, and frequency to identify where sounds originate. Spatial audio processing recreates some of these cues digitally. It can therefore make headphones sound more like a surrounding speaker system.

The experience depends on the audio source, software, headphones, and processing method. Some systems render specially mixed spatial content. Others can process conventional stereo material to create a wider, more immersive effect.

How Head Tracking Enhances Realism

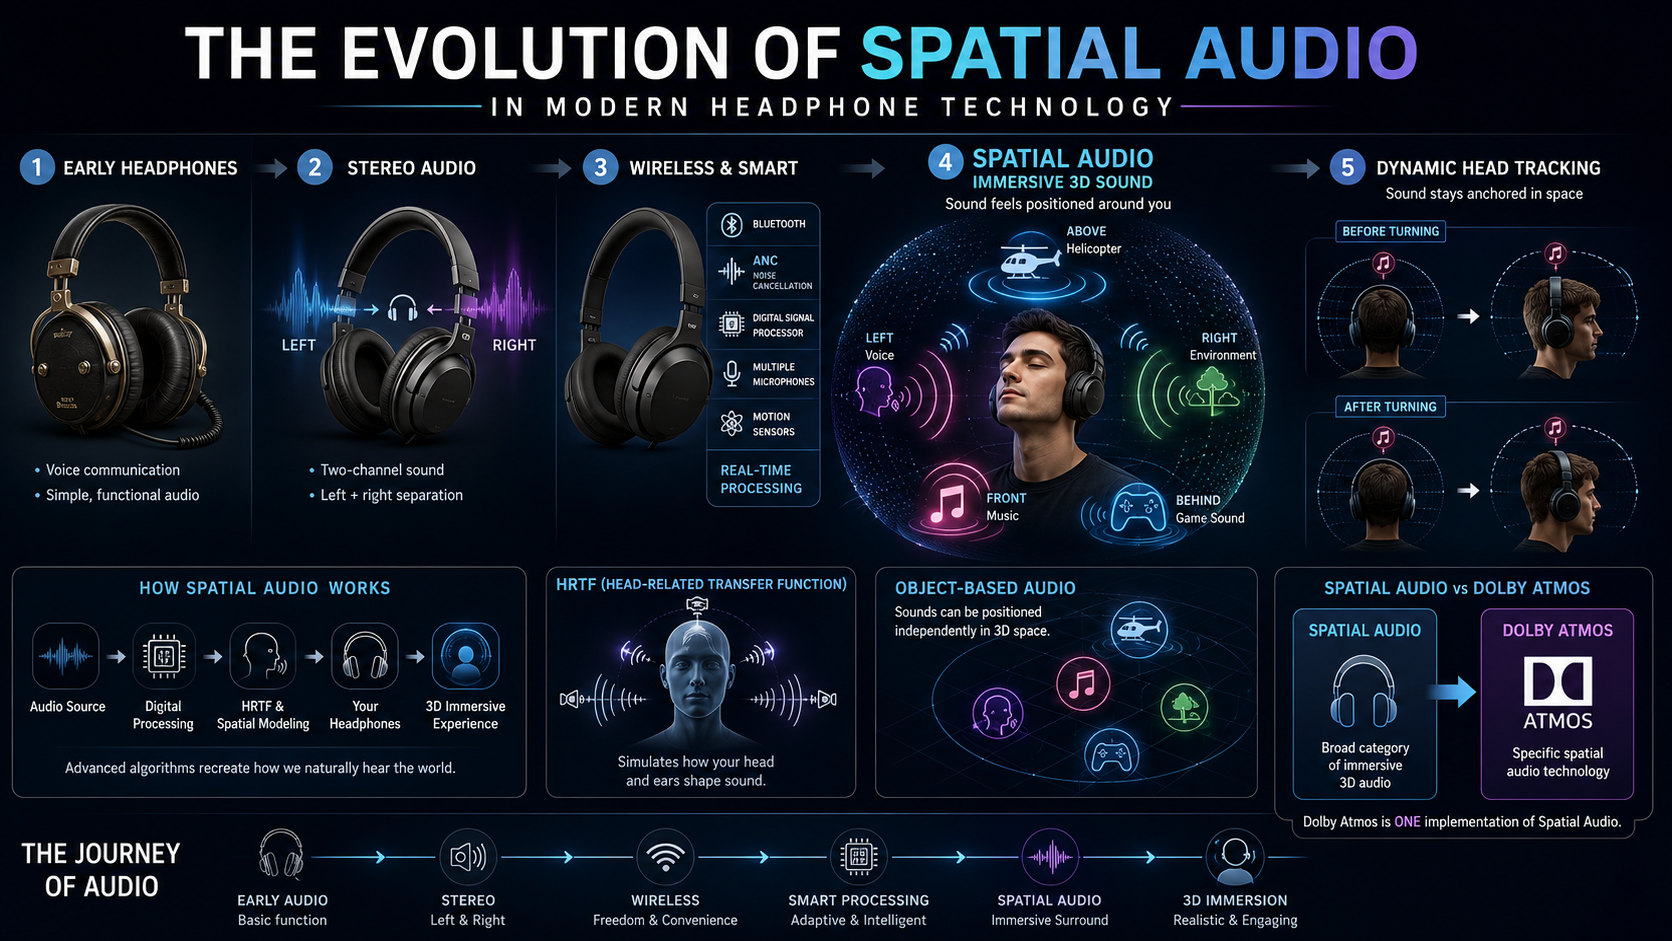
Dynamic head tracking can make spatial audio feel even more convincing. Compatible headphones use motion sensors to detect changes in head position. The audio processor then adjusts the virtual sound field as you move.

For example, imagine a vocalist positioned directly in front of you. If you turn your head right, the vocalist should remain anchored in front of the virtual scene. The sound therefore appears to shift toward your left ear.

This behavior helps create a stable sense of space. Without head tracking, the entire soundstage can move with your head instead.

How have headphones evolved over time?

Headphones have changed dramatically since their early use in telephone and radio communication. Early models were often large, heavy, and designed mainly for voice transmission. They were very different from today’s high-fidelity consumer headphones.

Stereo technology later introduced separate left and right channels. This created a basic sense of width and became a foundation of modern headphone listening. Manufacturers then improved frequency response, reduced distortion, and developed smaller, more comfortable drivers.

Digital technology accelerated this development. Wireless Bluetooth connectivity removed the need for physical cables. Active noise cancellation (ANC) added another layer of control by reducing unwanted environmental sounds.

Modern headphones now combine audio hardware with digital processors and sensors. These components can support features such as adaptive noise cancellation, spatial rendering, transparency modes, and head tracking. The focus has therefore moved beyond simple sound reproduction toward software-enhanced listening.

The Shift Toward Wireless and Smart Audio

The move from wired headphones to wireless devices changed personal audio significantly. Bluetooth headphones can now contain digital signal processors, microphones, motion sensors, and other compact components.

These processors perform audio calculations in real time. They can manage noise cancellation, equalization, spatial processing, and other features within a small device.

Wireless technology has also made advanced audio features more accessible. Users no longer need a home theater receiver or multiple physical speakers to experience virtual surround effects.

However, wireless headphones still depend on their hardware and software capabilities. Codec support, processing power, battery capacity, and device compatibility can all affect the final experience.

What is the latest technology in headphones?

The latest headphone technology combines advanced processing with improved wireless connectivity and personalization. Many premium models now include adaptive noise cancellation, spatial audio, head tracking, and sophisticated digital signal processing. For guidance on choosing between different ANC options, see how to choose the right noise-cancelling headphones.

Personalized sound is another important development. Some systems analyze the listener’s ears or use hearing-related measurements to adjust audio processing. The goal is to improve the accuracy of virtual sound placement.

Bluetooth audio codecs have also continued to evolve. Newer standards can support higher-quality wireless transmission, depending on the codec, source device, and headphones. However, codec support alone does not guarantee better sound.

Modern headphones also use multiple microphones and sensors. These components can monitor environmental noise and head movement. The processor can then adjust audio output in real time. Proper maintenance also matters, so learning how to clean and maintain premium headphones can help preserve their performance.

Together, these technologies create a more responsive listening experience. Instead of simply playing an audio signal, today’s headphones can continuously adapt to the listener and surroundings.

How Personalized Head-Related Transfer Functions Improve Spatial Accuracy

A Head-Related Transfer Function (HRTF) describes how your head, ears, and upper body affect incoming sound. These physical features change the frequency and timing of sounds before they reach your eardrums.

Spatial audio systems use HRTF-based processing to reproduce these directional cues. This helps the brain identify the apparent position of a virtual sound source.

Generic HRTFs can work well, but they do not perfectly match every listener. Ear shape, head size, and other physical differences can affect spatial perception.

Personalized audio systems attempt to account for these differences. Some use measurements, photographs, or guided calibration methods. Others rely on carefully designed generic profiles.

The result can be more accurate positioning and a more natural sense of space. However, personalization is not equally effective for everyone. The quality of the measurement and rendering system also matters.

How is spatial audio achieved?

Spatial audio combines several technologies to create the impression of three-dimensional sound. Digital signal processing (DSP) is central to this process. It modifies audio signals before they reach the headphone drivers.

One important technique uses HRTFs. These filters simulate how sound changes as it travels around the head and reaches the ears. The resulting timing and frequency differences provide the brain with directional information.

Spatial systems can also process multi-channel or object-based audio. Instead of sending fixed signals to individual speakers, object-based mixes describe where sounds should appear within a virtual environment.

The playback system then renders those sounds for the listener’s headphones. Head tracking can add another layer by changing the rendering as the listener moves.

Importantly, spatial audio does not require physically separate speakers around your head. Standard headphone drivers can reproduce the processed signals. The illusion comes from the interaction between digital processing and human hearing.

How Object-Based Audio Mixing Creates Flexible Sound Placement

Object-based audio treats individual sounds as separate elements within a three-dimensional scene. A dialogue track, musical instrument, sound effect, or aircraft can each be treated as an audio object.

Each object can have information describing its position or movement. The playback system uses that information to calculate how the sound should reach the listener.

This approach differs from traditional channel-based audio. A conventional mix may assign sounds to fixed channels such as left, right, center, or surround speakers.

Object-based mixing offers greater flexibility. The same content can be rendered for different playback systems and speaker configurations.

For headphones, the renderer converts the scene into signals suitable for two headphone drivers. HRTF processing can then add the acoustic cues needed for directional perception.

This approach helps spatial audio remain adaptable across earbuds, over-ear headphones, soundbars, and larger speaker systems.

What is Dolby Atmos vs spatial audio?

Spatial audio is a broad term for technologies that create a three-dimensional listening experience. Dolby Atmos is a specific audio format and technology developed by Dolby. Therefore, Dolby Atmos can be considered one implementation within the wider spatial audio category.

Dolby Atmos uses object-based audio to position sounds within a three-dimensional environment. Supported content can place effects and other audio elements around the listener, including overhead.

Other spatial formats also exist. Examples include Sony’s 360 Reality Audio and Apple’s spatial audio features. These systems can use different processing methods and ecosystems while pursuing similar immersive results. For listeners comparing major music platforms, Spotify vs. Apple Music is another useful comparison to consider.

Compatibility is important when comparing these technologies. The content, playback device, operating system, application, headphones, and processing system can all affect the result.

Standard stereo content can also receive spatial processing on some devices. However, this is different from listening to audio that was specifically mixed for a spatial format. The streaming service you choose can also affect your access to content, making YouTube Premium vs. Spotify Premium worth comparing.

Proprietary Standards Versus Flexible Spatial Audio Formats

The spatial audio market includes several competing technologies and ecosystems. Each can use different codecs, renderers, processing methods, and hardware requirements.

Dolby Atmos is widely used for movies, television, games, and music. Compatible content is created and mastered to support the format. Playback devices then render the content for the available hardware.

Other platforms use their own spatial audio systems. Some focus on music, while others target movies, gaming, or general headphone playback.

The main difference is not simply sound quality. Content availability and device compatibility can be equally important. A listener may have excellent headphones but limited access to compatible spatial content.

When choosing a system, consider the services and devices you already use. Also check whether your headphones support the required spatial features. This approach can help you avoid paying for capabilities that your existing setup cannot use.

Frequently Asked Questions About Spatial Audio in Headphones

Does spatial audio work with all headphones?

Basic spatial audio processing can work with almost any pair of headphones because the software magic happens inside your playback device or source app. However, achieving true, optimal immersion usually requires certified hardware equipped with built-in gyroscopes, accelerometers, and custom tuning. Standard analog headphones will give you a simulated spatial effect, but modern wireless models with dynamic head tracking deliver a significantly more convincing and realistic three-dimensional listening experience overall.

Does spatial audio drain battery life faster?

Yes, using spatial audio features typically consumes more battery power than listening to standard stereo tracks. This increased energy consumption happens because the internal processor must continuously run complex psychoacoustic algorithms and track your head movements in real time. Sensors like gyroscopes and accelerometers require constant power to monitor your physical orientation. Fortunately, most modern headphones manage this power draw efficiently, though turning spatial audio off can still extend your daily listening time.

Can you use spatial audio for gaming?

Spatial audio is exceptionally popular in gaming because it provides a major competitive advantage by improving directional awareness. Gamers can pinpoint exact audio cues like footsteps, gunfire, or vehicle engines approaching from behind or above. Many modern gaming headsets feature dedicated spatial software to enhance these positional cues. This level of precise acoustic detail helps players react faster and immerses them deeply into virtual game worlds, making it an essential feature for modern competitive gaming setups.

Do I need special music tracks for spatial audio?

You do not strictly need special tracks, as many devices can upscale standard stereo music into spatial audio automatically. However, experiencing the highest quality spatial sound requires music specifically mixed and mastered in formats like Dolby Atmos Music. Streaming services now offer extensive catalogs of these specially mixed tracks. These dedicated recordings give sound engineers precise control over where every instrument and vocal sits in the virtual three-dimensional soundstage around you.

Conclusion: Why Spatial Audio Is Shaping the Future of Headphone Technology

The evolution of spatial audio in headphones has changed the way people experience music, movies, and games. Headphones have moved from simple stereo reproduction toward intelligent systems that combine processing, sensors, and advanced acoustic modeling.

Spatial audio can create a convincing sense of three-dimensional space. HRTF processing provides important directional cues, while object-based audio enables flexible sound placement. Head tracking can further stabilize the virtual scene as you move.

Modern headphone technology also continues to improve personalization. Adaptive processing, better wireless standards, noise cancellation, and customized audio profiles are making immersive listening more accessible.

Dolby Atmos remains one important spatial audio technology, but it is not synonymous with spatial audio as a whole. Other formats and processing systems can create similar immersive experiences.

When choosing headphones, consider more than sound quality alone. Check spatial audio support, head tracking, device compatibility, content availability, battery life, and personalization features.

As these technologies continue to develop, headphones will become increasingly capable of recreating the depth and realism of a real acoustic environment.

How To Get More Out Of Your GPU Without Overclocking

How To Get More Out Of Your Graphics Card Without Overclocking

Many PC gamers and creators want to get more from their GPU without overclocking. Pushing hardware beyond factory settings can cause instability and extra heat. Fortunately, you can improve performance through safer software and maintenance techniques, as also supported by guidance from the NVIDIA Driver Downloads page and official optimization notes in the AMD Software Support resources. For broader graphics considerations, integrated and discrete graphics can also affect how a system handles demanding creative workloads.

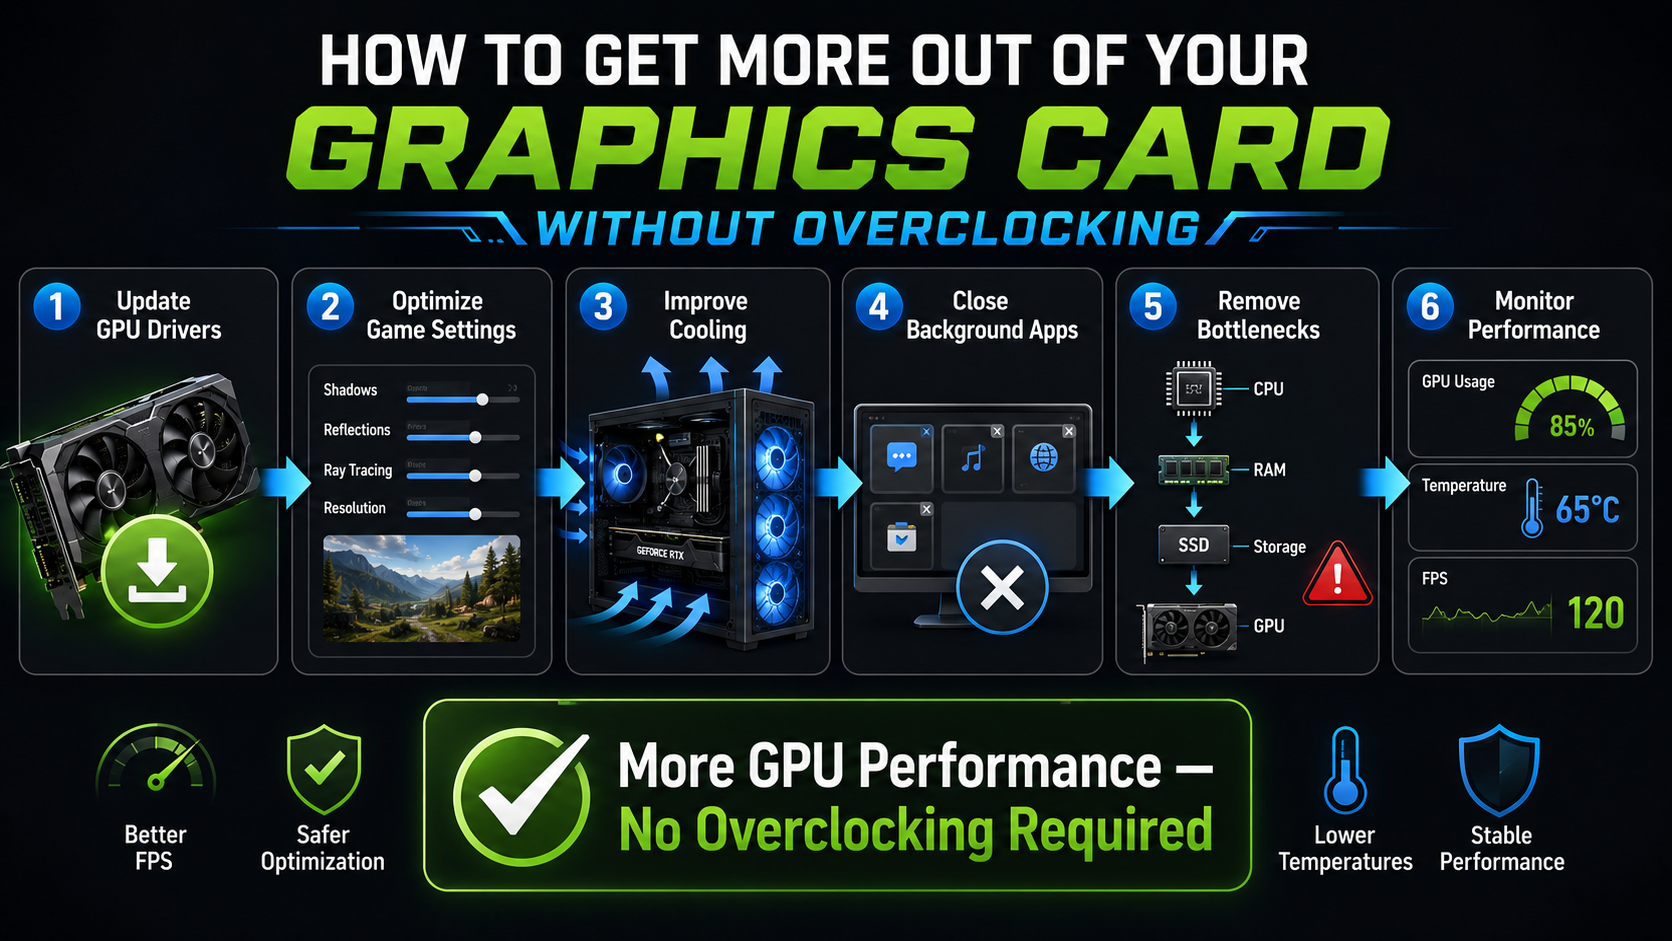
Keeping your graphics drivers updated can provide game optimizations, bug fixes, and performance improvements. Good airflow also helps your GPU maintain its normal boost behavior under sustained workloads.

This guide explains how to improve graphics performance without manually increasing clock speeds or voltage. It also answers common questions about GPU utilization, temperatures, bottlenecks, and frame rates.

You will learn how to:

  • Optimize in-game graphics settings.
  • Keep GPU drivers current.
  • Improve cooling and airflow.
  • Reduce CPU and system bottlenecks.
  • Monitor temperatures and utilization.
  • Avoid unnecessary clock and voltage changes.

These practical steps can help you achieve smoother gaming and creative workloads. They also let your hardware operate closer to its intended performance without unnecessary tuning risks.

Is GPU 90% Bad?

A 90% GPU usage reading is usually normal during demanding games or creative workloads. High utilization means your graphics card is using much of its available processing capacity. It does not automatically indicate a problem.

In fact, high usage can be a positive sign during gaming. When the GPU is the main performance limit, it is working efficiently to produce as many frames as possible.

The more important factors are temperature, stability, clock behavior, and performance consistency. A GPU running at 90% utilization with safe temperatures is generally operating as intended.

Problems can appear when high usage combines with excessive temperatures, poor airflow, driver issues, or unstable hardware. Your GPU may then reduce its clock speed through thermal or power management.

Monitoring Thermal Limits During High Loads

Monitor GPU temperature while playing demanding games or running intensive applications. Most modern graphics cards are designed to manage high workloads automatically.

Avoid treating a single temperature number as a universal safety limit. Different GPUs have different thermal specifications, so check your manufacturer’s documentation.

Watch for:

  • Unusually high temperatures.
  • Sudden clock-speed reductions.
  • Performance drops during long sessions.
  • Excessive fan noise.
  • Unexpected crashes or graphical artifacts.

Good case airflow and clean heatsinks help maintain stable temperatures. High utilization alone is not a reason to reduce GPU usage.

How to Avoid Overclocking a GPU?

You can avoid GPU overclocking by leaving clock speeds, voltage, and power settings at their default values. Modern graphics cards already use sophisticated boost algorithms within their designed operating limits.

Start by checking your GPU control software. Make sure manual frequency adjustments are disabled. Also review any automatic tuning features that may change performance settings.

Third-party utilities can be useful for monitoring temperatures and fan speeds. However, avoid automated overclocking modes if your goal is to keep the card at stock settings.

Keeping factory settings does not mean leaving performance on the table. Driver updates, game-specific optimizations, cooling improvements, and background-process management can improve real-world performance without changing clock targets.

You should also avoid increasing voltage simply to gain performance. Voltage changes can increase power consumption and heat while adding little practical benefit.

Sticking To Factory Default Settings

Restoring your GPU software to default settings is a simple way to prevent accidental tuning. Most graphics utilities provide a reset option for performance controls.

After resetting the settings, check that core and memory clocks use their normal automatic behavior. You can still customize safe options such as fan curves when supported.

Factory settings provide a reliable baseline for troubleshooting. If a game becomes unstable, you can investigate drivers, temperatures, software conflicts, or hardware issues without wondering whether an overclock caused the problem.

This approach also makes performance comparisons easier. You can measure changes after updating drivers or adjusting game settings while keeping the GPU configuration consistent.

How Do I Get More Out of Your Graphics Card?

The safest way to get more performance from your graphics card is to optimize everything around it. Start with your graphics driver and make sure you use a current, stable release.

Next, review the games or applications that you use most. Settings such as shadows, reflections, volumetric effects, and anti-aliasing can have a significant performance impact.

You do not always need to lower every setting. Instead, identify the options that consume the most GPU resources. A small reduction in demanding effects can produce smoother frame rates while preserving overall image quality.

Cooling also matters. Clean dust filters and unobstructed airflow help your GPU maintain its normal boost behavior. For better overall thermal management, air cooling vs liquid cooling is an important consideration when choosing a cooling approach. Thermal paste should only be replaced when there is a clear reason, such as aging paste or unusually high temperatures.

Optimizing In-Game Graphics Settings

Start by lowering settings that have a high performance cost. Shadows, reflections, volumetric effects, and ray tracing can significantly increase GPU workload.

Resolution scaling and upscaling technologies can also provide major performance gains. Supported features such as DLSS, FSR, or XeSS can improve frame rates while maintaining good image quality. Choosing the right display also matters, so learning how to choose the perfect gaming monitor can help you match resolution and refresh rate to your GPU’s capabilities.

Try changing one setting at a time. This approach helps you identify which option provides the best performance improvement.

For example, reducing shadow quality may provide a noticeable frame-rate increase with minimal visual impact. Lowering texture quality may have less benefit when your GPU has sufficient video memory.

Aim for a balance between image quality and responsiveness. You do not need maximum settings to enjoy a high-quality gaming experience.

How to Make a GPU Run 100%?

You should not try to force your GPU to reach 100% utilization at all times. Utilization depends on the application, resolution, frame-rate target, CPU performance, and graphics settings.

If your GPU usage remains low during a demanding game, investigate possible bottlenecks. A CPU limit, frame-rate cap, background process, or power-management setting may prevent higher utilization.

In CPU-limited games, faster system memory can sometimes improve performance. Enabling a supported XMP or EXPO memory profile may also help your system reach its rated memory speed, provided the configuration remains stable. Your processor can also influence overall gaming performance, making Intel Core Ultra processors relevant when evaluating CPU-related bottlenecks.

Fast storage mainly improves loading and asset-streaming behavior. It does not automatically increase GPU rendering performance.

You can increase resolution or graphical quality when your goal is to place more load on the GPU. However, this is useful only when you actually want higher image quality rather than simply higher frame rates.

Eliminating System Bottlenecks For Full Power

A GPU cannot perform at its maximum potential if another component limits the workload. This situation is known as a system bottleneck.

CPU limitations are common in games with high frame rates, large simulations, or complex game worlds. In these situations, GPU utilization may remain below 100% because the processor cannot prepare frames quickly enough.

System memory can also influence performance. Running compatible RAM at its rated speed may improve performance in CPU-bound workloads.

Storage has a different role. An NVMe SSD can reduce loading times and improve some asset-streaming scenarios, but it does not directly increase GPU processing power. If you’re considering faster storage, NVMe SSDs and their benefits, speed, and uses are worth understanding before upgrading.

Use monitoring software to identify the actual limitation before upgrading anything. Check CPU usage, GPU usage, temperatures, memory usage, and frame-time behavior.

Once you understand the bottleneck, you can make targeted improvements. This is more effective than changing settings without knowing what limits performance.

Is 100% GPU Usage Bad?

100% GPU usage is not inherently bad. During a demanding game, rendering workload, or GPU-accelerated application, maximum utilization can be completely normal.

High utilization often means the graphics card is being fully used. This can happen when you run a game at high resolution or aim for the highest possible frame rate.

The important factors are temperature, stability, power behavior, and performance. Modern GPUs include thermal and power-management protections that can reduce performance when operating conditions require it.

You should investigate the situation if maximum utilization comes with crashes, graphical artifacts, severe overheating, or unexpected performance drops. These symptoms may indicate cooling problems, driver issues, or hardware instability.

Good airflow is especially important during sustained workloads. Keep vents clear and remove accumulated dust from filters and heatsinks.

Understanding Hardware Self-Protection Mechanisms

Modern graphics cards use built-in safeguards to manage temperature, power, and operating conditions. These systems can reduce clock speeds or power consumption when necessary.

Thermal management is one reason a GPU can safely handle demanding workloads without manual intervention. The card continually monitors operating conditions and adjusts performance within its designed limits.

However, these protections do not make excessive heat harmless. Repeated operation near thermal limits can increase fan activity and may reduce sustained performance through throttling.

For that reason, monitoring remains important. Check your GPU temperature and clock behavior during the workloads you actually use.

If temperatures suddenly become higher than usual, inspect the fans, airflow, dust levels, and ambient temperature. A properly designed PC case for air and liquid cooling can also help maintain effective airflow and thermal performance. Driver or software changes can also affect power and performance behavior.

The goal is not to avoid high GPU usage. Instead, maintain stable temperatures and consistent performance while allowing the hardware to work as designed.

FAQ SECTION

What causes unexpected frame rate drops during gaming?

Frame rate drops typically occur due to thermal throttling, outdated display drivers, or background applications consuming critical system resources. Monitoring your hardware temperatures and closing unnecessary background tasks helps maintain steady performance. Keeping your operating system and graphics drivers updated resolves most sudden stuttering issues.

How often should I clean dust out of my computer?

You should inspect your computer system and clean internal dust filters every three to six months. Dust accumulation restricts airflow, causing internal temperatures to rise and forcing components to throttle performance. Regular cleaning ensures optimal cooling efficiency and extends overall hardware lifespan.

Does RAM speed affect graphics card performance?

System memory speed directly influences frame rate stability, especially in CPU-bound games and open-world titles. Faster memory and enabled XMP profiles reduce stuttering and ensure data reaches your rendering hardware without delays. Upgrading slow memory provides a noticeable boost to overall system responsiveness.

Are third-party tuning utilities safe to use?

Reputable software tools are generally safe if used cautiously to monitor temperatures and adjust fan curves. However, utilizing automated overclocking features within these applications can introduce instability and system crashes. Sticking to manual monitoring and fan profile adjustments is recommended for everyday users.

Conclusion

Optimizing your hardware does not require risky clock adjustments or voltage changes. You can get more from your GPU by improving the software and conditions around it.

Start with current graphics drivers and optimized game settings. Then check airflow, dust levels, temperatures, and background processes.

High GPU utilization is not automatically a warning sign. A GPU running near 100% can be working exactly as intended during demanding workloads.

Likewise, 90% utilization is generally normal when temperatures and performance remain stable. Focus on actual symptoms rather than utilization percentages alone.

System bottlenecks also deserve attention. CPU limitations, memory configuration, and other system factors can prevent your GPU from reaching higher utilization.

The safest approach is simple: keep factory clock and voltage settings, maintain effective cooling, and optimize software intelligently. These steps can improve frame rates and responsiveness without unnecessary hardware tuning.

With regular maintenance and sensible configuration, your graphics card can deliver reliable performance for gaming, rendering, and other demanding workloads.

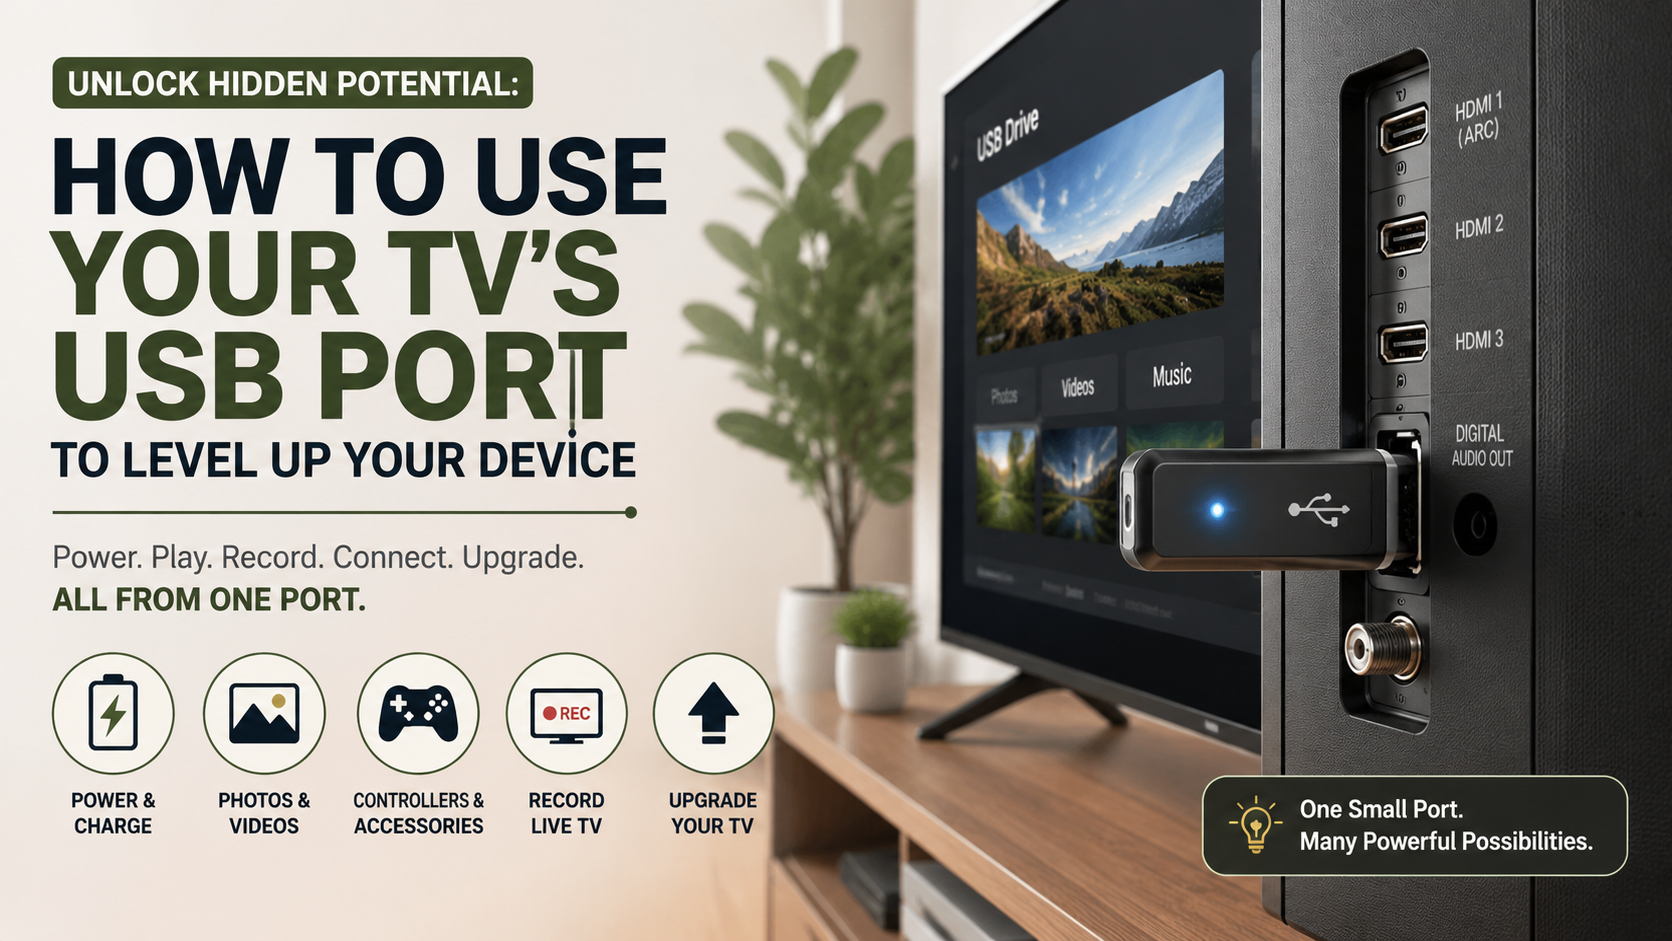
5 Ways To Use Your TV’s USB Port To Level Up Your Device

Unlock Hidden Potential: How to Use Your TV’s USB Port to Level Up Your Device

Have you ever looked at the back or side of your television and wondered what that small slot is for? Most people either use it to charge a device or ignore it completely. However, your TV’s USB port can offer several useful features for your home entertainment setup.

Depending on the television model, a USB connection can play media, provide power, support firmware updates, or connect compatible accessories. It can also help reduce cable clutter when powering certain streaming devices.

You can watch movies from a flash drive, browse photos, play music, or connect supported storage devices. Some televisions also support recording or time-shifting when compatible external storage is connected.

Modern TVs can pack several useful functions into their USB connections. Consumer Reports also covers the expanding capabilities found in modern televisions and their connections.

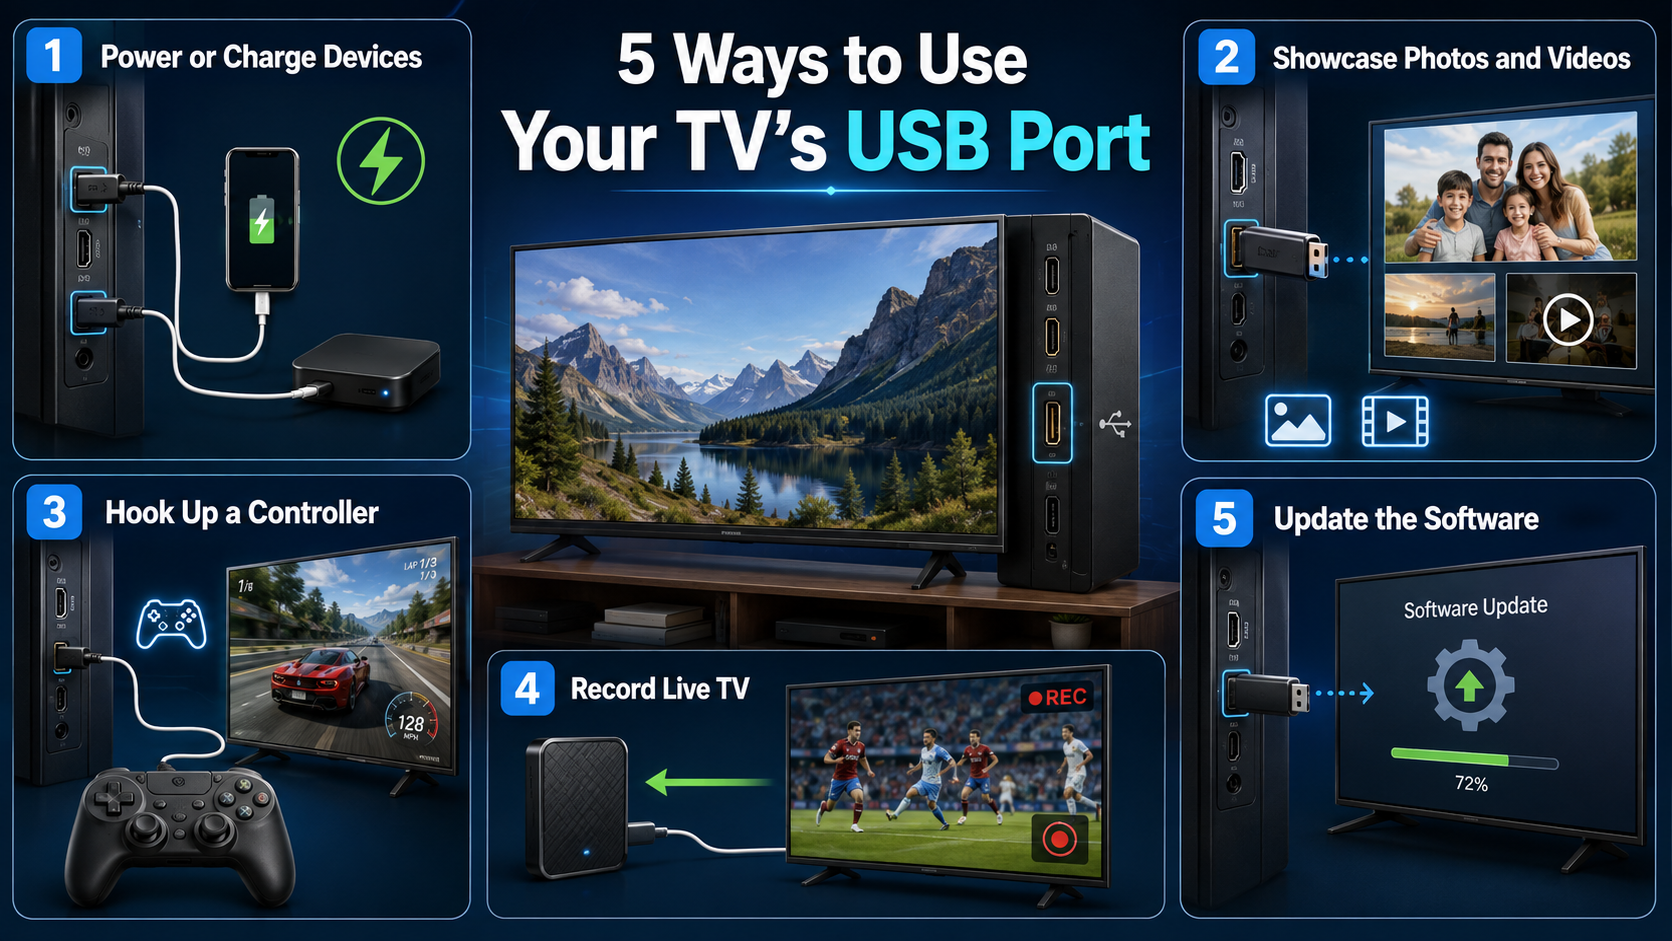
This guide answers five common questions about TV USB ports. You’ll learn how to use them, expand available connections, choose suitable storage formats, and power accessories. You’ll also discover how USB can support an upgrade for an older television.

1. Power or Charge Devices

One of the simplest uses for a TV’s USB port is supplying power. Many televisions can provide power to compatible low-power devices through their USB connections. This can help reduce the number of cables running to a nearby wall outlet.

You may be able to use the port for devices such as streaming accessories, LED lighting, or other USB-powered equipment. You can also connect some smartphones and other small devices for basic charging.

However, TV USB ports usually provide less power than dedicated wall chargers. Charging speeds can therefore be much slower.

USB power output also varies between television models. Some ports provide enough power for an accessory, while others may not.

Before powering a device, check its required voltage and current. If the device needs more power than the TV can provide, use its supplied wall adapter instead.

Never assume that every USB port on your TV provides the same output. The manufacturer’s specifications are the safest guide.

2. Showcase Photos and Videos

Your TV’s USB port can turn a simple flash drive into a convenient media library. If your television supports USB media playback, you can display photos and play compatible videos directly on the big screen.

Start by copying your photos or videos to a compatible USB drive. Insert the drive into the TV, then select the USB or media option using your remote.

Your TV should display supported folders and files. Select a photo to view it or choose a compatible video to start playback.

File compatibility depends on your television. The TV may support specific file systems, video containers, codecs, and audio formats.

For example, many TVs support common formats such as MP4 and H.264. However, support varies, so check your model’s specifications before transferring a large collection.

This feature can be especially useful for showing vacation photos, family videos, presentations, or downloaded media. It also eliminates the need to connect a laptop or other media player for basic playback.

3. Hook Up a Controller

Some modern televisions support USB controllers and gaming accessories. If your TV has compatible software or built-in gaming features, you may be able to connect a wired controller directly through its USB port.

Simply plug the compatible controller into the television’s USB connection. Your TV may recognize it automatically, or you may need to select an input or enable the accessory through its settings.

Compatibility varies considerably between television brands and operating systems. Some TVs support only specific controllers or USB accessories.

You can also use compatible USB keyboards and mice on certain smart TVs. These peripherals can make searching, browsing, and navigating apps easier.

If you plan to use a controller for cloud gaming or another gaming service, check whether your TV supports that controller. The gaming platform may also have its own compatibility requirements.

A USB connection can make your setup simpler by avoiding wireless pairing. However, a wired controller needs to remain connected to the TV while you use it.

Always check your TV’s supported accessories before purchasing a new controller.

4. Record Live TV

Some televisions can use a USB port for recording live TV. This feature allows you to connect compatible external storage and save supported broadcasts for later viewing.

The exact recording options depend on your TV, tuner, region, and broadcast system. Some models may support recording, pausing, or rewinding live television.

If your TV supports this feature, you may need to connect a USB flash drive or external hard drive. The television may also require you to format the storage device before recording.

Formatting can erase existing files, so back up important data first. Some TVs may also require a minimum storage capacity or a specific type of drive.

Recording restrictions can apply as well. Certain broadcasts may prevent recording because of copyright or broadcast protection rules.

Check your TV’s manual for supported storage devices and recording features. Do not assume that every USB port can record live TV.

When supported, USB recording can be useful for watching programs later. It can also provide convenient time-shifting features without requiring a separate recorder.

5. Update the Software

A TV’s USB port can also help install firmware or software updates. This can be particularly useful when your television cannot download an update through an internet connection.

Some manufacturers provide firmware files that can be copied to a USB drive. You then connect the drive to the TV and follow the on-screen update instructions.

The process differs between manufacturers. You must use the correct firmware version for your exact TV model.

Never install software intended for a different television model. Using an incorrect update can cause serious software problems.

You should also avoid turning off the television or removing the USB drive while an update is running. Interrupting the process could prevent the TV from starting correctly.

Before updating, read the manufacturer’s instructions carefully. Use a compatible USB drive and follow the required folder and file structure.

USB firmware updates are less common for everyday users than automatic online updates. Still, they provide a useful backup option when internet-based updating is unavailable.

Once the update finishes, remove the USB drive only when the TV tells you it is safe to do so.

How Do I Use the USB Port on My TV?

Using the USB port on your TV is usually simple once you know what the connection supports. Start by checking your television’s manual or specifications. Different models can assign different functions to their USB ports.

If your TV supports media playback, copy compatible movies, photos, or music to a USB flash drive. Insert the drive into the USB port, then press the Source, Input, or Home button on your remote.

Select the USB or media option from the available sources. Your television should then display folders and supported files. Select a file to start playback and use your remote to control it.

The supported file system and media formats vary by television. Some models support FAT32, exFAT, or other formats, while others have more limited compatibility.

USB ports can also support firmware updates or accessories on certain models. Always check the manual before connecting an unfamiliar device. This helps you avoid compatibility problems and ensures you use the port correctly.

Safely Ejecting Your Storage Device

Before removing a USB flash drive, stop playback and exit the media application. If your television provides an eject or unmount option, use it before disconnecting the drive.

Removing a storage device while it is actively reading or writing data can sometimes cause file corruption. It may also make the drive harder to access on another device.

A safe removal process only takes a few seconds. It is especially useful when your USB drive contains important photos, videos, or other files.

If your television does not provide an eject function, wait until playback has stopped before removing the drive. Avoid unplugging it while a file is loading or being transferred.

This simple habit helps protect your stored content and reduces unnecessary problems with the USB drive.

How to Increase USB Ports on TV?

Most televisions provide only one or two USB ports. That can become inconvenient when you want to connect several accessories at once. You might need a storage drive, LED lighting, or another compatible USB device.

A USB hub can potentially expand the number of available connections. However, your television must support USB hubs for this solution to work properly.

A powered USB hub can be useful when connected devices require more power. Instead of drawing all available electricity from the TV, the hub receives power from a separate wall outlet.

This setup can provide more stable power for compatible accessories. It can also reduce the need to repeatedly unplug devices from the television.

When choosing a hub, check your TV’s specifications first. USB 3.x can offer faster data transfer than older USB standards, but the TV and connected devices must support those speeds.

A hub also does not automatically give every connected device full functionality. The television’s operating system determines which accessories it can recognize.

For the best results, choose a compatible hub with enough ports and suitable power output. A powered model may be preferable for several connected accessories.

Choosing the Right USB Hub

Choosing the right USB hub for your TV depends on your television and connected devices. First, confirm that the TV supports USB hubs. Some models may recognize only specific accessories or may not support hubs at all.

A multi-port hub can be useful when you regularly connect several low-power devices. If your accessories require significant power, a powered hub is generally more practical.

Individual power switches can also make a hub easier to manage. You can turn specific accessories off without removing their cables.

Before buying, consider these factors:

  • Compatibility: Check whether your TV supports USB hubs.
  • Power: Choose enough power for your connected accessories.
  • USB standard: USB 3.x may provide faster data transfers.
  • Port count: Select enough connections for your setup.
  • Cable length: Make sure the hub can reach your TV comfortably.

Remember that a hub cannot overcome limitations built into your television. If the TV does not support a particular USB device, adding a hub will not necessarily make it compatible.

What USB Format Should I Use for Watching Movies on My TV?

Choosing the right USB format for watching movies on your TV is important. Your television must recognize the drive before it can access your media files.

FAT32 is widely supported, but it has a major limitation. Individual files cannot exceed about 4 GB. This can make FAT32 inconvenient for large high-definition or 4K video files.

exFAT supports much larger individual files and works with many newer televisions. However, you should not assume that every TV supports exFAT. Compatibility varies between manufacturers and models.

Always check your television’s specifications before formatting a USB drive. Formatting usually erases the existing contents, so back up important files first.

The drive’s file system is only one part of media compatibility. Your TV must also support the video’s container, codec, and audio format.

MP4 with H.264 video and AAC audio is widely supported, but compatibility still varies. Some televisions also support MKV, HEVC/H.265, or other formats.

For reliable playback, check your TV’s supported formats before transferring your movie collection. This can prevent frustrating playback errors and unnecessary file conversions.

Checking Video Codec Compatibility

Even when your television recognizes the USB drive, a movie may still fail to play. The problem can come from an unsupported video codec, container, or audio format.

A file such as MP4 describes the container. The actual video and audio inside that container use separate codecs. Your TV needs to support both the video and audio formats.

H.264 is widely supported across many televisions. Newer models may also support H.265, also called HEVC. However, support can vary based on resolution, bitrate, audio format, and television model.

If a movie produces an error message, check your TV’s media specifications first. Converting the file to a supported combination can resolve compatibility problems.

Do not assume that every MP4 file will play automatically. Two MP4 files can use different codecs and produce different playback results.

For the smoothest experience, use formats listed in your television’s official specifications. This approach is more reliable than converting every file unnecessarily.

What Is the USB Port on the Back of My TV For?

The USB port on the back of your TV can serve several purposes. Its exact function depends on the manufacturer, model, and port label.

Some USB ports support media playback. You can connect a flash drive and play compatible movies, photos, or music directly through the television.

Other ports provide power to compatible accessories. Certain streaming devices, LED lighting products, and other low-power equipment may work through a TV USB connection.

USB ports can also support firmware updates. Some televisions allow users to install software updates from a flash drive when an internet connection is unavailable.

Certain models support external storage for features such as recording or time-shifting live broadcasts. These features depend on the TV’s software, tuner, region, and manufacturer restrictions.

Check the labels beside your TV’s USB connections. A port marked Service Only may be intended for maintenance or diagnostics rather than media playback.

Never assume that every USB port on the same television performs the same function. Your owner’s manual remains the best source for model-specific information.

Powering Smart Streaming Accessories

Using your TV’s USB port to power a streaming device can help create a cleaner entertainment setup. It may remove the need for a separate power adapter and reduce cable clutter.

However, USB power output varies between televisions. Some ports provide more power than others, so you should check the TV’s specifications before relying on USB power.

The streaming device must also support the available power level. If the connection cannot provide enough power, the device may restart, shut down, or behave unpredictably.

For this reason, do not assume that every streaming stick can run reliably from every TV USB port. Follow the streaming device manufacturer’s power requirements.

If the TV cannot provide sufficient power, use the supplied wall adapter instead. Stable power is especially important during demanding tasks, such as high-resolution streaming.

A USB-powered setup can be convenient, but reliability should come before cable management. Check both devices’ specifications before making the connection.

Can I Turn Any Smart TV Into a Smart TV?

The wording of this question can be confusing. You cannot turn a standard or non-smart TV into a smart TV using USB alone. USB primarily handles data and power rather than the high-definition video connection required for a streaming interface.

However, many older televisions can be upgraded with an HDMI streaming device. Connect the streaming device to an available HDMI input on the TV. If supported, use the nearby USB port to provide power.

This combination can give an older display access to modern streaming services and applications. The exact services available depend on the streaming device and your region.

A compatible HDMI connection is essential. USB power cannot replace the HDMI connection because the two ports perform different jobs.

An external streaming device can also improve an older smart TV. If the built-in software feels slow or no longer receives useful updates, an external device may offer a faster interface.

Before buying anything, check your television’s HDMI inputs and the streaming device’s power requirements. Some older displays may also need additional adapters for compatibility.

Maximizing Older Display Hardware

Pairing an HDMI streaming device with your TV’s USB port can make an older display more convenient. The HDMI connection carries the picture and sound, while USB may provide power when supported.

This setup can reduce cable clutter, especially when the television is wall-mounted. It can also help you avoid relying on outdated built-in TV software.

External streaming devices often provide their own interfaces and app ecosystems. Their available services and features depend on the specific device and software.

Before connecting one, check that your TV has a compatible HDMI input. Then verify whether its USB port provides enough power for the streaming device.

If the TV USB port cannot supply sufficient power, use the included power adapter. This can prevent unexpected restarts and other performance issues.

An external streaming device will not change the physical display capabilities of your television. However, it can add modern streaming features to a compatible older screen.

This makes the USB port a useful supporting connection rather than a replacement for HDMI.

Frequently Asked Questions

Can I charge my smartphone using my TV’s USB port?

Yes, you can plug your smartphone charging cable into a TV USB port to draw power, but it will charge much slower than a dedicated wall adapter. Most television USB ports output around 0.5 to 1.0 amps, whereas modern wall chargers push much higher wattage. It works well in a pinch, but do not expect fast charging speeds.

Why won’t my TV recognize my USB flash drive?

If your television refuses to read your flash drive, the issue usually stems from an incompatible file system format or partition style. Televisions typically cannot read drives formatted in NTFS or Apple’s APFS. Reformatting your flash drive to exFAT or FAT32 on a computer will usually resolve the recognition problem instantly.

Can I connect a USB mouse and keyboard to my TV?

Many modern smart televisions support basic USB mice and keyboards for easier web browsing and typing in search fields. You can plug a wired USB peripheral or a wireless USB dongle directly into the port. However, compatibility varies by manufacturer and operating system, so check your specific user manual for confirmation.

Do all TV USB ports support playing movies?

No, not all TV’s USB port are built for media playback. Some budget televisions feature USB ports labeled as “Service Only,” which are strictly reserved for factory diagnostics and firmware updates. These specific ports lack the internal hardware drivers necessary to read media files, photos, or movies from an external storage drive.

Conclusion

Unlocking the full potential of your display comes down to understanding the versatile capabilities hidden right on the back panel. Throughout this guide, we explored how to use your TV’s USB port to play local media, expand connections with powered hubs, format storage drives correctly, power streaming hardware, and modernize older screens. By leveraging these techniques, you can enhance your home entertainment setup without spending extra money on new equipment. Take a moment today to check your television inputs, organize your media libraries, and apply these practical tips to enjoy a smoother viewing experience.

For an even better home entertainment setup, your TV can benefit from the features already available on your home network. Your Wi-Fi router can help manage connected devices, improve coverage, and even support network storage for sharing media across compatible devices. For more ideas, check out our guide on cool things your Wi-Fi router can do.

How Noise Cancellation Works: The Science Explained

Understanding How Noise Cancellation Works in Modern Audio Devices

Have you ever wondered how headphones silence airplane engines or office chatter? Understanding how noise cancellation works reveals the clever science behind modern audio devices. Active noise cancellation uses microphones and digital processors to reduce unwanted ambient sounds before they reach your ears.

According to the Acoustical Society of America, sound manipulation plays an important role in controlling unwanted environmental noise. Active noise cancellation uses a principle called destructive interference to reduce external sounds.

This article explains the science behind noise cancellation in simple terms. It also covers its limitations, safety, benefits, and everyday uses. You will learn why some sounds are easier to cancel than others. You will also discover what to consider before buying noise-cancelling headphones.

What Is Noise Cancellation and How Does It Work?

Understanding how noise cancellation works starts with the basic properties of sound waves. Noise cancellation is an audio technology that reduces unwanted sounds around you. Sound travels through the air as pressure waves with peaks and valleys.

Active noise cancellation, or ANC, uses small microphones to detect surrounding sounds. A digital signal processor then analyzes the captured sound. It creates a second sound wave with the opposite phase.

When the original sound and inverse wave meet, destructive interference occurs. Their opposing pressure patterns reduce the overall sound energy. This process happens continuously and within a very short time.

ANC works especially well with predictable sounds. Examples include airplane engines, air conditioners, and train noise. These sounds usually contain steady, low-frequency patterns.

Passive isolation also plays an important role. Ear cups and ear tips physically block some external noise. Combining passive isolation with ANC provides stronger overall noise reduction.

The Role of Microphones and Processors

Microphones and processors are essential to understanding how noise cancellation works in modern headphones. External microphones monitor sounds around the listener. Some models also use internal microphones to monitor sound inside the ear cup.

The digital signal processor analyzes these signals in real time. It then creates an opposing waveform designed to reduce the detected noise. This process repeats continuously as the surrounding sound changes.

The microphones and processor must work extremely quickly. Even small delays can reduce cancellation effectiveness. Advanced ANC systems use carefully tuned algorithms to improve timing and accuracy.

Some headphones use feedforward, feedback, or hybrid ANC systems. Feedforward microphones monitor external noise before it reaches the ear. Feedback microphones monitor the sound closer to the listener.

This technology reduces unwanted background noise without requiring higher music volumes. As a result, users can enjoy clearer audio in many noisy environments.

Is 100% Noise Cancellation Possible?

Understanding how noise cancellation works also explains why complete silence is difficult to achieve. Reaching 100% noise cancellation is not currently possible with consumer headphones. ANC can reduce many unwanted sounds dramatically, but it cannot remove every sound.

Active noise cancellation works best with steady, predictable, low-frequency sounds. Airplane engines, air conditioners, and constant road noise are good examples. Their consistent patterns give the processor enough information to create an effective inverse wave.

Sudden and unpredictable sounds are much harder to cancel. Voices, clapping, sirens, and sharp noises can change rapidly. Their frequencies and wave patterns may shift before the system can respond accurately.

Passive isolation also has physical limitations. Ear cups and ear tips can block some external sound. However, they cannot completely seal every sound pathway.

ANC performance also varies between headphone designs. Ear shape, fit, microphone placement, and processing quality all matter. A poor seal can reduce noise reduction even when the internal technology is advanced.

Therefore, modern ANC headphones should be viewed as noise-reduction devices, rather than perfect silence machines.

Limitations With High Frequencies

High-frequency sounds create particular challenges for active noise cancellation. Their wavelengths are shorter, and their patterns can change rapidly. This makes accurate phase matching more difficult.

Human voices demonstrate this limitation clearly. Speech contains many changing frequencies and irregular patterns. ANC may reduce some vocal sounds, but it rarely removes conversations completely.

Sudden noises create another challenge. A shout, horn, or dropped object may happen too quickly for the system to cancel effectively. Some of the original sound can reach the listener before the processor responds.

This limitation is important when considering how noise cancellation works in everyday environments. ANC does not perform equally well across every frequency range.

Modern headphones can still reduce some higher-frequency sounds. They achieve this through a combination of active noise cancellation and passive isolation.

The physical design of the headphones also matters. Well-fitting ear cups or ear tips provide additional sound reduction. Together, passive isolation and active processing offer broader background noise reduction.

What Does Noise Cancellation Work Against?

Active noise cancellation works primarily against continuous and predictable low-frequency sounds. These sounds usually follow patterns that the headphones can detect and analyze effectively.

Common examples include airplane engines, train movement, traffic rumble, and computer fans. Air conditioners and other mechanical equipment can also create ideal conditions for ANC.

The microphones continuously monitor the surrounding environment. The processor identifies unwanted sound patterns and generates an opposing waveform. This process helps reduce the perceived intensity of the original noise.

Low-frequency sounds are especially suitable for ANC because they often remain relatively consistent. Their longer wavelengths also give the system more time to process changes.

This makes noise-cancelling headphones particularly useful during travel. They can reduce engine rumble on airplanes, trains, and buses. They can also make focused work more comfortable in noisy environments, especially when paired with music that can support memory and focus.

However, ANC does not remove every sound equally. Sudden noises and complex sounds can remain noticeable. The best results usually come from combining active noise cancellation with passive sound isolation.

Targeting Steady Low Frequencies

Steady low-frequency sounds create a consistent baseline that ANC systems can track. Their predictable patterns make it easier for processors to generate suitable inverse waves.

For example, an airplane engine produces continuous background noise. The headphones can monitor this sound and continuously adjust their anti-phase signal.

The same principle applies to air conditioners, ventilation systems, and some traffic noise. These sounds tend to change more gradually than speech or sudden impacts.

ANC does not need to make the inverse signal perfect to be useful. Even partial cancellation can significantly reduce perceived background noise. This can make music and spoken audio easier to hear.

The headphone fit also affects performance. A good seal improves passive isolation and supports the overall cancellation effect. Poorly fitting headphones may allow more external noise to enter.

As a result, steady low-frequency noise remains the strongest target for ANC technology. This explains why noise cancellation often feels most impressive on airplanes and during long commutes.

Is Noise Cancellation Safe for Your Ears?

Using noise-cancelling headphones at appropriate listening levels is generally considered safe. In some situations, ANC may even help users listen more comfortably at lower volumes.

Background noise can encourage people to increase their music volume. This habit can expose the ears to excessive sound levels for long periods. ANC reduces some background noise, which may make lower listening levels more practical.

However, noise cancellation itself does not make loud listening safe. Excessive volume can still damage hearing over time. Users should therefore keep listening levels moderate and take regular breaks.

Some people experience a mild feeling of pressure when ANC is enabled. Others may notice slight discomfort or dizziness. These sensations can vary between individuals and usually relate to how the brain perceives reduced low-frequency sound.

ANC headphones should also be used responsibly in public spaces. Strong noise reduction can make it harder to hear traffic, alarms, or other important environmental sounds.

For these reasons, safe listening habits remain essential, even when using advanced noise-cancelling technology.

Protecting Hearing Through Lower Volumes

Listening at lower volumes is one of the most important ways to support long-term hearing health. Loud sounds can damage sensitive structures inside the inner ear when exposure is excessive or prolonged.

ANC can make lower-volume listening easier in noisy environments. Users may not need to compete with airplane engines, traffic, or office chatter by increasing their music volume.

A comfortable listening level should remain the priority. Turning ANC on should not be treated as permission to listen at maximum volume.

Good habits include taking regular listening breaks and avoiding unnecessarily loud settings. Users should also choose headphones that fit comfortably and provide suitable passive isolation.

Noise cancellation can therefore support healthier listening habits when used correctly. Its main benefit is reducing background noise, not making high-volume listening harmless.

If you experience persistent ringing, discomfort, or changes in hearing, consider speaking with a qualified healthcare professional. These symptoms should not be ignored.

What Are the Disadvantages of Noise-Cancelling Headphones?

Noise-cancelling headphones offer major benefits, but they also have some drawbacks. Understanding these limitations can help you decide whether ANC suits your needs. Keeping headphones clean and well maintained can also support their long-term usability, so proper headphone cleaning and maintenance is worth considering.

First, ANC headphones often cost more than comparable standard headphones. Their microphones, processors, batteries, and additional circuitry increase manufacturing costs.

Battery life is another consideration. Active noise cancellation requires electronic processing, which consumes power. Wireless models may need frequent charging when ANC is used regularly.

Some users also experience a mild pressure sensation or discomfort. Others simply dislike the feeling of being isolated from their surroundings.

Strong noise reduction can create safety concerns in certain situations. Walking near traffic while blocking environmental sounds may reduce awareness of vehicles, cyclists, or warnings.

Some ANC systems can also produce a faint hiss or slightly change the perceived sound. The effect varies between models and listening environments.

Key disadvantages include:

  • Higher purchase costs than many conventional headphones.
  • Battery consumption from continuous ANC processing.
  • Limited cancellation of voices and sudden sounds.
  • Reduced environmental awareness in some situations.
  • Possible audio artifacts or mild pressure sensations.

Battery Consumption and Cost Factors

Active noise cancellation requires continuous electronic processing. The microphones must monitor surrounding sounds, while the processor calculates adjustments in real time.

This process consumes battery power. Wireless headphones may therefore provide different battery performance with ANC enabled or disabled.

Battery capacity and hardware efficiency vary between models. Premium headphones often use more advanced processors and optimized power management.

Cost is another factor worth considering. ANC headphones contain additional microphones, processing hardware, and related components. These features can increase the final retail price.

However, higher cost does not automatically mean better noise cancellation. Headphone fit, microphone design, software algorithms, and tuning all influence real-world performance.

Before buying, consider where you will use the headphones most often. Frequent travelers may value strong engine-noise reduction. Office users may prioritize comfort and voice handling.

Comparing battery life, ANC performance, comfort, and price can help you choose a model that fits your needs.

Frequently Asked Questions

Can noise cancellation work without playing any music?

Yes, you can use active noise-cancelling headphones purely for silence. Many people wear them in noisy offices or during flights simply to block out ambient sound without listening to audio tracks, helping them focus or sleep better.

Do noise-cancelling headphones block human voices completely?

No, they do not block human speech entirely. Because speech features dynamic, mid-to-high frequencies and rapid variations, active systems struggle to cancel voices completely, though they muffle conversations into faint murmurs.

Does turning on noise cancellation affect audio quality?

It can slightly alter sound perception in some models. The phase-inversion process sometimes introduces a faint background hiss or subtly colors the bass response, though top-tier brands minimize this artifact effectively.

Can noise-cancelling headphones be wired, or must they be wireless?

They can be both. While most modern noise-cancelling headphones connect via Bluetooth, many models also include a wired cable option that still powers the active cancellation circuitry through an internal battery.

Conclusion

Understanding how noise cancellation works reveals the clever engineering behind modern audio devices. Microphones detect surrounding sounds, while processors create opposing waves to reduce unwanted noise.

ANC works particularly well against steady, low-frequency sounds. Airplane engines, air conditioners, and continuous traffic rumble are common examples. Sudden sounds and human voices remain more difficult to cancel.

Noise cancellation can also support better listening habits. By reducing background noise, it may help users enjoy audio at more comfortable volume levels, whether they listen to music through YouTube Premium or Spotify Premium.

However, ANC has limitations. It can increase cost and battery consumption. Some users may also experience mild pressure or reduced awareness of their surroundings.

Choosing the right headphones depends on your environment and listening habits. Consider ANC performance, passive isolation, comfort, battery life, and sound quality before making a purchase.

With realistic expectations, noise-cancelling headphones can make travel, work, and everyday listening much more comfortable.

Free Tools for Aspiring Designers: 7 Picks to Master

Free Tools for Aspiring Designers: 7 Picks to Master

Entering visual design can feel overwhelming, especially when professional software comes with expensive subscriptions. Fortunately, many capable design platforms now offer free options for beginners. Learning about the free tools for aspiring designers can help you build practical skills without a large upfront investment.

Whether you create social media graphics, edit photos, design interfaces, or explore digital illustration, the right tools can support your learning journey. Popular options include image editors, vector design software, layout tools, and browser-based platforms.

This guide explores useful design software, AI-powered options, and essential design principles. It also explains how to choose tools based on your goals. You can experiment with different workflows before paying for premium software.

For guidance on web accessibility and standards, you can also refer to the World Wide Web Consortium (W3C). The goal is not to master every application. Instead, focus on building strong design skills and creating portfolio projects that demonstrate them.

What Are Some Free Tools for Designers?

Aspiring designers can choose from many capable free design tools. These platforms cover different creative needs, including image editing, vector graphics, page layouts, and interface design. The best choice depends on the type of work you want to create.

GIMP is useful for photo editing and raster-based image manipulation. Inkscape focuses on vector graphics and provides tools for illustrations, icons, and scalable artwork. Scribus offers an open-source option for page layout and desktop publishing projects.

For interface and collaborative design, Figma provides a browser-based workflow with a free Starter plan. Its free offering includes unlimited drafts and collaboration features, although some advanced capabilities require paid access.

Other tools may suit specific needs better. Photographers may prefer image editors, while illustrators may need drawing software. Start with one tool that matches your goals. Then add another when your projects require it.

Leveraging Open-Source Alternatives

Open-source design software can reduce your dependence on expensive subscriptions. It also gives beginners an opportunity to learn professional concepts through accessible tools. Programs such as GIMP, Inkscape, Krita, and Scribus cover several major areas of digital design.

One advantage of open-source software is its community-driven development model. Users can access documentation, tutorials, extensions, and community discussions. These resources can make it easier to troubleshoot problems as you learn.

Open-source tools can also strengthen transferable skills. Understanding layers, paths, typography, masks, grids, and color systems matters more than memorizing a particular interface. Those concepts often appear across different design applications.

However, free does not automatically mean better. Some open-source applications have steeper learning curves than commercial alternatives. Their interfaces may also feel less familiar to beginners.

Choose software based on your project rather than its price alone. Use open-source tools to practice consistently and build real projects. Once your workflow becomes clear, you can decide whether premium software offers enough additional value to justify its cost.

Which Free AI Tool Is Best for Designing?

There is no single best AI design tool for every project. Your ideal choice depends on whether you need images, layouts, text effects, editing, or concept development. AI can speed up repetitive work, but it should not replace fundamental design skills.

Adobe Firefly is a strong option for designers who want AI-assisted creative workflows. The platform includes generative AI models and tools designed specifically for creative work. According to Adobe, its Firefly models are trained using licensed content and public-domain content rather than customer content.

Microsoft Designer is another option for AI-assisted graphics and image creation. Microsoft states that Designer uses AI powered by DALL-E to generate images from user ideas and prompts.

AI tools are especially useful during early concept development. You can generate ideas, explore visual directions, and create starting points quickly. However, generated content still needs human judgment.

Always check the current plan, usage limits, and licensing terms before using AI-generated assets commercially. These conditions can change over time.

Maximizing AI Efficiency

AI works best when you treat it as part of your design workflow. It should help you explore ideas, overcome creative blocks, and reduce repetitive work. It should not become a substitute for learning composition, typography, hierarchy, or visual communication. For more options, explore best AI tools for image generation for creative workflows.

Start with a clear objective before writing a prompt. Describe the subject, style, audience, format, mood, and important visual requirements. Specific instructions usually give you more useful starting points.

You can also generate several variations instead of accepting the first result. Compare them against your design goal and identify what works. Then refine the strongest direction manually.

For example, AI can suggest a social media composition. You can then adjust spacing, typography, colors, and alignment yourself. This process develops your design judgment while still saving time.

Remember that AI-generated output can contain mistakes. Review images, text, proportions, and visual details before publishing anything. Also check usage rights when working on commercial projects.

The strongest workflow combines AI speed with human decision-making. Your final design should communicate a clear message rather than simply demonstrate what an AI tool can generate.

What Are the 7 Basic Elements of Design?

The seven basic elements of design are line, shape, color, value, form, texture, and space. These elements provide the visual building blocks used in many forms of graphic and digital design.

Line can define boundaries, guide attention, or create movement. Shape gives objects structure and helps organize a composition. Color influences mood, emphasis, identity, and visual relationships. Value describes the lightness or darkness of an area and helps create contrast.

Form represents three-dimensional qualities. It can make an object appear solid or dimensional. Texture adds visual or tactile character to surfaces. Space controls the distance between elements and helps prevent crowded layouts.

These elements work together rather than independently. A strong design uses them intentionally to communicate information. For example, contrast between color and value can make an important heading easier to notice.

Learning these principles is often more valuable than learning a specific application. Software changes, but fundamental design concepts remain useful across different tools and industries.

Practice each element through small projects. Create layouts that focus on spacing, then experiment with color or contrast. Over time, these exercises can improve your visual judgment and make your designs more deliberate. You can also experiment with setting up constraints to inspire creative thinking when developing practice projects.

Applying Foundation Principles

Knowing the seven elements is only the beginning. The real challenge is using them together to create clear and balanced compositions. Beginners often focus heavily on decoration while overlooking hierarchy, spacing, and consistency. Understanding how design constraints create better products can also help you think more deliberately about design decisions.

Start by deciding what viewers should notice first. Then use size, position, contrast, color, and space to guide their attention. This creates a clear visual hierarchy and makes information easier to understand.

Consistency also matters. Repeated typography, spacing, colors, and alignment can make different parts of a design feel connected. A consistent system is especially important when creating branding materials or multi-page layouts.

Balance is another useful principle. A composition does not always need perfect symmetry. Instead, visual weight should feel intentional and stable.

Before finishing a project, step back and evaluate the overall result. Ask whether the main message is obvious and whether unnecessary elements distract from it.

You can also test your design at different sizes. A layout that looks good on a large monitor may become difficult to read on a phone.

The more projects you complete, the easier these decisions become. Use free tools as practice environments. Focus on solving communication problems rather than simply making attractive graphics.

What Are the Top 10 Tools for Graphic Design?

The top 10 graphic design tools in this broad beginner-friendly list are Canva, Adobe Express, GIMP, Inkscape, Figma, Krita, Gravit Designer, Pixlr, Vectr, and Blender. They cover different areas of creative work, so they should not be treated as interchangeable applications.

Canva and Adobe Express are useful for quick graphics, social content, presentations, and marketing materials. GIMP and Pixlr focus more heavily on image editing. Inkscape and Vectr are designed around vector graphics.

Figma is particularly useful for interface design, prototypes, and collaborative workflows. Its current Starter plan is free, although advanced features are limited compared with paid plans.

Krita is well suited to digital painting and illustration. Blender extends beyond traditional graphic design into 3D modeling, animation, and visual production.

Not every tool will fit your goals. A beginner creating Instagram graphics does not need the same software as someone learning 3D design.

The important point is to choose tools based on the work you want to produce. Free software can give you enough functionality to practice, experiment, and build portfolio projects before investing in premium applications.

Choosing Your Core Toolkit

Having access to many design tools can create another problem: spending more time comparing software than actually designing. Beginners usually benefit from mastering a small core toolkit first.

Start with two or three applications that match your primary goals. For example, a beginner interested in social media design could combine Canva with an image-editing tool. Someone interested in vector illustration could focus on Inkscape and a raster editor.

If you want to learn interface design, Figma may deserve priority because it supports design, prototyping, inspection, and collaboration. Its free Starter plan provides a practical entry point, although it has limits on certain advanced features. For broader guidance, see how to design a website that is mobile friendly.

Do not choose software simply because it appears frequently in design tutorials. Choose it because it supports the projects you want to create.

Once you become comfortable with your core tools, add specialized applications when necessary. This approach keeps your learning focused and prevents tool overload.

Your portfolio should demonstrate problem-solving, not the number of applications you know. Strong concepts and polished execution matter more than a long software list.

Is Canva Better Than Illustrator?

Canva and Adobe Illustrator solve different design problems, so calling one universally better is misleading. Your choice should depend on the type of project, required precision, and your experience level.

Canva focuses on speed and accessibility. Its templates and simplified controls make it useful for social media posts, presentations, marketing graphics, and other quick visual materials. Beginners can create polished layouts without learning every technical aspect of graphic production.

Adobe Illustrator, by comparison, is a professional vector graphics application. It provides detailed control over paths, anchor points, shapes, typography, and scalable artwork. That precision makes it useful for branding, illustration, icons, packaging, and other projects requiring custom vector assets.

Canva is often the easier starting point. Illustrator offers deeper control when a project requires precise construction and customization.

The difference becomes clearer when you consider the final output. A quick promotional graphic may benefit from Canva’s efficiency. A custom logo system may require Illustrator’s vector workflow.

Neither application replaces strong design principles. A poor composition remains poor regardless of the software used.

Choose Canva when speed and simplicity are priorities. Choose Illustrator when detailed vector control is central to the project.

The Professional Workflow Balance

Using Canva and Illustrator together can create a practical workflow. Each application can handle the tasks for which it is best suited.

A designer might build a custom icon, illustration, or logo asset in Illustrator. The finished vector artwork can then become part of a broader content system. Canva can help turn those assets into social media graphics, presentations, or marketing materials.

This approach separates asset creation from content production. It can save time when a business needs many variations of similar designs.

The workflow also helps maintain consistency. Custom assets can provide a distinctive visual identity, while templates make repeated content easier to produce.

However, moving between applications is not always necessary. If Canva already provides everything a project needs, adding Illustrator may create unnecessary complexity.

Similarly, using Illustrator for simple social media graphics can slow down production. The best workflow depends on the project’s requirements.

Beginners should first understand what each tool does well. Then they can decide whether combining them actually improves efficiency.

The goal is not to use more software. The goal is to produce better work with less wasted effort. Build a workflow around your design needs, deadlines, and required level of control.

Free Design Tool Online: What Should You Use?

Finding a free design tool online is easier than ever. Browser-based platforms reduce installation requirements and let you work from compatible computers with an internet connection. This makes them useful for students, freelancers, and beginners who work across multiple devices.

Canva, Pixlr, and Figma are examples of browser-based design platforms. Their workflows differ, but each can support common creative tasks. Figma is particularly useful for interface design and collaboration, while Canva focuses on accessible visual content creation.

Cloud-based tools also make sharing easier. You can send project links instead of repeatedly exporting files for every review. Figma’s free offering supports sharing and collaboration, although its Starter plan has specific limitations.

Online tools can also reduce hardware requirements. Many beginner projects can be completed without installing large desktop applications.

However, browser-based software still has limitations. Internet access, account requirements, browser performance, storage limits, and advanced feature restrictions can affect your workflow.

Do not choose an online tool only because it is free. Check whether it supports your required file formats, export options, collaboration needs, and design features.

For beginners, online design tools provide a convenient way to practice regularly. They can also make it easier to share early portfolio work and receive feedback.

Cloud-Based Design Advantages

Cloud-based design tools offer several advantages for collaborative work. Multiple people can review or edit projects without passing files back and forth. This can reduce confusion when several versions of the same design exist.

Real-time collaboration is especially useful for teams and client projects. Designers can share work, collect comments, and make revisions within a shared environment. Figma, for example, allows collaboration and file sharing through its platform.

Cloud workflows can also improve accessibility. You can continue working from another compatible device instead of relying on one computer. This is useful for students and freelancers who regularly switch between locations.

Automatic saving can provide another layer of convenience. However, designers should still understand how version history and file recovery work within their chosen platform.

There are trade-offs as well. Cloud tools depend more heavily on internet connectivity and service availability. Free plans may also restrict storage, collaboration, version history, or advanced features.

Security and privacy should also matter when handling client work. Review the platform’s terms and permissions before uploading sensitive material.

Used carefully, cloud-based design tools can make creative workflows more flexible. They are especially useful when collaboration and accessibility matter as much as design functionality.

For aspiring designers, the key is to use these tools consistently. Practice, feedback, and portfolio development will have a greater impact on your progress than constantly switching platforms.


FAQ SECTION

How can I improve my design skills for free?

You can improve your design skills without spending money by practicing consistently and studying fundamental principles such as balance, contrast, alignment, color, and typography. Recreate designs you admire to understand how professional layouts are structured, then experiment with your own ideas. Use free tutorials on YouTube, Coursera, and Khan Academy, and join online design communities for constructive feedback. Regular design challenges can also help you develop creativity, explore different styles, and build a portfolio that shows steady improvement.

Do I need a powerful computer for these tools?

You usually do not need a powerful computer to use many Free Tools for Aspiring Designers. Browser-based platforms such as Canva and Figma can run smoothly on average laptops with basic specifications. However, demanding applications such as Blender or advanced image-editing software may require more RAM, storage, and graphics performance. If you are a beginner, start with lightweight tools and upgrade your computer only when your projects become too demanding for your current hardware.

Where can I find free stock photos and icons?

Several websites provide free resources that can support your design projects. Unsplash, Pexels, and Pixabay offer large collections of photographs, while Flaticon and The Noun Project provide icons and vector graphics. These resources can make Free Tools for Aspiring Designers even more useful by giving you quality visual assets to work with. Before using any image, icon, or illustration, check its current license and attribution requirements, particularly when creating commercial work for clients.

Can I sell work created with free tools?

Yes, you can sell designs created with free software, but the software being free does not automatically mean every asset or feature can be used commercially. Always review the licensing terms of the specific tool, template, font, image, icon, or other resource you use. Some platforms may place restrictions on certain assets or premium elements. Understanding these requirements is an important part of using Free Tools for Aspiring Designers professionally and avoiding copyright or licensing problems when working with clients.


Conclusion

Mastering design does not require a large budget. It requires consistent practice, experimentation, and access to the right resources. Free Tools for Aspiring Designers make it possible to learn essential design skills, experiment with different creative approaches, and produce professional-looking projects without making a major financial investment.

From learning fundamental design principles to using AI-assisted features and free visual resources, beginners have plenty of opportunities to develop their abilities. The most important factor is not the price of your software but how consistently you practice and apply what you learn.

Whether you use Canva for social media graphics, Figma for interface design, or Inkscape for vector illustrations, Free Tools for Aspiring Designers can provide a practical starting point. Create real projects, experiment with different styles, collect your strongest work in a portfolio, and continue developing your skills. Over time, consistent practice can help you become a more capable and confident designer.

How Recruiters Verify Employment History and Background

How Recruiters Verify Employment History and Background

Navigating the hiring process can feel stressful, especially when background checks are involved. Understanding how recruiters verify employment history can help job seekers prepare accurate resumes and avoid unnecessary surprises. Employers may review your work history to confirm that your experience matches what you reported during the application process. A strong, accurate resume is especially important, so reviewing common resume mistakes recruiters notice can help you correct potential issues before applying.

During screening, recruiters may verify employment dates, job titles, responsibilities, and other relevant details. They may contact previous employers or use third-party background screening providers. Some employers may also request supporting documents when records are unavailable.

This guide explains how recruiters verify employment history, how employers check past jobs, what can happen after a failed background verification, and which industries often use stricter screening. It also covers common background-check red flags and ways to handle discrepancies.

In the United States, employers must follow applicable employment and background-check laws. The U.S. Equal Employment Opportunity Commission (EEOC) explains that background information must be used consistently and without unlawful discrimination.

How Do Employers Check Employment History?

Employers usually verify employment history by comparing information from your resume or application with records provided by previous employers. Recruiters may confirm your job title, employment dates, department, and other basic details. The exact process varies by company, industry, location, and screening provider.

Some employers contact a former company’s human resources department directly. Others use a third-party background screening company to collect and verify employment information. The screening process may begin after you provide written authorization.

If a former employer has closed, merged, or cannot respond, the recruiter may request alternative documentation. This could include employment letters, pay records, tax documents, or other official proof.

Accuracy matters because even small differences can create questions during screening. A one-month date difference may have a simple explanation. However, deliberately changing employment dates or job titles can create a much more serious concern. This is also why candidates should understand how to explain employment gaps in an interview when legitimate breaks appear in their work history.

Keeping copies of employment documents can make the verification process faster. It also gives you evidence if an employer’s records contain an error.

Utilizing Third-Party Background Screening Vendors

Many organizations use specialized background screening vendors to handle employment verification. These companies collect information from available databases and contact previous employers when necessary. Their role is to provide verified information to the hiring organization rather than make the final hiring decision.

Before a third-party screening company performs certain background checks, employers may need your written permission. In the United States, the Fair Credit Reporting Act can impose additional requirements when employers obtain background reports from consumer reporting companies.

The screening vendor may compare the information you submitted with records from previous employers. If the information matches, the employment entry can generally be marked as verified. If the records do not match, the vendor may seek clarification or supporting documents.

As a candidate, review every employment detail before submitting your application. Use consistent dates, accurate titles, and correct employer names. This reduces unnecessary questions and helps the screening process move forward without avoidable delays. You can also improve your chances of making a strong first impression by learning how to answer “Tell Me About Yourself” in an interview.

Will I Get My Salary If BGV Fails?

A failed background verification does not automatically mean you will lose money you have already earned. What happens depends on your employment contract, company policies, local employment laws, and the reason for the failed verification.

If you have already started working, the outcome can differ based on the circumstances. A minor administrative discrepancy may be resolved after you provide clarification or supporting documents. An intentional misrepresentation, such as a fabricated job or qualification, can lead to termination or withdrawal of the offer.

Your employer may also have specific rules covering probation, termination, notice periods, and other employment conditions. These rules can vary significantly between countries and jurisdictions.

The safest approach is to avoid assuming that every background-check failure has the same result. If the problem comes from incorrect information supplied by a former employer, respond quickly. Provide documents that support your actual employment history and ask the relevant HR team or screening provider to review the discrepancy.

If the issue involves wages, termination, or contractual rights, local employment law matters. Consider obtaining qualified legal advice rather than relying on general assumptions about background verification.

Navigating Disputed Background Check Results

Background-check information can sometimes contain errors. A screening report may include incorrect employment dates, records belonging to another person, or outdated information. If you believe the result is inaccurate, you should raise the issue promptly with the screening company and employer.

When disputing an employment verification result, provide clear documentation. Useful records may include employment letters, pay statements, tax documents, appointment letters, or other official records showing your actual employment history.

In the United States, the FCRA provides specific rights when an employer uses a background report from a consumer reporting company. Candidates can dispute inaccurate or incomplete information and may receive an additional free report after certain adverse employment decisions.

Keep your explanation factual and concise. Explain exactly what information is incorrect and provide evidence supporting the correction. Avoid emotional arguments or unnecessary details.

The sooner you respond, the easier it may be to resolve the issue before it affects your hiring decision. Always check the laws that apply to your location because employment-screening requirements vary by jurisdiction.

Which Companies Have Strict BGV Processes?

Companies in highly regulated industries often conduct more extensive background verification. These can include organizations in finance, healthcare, aviation, defense, government contracting, and certain technology sectors. The exact screening requirements depend on the role and the information the employee will access.

Financial institutions may perform detailed checks because employees can handle sensitive financial information and regulated transactions. Healthcare organizations may conduct additional screening because workers can interact with patients and confidential medical information.

Defense contractors and certain government-related roles may involve security-clearance procedures. These checks can examine employment history and other areas more deeply than a standard corporate background check.

Large multinational companies may also use structured screening programs. However, it is inaccurate to assume that every major company uses the same process. Screening depth depends on the position, country, industry regulations, and internal risk policies.

For job seekers, the practical lesson is simple: expect more documentation when applying for regulated or security-sensitive positions. Keep employment records organized and ensure your resume matches the information you provide during the background-check process.

Understanding Financial and Regulatory Compliance Standards

Strict background screening usually exists because employers need to manage specific legal, financial, security, or operational risks. Companies handling sensitive information or regulated activities may have stronger verification requirements than ordinary businesses.

Financial institutions, healthcare providers, aviation organizations, and defense contractors can face significant consequences when employees fail to meet required standards. As a result, these employers may verify employment, education, professional credentials, identity, or other information relevant to the position.

However, strict screening does not mean employers can ignore employment laws. In the United States, employers must apply background-screening practices consistently and avoid unlawful discrimination.

Some background reports also trigger additional legal requirements. For example, employers using third-party consumer reports may need to obtain authorization and follow specific procedures when taking adverse action.

Candidates should therefore focus on accuracy rather than trying to predict every screening method. Provide truthful information, keep supporting documents, and address genuine discrepancies before they become larger problems.

How Do They Check Employment Verification?

Employment verification commonly starts with the information you provide in your application. A recruiter or screening provider may compare your employer names, job titles, and employment dates against available records.

The verifier may then contact the previous employer’s human resources department. Some organizations use automated employment-verification systems instead of manual phone calls. The information requested can vary, but basic employment details are commonly the focus.

If the employer cannot confirm your records, the screening company may contact you for additional information. You could be asked for another HR contact, an employment letter, or documents supporting your work history.

Former employers may also have policies limiting the information they disclose. Some organizations provide only basic details, such as dates of employment and last position held.

This means a recruiter may not always receive a detailed description of your previous performance. The verification process is primarily designed to confirm whether the information you provided can be supported.

To make verification easier, double-check employer names, dates, and contact details before submitting your application. Consistency between your resume, application, and supporting documents can prevent avoidable delays. Before applying, it is also useful to learn how to write a cover letter step by step so your application materials remain accurate and professional.

Leveraging Tax Documents and Pay Stubs

When a previous employer cannot verify your employment, recruiters may ask for alternative documentation. The exact documents accepted depend on the employer and screening provider.

Possible evidence can include employment letters, appointment letters, pay statements, tax records, or other official documents showing that you worked for the company. These records can help establish your employment dates and relationship with the employer.

Pay records can be especially useful when a company has closed or no longer maintains accessible employee records. However, you should only provide documents that the employer or screening provider specifically requests.

Protect sensitive financial information when submitting documents. If a document contains unrelated personal or financial details, ask whether you can redact information that is not necessary for verification.

Do not create or alter documents to make your employment history appear stronger. Fabricated evidence can create a much more serious problem than an ordinary verification delay.

The best approach is to maintain organized employment records throughout your career. Keep copies of appointment letters, relieving letters, experience certificates, and relevant pay documentation. These records can become valuable when a future employer needs to verify your professional history.

What Is a Red Flag in a Background Check?

A background-check red flag is information that creates a significant concern about the accuracy, suitability, or credibility of a candidate’s application. Common examples include fabricated employment, false job titles, major date discrepancies, fake qualifications, or undisclosed information that directly conflicts with the application.

Not every discrepancy is automatically serious. A small difference in an employment date can result from a memory error or an employer’s recordkeeping system. The candidate’s explanation and supporting evidence often matter.

Intentional deception is more concerning. Claiming experience at a company where you never worked can damage your credibility. Similarly, changing an entry-level role into a management position can raise questions about the accuracy of other claims.

Background checks may cover more than employment. Depending on the role and applicable laws, employers may review education, criminal records, professional credentials, or other relevant information.

The best strategy is transparency. Review your resume before applying and correct errors before a screening company finds them. If a legitimate issue exists, prepare a short, honest explanation and provide documentation when appropriate. You should also understand how to prepare for HR interview success so you can discuss potential concerns clearly and confidently.

Handling Unexplained Gaps and Minor Discrepancies

Employment gaps and minor discrepancies do not automatically mean that you will fail a background check. People change careers, take breaks, become unemployed, return to education, or experience periods between jobs. The important issue is whether your application accurately represents your history.

If your employment dates differ slightly from a former employer’s records, explain the difference clearly. Do not invent dates simply to make your career history appear continuous.

For longer gaps, prepare a straightforward explanation. You can describe the period as a career break, education period, job search, personal project, or another truthful circumstance. If you are preparing for an interview, review how to explain employment gaps in an interview to present your situation clearly and honestly.

It is also useful to review your resume against your official records before submitting applications. Check employer names, job titles, joining dates, leaving dates, and qualifications carefully.

If a screening report contains inaccurate information, raise the issue quickly. In the United States, candidates may have rights to dispute inaccurate information in certain background reports.

Ultimately, how recruiters verify employment history matters less than whether your information is truthful and consistent. Accurate records make screening easier and help protect your credibility throughout the hiring process.

FAQ SECTION

Can an Employer Check My Employment History Without My Consent?

Whether an employer can check your employment history without consent depends on your location and the type of information being requested. In many situations, formal third-party background checks require authorization before they begin. Employers may ask you to sign a disclosure and consent form during the hiring process. However, the rules differ by jurisdiction and screening method. How recruiters verify employment history also depends on whether they contact a former employer directly or use a screening provider. Your current employer may also have separate privacy considerations. Before submitting an application, read the background-check authorization carefully. It should explain what information may be collected and how it will be used. If you are concerned about your current employer being contacted, ask the recruiter about their process before giving authorization.

How Many Years of Employment History Do Background Checks Cover?

There is no universal number of years that every employment background check covers. Many employers request several years of recent employment history, but the period can vary based on the company, position, industry, and local laws. Some applications may ask for five or seven years, while certain regulated or security-sensitive positions may require more extensive employment information. How recruiters verify employment history also varies because screening providers use different databases and verification procedures. Senior positions may involve broader checks because employers want to understand a candidate’s professional background in greater detail. The safest approach is to provide complete and accurate information for the period requested by the employer. Do not assume that an older job will never be reviewed. If the application specifically requests your entire career history, provide every relevant position and explain legitimate employment gaps clearly.

What Happens If My Former Employer Refuses to Respond to Verification Requests?

A former employer’s failure to respond does not necessarily mean you will fail the background check. Companies may refuse to provide detailed information because of internal policies, privacy concerns, or limited record availability. When direct verification fails, the screening provider may contact you and request alternative documentation. Depending on the employer’s requirements, acceptable evidence could include employment letters, appointment letters, pay statements, tax records, or other official documents. Avoid assuming that bank statements or tax documents will always be accepted because requirements differ between screening companies. How recruiters verify employment history can change when a former employer is unavailable. Keep copies of important employment documents so you can respond quickly. If your previous company closed, merged, or changed ownership, explain the situation and provide whatever legitimate records you have available.

Does a Background Check Reveal My Exact Salary From Previous Jobs?

A standard employment verification does not necessarily include your previous salary. Many verification processes focus on basic employment information, such as job title, employment dates, and employer name. Salary-history rules also vary by location, and some jurisdictions restrict employers from asking candidates about previous compensation. Therefore, you should not assume that every background check will reveal your exact earnings. How recruiters verify employment history depends on the screening provider, employer policies, applicable laws, and the information being requested. If salary information is relevant to the hiring process, the employer may ask about compensation separately where legally permitted. Always answer such questions truthfully and understand the requirements that apply in your location. If you are unsure whether salary information can be requested, check the relevant employment laws before sharing sensitive compensation details.

Conclusion

Mastering how recruiters verify employment history ensures you approach job applications with confidence and complete honesty. Throughout this article, we examined the mechanics of background screening, salary protections during failed verifications, the strictest industry protocols, verification methods, and critical red flags to avoid. Maintaining transparency on your resume protects your career trajectory and builds instant trust with prospective employers. As you move forward in your professional journey, keep your records organized, communicate openly about employment gaps, and present your achievements accurately. Applying these insights will streamline your hiring experience and help you secure your next career milestone. For additional preparation, explore how to interview like a pro to strengthen your overall interview approach.

How to Create a Personal Financial Plan for Wealth

How to Create a Personal Financial Plan

Learning how to create a personal financial plan can help you take control of your money and reduce financial stress. A clear plan makes it easier to manage expenses, prepare for emergencies, reduce debt, and work toward long-term goals. The Consumer Financial Protection Bureau also provides resources that support better financial decision-making and financial well-being.

There is no single budgeting method that works for everyone. Rules such as the 7-7-7 rule, 70-10-10-10 rule, and 50/30/20 rule are useful frameworks. However, you should adapt them to your income, expenses, debt, and goals. This guide explains how to create a personal financial plan and provides a practical example. You will also learn the five basic steps of financial planning and ways to make your plan easier to maintain.

What is the 7 7 7 rule for money?

The 7-7-7 rule for money is sometimes presented as a financial planning framework built around three groups of seven. However, unlike the 50/30/20 rule, it is not a universally standardized personal finance method. Different sources may define the three parts differently. One version focuses on maintaining several months of emergency savings, investing for a longer period, and managing debt through structured targets. Because interpretations vary, you should treat this rule as a planning concept rather than a strict financial formula. Before following it, consider your income, monthly expenses, interest rates, and financial goals. The most useful part of the approach is its emphasis on financial security, long-term investing, and debt reduction. These priorities can help you create a balanced strategy. Still, you do not need to force every financial decision into a seven-year or seven-month target if another timeframe better suits your circumstances.

Emergency Funds and Milestone Planning

An emergency fund should protect you from unexpected expenses without forcing you to rely on credit cards or loans. Start by calculating your essential monthly costs, including housing, food, utilities, transportation, and minimum debt payments. You can then choose an emergency savings target based on your circumstances.

Many people begin with a smaller cash buffer before working toward several months of essential expenses. A larger reserve may be useful when income is unstable or major financial responsibilities exist. Keep emergency savings accessible instead of placing the money in investments that could lose value.

You can also divide the goal into manageable milestones. For example, you might first save $1,000, then one month of essential expenses, and eventually several months. Automatic transfers can make progress easier by moving money into savings before you have an opportunity to spend it. Review the target whenever your income, household situation, or monthly expenses change. For more guidance, see emergency fund vs. savings priorities

What is the 70-10-10-10 rule for money?

The 70-10-10-10 rule for money is a budgeting framework that divides income into four categories. A common version assigns 70% to living expenses, 10% to savings or investments, 10% to debt repayment, and 10% to giving. However, this is a guideline rather than a universal financial standard. Your percentages may need to change based on housing costs, income level, debt, family responsibilities, and financial goals. For example, someone with high-interest debt may benefit from directing more than 10% toward repayment. Another person may need a larger savings contribution to build an emergency fund. The value of this framework comes from giving each part of your income a clear purpose. It encourages you to cover current expenses while also planning for the future. When learning how to create a personal financial plan, use the 70-10-10-10 rule as a starting point. Adjust the percentages when your circumstances require a different allocation.

Living Within Your Means

Living within your means requires keeping spending below your available income. The 70% spending target can provide a useful benchmark, but it should not become a rigid requirement. Using a structured approach such as the envelope budgeting method can also help you control spending across different categories.

Housing, transportation, childcare, and other essential costs vary between households. Start by reviewing your actual spending instead of assuming every expense fits neatly into one category.

Separate fixed expenses from variable expenses. Then identify costs you can reduce without affecting essential needs.

If housing consumes most of your income, cutting small purchases may not solve the problem. You may need larger changes, such as reducing transportation costs or reviewing housing expenses.

Avoid creating an unrealistic budget that removes every enjoyable purchase. A sustainable financial plan should leave room for reasonable lifestyle spending.

Regular expense reviews can help you identify waste and redirect money toward important goals. They also keep your budget aligned with changing income and priorities.

What is the 50/30/20 rule for personal finance?

The 50/30/20 rule for personal finance divides after-tax income into three broad spending categories. The traditional framework assigns 50% to needs, 30% to wants, and 20% to savings and debt repayment.

Needs can include housing, utilities, groceries, transportation, insurance, and required debt payments. Wants may include dining out, entertainment, hobbies, subscriptions, and vacations.

The final 20% can support emergency savings, retirement contributions, investments, or additional debt payments. This framework provides a simple starting point for organizing your money.

However, these percentages are not mandatory. Someone living in an expensive city may spend more than 50% on essential costs.

Someone with aggressive financial goals may choose to save more than 20%. Your budget should reflect your actual financial circumstances.

When considering how to create a personal financial plan, use the rule to understand your spending patterns. Then adjust the percentages according to your income, expenses, and priorities.

Balancing Needs and Wants

Separating needs from wants is essential when building a realistic budget. Needs are expenses required for basic living or important financial obligations.

These can include rent, groceries, utilities, insurance, transportation, and minimum loan payments. Wants provide convenience, entertainment, or enjoyment but are usually easier to reduce.

The distinction is not always absolute. For example, transportation may be a need, while an expensive vehicle upgrade may be a want.

Review each expense based on its purpose and cost. If spending exceeds your available income, start with flexible wants before cutting essential expenses.

You can also create limits for discretionary categories instead of removing them completely. This approach makes your budget easier to maintain over time.

A sustainable budget should reflect real life, rather than an unrealistic spending pattern. As your income or responsibilities change, revisit your needs, wants, and savings priorities.

That flexibility can help prevent your financial plan from becoming too restrictive.

What are the 5 basic steps in personal financial planning?

The five basic steps in personal financial planning provide a simple structure for managing your money. First, assess your current financial position by reviewing your income, expenses, savings, debts, assets, and net worth.

Second, establish specific financial goals. These might include building an emergency fund, paying off debt, buying a home, or preparing for retirement.

Third, create a budget that connects your income with those goals. You can use frameworks such as the 50/30/20 rule as a starting point.

Fourth, put the plan into action through consistent saving, appropriate investing, debt repayment, and expense management. If debt is a major priority, learning how to pay off debt faster can help you choose a repayment strategy. Choose strategies that match your financial situation and goals.

Fifth, monitor your results and make adjustments when your circumstances change. These steps work together rather than operating as isolated tasks.

A new expense can affect your budget, while a salary increase can change your savings capacity. Learning how to create a personal financial plan therefore requires both initial planning and regular review.

The goal is to create a system that can adapt as your financial life changes.

Tracking and Adapting Over Time

A financial plan should not remain unchanged after you create it. Regular reviews help you identify problems before they become larger financial setbacks.

Review your budget several times each year. Consider a deeper review whenever your income or expenses change significantly.

Check whether you are meeting savings targets, reducing debt, and progressing toward longer-term goals. You should also review recurring expenses, subscriptions, insurance costs, and investment contributions. Using personal finance apps can make it easier to track these areas consistently.

Major life events may require more significant changes. A new job, marriage, relocation, large purchase, or change in household income can affect your priorities.

Market conditions can also influence investment decisions. Understanding risk vs. return in investing can help you evaluate how much uncertainty you are comfortable accepting. However, short-term market movements should not automatically change a long-term investment strategy.

Keep a simple record of your goals and progress. This makes it easier to compare results and identify areas that need attention.

Financial planning is an ongoing process, not a one-time exercise. Adjust your plan when circumstances change while keeping your broader financial objectives in focus.

How to create a personal financial plan example?

A practical example can make how to create a personal financial plan easier to understand. Imagine Sarah earns $4,000 in monthly take-home pay.

She wants to build an emergency fund, save for retirement, and manage everyday expenses. Using the 50/30/20 framework as a starting point, she could allocate up to $2,000 toward essential needs.

These needs might include housing, groceries, utilities, and transportation. She could reserve up to $1,200 for wants, including dining, entertainment, and hobbies.

The remaining $800 could support savings and additional debt payments. If Sarah has high-interest debt, she may direct more money toward repayment before increasing investments.

If her essential expenses already exceed $2,000, she should adjust the percentages. She should not force her budget to fit the rule.

Sarah can track her spending each week and review her progress monthly. This personal financial plan example shows how a simple framework can become a practical system.

The plan should reflect her actual income, expenses, financial obligations, and long-term priorities.

Setting Up Automated Transfers

Automation can make your financial plan easier to follow. It reduces the need to make the same saving decision every month.

After receiving your paycheck, schedule automatic transfers toward your emergency fund, retirement account, investment account, or other savings goals. Start with an amount your budget can consistently support.

If you are building an emergency fund, keep those savings accessible. Separating them from everyday spending money can also reduce the temptation to spend them.

Once you establish a sufficient cash reserve, you can redirect additional savings toward longer-term goals. Exploring investment ideas and tips for financial success can help you consider different approaches. Consider your risk tolerance and investment time horizon when making those decisions.

Automation should support your plan rather than replace it. Review your transfers whenever your income, expenses, or financial priorities change.

You should also maintain enough money in your main account for essential bills and unexpected costs. Paying yourself first can make saving more consistent, while learning about the best places to keep your savings safely can help you decide where to hold your cash. The amount must still fit your overall budget.

When combined with regular reviews, automated transfers can turn financial goals into repeatable monthly habits.

Frequently Asked Questions

What is the best way to start tracking daily expenses?

The best way to start tracking daily expenses is by using a dedicated mobile budgeting app or a simple digital spreadsheet. Reviewing every transaction weekly helps you identify wasteful spending patterns and ensures you stay aligned with your overall financial plan.

How often should I review my personal financial plan?

You should review your personal financial plan at least once every quarter, or immediately after experiencing major life changes. Significant events like getting married, changing jobs, or buying a home require immediate adjustments to your budget and savings goals.

Is it necessary to eliminate all debt before investing?

It is not necessary to eliminate all low-interest debt before investing, but high-interest consumer debt should be cleared first. Balancing debt repayment with retirement contributions allows your money to compound in the market while you steadily reduce liabilities.

What constitutes an emergency expense?

An emergency expense is an unexpected, urgent, and necessary financial need that threatens your immediate well-being or stability. Examples include sudden medical bills, critical car repairs, or emergency home maintenance, rather than planned vacations or holiday shopping.

Conclusion

Learning how to create a personal financial plan empowers you to take command of your money rather than letting money control you. By applying structured frameworks like the 50/30/20 rule, the 70-10-10-10 guideline, and essential planning steps, you build unshakeable security. Financial freedom does not happen overnight, but consistent small actions compound into massive long-term results over time. Take the first step today by assessing your income, setting clear goals, and automating your savings routines. Your future self will thank you for the financial discipline and peace of mind you cultivate right now.

Public Service Loan Forgiveness: Complete Guide

Understanding the Complete Guide to Public Service Loan Forgiveness

Navigating student debt can feel overwhelming when you are building a career in public service. Fortunately, Public Service Loan Forgiveness (PSLF) can help eligible borrowers eliminate the remaining balance on qualifying federal student loans.

The program is available to borrowers who meet specific requirements involving their employer, loan type, repayment plan, and qualifying payments. The rules are detailed, so checking your status regularly is essential. You can review current guidance and use official tools through Federal Student Aid.

PSLF generally requires 120 qualifying monthly payments while working full-time for an eligible employer. Those payments do not need to be consecutive. Your eligible employment and loan status must also meet program requirements during the qualifying period.

This guide explains how Public Service Loan Forgiveness works, who qualifies, how to document employment, what happens after 10 years, and how recent policy changes may affect borrowers.

How to do Public Service Loan Forgiveness?

Successfully pursuing Public Service Loan Forgiveness requires careful attention to your loans, employment, repayment plan, and payment history. Start by checking whether your federal loans are eligible Direct Loans. Federal Family Education Loan and Perkins Loans generally do not qualify unless they are consolidated into a Direct Consolidation Loan.

Next, confirm that your employer qualifies. PSLF eligibility depends primarily on your employer rather than your specific job title. Government organizations and qualifying nonprofit employers can meet the requirement. Understanding how debt affects your broader finances is also important, so consider reviewing good debt vs. bad debt.

You should then review your repayment options and confirm that your payments can qualify. Federal Student Aid recommends using its repayment calculator when comparing plans for PSLF. Current repayment rules have changed, including new repayment options introduced in 2026. Managing these payments alongside other financial obligations can be easier with a clear budgeting strategy.

Finally, submit a PSLF form regularly to document your qualifying employment and track your payment count. Keeping copies of forms, employment records, and payment information can help resolve future discrepancies.

Submitting Employment Certification Forms

Submitting employment certification regularly is one of the most useful ways to monitor your Public Service Loan Forgiveness progress. Federal Student Aid encourages borrowers to submit a PSLF form each year. You should also consider submitting one when you change qualifying employers.

The form allows the Department of Education to verify your employer and update your qualifying payment information. Your employer must provide the required certification and signature. The PSLF Help Tool can help identify eligible employers and generate the appropriate form.

Annual certification is not the only time you can submit the form. Current guidance states that borrowers are required to submit it when they reach the required 120 qualifying months. However, submitting it more frequently can help identify problems earlier.

Keep copies of submitted forms and confirmation records. Also monitor your payment count through your StudentAid.gov account. If your count changes unexpectedly, review your employment and payment history promptly.

What qualifies under Public Service Loan Forgiveness?

Eligibility for Public Service Loan Forgiveness depends on several requirements working together. Your employer, loans, repayment plan, employment status, and payments all matter. Meeting only one or two requirements is not enough to receive forgiveness.

Your employer generally must be a qualifying government organization or eligible nonprofit organization. Federal, state, local, and tribal government employers can qualify. Certain tax-exempt nonprofit organizations also qualify, along with some other nonprofit organizations providing qualifying public services.

Your loans must generally be eligible Direct Loans. Federal Family Education Loan and Perkins Loans do not qualify for PSLF unless appropriate consolidation requirements are met.

You must also work full-time for a qualifying employer while making qualifying payments. PSLF requires 120 qualifying monthly payments before forgiveness can be granted. Those payments do not have to be consecutive.

Because repayment rules are changing, borrowers should verify their current repayment options through Federal Student Aid rather than relying on older PSLF guides. Borrowers can also benefit from managing education expenses wisely when planning their overall student finances.

Evaluating Eligible Employer Types

Your employer’s status is more important than your job title when determining Public Service Loan Forgiveness eligibility. A qualifying position does not automatically make an employer eligible, and a specific profession is not required for PSLF.

Government organizations at the federal, state, local, and tribal levels can qualify. Certain tax-exempt organizations under Section 501(c)(3) can also qualify. Some other nonprofit organizations may qualify when they provide specified public services.

Before assuming that your employer qualifies, use the official PSLF Employer Search. Federal Student Aid allows borrowers to search for an employer using identifying information such as the employer’s EIN.

This step is especially important before relying on future forgiveness as part of your financial plan. Employer eligibility can also change, so previously qualifying employment should not be treated as permanent proof of future eligibility.

Keep documentation showing where you worked and when you worked there. Regular PSLF certification can provide additional confirmation and help identify eligibility problems before you reach the end of your repayment period.

What happens after 10 years of PSLF?

Reaching 10 years of qualifying service does not automatically erase your loans. Instead, you generally need 120 qualifying monthly payments before requesting Public Service Loan Forgiveness. The payments must meet program requirements, and qualifying employment must also be established.

Once you reach the required number of qualifying payments, you can request forgiveness through the appropriate PSLF application process. The Department of Education reviews your qualifying employment and payment history before approving the discharge.

The amount forgiven generally includes the remaining principal and accrued interest on eligible loans after the final required payment.

Do not assume that every payment made during a 10-year period automatically qualifies. Periods involving certain repayment plans, deferments, forbearances, or employment changes may affect your payment count. If you are managing multiple balances, learning how to pay off debt faster can also help you stay financially organized.

The safest approach is to track your qualifying payment count throughout the process. Review your StudentAid.gov account regularly and resolve discrepancies before submitting your final forgiveness request.

Receiving Official Loan Discharge

The final stage of Public Service Loan Forgiveness involves submitting your forgiveness request and allowing the Department of Education to verify your eligibility. Reaching 120 payments does not mean that your balance disappears immediately.

The department must confirm that your payments and employment satisfy the applicable requirements. Current federal regulations provide that forgiveness covers the qualifying principal and accrued interest remaining when the borrower satisfies the final required monthly payment obligation.

Until your forgiveness is officially processed, follow instructions from your loan servicer regarding payments. Do not simply stop paying because your payment count appears to have reached 120.

Keep copies of your PSLF forms, employment certifications, payment records, and official correspondence. These documents can be useful if your account requires additional review. Maintaining an emergency fund can also provide a financial cushion while you wait for your loan status to be finalized.

After approval, monitor your loan account to confirm that the eligible balance has been discharged. You should also check your account for any remaining loans that were not included in the forgiveness request.

The important distinction is simple: 120 qualifying payments make you eligible to request forgiveness; they do not replace the final approval process.

Are PSLF loans still being forgiven?

Yes. Public Service Loan Forgiveness remains an active federal program in 2026. The program continues to provide forgiveness for eligible borrowers who satisfy the applicable requirements. Federal Student Aid continues to provide PSLF forms, employer verification tools, payment tracking, and forgiveness resources.

However, borrowers should not assume that older PSLF guidance remains completely unchanged. Federal student loan repayment rules have undergone significant changes during 2026. New repayment options took effect July 1, 2026, while some older repayment plans are being phased out.

The Department of Education has also implemented changes affecting PSLF regulations and employer eligibility. Some regulatory provisions have faced court action, so borrowers should rely on current federal guidance rather than outdated articles or social media claims.

For borrowers pursuing forgiveness, the practical priorities remain the same: verify your employer, understand your loan status, track qualifying payments, and submit PSLF documentation regularly.

Tracking Ongoing Program Updates

Following official updates is especially important because Public Service Loan Forgiveness rules can change through legislation, regulations, court decisions, and administrative actions. Borrowers should avoid making long-term financial decisions based solely on headlines or social media posts.

Start with StudentAid.gov and the Department of Education for authoritative information. The PSLF Help Tool can help borrowers check employer eligibility, submit forms, and monitor their progress.

Current repayment rules also deserve attention. Federal student loan reforms introduced new repayment options in 2026, while some existing plans are scheduled to end later. Borrowers pursuing PSLF should therefore review how their repayment plan fits their individual circumstances.

Keep records of important notices and changes affecting your account. If your payment count changes, investigate the reason rather than assuming the change is permanent.

Finally, be cautious with companies promising guaranteed student loan forgiveness. You can access official PSLF resources directly through Federal Student Aid without paying a third party to explain basic eligibility requirements.

What is Trump’s new student loan forgiveness?

The phrase “Trump’s new student loan forgiveness” can be misleading because there is not one new program that simply replaces Public Service Loan Forgiveness. Instead, the Trump administration has implemented broader federal student loan changes through legislation and Department of Education regulations.

The Working Families Tax Cuts Act introduced significant changes to federal student lending and repayment. Regulations effective July 1, 2026, established new repayment options, including the Repayment Assistance Plan and Tiered Standard plan, while phasing out certain existing plans.

PSLF itself continues as a separate statutory forgiveness program. Eligible borrowers still need qualifying Direct Loans, qualifying employment, and 120 qualifying monthly payments.

The administration has also pursued changes affecting which organizations can qualify as PSLF employers. However, a federal court vacated a related final rule shortly before its planned July 2026 effective date, and the Department subsequently moved to revise the PSLF form.

Therefore, borrowers should distinguish between PSLF, broader repayment reforms, and other federal loan relief programs.

Navigating Policy Shifts and Waivers

Federal student loan policy can change quickly. Following outdated PSLF information can therefore create unnecessary risks. Borrowers should verify their repayment plan, employer eligibility, and qualifying payment count through current federal resources.

In 2026, the Department of Education introduced the Repayment Assistance Plan and Tiered Standard plan. The department also began phasing out several older repayment options. Some existing plans will end no later than July 1, 2028.

PSLF borrowers should carefully review how these changes affect future qualifying payments. Your loan type, borrowing history, income, and other circumstances can influence which repayment option fits your situation. Keeping track of your overall financial position also makes understanding your assets and liabilities easier.

Court decisions can also change how federal agencies apply student loan rules. For example, a federal court vacated a PSLF employer-related final rule before its planned July 2026 effective date. The Department of Education then sought changes to the PSLF certification form to address the court’s decision.

Accurate documentation offers the best protection. Save employment certifications, payment records, account notices, and official correspondence. Check StudentAid.gov regularly before changing your repayment strategy or assuming a new policy changes your eligibility.


FAQ

What happens if I miss a monthly payment?

Missing a monthly payment means that specific month will not count toward your required 120 payments. To stay on track, you must make consecutive or cumulative qualifying payments rather than relying on grace periods. Setting up automatic debit can prevent accidental missed deadlines.

Can part-time employment count toward qualification?

Part-time jobs generally do not qualify unless you work multiple part-time positions for eligible employers totaling at least 30 hours per week. Your combined hours must meet the standard definition of full-time work established by your employers.

Do payments need to be consecutive?

Your 120 qualifying payments do not need to occur consecutively to qualify for PSLF forgiveness. If you leave public service or change employers, you can return to qualifying employment later. Your previous qualifying payments can still count toward the 120-payment requirement, provided they met the program rules when you made them.

Are Parent PLUS Loans Eligible for This Program?

Direct Parent PLUS Loans do not qualify directly for Public Service Loan Forgiveness (PSLF). However, borrowers can consolidate these loans into a Direct Consolidation Loan. After consolidation, the borrower must use the Income-Contingent Repayment (ICR) Plan to pursue PSLF. Qualifying employment and monthly payment requirements still apply.


Conclusion

Mastering Public Service Loan Forgiveness provides a clear pathway to eliminating student debt while building a meaningful career. By understanding qualifying employment, maintaining accurate paperwork, and tracking your monthly progress, you secure your financial independence. The journey requires patience and attention to detail, but the ultimate reward of debt freedom is well worth the effort. Apply these insights today by verifying your loan types and setting up your annual employment certification routine. Take control of your financial future and let your public service work for you.

Best Child Education Plan Strategies & Options in India

What Is the Best Child Education Plan to Secure Your Child’s Future?

Securing your child’s future is one of the most important financial responsibilities for parents. Rising education costs make early planning essential. A well-designed child education plan can help you build a dedicated fund for school, college, or higher education. Understanding why education is important in our life can also help parents put the long-term value of these expenses into perspective.

The right approach depends on your child’s age, your financial capacity, investment horizon, and risk tolerance. Parents can consider insurance-based child plans, mutual funds, Public Provident Fund (PPF), or other suitable savings options. Each option has different risks, costs, returns, and levels of protection.

A child education plan should also account for future education inflation. Starting early gives your investments more time to grow and reduces the amount you need to save each month. For reliable information about inflation and economic trends, parents can refer to the Reserve Bank of India.

This guide explains how to plan for your child’s education and compares common options available in India. It also covers LIC child plans and important features to check before making a decision.

What Are the Best Plans for Children’s Education?

There is no single best child education plan for every family. The right choice depends on how much you need, when you need the money, and how much investment risk you can accept. Insurance-based child plans can combine savings with life insurance protection, while mutual funds can provide greater growth potential over longer periods.

Market-linked plans, including ULIPs, invest through equity, debt, or other funds. Their value can rise or fall with market conditions. Traditional child insurance plans generally provide more predictable benefits, but their returns may be lower than those of equity-oriented investments.

Before choosing a plan, compare the policy’s costs, lock-in period, liquidity, maturity benefits, and insurance coverage. Also check whether the plan provides a premium waiver benefit.

The Power of Waiver of Premium

A premium waiver benefit can protect an education goal if the insured parent dies during the policy term. When applicable, the insurer may waive future premiums according to the policy terms. The policy can then continue toward its intended benefits.

This feature can be valuable because the child’s education fund does not depend entirely on the parent’s ability to continue paying premiums. However, the exact conditions vary between policies. Some plans provide the benefit automatically, while others offer it through an additional rider.

Parents should therefore read the policy document before assuming that future premiums will be fully waived. Check the covered events, exclusions, waiting periods, rider charges, and benefit conditions. A premium waiver can strengthen an education plan, but it should not be the only reason for choosing a policy.

How to Plan for Your Child’s Education?

Planning for your child’s education starts with estimating the future cost rather than today’s cost. Begin by identifying your expected education expenses. These may include tuition, accommodation, books, travel, entrance preparation, and other related costs. Parents should also consider how to choose the right school for their child when estimating potential education costs and planning ahead.

Next, determine how many years remain before your child needs the money. A longer investment horizon gives you more time to build the required corpus. You can then calculate a monthly investment amount based on your target and expected investment growth. If your child is approaching college age, helping your teen prepare for college can also help you anticipate upcoming education needs and expenses.

Consider using a diversified approach instead of depending on one financial product. Depending on your circumstances, this could include equity mutual funds for long-term growth and safer investments as the goal approaches. Before finalizing your child’s education path, parents can also review questions to ask before taking admission to better understand the costs and commitments involved.

Review your portfolio regularly. As college approaches, gradually reducing exposure to high-volatility assets can help protect money that you will soon need. The exact allocation should reflect your risk tolerance and financial situation.

Factoring Education Inflation Into Your Goals

Education costs can increase significantly over time. Using only today’s tuition fees can therefore leave you with a funding shortfall when your child enters college.

Instead, include an education inflation assumption when estimating your future requirement. The appropriate rate will depend on the type of education and institution. Professional courses and international education can have very different cost patterns.

For example, if an education course costs ₹10 lakh today, its future cost could be substantially higher after 10 years. The calculation should also include living expenses and other education-related costs where relevant.

It is better to review your inflation assumption periodically than to rely on one fixed estimate for decades. Changes in tuition fees, exchange rates, living costs, and your child’s education preferences can affect the final requirement.

Which Plan Is Best for a Child?

The best child education plan depends on your objective rather than the product’s name. Parents with a long investment horizon and higher risk tolerance may consider diversified equity mutual funds for growth. Parents who prioritize predictable benefits may prefer traditional savings or insurance products. The choice of education path also matters, so parents may want to explore personalized learning in education when thinking about their child’s long-term needs.

Another approach is to separate insurance from investment. A suitable term insurance policy can provide financial protection for the family, while investments can focus specifically on building the education corpus. This approach can offer greater flexibility and transparency.

If your child is still young, you may have several years to absorb market fluctuations. If college is only a few years away, capital preservation becomes more important. Your strategy should therefore change as the goal gets closer.

Before investing, compare expected returns, risks, taxes, charges, liquidity, and insurance protection. No product guarantees that your education goal will be fully funded without adequate planning.

Balancing Risk and Guaranteed Returns

A balanced strategy can help manage both growth and stability. When the education goal is many years away, some investors may accept greater equity exposure to pursue long-term growth.

As the withdrawal date approaches, protecting the accumulated corpus becomes increasingly important. You can gradually move part of the portfolio toward lower-volatility investments based on your financial plan.

Guaranteed products can provide greater predictability, but they may offer lower growth potential. Market-linked investments can offer higher long-term growth potential, but they carry investment risk.

The key is to match the investment with the time horizon. Do not choose an aggressive investment simply because it has produced strong historical returns. Similarly, do not choose a low-return product solely because it feels safer. Compare the risk and expected outcome against your actual education target.

Which LIC Child Education Plan Is the Most Beneficial?

LIC currently lists LIC’s Amritbaal, LIC’s Jeevan Tarun, and LIC’s New Children’s Money Back Plan under its plans for children’s future.

LIC’s Amritbaal is a non-linked, non-participating savings plan designed to build a corpus for a child’s education and other needs. Its current brochure states that it provides guaranteed additions and allows maturity-age choices from 18 to 25 years, subject to policy conditions. It also offers a Premium Waiver Benefit Rider for an additional premium.

LIC’s Jeevan Tarun is another child-focused savings plan. Its current brochure describes survival benefits from ages 20 to 24 and a maturity benefit at age 25. Parents or grandparents can purchase the plan for eligible children.

These products may suit parents who value structured benefits and insurance protection. However, compare them with other investment options before deciding.

Choosing the Right LIC Policy Features

Choosing an LIC child plan requires looking beyond the brand name. Start by checking the policy’s maturity age, premium payment period, death benefit, survival benefits, and maturity benefits.

For example, LIC’s Jeevan Tarun provides different survival-benefit options. These benefits are designed to provide payments during the child’s later school or college years, while the maturity benefit is payable at the specified policy age.

LIC’s Amritbaal offers maturity-age choices between 18 and 25 years. This flexibility can help parents align the policy with an expected education milestone.

Also check whether you need a Premium Waiver Benefit Rider. Review its additional premium and conditions before adding it. Most importantly, compare the policy’s projected benefits with alternative investment strategies. A guaranteed benefit does not automatically make a product the most suitable choice for every family.

Top 5 Child Education Plans in India

There is no universally valid ranking of the top child education plans in India because products differ in risk, costs, benefits, and suitability. The original list also included specific private insurance products without explaining that their availability and features can change.

For a practical comparison, parents can evaluate these broad options:

  1. LIC Amritbaal – A child-focused, non-linked savings plan with guaranteed additions and flexible maturity-age options.
  2. LIC Jeevan Tarun – A child savings plan that provides survival benefits during specified ages and a maturity benefit at age 25.
  3. Equity mutual funds – Suitable for investors seeking long-term market-linked growth and who can tolerate volatility.
  4. PPF – A government-backed long-term savings option that can form part of a conservative education strategy.
  5. Term insurance plus investments – Separating life protection from investments can provide greater flexibility for some families.

The best option depends on your target amount, time horizon, risk tolerance, and need for insurance protection.

Evaluating Performance and Hidden Charges

Before choosing a long-term child education plan, examine the costs as carefully as the projected benefits. Insurance-based investment products can include several charges, while mutual funds and other investments have their own expenses.

For market-linked insurance products, review fund management charges, policy administration charges, mortality charges, premium allocation charges, and other applicable costs. IRDAI has specific disclosure requirements around charges and benefit illustrations for insurance products.

For traditional insurance plans, focus on the guaranteed benefits, non-guaranteed benefits, premium commitment, surrender conditions, and maturity structure. Do not judge a policy only by the maturity amount shown in a sales illustration.

Also check the lock-in period, withdrawal rules, tax treatment, and liquidity before investing. A product that looks attractive on paper may not suit you if you need flexibility.

Finally, compare the policy against alternatives. Your goal is not simply to buy a child plan. Your goal is to build enough money to fund your child’s education without creating unnecessary financial pressure.

FAQ SECTION

What is the ideal age to start a child education plan?

The ideal time to start a child education plan is as early as possible, ideally right after your child is born. Starting early allows you to harness the power of compounding, keeping monthly financial commitments manageable while building a massive corpus over fifteen to twenty years.

Can I withdraw money from a child plan before maturity?

Most child education plans offer partial withdrawal facilities after the completion of a mandatory five-year lock-in period. These withdrawals help cover urgent academic expenses or unexpected schooling milestones without forcing you to completely surrender or terminate the policy.

Is term insurance better than a child education plan?

Term insurance provides pure life coverage at a low cost, but it does not build an investment corpus on its own. While term insurance is essential for parental protection, combining it with dedicated mutual funds or child plans creates a comprehensive financial safety net.

Are maturity proceeds from child education plans taxable?

Under current Indian income tax laws, maturity proceeds and death benefits from most life insurance child plans are tax-free under Section 10(10D), subject to specific annual premium thresholds. Consulting a tax professional helps ensure your investments remain fully tax-efficient.

Conclusion

Securing your child’s academic future demands early preparation, careful product evaluation, and disciplined execution. By understanding the distinct advantages of market-linked ULIPs, traditional endowment policies, and government-backed schemes, you can build a resilient financial foundation. Every strategy discussed, from factoring in high education inflation to leveraging waiver of premium riders, protects your family against unforeseen hurdles. Take action today by assessing your long-term goals, choosing the right plan, and setting up automated monthly investments. Empowering your child with a debt-free education is the greatest gift and the most enduring legacy you can possibly leave behind.

Visual Hierarchy in Graphic Design: A Complete Guide

Understanding Visual Hierarchy in Graphic Design

Mastering visual hierarchy in graphic design helps designers control how audiences experience creative work. It determines which elements viewers notice first, second, and last. This structure helps communicate important information without overwhelming the eye.

Designers use size, color, contrast, spacing, alignment, and placement to establish clear visual priorities. A strong hierarchy makes layouts easier to scan and helps viewers understand the intended message quickly. It also creates a more consistent experience across websites, posters, advertisements, presentations, and other visual materials.

According to the Interaction Design Foundation, organizing information visually can improve usability and comprehension. This principle applies across both digital and print design.

Whether you are creating a website or developing a promotional poster, arrangement matters. Understanding visual hierarchy principles can help you create designs that feel organized, intentional, and easy to navigate. This guide explores key hierarchy principles, information structure, graphic design types, artistic applications, and AI’s changing role.

What are the 12 visual hierarchy principles?

The 12 visual hierarchy principles provide a useful framework for organizing design elements according to importance. Designers use these principles to control how viewers move through a composition and identify its most important information.

Common hierarchy tools include:

  • Size: Larger elements usually attract attention first.
  • Color: Bright or distinctive colors can create strong focal points.
  • Contrast: Differences in color, size, or weight separate important elements.
  • Alignment: Consistent alignment creates order and visual relationships.
  • Spacing: White space separates ideas and prevents clutter.
  • Proximity: Related elements appear connected when positioned together.
  • Repetition: Repeated styles create consistency across a design.
  • Typography: Font size, weight, and style establish different information levels.
  • Position: Elements placed strategically can receive greater attention.
  • Scale: Proportional differences communicate relative importance.
  • Shape: Distinctive shapes can attract attention within a uniform layout.
  • Movement: Directional elements can guide the eye through a composition.

These principles work together rather than independently. A successful layout uses several techniques to create a clear path through the content.

The Power of Scale and Contrast

Scale and contrast are two of the strongest tools for creating visual hierarchy in graphic design. Scale communicates importance through differences in size. A large headline immediately appears more important than smaller supporting text.

Contrast creates separation between competing elements. Designers can use differences in color, brightness, weight, size, or shape to make specific information stand out. Strong contrast can establish a focal point and prevent important content from getting lost.

These techniques become more effective when designers use them together. For example, a large headline with strong contrast can establish the first visual level. Smaller text and softer contrast can then create secondary and tertiary levels.

However, excessive contrast can make a composition feel chaotic. Too many large elements compete for attention. Too many bright colors also weaken the intended focal point.

The goal is not to make everything noticeable. The goal is to make the right elements noticeable in the right order. This approach creates clearer communication and a more controlled viewing experience.

What is the visual hierarchy of information in graphic design?

The visual hierarchy of information in graphic design refers to arranging content according to its importance. It helps viewers understand what to notice first and where to look next.

Most designs contain several information levels. A primary headline usually receives the strongest visual emphasis. Subheadings, supporting information, captions, buttons, and body text then occupy lower levels.

Without a clear information hierarchy, viewers may struggle to identify the main message. A cluttered layout can increase cognitive effort and make important details easier to miss.

Digital interfaces often rely on familiar scanning patterns. Users may scan content in an F-shaped pattern or move through a Z-shaped path, depending on the layout. Designers can use these behaviors when positioning headlines, images, navigation, and calls to action.

Hierarchy also improves accessibility and usability. Clear differences between content levels help users scan pages quickly and understand relationships between elements.

A strong hierarchy does not simply make a design attractive. It gives information a logical order and helps the audience process the message efficiently.

Prioritizing Headlines and Body Text

Creating a clear distinction between headlines, subheadings, and body text keeps readers oriented. Each text level should have a recognizable visual role.

Primary headlines usually receive the strongest emphasis. Designers can increase their size, weight, spacing, or contrast to establish an immediate focal point. Subheadings should remain noticeable but less dominant than the main heading.

Body text should support readability rather than compete with larger elements. A comfortable font size, appropriate line spacing, and sufficient contrast can make longer content easier to consume.

Typography also creates relationships between sections. Consistent heading styles help readers predict where new topics begin. Similar formatting across related elements creates a sense of structure.

Designers should avoid making every text element equally prominent. If everything appears important, nothing has clear priority.

A useful approach is to establish a simple type scale before designing the complete layout. This creates predictable differences between content levels.

When typographic hierarchy remains consistent, readers can scan information faster. They can also understand the structure without carefully reading every word.

What are 7 types of graphic design?

Graphic design includes several specialized disciplines, each serving different communication goals. Seven widely recognized types include visual identity, marketing and advertising, user interface, publication, packaging, motion, and environmental design.

Visual identity design develops elements such as logos, typography, and color systems that represent a brand. Marketing and advertising design creates promotional materials for campaigns, products, and services.

User interface design focuses on digital products such as websites and applications. It combines visual communication with usability and interaction principles.

Publication design organizes content for books, magazines, newspapers, reports, and digital publications. Packaging design combines visual communication with physical product presentation. These skills can also be useful when creating better presentations for work, where clear visual organization helps communicate information effectively.

Motion design adds movement to graphic elements through animation and video. Environmental design uses graphics, signage, and spatial elements to help people navigate physical environments.

Each discipline requires different technical and creative skills. However, visual hierarchy in graphic design remains important across all seven areas.

Designers must understand how audiences notice information, interpret visual cues, and move through a composition. The tools and mediums may differ, but the underlying goal remains similar: communicate information clearly and effectively.

Exploring Digital and Print Specializations

Choosing a specific graphic design specialization allows professionals to develop deeper skills for a particular medium. Digital and print design share fundamental principles, but their practical requirements can differ significantly. Building the right combination of technical and soft skills can also help designers adapt to different roles and work environments.

Digital designers often work with responsive layouts, interfaces, interaction patterns, accessibility, and screen-based typography. User interface designers may also collaborate closely with developers and product teams.

Print designers work with physical materials and production limitations. Paper type, printing methods, dimensions, color reproduction, and finishing techniques can affect the final result.

Both areas require a strong understanding of composition and visual hierarchy. Digital layouts must guide users through screens, while print layouts must communicate effectively within fixed physical dimensions.

Specialization does not mean designers must work in only one medium. Many professionals develop transferable skills across digital and traditional formats. A strong portfolio without work experience can help demonstrate those transferable abilities when pursuing design opportunities.

Understanding typography, spacing, contrast, alignment, and composition provides a strong foundation for either path. Designers can then add medium-specific technical knowledge based on their career goals.

The right specialization depends on interests, strengths, preferred tools, and the type of work a designer wants to produce.

What is visual hierarchy in art?

Visual hierarchy in art describes how artists control the viewer’s attention within an artwork. It determines which subjects, details, or areas appear most important during the viewing experience.

Graphic design often uses hierarchy to communicate information efficiently. Fine art can use the same principles for different purposes, including emotion, storytelling, symbolism, and atmosphere.

Artists can create hierarchy through lighting, color, contrast, scale, positioning, perspective, and compositional lines. A brightly illuminated subject against a dark background can immediately become the dominant focal point.

Proximity and contrast can also establish relationships between different parts of an artwork. Complex compositions may contain several focal areas that guide viewers through a visual narrative.

Hierarchy can influence emotional response as well. A central figure may create immediate recognition, while subtle background details encourage viewers to explore the artwork gradually.

The technique appears across painting, photography, sculpture, illustration, and other visual disciplines. Artists decide which elements deserve immediate attention and which should remain secondary.

Although artistic goals differ from commercial design goals, the underlying principle remains similar. Visual hierarchy directs attention and creates order within a composition.

Utilizing Focal Points and Lighting

Focal points and lighting are powerful tools for controlling attention in art. A focal point is an area that naturally attracts the viewer’s gaze before surrounding details.

Artists can establish focal points through brightness, color contrast, scale, sharpness, position, or distinctive shapes. A subject placed near the center may attract attention, but position alone does not guarantee dominance.

Lighting can strengthen this effect. Strong illumination against darker surroundings creates separation and directs attention toward the highlighted subject. Artists have used this approach for centuries to create depth and dramatic emphasis.

The technique known as chiaroscuro uses strong contrasts between light and shadow. It can isolate important subjects while adding volume, depth, and emotional intensity.

However, effective hierarchy does not require dramatic lighting. Subtle differences can guide attention without making the composition feel artificial.

Artists can also combine lighting with color, perspective, and composition. These techniques create multiple levels of attention and encourage viewers to explore the artwork naturally.

The strongest compositions usually balance emphasis with restraint. Too many competing focal points can weaken the intended visual journey.

Is AI replacing graphic designers?

Artificial intelligence is changing graphic design, but the idea that AI will simply replace every graphic designer is too simplistic. AI tools can generate concepts, variations, images, and layouts quickly. They can also automate repetitive production tasks.

However, generating visual assets is only one part of professional design. Designers must interpret objectives, understand audiences, evaluate ideas, solve communication problems, and make strategic decisions.

Human designers also bring cultural awareness, emotional understanding, client communication, and brand knowledge to their work. These factors influence whether a design feels appropriate for a specific audience.

AI can support these processes, but generated output still requires human judgment. Designers need to select useful concepts, correct errors, refine compositions, and ensure consistency with brand requirements. For designers exploring these tools, how AI generates images provides useful context on the technology behind AI-assisted visual creation.

Companies and technology organizations increasingly position AI as a creative tool rather than a complete replacement for human decision-making. Designers who understand how to use AI effectively may improve their workflows and produce more variations in less time.

The role of the designer is therefore evolving. Instead of competing only on production speed, professionals can focus more heavily on strategy, creative direction, problem-solving, and communication.

The strongest approach combines efficient AI tools with deliberate human judgment.

The Value of Human Creativity

Human creativity remains important because effective design involves more than producing attractive visual assets. Designers must understand why a particular visual solution works for a specific audience and objective.

AI systems are highly capable at recognizing patterns and generating variations. They can help designers explore concepts quickly and automate repetitive tasks. However, generated options still require evaluation and refinement.

Human designers contribute personal experience, empathy, cultural understanding, strategic thinking, and contextual judgment. These qualities can influence decisions that cannot be reduced to visual patterns alone.

Brand identity provides a useful example. A designer must understand a company’s personality, audience, market position, and communication goals before selecting appropriate visual choices.

This makes creative strategy increasingly valuable. Designers who can explain their decisions and connect visual choices to business or communication objectives can offer more value than production skills alone, particularly when developing careers in digital marketing.

The future of graphic design is therefore unlikely to depend on choosing between humans and AI. Instead, designers can use AI for speed while retaining human control over direction and judgment.

As technology develops, professionals who combine design fundamentals with strategic thinking and effective AI workflows may remain highly competitive.


FAQ SECTION

How do I practice visual hierarchy in my daily design projects?

Practicing visual hierarchy starts by limiting your font weights and sizes to three distinct levels. Squint at your design from a distance to see if the main focal point stands out immediately. If your eye wanders aimlessly, adjust the scale and contrast until the intended path becomes crystal clear.

Does visual hierarchy matter for mobile app design?

Visual hierarchy is critical for mobile apps due to smaller screen sizes and limited user attention spans. Users make split-second decisions on mobile interfaces, so primary calls-to-action must be instantly recognizable. Proper layout structure prevents frustration and drastically improves overall user retention rates.

What is the difference between visual weight and visual hierarchy?

Visual weight refers to how much attention an element commands through its size, color, texture, or other visual characteristics. By contrast, visual hierarchy organizes these weighted elements into a logical reading order. In simple terms, visual weight is the tool, while visual hierarchy is the structured result.

Can color alone establish a strong visual hierarchy?

Color can establish hierarchy effectively, but relying on it exclusively causes accessibility issues for color-blind users. Pairing color variations with changes in size, weight, and spatial placement creates a foolproof hierarchy. Combining multiple design variables ensures your message reaches every member of your target audience.


Conclusion

Understanding visual hierarchy in graphic design empowers creators to build intuitive, engaging, and highly effective layouts. Throughout this guide, we explored core design principles, structural information ordering, distinct industry specializations, artistic applications, and the evolving role of artificial intelligence. By mastering scale, contrast, and spatial organization, you can guide viewer attention effortlessly across any medium. AI tools may automate repetitive tasks, but they cannot replace human strategic thinking and emotional nuance. We encourage you to apply these foundational hierarchy concepts to your next creative project to elevate both usability and visual appeal.

Spotify vs. Apple Music: Which Service Wins the Audio Crown?

Spotify vs. Apple Music: Which Service Wins the Audio Crown?

Choosing between Spotify vs. Apple Music can shape your entire listening experience. Both platforms lead the music streaming market, but they serve different listener preferences. Spotify focuses strongly on discovery, personalization, and cross-platform flexibility. Apple Music emphasizes sound quality, curated content, and integration with Apple’s ecosystem.

Your ideal service depends on what matters most during everyday listening. Some users want smart recommendations and collaborative playlists. Others prioritize lossless audio, spatial sound, and a focused music experience.

This guide compares Spotify and Apple Music across sound quality, artist payouts, market position, discovery, and user experience. It also explores why some listeners switch from Spotify to Apple Music. By comparing these important factors, you can decide which streaming service best matches your listening habits and priorities, while also considering how YouTube Music compares as another popular listening option.

Which Sound Quality Service Is Better, Spotify or Apple Music?

When comparing Spotify vs. Apple Music for audio quality, Apple Music has the clear advantage. Apple Music offers lossless audio and Spatial Audio with Dolby Atmos at no additional cost. These features provide greater detail, depth, and instrument separation for compatible recordings and equipment.

Spotify traditionally uses compressed Ogg Vorbis audio, with its highest current quality reaching 320 kbps for Premium users. Spotify has discussed a higher-quality lossless option for years, but availability has not matched Apple Music’s offering. As a result, listeners with quality headphones or dedicated audio equipment may prefer Apple Music.

Apple Music is particularly appealing to audiophiles who want access to high-resolution music. However, everyday listeners may notice less difference when using basic earbuds or speakers. Your equipment and listening environment can significantly affect the practical benefit of lossless audio, making it important to understand how to choose the right pair of noise-cancelling headphones.

Lossless Audio Differences Explained

Lossless audio retains more of the original recording data than compressed formats. This can preserve subtle details and produce a more faithful reproduction of studio recordings. Apple Music offers lossless listening across its catalog of more than 100 million songs.

Spotify’s standard streams use compression to reduce file sizes and data usage. This approach works well for everyday listening and helps Spotify deliver reliable playback across many devices. However, compression can remove some audio information.

For listeners who prioritize studio-quality sound, Apple Music provides the stronger technical option. It also supports Spatial Audio with Dolby Atmos on compatible content and devices.

Keep in mind that lossless audio does not automatically sound better in every situation. Your headphones, speakers, connection, and listening environment all matter. Casual listeners may find Spotify’s 320 kbps quality more than sufficient for everyday use.

How Much Money Is 1,000,000 Streams on Apple Music?

One million Apple Music streams can generate roughly $7,000 to $10,000 in gross royalties, depending on several factors. The actual amount an artist receives can vary by territory, subscription type, label agreement, distributor, and other contractual arrangements.

Apple Music has historically maintained a relatively high effective per-stream royalty compared with many major streaming services. A commonly cited figure is around $0.01 per play, although this should not be treated as a guaranteed rate. Streaming services generally calculate royalties through complex agreements and revenue-sharing systems.

For independent musicians, stronger streaming royalties can make a meaningful difference. However, artists do not always receive the full amount generated by their streams. Labels, publishers, distributors, and other rights holders may receive portions of the revenue.

Therefore, calculating artist income requires more than multiplying streams by a fixed rate. Still, Apple Music remains attractive to creators who prioritize higher potential streaming revenue. Its payout structure can provide valuable income when an artist builds a large and engaged audience.

Understanding Artist Payout Structures

Artist payouts depend on several factors beyond the number of plays. Subscription revenue, listener location, rights ownership, and distribution agreements can all affect the final amount.

Apple Music has often been associated with an effective royalty rate near one cent per stream. However, rates can change and should not be considered a guaranteed payment for every play.

Family and individual subscription plans can also contribute differently to overall platform revenue. Streaming companies typically distribute revenue through agreements with rights holders rather than paying every artist directly.

Independent artists may therefore receive different amounts from the same number of streams. Distribution fees and label commissions can further reduce take-home earnings.

For musicians building sustainable careers, streaming income is only one part of the business. Touring, merchandise, licensing, publishing, and direct fan support can also contribute significantly.

Still, Apple Music’s relatively strong royalty economics make it an important platform for artists. Spotify also provides substantial exposure, especially because of its enormous global audience and powerful discovery tools.

What Is the No. 1 Music App?

Spotify remains one of the world’s largest music streaming platforms and leads the market by overall user reach. Its enormous audience comes from years of global expansion, a recognizable brand, and a widely available free tier.

Spotify also benefits from broad device compatibility. Users can access it across smartphones, computers, smart TVs, gaming consoles, cars, and smart speakers. This flexibility helps explain its strong position in the global streaming market.

Another major advantage is Spotify Wrapped, its annual personalized listening recap. The feature generates significant social engagement and has become a recognizable part of modern music culture.

Apple Music remains a major competitor, particularly among users within Apple’s ecosystem. Its integration with iPhone, iPad, Mac, Apple Watch, and HomePod devices creates a seamless experience.

Ultimately, Spotify’s market strength comes from accessibility, personalization, and scale. Apple Music competes by offering premium audio, curated content, and deep ecosystem integration.

Why Spotify Dominates Global Market Share

Spotify’s freemium business model has played an important role in its global growth. Its advertising-supported free tier allows users to explore the platform without paying for a subscription.

That low barrier to entry helps Spotify attract new listeners. Some free users eventually upgrade to Premium plans for additional features and fewer restrictions.

Spotify’s availability across numerous platforms also expands its reach. Users can move between phones, computers, televisions, gaming systems, and smart speakers without abandoning the same account.

The platform’s recommendation system adds another major advantage. Personalized playlists encourage users to return regularly and discover new music.

Spotify has also built a strong cultural presence through features such as Wrapped and collaborative playlists. These features encourage listeners to share their activity with friends and online communities.

Together, freemium access, personalization, device compatibility, and social features have helped Spotify maintain its leading position in global music streaming.

Is Spotify Actually Better Than Apple Music?

Spotify is not universally better than Apple Music. The better choice depends on the features you use most. Spotify stands out for music discovery, collaborative listening, device compatibility, and personalized playlists.

Features such as Discover Weekly, Daily Mixes, and Blend can make finding new music effortless. Spotify Connect also lets users control playback across compatible devices from their phones.

Apple Music takes a different approach. It combines a focused music interface with curated playlists, radio programming, synchronized lyrics, and high-quality audio. Its close integration with Apple devices is another major advantage.

Spotify may suit listeners who constantly explore new artists and playlists. Apple Music may appeal more to listeners who prefer albums, curated content, and premium audio. For listeners interested in the broader effects of music itself, music’s connection with memory and focus offers another perspective on the listening experience.

Your choice should also consider your existing devices. Android and Windows users can access Apple Music, but Apple device owners may enjoy deeper integration.

In short, Spotify is stronger for discovery and flexibility, while Apple Music excels in audio quality and a focused music experience.

Discovery Algorithms vs. Curated Radio

Spotify relies heavily on algorithms to understand listening habits and recommend music. Its personalized playlists can identify patterns across songs, artists, genres, and listening behavior.

Discover Weekly is a standout example. It introduces listeners to tracks that match their preferences while encouraging exploration beyond familiar artists.

Apple Music combines personalization with stronger emphasis on human curation. Its editorial playlists and radio programming provide recommendations shaped by music editors and industry professionals.

Apple Music also offers live radio programming through stations such as Apple Music 1. These stations can feature artist interviews, premieres, and genre-focused programming.

The difference comes down to discovery style. Spotify is ideal for listeners who enjoy automated recommendations that constantly adapt. Apple Music works well for users who value editorial judgment and traditional radio-style programming. For younger listeners, the experience of music can also be shaped by how musical training influences development in children.

Neither approach is inherently better. If you enjoy finding unexpected tracks through algorithms, Spotify may feel more engaging. If you prefer curated playlists and artist-led programming, Apple Music may provide a more satisfying experience.

Why Are People Leaving Spotify for Apple Music?

Some listeners switch from Spotify to Apple Music because they want better audio quality, a focused interface, or stronger Apple ecosystem integration. Price changes and dissatisfaction with product direction can also influence individual decisions. For a broader comparison of streaming subscriptions, YouTube Premium and Spotify Premium offer another useful point of comparison.

One common complaint among audiophiles has been Spotify’s delayed rollout of a lossless listening option. Apple Music already includes lossless audio and Spatial Audio with Dolby Atmos in its standard subscription.

Some users also prefer Apple Music because its interface keeps music at the center of the experience. Spotify has expanded beyond music into podcasts and audiobooks, which some listeners enjoy. Others may prefer a platform that focuses more directly on songs, albums, artists, and radio.

Switching services can also become easier with playlist migration tools. Users can transfer much of their existing music library instead of rebuilding everything manually.

However, Spotify continues to offer major advantages. Its recommendation system, social features, and broad device support remain compelling reasons to stay.

The decision ultimately depends on whether audio fidelity and a focused interface outweigh Spotify’s discovery and ecosystem flexibility.

The Appeal of Lossless Sound and Clean UI

Lossless audio is a major attraction for listeners who use quality headphones, wired equipment, or dedicated home audio systems. Apple Music makes lossless tracks available without requiring a separate premium tier. To get the most from premium audio equipment, it is also important to know how to clean and maintain your headphones properly.

Compatible recordings can also support Spatial Audio with Dolby Atmos. This creates a more immersive listening experience when the content and playback equipment support the format.

The interface is another reason some users prefer Apple Music. Its design keeps albums, artists, songs, and curated playlists prominent. This can appeal to listeners who enjoy exploring complete discographies.

Spotify offers a more recommendation-driven experience. Its personalized playlists can be extremely useful, but some users may prefer a less algorithm-focused interface.

The difference is largely about listening philosophy. Spotify encourages constant discovery and personalized recommendations. Apple Music places greater emphasis on albums, sound quality, and editorial curation.

For listeners who want a clean music library and high-fidelity playback, Apple Music can be an appealing alternative. Those who value endless recommendations may still find Spotify more useful.

FAQ: Spotify vs. Apple Music

Does Apple Music offer a free trial for new users?

Yes, Apple Music offers a generous free trial period for new subscribers to test the platform. The exact duration of the trial often ranges from one to three months depending on promotional offers. Users gain full access to the entire catalog, spatial audio, and offline downloads during this promotional window. You can cancel your subscription anytime before the trial ends without being charged.

Can I transfer my playlists from Spotify to Apple Music?

You can easily transfer your favorite playlists from Spotify to Apple Music using third-party utility apps. Popular migration tools like SongShift, FreeYourMusic, and Soundiiz handle the entire transfer process within minutes. These apps match song metadata across platforms to rebuild your exact library automatically. This eliminates the tedious hassle of recreating custom playlists manually after switching services.

Using a playlist transfer tool saves time and avoids rebuilding your music library manually. If you are comparing Spotify vs. Apple Music, this makes switching to Apple Music much easier while keeping your favorite songs and playlists organized.

Which platform has better offline listening features?

Both platforms offer robust offline listening capabilities, letting you download thousands of songs for playback without internet access. Spotify allows you to download up to 10,000 songs across a maximum of five different devices. Apple Music allows up to 100,000 songs stored locally in your library across authorized devices. Apple Music wins this category for power users with massive personal collections.

Does Spotify work better with smart home devices?

Spotify offers significantly better integration with third-party smart home ecosystem products. Thanks to Spotify Connect, you can control playback seamlessly across smart speakers, gaming consoles, and TVs. Apple Music works brilliantly within the Apple ecosystem via Siri and HomePod devices, but cross-platform smart home support feels more restricted. If you use diverse smart hardware brands, Spotify provides a more flexible user experience.

Conclusion

Choosing between Spotify vs. Apple Music ultimately depends on your listening priorities. Spotify remains a strong choice for personalized discovery, collaborative playlists, and broad device compatibility.

Its recommendation tools make finding new music easy. Features such as Discover Weekly, Daily Mixes, Blend, and Spotify Connect also create a flexible listening experience.

Apple Music takes the lead for listeners who prioritize audio quality. Its lossless audio and Spatial Audio features are included without requiring a separate high-fidelity subscription.

Apple Music can also appeal to users who prefer curated playlists, radio programming, and a music-focused interface. Its ecosystem integration adds another advantage for Apple device owners.

Artist payouts can also influence the decision. Apple Music has historically offered relatively strong royalty economics, although actual earnings vary by artist and agreement.

Ultimately, there is no single winner for everyone. Choose Spotify for discovery and flexibility, or choose Apple Music for sound quality and Apple-focused integration. The best service is the one that fits your devices, listening habits, and priorities.

Unlock Hidden Features on OnePlus Phones Like a Pro

Unlock Hidden Features on OnePlus Phones Like a Pro

OxygenOS includes many hidden features on OnePlus phones that can change how you use your device. Many users only explore basic settings and miss these useful tools. Features such as Shelf, Work-Life Balance, Canvas, Private Safe, and diagnostic options can improve everyday use.

OnePlus has built several customization and productivity features into OxygenOS. However, available options can vary by model, region, and software version. Always check your phone’s current settings before following a specific menu path.

This guide explores some of the most useful OnePlus hidden features. You will learn about diagnostic codes, private photos, customization tools, and more. We also explain the OnePlus secret code and the *#899# code.

Whether you own a flagship or Nord device, these tips can help you get more from OxygenOS. Explore the options that match your needs and avoid changing advanced settings without understanding them. For device-specific instructions and the latest software information, you can also check the official OnePlus Support page.

What Are Some Unique Features of the OnePlus Phone?

OnePlus phones include several useful features that are easy to overlook. The Alert Slider remains one of the brand’s most recognizable shortcuts on supported models. It lets you switch between ring, vibrate, and silent modes quickly.

OxygenOS also includes software tools for faster access and deeper customization. Depending on your model, you may find Shelf, OnePlus Scout, Quick Launch, customizable display settings, and eye-comfort options. These features make OnePlus phones feel more flexible during everyday use, especially when combined with useful Android home screen customization.

Some useful OnePlus features include:

  • Shelf: Access selected widgets, shortcuts, and information quickly.
  • OnePlus Scout: Search apps, settings, media, and other phone content.
  • Quick Launch: Open selected apps or functions from supported fingerprint shortcuts.
  • Work-Life Balance: Separate work notifications from personal distractions.
  • Canvas AOD: Turn compatible portraits into artistic lock-screen effects.

These hidden features on OnePlus phones can improve productivity without requiring extra apps. However, feature names and menu locations can change with OxygenOS updates.

Check your current Settings app before following older tutorials. A feature available on one OnePlus model may use a different menu on another.

Shelf and Work-Life Balance

Shelf acts as a customizable dashboard for useful widgets, shortcuts, and information. Depending on your OxygenOS version, you can access it through a swipe gesture or another configured shortcut. Available cards may include weather, notes, steps, tools, and other information.

Work-Life Balance is another useful OxygenOS feature. It helps separate professional notifications from personal distractions. On supported versions, you can configure Work and Life modes around apps, schedules, locations, or Wi-Fi networks.

For example, you could allow work notifications during office hours. Your phone could then switch to Life mode afterward. This reduces interruptions without requiring constant manual changes.

These hidden features on OnePlus phones are especially useful if you use one device for work and personal activities. They can help organize your digital routine without installing third-party applications.

Check Settings and Quick Settings to see which options your phone supports. OxygenOS interfaces change over time, so older instructions may not match your current menus.

If Shelf or Work-Life Balance is missing, your model or software version may not support it. This does not indicate a problem with your phone.

What Is the OnePlus Secret Code?

OnePlus phones can support dialer codes that open diagnostic or system information screens. These codes are different from normal Settings shortcuts. Some are designed for hardware testing, troubleshooting, or technical checks.

The most widely discussed OnePlus diagnostic sequence is *#899#. On supported devices, entering it in the Phone app can open Engineer Mode or a related factory-testing interface. The available options depend on your phone and OxygenOS version.

These hidden features on OnePlus phones are not universal. A code that works on one model may produce no response on another. Regional software and carrier configurations can also affect diagnostic functions.

Before using any diagnostic menu, follow these precautions:

  • Use codes from reliable sources.
  • Avoid changing settings you do not understand.
  • Do not alter calibration or network values unnecessarily.
  • Use diagnostic menus mainly for testing.
  • Exit without saving unknown configuration changes.

Diagnostic tools can help identify hardware problems. However, they should not be treated as ordinary customization features.

If you find an unfamiliar option, research its purpose first. When a hardware problem is serious, contacting OnePlus support or a qualified technician is safer.

Engineering Mode and Hardware Diagnostics

Engineering Mode can provide access to hardware testing tools on supported OnePlus devices. Technicians and experienced users can use these tools to check components and identify potential problems.

Depending on your phone and OxygenOS version, the diagnostic interface may include tests for the touchscreen, sensors, speakers, cameras, vibration, and other hardware. The exact menu can differ considerably between models.

The *#899# code is commonly associated with this diagnostic environment on supported OnePlus phones. It can be useful when checking a second-hand device. You may be able to test important components before deciding whether the phone works correctly.

However, diagnostic menus require caution. Some options are intended for technicians rather than ordinary users. Changing calibration values without understanding them can create additional problems.

Use the menu mainly for testing and viewing information. If a test produces an unexpected result, record the result instead of changing random settings.

These hidden features on OnePlus phones can be valuable during troubleshooting. Still, the code may not work on every device.

If nothing happens after entering the code, your model or software build may not support that shortcut. Do not install questionable third-party apps simply to force access to an engineering menu.

How to Make a OnePlus Phone Cool?

Making a OnePlus phone look more personal does not require a third-party launcher. OxygenOS provides several customization options that can change the appearance and behavior of your device.

Start with the display and personalization settings. Depending on your model, you can adjust wallpapers, icons, colors, fonts, lock-screen styles, and refresh-rate options. A higher supported refresh rate can make compatible animations and scrolling appear smoother.

You can also explore Always-On Display options. Some OnePlus models support Canvas AOD, which creates an artistic outline from a compatible portrait. This gives the lock screen a distinctive appearance without installing another application.

Other customization ideas include:

  • Choose a wallpaper that matches your preferred theme.
  • Set the highest supported screen refresh rate.
  • Customize Always-On Display elements.
  • Experiment with supported icon and font options.
  • Adjust notification and lock-screen behavior.

These hidden features on OnePlus phones can make your device feel more unique. They can also improve usability when configured carefully.

Remember that OxygenOS features vary between models, regions, and versions. Explore the available settings gradually. Keep the changes that improve your experience and avoid unnecessary modifications.

Always-On Display and Canvas Feature

Canvas AOD is one of the most distinctive personalization features associated with OxygenOS. On supported OnePlus phones, it can transform a selected portrait into a stylized line-art effect.

The feature creates an outline based on the chosen portrait. This produces a minimalist look while keeping the subject recognizable. It can make the Always-On Display feel more personal without using complicated customization tools.

The exact Canvas options depend on your phone and OxygenOS version. If your device supports the feature, look under Always-On Display or personalization settings.

Canvas is one of the more creative hidden features on OnePlus phones because it combines photography with lock-screen customization. Try different portraits to find images that create clean and recognizable outlines.

You can also explore other AOD settings while customizing Canvas. Depending on your device, you may be able to change clock styles, colors, display behavior, and notification information.

If Canvas does not appear, your phone may not support it. OxygenOS does not provide identical features across every OnePlus model.

Rather than installing another customization app, explore the built-in options first. You may already have enough tools to create the look you want.

How to See Hidden Pics in OnePlus?

OnePlus provides built-in privacy tools for hiding personal photos and videos. Depending on your OxygenOS version, these files may appear under Private album or Private Safe.

On supported versions, you can mark photos as private from the Photos app. Private media is then separated from the normal Photos view. This can prevent sensitive images from appearing alongside your regular gallery content.

The exact method for viewing private photos depends on your OxygenOS version. On supported devices, open Photos and touch and hold the appropriate bottom tab area. The phone may then request your privacy password.

After authentication, you can access your private content. You may also find Private Safe through a path such as:

Settings → Security & privacy → Private Safe → Images and videos

The wording can differ between OxygenOS releases. This is why checking your current settings is important.

These hidden features on OnePlus phones provide a convenient way to keep private media separate. They can be useful for personal photographs, documents, and other sensitive files.

Always remember your privacy password before moving important content. Without the correct authentication method, accessing protected files may be difficult.

Private Safe and File Manager Access

Private Safe extends OnePlus privacy controls beyond ordinary gallery hiding. Depending on your OxygenOS version, it can protect images, videos, audio, documents, and other files.

The location of Private Safe can change between software releases. On supported recent versions, you may find it under Settings → Security & privacy → Private Safe. Older versions may use different menu names.

To protect a photo or video, select it in Photos and choose the option that marks it as private. After moving it, the file should no longer appear in your ordinary photo feed. You can authenticate later to view or restore it.

Private Safe can also help organize sensitive documents. For example, you could keep personal records separate from ordinary downloads and use Android apps for managing everyday life to organize other routine tasks.

These hidden features on OnePlus phones are useful when privacy matters. However, you should still protect your phone with a strong screen lock and privacy password.

It is also important to distinguish Private Safe from Android’s Private Space. Private Safe focuses on protecting files. Private Space isolates supported apps and their data.

The feature available on your phone depends on its OxygenOS implementation. Always check the current settings before following instructions from an older version.

What Is the *#899 Code Used for OnePlus?

The *#899# code is commonly associated with the Engineer Mode or factory diagnostic interface on supported OnePlus devices. When available, it can provide testing tools for different hardware components.

Technicians and experienced users may use this menu during troubleshooting. Depending on the device, it can help check sensors, touch input, cameras, speakers, vibration, and other components.

However, *#899# should not be described as a universal OnePlus health-check code. The available menu depends on the phone model and software build. Some devices may offer different tests or block the code completely.

If you want to test it, open the Phone app and enter:

*#899#

If a diagnostic screen appears, use it for testing rather than changing advanced settings. Do not assume that every option is safe to modify.

This code can be useful when checking a used OnePlus phone. It may help identify hardware issues before you purchase the device. It can also provide useful information when troubleshooting and speeding up an Android phone.

These hidden features on OnePlus phones should always be used carefully. If a test reveals a serious fault, professional repair support is a better option than changing advanced settings yourself.

Comprehensive Sensor Testing Suite

The diagnostic interface associated with *#899# can expose several hardware tests on supported OnePlus devices. Available tests vary by model, so your screen may not match another user’s device.

Depending on the phone, you may find tests for sensors, touch input, cameras, speakers, vibration, and other components. These tools can help identify unusual hardware behavior, which can be useful when assessing how long Android tablets last and what kinds of hardware issues may develop over time.

For example, you might test a sensor after noticing inconsistent readings. You could also test the touchscreen, speaker, or vibration motor when inspecting a second-hand device.

However, treat calibration options with extra care. Running a test is generally safer than changing an advanced calibration value. If you do not understand a setting, leave it unchanged.

These hidden features on OnePlus phones can provide useful information before contacting technical support. Record failed tests and unusual results first. This information can help a technician understand the problem.

Most importantly, remember that diagnostic interfaces are software-dependent. A feature available on one OnePlus phone may not appear on another.

If *#899# does not work, do not assume your device is faulty. Your model or OxygenOS version may simply not support the code.

Frequently Asked Questions

Can I Use OnePlus Secret Codes on Carrier-Locked Models?

Secret codes are not guaranteed to work across all OnePlus devices. Carrier restrictions, regional software, and OxygenOS versions can affect available diagnostic functions. A code that works on one model may produce no response on another, just as Android phone RAM needs can vary depending on the device and how you use it.

Does the Alert Slider Work on Every OnePlus Model?

No. The Alert Slider is available on many OnePlus devices, but it is not universal across the product range. Check your specific model before relying on this hardware shortcut.

Is Private Safe Completely Secure From Data Recovery?

Private Safe is designed to protect private files through OnePlus privacy controls. However, avoid describing it as absolutely impossible to recover. Security depends on your device, software, credentials, and system implementation.

How Do I Turn On the High Refresh Rate?

Open Settings → Display & brightness and look for the screen refresh-rate option. Choose the highest supported setting if you prefer smoother scrolling. Menu names can vary by OxygenOS version.

Why Can I Not Find a Feature Mentioned in This Guide?

OxygenOS features vary by model, region, and software version. Some features may also be renamed or moved after an update. If an option is missing, check your device’s current user manual or OnePlus support documentation.

Can I Hide Photos Without a Third-Party App?

Yes. Supported OnePlus phones provide private-photo and Private Safe tools. These options can keep selected media away from the normal Photos view.

The exact steps can vary between OxygenOS releases. Check your current privacy and Photos settings if the menu described above is missing.

Conclusion

Learning the hidden features on OnePlus phones can help you get more from OxygenOS without installing extra apps. Tools such as Shelf, Work-Life Balance, Canvas AOD, Private Safe, and supported diagnostic menus offer useful options for everyday users.

The *#899# diagnostic code can be helpful when checking supported hardware. However, it should be used carefully. Diagnostic menus can expose advanced settings that are not intended for casual experimentation.

For privacy, Private Safe provides a convenient way to separate sensitive photos, videos, and documents from regular files. For customization, OxygenOS offers several ways to change your display and overall phone experience. If you’re also comparing OnePlus devices for a larger-screen experience, see OnePlus Pad Lite vs iPad Air.

Keep in mind that OxygenOS changes frequently. A feature’s name, location, or availability can differ between devices. Always verify instructions against your phone’s current software before changing advanced settings.

The best hidden features on OnePlus phones are the ones that solve real problems. Try a few features at a time and keep the options that improve your workflow.

With careful exploration, your OnePlus phone can become more personal, efficient, and useful. You can also discover new tools after major OxygenOS updates. Check your settings regularly to see what your device can do.

What Happens If You Don’t Update Apps?

What Happens If You Don’t Update Apps?

Have you ever wondered what happens if you don’t update apps on your smartphone or computer? Ignoring update notifications for weeks or months may seem harmless. You might want to save mobile data or avoid changes to familiar features. However, outdated apps can create security, compatibility, and performance problems over time.

According to Google Play Security guidance, keeping software current helps protect users from emerging security threats. App updates can also fix bugs and improve compatibility with newer operating systems.

This guide answers five common questions about updating apps. You will learn what happens when an app is never updated. You will also discover whether you can refuse updates and why some developers require newer versions.

By the end, you will understand the risks of outdated apps. You will also know how to manage updates without giving up control of your device.

What Happens If You Never Update an App?

When you never update an app, you can miss important security patches and bug fixes. Developers regularly discover vulnerabilities that attackers may exploit. Updates often address these weaknesses before they can cause serious problems. Running an older version can therefore leave your personal information less protected.

Outdated apps can also develop compatibility problems. Operating systems, cloud services, and app servers change over time. An old app may eventually stop working correctly with these newer systems. You could experience crashes, missing features, connection errors, or login problems, especially when using iPhone and Android apps across changing software environments.

Long-Term Software Degradation

Long-term use of outdated software can make everyday tasks less reliable. An app may become slower or lose support for newer device features. Developers also tend to focus customer support on currently supported versions.

Older software does not automatically make your entire device unsafe. However, it can increase your exposure to known vulnerabilities. It may also prevent you from receiving important fixes.

Keeping apps reasonably current helps maintain security, compatibility, and stability. You do not need to install every update immediately. However, delaying critical security updates for long periods creates unnecessary risks.

Can I Refuse to Update an App?

Yes, in many cases, you can delay or manually manage app updates. Both Android and iPhone users have settings that control automatic updates. Some people prefer this approach because they want to manage storage, mobile data, or update timing.

However, refusing updates for long periods has disadvantages. You may miss security patches, bug fixes, performance improvements, and compatibility updates. An app can continue working normally for months before a server or operating system change causes problems.

Managing Manual Update Choices

Manual updates can provide a useful middle ground. You can review available updates and install them when convenient. This approach also lets you prioritize important security or compatibility fixes.

If mobile data is your main concern, wait until you have a trusted Wi-Fi connection. You can then update several apps at once without using your mobile data allowance while managing your collection of free apps for Android users.

Remember that some updates become more important than others. A minor visual change can usually wait. A security patch deserves greater attention.

Before delaying an update, check its release notes when available. Look for references to security, stability, compatibility, or critical bug fixes. This helps you make a more informed decision instead of ignoring every update automatically.

Is Updating Apps Good or Bad?

Updating apps is generally beneficial because updates can improve security, stability, compatibility, and functionality. Developers release new versions to fix problems and respond to changing operating systems. Updates may also introduce useful features or improve an app’s overall performance, including the kinds of tools found in educational apps for students in 2026.

However, updates are not always perfect. A new version can occasionally introduce bugs, change a familiar interface, or increase storage requirements. These situations can make users hesitant about installing updates immediately.

The Balance of Performance and Security

The benefits usually outweigh these temporary drawbacks. Security updates are especially important because they can address vulnerabilities that were not known when the previous version was released. Updates can also improve compatibility with newer operating systems and device components.

Keeping your apps current can help protect sensitive information. This includes passwords, payment details, private messages, and personal files handled by supported applications.

If an update causes problems, do not assume that every update is harmful. Check whether the developer has released a newer patch. You can also consult the app’s official support resources.

A sensible approach is to keep apps updated while allowing yourself time to respond to major problems. For critical apps, prioritize security and compatibility updates over cosmetic changes.

How Do I Skip Updating an App?

You can usually delay app updates by changing automatic update settings. On Android, update controls are available through Google Play settings. On iPhone, automatic app updates can be managed through the device’s App Store settings, alongside other productivity apps for Windows 11 when managing software across your devices.

Skipping an update temporarily can make sense in certain situations. You might have limited mobile data or insufficient storage. You may also want to wait briefly after a major release to see whether other users report serious bugs.

Changing App Store Preferences

If you choose manual updates, review your apps regularly. Open your app store and check the available updates. Prioritize updates that mention security fixes, critical bugs, or compatibility improvements.

Avoid treating permanent update avoidance as a long-term strategy. The longer an app remains outdated, the greater the chance that it will become incompatible or unsupported. Some older versions may also contain vulnerabilities that later releases have already fixed.

A practical approach is to delay nonessential updates when necessary. Then install them once you have enough storage or a reliable Wi-Fi connection.

Keep your operating system updated as well. App and operating system compatibility often depends on both sides staying reasonably current. This is particularly important on computers, as explained in what happens to your computer if you skip Windows updates. This simple maintenance routine gives you more control without leaving important software updates ignored indefinitely.

Why Am I Forced to Update Apps?

Some apps require users to install a newer version before continuing. Developers may enforce updates when older versions can no longer communicate reliably with their servers. This can happen after major backend changes or when older technologies are retired.

Security can also be a reason for mandatory app updates. If an older version contains a serious vulnerability, keeping it active may expose users to unnecessary risks. Requiring a newer version can reduce that exposure across the entire user base.

Protecting Ecosystem Integrity

Mandatory updates can also simplify technical maintenance. Supporting many outdated versions requires additional testing, server resources, and security work. Developers can focus more effectively when most users run supported software, which is particularly important when using mobile apps for your business.

For users, a forced update can be frustrating. You may have limited storage, slow internet, or concerns about a new interface. However, the requirement usually exists because the older version no longer meets technical or security requirements.

Not every forced update means the previous version was dangerous. Sometimes the change is necessary because backend systems have changed. Other times, developers are ending support for older software.

If an app refuses to work until you update it, use a trusted connection and ensure sufficient storage first. After installation, restart the app and check that your account and saved information remain available.

FAQ SECTION

Do app updates use up all my phone storage?

update apps sometimes increase in size, but they frequently overwrite older, redundant code rather than simply adding new files. While major feature overhauls might require a bit more room, developers work hard to optimize storage efficiency. Clearing your device cache regularly helps manage space without sacrificing essential software updates.

Will updating an app delete my saved data?

Most standard update apps preserve your personal settings, login credentials, and saved progress seamlessly. Operating systems are designed to protect local user data during the installation process. However, backing up your important data or syncing accounts to the cloud before major software upgrades is always a smart precaution.

Can old app versions drain my battery faster?

Outdated applications frequently struggle to communicate efficiently with modern operating systems and hardware. These compatibility bottlenecks force your processor to work harder, which rapidly depletes battery life. Installing current updates ensures your software runs smoothly and preserves optimal battery performance throughout the day.

What should I do if an update breaks an app?

If a newly installed update introduces a frustrating bug or causes crashes, check the app store for a subsequent patch. Developers usually release rapid hotfixes to resolve newly reported issues within a few days. You can also reach out to customer support or consult official help forums for troubleshooting steps.

Conclusion

Failing to update apps may seem harmless at first, but long-term delays can create unnecessary risks. Outdated software can miss security patches, develop compatibility problems, and eventually stop working correctly.

Throughout this guide, we explored what happens when you never update an app. We also explained whether you can refuse updates and why some developers require newer versions.

Regularly updating apps helps protect your device against known security vulnerabilities. Updates can also improve stability, compatibility, and access to newer features. Although occasional update bugs can happen, avoiding every update creates greater long-term risks.

You do not need to install every update the moment it appears. Instead, pay particular attention to security fixes and important compatibility releases. If mobile data or storage is limited, use trusted Wi-Fi and free space before updating.

Take a few minutes today to review your app store settings. Check for pending updates and prioritize important ones. A simple update routine can help keep your digital experience safer, more stable, and more reliable.

Clear Cache and Clear Data Difference: What to Know

Understanding the Clear Cache and Clear Data Difference on Your Smartphone

When your smartphone slows down or runs low on storage, app settings can help. Two options often appear together: Clear Cache and Clear Data. They sound similar, but they perform very different tasks.

Understanding the clear cache and clear data difference helps you troubleshoot apps safely. Cache files contain temporary information that helps apps load faster. App data stores settings, accounts, databases, and other information needed for normal use.

Choosing the wrong option can create unnecessary problems. Clearing cache is usually a safe first step for minor issues. Clearing data is much more powerful and can reset an app completely.

According to Google Support, managing app storage correctly can resolve unexpected app crashes and performance bottlenecks.

This guide explains what happens when you clear cache and data. It also covers when to clear storage, how app data differs from cache, and whether either option can delete your personal files.

What Happens If I Clear Data and Cache?

Clearing cache and clearing data affect an app in different ways. Clearing cache removes temporary files, while clearing data removes information stored by the app for your personal setup.

Cache may include thumbnails, temporary images, scripts, and other files. These files help an app load content faster. Removing them does not normally delete your photos, documents, or downloaded files.

Clearing data is much more extensive. It can remove your account settings, preferences, local databases, and offline content. The app itself usually remains installed, but it returns to a fresh state.

After clearing data, you may need to:

  • Sign in to your account again.
  • Restore personal settings and preferences.
  • Re-download offline content.
  • Restore locally stored game progress, if no backup exists.

For this reason, clear cache is the safer first option when troubleshooting minor app problems. Use clear data only when a deeper reset is necessary.

Why Temporary Files Quickly Rebuild Themselves

Cache files naturally return after you use an app. That happens because applications create temporary files to improve performance and reduce loading times.

For example, a video app may cache thumbnails and frequently accessed images. A browser may store temporary website resources. Removing these files does not stop the app from creating them again.

This means clearing cache provides a temporary storage boost, rather than a permanent storage solution. The available space may increase immediately after the cleanup. However, the cache can grow again as you continue using the app.

You do not need to clear cache regularly just because it exists. Modern Android devices generally manage temporary storage automatically. Manual cache clearing is more useful when an app behaves incorrectly or its cache becomes unusually large.

Clearing cache can help when you notice:

  • Slow loading inside one specific app.
  • Display problems or outdated content.
  • Minor app glitches.
  • Unexpected app behavior after an update.
  • Unusually large temporary storage usage.

If the same problem continues after clearing cache, a deeper reset may be appropriate. That is where clearing app data becomes useful.

Which Is Better, Clear Storage or Clear Cache?

The better option depends on the problem you are trying to solve. Clear cache is designed for temporary files, while clear storage or clear data resets the app’s stored information.

If an app freezes, crashes, loads incorrectly, or behaves strangely, clearing its cache is usually the best first step. It removes temporary files without normally affecting your account or personal settings.

Clear storage is more aggressive. It removes the app’s stored data and returns it to a near-fresh state. This can solve persistent problems that cache clearing cannot fix.

Choose clear cache when you want to:

  • Remove temporary files.
  • Troubleshoot minor app problems.
  • Free a small amount of storage.
  • Keep your account and preferences intact.

Choose clear storage when you need to:

  • Reset an app completely.
  • Remove corrupted local data.
  • Fix persistent app problems.
  • Reclaim substantial app storage.

Before clearing storage, check whether important information is backed up. Local game saves, offline files, and app-specific settings may not be recoverable afterward, making how to safely upgrade to Windows 11 without losing data a related example of why backups matter before making major changes.

Choosing Full Resets for Persistent App Glitches

If clearing cache does not solve an ongoing app problem, clearing storage can provide a deeper reset. This process removes the app’s locally stored information and restores its initial setup state.

You may need to sign in again after the reset. You may also need to change preferences, download offline content, or recreate custom settings.

Clearing storage can help when an app:

  • Crashes every time you open it.
  • Remains stuck after an update.
  • Uses an unusually large amount of storage.
  • Shows persistent errors.
  • Continues behaving incorrectly after cache removal.

However, clearing storage should not be your first response to every minor glitch. It can remove useful local information, so use it carefully.

Before choosing this option, look for cloud backups or account synchronization. Some apps automatically store important information online. Others keep certain files only on your device.

The clear data option is essentially an app reset. It does not normally uninstall the application itself. Instead, it removes the information the app has accumulated for your account and local configuration.

What Is Clear Cache and Clear Data?

Clear cache and clear data are Android storage-management options. They control different types of information saved by individual applications.

Clear cache removes temporary files created during normal app use. These files can include cached images, temporary resources, and other data used to speed up loading.

Clear data removes the app’s stored information. Depending on the application, this can include preferences, local databases, account information, downloaded content, and saved states.

The exact information removed depends on the app. Some applications store important content online, while others keep certain information locally.

A simple way to remember the difference is:

  • Clear cache = remove temporary files.
  • Clear data = reset stored app information.

Clearing cache is generally the lower-risk troubleshooting option. It can help resolve small performance or display issues without changing your app setup.

Clearing data is more drastic. It can make an app behave as though you are opening it for the first time.

Always check what an app stores locally before clearing its data. This is especially important for games, messaging apps, note-taking tools, and apps with offline content.

The Permanent Impact of Erasing App Databases

App data contains the information that allows an application to remember your preferences and local activity. Removing that data can therefore have a much larger impact than clearing cache.

Depending on the app, stored data may include local databases, account settings, offline maps, downloaded content, chat history, saved preferences, or game progress.

Once this information is removed, recovery may not be possible. That depends on whether the app synchronizes your information with a cloud account or another backup service, so understanding how hackers steal data can also help you recognize why protecting stored information matters.

Before clearing app data, consider these steps:

  • Confirm that important information is backed up.
  • Check whether the app syncs with an online account.
  • Make sure you remember your login details.
  • Check whether offline content can be downloaded again.
  • Verify that important game progress is synchronized.

The app package itself usually stays installed. However, its locally stored information is reset.

This makes clear data useful for serious troubleshooting, but it also makes it a higher-risk option. If you only need to remove temporary files, clearing cache is usually enough.

Is Clear App Data the Same as Clear Cache?

No. Clear app data and clear cache are not the same function. Both options manage information stored by an application, but they remove different types of files.

Clearing cache targets temporary information. Apps can recreate these files when needed. That is why cache clearing usually has little effect on your personal setup.

Clearing app data removes information that the application uses to remember your configuration. This may include preferences, local databases, saved sessions, downloads, and other app-specific information.

The easiest comparison is to think of cache as temporary workspace. App data is closer to the application’s personal storage for your account and settings.

Clearing cache is generally suitable for minor problems. Clearing data is better suited to persistent problems that require a full reset.

Neither option is exactly the same as uninstalling the app. When you clear data, the application remains installed on your phone. However, it may behave like a newly configured app.

Because the consequences differ, do not select clear data simply because an app is using storage. Check what information the app stores first. This can help prevent accidental loss of local content.

Understanding How Storage Buttons Affect App Memory

Understanding how Android storage works makes the clear cache and clear data difference easier to remember. Apps typically use several types of storage for different purposes.

Cache contains temporary resources. These files help apps load frequently used content faster. They can usually be removed safely because the app can recreate them.

App data is more important. It can contain user preferences, databases, downloaded resources, login information, and other local files. Removing this information can reset the application’s behavior.

The amount of storage used by each category can vary greatly. A streaming app may build a large cache, while a productivity app may store more permanent data.

Before clearing either category, check the storage breakdown in your phone’s settings. This can show whether the problem comes from temporary files or stored app information.

A practical approach is simple:

  1. Check the app’s storage usage.
  2. Clear cache if temporary files are the main issue.
  3. Test the app again.
  4. Clear data only if the problem continues.
  5. Restore backups or settings when necessary.

This approach limits unnecessary data loss while still giving you a useful troubleshooting path.

Is It Better to Clear Data or Cache?

For most minor app problems, clearing cache is the better first choice. It removes temporary files while preserving most of the app’s important information.

Cache clearing can help when an app feels slow or displays outdated content. It can also help resolve minor glitches caused by corrupted temporary files.

Clearing data is appropriate when the problem is more serious. It resets the app and removes locally stored information. You may then need to sign in again and configure the app from scratch.

Use cache clearing when you want a light cleanup. Use data clearing when you need a complete app reset.

A simple decision guide can help:

  • App is slightly slow: Try clearing cache.
  • App displays incorrect temporary content: Try clearing cache.
  • App keeps crashing: Clear cache first, then consider data.
  • App will not open correctly: Consider clearing data after checking backups.
  • App uses excessive storage: Review its cache and data before deleting anything.
  • You want a complete reset: Clear data after confirming important information is backed up.

The safest approach is to start with the least destructive option. If cache clearing does not help, move to a deeper reset only when necessary.

When Deep Resets Outperform Simple Cache Cleanups

A deep reset can be useful when an app continues to malfunction after simpler troubleshooting steps. Clearing data removes the app’s locally stored information and gives it a fresh configuration.

This can help when corrupted settings or local databases are causing repeated crashes. It may also help when an app becomes unusually large because of accumulated local content.

However, clearing data comes with trade-offs. You may lose local settings, offline files, downloaded content, or game progress. You may also need to sign in again.

Before performing a deep reset, confirm that important information is synchronized or backed up. If the app supports cloud storage, make sure the latest version of your information has synced.

After clearing data, open the app and configure it again. Sign in when required, restore settings, and download necessary offline content.

Think of the process as a troubleshooting ladder:

  1. Restart the app.
  2. Check for updates.
  3. Clear the cache.
  4. Test the app again.
  5. Back up important information.
  6. Clear data if the issue remains.

This method avoids unnecessary resets. It also gives you a safer way to resolve stubborn application problems.

Frequently Asked Questions About Clear Cache and Clear Data

What does clearing cache do to my photos or downloads?

Clearing your cache does not touch personal photos, downloaded files, or saved documents. It only deletes temporary internet files and cached interface assets designed to speed up loading times. Your personal media remains completely safe and untouched during a cache wipe.

Do I need to log back in after clearing cache?

You do not need to log back into your accounts after clearing the cache. Your session tokens and login cookies stay active because they are stored separately from temporary cache files. You can clear cache freely without disrupting your active app logins.

Will clearing app data delete my game progress?

Clearing app data will erase local game progress if the game does not back up your saves to the cloud. Modern games linked to Google Play Games, Apple Game Center, or external servers restore your progress automatically after logging back in.

How often should I clear my app cache?

You should clear your app cache only when your phone runs low on storage or specific apps start lagging. Operating systems manage temporary files automatically, so routine manual cache clearing is rarely necessary for modern smartphones to function well.

Conclusion

Understanding the clear cache and clear data difference helps you manage smartphone storage without unnecessary data loss. The two options may appear together, but they serve very different purposes.

Clearing cache removes temporary files. It is usually the safer choice for minor glitches, slow loading, or outdated app content. Your personal settings and account information generally remain intact.

Clearing data provides a deeper reset. It removes locally stored app information, which can include preferences, databases, offline content, and saved progress. Because this process can cause data loss, confirm your backups before using it.

A simple rule can make the choice easier: clear cache first, and clear data only when a deeper reset is needed.

Use these options based on the problem you are trying to solve. This approach can help you free storage, troubleshoot apps, and avoid accidental loss of important local information.

Why Apps Keep Crashing and How to Fix Them Permanently

Why Apps Keep Crashing and How to Fix Them Permanently

Have you ever wondered why apps keep crashing when you need them most? Unexpected freezes and sudden closures can interrupt work, communication, and entertainment.

Common causes include outdated apps, software bugs, corrupted temporary data, limited storage, and system-level problems. Google Android Help also recommends checking updates, restarting the device, and troubleshooting affected apps.

According to Google Android Help, software bugs, outdated versions, and low device storage are common culprits behind these frustrating glitches.

If apps keep crashing on your phone, the right solution depends on whether one app crashes or many apps fail. This guide explains the most common causes and practical fixes.

You will learn how to fix an app that constantly crashes, free storage, manage system components, and reduce unnecessary interruptions. You will also find answers to common questions about app crashes, RAM, storage, and factory resets.

How to Fix an App Constantly Crashing

When apps keep crashing in only one application, the problem often affects that app rather than the entire phone. Corrupted cache files, outdated software, and damaged app data are common causes. Compatibility problems can also appear after an operating system update.

Start with the simplest fixes. Restart your phone, then open the app again. If it still crashes, check whether an update is available. Developers often release updates that correct bugs and improve compatibility.

If updating does not help, clear the app’s cache. This removes temporary files without normally deleting your personal information. If the problem continues, clearing the app’s storage can provide a deeper reset. However, this may remove saved settings or account data.

Before clearing storage, make sure important information is synchronized with your account.

If none of these steps work, reinstall the app. A fresh installation can replace damaged files and resolve persistent errors. Also check for available system updates.

Clear Cache and Update Your Software

Clearing an app’s cache is one of the safest ways to troubleshoot repeated crashes. Open your phone’s settings, select the affected app, and find its storage options. Choose Clear cache and then reopen the app.

Next, visit your device’s official app store. Search for the affected app and install any available update. Also check your phone’s system settings for an operating system update, especially if you need to speed up your Android phone.

Updates can fix known bugs, security problems, and compatibility issues. They can also improve performance after major system changes.

If apps keep crashing after an update, consider clearing the app’s storage or data. Remember that this step can remove locally stored information. You may need to sign in again afterward.

Reinstalling the app is another useful option. Uninstall it, restart your phone, and download the latest version again.

If only one app continues crashing after these steps, the problem may involve the app itself. Check the developer’s support information for known issues.

What Caused All the Apps to Crash?

When apps keep crashing across your entire device, the cause may be broader than a single application. System services help apps perform basic tasks, so problems with those services can affect multiple programs.

A recent operating system update can sometimes introduce compatibility problems. Corrupted system data or a malfunctioning system component can also cause widespread crashes. On Android devices, Android System WebView and related system components have historically been involved in some multi-app crashing problems.

Start by restarting the phone. Then install pending system and app updates. If several apps began crashing after a recent update, check for newer patches before making major changes.

Avoid immediately deleting system components or performing a factory reset. Some system apps are essential, and changing them incorrectly can create additional problems.

Safe Mode can help identify whether a downloaded app is interfering with the system. If crashes stop in Safe Mode, a recently installed application may be responsible.

For persistent system-wide crashes, back up important data and contact the device manufacturer’s support team.

System Component Failures and Corrupt Updates

A malfunctioning system component can cause multiple apps to crash simultaneously. This happens because many applications depend on shared services to display content, process data, or communicate with the operating system.

Android System WebView is one example of a shared component. It allows apps to display web-based content within their interfaces. If it develops a compatibility problem, several unrelated apps may behave unexpectedly.

First, restart your phone and check for updates. Look for updates to both your installed apps and system components. Installing the latest versions may resolve the issue without further troubleshooting.

If apps keep crashing after a particular system update, search your device manufacturer’s support resources for a confirmed fix. Some devices may provide an option to uninstall updates for certain system components. However, this option varies by device and Android version.

Do not remove critical system packages unless official instructions recommend doing so.

If widespread crashes continue, try Safe Mode. This temporarily disables downloaded apps and can help identify third-party software conflicts.

Why Is My Phone Kicking Me Out of Every App?

If apps keep crashing and your phone repeatedly returns you to the home screen, several factors may be responsible. Low available storage, software bugs, overheating, and system instability can all contribute to unexpected app closures.

Storage problems are especially important. Apps need some free space for temporary files, updates, and normal operations. When storage becomes critically low, the device may experience performance problems and failed processes.

Memory pressure can also affect multitasking. Modern phones manage RAM automatically and may stop background processes when resources are needed. This does not always indicate a hardware fault.

Start by checking your available storage. Remove unnecessary downloads, duplicate files, and large media you no longer need. Then restart the phone and test the affected apps.

If the device feels unusually hot, let it cool before using demanding applications again. Avoid prolonged heavy workloads while the phone is overheating.

If every app continues closing, check for system updates. Persistent problems may indicate a deeper software issue that requires manufacturer support.

Free Up RAM and Storage Space

Keeping enough free storage can improve overall device stability. Open your phone’s storage settings to see which categories consume the most space. Large videos, downloads, photos, and unused applications often account for substantial storage use.

Delete files you no longer need, but back up important photos and documents first. You can also remove unused apps and clear unnecessary downloads.

RAM works differently from storage. RAM is temporary working memory used by active processes. If you’re unsure how much memory your device needs, see our guide to Android phone RAM needs. Android generally manages RAM automatically, so constantly force-closing background apps is not usually necessary.

If apps keep crashing when your phone becomes sluggish, restarting the device can temporarily clear active processes. However, frequent crashes are unlikely to be solved permanently by repeatedly closing apps.

Try to keep the operating system and applications updated. Also avoid running demanding tasks when the phone is overheating.

If crashes continue despite sufficient storage and current software, investigate the specific app or system component involved. Persistent device-wide failures may require professional or manufacturer support.

Why Is My Phone Suddenly Closing Apps?

A phone may suddenly close an app because of software errors, memory pressure, overheating, or system restrictions. These problems can explain why apps keep crashing without warning.

For example, an app that closes during heavy use may be struggling with a software bug or resource demand. An app that closes after the phone becomes very hot may be affected by thermal protection.

Battery-saving features can also restrict background activity. However, they do not normally force-close an app that you are actively using. Their effects are more noticeable with background syncing, notifications, and other background tasks.

Check whether the issue occurs only with one application. If so, update, clear the cache, or reinstall that app.

If several apps close unexpectedly, check storage and system updates. Also note whether the problem began after installing a new application or update.

Avoid using demanding games, cameras, or video editors while your phone is excessively hot. Give the device time to cool before continuing.

These steps can help identify whether the problem comes from an individual app, system software, or device conditions.

Manage Battery Saver and Thermal Limits

Battery-saving features can limit background activity to extend battery life. Depending on your phone, these settings may delay notifications, restrict synchronization, or limit background processes. Understanding battery health and cycle count can also help when evaluating how your device’s battery is performing over time.

If an important app does not work correctly in the background, check its battery or background-usage settings. Some devices let you choose less restrictive settings for individual applications.

Do not disable battery optimization for every app. Doing so can increase battery consumption without fixing ordinary crashes.

Heat is another important factor. Phones can reduce performance when temperatures become too high. Heavy games, video editing, navigation, or camera use can generate substantial heat, especially while charging.

If your phone becomes hot, stop demanding tasks and allow it to cool naturally. Avoid placing it in extreme temperatures or using unsafe cooling methods.

A protective case can also retain heat in some situations, although this depends on the device and case design.

If apps keep crashing even when the phone is cool, check for updates and available storage. Persistent crashes may require reinstalling the app or contacting the developer or device manufacturer.

How Do I Stop Apps From Closing?

If apps keep crashing, preventing repeated closures starts with regular device maintenance. Keep your apps and operating system updated so known bugs and compatibility problems can be corrected.

Storage management also matters. Try to keep a reasonable amount of free space available for temporary files, updates, and normal system activity. Remove unused apps, downloads, and large files when storage becomes crowded.

Restarting your phone can resolve temporary software problems. It is also useful after installing major updates or when the device begins behaving unusually.

Avoid installing apps from untrusted sources. Third-party software can contain bugs or conflict with other applications. Use official app stores whenever possible.

Pay attention to patterns. If crashes began after installing one application, updating the operating system, or changing a battery setting, that information can help identify the cause.

You should also keep your phone at a reasonable temperature. Avoid prolonged heavy workloads when the device is already hot.

If one app continues crashing after basic troubleshooting, contact its developer. If every app fails, seek manufacturer support before performing a factory reset.

Maintain Routine Device Maintenance

Routine maintenance can reduce many common causes of app crashes and poor phone performance. Start by checking for operating system and application updates regularly. Updates often contain bug fixes, security improvements, and compatibility changes.

Review your storage periodically. Delete unnecessary downloads and large files, and remove applications you no longer use. Back up important data before making major changes.

You can also restart your phone when it becomes unusually slow or unstable. A restart can clear temporary processes and resolve minor system glitches.

Avoid repeatedly clearing RAM or force-stopping every background app. Modern operating systems manage memory automatically, and aggressive task management can sometimes reduce efficiency.

Monitor your phone’s temperature during demanding activities. If the device becomes very hot, pause the activity and let it cool.

Finally, watch for patterns. Note which applications crash, when the crashes occur, and whether they started after an update.

If apps keep crashing despite regular maintenance, the issue may require deeper system troubleshooting or professional support.

FAQ

When apps keep crashing, the right solution depends on the symptoms. A single crashing app usually requires app-level troubleshooting. Several crashing apps may indicate a system or storage problem.

Before taking drastic action, start with simple fixes. Restart the device, install available updates, check storage, and test the affected applications again.

If an app still crashes, clear its cache or reinstall it. For widespread crashes, investigate system updates and shared components. Safe Mode can also help identify conflicts caused by downloaded applications.

A factory reset should remain a last resort. It removes personal data and requires you to restore your device afterward.

The questions below cover common concerns about app crashes. They also explain when storage, background apps, or system problems may be responsible.

Why Do My Apps Crash Immediately Upon Opening?

Apps that crash immediately after opening may have corrupted data, outdated software, or compatibility problems. Start by restarting your phone and checking for an available app update.

If the problem continues, clear the app’s cache through your device settings. This removes temporary files without normally deleting your account information or personal files.

If apps keep crashing immediately after opening, clearing the app’s storage may provide a deeper reset. This can remove saved settings and require you to sign in again.

Reinstalling the application is another effective option. Uninstall the app, restart your phone, and download the latest version from the official app store.

If several apps crash immediately, investigate system updates, available storage, and shared system components. A device-wide problem requires different troubleshooting than an isolated app failure.

When only one app continues crashing after reinstallation, the issue may be specific to that app. Check its official support resources for known problems.

Can a Lack of Storage Space Cause Apps to Crash?

Yes, critically low storage can contribute to app crashes and poor device performance. Applications need available space for temporary files, updates, cached content, and other operations.
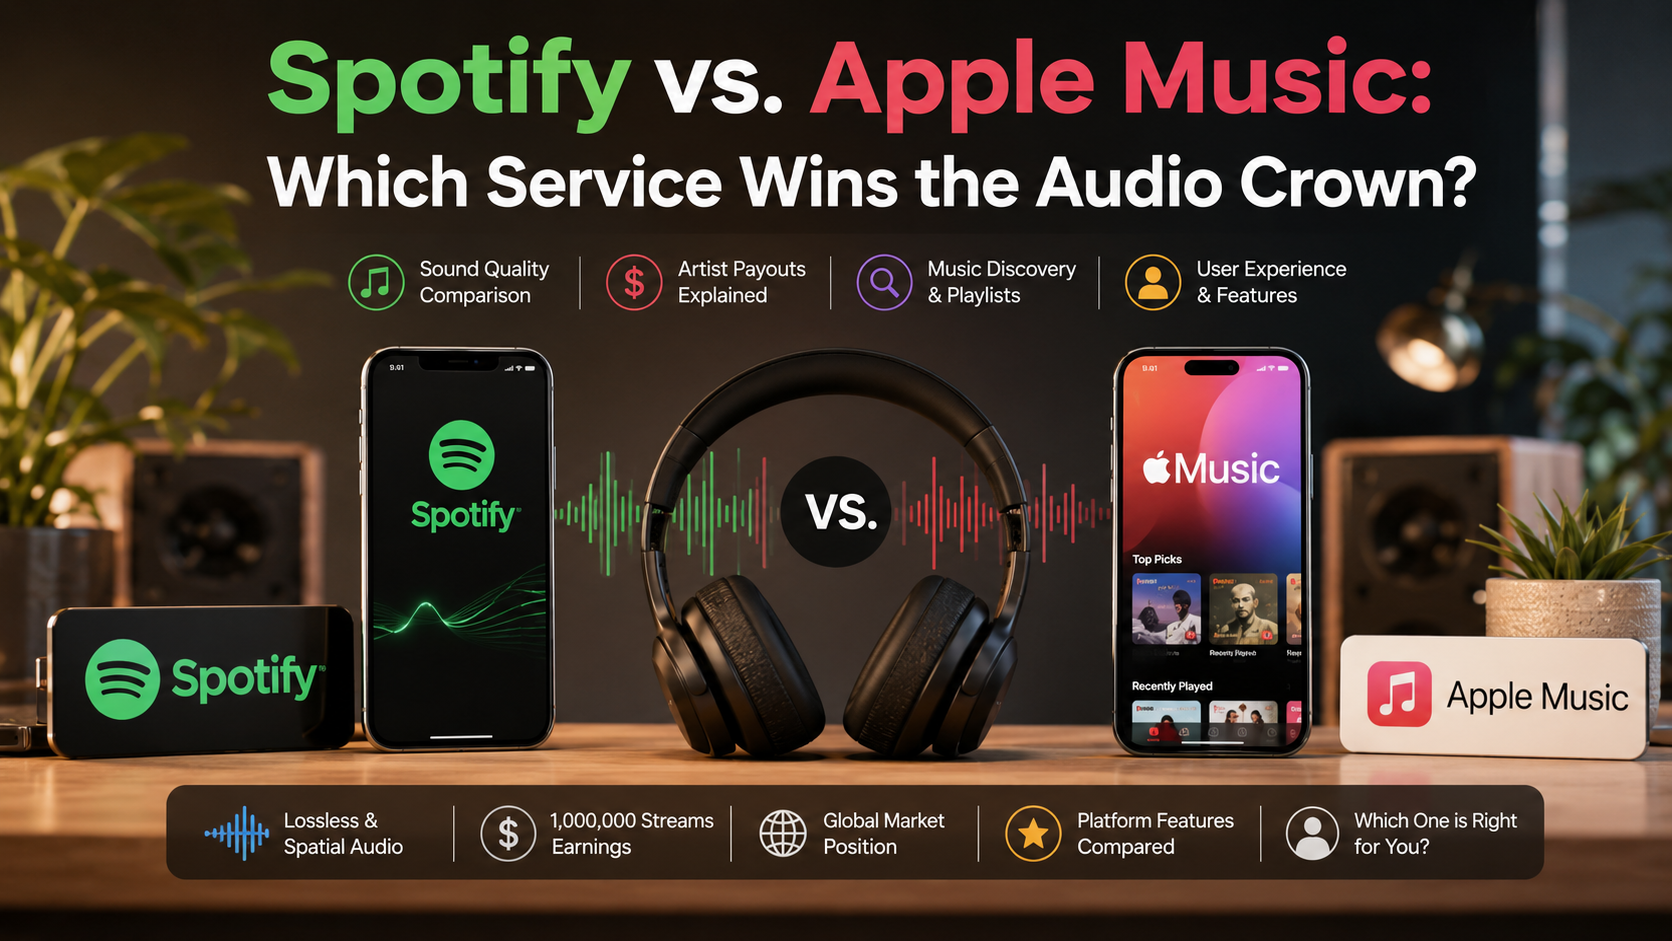
When storage becomes nearly full, the phone may struggle to complete routine tasks. You may notice failed updates, slow performance, freezes, or unexpected app closures.

Check your storage through the device settings. Identify large files, unused applications, downloads, and other unnecessary data.

Before deleting anything important, create a backup. Photos and videos often consume the most space, so reviewing large media files can quickly free capacity.

Do not confuse storage with RAM. Storage holds files and applications, while RAM provides temporary working memory for active processes.

If apps keep crashing despite having enough storage, investigate other causes. Corrupted app data, software bugs, overheating, or system conflicts may be responsible.

After freeing storage, restart your phone and test the affected apps. If crashes continue, update the apps and operating system.

Should I Factory Reset My Phone If Apps Keep Crashing?

A factory reset should be a last resort when apps keep crashing despite other troubleshooting steps. It removes personal data, installed applications, settings, and other information from the device.

Before considering a reset, try less destructive solutions first. Restart the phone, install updates, check storage, clear problematic app data, and reinstall affected applications.

If many apps crash, test the phone in Safe Mode when that feature is available. Safe Mode can help determine whether a downloaded application is causing system instability.

Also check whether the crashes began after a recent update or installation. This timing can provide useful clues.

If you decide to perform a factory reset, back up important information first. Save photos, contacts, documents, authentication information, and other essential data.

Make sure you know the account credentials needed to set up the phone again. After the reset, reinstall applications gradually rather than restoring everything at once.

If crashes continue even after a factory reset, the problem may involve hardware or deeper system issues. Contact the device manufacturer’s support team or an authorized repair provider.

Do Background Apps Affect Performance and Cause Crashes?

Background apps can use RAM, battery, storage, and processing resources, but modern phones manage these resources automatically. A large number of installed apps does not necessarily mean they are all actively consuming RAM.

When memory becomes limited, the operating system may stop background processes. This helps keep the current task responsive and does not automatically mean the phone is malfunctioning.

However, poorly designed or buggy applications can continue performing background tasks. These may increase battery use, consume resources, or interfere with other software.

If you notice unusual behavior after installing an application, uninstalling it can help determine whether it is responsible. You can also review battery and background-usage settings on your device.

Restarting the phone may resolve temporary performance problems. Keeping apps and system software updated is also important.

If apps keep crashing while multitasking, investigate storage, overheating, system updates, and possible software conflicts. Avoid task-killer apps that constantly force-stop background processes.

If every app keeps closing, manufacturer support may be necessary.

Conclusion

When apps keep crashing, the cause can range from simple app bugs to broader system problems. The most effective solution depends on whether one application or the entire device is affected.

For a single crashing app, start by restarting the phone and installing updates. Then clear the app’s cache and consider clearing its data or reinstalling it.

If several apps crash, check your available storage and system software. Shared components and faulty updates can sometimes cause widespread failures.

Device temperature also matters. Let an overheating phone cool before running demanding applications again. Battery settings may affect background activity, but they are not usually the main cause of active-app crashes.

Regular maintenance can reduce recurring problems. Keep software updated, maintain sufficient storage, and avoid untrusted applications.

A factory reset can help with severe software corruption, but it should remain a final option. Always back up important information first.

If apps keep crashing after trying these fixes, look for patterns and check your manufacturer’s support resources. With the right troubleshooting steps, you can identify common causes and keep your phone more stable and reliable.

How to Build a Portfolio Without Work Experience

How to Build a Portfolio Without Work Experience

Starting your professional journey can feel intimidating when every job description demands prior experience. Yet, you do not need a traditional corporate background to showcase your true capabilities to potential employers. Learning how to build a portfolio without work experience opens doors by highlighting what you can actually create and achieve right now. Many aspiring professionals wonder how to create a portfolio with no experience, whether AI can help build it, how to design graphics without a history, or how to market yourself effectively. According to Google Search Central, demonstrating genuine expertise and high-quality content is vital for standing out. This comprehensive guide walks you through every essential step to help you launch a compelling portfolio that wins clients and secures interviews.

How to Build a Portfolio Without Work Experience

Building a portfolio without professional experience means replacing job history with proof of your skills. You can demonstrate your abilities through personal projects, volunteer work, open-source contributions, and real-world practice.

Start by choosing a clear niche and identifying the roles you want to target. Then, create projects that match the skills employers expect from those roles. For example, aspiring developers can build websites or applications, while designers can create branding concepts or user interfaces. Exploring career options without a college degree can also help you identify roles where a strong portfolio can demonstrate your abilities.

Document each project from the initial idea to the final result. Explain the problem, your approach, tools, challenges, and outcome. This gives hiring managers insight into how you think and solve problems.

Treat personal projects as seriously as paid assignments. A polished project can show initiative, technical ability, creativity, and attention to detail even when you have no formal employment history.

Focus on Personal and Pro Bono Projects

Personal and pro bono projects are among the most useful ways to build a portfolio without work experience. They give you practical examples that employers can evaluate instead of relying only on qualifications or coursework.

Start with projects that solve a specific problem. You could redesign a local business website, create marketing materials for a community organization, or build a small application that addresses an everyday need. These projects provide stronger evidence than generic practice exercises.

Volunteering your skills can also introduce you to real deadlines, feedback, and client requirements. Ask the organization for permission before publishing completed work in your portfolio.

Open-source contributions are another option, especially for developers. Even small improvements can demonstrate collaboration and familiarity with professional workflows.

For every project, explain:

  • The problem you wanted to solve.
  • Your role and responsibilities.
  • The tools or skills you used.
  • The challenges you encountered.
  • The final result and what you learned.

This approach turns limited experience into verifiable evidence of your abilities.

Can AI Make My Portfolio?

AI can help you create a portfolio faster, but it cannot replace your judgment or experience. Tools powered by artificial intelligence can assist with website layouts, content ideas, project descriptions, research, and design concepts. However, publishing AI-generated material without meaningful customization can make your portfolio feel generic.

Use AI as a creative and productivity assistant, not as the author of your professional identity. Platforms and models from companies such as OpenAI can help you explore ideas and improve early drafts.

The important work still comes from you. Choose the projects, make strategic decisions, test your work, and explain why you made those choices.

When using AI, review every output carefully. Correct inaccurate information and remove anything that does not reflect your actual abilities. You should also avoid claiming that you completed work that AI performed for you.

A strong portfolio shows what you can do, not simply what an AI tool can generate. Use these tools to save time while keeping your skills, perspective, and decisions at the center.

Leverage AI as a Creative Assistant

Generative AI can support many stages of portfolio development. It can help organize your content, suggest project ideas, create placeholder copy, and explore different design directions.

For example, you can ask an AI tool to suggest a structure for a case study. You can then rewrite the content using your actual project details and experiences. This keeps the final result personal and credible.

AI can also help identify gaps in your portfolio. Ask it to review your project descriptions and suggest information that employers may need. You should make the final decisions rather than accepting every recommendation automatically.

For visual projects, AI can provide inspiration for layouts, typography combinations, or color palettes. Treat these suggestions as starting points. Your final design should reflect your own decisions and design principles.

The same approach works for technical portfolios. AI can help brainstorm project ideas or explain unfamiliar concepts. However, you should understand and test any code before presenting it.

Used carefully, AI can reduce repetitive work while leaving the creative direction and professional judgment in your hands.

How Do I Build My Own Portfolio?

To build your own portfolio, start with a platform that matches your technical skills and the type of work you want to showcase. You can use a website builder, content management system, or create the site yourself if you have development experience. If you’re deciding between independent work and employment, freelance vs. full-time career paths can help you evaluate which direction fits your goals.

Keep the design simple. Clear navigation, responsive layouts, readable typography, and fast loading times help visitors find your work quickly.

Choose only your strongest projects. Each project should demonstrate a specific skill and explain the process behind the final result. A short case study can cover the objective, your approach, tools, challenges, and outcome.

Avoid filling your portfolio with unfinished experiments. A smaller collection of polished projects can create a stronger impression than dozens of weak examples.

Your portfolio should also make it easy to contact you. Include a clear contact section and relevant professional profiles, such as LinkedIn or GitHub.

If you have no professional experience, your projects become the main evidence of your ability. Make each project useful, well-presented, and relevant to the roles you want.

Choose a Clean and Minimalist Layout

A clean layout helps visitors focus on your work instead of navigating unnecessary design elements. Your portfolio should make important information easy to find within seconds.

Use consistent typography, spacing, colors, and visual hierarchy throughout the site. Avoid excessive animations, decorative graphics, or complicated navigation unless they support the purpose of your portfolio.

Make the website responsive across desktop computers, tablets, and smartphones. Employers may review your portfolio from different devices, so every project should remain easy to understand on smaller screens.

Your homepage should quickly explain who you are, what you do, and what type of opportunities you seek. Then, guide visitors toward your strongest projects.

Project pages should provide enough context without overwhelming readers. Use screenshots, demonstrations, or short videos when they help explain the work.

Fast performance also matters. Compress large images, avoid unnecessary scripts, and test your pages before publishing.

A minimalist design does not mean an empty website. It means removing distractions so your skills and projects receive the attention they deserve.

Can I Do Graphic Design With No Experience?

Yes, you can begin graphic design without formal employment or a professional design degree. The bigger challenge is proving that you understand design fundamentals and can produce consistent work.

Start by learning principles such as typography, color theory, composition, contrast, visual hierarchy, and spacing. Free tutorials and structured online courses can help you develop these foundations.

Practice by creating realistic design briefs. You could develop a fictional brand identity, design packaging for an imaginary product, or create social media graphics for a hypothetical business.

Recreating existing designs can also help you understand how professional work is constructed. However, clearly label practice work and never present another designer’s work as your own.

Share selected projects online to receive feedback. Constructive criticism can reveal weaknesses that are difficult to notice yourself. Apply that feedback to later projects and show how your skills improve over time.

Your portfolio should demonstrate variety without becoming unfocused. Select projects that match the type of graphic design work you want to pursue.

Consistency matters more than creating hundreds of pieces. A small collection of polished, thoughtful projects can establish credibility even before your first design job.

Master Fundamental Design Principles Early

Strong graphic design depends on more than knowing how to operate design software. Understanding fundamental principles helps you create work that looks intentional and communicates information clearly.

Typography affects readability, tone, and visual hierarchy. Learn how font size, weight, spacing, and pairing influence how people interpret information.

Color theory helps you create appropriate visual relationships and communicate emotion. Study contrast, harmony, saturation, and accessibility before choosing colors for portfolio projects.

Visual hierarchy guides attention toward the most important elements. Use size, position, spacing, and contrast to establish a clear reading order.

Whitespace is equally important. Giving elements enough room can improve readability and prevent a design from feeling crowded.

Composition determines how individual elements work together. Practice balancing images, text, shapes, and negative space within a defined layout.

These principles apply across logos, posters, websites, advertisements, presentations, and social media graphics. Learning them early gives your projects a stronger foundation.

Instead of relying on templates alone, understand why a design works. That knowledge will help you create original work and explain your decisions during interviews.

How to Build a Marketing Portfolio With No Experience

Building a marketing portfolio without professional experience requires evidence of your strategic thinking. You do not need a corporate job to demonstrate that you understand audiences, content, search, social media, or campaign performance.

Start a personal blog, niche website, newsletter, or social media account. Choose a topic that gives you enough opportunities to create and measure content consistently. You can also explore jobs in the creator economy to understand how content creation can develop into a professional career.

You can also create a simulated marketing campaign for a fictional company. Define the target audience, campaign objective, messaging, channels, content strategy, and expected results.

Whenever possible, collect real performance data. Track metrics such as website traffic, engagement, click-through rate, search impressions, conversions, or audience growth.

Do not invent results. If a project is hypothetical, clearly label it as a simulated campaign. Employers can still evaluate your strategic reasoning and execution.

Present each project as a short case study. Explain the problem, your research, strategy, implementation, metrics, and lessons learned. Building a personal brand for career growth can further help you present these projects and communicate your professional strengths.

This approach helps build a marketing portfolio without experience while showing employers that you understand how marketing decisions connect to measurable outcomes.

Highlight Data and Campaign Metrics

Marketing employers want to see whether you can connect activities with measurable outcomes. Including relevant metrics makes your portfolio more credible and gives readers evidence of your analytical thinking.

For a website project, you could report organic traffic, search impressions, keyword rankings, click-through rate, or conversions. For social media work, engagement rate, follower growth, reach, and link clicks may be useful.

Avoid presenting metrics without context. Explain what you changed and why the result matters. For example, describe how changing a headline affected clicks or how a content strategy increased organic traffic.

Charts can make performance information easier to understand. Keep them simple and show only metrics that support your case study.

If you have limited data, focus on the process instead. Explain your research, audience analysis, campaign objectives, content choices, and measurement strategy.

Most importantly, distinguish real results from projected results. Transparent reporting is more valuable than impressive-looking numbers with no evidence.

A marketing portfolio should demonstrate both creativity and analytical thinking. Showing how you made decisions and measured outcomes can help compensate for limited professional experience.


FAQ SECTION

What Tools Should I Use to Build My Portfolio Website?

When learning how to build a portfolio without work experience, choose a website platform that matches your technical skills and goals. WordPress, Webflow, and Notion are useful options for beginners because they require little or no advanced coding knowledge. Consider factors such as design flexibility, hosting reliability, mobile responsiveness, SEO features, and custom domain support. A professional domain can make your website easier to remember and improve its credibility. Most importantly, choose a platform that lets you present your projects clearly and maintain your portfolio easily.

How Many Projects Should I Include in My Portfolio?

When considering how to build a portfolio without work experience, focus on project quality rather than creating a large collection. For most beginners, three to five strong projects are enough to demonstrate relevant skills. Select projects that match the type of role you want to pursue. Each project should showcase a different ability or demonstrate meaningful problem-solving. Include a short description, your role, the tools you used, and the final outcome. Avoid adding weak, unfinished, or repetitive work simply to make your portfolio appear larger. A focused portfolio is usually easier for employers to review.

Should I Include Failed Projects in My Portfolio?

A failed project can still be useful when you are learning how to build a portfolio without work experience. However, only include it when the project demonstrates meaningful problem-solving, learning, or improvement. Explain the original goal, what went wrong, and how you identified the underlying issue. Then describe the changes you made and what you learned from the experience. Be transparent about the outcome and avoid presenting failure as success. A well-explained mistake can demonstrate self-awareness and adaptability. However, remove projects that contain major unresolved problems or do not provide useful evidence of your abilities.

How Do I Write Case Studies With No Real Clients?

You can create strong case studies while learning how to build a portfolio without work experience. Use personal projects, freelance practice assignments, volunteer work, or open-source contributions as examples. Start by defining a realistic problem and identifying the intended audience or user. Then explain your research, planning, tools, decisions, implementation, testing, and final solution. If the project is hypothetical, clearly label it as a concept or simulated assignment. Include screenshots or other visuals when useful. Never invent clients, revenue, traffic, or other results. Honest, detailed case studies can demonstrate your skills even without professional client experience.


Conclusion

Mastering how to build a portfolio without work experience is an empowering journey that transforms your self-driven passion into tangible professional proof. By focusing on personal projects, leveraging smart digital tools wisely, and documenting your creative process thoroughly, you create undeniable value. Every great professional started somewhere with a blank page and a willingness to learn through continuous practice. Take the first step today by outlining your initial project idea, organizing your best creative concepts, and publishing your work online. Your future employers and clients are waiting to see what you can accomplish when given the opportunity to shine.

Signs of a Good Company Culture: Complete Guide

The Ultimate Guide to Recognizing the True Signs of a Good Company Culture

Finding the right workplace begins with understanding the core signs of a good company culture. A thriving organizational environment directly impacts employee happiness, retention, and overall productivity. When leadership values transparency and trust, teams naturally flourish. According to research published by Harvard Business Review, positive work environments foster higher engagement and lower burnout rates. This comprehensive guide answers critical questions regarding corporate frameworks, descriptive terms, core organizational characteristics, actionable improvement strategies, cultural models, and real-world examples. By examining these elements, you will gain deep insight into what makes a modern workplace truly exceptional and successful.

What Are the 5 P’s of Corporate Culture?

The 5 P’s of corporate culture provide a useful framework for understanding workplace health. They include purpose, people, processes, practices, and philanthropy. Together, they show how a company operates and treats its employees.

Purpose explains why the organization exists and what it aims to achieve beyond profit. People reflect leadership, teamwork, communication, and employee relationships. Processes cover decision-making, workflows, accountability, and information sharing. Practices include recognition, professional development, feedback, and everyday workplace habits. Philanthropy reflects social responsibility and the company’s wider community impact.

These areas can also help employees identify the signs of a good company culture. A strong culture usually connects business goals with employee needs. It also creates clear expectations without becoming overly rigid. When these five elements work together, employees understand their role and feel connected to the organization’s direction.

Understanding Purpose and People Dynamics

Purpose and people often reveal some of the clearest signs of a good company culture. A clear mission gives employees a reason to care about their work. It also helps teams understand how their responsibilities support larger business goals.

People dynamics matter just as much. Supportive managers encourage employees to share ideas, ask questions, and solve problems together. Diverse teams can also bring different perspectives to complex decisions.

A healthy workplace does not depend only on having friendly colleagues. Employees need respectful leadership, fair treatment, and opportunities to contribute. They should also understand how their work affects customers and the wider organization.

Companies can strengthen these areas by communicating their purpose regularly. Leaders should also model the behaviors they expect from employees. When purpose and people align, teams often develop stronger trust, engagement, and collaboration.

What 3 to 5 Words Would You Use to Describe Your Company’s Culture?

Choosing three to five words can quickly communicate what a workplace feels like. Useful descriptions include collaborative, transparent, supportive, innovative, and resilient. These words describe behaviors rather than simply promising that a company has a positive culture.

A collaborative company encourages employees to share knowledge and solve problems together. A transparent workplace communicates important decisions and expectations clearly. A supportive culture gives employees access to guidance, feedback, and professional development. An innovative company allows people to test ideas without creating unnecessary fear around failure. A resilient organization helps teams adapt when priorities or market conditions change.

These descriptions can also help identify the signs of a good company culture during a job search. However, candidates should look beyond company websites and interview claims. Employee reviews, conversations with current staff, and interview experiences can provide additional evidence. The strongest cultural descriptions match what employees actually experience each day.

The Impact of Choosing Descriptive Cultural Words

Words influence how employees understand workplace expectations. Terms such as transparent, supportive, collaborative, and innovative become useful when companies connect them to specific behaviors.

For example, a company that calls itself transparent should explain major decisions clearly. A supportive workplace should provide meaningful feedback and reasonable access to managers. An innovative culture should give employees room to experiment and learn from mistakes.

This distinction matters when evaluating the signs of a good company culture. A list of attractive values means little if employees rarely see those values in practice. Leaders need to demonstrate cultural values through hiring, communication, promotions, recognition, and everyday decisions.

Employees should also be able to describe how company values affect their work. If people can provide clear examples, the culture is more likely to be genuine. If the words appear only on a careers page, they may represent branding rather than reality.

What Are the 7 Key Characteristics of Organizational Culture?

Organizational culture can be understood through seven common characteristics: innovation, attention to detail, outcome orientation, people orientation, team orientation, aggressiveness, and stability. Each characteristic influences how employees work and make decisions.

Innovation encourages experimentation, creativity, and calculated risk-taking. Attention to detail emphasizes accuracy and careful analysis. Outcome orientation prioritizes results rather than following processes simply for their own sake. People orientation considers how management decisions affect employees. These expectations also connect closely with the skills employers look for in graduates when evaluating potential talent.

Team orientation emphasizes collaboration and shared responsibility. Aggressiveness describes how strongly an organization competes and pursues its goals. Stability focuses on consistency, predictability, and maintaining established operations.

No single combination works for every business. A startup may prioritize innovation and speed, while a regulated company may value stability and precision. The important issue is whether the culture supports the organization’s goals without damaging employee well-being. These characteristics can also reveal several signs of a good company culture when they remain balanced.

Balancing People Orientation With Outcome Goals

Strong workplace cultures do not choose between employee well-being and business performance. They create systems that support both. Employees need clear expectations, but they also need reasonable workloads and effective management. Understanding technical and soft skills can also help organizations balance performance expectations with the broader skills employees need to succeed.
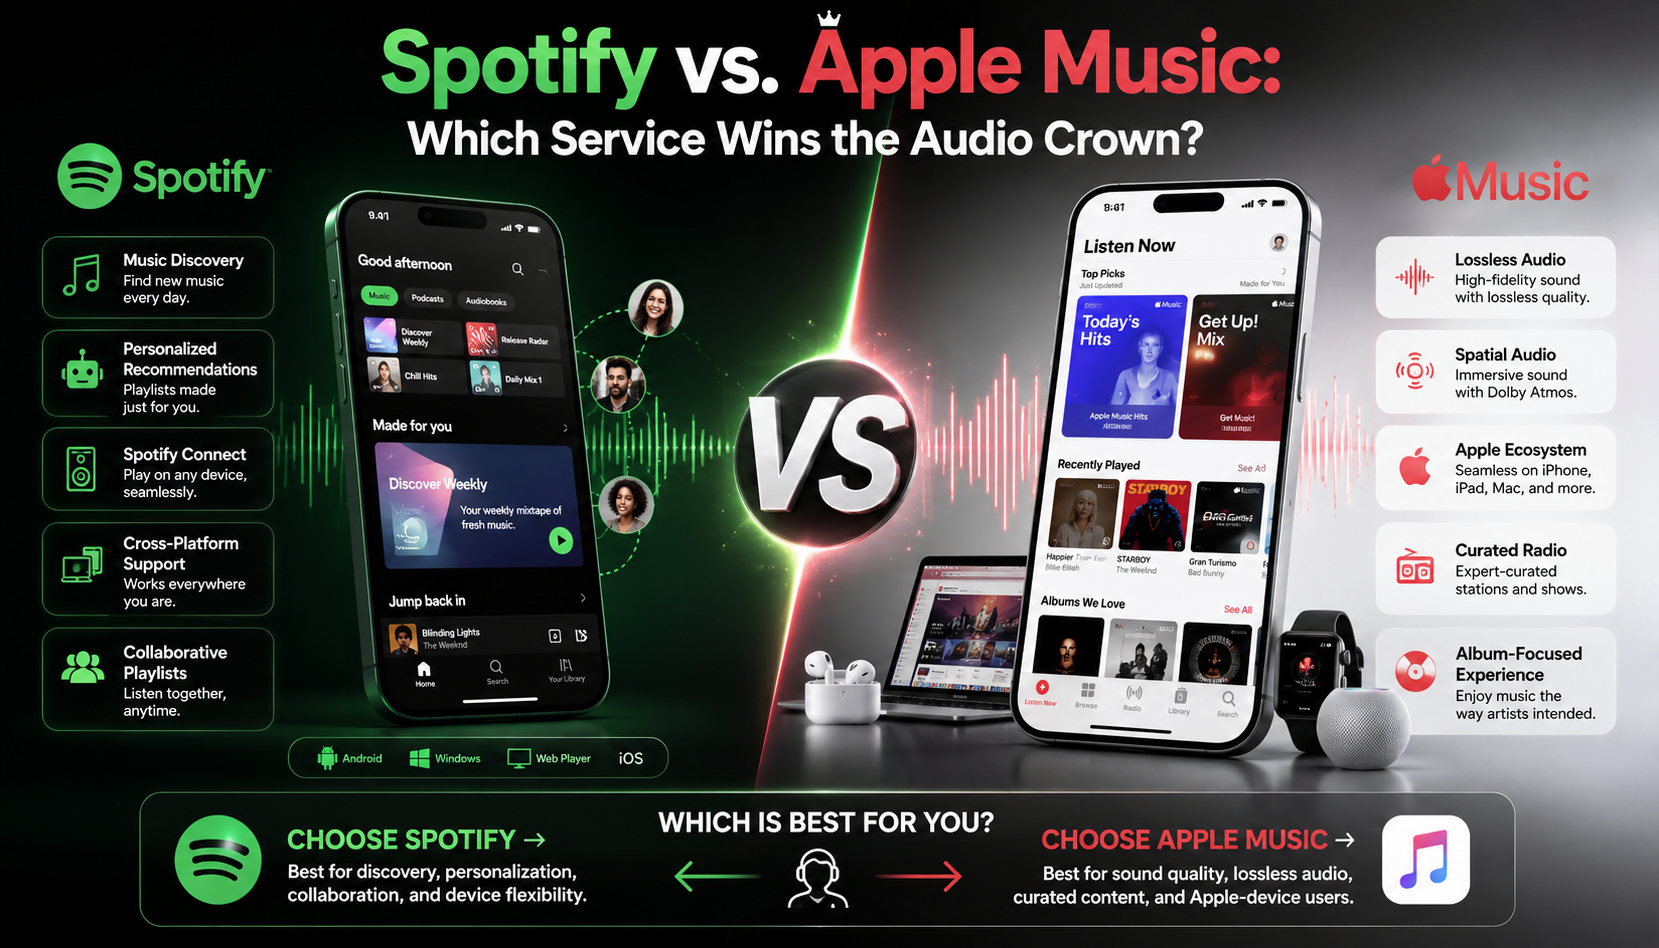
A company that focuses only on outcomes can create unnecessary stress and burnout. However, a workplace that avoids performance standards can also become ineffective. The goal is to create accountability without treating employees as disposable resources.

This balance is one of the most important signs of a good company culture. Managers should explain priorities clearly and provide the resources needed to meet them. They should also recognize strong performance and address problems consistently.

Employees should feel that high standards are achievable rather than arbitrary. Regular feedback can help teams understand where they stand. When performance expectations and employee support work together, companies can improve productivity while building stronger long-term engagement.

What Are 7 Ways to Improve Company Culture?

Improving company culture requires consistent action rather than occasional team-building events. Seven practical approaches include collecting employee feedback, recognizing achievements, encouraging open communication, investing in development, supporting work-life balance, defining core values, and promoting inclusion.

Regular surveys can reveal problems that managers may not notice. Recognition programs reinforce valuable behaviors and show employees that their contributions matter. Open communication helps reduce uncertainty and encourages people to raise concerns earlier. Companies can also strengthen collaboration through team activities in the workplace.

Professional development gives employees opportunities to build skills and progress in their careers. Upskilling and reskilling can also help employees adapt as roles and business needs change. Work-life balance helps prevent excessive workloads from becoming normal. Clear core values give teams a framework for making decisions. Inclusive practices ensure employees have opportunities to contribute and feel respected.

Companies should measure whether these changes actually improve employee experiences. Simply introducing new policies does not guarantee cultural improvement. Leaders should monitor feedback, participation, retention, and workplace behavior. These results provide practical evidence of whether the signs of a good company culture are becoming stronger.

Gathering Feedback Through Regular Pulse Surveys

Regular pulse surveys can give leaders a clearer view of employee sentiment. Unlike large annual surveys, short pulse surveys can identify emerging issues throughout the year. They can cover workload, communication, management support, recognition, and team collaboration.

Anonymous responses may encourage employees to discuss concerns more honestly. However, collecting feedback is only useful when leaders act on what they learn. Ignoring repeated concerns can reduce trust and make future surveys less effective.

Companies should therefore focus on a small number of actionable questions. Leaders can share major findings with employees and explain which changes will follow. Even when a request cannot be implemented, explaining the reason can demonstrate transparency.

This process can reveal both positive and negative signs of a good company culture. Employees may highlight strong teamwork while identifying problems with communication or workload. Acting on these insights helps organizations build a culture based on actual employee experiences rather than assumptions.

What Are the Five C’s of Culture?

The five C’s of culture provide another simple framework for evaluating organizational health. They include clarity, care, collaboration, commitment, and celebration. Each element addresses a different part of the employee experience.

Clarity means employees understand their responsibilities, goals, and expectations. Care involves empathy, psychological safety, and attention to employee well-being. Collaboration encourages teams to share knowledge and work across organizational boundaries. Commitment reflects dedication to shared goals, values, and ethical standards. Celebration recognizes progress, achievements, and meaningful contributions.

Together, these elements can help companies evaluate whether their stated values appear in daily behavior. They can also help employees identify signs of a good company culture when comparing potential employers.

A healthy culture does not require every employee to agree on everything. Instead, people should understand expectations, communicate respectfully, and work toward shared objectives. Leaders play a major role by reinforcing these behaviors through decisions, feedback, recognition, and consistent communication.

Cultivating Psychological Safety and Care

Psychological safety allows employees to ask questions, admit mistakes, and challenge ideas without unnecessary fear. It does not mean removing accountability. Instead, it creates an environment where people can learn from problems and improve their work. When disagreements do arise, handling workplace conflict and stress constructively can help protect this environment.

Care becomes meaningful when leaders demonstrate it through everyday actions. Managers can check workloads, provide useful feedback, respect boundaries, and respond appropriately to concerns. These behaviors are stronger indicators than occasional employee perks.

Psychological safety can also support creativity. Employees are more likely to suggest improvements when they believe their ideas will receive fair consideration. Teams can then identify problems earlier and explore different solutions.

For job seekers, this is another important area when looking for signs of a good company culture. During interviews, candidates can ask how managers handle mistakes and disagreements. The answers may reveal more about workplace culture than a company’s published values. Candidates can also use HR interview preparation strategies to approach these conversations with greater confidence.

Can You Give Me Some Examples of Good Company Culture?

Real-world companies can provide useful examples of how culture influences workplace behavior. HubSpot has emphasized transparency and publicly documented its culture principles. Google is widely associated with innovation and experimentation. Zappos has built its identity around customer service and distinctive workplace values.

Patagonia has connected its corporate identity with environmental responsibility and activism. Salesforce promotes its Ohana concept, which emphasizes community, equality, and giving back.

These examples should not be treated as proof that every employee has the same experience. Large companies can have different cultures across teams and managers. Instead, they show how organizations can make values visible through policies and everyday practices.

For job seekers, the better question is whether a company’s stated values match employee experiences. That comparison can reveal meaningful signs of a good company culture.

Emulating Zappos and Customer-Centric Values

Zappos offers a useful example of how clearly defined values can influence hiring and customer service. Its culture has historically emphasized customer satisfaction, employee empowerment, and strong organizational values.

However, companies should not copy another organization’s culture word for word. What works for one business may conflict with another company’s customers, workforce, or operating model. The useful lesson is to build cultural values around the organization’s actual mission.

Companies can start by defining a small number of specific values. They should then connect those values to hiring, onboarding, performance reviews, recognition, and management decisions. Employees should be able to see the values in everyday behavior.

This approach also helps job seekers identify the signs of a good company culture. Ask how values influence real decisions, not just what the company lists on its website. A consistent answer suggests the culture is embedded in operations. A vague answer may indicate that the values exist mainly as employer branding.


Frequently Asked Questions

How long does it take to change a toxic company culture?

Transforming a toxic corporate environment typically requires one to three years of sustained effort. Real change demands active leadership commitment, transparent communication, and consistent reinforcement of new behavioral standards. Management must address root causes, remove resistant barriers, and continuously gather employee feedback to measure progress effectively over time.

Why is company culture important for business success?

Company culture directly influences employee retention, productivity, and customer satisfaction. A positive environment attracts top-tier talent, reduces costly turnover, and inspires teams to innovate. When workers feel valued and aligned with corporate goals, they deliver superior results that drive long-term profitability and sustainable competitive advantage.

Can remote companies maintain a strong company culture?

Remote and hybrid companies maintain strong cultures by intentionally designing virtual communication touchpoints. Utilizing collaborative digital tools, hosting virtual team-building events, and establishing clear boundaries for asynchronous work help build connection. Prioritizing empathy and regular check-ins ensures remote employees feel included and valued.

Who is responsible for maintaining company culture?

Maintaining company culture is a shared responsibility across all levels of the organization. While executive leadership sets the vision, tone, and policies, middle managers model daily behaviors. Ultimately, every individual employee contributes through their daily interactions, attitude, and commitment to shared organizational values.


Conclusion

Recognizing the signs of a good company culture helps professionals choose inspiring workplaces and empowers leaders to build thriving organizations. Throughout this guide, we explored essential frameworks like the 5 P’s and five C’s, key organizational characteristics, practical improvement strategies, and inspiring real-world examples. Cultivating an environment defined by transparency, care, clarity, and collaboration requires ongoing dedication. By actively applying these principles, organizations can reduce turnover, boost engagement, and unlock unprecedented levels of innovation. Take these actionable insights today, evaluate your current workplace dynamics, and start building a healthier, more successful corporate culture for everyone.

How to Decide Between Two Job Offers: Expert Guide

How to Decide Between Two Job Offers: The Ultimate Career Guide

Receiving multiple job opportunities is an incredible professional milestone. Yet, figuring out how to decide between two job offers can quickly become an overwhelming mental puzzle. This difficult dilemma requires evaluating salary packages, company culture, daily responsibilities, and long-term career trajectory. Professionals often find themselves paralyzed by the fear of making the wrong choice. Fortunately, structured decision-making frameworks can simplify this process immensely. According to guidelines from the U.S. Bureau of Labor Statistics, careful evaluation of job metrics helps secure long-term career satisfaction. This comprehensive guide directly answers your most pressing career questions, including what is the 3 month rule in a job, how to spot red flags, and how to evaluate your current job versus a new offer.

What Is the 3-Month Rule in a Job?

The three-month rule in a new role creates an important adjustment period for both the employer and employee. During these first 90 days, expectations are tested against reality, and workplace relationships begin to develop. It can also help you judge whether the job matches what you expected.

Use this period to compare your actual responsibilities with the original job description. Pay attention to your manager’s communication style, team dynamics, workload, and company culture. These factors often become clearer after you join.

Managers also use this period to assess performance, adaptability, communication, and reliability. If major differences appear, either side may decide that the role is not the right fit.

The three-month period should not be treated as a strict universal rule. Probation policies vary between employers and countries. Instead, use it as a practical checkpoint for evaluating your decision.

Maximizing Success During Your First Ninety Days

Proactive communication is important during your first 90 days. Schedule regular check-ins with your direct manager and ask for specific feedback. Early feedback helps you correct mistakes before they become recurring problems.

Focus first on understanding the team, processes, expectations, and priorities. Avoid making major changes before you understand why existing systems work the way they do. Demonstrating patience can help you build credibility faster.

Use your first three months to learn as much as possible about the organization. Pay attention to how decisions are made and how employees communicate with leadership. Notice whether the workplace matches what you were told during interviews.

Keep track of your accomplishments, challenges, and questions. This record can help during performance discussions and future career decisions. It can also reveal whether the position provides the growth and support you expected.

Most importantly, treat the first 90 days as a learning period. Build relationships, deliver reliable work, and evaluate whether the role supports your longer-term career goals.

What Are Red Flags in a Job Offer?

Identifying job offer red flags can protect you from accepting a role that creates unnecessary stress. Warning signs may include vague responsibilities, unusually high turnover, unclear reporting structures, or promises that are difficult to verify.

Pay close attention when an employer avoids direct questions about workload, working hours, management, or workplace culture. A company does not need to provide perfect answers, but repeated evasiveness deserves further investigation.

Unrealistic expectations can also indicate future problems. Be cautious if the employer expects constant availability without clearly explaining compensation or time-off policies. Similarly, pressure to accept an offer immediately can prevent you from reviewing important details.

Compare the written offer with what the recruiter or hiring manager promised during interviews. Any major difference should be clarified before you sign.

Do not rely entirely on your instincts, either. Verify concerns by asking specific questions and researching the employer. Walking away can be the right decision when the risks clearly outweigh the benefits.

Identifying Hidden Compensation Traps in Contracts

Salary figures can make an offer look attractive while hiding important conditions. Review the complete compensation package before deciding between job offers. Pay attention to bonuses, equity, commissions, benefits, deductions, and vesting schedules.

A performance bonus may not be guaranteed. Ask whether it is contractual, discretionary, or dependent on individual and company targets. You should also understand when bonuses are paid and whether you must remain employed on the payment date.

Equity requires similar attention. Check the vesting schedule, eligibility requirements, and what happens if you leave the company. Do not treat unvested equity as guaranteed income.

Review clauses covering notice periods, non-compete restrictions, confidentiality, repayment obligations, and other employment conditions. Requirements vary by jurisdiction, so consider professional advice when the contract is complex.

Most importantly, get important promises in writing. If a recruiter promises remote work, a specific bonus, or a future salary review, ask for confirmation in the written offer.

How Do I Tell a Potential Employer I’m Deciding Between Two Job Offers?

You can tell a potential employer that you are considering another opportunity without creating unnecessary tension. The key is to remain honest, professional, and concise.

Start by expressing genuine interest in their position. Then explain that you are evaluating multiple opportunities and want enough time to make a thoughtful decision. You do not need to reveal the other company’s name or disclose its exact salary.

A clear timeline can make the conversation easier. Tell the employer when you expect to make your final decision. If you need additional time, ask whether they can extend the deadline.

This approach can also help you negotiate. If the company strongly wants you, knowing that you have another offer may encourage them to clarify compensation, responsibilities, or flexibility. However, never invent a competing offer to gain leverage.

Most professional hiring managers understand that strong candidates may have multiple options. The goal is to communicate confidence without appearing demanding or using another offer as a threat.

Crafting a Professional Response Email

Your response should communicate appreciation, interest, and a clear decision timeline. Avoid writing a long explanation about every factor influencing your choice. A short and professional message is usually more effective.

You could write:

Thank you for the offer and for the time you and the team have invested throughout the interview process. I am very interested in the opportunity and appreciate the confidence you have shown in me.

I am currently evaluating another opportunity and want to make a thoughtful decision. Would it be possible to have until [date] to provide my final answer?

I remain very interested in the position and appreciate your understanding.

If you are comfortable sharing more information, you can mention that another offer is part of your decision. Avoid providing detailed salary figures unless there is a specific reason to do so.

If you need additional time, ask before the deadline expires. Giving the employer advance notice shows professionalism and makes the negotiation easier.

How Do I Choose Between My Current Job and a New Job Offer?

Learning how to decide between two job offers also helps when comparing your current position with a new opportunity.Start by evaluating your current role honestly. If the main issue is that your work has become repetitive or unfulfilling, consider ways to feel productive in a boring job before deciding to leave. Then consider your workload, manager, team relationships, learning opportunities, job security, and chances for advancement.

Then compare those factors with the new position. A higher salary may look attractive, but it could come with longer hours, a difficult commute, fewer benefits, or limited flexibility. A smaller salary increase may still be worthwhile if the new role offers stronger career development.

Consider your five-year career direction. Ask which position will help you build valuable skills, gain meaningful responsibility, or enter a stronger industry.

Write down the advantages and disadvantages of both options. Give more weight to factors that directly affect your priorities. This prevents one attractive feature from controlling your entire decision.

Finally, consider why you want to leave.

A temporary problem may not justify leaving your current role. When you are seriously considering a career change, compare freelancing versus a full-time job to determine which career structure better fits your goals. However, persistent problems with growth, management, or company culture may make a new opportunity the better long-term choice.

Assessing Long-Term Career Trajectory and Growth

A job should contribute to your future career rather than simply solve today’s problem. Compare where each opportunity could realistically take you over the next three to five years.

Look at the skills you will develop in each position. A role that provides stronger technical, leadership, communication, or industry experience may become more valuable over time. Consider whether those skills are transferable to future employers.

Your manager also matters. A supportive manager can accelerate your development through useful feedback, challenging assignments, and mentorship. A poor manager can limit your growth even when the job itself looks attractive.

Consider internal promotion opportunities and the company’s approach to employee development. Ask how employees typically progress from the position you are considering. If possible, speak with current employees about their experiences.

Be cautious about accepting a counteroffer simply because your current employer offers more money after you resign. Ask why the change became possible only after you decided to leave. A short-term salary increase may not solve the original problem.

Choose the role that strengthens your future options.

How to Decide Between Current Job and New Job

When comparing your current job with a new opportunity, evaluate both financial and lifestyle factors. Start with total compensation rather than base salary alone. Include bonuses, insurance, retirement contributions, paid leave, allowances, and other benefits. Then consider whether your needs and wants when spending money align with the income each option provides.

Then consider your daily experience. A long commute can reduce the practical value of a higher salary. Remote or hybrid flexibility may improve your time, energy, and overall work-life balance.

Risk also deserves attention. A new company may offer faster growth but less stability. If you are considering leaving your current employer, understand when and how to take a voluntary severance package as another possible transition option. Your current employer may provide security but fewer opportunities to develop new skills.

Speak with trusted mentors or experienced professionals when you need another perspective. They can identify risks you may overlook because you are emotionally involved in the decision.

However, do not let other people’s preferences determine your choice. Your priorities may differ from theirs.

Create a simple comparison based on the factors that matter most to you. Then ask one final question: Which option would I regret not choosing six months from now? Your answer can reveal priorities that a basic salary comparison misses.

Conducting a Comprehensive Total Rewards Comparison

Base salary is only one part of the financial value of a job. When comparing two opportunities, calculate the complete total compensation package for each role.

Consider these factors:

  • Base salary and guaranteed allowances
  • Performance bonuses and commissions
  • Employer retirement contributions
  • Health insurance and other benefits
  • Paid vacation and sick leave
  • Remote or hybrid work flexibility
  • Professional development support
  • Stock options or equity
  • Relocation or commuting benefits

Try to assign an estimated annual value to benefits when possible. This makes comparisons more objective. A role with a slightly lower salary may provide significantly better benefits and flexibility.

Also compare how compensation could change over time. Ask about salary reviews, bonus eligibility, promotion cycles, and typical career progression.

Do not ignore non-financial value. A supportive manager, shorter commute, better work-life balance, and stronger learning opportunities can have substantial long-term value.

The goal is not to find the offer with the highest headline number. It is to understand what each opportunity is actually worth to you.

How to Decide Between Two Jobs at the Same Company

When learning how to decide between two job offers, comparing internal roles requires a slightly different approach. Both positions may offer similar benefits, job security, and company culture. The biggest differences usually involve responsibilities, managers, teams, and career paths.

Start by comparing the scope of each role. Identify which position offers stronger exposure to important projects or valuable business functions. Consider how each department contributes to the company’s broader goals.

Your future manager also deserves careful attention. A strong manager can influence your learning, workload, visibility, and promotion opportunities. Speak privately with employees in both departments to understand their daily experiences.

Consider which role expands your existing skills instead of repeating what you already know. Building complementary skills can increase your long-term career value.

Internal visibility also matters. A role connected to important projects may create more opportunities to demonstrate your capabilities. However, visibility should never outweigh a poor manager or unhealthy workload.

Finally, protect your professional relationships during the transition. Internal mobility should strengthen your career while preserving goodwill with your current team and manager.

Protecting Your Internal Reputation During Transitions

Internal transfers require careful communication because you may continue working with the same colleagues. Avoid treating the move as an escape from your current team or manager. Instead, present it as a career-development decision.

Tell your current manager about the transition professionally and follow the company’s internal process. Give enough time to document your responsibilities and help transfer important work.

Create a clear handover that covers ongoing projects, deadlines, important contacts, and unresolved issues. This reduces disruption and demonstrates professionalism.

You should also confirm the details of the new position with HR. Verify your title, compensation, reporting manager, responsibilities, start date, and any changes to benefits. Do not rely only on informal conversations.

Maintain positive relationships with your current colleagues after moving departments. Your professional reputation can follow you across the organization.

Most importantly, make sure the internal move actually improves your career position. A new title alone is not enough. Look for stronger skills, greater responsibility, better mentorship, or clearer advancement opportunities.

A successful internal transition should leave both teams confident that the move was handled professionally.


Frequently Asked Questions

How Long Should I Typically Take to Evaluate a Job Offer?

Most employers expect a response within 48 hours to one week. If you are deciding how to decide between two job offers, ask for additional time when necessary. You can usually request an extension of up to one week to review the contract, compare compensation, or consider another opportunity. Thank the employer and provide a specific date for your final decision.

Can I Negotiate a Job Offer After Telling Them I Have Another Option?

Yes, you can negotiate after telling an employer about another offer. When learning how to decide between two job offers, comparing salary, benefits, flexibility, and growth can strengthen your negotiating position. Mention the competing opportunity honestly without exaggerating its terms. Explain what would make the employer’s offer more attractive. Keep your requests realistic, specific, and professional throughout the negotiation process.

What Should I Do If a Counter-Offer Makes Me Stay at My Current Job?

Think carefully before accepting a counter-offer. If you were considering how to decide between two job offers, first identify why you wanted to leave your current employer. A higher salary may not fix problems involving management, workload, culture, or limited growth. If you stay, confirm your new salary, title, responsibilities, and other promises in writing. Then reassess whether the original problems have actually been addressed.

How Do I Politely Decline a Job Offer I Spent Weeks Interviewing For?

Send your response promptly and thank the hiring team for their time. If you have been comparing two job offers, you can explain that another opportunity better matches your current career goals. Keep your explanation brief and avoid criticizing the company or its offer. A professional response helps protect the relationship and leaves the door open for future opportunities with the employer.


Conclusion

Knowing how to decide between two job offers becomes easier when you evaluate each opportunity systematically. Compare total compensation, career growth, management, flexibility, responsibilities, and company culture. Do not let salary alone determine your choice. The right decision should also support your long-term goals and lifestyle. Whether you are comparing external offers, your current job with a new opportunity, or two internal roles, focus on overall value rather than short-term excitement.

Cover Letter vs. Resume: Key Differences & When to Use Both

Master Cover Letter vs. Resume: The Ultimate Guide to Job Application Success

Navigating the job market often brings up a common dilemma: figuring out the core differences in the cover letter vs. resume debate. Understanding how these two documents work together can completely transform your job search and help you land interviews faster. Whether you are a recent graduate or a seasoned professional, knowing which document does what is essential for career growth. According to guidance from the U.S. Department of Labor CareerOneStop, tailoring your application materials significantly improves your chances of getting noticed by hiring managers. This comprehensive guide answers your most pressing questions, including whether a cover letter is better than a resume, if a CV is a cover letter, whether you can use a resume as a cover letter, and if you truly need both. Let’s dive into the details to clear up any confusion and elevate your application strategy.

Is a Cover Letter Better Than a Resume?

Deciding whether a cover letter is better than a resume is a common question for job seekers. The answer is no. Neither document is objectively better because each serves a different purpose in the hiring process. A resume provides a structured summary of your professional history, skills, education, and achievements. It gives recruiters the facts they need to assess your qualifications quickly.

A cover letter works differently. It provides a personalized introduction and explains why you want the role. It can also show your communication style, motivation, and interest in the company. While a resume shows what you have accomplished, a cover letter explains why those accomplishments matter for the position.

Using only one document can leave important gaps in your application. Your resume may show strong experience but provide little context about your motivation. Your cover letter may explain your interest but lack enough evidence of your qualifications. Using both documents together gives employers a clearer picture of your professional value.

Why You Need Both Documents

The strengths of a resume and cover letter become clearer when you compare their roles. A resume focuses on facts, evidence, and career history. A cover letter provides context and connects that experience to a specific opportunity. Together, they create a stronger job application.

Your resume should make your qualifications easy to scan. Recruiters often review applications quickly, so relevant skills, achievements, and experience should stand out immediately. The document should focus on measurable results rather than lengthy explanations.

Your cover letter gives you more room to explain your motivation. You can discuss why you want the position and how your experience matches the employer’s needs. You can also briefly explain circumstances that may require additional context, such as a career change or employment gap.

The two documents should support each other rather than repeat each other. Your resume provides the evidence, while your cover letter adds meaning and direction. This combination helps hiring managers understand both what you offer and why you want the opportunity.

Is a CV a Cover Letter?

Many job seekers mistakenly use the terms CV and cover letter interchangeably. They are different documents with different purposes. A curriculum vitae, or CV, provides a detailed record of your academic and professional background. Depending on the field and country, it may include education, research, publications, presentations, awards, certifications, and professional experience.

A cover letter is much shorter and more targeted. It normally accompanies a resume or CV during a job application. Its purpose is to introduce you, explain your interest in the position, and connect your background to the employer’s requirements.

The difference becomes especially important when applying for jobs internationally. Employers may use the terms “CV” and “resume” differently depending on the country. However, a cover letter remains a separate document from either one.

Before submitting an application, always check the employer’s instructions. If the company requests a CV and cover letter, submit both. Do not assume that one document can replace the other. Understanding these differences helps you follow application instructions and present your experience professionally.

Understanding the Core Differences

A CV is generally a comprehensive record of your academic and professional experience. It may extend across several pages when the applicant has substantial experience. Academic and research positions often require detailed information about publications, research projects, teaching experience, and awards.

A cover letter serves a completely different purpose. It is usually a concise, targeted document written for one specific position. Instead of listing everything you have done, it highlights the experiences most relevant to the opportunity.

The difference can be summarized simply:

  • CV: Provides detailed information about your background.
  • Resume: Summarizes relevant qualifications and achievements.
  • Cover letter: Explains your interest and suitability for a specific role.

Keeping these documents separate prevents unnecessary repetition. Your CV or resume should contain the detailed evidence. Your cover letter should explain the connection between that evidence and the employer’s needs.

This distinction also helps recruiters evaluate your application more efficiently. When every document has a clear purpose, your overall application becomes easier to understand. More importantly, you avoid submitting a resume when an employer specifically expects a personalized cover letter.

Can I Use a Resume as a Cover Letter?

Using a resume as a cover letter is usually a mistake because the two documents communicate information differently. A resume uses structured sections, bullet points, dates, job titles, skills, and achievements. Its design allows recruiters to scan your qualifications quickly.

A cover letter requires a more natural narrative structure. It normally addresses the hiring manager or employer and explains why you are interested in the position. It should connect your relevant experience to the company’s needs rather than simply repeat your resume.

Copying resume bullet points into a letter does not automatically create an effective cover letter. Recruiters want to understand your motivation and see why your background makes you relevant to the specific role. A strong cover letter adds context instead of duplicating information.

There is also an important practical issue. If the job posting specifically asks for a cover letter, submitting only your resume means you have not followed the application instructions. That can weaken your application before your qualifications are even considered.

A resume and cover letter should work together. Your resume proves your experience, while your cover letter explains its relevance.

The Risks of Improper Formatting

Poor formatting can make an otherwise qualified candidate appear careless. A resume is designed for fast scanning, so its structure should emphasize dates, positions, skills, achievements, and relevant qualifications. A cover letter needs a more conventional letter structure.

A proper cover letter should explain your purpose quickly. The opening should identify the position and establish your interest. The middle should connect your strongest qualifications to the role. The closing should reinforce your interest without making exaggerated claims.

Replacing this structure with resume-style bullet points can make the application feel impersonal. It also removes the opportunity to explain why you are interested in the company or position.

Improper formatting can create several problems:

  • Your motivation becomes unclear.
  • Your application may appear generic.
  • Important context gets lost.
  • You may appear to ignore application instructions.
  • Your communication skills become harder to evaluate.

A dedicated cover letter bridges the gap between your experience and the employer’s specific needs. It should not simply repeat your resume. Instead, use it to interpret your most relevant experience and explain why it matters to the position. For guidance on creating one, see this step-by-step guide to writing a cover letter.

Do You Need Both a Cover Letter and a Resume?

Whether you need both documents depends on the employer’s instructions. If a job posting specifically requests a cover letter and resume, submit both. Understanding Cover Letter vs. Resume requirements can help you avoid an incomplete application.

If a cover letter is optional, consider whether it adds useful information. A tailored letter can strengthen your application by explaining your motivation and connecting your experience to the specific role.

A cover letter can also provide context that does not fit naturally into your resume. For example, you might explain a career transition, employment gap, relocation, or change in professional direction. However, a generic letter adds little value and may waste the recruiter’s time.

Quality matters more than simply submitting another document. If you write a cover letter, tailor it to the company and position. Mention specific requirements, relevant achievements, or genuine reasons for wanting to join the organization. You should also avoid common problems covered in this guide to resume mistakes recruiters notice immediately.

The goal is not to submit more paperwork. The goal is to provide useful evidence and context that helps the employer make a hiring decision. In the Cover Letter vs. Resume comparison, both documents have value when they serve different purposes and complement each other.

Maximizing Your Competitive Edge

A tailored cover letter can strengthen your application when it adds information that your resume cannot communicate effectively. It gives you an opportunity to connect your experience with the employer’s current needs.

For example, your resume might show that you managed a project successfully. Your cover letter can explain how that experience relates to the challenges mentioned in the job description. This connection makes your application more specific and relevant.

A strong cover letter can also demonstrate communication skills. Clear writing, logical organization, and concise explanations show how effectively you communicate professionally. These qualities matter in many roles, particularly positions involving clients, teams, or written communication.

However, submitting a cover letter does not guarantee an advantage. A poorly written letter can have the opposite effect. Generic introductions, excessive flattery, spelling errors, and repeated resume content can make your application weaker.

Focus on relevance rather than length. A useful cover letter should:

  • Address the specific position.
  • Highlight two or three relevant strengths.
  • Explain your interest in the employer.
  • Connect your experience to the role.
  • End with a clear and professional closing.

Used properly, the cover letter gives your application additional context without duplicating your resume.

Cover Letter and Resume Similarities

Although cover letters and resumes have different purposes, they share several important characteristics. Both documents represent you professionally and should present a consistent message about your qualifications. They also need careful proofreading because spelling and grammar mistakes can damage your credibility.

Both documents should be tailored to the position. Review the job description and identify relevant skills, qualifications, responsibilities, and keywords. Then reflect those terms naturally when they accurately describe your experience.

Formatting also matters for both documents. Use readable fonts, clear headings, consistent spacing, and enough white space. Avoid unnecessary graphics or complicated layouts that make the content harder to scan. Your goal is to make important information easy to find.

The documents should also complement each other. If your resume highlights project management, your cover letter can explain how that experience prepares you for the advertised role. Avoid making both documents say exactly the same thing.

Ultimately, both documents support the same goal: helping you reach the next stage of the hiring process. The resume provides structured evidence, while the cover letter adds context and personality. Together, they create a cohesive and professional job application.

Shared Goals in the Hiring Process

Both documents are designed to communicate your professional value and encourage the employer to consider you for an interview. However, they achieve that goal through different methods. For a broader overview of the application and interview process, explore these resume and interview tips for beginners.

A resume answers questions such as what experience you have, where you worked, what skills you developed, and what results you achieved. Its structure helps recruiters evaluate your qualifications efficiently.

A cover letter answers different questions. Why do you want this position? Why are you interested in this company? Which parts of your experience are most relevant? What makes this opportunity a logical next step for you? You may also encounter these behavioral interview questions and answers when discussing your experience.

Because both documents contribute to the same application, they should tell a consistent story. Your job titles, dates, achievements, and skills should match across both documents. Avoid introducing claims in your cover letter that your resume cannot support.

Consistency does not mean repetition. Instead, each document should contribute something different. Your resume supplies evidence and career details, while your cover letter supplies explanation and motivation.

When these documents work together, recruiters can understand your qualifications faster. They can also see how your background connects to the specific opportunity. That makes your overall application clearer, more focused, and easier to evaluate.


FAQ SECTION

Should I Use the Same Cover Letter for Every Job Application?

No. You should tailor your cover letter for each job application. A customized letter can mention the specific company, position, and relevant achievements. This approach shows genuine interest and connects your experience to the employer’s needs. A generic letter may appear careless or impersonal. When comparing Cover Letter vs. Resume, remember that the cover letter gives you more space to explain why you fit the specific role.

How Long Should a Professional Resume Be?

For most professionals, a resume should be one to two pages long. Recent graduates and early-career applicants can usually keep their resume to one page. Experienced professionals may use two pages when their background requires more space. Avoid adding information simply to increase length. Every section should support your current career goals and demonstrate relevant skills, achievements, or experience.

Can a Cover Letter Be Longer Than One Page?

A professional cover letter should generally fit on one page. Hiring managers often review many applications, so concise writing is more effective. Aim for three or four short paragraphs. Introduce yourself, highlight your most relevant qualifications, explain your interest, and finish with a clear closing. The goal of a cover letter is to add context without repeating everything already included in your resume.

What Is Applicant Tracking System (ATS) Optimization?

ATS optimization means formatting your resume and using relevant keywords so applicant tracking systems can read your application correctly. Many employers use ATS software to screen applications before recruiters review them. Study the job description and naturally include relevant terms that accurately describe your experience. Use simple formatting and avoid excessive graphics, tables, or complicated layouts that may interfere with automated parsing.


Conclusion

Understanding Cover Letter vs. Resume requirements helps you create more complete and professional job applications. Your resume provides a structured overview of your experience, skills, education, and achievements. Your cover letter adds context by explaining your motivation and connection to the specific position.

Neither document replaces the other. They serve different purposes and should work together. Tailor both documents to the job description and follow the employer’s application instructions carefully.

When a cover letter is required, submit one that adds useful information rather than repeating your resume. When it is optional, include it only when you can make a relevant, personalized case.

By understanding the differences between Cover Letter vs. Resume, you can present your qualifications more clearly and give hiring managers stronger reasons to consider your application.

Video Interview Tips: Master Your Next Job Call

Mastering Video Interview Tips: Your Complete Guide to Success

Securing a job today often starts with a remote conversation, making it important to master effective video interview tips before meeting a hiring manager. Remote hiring has become common across industries, changing how candidates present their skills and personality.

A successful video interview requires more than a stable internet connection. It also demands thoughtful preparation, technical readiness, and clear communication. To stand out from other candidates, you must understand how virtual interviews work and how to present yourself professionally online while managing interview anxiety and building confidence.

Career resources such as Glassdoor emphasize the importance of professional presentation during the hiring process. This guide answers common questions about video interviews, including how to prepare, what to say, how to handle difficult questions, and how freshers can make a strong impression.

How to Prepare for a Video Interview

Preparing for a video interview requires both technical checks and interview practice. Start by testing your camera, microphone, speakers, and internet connection at least one day before the interview. Check that your interview platform works correctly and update the software if needed.

Choose a quiet, well-lit space with a clean background. Place your main light source in front of you to avoid dark shadows. Silence desktop notifications and phone alerts before joining the interview.

Review your resume and keep digital copies of your portfolio ready. You may need to share your work through screen sharing. Dress professionally from head to toe, even when interviewing from home. Follow these interview dress code tips for success to make sure your appearance matches the expectations of the role.

Practice speaking clearly while looking toward your webcam. This creates more natural virtual eye contact. Keep a notepad and pen nearby for quick notes.

Finally, join the virtual waiting room five to ten minutes early. This gives you time to handle unexpected audio, software, or connection problems.

Setting Up Your Environment for Success

A professional setup can reduce distractions and help you appear more confident. Position your camera at eye level and frame your face clearly. Avoid placing bright windows directly behind you.

Keep your desk organized and remove anything that could distract the interviewer. Close unnecessary browser tabs and applications before the interview begins.

Your background should look clean without appearing overly staged. If your platform offers a background effect, use a simple option that does not distract from your face.

Keep your phone on silent and disable computer notifications. Have your resume, job description, portfolio, and notes within easy reach.

Good preparation also includes checking your internet stability. If possible, use a wired connection or stay close to your Wi-Fi router. These simple video interview tips can prevent technical problems from affecting your performance.

What Is the 80/20 Rule in Interviewing?

The 80/20 rule in interviewing is less about following an exact percentage and more about balancing listening with speaking. A strong candidate should listen carefully before giving a focused response. Talking too much can make answers unclear and difficult to follow.

When an interviewer asks a question, take a moment to understand what they actually want to know. Avoid interrupting or immediately launching into a long explanation. Active listening helps you address the question instead of giving a rehearsed answer.

Your response should then provide the most relevant information. Use specific examples instead of vague claims about your skills or personality. Mention measurable achievements when they strengthen your answer.

This approach shows communication skills, emotional intelligence, and respect for the interviewer’s time. It also makes the conversation feel more natural.

The exact balance will vary between questions. Some answers may require more explanation, while others should remain brief. Focus on being clear, relevant, and responsive rather than forcing every conversation into an 80/20 formula.

Applying the Rule to Your Responses

Keep individual answers focused and avoid unnecessary details. A useful approach is to explain your main point first, then provide supporting evidence or an example.

For behavioral questions, the STAR method can help you organize your response. Explain the situation, describe your task, outline your actions, and finish with the result.

Try to communicate your primary message within about two minutes. You can then pause and allow the interviewer to ask follow-up questions.

Avoid memorizing complete answers. Memorized responses can sound unnatural and may make it harder to respond when the interviewer changes the question.

Instead, prepare a few key points for common topics. These might include your experience, strengths, achievements, challenges, and reasons for applying.

Good video interview tips should improve communication, not turn the conversation into a performance. Listen carefully, answer directly, and give the interviewer space to continue the discussion.
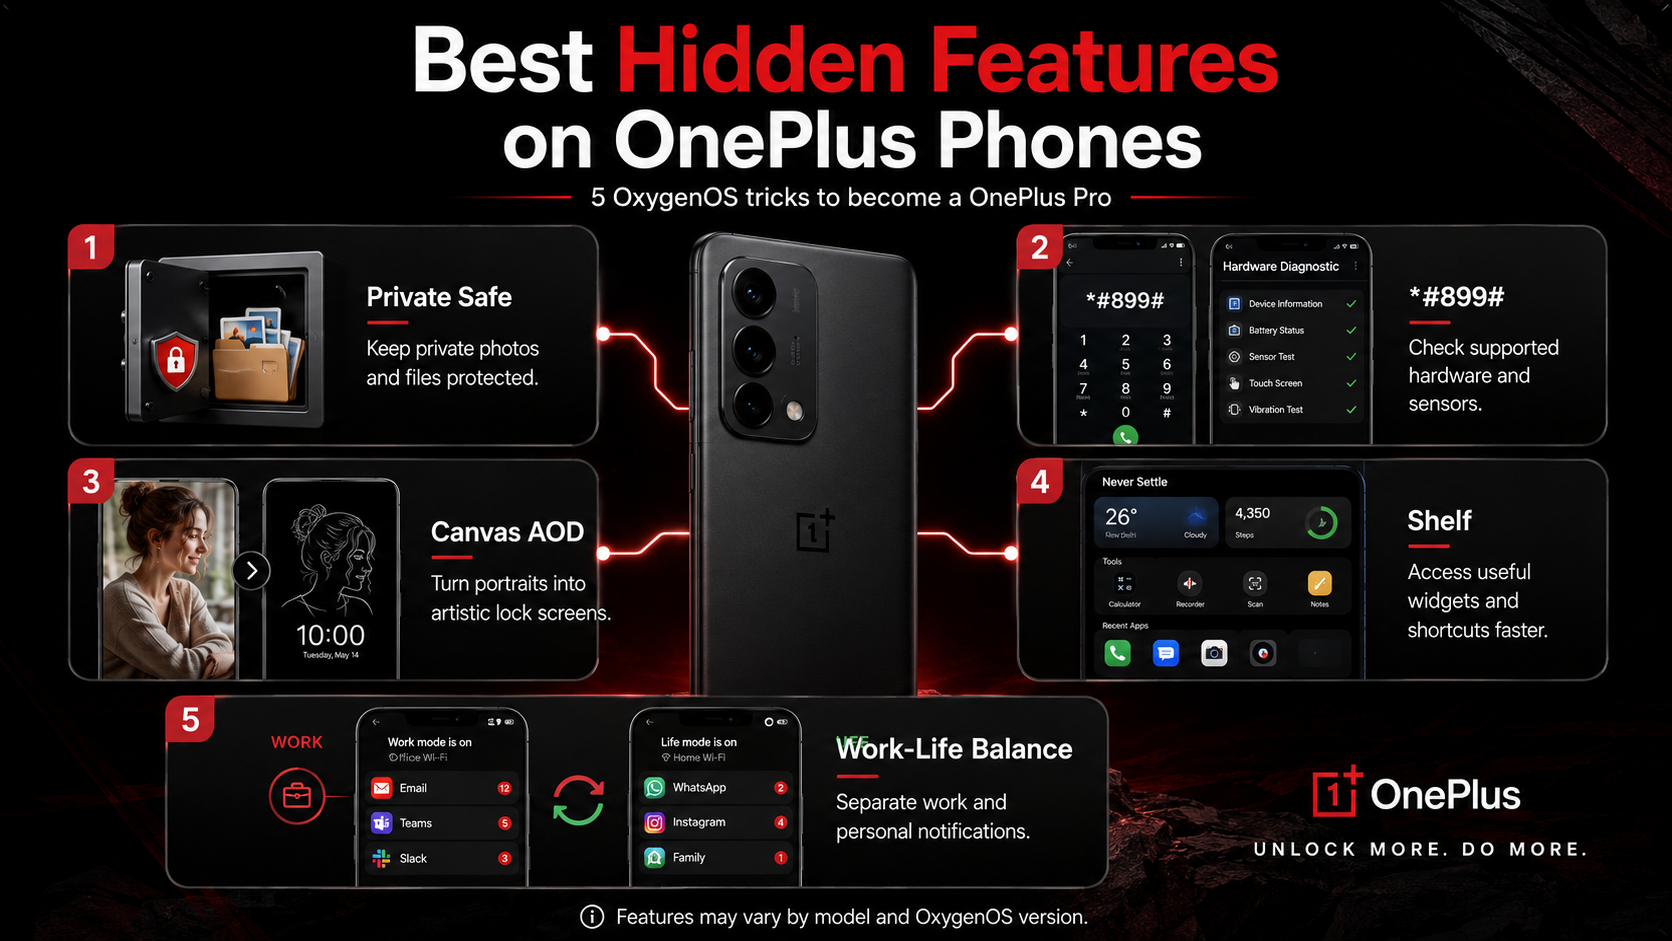
What Should I Say in a Video Interview?

What you say during a video interview should connect your experience with the employer’s needs. Avoid relying on generic statements that could apply to any company or position. For broader preparation, review this guide on how to prepare for HR interviews.

Use the STAR method when discussing accomplishments, challenges, or workplace situations. Start with the relevant situation, explain your responsibility, describe your actions, and finish with the result.

Whenever possible, include measurable evidence. Mention improvements in efficiency, revenue, customer satisfaction, project completion, or other relevant outcomes. Specific details make your claims more credible.

Research the company before the interview. Refer to its products, services, industry, or recent developments when explaining your interest in the role. Avoid pretending to know more than you do.

Keep your tone professional but conversational. Do not overload your answers with technical jargon or memorized phrases.

Explain your most relevant skills early in the interview. Then connect those skills to the responsibilities listed in the job description. Finish by asking thoughtful questions about the position, team, expectations, or future growth.

Highlighting Relevant Experience Effectively

Tailor your examples to the specific position rather than describing your entire work history. Start with experiences that demonstrate skills mentioned in the job description.

For example, if the role requires project management, describe a project you planned or coordinated. Explain the challenge, your responsibility, and the outcome.

Numbers can make these examples stronger. Mention percentages, time savings, revenue improvements, customer numbers, or other measurable results when accurate.

Do not invent metrics simply to make an answer sound impressive. Honest, specific evidence is more valuable than exaggerated claims.

You should also explain what you learned from important experiences. Employers often want to understand how you approach problems, make decisions, and respond to setbacks.

Strong answers connect past experience to future value. Show the interviewer how your existing skills can help you handle the responsibilities of the new role.

What Are the 5 Hardest Interview Questions?

Some interview questions are difficult because they require honesty without unnecessary negativity. Five common challenges involve your biggest weakness, employment gaps, professional failures, reasons for leaving a job, and conflicts with coworkers.

When discussing a weakness, choose a genuine area that you are actively improving. Explain what you are doing differently rather than presenting a disguised strength.

For employment gaps, give a brief and truthful explanation. You do not need to provide excessive personal information. Focus on what you learned, accomplished, or prepared for during that period.

When discussing failure, explain what went wrong and what you changed afterward. Avoid blaming coworkers, managers, or circumstances for everything that happened.

If asked why you want to leave your current role, stay professional. Focus on your future goals rather than criticizing your current employer.

Conflict questions also require balance. Explain how you handled disagreement through communication, problem-solving, and professional boundaries.

The strongest answers show self-awareness, accountability, and growth. Stay calm, answer directly, and avoid defensive or overly rehearsed responses.

Framing Weaknesses and Failures Constructively

Difficult questions can reveal how you respond when situations become uncomfortable. Your goal is not to make every weakness sound positive. Instead, demonstrate that you understand the issue and are taking practical steps to improve.

Choose an example that is real but does not undermine your ability to perform the job. Explain the situation briefly and describe the actions you took to address it.

For failures, focus on the lesson and the change that followed. Explain what you would do differently today.

Avoid common answers such as saying you are simply a perfectionist. Interviewers hear these responses frequently and may view them as rehearsed.

You should also avoid blaming other people. Even when external factors contributed to a problem, explain what you could control.

This approach demonstrates professional maturity and continuous learning. It also gives the interviewer evidence that you can accept feedback and adjust your behavior when circumstances require it.

Video Interview Tips for Freshers

Freshers often face video interviews without extensive professional experience. That does not mean you have nothing valuable to discuss. Instead, use academic projects, internships, volunteer activities, relevant certifications for beginners, and extracurricular experiences as evidence of your abilities.

Explain your specific contribution to group projects. Do not simply say that you worked as part of a team. Describe the problem, your responsibility, and the result.

Technical skills can also strengthen your answers. Mention relevant software, programming languages, tools, or platforms when they match the job requirements.

Research the company before your interview. Understand its industry, products, services, and the responsibilities of the position. Be prepared to explain why the opportunity fits your career goals.

During the interview, maintain good posture and look toward the camera when speaking. Smile naturally and keep your energy consistent.

Technical preparation is equally important. Test your microphone, camera, internet connection, and interview platform beforehand.

These video interview tips for freshers help you demonstrate potential even when your professional experience is limited.

Showcasing Potential Over Professional Experience

Freshers can demonstrate workplace readiness through experiences outside traditional employment. Academic projects are especially useful when they involve deadlines, teamwork, research, or problem-solving. Explore summer activities that can strengthen college preparation for additional ways to build relevant experience.

Explain what you personally contributed rather than describing the project broadly. If you solved a technical issue, organized a team, presented findings, or improved a process, mention it clearly.

Internships can provide even stronger examples because they demonstrate exposure to professional environments. Volunteer work and student organizations can also reveal communication, leadership, and organizational skills.

Avoid apologizing for your limited experience. Instead, focus on your willingness to learn and your ability to apply knowledge.

You should also prepare for questions about unfamiliar situations. Explain how you would research a problem, ask for guidance, test possible solutions, and learn from feedback.

Employers hiring entry-level candidates often evaluate potential, adaptability, communication, and learning ability. Your examples should give them evidence of those qualities.

Video Interview Tips and Tricks

Small adjustments can make your virtual interview more polished. One useful technique is placing short reminders near your webcam. Use keywords or numbers instead of complete sentences so you do not appear to be reading.

Record practice interviews before the real conversation. Review your posture, facial expressions, speaking speed, volume, and eye contact. Look for habits that could distract from your answers.

Keep your professional profiles consistent with your resume. Differences in job titles, dates, or major achievements can create unnecessary questions during the hiring process.

Use natural hand gestures, but keep movements within the camera frame. Excessive movement can become distracting, especially on a small screen.

Prepare your environment before the interview begins. Close unnecessary applications, charge your device, and keep essential documents nearby.

Most importantly, do not try to appear perfect. A calm and authentic delivery usually feels more credible than an overly rehearsed performance.

The best video interview tips and tricks are practical. They should help you communicate your skills clearly while reducing avoidable distractions.

Using Hidden Notes and Cues Wisely

Brief visual cues can help you remember important information without interrupting your natural delivery. Place a small note near your webcam with keywords for achievements, questions, or important numbers.

Avoid writing full answers on your notes. Reading complete sentences can make your eyes move noticeably and can make your delivery sound robotic.

Use short prompts such as “STAR,” “project result,” “team example,” or “ask about growth.” These reminders can help you stay organized without controlling every word you say.

Keep the number of notes limited. Too many reminders can create another source of distraction and make you focus more on the notes than the interviewer.

You should also practice without the notes before the interview. The goal is to use them as a backup rather than a script.

When used correctly, visual cues can improve confidence while preserving natural eye contact. Combine them with technical preparation, mock interviews, and focused answers for a more professional virtual interview experience.


Frequently Asked Questions

How should I dress for a remote job screening?

Dress professionally from head to toe, matching the standard dress code of the industry you are entering. Solid, neutral colors work best on camera, as bright patterns can create visual distortion. Avoid overly shiny jewelry that might catch light reflections from your screen. Maintaining a full professional outfit also helps you psychologically prepare and perform at your best.

What should I do if my internet connection fails during the call?

Stay calm if technical issues arise unexpectedly during your virtual conversation. Immediately use your backup plan, such as switching to a mobile hotspot or calling in via telephone if audio options are available. Send a polite message to the recruiter through email or chat explaining the disruption. Quick, composed problem-solving demonstrates your resilience and grace under pressure.

How can I maintain good eye contact through a webcam?

Look directly into the camera lens rather than at the video feed of the interviewer on your monitor. This creates the illusion of direct eye contact for the person on the other end of the screen. Position the interview window close to the top center of your display near the camera. Practice this technique during mock sessions to build natural muscle memory.

Is it acceptable to have a virtual background during a meeting?

Using a clean, real background is always preferred over a virtual background to avoid glitchy visual artifacts around your silhouette. If your physical space is cluttered or distracting, opt for a subtle, professional virtual background or a blurred effect. Ensure the background matches a neutral office aesthetic to maintain a serious, focused impression.


Conclusion

Mastering video interview tips is an essential skill in today’s digital job market, directly influencing your career progression and hiring success. By preparing your technical environment, embracing the balance of active communication, and structuring your answers thoughtfully, you project confidence and competence. Every question you encounter is an opportunity to showcase your unique value, whether you are an entry-level candidate or an experienced professional. Remember to apply the strategies outlined here, maintain a calm demeanor, and treat each virtual encounter as your definitive moment to shine. Consistent practice and careful attention to detail will soon make remote recruitment feel natural and rewarding. Take what you have learned today, apply it to your upcoming preparations, and step into your next professional conversation ready to succeed.

Psychological Safety at Work: The Ultimate Guide

Psychological safety at work: The Ultimate Guide

Understanding psychological safety at work is essential for building high-performing teams where every member feels secure to share ideas. According to a landmark study by Google re:Work, psychological safety stands out as the single most critical dynamic of effective teamwork. Without it, employees often conceal their true thoughts out of fear of negative career consequences. This comprehensive guide answers core questions, including what psychological safety means, the 5 C’s framework, effective best practices, and practical workplace examples. Whether you are a team leader or an individual contributor, fostering this culture transforms how people collaborate. Let us dive deep into the core concepts that drive modern organizational success and trust.

What Is Psychological Safety in the Workplace?

Psychological safety at work is the shared belief that team members can speak openly without fear of humiliation, punishment, or dismissal. Employees feel comfortable asking questions, sharing ideas, raising concerns, and admitting mistakes. They can also challenge decisions when they believe something needs attention.

The concept was developed in organizational behavior research and focuses on creating trust within teams. It shifts workplace behavior away from fear-driven compliance and toward open collaboration. When employees feel safe speaking honestly, important information reaches the right people sooner.

Psychological safety also helps organizations uncover blind spots. Different perspectives are more likely to surface during discussions, reviews, and decision-making. This can improve problem-solving and support innovation.

Building Trust Through Open Communication

Open communication is a foundation of psychological safety at work. Leaders should actively invite opinions during meetings and listen without immediately judging or dismissing them. Employees can also strengthen this environment by developing strong communication skills that help them express ideas, concerns, and disagreements clearly. Employees notice how leaders respond when someone disagrees or raises a difficult issue.

When honest feedback receives a constructive response, people become more willing to participate. Over time, these interactions build trust and encourage shared accountability. Teams can then discuss complex problems without avoiding uncomfortable topics.

What Are the 5 C’s of Psychological Safety?

The 5 C’s of psychological safety offer a practical framework for building trust and openness within teams. They include Compassion, Curiosity, Clarity, Courage, and Consistency. Each element supports a workplace where employees can communicate honestly and contribute without unnecessary fear.

Compassion encourages people to respond with empathy when mistakes happen. Curiosity encourages teams to understand why something happened before assigning blame. Clarity provides clear expectations, responsibilities, and boundaries. Courage helps employees speak up about concerns, unpopular opinions, and potential risks. Consistency ensures these behaviors remain part of everyday workplace culture.

Together, the 5 C’s can help organizations create stronger working relationships. They also make psychological safety more practical because employees can connect the concept with specific behaviors.

The Role of Compassion and Consistency

Compassion and consistency provide stability within the 5 C’s framework. Compassion helps employees understand that mistakes are part of learning and improvement. It does not mean ignoring poor performance or avoiding accountability.

Consistency shows employees that psychological safety is not a temporary management initiative. Leaders must demonstrate the same standards during successful periods and difficult situations. When employees know what response to expect, they are more comfortable raising concerns.

This combination can create a workplace where people feel respected while remaining accountable for their work. It also supports long-term professional development and healthier team relationships.

What Are 5 Best Practices to Promote Psychological Safety in the Workplace?

Building psychological safety in the workplace requires consistent leadership behavior. Organizations can begin with five practical habits that encourage employees to participate and communicate openly:

  1. Listen actively: Give employees time to explain their concerns before responding.
  2. Normalize vulnerability: Leaders can acknowledge their own mistakes and knowledge gaps.
  3. Encourage different perspectives: Ask quieter team members for their views during discussions.
  4. Create clear feedback channels: Provide safe and accessible ways to raise concerns.
  5. Address toxic behavior quickly: Deal with intimidation, harassment, and repeated disrespect promptly.

These practices work best when leaders demonstrate them consistently. Employees are less likely to speak openly if management asks for constructive feedback but reacts defensively.

Psychological safety also depends on inclusion. Leaders should ensure that workplace discussions do not favor only senior or outspoken employees.

Normalizing Vulnerability as a Leader

Leaders strongly influence the emotional tone of a team. When managers admit mistakes or acknowledge that they do not know something, they make vulnerability more acceptable.

This does not require leaders to appear uncertain about every decision. Instead, it shows employees that being honest about limitations is acceptable. A manager might say, “I missed that issue,” or ask the team for help solving an unfamiliar problem.

These small behaviors can reduce the pressure to appear perfect. Employees may become more willing to ask questions, report problems, and suggest improvements.

Over time, this behavior can support a culture where mistakes become opportunities for learning. Teams can focus on solving problems instead of protecting individual reputations.

What Are Some Examples of Psychological Safety at Work?

Examples of psychological safety at work often appear during difficult conversations, project reviews, and everyday team interactions. For example, a junior developer might identify a security flaw in a senior developer’s code. In a psychologically safe team, the junior employee can raise the concern without fearing professional retaliation. Teams can also benefit from understanding how hackers steal data so employees recognize why speaking up about potential security risks matters.

Another example involves an employee who realizes they may miss an important deadline. Instead of hiding the problem, they inform the team early. The team can then adjust priorities, provide support, or communicate the delay to stakeholders.

These situations show how psychological safety affects practical workplace behavior. Leaders respond with curiosity and problem-solving rather than immediate blame.

Psychological safety does not mean employees avoid accountability. Instead, it allows people to discuss problems honestly so teams can correct them sooner.

Admitting Mistakes Without Fear of Retribution

Employees make mistakes in every workplace. The difference is how teams respond when those mistakes become visible.

When an employee reports an error and receives constructive guidance, others learn that honesty is safer than concealment. This can reduce the tendency to hide problems until they become more expensive or difficult to fix.

A psychologically safe response focuses on understanding what happened. Teams can examine the root cause, identify contributing factors, and develop safeguards. Leaders can still hold employees accountable when appropriate.

The goal is not to remove consequences from every mistake. Instead, the goal is to separate useful accountability from unnecessary blame.

This approach can improve learning and reduce repeated errors. Employees become more likely to report issues early, giving teams more time to respond effectively.

Psychological Safety at Workplace Examples

Looking at psychological safety at workplace examples shows how everyday interactions influence company culture. During a brainstorming session, for example, a manager might thank an employee for challenging a popular assumption. That response signals that respectful disagreement is welcome and helps build stronger team relationships.

Another example is a regular team check-in. Employees may discuss workload concerns, professional challenges, or signs of burnout without worrying about being labeled as weak or uncommitted.

These behaviors demonstrate that psychological safety is not simply a policy or workplace slogan. It develops through repeated interactions between employees, managers, and leaders.

Psychological safety can support belonging, resilience, collaboration, and better decision-making. However, it requires consistent behavior rather than occasional team-building activities.

Organizations should also watch for warning signs. Employees who regularly stay silent, avoid raising concerns, or agree with every decision may not feel safe enough to challenge the group.

Encouraging Dissent During Strategic Planning

Strategic planning provides a useful test of psychological safety. Leaders can ask direct questions such as, “What are the biggest weaknesses in this plan?” This gives employees a clear invitation to identify potential problems.

Constructive disagreement can prevent groupthink and expose risks before implementation begins. It can also reveal information that senior leaders may not have considered. Creating a high-performing team also depends on giving employees space to question assumptions and contribute different perspectives.

However, encouraging dissent does not mean accepting criticism without structure. Employees should explain their concerns respectfully and support important claims with evidence where possible.

Leaders also need to respond carefully. If someone raises a valid concern and gets dismissed, future participation may decline. If leaders explore the concern seriously, others learn that challenging an idea does not threaten their position.

Over time, this practice can improve strategic decisions. Teams become more willing to test assumptions, identify weaknesses, and consider alternative approaches before committing resources.


Frequently Asked Questions

Why is psychological safety important for innovation?

Psychological safety drives innovation by removing the fear of failure and ridicule. When employees feel secure, they share bold ideas and take creative risks without worrying about negative consequences. This freedom of expression sparks breakthrough solutions that closed cultures miss entirely.

How can remote teams build psychological safety?

Remote teams build psychological safety through intentional virtual communication and regular video check-ins. Leaders must create dedicated spaces for casual conversation, use digital feedback tools anonymously if needed, and ensure every remote voice receives equal airtime during online meetings.

Can psychological safety lead to lower accountability?

Psychological safety does not mean lowering performance standards or avoiding accountability. Instead, it pairs high support with clear expectations, allowing teams to address mistakes constructively without fear, which ultimately drives higher commitment and better results.

How do you measure psychological safety in a team?

You measure psychological safety through anonymous employee surveys, pulse checks, and observation of team meetings. Key indicators include how often people ask questions, admit mistakes, share dissenting opinions, and offer mutual support during challenging professional situations.


Conclusion

Embracing psychological safety at work transforms ordinary teams into resilient, high-performing powerhouses. By understanding its core definitions, implementing the 5 C’s, and practicing everyday vulnerability, organizations create environments where people truly thrive. When employees no longer fear speaking up, innovation accelerates, retention improves, and workplace culture becomes a competitive advantage. Start applying these best practices today to cultivate a trusting, open atmosphere. Your team’s future success depends on the safety you build today.

How to Become a Customer Service Representative

How to Become a Customer Service Representative

Embarking on a career path as a customer service representative is an exciting move for anyone who loves helping people and solving problems. If you want to know how to become a customer service representative, you are stepping into a dynamic field with immense growth potential. Companies across every industry rely on dedicated support professionals to keep clients happy and loyal. According to the Bureau of Labor Statistics, customer service professionals play a critical role in modern business operations. This comprehensive guide answers your most pressing questions. We explore the highest salary potential, the seven core steps of service, breaking into the industry without prior experience, starting a career in customer success, identifying key customer qualities, and finding remote support jobs. Let us dive right in and explore everything you need to know to launch your rewarding support career today.

What Is the Highest Salary for a Customer Service Representative?

The salary of a customer service representative varies based on location, industry, experience, and specialization. Entry-level roles often start near minimum wage, while experienced professionals can earn considerably more. Industries such as technology, finance, and healthcare often provide stronger compensation than general customer support roles.

Your earning potential can also increase when you move beyond standard agent responsibilities. Team leader, supervisor, customer success, and customer service management positions typically offer higher salaries. Specialized technical support roles can also provide better compensation because they require deeper product and technical knowledge.

Multilingual abilities can further improve your opportunities. Companies may pay more for representatives who can support customers across different regions. Strong conflict resolution and communication skills also help experienced representatives advance, especially in jobs that require strong communication skills.

To maximize your earnings, focus on developing technical expertise, industry knowledge, and leadership skills. These capabilities can help you qualify for senior positions and negotiate better compensation.

Maximizing Earnings in Tech Support

Technical support can provide some of the strongest earning opportunities within customer service. Software companies often need representatives who can troubleshoot complex products and resolve escalated technical issues.

Mastering ticketing systems, software platforms, troubleshooting methods, and product documentation can make you more valuable. Advanced technical knowledge allows you to handle problems that general customer service agents cannot solve independently.

Some technology companies also offer bonuses, commissions, or stock-based compensation. However, these benefits vary significantly between employers and locations.

If you want to increase your income, consider building skills in areas such as:

  • Software troubleshooting
  • CRM and ticketing platforms
  • Technical documentation
  • Product knowledge
  • Data analysis
  • Escalation management

These skills can help you move from general customer support into technical support specialist or senior support roles.

What Are the 7 Steps of Customer Service?

The seven steps of customer service provide a practical framework for handling customer interactions from beginning to end. They help representatives remain professional while solving problems efficiently.

The first step is to greet the customer and create a positive opening. Second, listen carefully to understand the customer’s concern. Third, acknowledge the customer’s feelings and demonstrate empathy.

Fourth, investigate the problem and identify its underlying cause. Fifth, explain a suitable solution clearly and confirm that the customer understands it. Sixth, take action and resolve the issue as efficiently as possible.

Finally, follow up when appropriate to confirm that the solution worked. This final step can improve customer satisfaction and prevent recurring problems.

These steps are not a rigid script. Instead, they provide a useful structure for maintaining consistency during different types of customer interactions.

The Power of Active Listening

Active listening is one of the most important customer service skills. Customers often become frustrated when they feel ignored or misunderstood.

Allow the customer to explain the problem without unnecessary interruptions. Pay attention to both their words and the underlying concern. Asking relevant follow-up questions can help you identify the actual issue.

You can also summarize the customer’s explanation before suggesting a solution. This confirms that you understood the situation correctly.

For example, saying, “So the main issue is that your payment was processed, but the order was not confirmed,” shows that you listened carefully.

Active listening also helps reduce tension during difficult conversations. Customers are more likely to cooperate when they feel heard and respected.

For anyone learning how to become a customer service representative, developing this skill early can make interviews and real customer interactions much easier.

How to Get Into Customer Service Without Experience?

You do not need years of professional experience to start a customer service career. Many entry-level employers focus on communication, patience, reliability, and problem-solving skills.

Start by identifying transferable skills from your previous experiences. Retail, hospitality, education, volunteering, college projects, and other activities can demonstrate useful customer service abilities.

Your resume should highlight situations where you helped people, solved problems, handled complaints, managed deadlines, or worked as part of a team. Avoid simply listing generic qualities. Show how you used those skills in real situations.

You can also complete beginner-friendly online customer service courses. Learning the basics of CRM platforms, ticketing systems, professional communication, and customer support can demonstrate initiative. As you gain experience, upskilling and reskilling can help you qualify for more advanced roles.

When applying for jobs, customize your resume for each position. Use relevant terms from the job description without forcing keywords into your application.

Entry-level positions such as customer service representative, support agent, call center representative, and help desk associate can provide practical experience and create opportunities for advancement.

Leveraging Transferable Skills Effectively

Your previous job does not have to involve customer service directly. Employers often value experiences that demonstrate patience, communication, organization, and problem-solving.

For example, retail work can demonstrate your ability to handle customer questions and complaints. Hospitality experience can show that you remain professional during busy periods. School projects can demonstrate teamwork and communication.

Focus on specific situations rather than vague claims. Instead of saying you are “good with people,” explain how you handled a difficult customer or solved a problem under pressure.

Useful transferable skills include:

  • Active listening
  • Verbal and written communication
  • Conflict resolution
  • Time management
  • Problem-solving
  • Teamwork
  • Attention to detail

Presenting these skills clearly can strengthen your resume even when you have limited professional experience.

How to Start a Career in Customer Success?

Customer success differs from traditional customer service because it focuses more on long-term customer outcomes. Support teams often respond to problems, while customer success teams work proactively to help clients achieve their goals.

A strong starting point is to understand traditional customer support first. Learn how customers use products, why problems occur, and how effective support influences retention.

Next, develop basic knowledge of customer relationship management software and customer data. Understanding metrics such as product usage, customer retention, renewals, and churn can help you understand the broader customer journey.

Communication remains essential. Customer success professionals often conduct meetings, explain product features, identify risks, and build relationships with clients.

Networking can also help you understand the profession. Connect with customer success professionals and study current job descriptions to identify commonly requested skills.

Certifications can support your learning, but practical knowledge matters more than collecting certificates. Focus on developing skills that help customers achieve measurable results.

Transitioning From Support to Success

Moving from customer support to customer success requires a change in mindset. Support usually focuses on resolving immediate customer problems. Customer success focuses on helping customers achieve long-term value.

Instead of measuring success only by closed tickets, customer success teams may track product adoption, retention, renewals, and customer satisfaction.

Support experience can provide a useful foundation for this transition. You already understand common customer problems and the challenges users face with products.

To prepare for a customer success role, learn how to identify customer goals and recognize signs of dissatisfaction. Practice explaining how a product can help customers achieve specific outcomes.

You should also become comfortable discussing customer data. Basic knowledge of CRM systems and customer health metrics can make your experience more relevant.

This transition can open paths toward roles such as Customer Success Associate, Customer Success Manager, Account Manager, or Implementation Specialist.

What Are the 7 Qualities of a Good Customer?

A good customer can make service interactions more productive, although customer behavior varies from person to person. Seven qualities are particularly helpful during customer service interactions.

First, good customers communicate their needs clearly. Second, they remain patient when representatives need time to investigate complex problems. Third, they treat support professionals with respect and courtesy.

Fourth, they remain open to reasonable solutions. Fifth, they provide constructive feedback instead of responding only with anger. Sixth, they take responsibility for relevant account information and settings when necessary.

Seventh, they recognize helpful service and show appreciation when a representative resolves their concern.

Customer service representatives cannot control every customer interaction. However, understanding these qualities can help agents recognize behaviors that encourage productive conversations.

The goal is not to expect every customer to behave perfectly. Instead, representatives should remain professional while encouraging clear communication, mutual respect, and practical problem-solving throughout the interaction.

Fostering Positive Client Relationships

Positive customer relationships depend on more than simply solving problems quickly. Customers also want to feel respected, understood, and taken seriously.

Representatives can encourage better interactions by communicating clearly and avoiding defensive language. A calm explanation can often prevent a disagreement from becoming a larger escalation.

Empathy is particularly useful when customers are frustrated. You do not have to agree with every complaint to acknowledge the customer’s experience.

For example, recognizing that a delayed order caused inconvenience shows understanding without accepting blame unnecessarily.

Clear expectations also improve relationships. Explain what you can do, what you cannot do, and when the customer should expect an update.

Over time, these habits can create more productive interactions and reduce unnecessary conflict. They also help representatives maintain professionalism during stressful conversations.

Strong relationship-building skills are valuable for anyone learning how to become a customer service representative, especially when the role involves frequent calls, complaints, or escalations.

How to Become a Customer Service Representative From Home

Learning how to become a customer service representative from home requires both customer service skills and reliable technology. Remote support roles have become more common across many industries, although requirements vary by employer.

Start by creating a quiet, dedicated workspace. Your environment should allow you to take calls without frequent background interruptions.

You will usually need a reliable computer and stable high-speed internet. Some employers may require an Ethernet connection, specific operating systems, or approved security software.

A professional headset can improve call quality and reduce distractions.

You should also become comfortable using video conferencing, CRM systems, email, chat platforms, and ticketing software. Understanding AI chatbots and business automation can also help you adapt to the technology increasingly used in modern customer support.

When searching for remote positions, look specifically for remote customer service representative and work-from-home support roles. Read each job description carefully because equipment and schedule requirements differ.

During remote interviews, demonstrate strong communication, self-discipline, time management, and problem-solving skills. Employers need confidence that you can work independently while maintaining consistent service quality.

Setting Up Your Home Office

A suitable home office can make remote customer service work more comfortable and productive. Start with a quiet area where you can focus without regular household interruptions.

A reliable internet connection is essential. If your employer supports it, a wired Ethernet connection can provide more consistent connectivity than Wi-Fi.

Your computer should handle the company’s required applications without performance problems. A professional headset can also improve audio quality during customer calls. If you are considering new equipment or software, learning how to evaluate new technology before you buy can help you avoid unnecessary upgrades.

An ergonomic chair and properly positioned desk can make long working sessions more comfortable. You do not necessarily need expensive equipment. Prioritize reliability and comfort over unnecessary upgrades.

Useful equipment may include:

  • Reliable computer
  • Stable internet connection
  • USB or compatible headset
  • Comfortable desk and chair
  • External monitor
  • Backup internet option

Keep your workspace organized and free from unnecessary distractions. A professional setup can help you communicate clearly and maintain focus throughout your shift.

For anyone exploring how to become a customer service representative, preparing your home workspace is an important practical step toward succeeding in a remote role.

Frequently Asked Questions

What qualifications do you need to be a customer service representative?

Most entry-level support roles require at least a high school diploma or equivalent qualification. Employers primarily look for strong verbal and written communication skills, basic computer literacy, and typing proficiency. Having patience, empathy, and emotional intelligence matters far more than holding an advanced university degree in this field.

Is customer service a stressful job?

Support roles can sometimes feel stressful due to dealing with upset clients and managing high call volumes. However, developing strong emotional resilience and stress-management techniques makes the role highly manageable. Many professionals find immense fulfillment in successfully resolving tricky problems and making someone’s day much better.

What software do customer service reps use daily?

Agents rely heavily on customer relationship management platforms and ticketing systems to track client issues. Popular tools include Zendesk, Salesforce Service Cloud, Freshdesk, and Intercom. Additionally, you will use live chat widgets, internal messaging apps like Slack, and Voice over IP phone systems to communicate.

Can you advance your career in customer service?

Yes, customer service offers fantastic pathways for upward mobility into leadership and specialized corporate roles. Successful agents frequently promote to team lead, customer support manager, quality assurance specialist, or customer success manager positions. Developing leadership skills opens doors to executive management over time.

Conclusion

Mastering how to become a customer service representative opens the door to a dynamic, people-centric career path with incredible growth potential. Throughout this guide, we explored competitive salary expectations, the foundational seven steps of service, and actionable ways to break into the industry without prior experience. We also looked at advancing into customer success, identifying positive client traits, and setting up a successful remote work environment from home. By applying these practical insights, you can position yourself as a top-tier candidate in today’s competitive job market. Take the first step today by updating your resume, refining your communication skills, and applying for roles that match your professional goals.

The Most Popular Programming Language Today In The World

This Programming Language Is Quickly Becoming One Of The Most Popular In The World

Choosing the right technology path often starts with finding the most popular programming language. Coding powers everything from mobile apps and websites to artificial intelligence systems. It also supports automation, cloud services, games, and enterprise software.

For beginners, popularity can provide a useful starting point. Experienced developers can also use programming language trends to assess career opportunities and technology demand. However, the most popular language is not always the best choice for every project.

In this guide, we explore today’s leading programming languages and their common uses. We also compare Python and C++, explain the widely used language trio, and review the top programming languages in the current TIOBE Index. The August 2026 TIOBE Index ranks Python at No. 1, followed by C and C++.

Which Is the No. 1 Programming Language?

Python is currently the most popular programming language according to the August 2026 TIOBE Index. It holds the No. 1 position with an 18.53% rating. TIOBE measures programming language popularity using signals from skilled engineers, courses, third-party vendors, and major websites. It does not measure which language is objectively the best.

Python remains popular because it combines readable syntax with a broad ecosystem. Developers use it for artificial intelligence, machine learning, data science, automation, scripting, and web development. Its simple structure also makes it approachable for people learning programming for the first time.

Python’s flexibility gives it value across many industries. Businesses can use the same language for prototypes, data analysis, internal tools, and production applications. Its large collection of libraries also reduces development time for common tasks.

The Rise of Python in Modern Tech

Artificial intelligence has strengthened Python’s position in modern software development. Popular machine learning frameworks, including TensorFlow and PyTorch, provide extensive Python support. This makes Python a common choice for researchers, data scientists, and AI developers exploring what is generative AI and related technologies.

The language also benefits from its strong developer ecosystem. Teams can quickly test ideas, automate repetitive work, and build functional prototypes. This flexibility helps companies move from experimentation to production more efficiently.

Python is not ideal for every situation. Performance-critical systems may require languages such as C++, C, or Rust. Still, Python’s combination of simplicity and versatility keeps it highly relevant.

For anyone choosing a first language, Python offers a practical foundation. It teaches core programming concepts without introducing unnecessary complexity. Those skills can later transfer to other languages and development environments, especially when following the best coding websites for beginners.

Is C++ Harder Than Python?

C++ is generally considered harder to learn than Python. The two languages take very different approaches to programming. Python emphasizes readability and handles many low-level operations automatically. C++ gives developers much greater control over memory, performance, and system resources.

C++ can require developers to understand pointers, references, memory allocation, object lifetimes, and complex language features. These concepts create a steeper learning curve. They can also introduce difficult bugs when developers manage resources incorrectly.

Python uses automatic memory management, which removes much of that burden. This allows beginners to focus more directly on program logic and problem-solving. Its simpler syntax also makes Python code easier to read and write.

C++ offers important advantages. Developers use it for game engines, operating systems, embedded systems, and other performance-critical software. Its low-level control can produce highly optimized applications when used correctly, making it particularly relevant to gaming jobs for a secure future.

Memory Management and Performance Control

C++ gives programmers detailed control over how applications use memory. Developers can manage resources closely and optimize software for demanding workloads. This level of control is valuable when performance and efficiency are critical.

Game engines are a strong example. Complex games need fast processing, efficient memory use, and direct access to system resources. C++ can provide the performance control required for these demanding environments.

The trade-off is complexity. Developers must understand resource lifetimes and avoid problems such as memory leaks and invalid memory access. Modern C++ provides safer tools and practices, but the language still requires discipline.

Python takes the opposite approach. It sacrifices some low-level control for simplicity and faster development. Therefore, choosing between Python and C++ depends on the project’s requirements, performance needs, and the developer’s experience.

What Are the Big 3 Coding Languages?

The big three coding languages often discussed in mainstream software development are Python, JavaScript, and Java. Each language serves different technical needs. Together, they cover major areas of modern development, including web applications, enterprise systems, automation, data science, and backend services.

Python is particularly strong in artificial intelligence, machine learning, data analysis, automation, and scripting. JavaScript remains central to interactive web development. It runs directly in web browsers and also supports server-side development through environments such as Node.js.

Java has maintained a major role in enterprise software. Organizations use it for large backend systems, business applications, and Android development. Its long history and mature ecosystem have also created a large collection of tools and libraries.

These languages are popular for different reasons. Therefore, there is no single winner for every type of project. Your ideal choice should depend on the application, development environment, performance requirements, and long-term goals.

Powering the Global Digital Ecosystem

Each language in this trio has a distinct role. Python supports data-focused development, automation, and artificial intelligence. JavaScript powers interactive websites and many modern web applications. Java supports large-scale enterprise systems and backend platforms.

Modern development also involves many additional languages. C and C++ remain important for systems and performance-focused software. C# is widely used for enterprise applications and game development. SQL remains essential for working with relational databases.

This diversity shows why popularity rankings should not determine every technology decision. A language can rank highly while being unsuitable for a specific project.

Developers often combine several technologies in one application. A web platform might use JavaScript for its interface, Python for data services, and SQL for database operations. Understanding the strengths of each language helps developers choose tools more effectively, especially when building skills outlined in a data analytics career roadmap.

What Are the 10 Most Used Programming Languages?

The latest August 2026 TIOBE Index lists Python, C, C++, Java, C#, JavaScript, Visual Basic, SQL, R, and Rust as its top 10 programming languages. Python leads the ranking at 18.53%, while Rust has reached the top 10 at No. 10 with a 1.45% rating.

The current top 10 are:

  1. Python — AI, data science, automation, and web development
  2. C — systems programming and embedded software
  3. C++ — performance-focused applications and game development
  4. Java — enterprise software and backend systems
  5. C# — enterprise applications and game development
  6. JavaScript — web development and server-side applications
  7. Visual Basic — Windows and business applications
  8. SQL — relational database management
  9. R — statistics and data analysis
  10. Rust — systems programming and memory-safe software

These rankings show the diversity of modern software development. Popularity does not necessarily mean usage volume or job demand. TIOBE itself states that its index is an indicator of popularity, not a ranking of the best languages or total lines of code.

Ecosystem Diversity in Modern Development

Modern software rarely depends on one programming language alone. Developers combine languages, frameworks, databases, and cloud platforms to meet specific requirements.

For example, a web application may use JavaScript for its interface and Python for backend services. SQL can manage its relational data, while another language handles performance-critical components.

This approach gives development teams greater flexibility. They can select tools based on speed, security, maintainability, scalability, and available expertise.

The current TIOBE rankings also highlight this diversity. Rust has entered the top 10, while SQL and R have climbed into higher positions. Meanwhile, languages such as Go, PHP, TypeScript, and Swift remain relevant outside the current top 10.

Therefore, learning one popular language is useful, but understanding broader programming concepts is even more valuable. Developers who understand algorithms, data structures, APIs, databases, and software design can adapt more easily as technology changes.

How to Say “I Love You” in C++?

You can express “I love you” in C++ with a simple console program. C++ includes standard input and output functionality through the <iostream> header. The std::cout object then sends text to the console.

A basic example looks like this:

#include <iostream>

int main() {
    std::cout << "I love you\n";
    return 0;
}

The program first includes the <iostream> header. This provides access to standard output tools. The main() function contains the instructions that run when the program starts.

The std::cout statement prints the message. The \n moves the cursor to the next line. Finally, return 0; indicates that the program completed successfully.

This small example is also useful for beginners. It demonstrates several fundamental C++ concepts without requiring complicated logic. You can replace the message with any text you want.

Writing Your First Romantic Code Snippet

Writing a simple C++ message can be a fun way to practice basic programming syntax. Start by creating a new C++ source file. Then add the <iostream> header before the main() function.

Inside main(), use std::cout to display your message. The insertion operator, <<, sends the text to the console. Add \n if you want the cursor to move to a new line.

After saving the file, compile it with a C++ compiler. Run the resulting program to display your message.

This example teaches more than console output. It introduces headers, functions, statements, namespaces, operators, and return values. These concepts appear throughout larger C++ programs.

For beginners, small programs like this provide a simple way to build confidence. You can gradually expand the example by adding user input, variables, conditions, or functions.

FAQ: Most Popular Programming Language

Which Programming Language Should Beginners Learn First?

Beginners should typically start with Python because it has readable syntax and a gentle learning curve. As a result, new coders can focus on programming logic without dealing with complex memory rules.

Additionally, Python supports many areas of software development. For example, beginners can explore web development, automation, data analysis, and artificial intelligence. Therefore, learning Python can provide a strong foundation for future technical growth.

However, Python is not the only suitable choice. Beginners interested in websites may prefer JavaScript. Likewise, those interested in systems programming may eventually choose C or C++.

Ultimately, the best starting language depends on your goals. Nevertheless, Python remains a practical option for many new developers.

Is JavaScript Still Important for Web Development?

Yes, JavaScript remains essential for modern web development. In particular, it is supported natively by major web browsers. Therefore, developers can use it to create interactive features and dynamic web experiences.

Moreover, JavaScript is not limited to browser-based development. Through Node.js, developers can also use JavaScript for server-side applications. As a result, teams can build both frontend and backend systems with the same core language.

In addition, JavaScript has a large ecosystem of frameworks, libraries, and development tools. Consequently, it remains valuable for everything from simple websites to complex web applications, while beginners can also explore AI terms every beginner should know as they expand their technology knowledge.

For these reasons, JavaScript continues to be an important language for aspiring web developers.

How Long Does It Take to Learn a Programming Language?

Learning the basic syntax of a programming language usually takes a few weeks of consistent practice. During this stage, learners can understand variables, functions, loops, conditions, and other core concepts.

However, learning syntax is only the beginning. To become comfortable with programming, you need to build practical projects and solve real problems. Therefore, progress depends heavily on consistent hands-on practice.

For many learners, developing professional-level skills can take six months to a year or longer. The exact timeline varies based on study time, previous experience, learning resources, and the language itself.

Instead of focusing only on a deadline, set practical goals. For example, build small applications, fix bugs, and gradually work on more complex projects. As your experience grows, your programming skills will naturally improve.

What Language Is Best for Game Development?

C++ is widely used for high-performance game development. Its speed and low-level control make it suitable for demanding applications. In particular, developers can manage system resources and optimize performance closely.

Furthermore, major game engines such as Unreal Engine rely heavily on C++. This makes C++ an important skill for developers targeting high-end games, real-time graphics, and complex simulations.

However, C++ is not the only option for game development. For example, C# is widely used with Unity and can offer a more approachable development experience. Other game engines also support different programming languages.

Therefore, the best language depends on your chosen engine, platform, and project requirements. Beginners may prefer starting with a simpler language. Later, they can move to C++ when they need greater performance control.

Conclusion

Understanding the most popular programming language can help you make better technology and career decisions. According to the August 2026 TIOBE Index, Python currently holds the top position. Meanwhile, C, C++, Java, C#, and JavaScript remain among the leading languages. These skills can also connect to top IT jobs in demand as technology careers continue to evolve.

However, popularity should not be your only consideration. Each programming language solves different problems. For instance, Python excels in AI, data science, and automation. Similarly, JavaScript powers interactive web experiences, while C++ provides strong performance and low-level control.

Therefore, the best programming language depends on what you want to build. Consider your project requirements, learning goals, available tools, and the ecosystem surrounding each language.

Most importantly, start writing code and practice consistently. Build small projects first, then gradually tackle more challenging applications. As a result, you will develop practical skills through real-world problem-solving rather than memorization.

Finally, remember that software development continues to evolve. Programming languages may rise or fall in popularity over time. Nevertheless, strong fundamentals such as logic, algorithms, data structures, and problem-solving remain valuable across technologies and platforms.

How Does AI Generated Videos? A Complete Beginner Guide

How Does AI Generated Videos? A Complete Beginner Guide

Technology continues to change how people create and consume media. AI-generated videos are now opening new possibilities for creators, marketers, educators, and businesses. These tools can turn written prompts into moving visuals within minutes.

Many people want to understand how this technology works. They also want to know how to analyze existing footage, produce AI videos, and use artificial intelligence throughout production.

Modern generative AI models learn patterns from large datasets containing visual and textual information. They use those learned patterns to generate new visual content based on user instructions. For a practical look at modern AI video workflows, NVIDIA’s AI video generation guide explains how creators can combine generative AI models with tools such as Blender and ComfyUI.

This guide explains the process in simple terms. You will learn how AI video generation works, how multimodal AI can explain videos, and how to produce your own AI video.

We will also explore common uses, production workflows, hardware requirements, copyright considerations, rendering times, and free options. By the end, you will understand the basics of modern AI video creation.

How Are AI-Generated Videos Made?

AI-generated videos are created with machine learning models trained on large collections of visual and textual data. During training, neural networks learn patterns related to movement, lighting, objects, environments, and visual styles.

When you enter a prompt, the model interprets your instructions. It then generates visual content that matches the requested scene, action, and style. Some systems generate video directly, while others create images and animate them.

Diffusion models play an important role in many modern generative systems. They learn how to remove noise from training data. During generation, the model gradually transforms noisy information into a structured visual result.

Video generation adds another challenge. Each frame must remain consistent with the frames around it. Objects, people, lighting, and camera movement should change naturally over time.

Powerful GPUs help train and operate these models. The result can range from realistic footage to highly stylized scenes. Output quality depends on the model, prompt, settings, and available computing resources, including the capabilities of Intel Core Ultra processors.

The Role of Diffusion Models

Diffusion models in generative AI are widely used in modern generative AI. They learn by adding controlled amounts of noise to training images. The model then learns how to reverse that process.

During generation, the system begins with noisy information. It gradually removes that noise while following the instructions provided in the prompt. Each step makes the result more structured and visually recognizable.

For AI-generated videos, the process becomes more complex. The system must maintain consistency across multiple frames. A person’s appearance, an object’s position, and the surrounding environment should remain coherent as the scene develops.

Video models may also learn patterns involving motion, camera movement, and temporal relationships. These capabilities help create smoother sequences rather than disconnected images.

The process can be guided by text, reference images, or other inputs. Users can describe subjects, actions, environments, lighting, and camera styles.

The model then generates a sequence that attempts to match those instructions. Better prompts can provide clearer direction, but results still vary between models and generations.

How to Make AI Explain a Video?

AI can also analyze existing videos rather than create new ones. This process usually relies on multimodal AI models that can interpret different types of information together.

A multimodal system can examine visual content while also processing spoken dialogue, subtitles, or other audio information. The video may first be divided into frames or segments. Speech can then be converted into text through automatic transcription.

The AI combines these signals to understand what happens throughout the footage. It can identify objects, actions, scenes, dialogue, and other relevant details.

You can upload a compatible video and ask targeted questions. For example, you might ask for a summary, identify specific events, or locate a particular action. The system can then provide an answer based on the available video information.

This approach can save significant review time. Researchers, educators, journalists, and content creators can use AI to examine lengthy footage more efficiently.

However, AI analysis is not always perfect. Visual ambiguity, poor audio, complex scenes, and unclear context can affect the accuracy of generated explanations.

Utilizing Multimodal AI Tools

Multimodal AI connects technologies such as computer vision, speech recognition, and natural language processing, instead of examining only text or images. These systems can work with several information types together.

When analyzing a video, the system can process visual frames and spoken language. It may also use subtitles, timestamps, or other available metadata.

The model connects visual events with language descriptions. For example, it can associate a person entering a room with dialogue heard during that moment. This helps the system create a more complete understanding of the scene.

Users can then ask questions about the footage. The AI may summarize events, describe specific scenes, or explain what happened during a particular section.

This technology is especially useful when videos contain large amounts of information. Manual review can take hours, while AI can help identify important moments quickly.

Still, users should review important outputs. AI systems can misunderstand unclear visuals, speech, or context. Human verification remains valuable when accuracy matters.

How to Produce an AI Video?

Producing an AI video involves several stages, from planning and generation to editing and export. The process usually starts with a clear concept, script, or collection of prompts.

First, define the story and visual direction. Describe the subjects, setting, actions, camera movement, lighting, and desired style. Clear instructions can help the generation system produce more useful results.

Next, choose a suitable AI video platform. Enter your prompts and generate the required clips. You may need several attempts before achieving consistent results.

After generation, bring the selected clips into an editing application. Arrange them according to your script or storyboard. You can then add voiceovers, music, sound effects, transitions, and subtitles.

A final review helps identify visual inconsistencies and timing problems. Check the audio, pacing, text, and overall storytelling before exporting the finished project.

A structured workflow makes the process easier. It also reduces wasted generations and keeps your project organized from the first prompt through final delivery.

Streamlining Your Production Workflow

An organized production workflow can make AI video creation faster and more consistent. For larger projects, optimizing AI pipelines can also help streamline processing. Start by developing your script or storyboard before generating large numbers of clips.

Create visual assets in batches when possible. Keep similar scenes together and name files using clear scene numbers. This makes it easier to locate the correct clips during editing.

Consistency also matters. Use similar descriptions for recurring characters, locations, lighting, and visual styles. This can help reduce noticeable differences between separate generations.

Once the clips are ready, move them into your editing timeline. Add voiceovers and background music after establishing the basic visual sequence. Then synchronize audio with important actions and dialogue.

Before exporting, review the complete video from beginning to end. Look for continuity problems, awkward movements, incorrect text, and audio issues.

A practical workflow can include:

  • Plan: Write the script and define each scene.
  • Generate: Create visual clips and supporting assets.
  • Edit: Arrange clips and synchronize audio.
  • Polish: Add subtitles, music, effects, and corrections.
  • Export: Review the final project and render the finished video.

How Is AI Used in Videos?

Artificial intelligence is used throughout modern video production. Its applications range from planning and creation to editing, visual effects, localization, and distribution.

Creators can use AI for script development, video generation, voice production, subtitle creation, and automated editing. Visual effects teams can use machine learning for tasks such as background removal, object tracking, and image enhancement.

Marketing teams can also use AI to adapt videos for different audiences. Automated translation and dubbing can help create localized versions in multiple languages.

AI tools can also improve older footage. Upscaling technologies may increase perceived detail in low-resolution video. Other tools can help reduce noise, improve audio, or remove unwanted elements. Similar AI-powered enhancement techniques are also used in AI camera technology in smartphones.

Streaming services use artificial intelligence in another way. Recommendation systems analyze viewing behavior and other signals to suggest content to users.

These applications can reduce repetitive work and speed up production. They also give smaller teams access to capabilities that once required specialized resources.

However, AI does not eliminate the need for human direction. Creative decisions, storytelling, quality control, and ethical judgment still require human involvement.

Enhancing Post-Production Efficiency

Post-production is one of the areas where AI can save editors significant time. Many editing tasks are repetitive and require careful attention rather than creative decision-making.

AI-powered tools can automatically detect pauses, remove unwanted silence, balance audio levels, and organize footage. Some systems can also generate captions and identify speakers within recordings.

Other tools assist with color correction and visual enhancement. Automated processes can provide a useful starting point for editors, especially when working with large amounts of footage.

AI can also help locate specific moments in a video. Editors may search for spoken words, scenes, or visual elements instead of reviewing every frame manually.

These features do not necessarily replace professional editors. Instead, they can reduce routine work and allow more time for creative decisions.

A human editor can review automated changes and make the final adjustments. This approach combines machine efficiency with human judgment.

For professional projects, that balance remains important. Automated tools can accelerate the workflow, but storytelling, pacing, tone, and visual quality still benefit from experienced creative direction.

How Can I Create an AI Video?

Creating an AI video is now accessible to beginners. You do not necessarily need advanced technical skills or a powerful local computer. Many platforms provide cloud-based tools that handle the demanding processing.

Start by choosing a generative video platform that matches your goals. You can compare the best AI tools for image generation to better understand how different generative platforms and capabilities compare. Look at its available models, export options, editing features, pricing, and usage limits.

Next, write a detailed prompt. Include the subject, environment, action, camera angle, lighting, mood, and visual style. Specific instructions can give the model clearer direction.

Generate a short clip and review the result. If it does not match your expectations, adjust the prompt and try again. Iteration is a normal part of AI video generation.

After creating your clips, combine them in an editor. Add narration, music, sound effects, and subtitles as needed. Then review the final sequence for continuity and quality.

For beginners, starting with a short project is often easier. A simple scene or social media clip lets you learn the workflow before attempting a longer production.

Choosing the Right Platform

The best AI video platform depends on your project, experience, budget, and desired level of control. Different tools support different approaches to creating AI-generated videos, so choosing the right option can improve your workflow.

Some platforms specialize in quick text-to-video generation. These can work well for social media content, demonstrations, and short creative experiments.

Other platforms provide more advanced controls. They may support reference images, detailed camera instructions, character consistency, or professional editing workflows.

Before choosing a service, consider several factors:

  • Generation quality: Check how realistic and consistent the output looks.
  • Controls: Look for features that match your creative requirements.
  • Export options: Review supported resolutions, formats, and watermark policies.
  • Pricing: Compare subscriptions, credits, and generation limits.
  • Ease of use: Choose an interface that fits your technical experience.
  • Commercial use: Check the platform’s current licensing terms before publishing paid work.

Free trials or limited plans can help you test a platform first. Generate several sample clips before committing to a subscription.

Frequently Asked Questions

What hardware do I need to run AI video generators locally?

Running generative video models locally requires high-end hardware. You need a powerful graphics card with a large amount of video memory, a fast multi-core processor, and plenty of system RAM. Most creators avoid local hardware setups. Instead, they use cloud-based software platforms that handle heavy computational rendering on remote servers.

Can I copyright videos created with artificial intelligence?

Copyright laws regarding AI-generated media vary by region and continue to evolve rapidly. AI and copyright considerations are especially important when publishing or monetizing generated content. In many jurisdictions, works created entirely by machines without significant human creative input cannot be copyrighted. However, if you substantially edit, rearrange, or combine AI clips with your own original footage and script, you may secure copyright protection.

How long does it take to render an AI video?

Rendering times vary widely based on platform congestion, video length, resolution, and model complexity. Short clips of a few seconds can render in under a minute on modern cloud platforms. Longer, high-definition sequences with complex motion physics may take several minutes or even hours to process completely.

Are there free tools available for beginners?

Yes, many platforms offer free tiers or trial credits for beginners. These options let you test text-to-video generation without upfront financial commitment. Free plans usually include watermarks, lower export resolutions, or monthly generation limits, making them ideal for learning the basics before upgrading.

Conclusion

AI generated videos are changing how people approach content creation, storytelling, marketing, and visual production. Modern systems can generate new footage, analyze existing videos, and automate many production tasks.

This guide explored how AI video generation works and why diffusion models are important. We also covered multimodal video analysis and practical methods for producing complete AI videos.

Artificial intelligence can support many stages of production. It can help with scripts, visuals, voiceovers, subtitles, editing, localization, and post-production tasks.

However, AI works best as a creative tool rather than a complete replacement for human direction. People still provide the ideas, context, creative judgment, and quality control that shape the final result.

If you are new to AI video creation, start with a small project. Experiment with prompts, compare different outputs, and learn how your chosen platform responds to instructions.

As your experience grows, you can develop more advanced workflows. With thoughtful planning and human creativity, AI can help you create engaging video content more efficiently.

Mechanical vs Membrane Keyboard for Gamers: Which Wins?

Mechanical vs Membrane Keyboard for Gamers: Which One Is Better?

Choosing the right keyboard can make gaming more comfortable and responsive. The mechanical vs membrane keyboard debate usually comes down to performance, feel, durability, noise, and price.

Mechanical keyboards use individual switches beneath each key. Membrane keyboards use rubber domes and a conductive membrane to register keystrokes. These different designs create noticeably different gaming experiences.

Mechanical keyboards are popular among competitive players because they offer consistent feedback and extensive customization. Membrane keyboards appeal to gamers who want a quieter and more affordable setup.

Neither option is perfect for every player. Your preferred games, budget, playing style, and workspace all influence the right choice.

This guide compares mechanical vs membrane keyboard options across speed, comfort, durability, rollover, noise, and customization. For a deeper technical comparison of these keyboard technologies, see RTINGS’ mechanical vs. membrane keyboard guide.

Whether you are buying your first gaming keyboard or upgrading your setup, understanding these differences can help you make a confident decision.

Do Gamers Prefer Membrane or Mechanical Keyboards?

Many dedicated gamers prefer mechanical keyboards, especially those who play competitive titles. Mechanical switches provide individual actuation for each key and create a more defined gaming feel.

Membrane keyboards use rubber domes instead. When you press a key, the dome pushes against a conductive layer to register the input. This design is simple, affordable, and usually quieter.

However, preference is not universal. Some gamers enjoy membrane keyboards because they are inexpensive, quiet, and comfortable for everyday use.

Mechanical keyboards also offer more switch choices. Players can choose between linear, tactile, and clicky switches based on their preferred feedback and sound.

Competitive players often choose mechanical models because of their consistent feel and customization. They can select switches that suit rapid movements and repeated inputs.

Still, a membrane keyboard can perform well for casual gaming. The best choice depends on your priorities rather than popularity alone.

Why Tactile Feedback Matters in Gaming

Tactile feedback gives your fingers a physical indication that a key has reached its actuation point. This can make each input feel more controlled and predictable.

For gamers, that feedback can help develop consistent muscle memory. It may also reduce the need to press every key completely to the bottom.

However, tactile feedback does not automatically make a keyboard faster. Switch design, actuation force, key travel, and latency all affect responsiveness.

Linear switches provide smooth movement without a tactile bump. Many gamers prefer them for rapid and repeated actions.

Tactile switches provide a noticeable bump during each press. They can suit players who want clearer feedback from every keystroke.

Clicky switches add an audible click alongside tactile feedback. They can feel satisfying but may be too loud for shared spaces.

Ultimately, feedback is a personal preference. A consistent and comfortable switch can help you play longer with less unnecessary hand fatigue.

Which Is Better for Gaming: Mechanical or Membrane?

When comparing mechanical vs membrane keyboard options, mechanical models often provide a stronger feature set. They typically offer consistent actuation, durable switches, and extensive customization.

However, mechanical technology does not guarantee better gaming performance by itself. A well-designed membrane gaming keyboard can also provide reliable inputs and useful gaming features.

Anti-ghosting and key rollover depend on the keyboard’s circuit and controller. Some gaming membrane keyboards support several simultaneous inputs, while mechanical models can offer different rollover capabilities.

Mechanical switches also tend to maintain their feel for a long time. Many are rated for tens of millions of keystrokes, although ratings vary by switch and manufacturer.

Membrane keyboards usually cost less and can operate quietly. They are practical for casual gamers who do not need advanced customization.

For competitive FPS, fighting, and action games, many players prefer mechanical keyboards. Their consistent feel and broad switch selection can be useful during fast gameplay. Players building a complete setup may also want to explore how to choose the perfect gaming monitor.

For casual gaming, however, the difference may be less noticeable. A quality membrane keyboard can still provide a smooth and reliable experience.

Customizable Actuation and Switch Options

Mechanical keyboards offer many customization choices, although traditional switches usually have fixed actuation points. Their actuation distance depends on the specific switch design.

Some modern gaming keyboards use adjustable actuation through Hall-effect or other advanced switch technologies. These keyboards let users change how far a key travels before registering.

A shorter actuation setting can suit games that require frequent and rapid inputs. A longer setting may help prevent accidental presses during normal use.

Players can also choose between different switch characteristics. Linear switches feel smooth, while tactile switches provide a noticeable bump.

Some keyboards allow different actuation settings for individual keys. This can help players customize movement, ability, and modifier keys separately.

However, adjustable actuation is not standard on every mechanical keyboard. It is generally found on more advanced gaming models.

For most gamers, choosing the right switch feel is more important than chasing the shortest possible actuation distance.

Is a Mechanical Keyboard the Same as a Gaming Keyboard?

A mechanical keyboard and a gaming keyboard are not the same thing. Mechanical describes the switch technology, while gaming describes the keyboard’s intended features and audience.

A gaming keyboard can use either mechanical or membrane switches. Some affordable gaming keyboards use membrane technology while adding RGB lighting and gaming-focused controls.

Mechanical gaming keyboards combine mechanical switches with features designed for players. These may include programmable keys, RGB lighting, onboard profiles, media controls, and dedicated software.

A standard mechanical keyboard may not include those gaming features. It can still provide excellent typing and gaming performance.
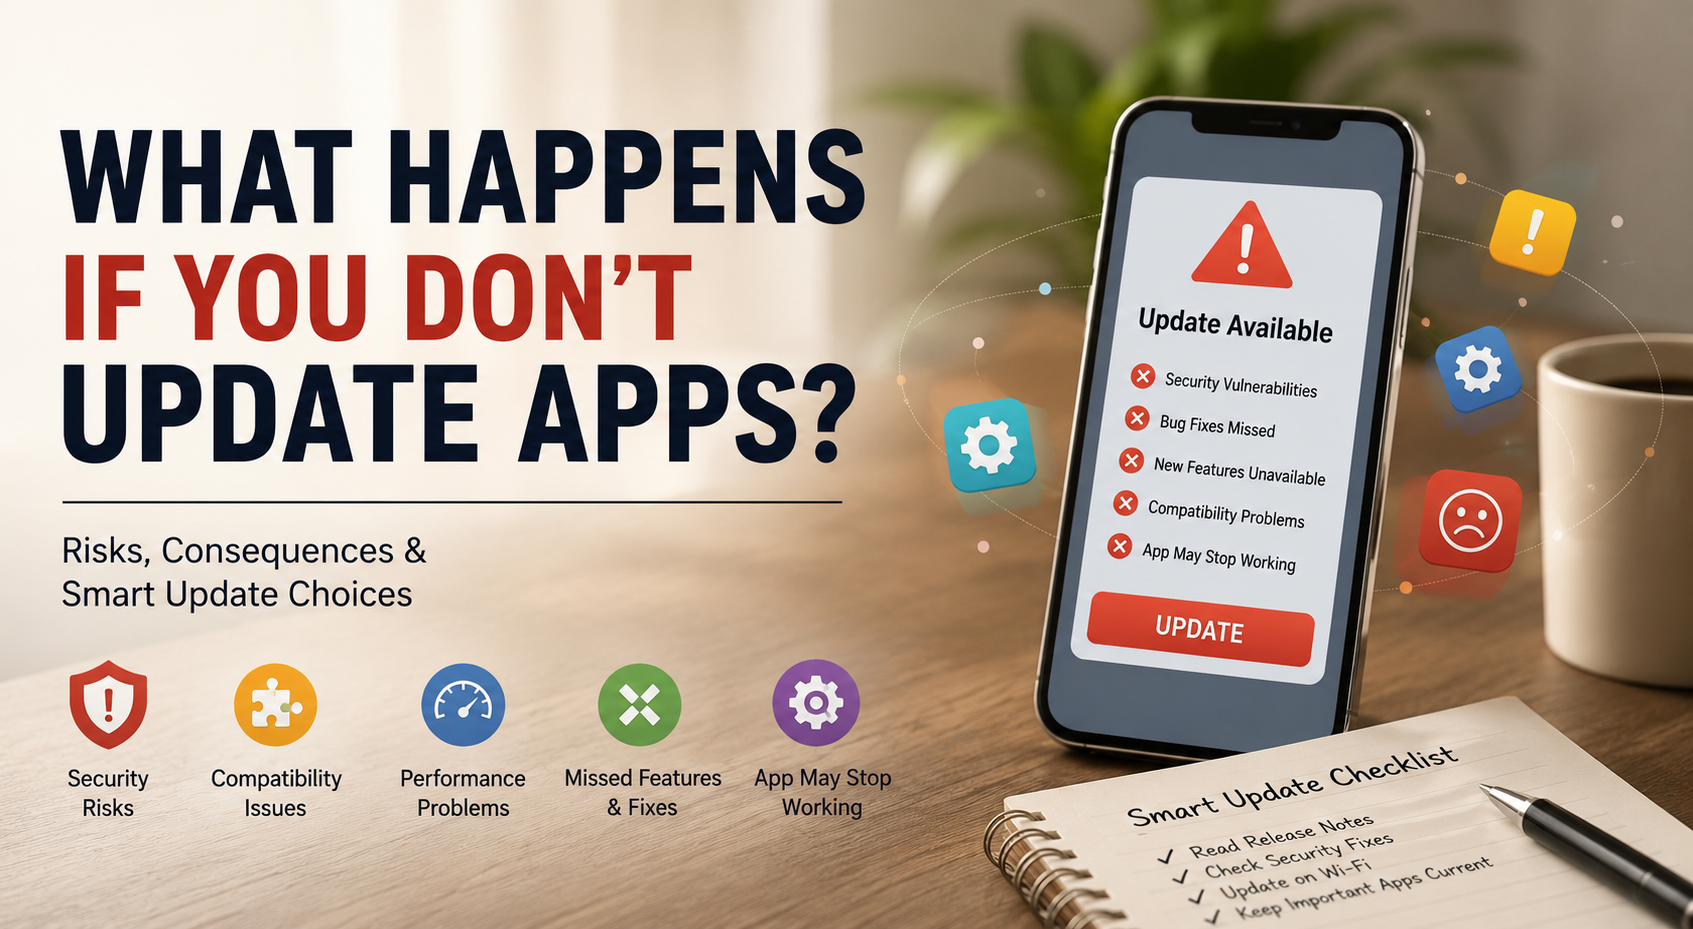
When considering mechanical vs membrane keyboard options, look beyond the switch type. Check latency, rollover, layout, software support, build quality, and comfort.

RGB lighting is useful for customization, but it does not improve gaming performance. Likewise, mechanical switches do not automatically make a keyboard better for every player.
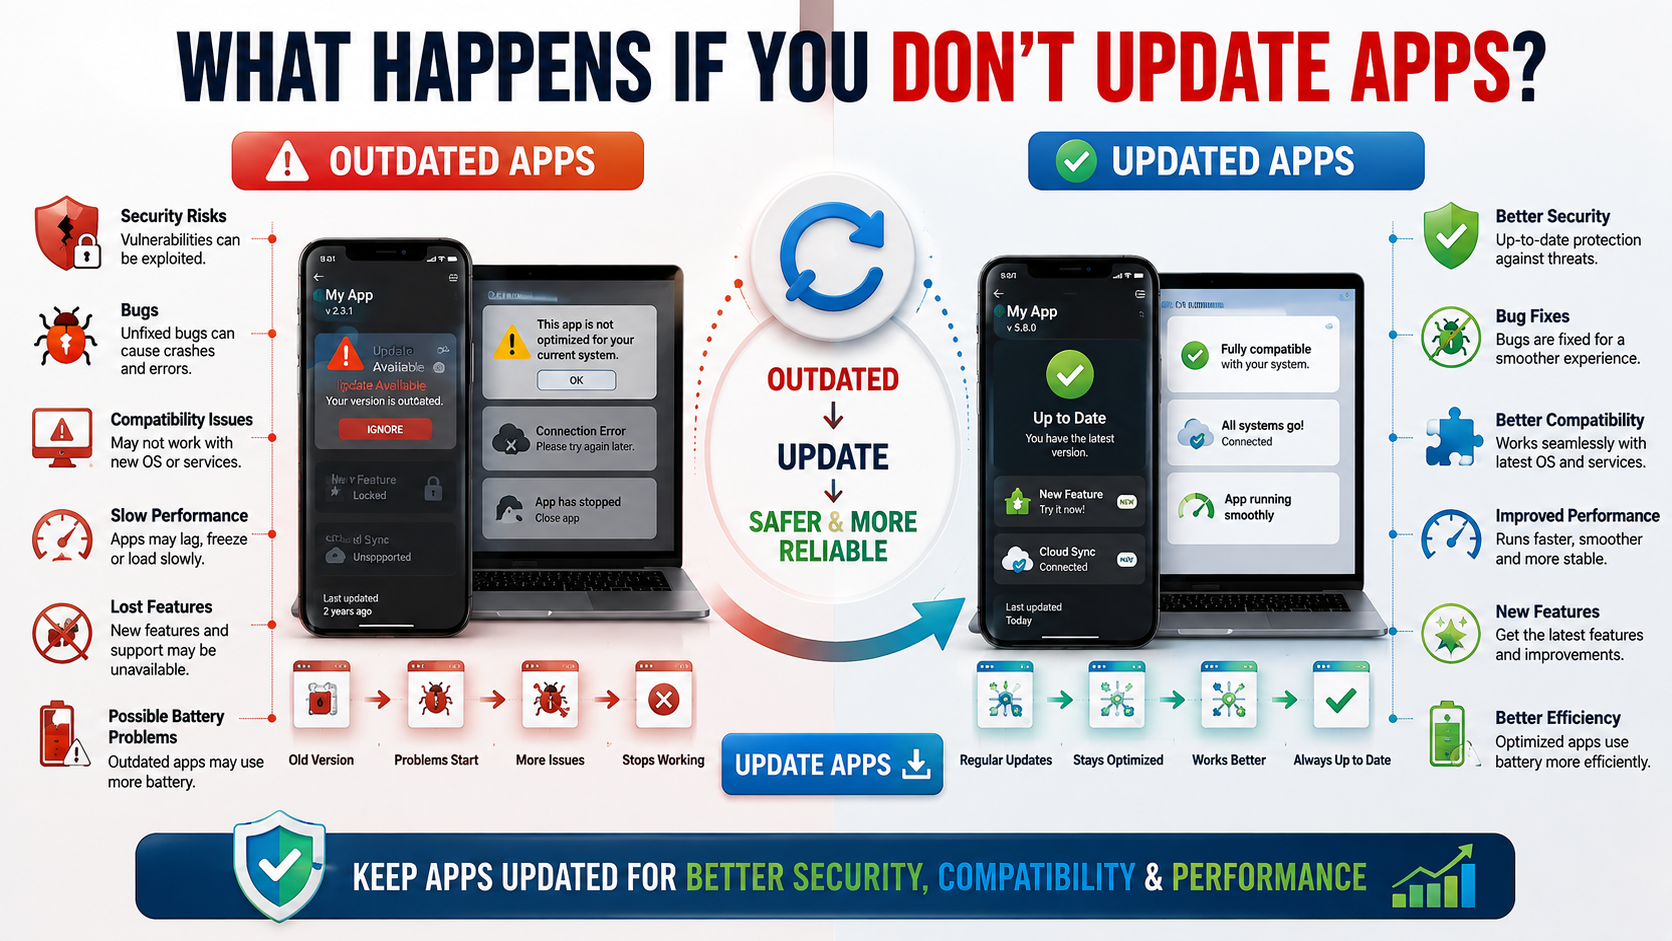
The best gaming keyboard combines suitable switches with reliable hardware and features that match your needs.

RGB Lighting and Macro Features

Gaming keyboards often include software for RGB lighting, macros, profiles, and key customization. These features allow players to personalize their setups and create different configurations. For a broader overview of essential gaming peripherals, see this guide to gaming equipment.

Per-key RGB lighting lets users assign colors to individual keys. Some software can also create lighting effects or game-specific profiles.

Macro functionality can assign several actions to one key. This can be useful for productivity and supported gaming functions. However, some multiplayer games restrict automation features.

Onboard memory is another useful feature. It allows the keyboard to store profiles and settings for use across different computers.

These features are not exclusive to mechanical keyboards. Some membrane gaming keyboards also include RGB lighting, macros, and programmable controls.

The difference is that mechanical gaming keyboards often combine these features with a wider selection of switch types.

When choosing between mechanical vs membrane keyboard designs, prioritize useful features over appearance. Comfort, reliable input, and a suitable layout should come first.

Are Membrane Keyboards Good for Gaming?

Yes, membrane keyboards can be good for gaming. They are especially suitable for casual players, beginners, and gamers working with a limited budget.

Membrane keyboards can handle everyday games without requiring a large investment. Their simple construction also makes them widely available at affordable prices.

Quiet operation is another major benefit. Rubber-dome keyboards generally produce less noise than clicky mechanical switches.

They can work especially well for strategy games, simulation titles, and slower-paced games. These genres may not demand constant rapid key inputs.

Their main limitation is feel. Many membrane keyboards have a softer keypress than mechanical models. Some players may find this less satisfying during long sessions.

Gaming membrane keyboards can still include anti-ghosting and improved rollover. Therefore, not every membrane keyboard struggles with simultaneous inputs.

For competitive players, mechanical keyboards may provide a more consistent and customizable experience. For casual gamers, a quality membrane keyboard can offer excellent value.
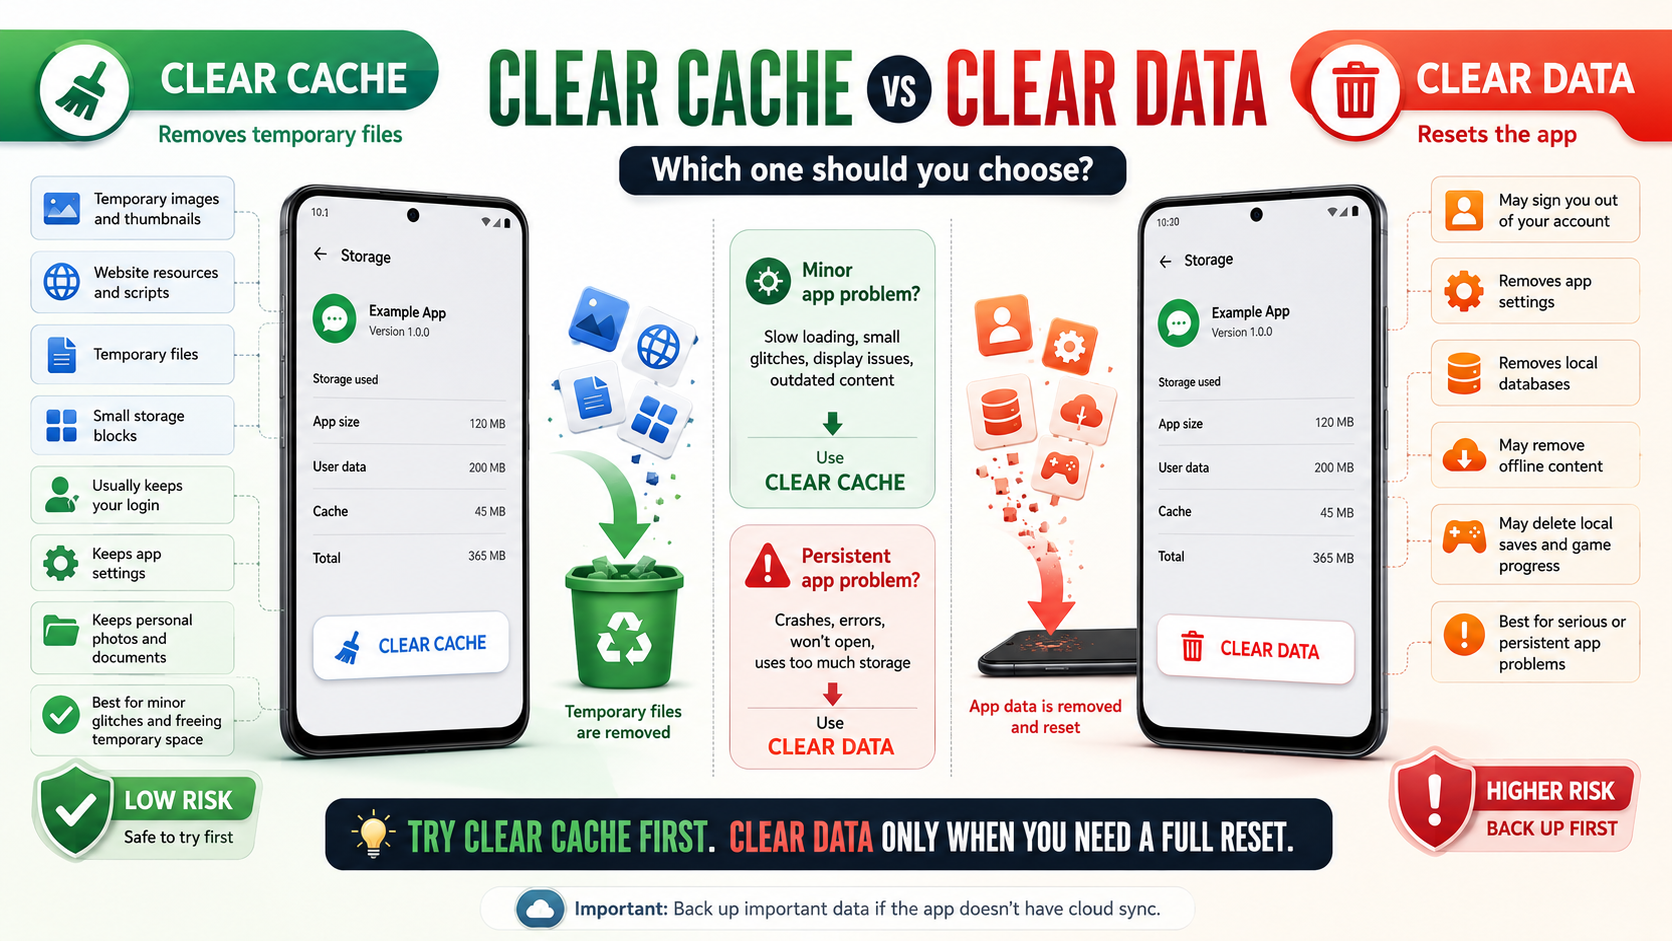
Your games, preferences, and budget should guide the final decision.

Why Quiet Operation Can Be an Advantage

Keyboard noise matters when you share a room or play late at night. Membrane keyboards are generally quieter because their rubber-dome construction produces less mechanical sound.

This makes them useful in bedrooms, dorms, offices, and shared living spaces. You can play without creating the sharp sounds produced by some clicky switches.

However, mechanical keyboards are not always loud. Linear and silent mechanical switches can operate much more quietly than clicky alternatives. If audio is also important to your gaming setup, consider how to clean and maintain your premium headphones.

Keycap design and typing technique also affect noise. Pressing keys forcefully can make almost any keyboard louder.

A quiet mechanical keyboard can therefore offer a useful middle ground. It provides the switch feel many gamers prefer while keeping noise under control.

Membrane keyboards remain an excellent option when affordability and quiet operation are the main priorities.

When comparing mechanical vs membrane keyboard choices, consider sound, switch feel, price, comfort, and gaming requirements together.

Why Do Some People Dislike Membrane Keyboards?

Membrane keyboards are not universally disliked. However, keyboard enthusiasts often criticize their softer feel and limited customization.

Many users describe inexpensive membrane keyboards as spongy or less precise than mechanical models. The experience varies significantly between different keyboards.

Higher-quality membrane models can feel smooth and responsive. Cheap models may develop inconsistent resistance or feel less satisfying over time.

Durability is another common concern. Rubber components can change with heavy use and may gradually lose their original feel.

Membrane keyboards can also be harder to repair. Their internal layers are usually integrated into a single assembly rather than separated into replaceable components.

Despite these drawbacks, membrane keyboards remain practical. Their affordable pricing and quiet operation make them attractive to many users.

Casual gamers may not need switch customization, hot-swappable components, or enthusiast-level durability.

The criticism mainly comes from players who prioritize feedback, customization, repairability, and consistent long-term performance.
For those users, mechanical keyboards often provide a more satisfying experience. For others, membrane keyboards remain a sensible and cost-effective choice.

Durability and Long-Term Reliability

Durability is one of the biggest advantages associated with mechanical keyboards. Many mechanical switches are rated for tens of millions of keystrokes.

Some premium switches carry ratings of 100 million presses or more. Actual lifespan still depends on the switch, keyboard, usage, and build quality.

Membrane keyboards use flexible rubber domes and conductive layers. Heavy use can gradually change the feel and responsiveness of these components.

Mechanical keyboards also offer an important repair advantage. Many models have removable keycaps, while hot-swappable keyboards allow compatible switches to be replaced easily.

This modular design can extend a keyboard’s useful life. A damaged switch does not always require replacing the entire keyboard.

However, not every mechanical keyboard is hot-swappable. Some models require soldering to replace switches.

A quality membrane keyboard can still last for years. Mechanical keyboards simply tend to provide more opportunities for customization and component replacement.

For heavy gamers and enthusiasts, these advantages can help justify the higher purchase price.

Frequently Asked Questions

What makes mechanical switches last longer than membrane rubber domes?

Mechanical switches rely on independent metal springs and electrical contacts rated for up to one hundred million keystrokes. In contrast, membrane keyboards use rubber domes that stretch, flatten, and tear under continuous heavy pressure. This structural difference explains why mechanical units maintain their original performance for decades while rubber domes degrade within a few years.

Can membrane keyboards support anti-ghosting for fast gaming inputs?

Most traditional membrane setups feature limited key rollover, meaning they can only register three or four simultaneous keypresses. While specialized gaming membrane boards implement basic anti-ghosting matrices, they still lag behind mechanical boards. Mechanical options natively support full n-key rollover, ensuring every single keystroke registers accurately during intense gaming sessions.

Are optical switches considered a type of mechanical keyboard?

Optical switches represent an evolution of traditional mechanical technology by using infrared light beams to register inputs. They offer lightning-fast response times and eliminate metal debounce delay entirely. While they use physical stems similar to mechanical switches, their light-based actuation makes them the fastest option currently available for competitive esports players.

Do mechanical keyboards require specialized cleaning and maintenance?

Mechanical units are significantly easier to clean and maintain because you can pull individual keycaps off safely. Dust, debris, and pet hair can be easily brushed or blown out from between the switches. Furthermore, many mechanical models feature hot-swappable sockets, allowing you to replace worn or damaged switches without buying an entirely new keyboard.

Conclusion

Choosing between mechanical vs membrane keyboard options depends on your gaming style, preferences, and budget.

Mechanical keyboards generally provide consistent actuation, greater switch variety, strong durability, and extensive customization. These qualities make them popular with competitive gamers and enthusiasts.

Membrane keyboards remain a practical choice for casual gaming. They are affordable, quiet, and capable of providing reliable performance for many games.

Remember that switch technology is only one part of gaming performance. Latency, rollover, anti-ghosting, layout, build quality, and comfort also matter.

Mechanical does not automatically mean faster. Membrane does not automatically mean poor quality.

For competitive FPS and other input-heavy games, a quality mechanical keyboard can provide useful advantages. For casual gaming or shared spaces, a good membrane model may offer better value.

Before buying, consider the games you play and the features you actually need. The right balance of performance, comfort, durability, and price will help you build a gaming setup that suits you. If you are upgrading more than just your keyboard, check out this guide to choosing the best gaming laptop.

Logitech Combo Touch Review: Is It Worth Buying?

A Complete Guide to the Logitech Combo Touch

If you need a versatile keyboard case for your tablet, Logitech Combo Touch is worth considering. It can change how you use your device for work, school, or entertainment. Many buyers want to know how well it performs and protects their tablet. They also want to know whether its weight becomes uncomfortable during daily use.

Logitech designs its tablet accessories around specific device models. This approach helps ensure reliable compatibility and seamless power delivery through smart connectors. The exact features can vary by tablet model, so compatibility should always be checked before buying.

In this guide, we examine the Logitech Combo Touch from several practical angles. We cover its performance, design, protection, weight, and versatility. We also compare Logitech with HP to help you understand which brand suits your needs.

Is the Logitech Combo Touch Good for Everyday Use?

The Logitech Combo Touch is a strong choice for tablet users who want laptop-style productivity. It combines a protective case with a detachable keyboard and trackpad. This design gives you more flexibility than a basic tablet cover.

The keyboard provides well-spaced keys and a responsive typing experience. Its trackpad also supports multi-touch gestures for easier navigation. You can detach the keyboard when you want to read, watch videos, or draw.

For students, remote workers, and frequent travelers, this flexibility can be especially useful. You can quickly switch between typing documents and using the tablet as a traditional touchscreen device. The setup also keeps essential productivity tools together instead of requiring separate accessories.

Another benefit is the overall convenience of the design. The keyboard remains connected through the tablet’s smart connector, so there is no Bluetooth pairing process. This makes it easier to start working whenever you open the case.

The Combo Touch also works well for different types of daily tasks. You can write notes, respond to emails, browse websites, edit documents, or watch videos. Its versatility makes it more than just a keyboard attachment.

Everyday Performance and Versatility

The adjustable kickstand supports different viewing angles for everyday tasks. You can use it for emails, documents, browsing, or creative work. The keyboard connects through the tablet’s smart connector, so Bluetooth pairing is unnecessary.

The keyboard also draws power from the tablet. That means there is no separate keyboard battery to charge. This setup can reduce connection problems and simplify daily use.

For people who often switch between productivity and entertainment, the modular design is useful. It offers a practical balance of typing comfort, flexibility, and tablet portability.

The kickstand is another useful part of the experience. It lets you position the tablet at a comfortable angle while typing or viewing content. This can make longer sessions more convenient.

Overall, the Combo Touch is well suited to users who want more from their tablet. It provides many laptop-style features without permanently turning the tablet into a laptop.

What Is the Logitech Combo Touch?

The Logitech Combo Touch is a detachable keyboard case designed for compatible tablets. It combines a keyboard, precision trackpad, and protective case. Together, these components give a tablet a more laptop-like setup.

The keyboard includes backlighting on supported models, making it easier to type in low-light environments. Its trackpad provides gesture support for navigation and multitasking. The physical connection also supplies power without requiring Bluetooth pairing.

Unlike a basic tablet cover, the Combo Touch is designed for several different use cases. You can use the tablet for productivity with the keyboard attached. You can also remove the keyboard when you want a lighter touchscreen experience.

This makes the accessory particularly useful for people who move between different activities. A student might use it for writing assignments and then detach the keyboard for reading. A professional could use the same setup for emails, meetings, and presentations.

The design also keeps the tablet protected while adding productivity features. Instead of carrying a separate case and keyboard, you get both functions in one system. This can make your everyday setup more organized.

Understanding the Core Components

The case has two main sections. One is the detachable keyboard, while the other is the protective back shell. The back shell includes an integrated kickstand for hands-free viewing.

The case supports several practical modes. You can use it for typing, viewing, sketching, or reading. This flexibility makes it suitable for different situations throughout the day.

Depending on the specific model, features can vary. Compatibility is therefore important when choosing a Combo Touch for your tablet.

The keyboard section provides physical keys for longer typing sessions. The trackpad also lets you control the cursor without constantly touching the display. This can make document editing and multitasking feel more natural.

The protective shell holds the tablet securely while helping protect its back and edges. Meanwhile, the kickstand provides hands-free positioning. These components work together to create a flexible tablet workstation.

Key features include:

  • Detachable keyboard for flexible tablet use
  • Integrated trackpad for cursor control and gestures
  • Adjustable kickstand for multiple viewing positions
  • Protective case design for everyday tablet protection
  • Smart connector support on compatible tablet models

Which Keyboard Is Better: HP or Logitech?

Choosing between HP and Logitech depends on your device and how you plan to use it. HP keyboards often focus on traditional Windows computers and business environments. Logitech offers a wider range of accessories across different platforms.

For tablet users, Logitech has a clear advantage with specialized products such as the Combo Touch. Its tablet-focused design combines a keyboard, trackpad, kickstand, and protective case. This makes it more suitable for people seeking mobile productivity.

However, HP can still be the better choice for users who mainly work with HP laptops or desktop computers. Its accessories are often designed around conventional Windows setups. That familiarity can matter in professional or office environments.

Your typing preferences should also influence the decision. Some users prefer traditional desktop-style keyboards, while others value compact tablet accessories. Consider the device you already own before choosing between the brands.

Price and portability are also worth considering. A tablet-focused Logitech accessory can provide more functionality than a standard keyboard. However, users who only need basic typing may not need those additional features.

Key Factors in the Brand Comparison

Compatibility should be your first consideration. HP accessories may make more sense if you primarily use HP laptops or Windows desktops. Logitech can be a better fit for tablet users and people who want flexible accessories.

Your preferred software ecosystem also matters. Logitech offers software features for many compatible computer accessories. HP focuses heavily on its hardware ecosystem and business-oriented devices.

Build quality and intended use are equally important. HP products can suit office environments and traditional computer setups. Logitech’s tablet accessories focus more on portability and flexible working styles.

You should also consider how often you switch between typing and touchscreen use. The Combo Touch makes this transition simple because its keyboard can be detached. A standard keyboard does not offer the same tablet-focused flexibility.

Consider these factors before choosing:

  • Tablet compatibility: Logitech offers dedicated tablet accessories.
  • Windows use: HP can suit traditional Windows setups.
  • Portability: Logitech’s tablet products emphasize mobile use.
  • Productivity: Combo Touch adds keyboard and trackpad functionality.
  • Design preference: Both brands offer different styles and form factors.

Is the Logitech Combo Touch Protective?

The Logitech Combo Touch provides protection against everyday scratches, bumps, and general wear. Its form-fitting design helps cover the tablet’s back, corners, and edges. This gives your device more protection than a simple keyboard attachment.

The outer material also provides additional grip when handling the tablet. That can help reduce accidental slips during everyday use. However, it should not be treated as a heavy-duty rugged case for extreme environments.

For everyday users, this level of protection can be practical. The case is designed to handle common situations such as commuting, studying, and office use. It adds protection without focusing entirely on rugged construction.

The design also supports normal tablet handling. You can place the tablet on a desk, carry it in a backpack, or use it while traveling. The case helps protect the device during these routine activities, especially when considering screen safety during everyday use.

However, protection should not be confused with complete drop resistance. The Combo Touch is not intended to make a tablet immune to serious impacts. Careful handling remains important, especially with expensive tablet models.

Impact Protection and Screen Safety

The raised edges can help keep the display away from surfaces when the tablet is placed face down. The folio design also helps protect the screen while the device is stored or carried.

Its protective design is best suited to normal daily situations. These include commuting, school, office use, and travel. It offers a practical balance between protection, functionality, and portability.

The folio also adds a layer between the tablet display and other items in your bag. This can help reduce contact with everyday objects. However, sharp objects should still be kept away from the screen.

The protective shell can also help guard the tablet’s rear surface against scratches. This is useful when placing the device on desks or other frequently used surfaces. The exact level of protection depends on the specific model.

Keep in mind that no tablet case can guarantee protection from every drop. The level of protection also depends on the specific Combo Touch model and tablet. Checking the model-specific specifications is important before purchase.

Is the Logitech Combo Touch Heavy for Daily Carry?

The Logitech Combo Touch is heavier than a basic tablet folio. That is expected because it includes a physical keyboard, trackpad, and protective shell. The additional weight provides functionality that a simple cover cannot offer.

For many users, the extra weight remains manageable during commuting, studying, and travel. When attached, the setup can also replace some laptop tasks. This may reduce the need to carry a separate computer for lighter productivity work.

The overall weight can feel more noticeable when carrying the tablet for long periods. This is especially true when you already have other items in your backpack. However, the added functionality can make the extra weight worthwhile for productivity-focused users.

Your usage habits should therefore guide your decision. If you mainly watch videos or read, a slimmer case may be more suitable. If you type regularly, the Combo Touch can offer greater practical value.

The balance between weight and functionality is one of the main trade-offs. You are carrying more hardware, but you also gain a keyboard, trackpad, stand, and protective shell.

Managing Weight and Portability

The detachable design gives you another way to manage weight. You can remove the keyboard when you only need the tablet and protective back case. This works well for reading, drawing, browsing, or watching videos.

The trade-off is simple. You get more functionality and protection, but the setup is heavier than a slim folio. For frequent travelers and students, the added weight may be worthwhile.

The modular design also gives you more control over how you carry the tablet. Keep the keyboard attached when working outside your home. Remove it when you want a lighter setup for casual use.

This flexibility can make the additional weight easier to manage. You do not have to carry the complete setup during every activity. Instead, you can choose the configuration that fits your immediate needs.

Before buying, compare the combined weight of your tablet and case. This gives you a better idea of how comfortable the complete setup will be. Also consider your typical bag weight and how often you travel with the tablet.

For users who value productivity, the extra weight may be a reasonable compromise. Those seeking maximum portability may prefer a lighter folio instead.

Frequently Asked Questions About Logitech Combo Touch

The Logitech Combo Touch is designed to make tablet productivity simpler. Still, buyers often have questions about its connection method, charging, backlighting, and detachable keyboard.

Does the Logitech Combo Touch Require Bluetooth Pairing?

No. Compatible Combo Touch models connect directly through the tablet’s smart connector. This connection transfers data and power without traditional Bluetooth pairing.

That means you do not need to manage a separate keyboard connection. It can also eliminate the need to charge a separate keyboard battery.

Can I Charge My Tablet With the Case Attached?

Yes. The case is designed to provide access to the tablet’s charging port. You can normally charge the tablet without removing the protective case.

The exact port access can vary by device model, so check the specifications for your tablet.

Is the Keyboard Backlit for Low-Light Environments?

Many Combo Touch models include adjustable keyboard backlighting. This feature makes typing easier in darker environments.

Brightness controls can vary by model. Check the specifications for your exact tablet version before purchasing.

Can the Keyboard Be Detached When Not in Use?

Yes. The keyboard is detachable on Combo Touch models that use this design. You can remove it when you want a lighter tablet setup.

This makes the case useful for reading, sketching, or watching videos. You can then reconnect the keyboard when you need a more productive workspace.

Conclusion: Is Logitech Combo Touch Worth Buying?

The Logitech Combo Touch is a versatile accessory for compatible tablet users. It combines a keyboard, trackpad, kickstand, and protective case in one modular design. This makes it useful for both productivity and entertainment.

Throughout this guide, we examined its performance, protection, weight, and flexibility. We also compared Logitech with HP and explored common questions about connectivity and daily use.

For students, professionals, and creative users, the Combo Touch can make a tablet more practical for longer work sessions. Its detachable keyboard also lets you return to a lighter tablet setup when needed.

The main trade-off is weight. It is heavier than a basic folio because it adds more hardware and functionality. However, that extra weight may be worthwhile if you want laptop-style productivity without carrying a separate keyboard.

Before buying, confirm that your tablet model is compatible. Then consider its weight, protection, keyboard features, and available iPad accessories. If those features match your needs, the Logitech Combo Touch can be a practical tablet upgrade.

5 Cool Things You Didn’t Know Your Wi-Fi Router Can Do

5 Cool Things You Didn’t Know Your Wi-Fi Router Can Do

Most people plug in their networking gear and forget about it. However, a Wi-Fi router is more capable than it may seem. It manages network traffic, connects devices, and often includes useful controls.

Modern routers can also offer features for security, parental controls, bandwidth management, and network storage. IEEE Spectrum has highlighted how routers have evolved beyond simple packet forwarding.

That makes your router worth exploring before you replace it or ignore its settings. You may find tools that can improve coverage, manage devices, or make better use of older hardware.

In this guide, we will explore several practical questions about Wi-Fi routers. We will cover old-router projects, router age, network information, Wi-Fi optimization, and nighttime shutdowns.

1.Add and Share a Network Drive

Your Wi-Fi router may let you share files across your home network. Some routers include a USB port that supports external storage. When supported, you can connect a USB flash drive, hard drive, or SSD to the router.

After enabling storage sharing, compatible devices on your network can access the shared drive. This can make it easier to exchange documents, photos, videos, and other files without moving them between devices manually.

A shared network drive can be useful for families, home offices, and small households. You can keep commonly used files in one central location instead of storing separate copies on every computer.

However, router-based storage is not always as fast as a dedicated NAS. Performance depends on the router’s processor, USB port, storage device, and firmware.

Before enabling file sharing, check the router’s storage and security settings. Keep important files backed up somewhere else. A network drive should not be your only copy of valuable data.

2.Add and Share a Network Printer

A compatible router can sometimes turn a regular USB printer into a shared network printer. This lets multiple computers use the same printer without connecting it directly to each device.

Some routers provide built-in USB printer-sharing features. Others may require specific firmware, software, or operating-system support. Check your router and printer documentation before setting up the connection.

Once configured, computers on your home network may be able to send documents to the shared printer. This can be especially convenient when the printer sits in a central location.

A shared printer can reduce the need for extra hardware. It also makes printing easier for family members using different computers.

However, router-based printer sharing has limitations. Modern network printers often provide better wireless features and broader compatibility.

If your router supports printer sharing, review its access controls first. Keep the printer available only to trusted devices on your home network. Also update the router firmware to reduce security risks.

For an older USB printer, this feature can provide a simple way to extend its useful life.

3.Create a Smart Home-Friendly Guest Network

A guest network can help separate smart-home devices from your primary devices. This is useful when your home contains cameras, TVs, speakers, plugs, appliances, and other connected equipment.

Instead of placing every device on the same network, you can use the router’s guest Wi-Fi feature. Depending on the router, guest networking can restrict access between guests and devices on your main network.

This separation can provide an additional layer of protection. For example, your laptop and personal files can remain on the primary network while compatible smart devices use the guest network.

You can also create a separate guest network for visitors. This lets guests access the internet without giving them your main Wi-Fi password.

When configuring a guest network, use a strong password and modern security settings. Disable options that allow unnecessary access to your private network. For additional guidance, follow a secure home network guide when configuring your devices and connections.

Remember that guest-network capabilities vary by router. Some models offer better isolation than others.

For larger smart-home setups, VLANs or more advanced network segmentation may provide stronger control. For many households, however, a properly configured guest network is a useful starting point.

4.Host a Private VPN (Virtual Private Network) for Your Family

Some routers can host a VPN (Virtual Private Network) server. This feature can allow authorized family members to connect securely to the home network while away.

For example, a VPN connection may let you access certain devices or services on your home network while traveling. You could potentially reach a home file server or other resources without exposing those services directly to the internet.

The exact capabilities depend on the router and VPN technology it supports. Some routers offer WireGuard or OpenVPN, while others provide their own VPN-server implementation.

Before enabling a VPN server, make sure the router receives security updates. Use strong authentication and avoid exposing unnecessary services.

A VPN does not automatically make every online activity private. When connected to your home VPN, your traffic still passes through your home internet connection.

You should also understand the difference between a VPN server and a commercial VPN service. A home VPN primarily gives you secure access back to your network. It does not provide the same anonymity or server-location options as a commercial VPN.

When configured correctly, however, a home VPN can be a practical way to access trusted network resources remotely.

5.Build Custom Network Parental Controls to Protect Your Family

Your router can provide more than basic internet access. With the right features, it can become part of your family’s parental-control system.

Many modern routers allow you to create profiles for individual family members or groups of devices. You can then apply schedules, content filters, internet pauses, or usage limits to those devices.

For example, you might restrict a child’s tablet during school hours. You could also schedule internet access to stop at bedtime.

Some routers provide category-based filtering. Others can block specific websites, services, or domains. The available controls vary significantly between manufacturers.

Custom network controls can also help manage gaming consoles, streaming devices, and other connected equipment. This gives parents more control without changing settings on every individual device.

However, router-level controls are not foolproof. Encrypted connections, alternative DNS services, mobile data, and other technologies can affect filtering.

Use these features alongside clear family rules and age-appropriate supervision. Protect the router’s administrator account with a strong password so children cannot simply change the settings.

When used thoughtfully, custom parental controls can make your home network safer, more manageable, and easier to supervise.


What Are Some Cool Things I Can Do With an Old Router?

An old router does not always belong in the electronic waste bin. If its hardware and firmware are still supported, you can give it a useful second life.

One popular option is turning it into a secondary access point. Connect it to your main router with Ethernet, then use it to provide Wi-Fi in another room. This approach can improve coverage without buying a dedicated access point. OpenWrt documents this type of setup in detail.

You can also configure compatible hardware as a wireless repeater. OpenWrt supports several repeater methods, including AP+STA and relay-based configurations.

Another option is installing OpenWrt, where supported. Custom firmware can provide additional networking controls and packages.

Depending on the hardware, you could use an old router for:

  • A secondary access point
  • A wireless repeater
  • A separate test network
  • A basic VPN gateway
  • A small network-storage project
  • A dedicated network for older smart devices

Always check compatibility before flashing firmware.

Build a Network-Attached Storage Drive

Some compatible routers can connect to a USB hard drive or SSD. With suitable firmware and packages, the drive can provide shared network storage.

OpenWrt supports USB storage and documents using external drives for file sharing and other storage applications.

This setup can let devices on your local network access shared files. You might store documents, photos, backups, or media on the connected drive.

However, an old router is not necessarily a replacement for a dedicated NAS. Performance depends heavily on its processor, USB interface, memory, and firmware. For a better understanding of the infrastructure behind networked storage, see what a data center does.

Before starting, check whether your router has a USB port and supports the required software. Also, back up important files elsewhere. A reused router and external drive should not become your only copy of valuable data.

For a simple home project, though, this can be a useful way to reuse older hardware. It also gives you a practical introduction to network storage without buying a full NAS immediately.

Is a 10-Year-Old Router Outdated?

A 10-year-old router is usually outdated, especially if it remains your primary home gateway. Its age alone does not make it unusable. However, older hardware may lack newer Wi-Fi standards, faster Ethernet, modern security features, and current firmware support.

For example, newer Wi-Fi generations can provide better efficiency and capacity with compatible devices. An older router may also struggle with many connected devices or faster broadband plans.

Security is the bigger concern. Manufacturers eventually stop providing firmware updates for older models. Once security support ends, newly discovered vulnerabilities may remain unpatched.

That does not mean every old router becomes dangerous overnight. Instead, you should check its exact model, firmware version, and manufacturer support status.

Consider replacing the device if it:

  • No longer receives security updates
  • Uses outdated wireless security
  • Regularly drops connections
  • Cannot handle your internet plan
  • Lacks features your household now needs

A modern router can improve reliability and capacity. However, it cannot make your internet plan faster than the speed supplied by your ISP.

The Security Risks of Old Firmware

Running unsupported firmware can create unnecessary security risks. Router vulnerabilities can expose management interfaces, network services, or connected devices when attackers successfully exploit them. It is also important to recognize the warning signs of computer malware when protecting devices connected to your network.

That is why firmware updates matter. Updates can fix security flaws, improve stability, and sometimes add useful features.

If your router no longer receives updates, replacing it is usually safer than relying on outdated software. You should also disable unnecessary remote-management features and use a strong administrator password.

Check these settings regularly:

  • Firmware version
  • Automatic update options
  • Remote administration
  • Wi-Fi encryption
  • Administrator password
  • Connected-device list

Avoid installing unofficial firmware unless the device is fully supported. A failed firmware installation can make a router unusable.

If you repurpose an unsupported router, consider limiting its role. For example, using it as an isolated access point may be more sensible than making it your primary internet gateway.

Security should always come before saving a few dollars on old equipment.

What Information Can You Get From a Wi-Fi Router?

Your Wi-Fi router can provide useful information about your home network. The exact details depend on the manufacturer, firmware, and model.

Most router dashboards show currently connected devices. You may see device names, IP addresses, MAC addresses, connection types, and other basic information.

Many routers also provide traffic statistics. These can help you identify devices consuming unusually large amounts of bandwidth.

Depending on the router, you may also find:

  • Connected-device history
  • Data-usage statistics
  • Signal information
  • DHCP leases
  • Connection status
  • Parental-control activity
  • DNS or domain-related logs
  • Firewall events

However, router visibility has limits. A router does not automatically provide a complete record of everything someone does online. Encryption, browser behavior, DNS configuration, router software, and privacy features all affect what information is available.

Some modern devices also use privacy-focused DNS settings or encrypted DNS. That can reduce what traditional router logs can reveal.

Still, the administrator dashboard is valuable for troubleshooting. It can help you identify unknown devices, locate bandwidth-heavy clients, and understand how your network is being used.

Monitoring Parental Control Logs

Parental-control features can give families more control over internet access. Depending on the router, these tools may allow you to set schedules, pause devices, block categories, or restrict specific services.

Some systems also record blocked requests or activity summaries. However, the level of detail varies widely between manufacturers.

Do not assume that every router can show a complete browsing history. Many routers only record domains, categories, connection events, or blocked requests.

Parental controls work best when combined with clear household rules. Explain why limits exist and use age-appropriate settings.

Useful controls may include:

  • Bedtime schedules
  • Device-specific limits
  • Website or category blocking
  • Internet pauses
  • Guest-network restrictions
  • Usage reports

Keep your router administrator account protected. Anyone who gains access to that account may be able to change parental controls or network settings.

Also remember that parental controls are not foolproof. Apps can use encrypted connections, alternative DNS services, or other technologies that affect filtering.

Use these features as one layer of household supervision rather than a complete monitoring solution.

What’s the Wi-Fi Trick?

There is no single Wi-Fi trick that works for every home. However, several simple changes can improve wireless performance.

Start with router placement. Put the router in a central, elevated location when possible. Keep it away from thick walls, large metal objects, and sources of radio interference.

Channel selection can also help. Nearby networks may compete for the same wireless spectrum, especially in crowded areas. Some routers can automatically select channels, while others let you choose manually.

Modern routers may also offer Quality of Service (QoS) controls. These features can prioritize certain types of traffic or devices when your network becomes busy.

For better results, consider these practical steps:

  • Place the router in an open location.
  • Keep antennas positioned as recommended.
  • Use the appropriate Wi-Fi band.
  • Update router firmware.
  • Reduce unnecessary interference.
  • Test speeds near and far from the router.
  • Consider wired Ethernet for demanding devices.

Remember that Wi-Fi speed depends on more than the router. Your device, distance, walls, interference, broadband plan, and network congestion all matter.

Changing Wireless Channels for Speed

Changing the wireless channel can sometimes improve performance. This is especially useful when nearby networks create heavy interference.

On the 2.4 GHz band, overlapping networks can cause congestion. A cleaner channel may reduce interference and improve connection stability.

However, manually changing channels is not always necessary. Many modern routers can scan the surrounding wireless environment and select a suitable channel automatically.

Before changing anything, check your router’s wireless settings. Some models offer an automatic channel-selection feature or a built-in network analyzer.

You can also use a Wi-Fi analyzer on a compatible device to identify nearby networks. The goal is to reduce unnecessary overlap, not simply choose a channel that looks empty for a moment.

Keep in mind that channel options vary by region and wireless band. Some 5 GHz channels also have special requirements, such as DFS rules.

If your router supports automatic optimization, try that first. If performance remains poor, investigate channel congestion and router placement.

A channel change cannot fix every Wi-Fi problem. Weak signals, poor router placement, outdated hardware, and interference from physical obstacles can still limit performance.

Why Do People Shut Their Wi-Fi Off at Night?

Some people turn their Wi-Fi router off at night for practical or personal reasons. One reason is reducing energy use. However, the savings from a typical home router are usually modest.

Another reason is managing screen time. Parents may switch off the network to discourage late-night gaming, streaming, or social media use.

Some people also prefer shutting down wireless equipment when nobody needs an internet connection. It can provide peace of mind, but it is not required for most homes.

Turning Wi-Fi off does not automatically make a network secure. It simply stops wireless connectivity while the router is powered down. Wired devices or other network equipment may still remain active.

There is also an important trade-off. If you regularly switch off your router, connected devices lose internet access during those hours. Some smart-home products may also depend on continuous connectivity.

For most households, leaving a modern router powered on is perfectly reasonable. The more important security steps are keeping firmware updated, using strong Wi-Fi encryption, and securing the administrator account.

Promoting Better Sleep Hygiene

Turning off Wi-Fi at bedtime can be useful as a behavioral tool, especially in households trying to reduce nighttime screen use.

The benefit may come less from the wireless signal itself and more from removing easy internet access. A scheduled internet pause can create a clear boundary between daytime and bedtime.

You do not necessarily need to unplug the entire router. Many modern routers offer device schedules or parental-control settings. These can restrict specific devices while leaving essential smart-home equipment connected.

For example, you might schedule phones, tablets, or gaming consoles to lose internet access after bedtime. This approach can be more convenient than powering down the whole network.

If you choose to turn off the router completely, remember that devices will disconnect. Automatic updates and cloud-based smart-home functions may also stop until the connection returns.

The main goal should be a healthier nighttime routine. Reducing notifications, setting device limits, and keeping screens away from bedtime can all support that goal.

Wi-Fi shutdowns are optional. They are not a required security practice for a properly maintained home network.

FAQ SECTION

Can I use an old router as a repeater?

Yes, you can easily configure an old gateway to act as a wireless repeater or bridge. This process extends your primary network coverage to hard-to-reach areas like basements, garages, or distant backyards without requiring expensive mesh system purchases.

How often should I reboot my router?

Experts recommend restarting your gateway once every month to clear cached memory, fix minor software glitches, and restore optimal connection speeds. A simple power cycle often resolves sluggish browsing performance instantly.

Does a better router increase internet speed?

A modern gateway cannot exceed the maximum download speed provided by your internet service provider plan. However, it significantly improves Wi-Fi range, reduces latency, and handles multiple simultaneous device connections much more efficiently.

Is it safe to leave my router on 24/7?

Leaving your hardware powered on continuously is entirely safe and recommended. Continuous operation ensures your devices receive crucial security updates, maintain smart home automation schedules, and stay connected without interruption.

Conclusion

Your Wi-Fi router is much more than a plastic box that connects your devices to the internet. Its features can help you improve coverage, manage traffic, monitor connected devices, and reuse older hardware.

An old router may work as a secondary access point, repeater, or small storage server when its hardware supports those functions. OpenWrt provides several documented ways to repurpose compatible devices.

You can also improve your current network by checking router placement, managing wireless channels, and using available traffic controls. Regularly reviewing security settings is equally important.

If your router is around a decade old, check its firmware support before continuing to use it as your primary gateway. Unsupported software can leave your network exposed to known vulnerabilities.

Finally, remember that there is no single Wi-Fi trick that fixes every connection problem. Good placement, updated firmware, suitable hardware, and sensible configuration usually deliver the best results.

Take a few minutes today to open your router’s administrator dashboard. You may discover useful features you have never used. For additional protection when connecting to unfamiliar networks, see our guide to public Wi-Fi risks and how to stay safe.