Category Archives: Technology

Posts are related to technology.

Critical Thinking in the Digital Age: Guide

Critical Thinking in the Digital Age: A Guide to Smarter Information Literacy

We consume hundreds of information feeds every day, yet distinguishing verified facts from misinformation has become increasingly difficult. Practicing critical thinking in the digital age is no longer just an academic exercise. It is an essential skill for navigating viral content, deepfakes, misleading headlines, and online echo chambers that influence our emotions and opinions.

The Pew Research Center examines how people encounter and respond to information in today’s digital environment. Online misinformation can influence decisions about public health, politics, and everyday life. Navigating this constant flow of information requires active evaluation rather than passive consumption. When you verify sources, identify logical fallacies, and question sensational claims, you make more informed decisions.

This guide explores the essential principles of critical thinking, five practical reasoning skills, and modern digital literacy standards. It also examines generational habits and practical strategies for evaluating online information. By developing these skills, you can recognize unreliable claims, challenge your assumptions, and make better decisions in an increasingly connected world.

What are the 7 main principles of critical thinking?

The seven main principles of critical thinking provide a foundation for evaluating arguments, evidence, and information objectively. They help you avoid common reasoning mistakes and make better decisions, especially when encountering conflicting claims online.

  1. Intellectual humility: Recognize that your knowledge has limits. Accept new evidence when it challenges your existing beliefs.
  2. Open-mindedness: Consider different perspectives before reaching a conclusion. Avoid dismissing an argument simply because you disagree with it.
  3. Healthy skepticism: Question unsupported claims and verify evidence before accepting information as fact.
  4. Logical consistency: Ensure your conclusions follow logically from your evidence. Identify contradictions in arguments and explanations.
  5. Clarity: Express ideas precisely and identify vague language that could hide important details.
  6. Relevance: Focus on evidence that directly supports or challenges the argument. Ignore distractions that do not address the main issue.
  7. Fair-mindedness: Evaluate opposing viewpoints using the same standards you apply to your own beliefs.

Applying these principles strengthens critical thinking in the digital age. For example, before sharing a viral news story, examine its source, supporting evidence, and alternative explanations. This approach helps you separate reliable information from emotional persuasion and misleading claims.

What are 5 critical thinking skills?

Five essential critical thinking skills help you examine information systematically and reach evidence-based conclusions. These skills are especially valuable when evaluating online articles, social media posts, research findings, and claims generated by artificial intelligence. For a broader understanding of analytical skills, explore Topics You Should Educate Yourself On: 8 Critical Areas.

  1. Analysis: Break complicated information into smaller parts. Identify the main argument, supporting evidence, and assumptions behind a claim.
  2. Interpretation: Understand the meaning and context of information. Consider the author’s purpose, intended audience, and possible motives.
  3. Inference: Draw reasonable conclusions from available evidence. Distinguish between what the facts establish and what you merely suspect.
  4. Evaluation: Assess the credibility of sources, the quality of evidence, and the strength of competing arguments.
  5. Self-regulation: Review your own thinking and correct mistakes. Recognize when personal beliefs or emotions influence your judgment.

These skills work together rather than independently. For instance, when you encounter a dramatic health claim online, analyze its supporting evidence, interpret its context, and evaluate the source. Then consider whether the available facts justify the conclusion. Finally, reflect on whether your existing beliefs affect your judgment.

Developing these abilities makes you a more careful information consumer. They also improve problem-solving, decision-making, academic performance, and professional communication. You can strengthen these habits further by exploring How Battlefield Analysis Supports Strategic Thinking.

Are Gen Z critical thinkers?

Gen Z, generally defined as people born between 1997 and 2012, has grown up alongside smartphones, social media, and instant access to online information. This experience can support digital awareness, but it does not automatically produce strong critical thinking skills. Familiarity with technology and the ability to evaluate information are two different competencies.

Many young internet users encounter diverse perspectives through search engines, social platforms, and independent creators. However, frequent exposure to information can also make misleading claims harder to recognize. Algorithmic recommendations may repeatedly present similar viewpoints, while sponsored content can blur the distinction between advertising and independent advice.

Gen Z faces particular challenges when evaluating AI-generated images, deepfake videos, manipulated statistics, and persuasive short-form content. These problems also affect older generations, so they should not be treated as weaknesses unique to young people.

Critical thinking in the digital age requires more than knowing how to use digital tools. It involves checking original sources, comparing independent reports, examining evidence, and recognizing personal biases. Educational institutions can help by teaching media literacy, research techniques, and responsible technology use. With regular practice, young people can turn their digital experience into stronger analytical judgment.

Navigating Algorithmic Feeds Wisely

Algorithmic feeds influence which information people encounter by recommending content based on their activity, interests, and engagement patterns. These systems can help users discover relevant material, but they may also repeatedly expose them to similar opinions. This can create a narrow information environment where familiar claims appear more credible simply because they are frequently repeated.

To evaluate content more carefully, pause before reacting to emotionally charged posts. Check the original source, search for independent reporting, and distinguish evidence from personal opinion. If a video makes a surprising claim, look for its full context rather than relying on a short edited clip. Learn more about identifying misleading information through How to Spot Fake News and Misinformation Online.

It also helps to diversify your information sources. Read established news publications, consult primary documents, and explore credible viewpoints that challenge your assumptions. Balance short-form content with longer articles and detailed explanations when a topic requires deeper understanding.

These habits are particularly useful for younger users who spend substantial time on social platforms. However, they benefit people of every age. Responsible digital consumption means understanding how recommendations shape your attention while maintaining control over your own conclusions.

What are the 7 C’s of digital literacy?

The seven C’s of digital literacy offer a framework for understanding the knowledge and abilities needed to participate effectively in digital environments. Different educational frameworks may define these competencies differently, so this list should be treated as one practical interpretation rather than a universal standard.

  1. Critical thinking: Evaluate online sources, recognize misinformation, and assess evidence before accepting claims.
  2. Communication: Share information clearly, respectfully, and appropriately across digital platforms.
  3. Collaboration: Work with others using shared documents, communication tools, and online project platforms.
  4. Creativity: Develop original digital content, including presentations, videos, graphics, and other multimedia resources.
  5. Culture: Understand digital etiquette, respect cultural differences, and recognize the social impact of online behavior.
  6. Connectivity: Use digital networks and connected tools responsibly while understanding basic privacy and security practices.
  7. Construction: Create, organize, and develop digital resources or solutions using appropriate technologies.

These competencies complement one another. For example, creating an online presentation requires creativity and technical skills, while researching its content requires critical thinking. Sharing the finished presentation involves communication and responsible digital behavior. You can also explore Setting Up Constraints to Inspire Creative Thinking to understand how structured limitations can encourage creative problem-solving.

Together, these abilities support digital literacy and critical thinking. They help students, professionals, and everyday users participate more confidently in online communities. Understanding them also makes it easier to identify gaps in your digital skills and decide which abilities need further development.

What are 10 important digital skills?

Ten important digital skills can help students and professionals navigate modern workplaces, access reliable information, and use technology responsibly. Although specific requirements vary by industry, the following abilities provide a useful foundation for everyday digital tasks.

  1. Search proficiency: Use precise search terms and advanced search operators to locate relevant information efficiently.
  2. Data literacy: Interpret charts, tables, statistics, and numerical trends without overlooking misleading comparisons.
  3. Cybersecurity awareness: Recognize phishing attempts, create strong passwords, and protect sensitive information.
  4. Content creation: Produce clear written content, presentations, images, audio, and videos using appropriate tools.
  5. Cloud collaboration: Share files, manage permissions, and collaborate through online productivity platforms.
  6. Basic coding and computational thinking: Understand logical sequences, identify problems, and develop structured solutions.
  7. Media literacy: Distinguish credible reporting from propaganda, manipulated content, and unsupported claims.
  8. Device management: Keep software updated, organize files, and maintain devices through basic troubleshooting.
  9. Digital communication: Follow professional etiquette when using email, messaging applications, and virtual meetings.
  10. AI literacy: Write effective prompts, evaluate generated responses, and verify AI-produced information before relying on it.

These skills are increasingly useful across education, employment, and personal life. However, learning the tools alone is not enough. Users must also understand their limitations, privacy implications, and potential for producing misleading information. For a deeper look at how AI tools work, explore Anthropic Claude Review: Is It Worth the Hype?.

Combining technical proficiency with critical thinking in the digital age helps people make informed choices. It also supports adaptability as digital platforms, workplace expectations, and artificial intelligence technologies continue to evolve.

What are the 7 pillars of literacy?

The seven pillars of literacy describe important abilities involved in learning to read, understand, and communicate effectively. Their precise definitions can vary across educational frameworks. The following list combines foundational reading skills with the higher-order abilities needed to interpret and evaluate information.

  1. Phonemic awareness: Recognize and manipulate individual sounds in spoken language. This skill supports early reading development.
  2. Phonics: Understand the relationship between letters and speech sounds to decode unfamiliar words.
  3. Fluency: Read accurately and smoothly, allowing greater attention to meaning rather than decoding individual words.
  4. Vocabulary: Build knowledge of words and their meanings to improve comprehension across different subjects.
  5. Reading comprehension: Understand written material, identify main ideas, draw inferences, and recognize relationships between concepts.
  6. Writing: Organize ideas into clear, coherent text that communicates information effectively.
  7. Critical evaluation: Examine an author’s purpose, evidence, assumptions, and potential biases before accepting a message.

These abilities develop together and reinforce one another. Strong vocabulary supports comprehension, while writing helps readers organize and communicate their understanding. Critical evaluation extends these foundational skills by encouraging readers to question what they encounter rather than simply accept written statements.

This final ability is especially important when reading online. Digital content may combine factual reporting with opinions, advertisements, or misleading claims. Applying critical thinking in the digital age helps readers evaluate credibility, compare sources, and distinguish evidence from persuasion. These habits support lifelong learning and more responsible participation in digital society.

Frequently Asked Questions

How does confirmation bias weaken critical thinking?

Confirmation bias weakens critical thinking by prompting people to favor information that confirms existing opinions while ignoring conflicting evidence. When browsing social algorithms, this habit leads users deeper into algorithmic echo chambers. Overcoming it demands intentionally reviewing balanced, verified viewpoints.

Why is lateral reading effective against online misinformation?

Lateral reading is effective because it directs readers to leave an unfamiliar page immediately to verify source credibility across outside references. Rather than judging trustworthiness based on web design alone, checking multiple credible sources quickly exposes biases, financial interests, and factual inaccuracies.

What role does emotional regulation play in online reasoning?

Emotional regulation allows internet users to pause before reacting to provocative content online. Sensational headlines are intentionally engineered to provoke outrage, fear, or excitement. Maintaining emotional composure helps individuals evaluate factual veracity calmly instead of impulsively reposting misleading stories.

Can artificial intelligence replace human critical thinking?

Artificial intelligence cannot replace human critical thinking because large language models lack personal judgment, contextual nuance, and genuine ethical discernment. AI can organize vast data arrays rapidly, but humans must verify generated outputs, question implicit training biases, and make moral decisions.

Conclusion

Developing critical thinking in the digital age requires constant discipline, self-awareness, and proactive media literacy. The internet places unprecedented access to knowledge at our fingertips, but it simultaneously exposes us to manipulative algorithms, deceptive claims, and pervasive echo chambers. By mastering the core principles of objective reasoning, practicing foundational skills like lateral reading, and understanding modern digital literacies, you construct an enduring defense against online distortion.

Technological tools will continue to evolve, yet the human ability to pause, question, and independently verify remains irreplaceable. Commit to intellectual humility, treat sensational headlines with measured skepticism, and evaluate sources thoroughly before forming firm conclusions. Applying these strategies every day sharpens your cognitive independence and empowers you to navigate our interconnected world with clarity and purpose.
Which AMD CPU Is Best For Gaming In 2026?

Which AMD CPU Is Best for Gaming in 2026?

Building or upgrading a gaming PC requires a balance of performance, power efficiency, and long-term value. Choosing the best AMD CPU in 2026 can improve frame rates, reduce performance dips, and help your graphics card reach its potential. Modern games benefit from fast cores, large caches, and efficient communication between processor components.

AMD’s 3D V-Cache technology has made its Ryzen X3D processors leading options for gaming. However, the fastest processor is not always the best purchase for every build. Your budget, graphics card, monitor resolution, and other workloads all influence the right choice.

This guide compares AMD’s leading gaming processors and explains which models suit different budgets. It also covers CPU upgrades, cooling requirements, upcoming processor developments, and AMD versus Intel. By understanding these factors, you can choose a gaming processor that delivers the performance you need without overspending.

What Is the Best AMD CPU in 2026?

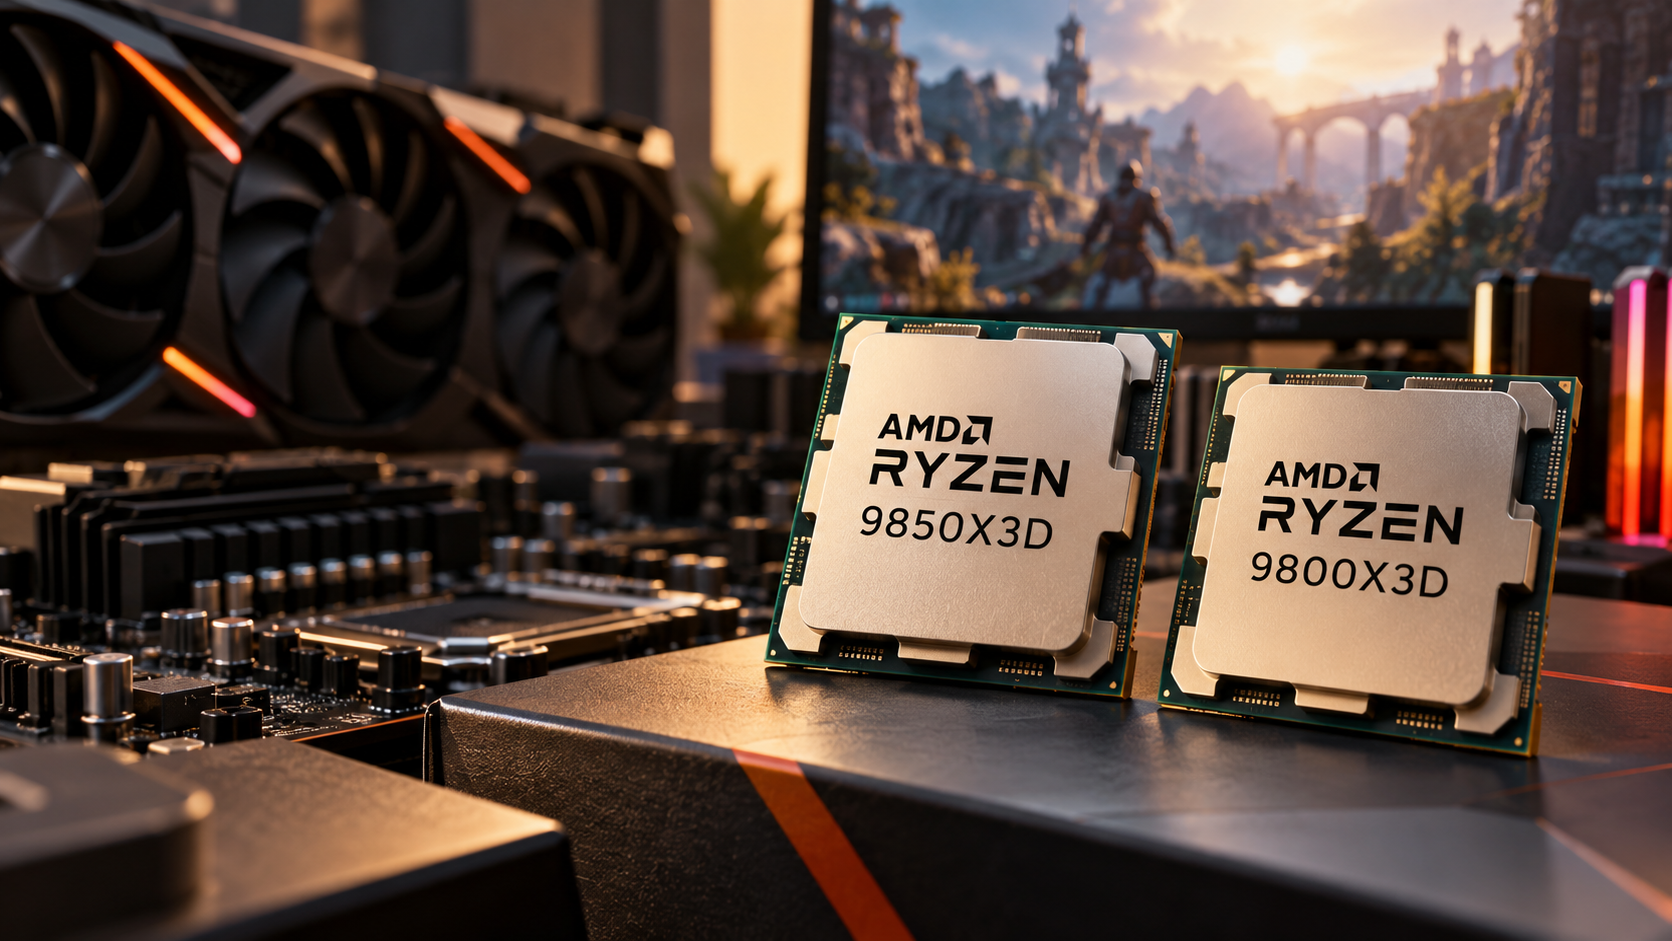
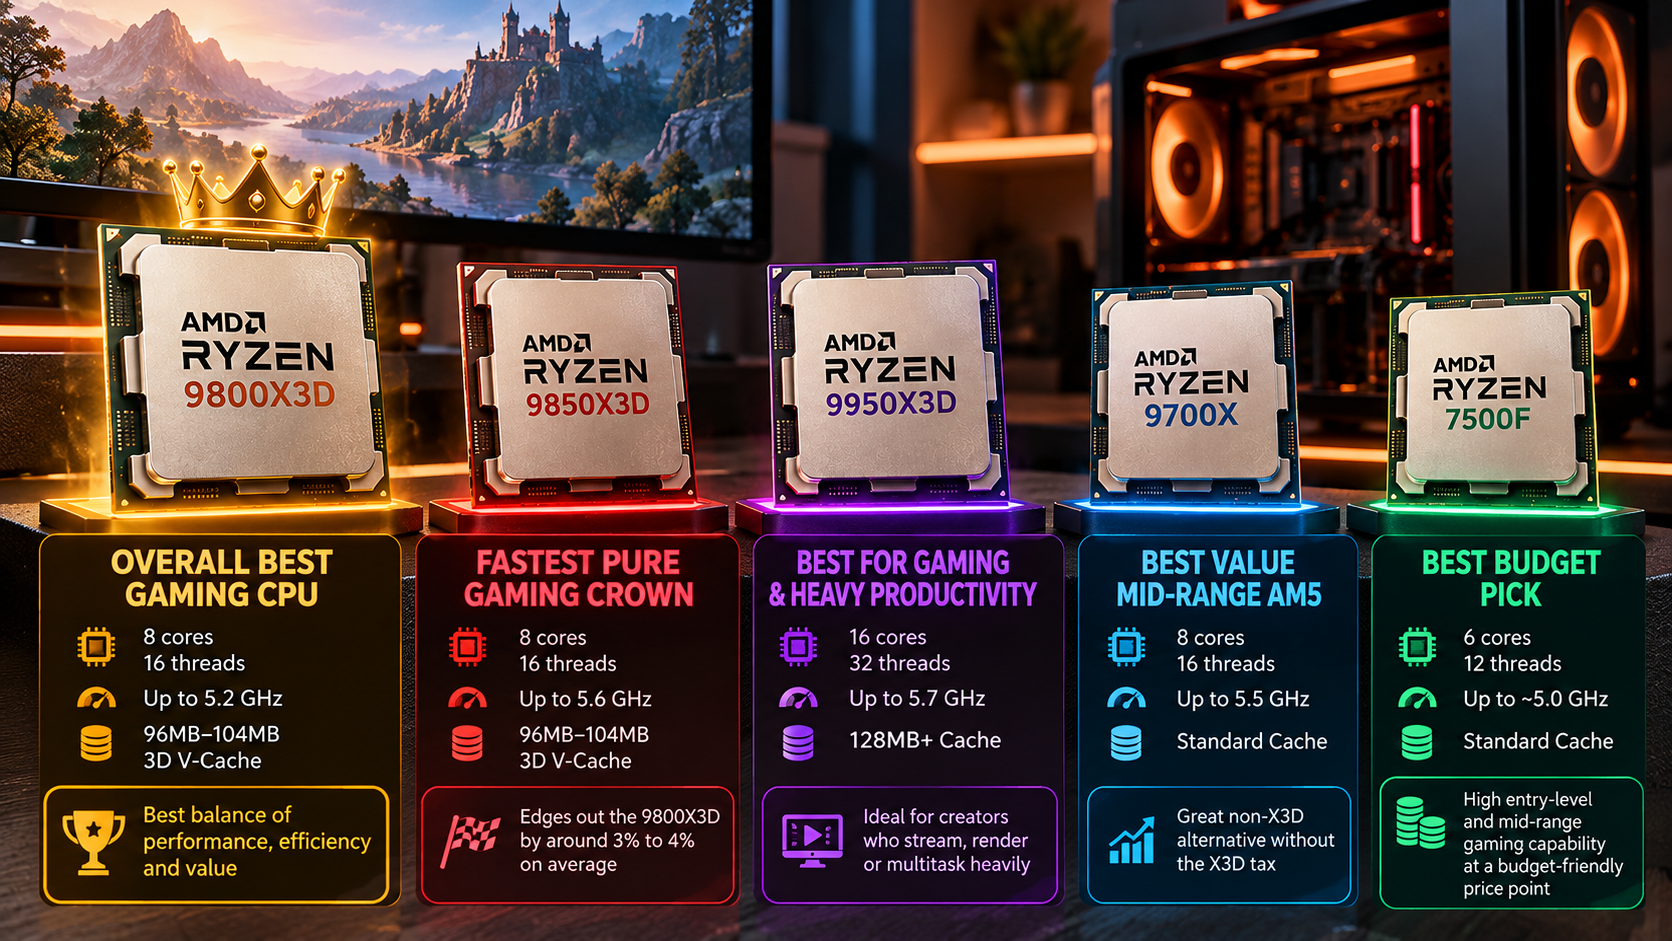
The AMD Ryzen 7 9850X3D is a leading choice for maximum gaming performance in 2026. It edges out the Ryzen 7 9800X3D in many gaming benchmarks, although the difference varies by game and system configuration. The 9800X3D remains an excellent alternative when its lower price makes it better value. Both processors feature eight cores, 16 threads, and 96 MB of L3 cache.

AMD’s second-generation 3D V-Cache places the additional cache beneath the processor’s core complex. This arrangement improves thermal transfer and supports higher clock speeds than the previous generation’s design. Games that frequently access large amounts of data can benefit from the reduced memory latency.

Before buying, compare current prices and independent gaming benchmarks. Also consider your graphics card, cooling solution, and motherboard compatibility. For official specifications, consult AMD’s Ryzen 7 9800X3D product page.

Next-Level Thermal Headroom and Overclocking

The Ryzen 7 9800X3D supports CPU overclocking, Precision Boost Overdrive, and Curve Optimizer adjustments. Its revised cache layout improves thermal management compared with earlier X3D designs. However, actual temperatures depend on the cooler, case airflow, ambient temperature, and workload. Before changing processor settings, review how to overclock your CPU safely to understand the risks and stability checks involved.

You do not need extreme overclocking to enjoy strong gaming performance. Start with default settings, enable a compatible memory profile, and monitor stability before changing advanced settings. DDR5-6000 can be a practical target for many AM5 gaming builds, but the ideal memory configuration depends on the processor and motherboard.

Choose a capable air cooler or liquid cooler based on your case and noise preferences. Check the manufacturer’s cooling guidance before purchasing. Remember that overclocking results vary, and higher voltages or aggressive settings can increase heat and reduce stability.

Which Processor Is Best for Gaming in 2026?

For gamers seeking the highest frame rates, an eight-core Ryzen X3D processor is an excellent starting point. The Ryzen 7 9850X3D targets maximum gaming performance, while the Ryzen 7 9800X3D offers a closely related experience. Both combine eight cores and 16 threads with 96 MB of L3 cache.

However, eight cores are not a universal requirement for every game. Many titles run well on six-core processors, particularly when paired with a suitable graphics card. Strategy games, simulations, and competitive titles can benefit significantly from fast cores and additional cache. Meanwhile, streaming, video editing, and demanding productivity workloads may benefit from more cores.

A processor with 12 or 16 cores is not automatically slower in games. Performance depends on architecture, clock speeds, cache, scheduling, and the specific game. Some multi-CCD processors can experience additional communication latency, but the impact varies by design.

Compare benchmarks for the games you actually play. That approach is more useful than choosing a CPU based only on core count.

The 1% Low Metric That Determines Real Playability

Average frame rates show overall performance, but they do not tell the whole story. 1% low frame rates help reveal how smoothly a game performs during its slower moments. Higher results generally indicate fewer severe frame-rate drops.

Large caches can improve these results in games that repeatedly access CPU-related data. This can make gameplay feel more consistent during busy scenes, complex simulations, or rapid changes in the environment. However, cache does not eliminate every stutter. Shader compilation, storage activity, memory limitations, drivers, and game optimization can also affect smoothness.

When comparing gaming processors, review average FPS and 1% lows together. Use benchmarks that test similar graphics settings and hardware. A CPU that delivers slightly higher average FPS may still provide less consistent frame pacing in some titles. Your monitor also affects the experience, so consult this guide on choosing the perfect gaming monitor to match its resolution and refresh rate to your system.

For competitive gaming, prioritize responsiveness and stable performance. For visually demanding games, balance CPU performance against the graphics card’s capabilities.

What CPU Should I Buy in 2026?

The best AMD CPU for your PC depends on your budget, gaming resolution, and graphics card. If you want maximum frame rates at 1080p or 1440p, consider the Ryzen 7 9850X3D or Ryzen 7 9800X3D. These processors are particularly useful when a powerful GPU can produce very high frame rates. If you are unsure whether your processor limits gaming performance, learn how to tell if your CPU is bottlenecking before spending more on an upgrade.

For a more balanced mid-range build, the Ryzen 5 9600X offers six cores and 12 threads. The Ryzen 7 9700X is another option if you want eight cores for gaming and additional workloads. Both use the AM5 platform and DDR5 memory.

At 4K resolution, the graphics card often becomes the main performance limit. A less expensive CPU may therefore deliver similar frame rates in GPU-bound games. The Ryzen 5 7600 can also remain attractive for budget-conscious builders, depending on its local price and the cost of a complete AM5 build.

Before deciding, compare total platform costs. Include the motherboard, memory, cooler, and power supply, rather than evaluating the processor price alone.

Platform Costs and Component Synergy

A gaming processor performs best when paired with compatible, balanced components. For most new AM5 builds, a suitable B650 or B850 motherboard can provide the features needed for gaming without requiring a premium chipset. Check the board’s supported processors and BIOS version before ordering. If you are planning a complete gaming setup, compare the costs and benefits of building your own PC before deciding where to spend your budget.

AM5 processors use DDR5 memory, so existing DDR4 memory cannot be reused on this platform. A two-module memory kit is generally a practical choice for a typical gaming system. Check the motherboard’s memory support list and enable the appropriate memory profile after installation.

Your graphics card deserves equal attention. Spending more on a CPU while using a much slower GPU may deliver less gaming improvement than upgrading the graphics card. Conversely, a powerful GPU benefits from a fast processor when targeting high refresh rates.

Budget for sufficient cooling, reliable power delivery, and adequate case airflow. These components help maintain consistent performance and reduce unnecessary noise. A balanced build usually provides better value than purchasing the most expensive part in every category.

Is AMD Releasing New CPUs in 2026?

AMD’s processor lineup continues to evolve, with newer models and product updates expanding the available choices. The Ryzen 7 9850X3D is one example of how AMD continues refining its gaming-focused desktop processors. Buyers should check official announcements and current reviews before assuming an unannounced architecture or release date.

New processors can offer higher clock speeds, architectural improvements, or better performance per watt. However, a newer name does not guarantee a worthwhile upgrade. The actual benefit depends on gaming benchmarks, pricing, power requirements, and the performance of your current CPU.

If you are building a PC now, compare available processors rather than delaying a purchase for unspecified future products. Waiting may make sense when an announced launch is close and your current system meets your needs. Otherwise, choose hardware based on verified performance and value.

For the latest specifications and announcements, use AMD’s official Ryzen processor information. Review release details carefully, as availability and pricing can differ between markets.

Should I Buy AMD or Intel in 2026?

AMD is a strong choice for dedicated gaming PCs, particularly if you want the high frame rates offered by Ryzen X3D processors. Models such as the Ryzen 7 9850X3D and Ryzen 7 9800X3D perform especially well in many CPU-limited games. However, AMD is not automatically the best choice for every buyer.

Intel processors can offer competitive gaming performance and strong productivity results at certain price points. The better option depends on the specific CPUs, applications, motherboard costs, and available discounts. Hybrid core designs can affect scheduling in some workloads, but they do not make every Intel processor slower in games.

Platform longevity also matters. AMD has committed to supporting AM5 through 2029, giving buyers a clearer stated upgrade horizon. Intel buyers should check the compatibility and expected upgrade options of their chosen platform rather than relying on general assumptions about socket changes.

Compare current independent benchmarks and complete build costs before deciding. If gaming is your priority, start with gaming results. If you also render video, compile code, or run demanding applications, consider those workloads before choosing a processor.

Power Efficiency and Everyday Cooling Demands

Power consumption affects temperatures, fan noise, and the cooling required for a gaming PC. AMD’s Ryzen processors offer several efficient options, but power use varies by model and workload. Do not assume that every AMD CPU consumes less electricity than every competing Intel processor.

The Ryzen 7 9800X3D has a default thermal design power (TDP) rating of 120 W. TDP is not the same as measured electricity consumption during gaming. Actual power draw depends on the game, processor settings, motherboard configuration, and workload intensity.

For a quieter PC, select an appropriate cooler and case with good airflow. A well-designed enclosure can support effective air or liquid cooling, depending on your components and layout. Use reasonable fan curves and avoid unnecessary voltage increases. These steps can help control noise without sacrificing much performance.

If electricity costs matter, compare measured gaming power consumption rather than relying on TDP alone. A processor that delivers strong frame rates at moderate power can be an excellent choice for everyday gaming. Your graphics card will also contribute substantially to the system’s total energy use.

Conclusion

Choosing the best AMD CPU in 2026 depends on your gaming goals, budget, and overall PC setup. The Ryzen 7 9850X3D is a strong option for gamers seeking maximum frame rates, while the Ryzen 7 9800X3D delivers excellent gaming performance. For budget-conscious builders, the Ryzen 5 9600X and Ryzen 5 7600 offer practical alternatives. Before buying, compare gaming benchmarks, current prices, cooling requirements, and motherboard compatibility. Ultimately, the right processor is not necessarily the most expensive one. It is the CPU that delivers the performance you need while leaving enough budget for a balanced gaming PC.

Smart Home Heaters Advantages and Disadvantages Explained

Smart Home Heaters Advantages and Disadvantages: The Complete Guide

Winter comfort is no longer limited to adjusting a thermostat manually. Smart home heaters allow you to control temperatures through mobile apps, create heating schedules, and monitor energy consumption. Some models also support voice commands and automated temperature adjustments. However, understanding smart home heaters advantages and disadvantages is important before investing in connected heating technology.

Heating represents a significant portion of household energy expenses. According to the U.S. Department of Energy, heating accounts for approximately 29% of residential utility bills. This makes energy efficiency an important factor when choosing a heating system.

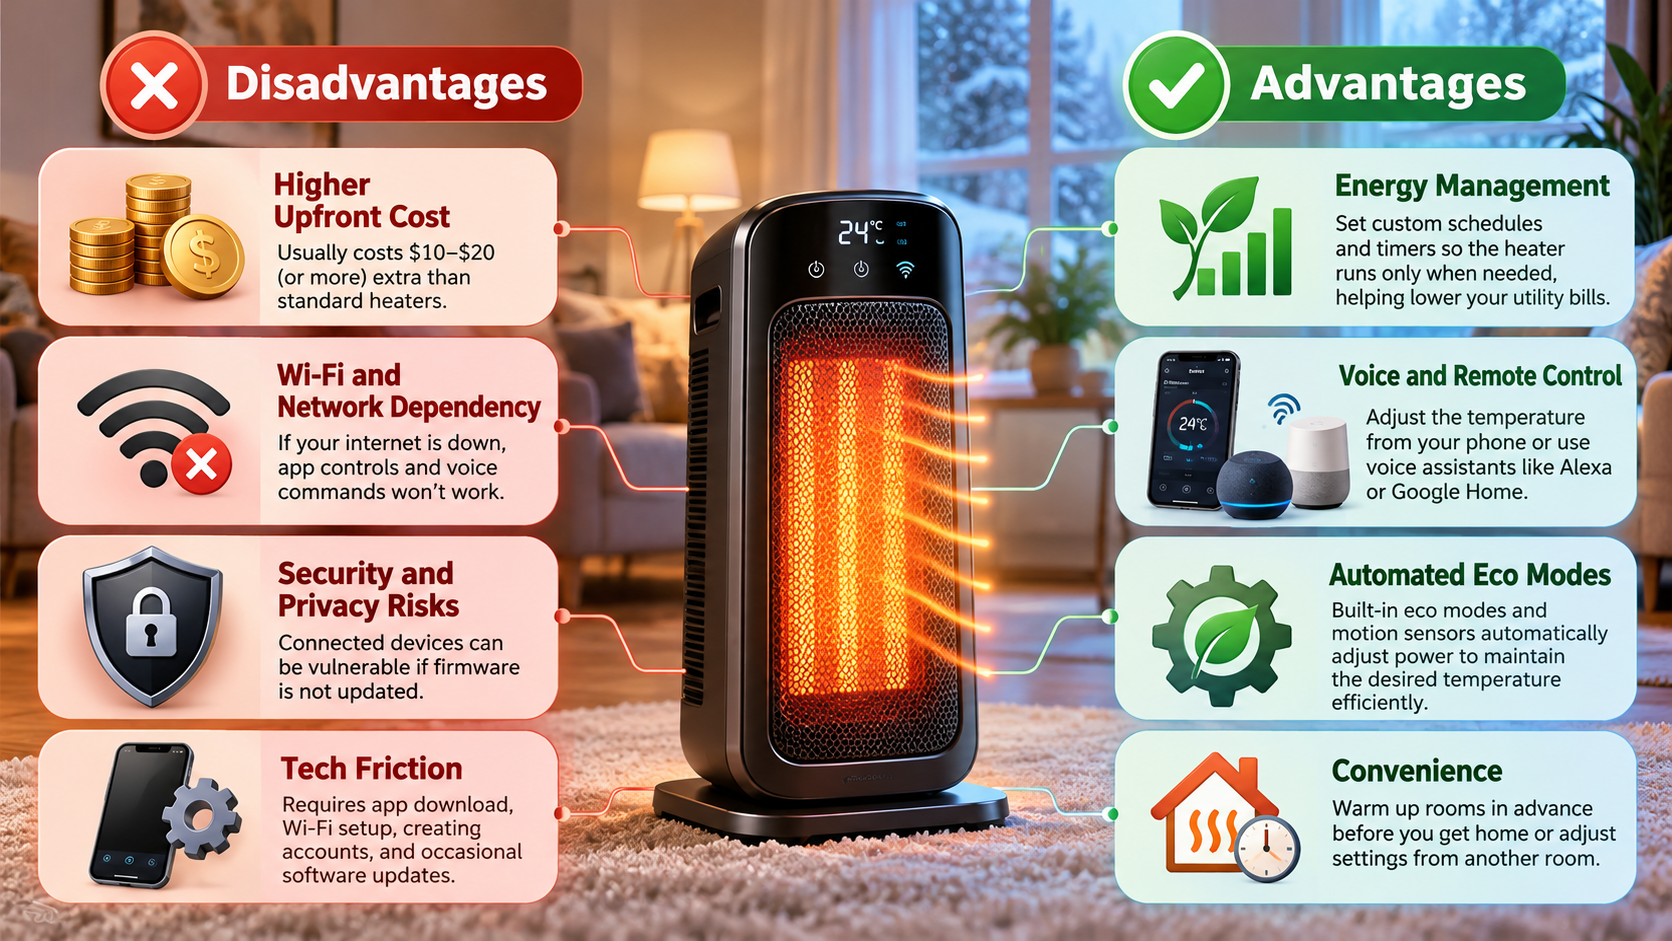
Smart heaters offer convenience and greater control, but they also come with limitations. Higher purchase prices, internet dependency, compatibility issues, and potential security risks can affect their overall value. Their actual energy savings also depend on your home, heating habits, and local electricity prices.

In this guide, we explore the main benefits and drawbacks of smart heating systems. You will also learn about traditional heater limitations, common smart device problems, safety concerns, and whether connected heating technology is worth the investment.

What Are the Advantages of Smart Home Heaters?

Smart home heaters provide convenient temperature control and automation. Depending on the model, you can adjust settings through a smartphone app, create heating schedules, and monitor energy consumption. Some connected thermostats also support occupancy detection and geofencing. These features can reduce unnecessary heating when nobody is home.

Another benefit is personalized comfort. Compatible heating systems allow you to manage temperatures according to your daily routine. For example, you can schedule heating before waking up or returning home. Zoned systems can also provide separate temperature settings for different areas.

Voice assistant integration adds another layer of convenience. You can adjust compatible devices without using physical controls. However, available features vary between manufacturers and models. Some functions may also require additional equipment or subscriptions.

Precision Scheduling Lowers Operating Costs

Automated heating schedules can help reduce unnecessary energy consumption. Instead of maintaining the same temperature throughout the day, you can adjust heating according to your routine. For example, lower the temperature when everyone leaves and restore comfortable settings before returning.

Smart home heaters advantages and disadvantages also depend on how effectively you use their automated features. The potential benefits include:

  • Scheduled heating: Run your heater only when necessary.
  • Remote temperature control: Adjust settings when your plans change.
  • Energy monitoring: Identify patterns that contribute to higher electricity bills.
  • Occupancy-based heating: Reduce heating in unused areas when supported.
  • Improved convenience: Manage compatible devices through apps or voice assistants.

However, smart controls do not guarantee lower bills. Actual savings depend on insulation, outdoor temperatures, electricity prices, and heating efficiency. A portable electric heater can still consume substantial electricity when operating at high power.

What Are the Disadvantages of a Heater?

Traditional heaters have several limitations, regardless of whether they include smart features. Operating costs can become expensive during colder months, especially when electricity or fuel prices are high. Poor insulation and inefficient equipment can increase consumption further. Choosing the correct heater for your room size and heating requirements is therefore important.

Safety is another major concern. Portable heaters can cause fires when placed near curtains, bedding, furniture, or other combustible materials. Damaged power cords and overloaded electrical circuits can also create hazards.

Some heating methods can make indoor air feel drier, although their effects on humidity vary. Uneven heat distribution may also leave certain areas uncomfortable. Older heating systems can require regular maintenance to operate safely and efficiently.

Understanding these disadvantages helps you compare different heating options. Smart controls may improve convenience, but they cannot eliminate the basic operating costs and safety requirements associated with heating equipment.

High Power Consumption and Fire Hazards

Electric heaters can consume considerable electricity, particularly when used for several hours daily. For example, a 1,500-watt heater running for four hours consumes approximately 6 kilowatt-hours of electricity. Your actual operating cost depends on your electricity tariff.

Fire prevention also requires careful attention. Follow these essential safety practices:

  • Keep heaters away from curtains, bedding, and furniture.
  • Place portable heaters on stable, level surfaces.
  • Keep children and pets away from hot surfaces.
  • Avoid damaged cords and overloaded electrical outlets.
  • Follow the manufacturer’s clearance and ventilation instructions.
  • Turn off portable heaters when leaving the room or going to sleep, unless the manufacturer explicitly supports the intended use.

Smart plugs and mobile controls cannot eliminate these hazards. Always check whether the heater and its controls are suitable for the intended electrical load. Never assume that remote operation makes an appliance safe to leave unattended.

What Are the Disadvantages of Smart Devices?

Smart devices introduce additional challenges that traditional appliances generally avoid. Privacy is one concern because connected products may collect account information, usage patterns, or device activity. The information collected depends on the manufacturer and its privacy policy. Weak passwords and outdated software can also increase security risks.

Another disadvantage is dependence on software support. Some smart heaters rely on mobile applications or cloud servers for remote access and advanced automation. If a manufacturer discontinues a service, certain features may stop working. Basic manual controls may remain available, depending on the model.

Compatibility can create further problems. Devices from different manufacturers may not work together seamlessly. Some products also require specific wireless standards or additional hubs.

Smart models typically cost more than conventional alternatives. Their electronic components may also require repairs or replacement. Before buying, consider the purchase price, available features, warranty, and expected software support.

Cloud Server Reliance and Security Risks

Cloud-connected heaters may depend on external servers for remote access, voice commands, and certain automated routines. If a service experiences an outage, these features may temporarily become unavailable. The heater itself may continue operating through physical controls, depending on its design.

Security risks deserve equal attention. Weak account passwords, outdated firmware, and compromised smart home accounts can expose connected devices to unauthorized access. The level of risk varies according to the manufacturer’s security practices and the device’s design.

You can reduce these risks by taking a few precautions:

  • Choose manufacturers that provide regular security updates.
  • Use a strong, unique password for your account.
  • Enable multifactor authentication when available.
  • Review the manufacturer’s privacy and data collection policies.
  • Check whether essential heating controls work without internet access.
  • Confirm the expected duration of software support.

A reliable smart heater should remain practical when your internet connection fails. Prioritize models with accessible physical controls and clear support policies. These features can help you avoid unnecessary dependence on cloud services.

What Are Some Common Problems With Smart Home Devices?

Smart home devices can experience connectivity failures, software bugs, and installation difficulties. Smart heaters are no exception. A weak Wi-Fi signal may prevent a device from connecting reliably to its companion app. Router settings, wireless interference, and incompatible network requirements can also cause problems.

Firmware updates sometimes introduce unexpected bugs or change how devices communicate. Pairing errors may require you to repeat the installation process or reset the appliance. Compatibility problems can also occur when connecting devices across different smart home platforms.

These issues can reduce the convenience that smart heating promises. A failed automation may leave a room colder than expected. Alternatively, incorrect schedules or control problems may cause heating to continue longer than intended.

Understanding common problems before purchasing a connected heater can help you choose a more reliable product. Look for clear troubleshooting instructions, accessible customer support, and controls that remain usable when connectivity fails.

Wireless Interference Causes Automation Failures

Reliable connectivity is essential for smart heating features that depend on wireless communication. Thick walls, long distances, and interference from other devices can weaken Wi-Fi signals. Some heaters also require a specific wireless frequency band, making network compatibility important during installation.

If your smart heater repeatedly disconnects, try these troubleshooting steps:

  1. Move the router or heater to improve signal strength, where practical.
  2. Check the manufacturer’s recommended Wi-Fi requirements.
  3. Restart your router and reconnect the device.
  4. Install available firmware updates according to the manufacturer’s instructions.
  5. Review heating schedules and automation settings in the companion app.
  6. Contact customer support if the problem continues.

A Wi-Fi extender may help in some homes, but it is not always necessary. First, identify whether the problem comes from signal strength, router settings, or the device itself.

For greater reliability, choose equipment with accessible physical controls. Locally stored schedules can also reduce dependence on uninterrupted internet access. These features help maintain basic heating functionality during network outages.

Is Smart Home Technology Worth It?

Smart home heating can be worthwhile for households that value convenience, scheduling, and better temperature control. Remote access allows you to adjust settings when plans change. Automated schedules can also reduce unnecessary heating when rooms are unoccupied.

However, the benefits depend on your heating system and daily habits. Smart controls may provide limited savings if you already manage temperatures efficiently. A connected portable heater can still consume substantial electricity when operating at high power. In some homes, improving insulation or upgrading inefficient equipment may offer greater benefits.

The initial purchase price also matters. Compare installation costs, maintenance expenses, subscription fees, and compatibility requirements before upgrading. Reliable Wi-Fi may be necessary for certain features, although some models support local controls.

When comparing smart home heaters advantages and disadvantages, consider whether their features solve a genuine problem. Paying extra for technology you rarely use may not provide sufficient value. The right choice depends on your budget, heating requirements, and willingness to manage connected devices.

Long-Term Value Depends on Consistent Feature Usage

Smart heating equipment provides better value when its features address real household needs. Automated schedules, remote adjustments, and occupancy-based controls can make heating easier to manage. However, paying extra for features you rarely use offers little practical benefit.

Consider these options before making a purchase:

  • Choose a smart heater if you regularly adjust temperatures, need remote access, or want automated schedules.
  • Choose a conventional heater if you need simple, affordable heating without connected features.
  • Consider a smart thermostat if your existing central heating system supports one and you want better temperature control.
  • Improve insulation first if heat loss is a major reason for high energy bills.

You should also check safety certifications, warranty coverage, manufacturer support, and compatibility with existing equipment. Compare operating costs rather than assuming every connected model will reduce energy consumption.

Ultimately, smart home heaters advantages and disadvantages should be evaluated against your specific needs. Smart heating can improve comfort and convenience, but it is not automatically the cheapest option. Compare the total cost with the practical benefits before deciding whether an upgrade makes sense.

Conclusion

Smart home heaters offer convenient temperature control, automated schedules, and better management of energy use. However, higher upfront costs, connectivity problems, security risks, and maintenance requirements can affect their overall value. Understanding smart home heaters advantages and disadvantages helps you choose a heating solution that suits your budget and needs.

If you frequently adjust temperatures or want remote access, a smart heater may be worth the investment. However, a traditional heater can be more affordable if you prefer simple controls. During winter, keeping your entire household comfortable also matters. If you have pets, read our guide on how to keep your pets warm during winters for practical tips to help them stay warm and comfortable.

Before upgrading, compare operating costs, safety features, warranty coverage, and compatibility with your existing devices. For more guidance on heating efficiency, explore the U.S. Department of Energy’s home heating systems guide.

Ultimately, the best heating solution balances comfort, safety, energy efficiency, and long-term affordability.

Alexa Glows Red: What It Means and How to Fix It

If Your Amazon Alexa Is Glowing Red: Here’s What It Means

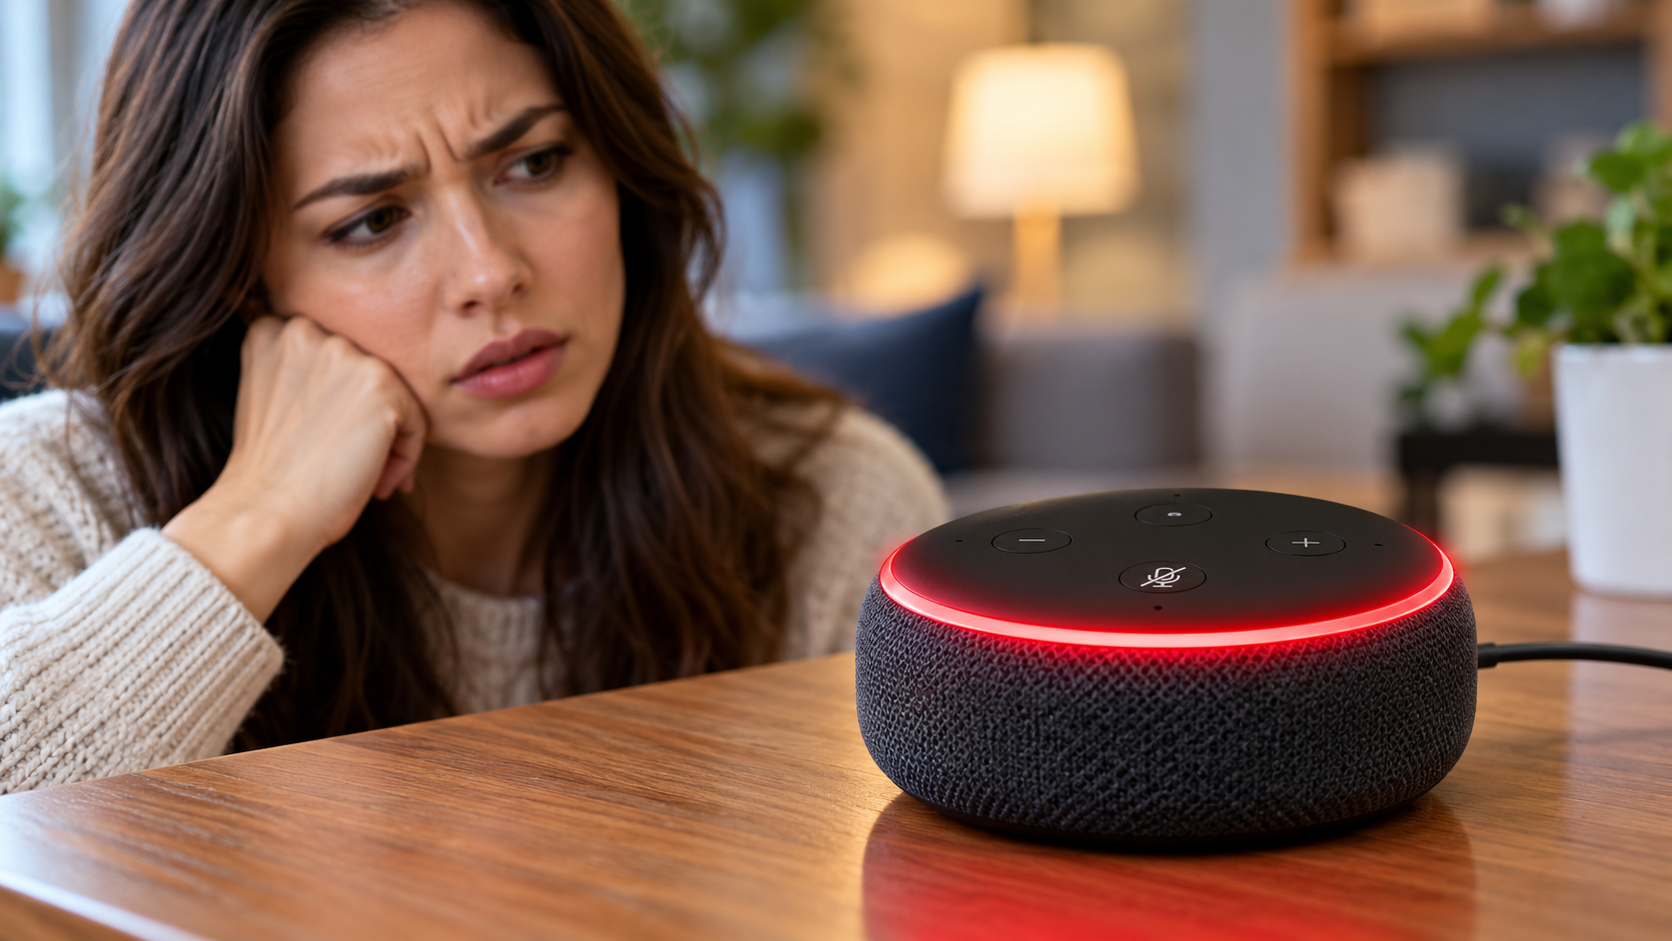
Seeing a red light ring on your smart speaker can be confusing. However, when your Alexa glows red, it usually means the microphone is muted. This is a normal device status, not necessarily a sign of a malfunction.

Amazon uses different light colors to communicate what your Echo device is doing. A red light indicates that Alexa cannot hear your voice commands through its muted microphone. You can check the official Amazon Device Support guide for more information about Echo light indicators.

In most cases, fixing the problem takes only a few seconds. You simply need to press the microphone button on your Echo speaker. However, if the red light stays on after you unmute the microphone, you may need to restart your device.

This guide explains why Alexa glows red, how to turn off the red light, and what to do when your Echo stops responding. You’ll also learn how Alexa’s privacy features work and how to recognize other important light signals.

What Does It Mean When Alexa Glows Red?

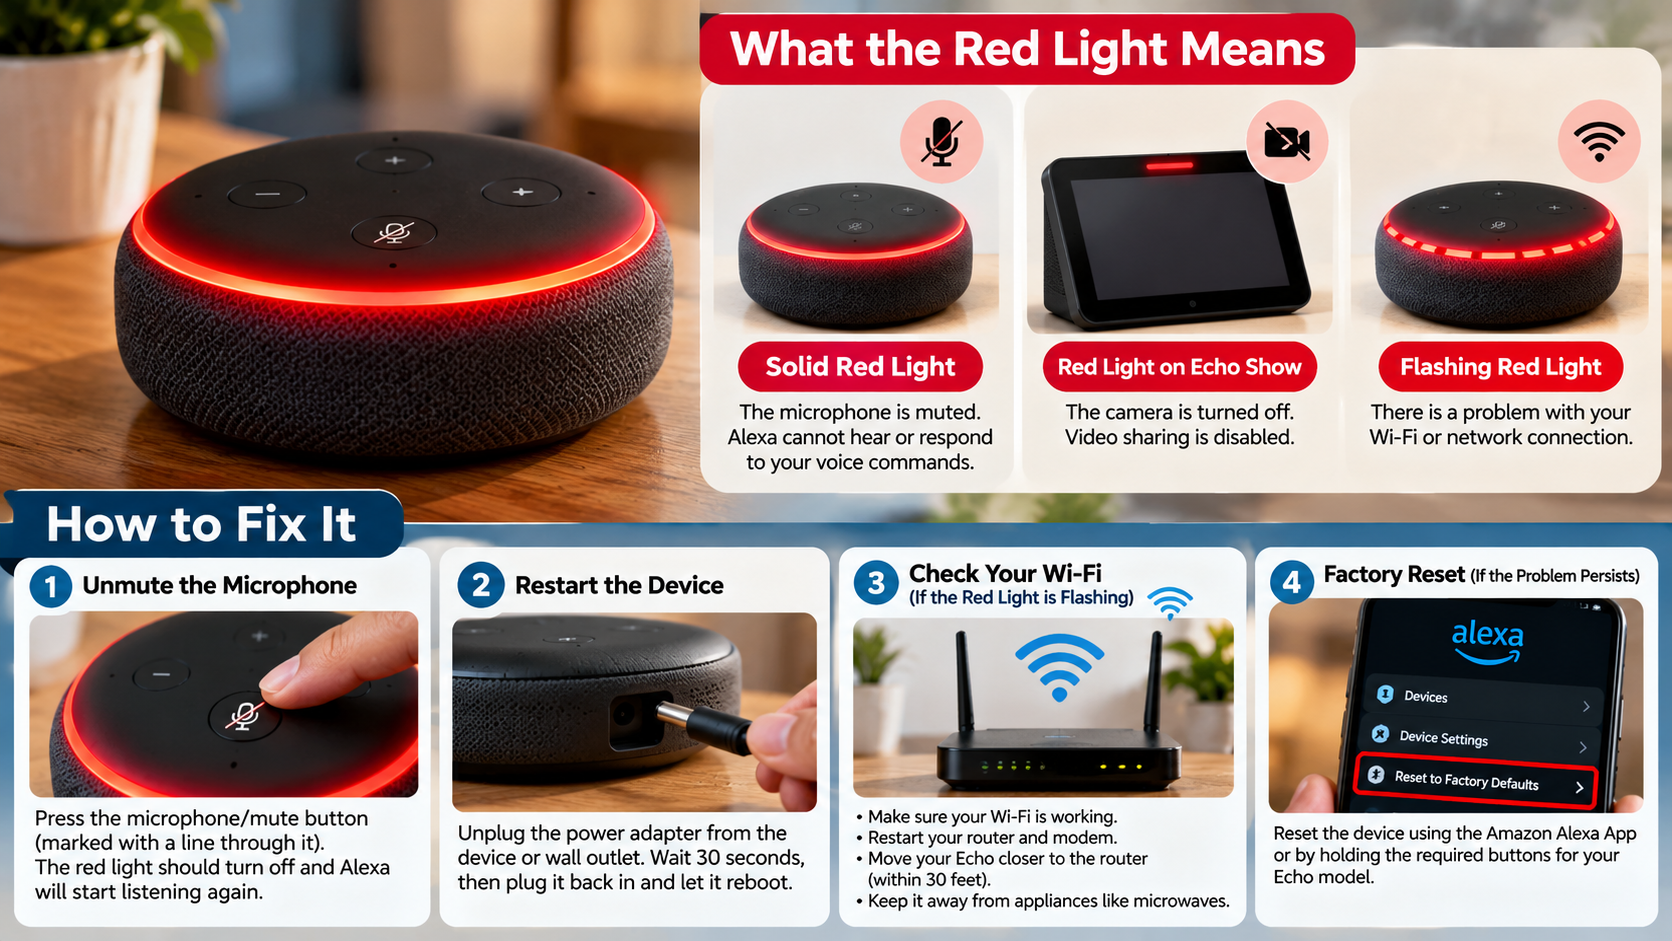
When your Alexa glows red, your Echo device’s microphone is muted. The device cannot hear your wake word or respond to voice commands until you unmute the microphone. Amazon uses this visual indicator to show that you’ve disabled the microphone.

On most Echo speakers, the red light appears as a ring around the device. On Echo Show smart displays, you may see a red indicator near the screen’s lower edge or another designated area, depending on the model.

The red light usually appears after someone presses the physical microphone-off button. You don’t need to assume that your speaker has malfunctioned when you see this indicator.

How to Turn Off Alexa’s Microphone Mute Feature

Follow these steps to remove the red light:

  1. Locate the microphone button on your Echo device.
  2. Look for the microphone symbol with a line through it.
  3. Press the button once to unmute the microphone.
  4. Wait for the red light to disappear.
  5. Say “Alexa” and try a simple voice command.

If the red light disappears, your device should respond normally again. If it remains red, restart the Echo and check whether the microphone button moves freely.

What Color Is Alexa If Someone Is Listening In?

Alexa uses different light signals to indicate calls and other activities. A red light generally means the microphone is muted, while a green light indicates calling activity on compatible Echo devices.

A spinning green light typically indicates an active call or Drop In session. A pulsing green light generally signals an incoming call. These indicators help people nearby recognize when calling features are active.

A red light differs from the indicators associated with calls. However, the light alone cannot prove that every aspect of your device’s privacy is secure. It indicates the microphone’s muted state, not the overall security of your Amazon account or network.

Identifying Active Call and Drop In Indicators

Learn to recognize these common Alexa light signals:

  • Pulsing green: An incoming call.
  • Spinning green: An active call or Drop In session.
  • Solid red: The microphone is muted.
  • Blue light: Alexa is generally processing a request or responding, depending on the light pattern.

If you want to prevent unexpected Drop In connections, open the Alexa app and review your communication settings. Disable Drop In where available, and check which contacts have permission to connect.

Why Is My Alexa Stuck on the Red Light?

If your Alexa stays red after you press the microphone button, the device may not respond correctly. However, a persistent red light doesn’t automatically indicate a firmware problem. Start by checking the physical controls before trying more complicated fixes.

Press the microphone button again and watch for a change in the light. Make sure the button moves freely and that dust or a protective cover doesn’t obstruct it. If the light remains red, unplug the Echo’s power adapter from the wall.

Wait approximately 30 seconds before reconnecting the power. Give the device a minute or two to restart, then check the light ring again.

If the problem continues, check the power adapter and cable for damage. Use the original or a compatible adapter that meets your Echo model’s requirements. Avoid repeatedly resetting the device without first identifying the problem.

Performing a Clean Echo Factory Reset

A factory reset may help if your Echo remains unresponsive after restarting. However, treat a factory reset as a last resort because it can remove device settings and require you to complete setup again.

The reset procedure varies by Echo model. Some devices use physical buttons, while others require a specific button combination or an option in the device settings.

Before resetting your speaker, identify its exact model and consult the relevant Amazon Device Support instructions.

After resetting, follow the Alexa app’s instructions to reconnect the device to your account and Wi-Fi network. Check whether the red light disappears, then test the microphone with a voice command.

If the microphone remains muted or the device still fails to respond, contact Amazon support for model-specific troubleshooting.

Why Is My Alexa Red and Not Responding to Me?

When Alexa glows red and ignores your voice, check the microphone mute setting first. A muted microphone prevents your Echo from detecting its wake word, such as “Alexa,” “Echo,” or “Computer,” depending on your selected setting.

Speaking louder won’t solve the problem because the microphone has been disabled. Press the microphone button and wait for the red indicator to disappear before trying another command.

If Alexa still doesn’t respond, check the power supply and Wi-Fi connection. A red light alone doesn’t mean your internet connection has failed. Microphone problems and network issues can occur separately, so troubleshoot each one independently.

Checking Device Network Status in the Alexa App

Use these steps to check your Echo’s connection:

  1. Open the Alexa app on your smartphone.
  2. Select Devices and choose your Echo speaker.
  3. Review the device status and available settings.
  4. If the device appears offline, check your home Wi-Fi connection.
  5. Restart your router if you identify a network problem.
  6. Restart your Echo and test a voice command again.

If Alexa responds after you unmute the microphone, you probably don’t need to change your network settings. If the device remains offline, investigate the Wi-Fi connection separately.

Is Alexa Always Listening to Me?

Alexa devices use their microphones to detect the configured wake word. Amazon states that compatible Echo devices process wake-word detection locally before sending a recognized request for cloud processing.

The device must monitor incoming sound to identify the wake word while the microphone remains enabled. After detecting the wake word, Alexa typically records and sends the request for processing.

When your Alexa glows red, the microphone mute feature prevents the device from detecting its wake word through its microphones. This feature provides a convenient way to stop Alexa from responding to nearby speech.

However, the red light doesn’t prove that your entire device, account, or network has no security risks. For additional protection, review your privacy controls, account security, and connected-device settings.

Managing Stored Audio Recordings and Privacy

You can manage available voice-history and privacy controls through the Alexa app or your Amazon account. These settings help you review recordings and choose how Amazon handles your voice data.

Follow these steps to review your privacy settings:

  1. Open the Alexa app.
  2. Go to Settings or Alexa Privacy, depending on your app version.
  3. Find the voice-history or activity-review options.
  4. Review available recordings and delete any you no longer want to keep.
  5. Check whether your account offers automatic deletion options.

You can also review how Amazon uses your voice recordings to improve its services. The available options may vary by device, account, and region.

For additional privacy, press the physical microphone mute button during sensitive conversations. You can also review Drop In permissions and strengthen your Amazon account security.

Final Thoughts

When your Alexa glows red, the most common explanation is that the microphone is muted. In most cases, pressing the microphone button restores voice control and turns off the red indicator.

If the light remains on, restart your Echo, check the physical button, and verify the device’s status in the Alexa app. Avoid a factory reset until you’ve tried simpler troubleshooting steps and identified your device model.

Understanding Alexa’s light signals also helps you distinguish microphone muting from calls and other activities. For better privacy, review your voice-history settings and control which contacts can use Drop In.

With these steps, you can identify the cause of the red light and get your Echo working again without unnecessary troubleshooting. If you’re planning to upgrade your smart speaker or buy another device, read our guide on the 30-day rule for buying new gadgets to make smarter purchasing decisions and avoid unnecessary spending.

Lifespan of a Gaming Headset: How Long Do They Last?

Lifespan of a Gaming Headset: Realistic Expectations and Care Guide

A reliable gaming headset delivers clear audio, immersive sound, and crisp team communication. However, daily use, cable damage, and battery wear can reduce its performance over time. Understanding the lifespan of a gaming headset helps you plan upgrades and get better value from your purchase.

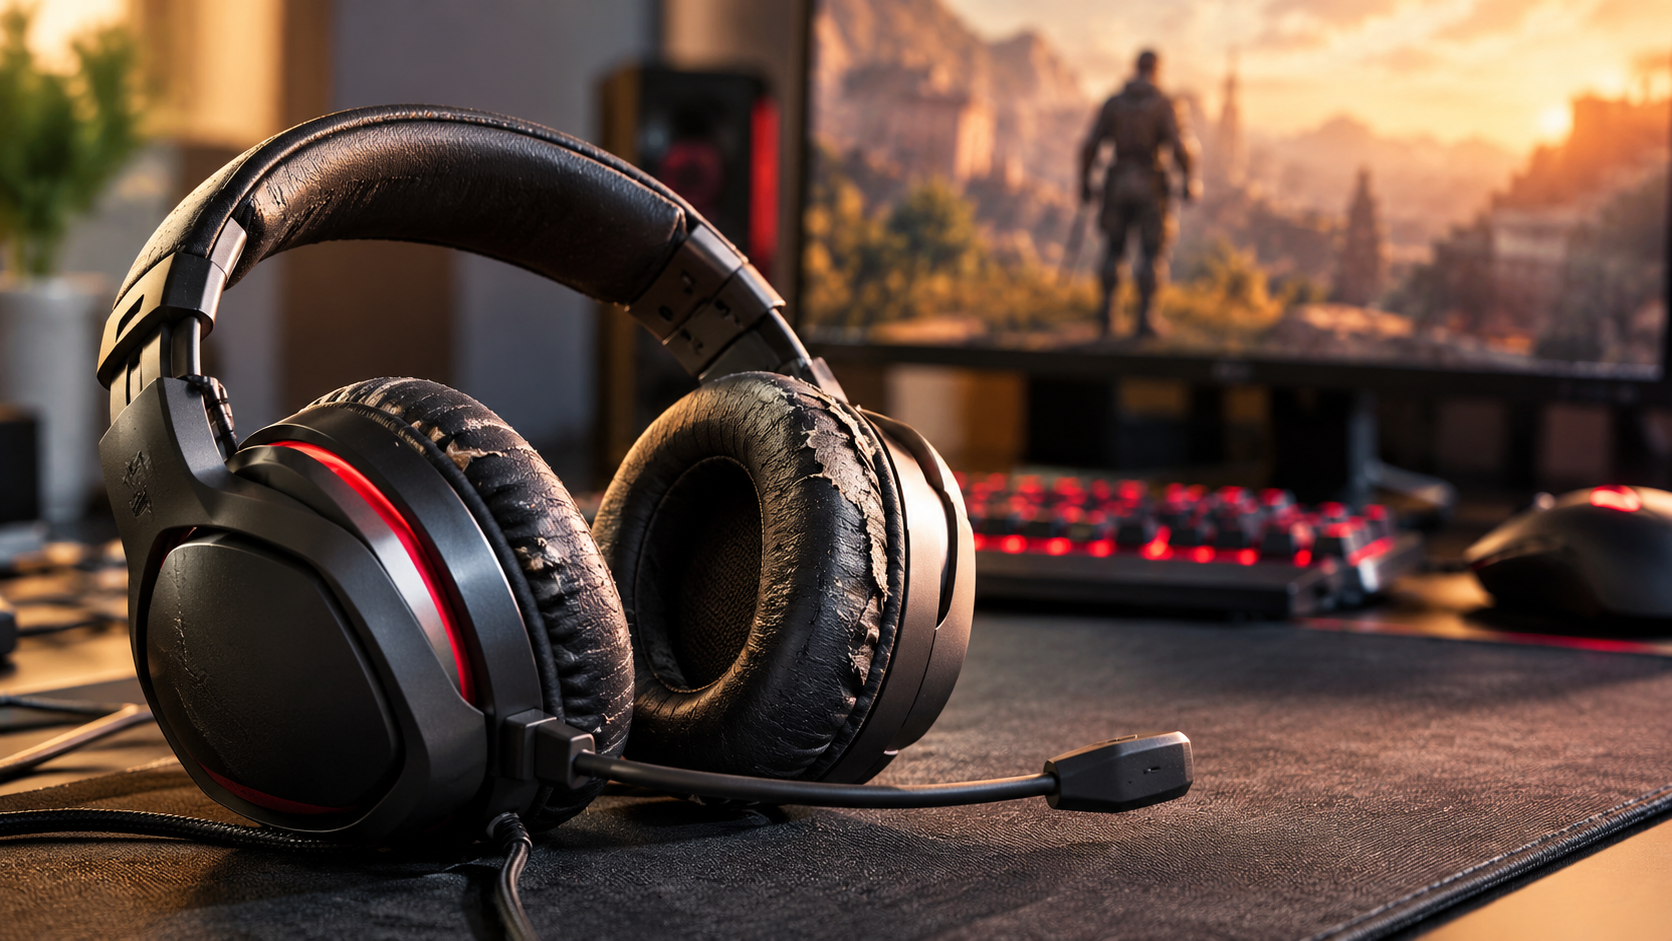
When ear cushions start peeling or audio suddenly cuts out, you might wonder whether to repair or replace your headset. Can a wired model last for decades? Why do wireless batteries sometimes lose their charge quickly?

This guide explains how long gaming headsets typically last and which factors affect their durability. You’ll also learn when to replace your headset, how to improve wireless battery life, and whether older headphones can remain usable for 20 years.

What Is the Lifespan of a Gaming Headset?

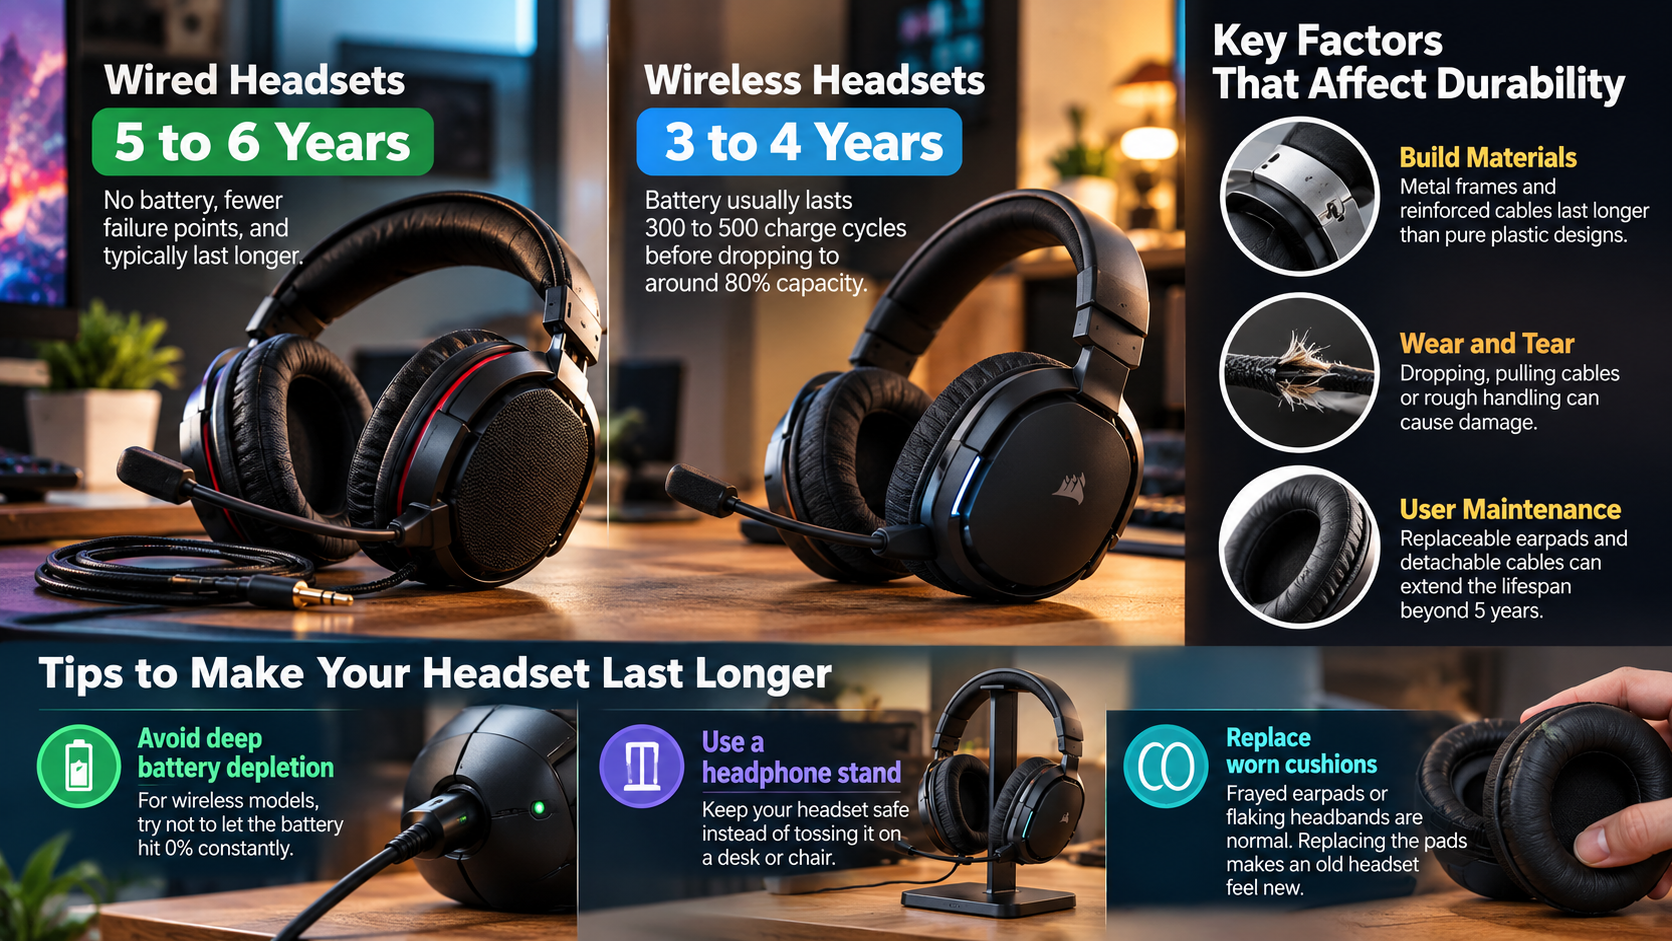
The typical lifespan of a gaming headset ranges from two to five years, depending on its build quality, usage, and maintenance. Budget models may develop cracked headbands, damaged cables, or connection problems sooner. Better-built headsets with reinforced frames and replaceable components can last much longer.

Wired and wireless headsets also have different limitations. Wired models avoid rechargeable battery degradation, while wireless versions eventually lose battery capacity. However, neither type has a fixed expiration date.

Your gaming habits also influence durability. Frequent use, accidental drops, excessive moisture, and poor storage can accelerate wear. Regular cleaning and careful handling help prevent unnecessary damage.

Impact of Build Materials on Device Durability

The materials used in a gaming headset affect how well it withstands everyday use. Metal-reinforced headbands generally resist bending better than thin plastic designs. Detachable cables also make repairs easier because you can replace a damaged cable without buying an entirely new headset.

Ear cushions require attention, too. Synthetic leather may peel or crack after prolonged exposure to sweat, heat, and friction. Following these headphone cleaning and maintenance practices can help preserve comfort and extend your headset’s useful life.

When choosing a durable model, look for these features:

  • Reinforced headband: Helps resist bending and cracking.
  • Detachable cable: Makes cable replacement easier.
  • Replaceable ear cushions: Helps maintain comfort over time.
  • Repairable components: Reduces the need to replace the entire device.

Choosing sturdy materials and replaceable parts can lower long-term costs.

How Often Should I Replace My Gaming Headset?

You should replace your gaming headset when its performance, comfort, or reliability becomes unacceptable. Many gamers consider upgrading every three to five years, but age alone does not determine whether a replacement is necessary.

First, identify the problem. Damaged cables, worn ear cushions, and loose connectors may be inexpensive to repair. Persistent audio distortion, a broken frame, or a failing internal battery may make replacement more practical.

Wireless headset owners should monitor battery performance. If the headset no longer lasts through a normal gaming session, compare the cost of battery replacement with that of a new model.

Consider replacing your headset when:

  • Audio quality remains poor after troubleshooting.
  • The microphone repeatedly disconnects or produces static.
  • The headband becomes damaged or uncomfortable.
  • Battery life becomes insufficient for your gaming sessions.
  • Repair costs approach the price of a suitable replacement.

If your headset remains comfortable, sounds clear, and works reliably, you don’t need to upgrade simply because a newer model is available.

Audio Driver Degradation and Critical Upgrade Signals

Gaming headset drivers convert electrical signals into sound. Although they can last for years, physical damage, moisture, excessive volume, and manufacturing defects may affect their performance. For safer listening during long gaming sessions, consider following the 60-60 rule for headphones to help manage your listening volume and duration.

Persistent buzzing, crackling, rattling, or distortion can indicate a problem. However, damaged drivers are not always responsible. Faulty cables, loose connections, wireless interference, and incorrect audio settings can produce similar symptoms.

Before replacing your headset, try these troubleshooting steps:

  1. Test it with another computer, console, or compatible device.
  2. Inspect the cable and connectors for visible damage.
  3. Disable audio enhancements and test different settings.
  4. Reduce the volume to check whether distortion disappears.
  5. Contact the manufacturer if the problem continues.

Replace the headset when troubleshooting fails and repairs are impractical. Persistent audio problems deserve attention, but they do not automatically mean the drivers have failed.

Can Headphones Last 20 Years?

Yes, some well-built headphones can last 20 years or longer with proper care. Passive wired headphones have an advantage because they do not depend on rechargeable batteries or wireless connectivity.

However, a 20-year lifespan is possible, not guaranteed. Headbands, cables, connectors, and ear cushions can deteriorate over time. Internal components may also require repair or replacement.

Studio headphones often demonstrate long-term durability because many models offer replaceable cables and cushions. Their lifespan depends on construction, maintenance, and frequency of use.

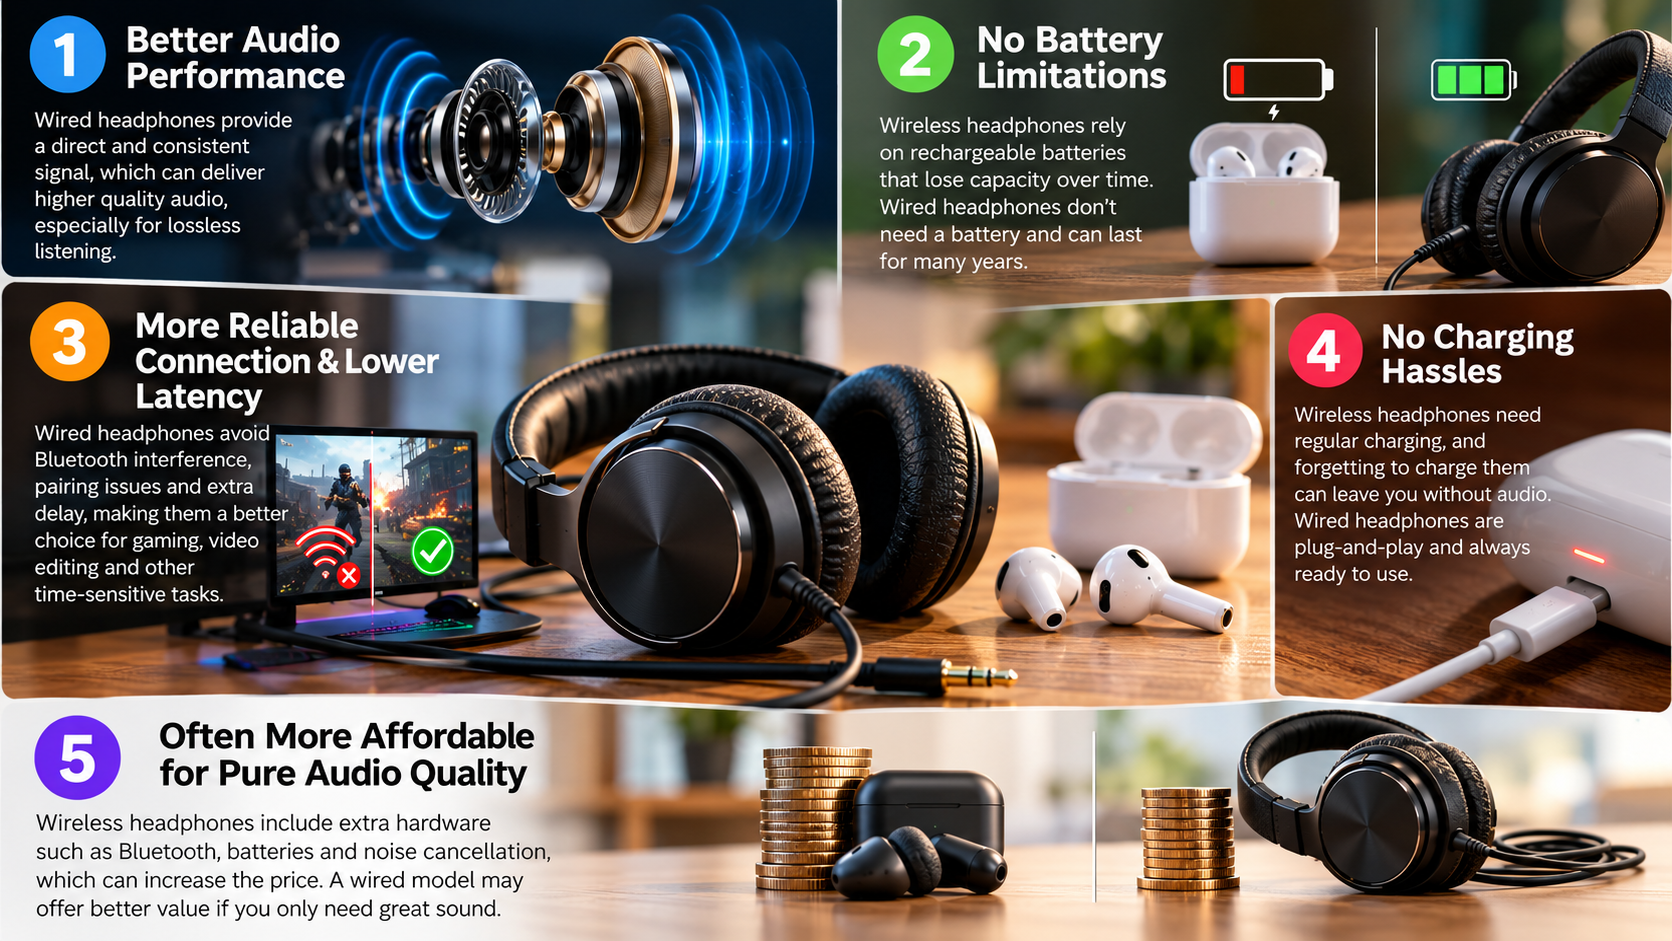
Gaming headsets face additional challenges when they include microphones, RGB lighting, wireless receivers, and electronic controls. These extra components create more potential failure points. Understanding why some gamers prefer wired headphones over wireless models can help you evaluate the long-term maintenance and durability trade-offs before purchasing your next headset.

If longevity matters, choose a wired headset with a sturdy frame and readily available replacement parts. Regular cleaning and careful storage can help extend the lifespan of a gaming headset without requiring frequent upgrades.

The Essential Advantage of Analog Audio Systems

Passive analog headphones avoid several potential failure points found in wireless headsets. They do not require rechargeable batteries, Bluetooth firmware, or wireless electronics to produce sound. Before choosing your next pair, compare wired and wireless audio options to understand their differences in convenience, connectivity, and long-term maintenance.

A standard 3.5 mm connector also works with many compatible computers, controllers, and audio devices. However, compatibility depends on the available ports and audio support. Some devices require an adapter.

Analog headphones can still develop problems. Cables may fray, connectors may loosen, and ear cushions can deteriorate. Drivers may also fail because of physical damage or excessive volume.

It’s also important to understand that wired does not always mean analog. Some USB headsets contain digital audio electronics and depend on compatible software.

For long-term use, choose a headset with replaceable cables and cushions. Check whether replacement parts are available before purchasing. These features can matter more than the connection type alone.

Why Is My Headset Dying Fast?

A wireless gaming headset may lose charge quickly because of battery aging, power-hungry features, or heavy usage. However, rapid battery drain does not always mean the battery is defective.

Lithium-ion batteries gradually lose capacity as they age and undergo charging cycles. Their degradation depends on battery quality, temperature, charging habits, and usage. There is no universal cycle count at which every headset battery begins to fail.

Several features can also increase power consumption. RGB lighting, active noise cancellation, high volume, and advanced audio processing may shorten operating time. The effect varies by model.

Common causes of rapid battery drain include:

  • Battery aging: Older batteries may hold less charge.
  • RGB lighting: Illumination can increase power consumption.
  • High volume: Louder playback may require more energy.
  • Wireless features: Noise cancellation and other processing can consume additional power.
  • Temperature extremes: Excessive heat or cold can affect battery performance.
  • Charging or firmware problems: These may affect charging behavior or battery readings.

Compare your actual runtime with the manufacturer’s specifications under similar conditions. If the battery still drains unusually quickly, consult the manufacturer’s troubleshooting guidance.

Battery Longevity and Proper Power Cycle Habits

Good charging habits can help preserve a wireless headset’s battery capacity. Lithium-ion batteries generally age faster when exposed to high temperatures or kept fully charged for extended periods.

You do not need to follow a strict charging schedule for every headset. Many modern devices include charging controls that help manage battery health. Leaving a compatible headset connected overnight is not automatically harmful when it functions correctly and follows the manufacturer’s instructions.

To help extend battery life:

  • Avoid direct sunlight and excessive heat.
  • Use the recommended charger and cable.
  • Follow the manufacturer’s charging instructions.
  • Enable battery-saving features when available.
  • Avoid storing the headset fully discharged for long periods.
  • Use battery protection modes if your device offers them.

Some headsets support charging limits around 80%. If yours includes this feature, using it may help reduce long-term battery wear.

Temperature management and manufacturer-approved charging practices are more useful than following an inflexible charging rule.

Is a 1% Battery Drain in 3 Minutes Normal?

A battery drain of 1% every three minutes equals approximately 20 percentage points per hour. If that rate remains constant, your headset would run for about five hours from a full charge.

Whether this is normal depends on the headset’s advertised battery life and the features you use. A model rated for five to eight hours may perform as expected at this rate. However, a headset advertised to last 20 hours should generally provide substantially longer runtime under comparable conditions. If active noise cancellation is one of your priorities, compare noise-cancelling headphone features and battery expectations before choosing a replacement.

Battery indicators can also be inaccurate. Some headsets display rounded percentages, so the reported change may not reflect the exact energy consumed.

Before concluding that your battery is defective, consider these factors:

  • RGB lighting: May increase power consumption.
  • Active noise cancellation: Can shorten runtime on supported models.
  • High volume: May increase energy use.
  • Battery age: Older batteries often have reduced capacity.
  • Usage conditions: Advertised runtime may assume specific settings.

If your headset drains rapidly while idle, even with unnecessary features disabled, investigate further. Check for firmware updates and contact the manufacturer if the problem continues.

Calculating Operating Run Time from Drain Rates

You can estimate your wireless headset’s operating time by tracking its battery percentage over a measured period.

For example, a drop from 100% to 80% over one hour indicates an average consumption of approximately 20 percentage points per hour. If that rate remains constant, the headset would provide roughly five hours from a full charge.

Use this simple formula:

Estimated runtime in hours = 100 ÷ percentage points consumed per hour

For example:

  • 10 percentage points per hour: Approximately 10 hours.
  • 20 percentage points per hour: Approximately 5 hours.
  • 25 percentage points per hour: Approximately 4 hours.

These estimates assume a constant discharge rate, which real batteries may not maintain. Battery indicators, operating conditions, and usage patterns can affect the results.

If your headset is rated for 20 hours but lasts only five, compare your settings with the manufacturer’s testing conditions. Disable optional lighting and reduce unnecessary processing features.

If runtime remains far below expectations, the battery may have degraded or the device may need troubleshooting. Contact the manufacturer before deciding whether to repair or replace your headset.

Final Thoughts

The lifespan of a gaming headset depends on its construction, usage, maintenance, and power source. Many models remain useful for several years, while well-built wired headphones can last much longer with proper care.

To extend your headset’s lifespan, clean it regularly, store it carefully, and protect it from excessive heat and moisture. For wireless models, monitor battery performance and follow the manufacturer’s charging recommendations. For additional troubleshooting and maintenance advice, consult the official Sony Headphones Help Guide or your headset manufacturer’s support documentation.

You don’t need to replace a headset simply because it is old. If it remains comfortable, delivers clear sound, and works reliably, continuing to use it is often the most practical choice.

Amazfit Helio Strap Vs. Fitbit Air: Best Screenless Band

Amazfit Helio Strap Vs. Fitbit Air: Which Screenless Tracker Should You Buy?

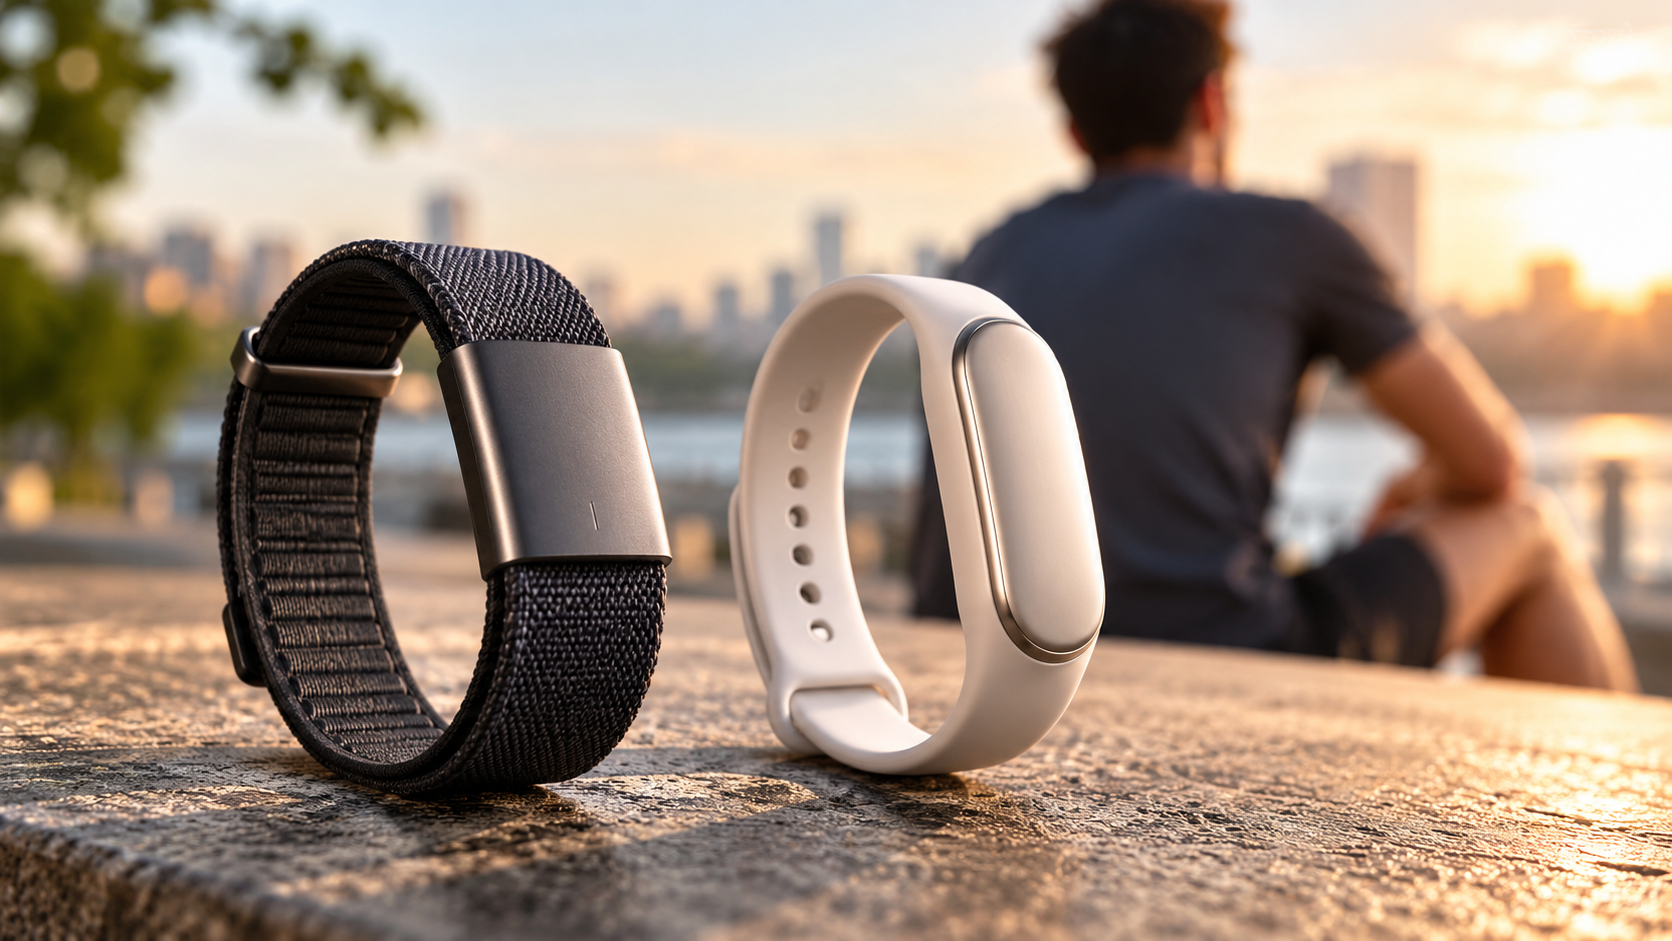
Amazfit Helio Strap Vs. Fitbit Air is a comparison worth exploring if you want a screenless fitness tracker without constant notifications. Both wearable bands track health and activity without a traditional smartwatch display. However, they differ in workout features, battery life, app integrations, and subscription requirements.

The Amazfit Helio Strap focuses on athletic performance, workout tracking, and recovery insights through the Zepp app. For a closer look at Google’s screenless wearable, explore the Google Fitbit Air features and benefits, including its everyday wellness and heart rhythm monitoring capabilities.

These differences matter when choosing a tracker for your daily routine. Some users prioritize detailed workout statistics and longer battery life. Others prefer automatic activity detection and health monitoring throughout the day.

This guide compares the key features of both screenless fitness bands. You’ll learn about their strengths, limitations, software experiences, and overall value. By the end, you can decide which tracker better matches your fitness goals and budget.

Is Amazfit Helio Better Than Fitbit Air?

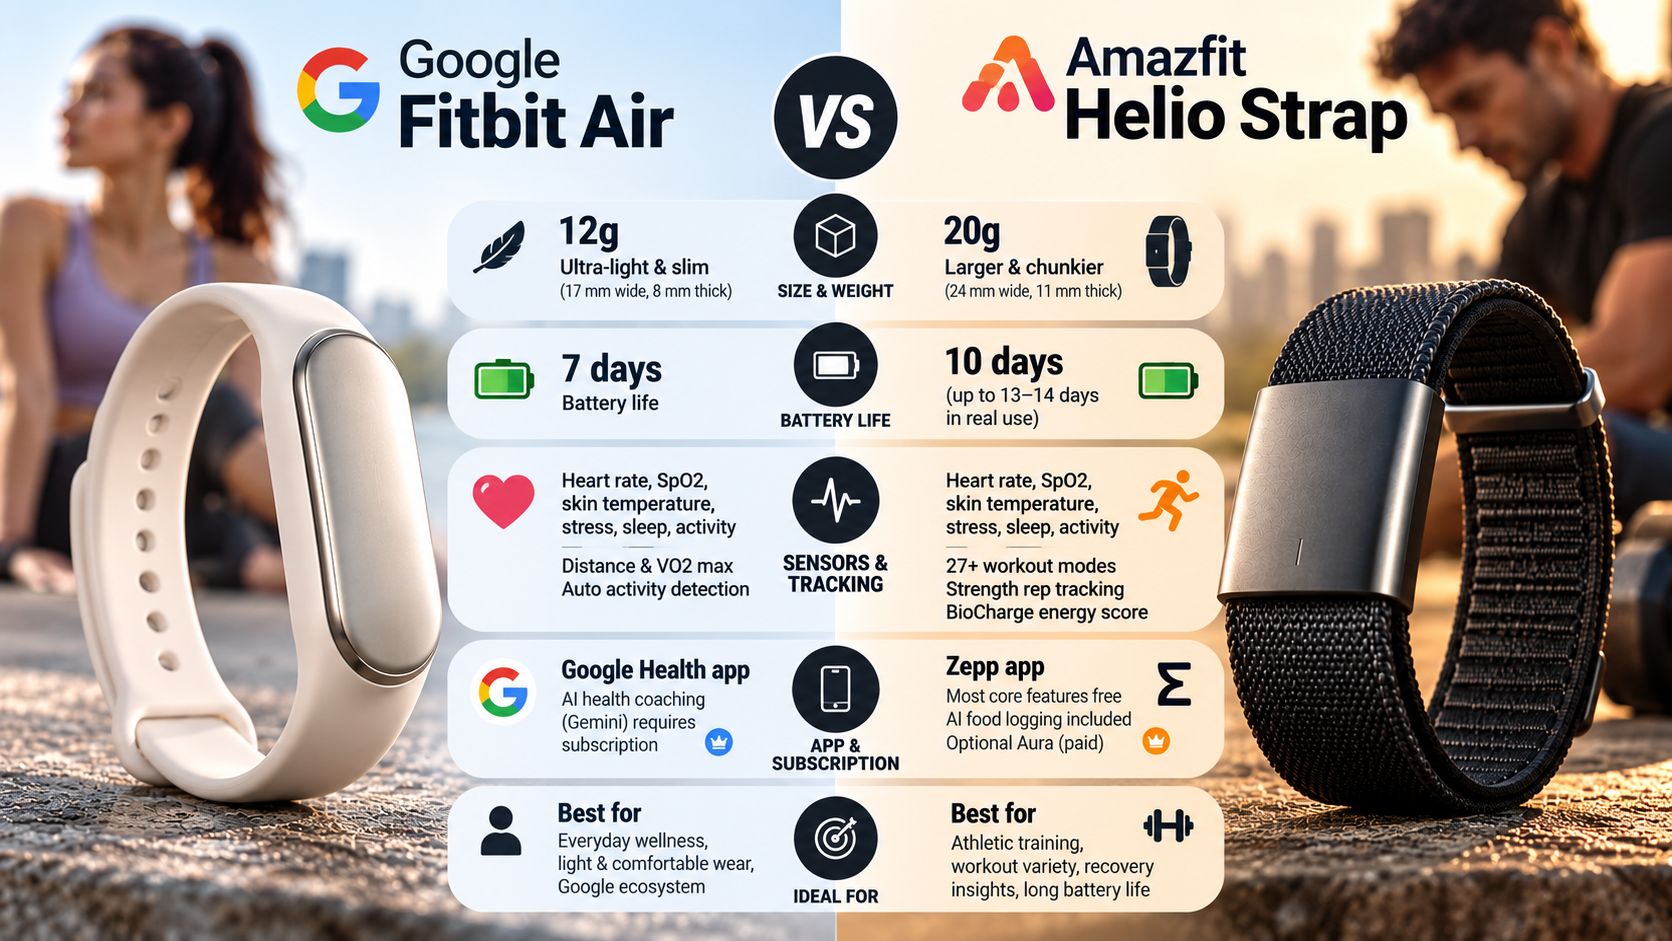
The Amazfit Helio Strap may be the better choice if you prioritize athletic training, recovery insights, and battery life. Amazfit advertises up to 10 days of battery life, while Fitbit Air advertises up to seven days. Actual endurance depends on usage, settings, and other factors.

The Helio Strap offers BioCharge energy monitoring, 27 workout modes, and strength-training recognition. These features appeal to users who want detailed fitness information without a screen. Its Zepp app also provides core tracking features without requiring a mandatory subscription.

Fitbit Air takes a different approach to fitness and wellness. It tracks heart rate, sleep, blood oxygen, and heart rhythm. It also supports automatic detection of common activities and connects with Google’s Health app. Personalized coaching and certain advanced insights require Google Health Premium.

Neither device is automatically more accurate in every situation. Consider your preferred features, smartphone compatibility, and budget before deciding which tracker offers better value.

Athletic Recovery Versus Everyday Health

The main difference between the Amazfit Helio Strap and Fitbit Air is their approach to health tracking. Amazfit focuses on athletic performance and recovery, while Fitbit combines everyday fitness monitoring with personalized wellness guidance.

The Helio Strap’s BioCharge feature helps users understand changes in their energy and recovery levels. Its workout modes and strength-training recognition also support structured exercise routines. The Zepp app brings these measurements together for users who want to review their progress without paying for a required premium subscription.

Fitbit Air suits people who prefer a simpler daily routine. It monitors heart rate, sleep, and other health indicators while automatically recognizing supported activities. Its heart rhythm monitoring can identify signs associated with atrial fibrillation (AFib), but it cannot replace a medical evaluation.

Choose Amazfit if training metrics are your priority. Consider Fitbit Air if everyday wellness tracking and Google’s health ecosystem appeal more to you.

Is Amazfit as Good as Fitbit?

Amazfit competes with Fitbit in screenless fitness tracking, but neither brand is universally better. Both offer heart rate monitoring, sleep analysis, and activity tracking. Their differences become clearer when you examine workout tools, software, integrations, and subscription costs.

The Helio Strap uses Amazfit’s BioTracker 6.0 sensor and Zepp app to monitor health indicators, including heart rate, blood oxygen, and sleep-related metrics. It also provides BioCharge energy monitoring and supports 27 workout modes. Amazfit advertises up to 10 days of battery life.

Fitbit Air connects with Google’s Health app and provides heart rate, sleep, activity, and heart rhythm monitoring. Google also offers personalized coaching through its premium membership.

Advertised specifications alone cannot establish which tracker measures every metric more accurately. Results can vary with fit, movement, skin contact, and the metric being measured. Compare the features you need instead of assuming one brand delivers superior accuracy across the board.

Ecosystem Value and Data Paywalls

Software access plays an important role in the Amazfit Helio Strap Vs. Fitbit Air comparison. A tracker might offer useful sensors, but its long-term value also depends on which insights remain available without additional payments.

The Zepp app provides core Helio Strap health and fitness features without requiring a mandatory subscription. Amazfit also supports selected third-party services, including Strava and Apple Health, although compatibility depends on the platform and integration.

Fitbit Air connects with Google’s Health app for activity tracking, sleep monitoring, and health metrics. However, personalized coaching and certain advanced insights require Google Health Premium.

Before buying either tracker, review the features included in the standard app experience. Check whether your preferred integrations work with your phone and existing fitness services.

If avoiding recurring fees is important, the Helio Strap may offer better value. Fitbit Air may appeal more if you want Google’s coaching tools and are comfortable with its subscription model.

Is the Amazfit Helio Strap Worth Buying?

The Amazfit Helio Strap is worth considering if you want a lightweight, screenless tracker for exercise, sleep, and recovery. It weighs approximately 20 grams and uses a nylon strap designed for comfortable everyday wear. Its display-free design avoids the notifications and visual interruptions associated with many smartwatches.

The device tracks 27 workout types and supports strength-training recognition. Its BioCharge feature provides insights into your energy and recovery, while continuous heart rate monitoring helps you review changes throughout the day. The Zepp app brings these measurements together without requiring a paid subscription for its core features.

Battery life is another advantage. Amazfit advertises up to 10 days per charge, reducing the need for frequent charging. The tracker also offers 5 ATM water resistance for suitable water-related activities.

However, consider your priorities before purchasing. The Helio Strap does not provide an on-device screen for checking information during exercise. It is best suited to people who prefer reviewing their workout data through a connected smartphone.

Premium Hardware Without Hidden Costs

The Helio Strap combines a lightweight design with practical features for regular training. Its fiber-reinforced polymer body, nylon strap, and 5 ATM water resistance make it suitable for many everyday activities. Amazfit also advertises up to 10 days of battery life, although actual endurance varies with usage.

Its main financial advantage is access to core fitness and recovery information through the Zepp app without a mandatory subscription. Users can review supported health metrics, workout records, and recovery-related information without paying recurring fees to unlock the main tracking experience.

However, not every feature or integration is necessarily unlimited. Third-party services may have their own requirements, and software capabilities can change over time. Check the current feature list before purchasing.

For athletes and fitness enthusiasts, the combination of workout modes, BioCharge monitoring, and longer advertised battery life offers practical value. However, users who mainly want basic step counts and sleep tracking might not need all these features. Compare the purchase price against your actual training needs before deciding.

What Is Better Than Fitbit Air?

The Amazfit Helio Strap is a strong alternative to Fitbit Air if you want a screenless tracker with a training-focused feature set. However, other wearables may suit different priorities. The right choice depends on your budget, preferred tracking style, and willingness to pay for ongoing coaching.

For example, WHOOP 4.0 focuses on strain, sleep, and recovery insights through a membership-based service. It may appeal to users who want structured guidance, provided they accept the recurring cost. Garmin’s vívosmart range offers a different approach, with a built-in display for checking activity information directly on the device.

These alternatives are not direct replacements in every respect. WHOOP emphasizes subscription-based coaching, while Garmin includes an on-device display that screenless trackers deliberately omit. The Helio Strap and Fitbit Air both focus on reducing visual distractions.

Before choosing an alternative, identify the features you use most. Consider workout tracking, sleep analysis, battery endurance, app compatibility, and long-term cost. A more expensive tracker is not necessarily better if its additional features do not support your goals.

Identifying the Best Wearable Alternative

Choosing a screenless fitness tracker becomes easier when you separate essential requirements from optional features. Start by deciding whether you care most about athletic performance, everyday health tracking, or personalized coaching. Then compare the devices against those priorities rather than relying on brand reputation alone.

The Amazfit Helio Strap suits users who want workout modes, recovery insights, and longer advertised battery life without a mandatory subscription. Fitbit Air is worth considering if you prefer Google’s Health app, automatic activity detection, and heart rhythm monitoring.

WHOOP 4.0 may suit people who value structured training and recovery guidance. However, include its membership costs in any long-term comparison. If you prefer a screen-free design, compare the Garmin Cirqa Smart Band’s tracking features and price before deciding which wearable best fits your needs.

Also check smartphone compatibility, water resistance, charging requirements, and the availability of your preferred health integrations. These practical details can matter more than small differences in advertised specifications.

Ultimately, the best tracker is the one that fits comfortably, provides useful information, and supports your routine without unnecessary costs.

Is the Fitbit Air Really Worth It?

Fitbit Air is worth considering if you want a lightweight, screenless wearable focused on everyday health and fitness tracking. It monitors heart rate, sleep stages, blood oxygen, and other health indicators through Google’s Health app. Its heart rhythm monitoring can also identify signs associated with atrial fibrillation (AFib).

Fitbit Air advertises up to seven days of battery life. Its fast-charging feature can provide up to a full day of power with a five-minute charge, according to Google. This can be useful if you forget to charge your tracker before bedtime or a workout.

The device also supports automatic detection of common activities, reducing the need to start every workout manually. Google Health integrates tracking information with personalized coaching, although coaching and certain advanced insights require Google Health Premium.

However, Fitbit Air is not automatically the best choice for everyone. Subscription costs can affect its long-term value, especially if you want advanced guidance. If you mainly need workout modes and recovery tracking without recurring fees, the Amazfit Helio Strap deserves serious consideration.

Passive Health Monitoring Done Right

Fitbit Air is designed for people who want health information collected throughout the day without constantly interacting with a device. Its screenless design supports uninterrupted wear, while the Google Health app provides access to activity records, sleep information, and other tracked metrics.

Automatic activity detection can make everyday exercise tracking more convenient. You can start an activity manually or allow the tracker to recognize supported activities. Afterward, the app helps you review your recorded workout and broader activity patterns.

Heart rhythm monitoring is another notable feature. Fitbit Air can look for signs associated with AFib, but these alerts are not a diagnosis and should not replace professional medical advice. Google’s health features are not intended to provide medical diagnoses.

The main trade-off involves the software experience. Core tracking features are available through Google Health, while personalized coaching and certain advanced insights require a premium membership.

Choose Fitbit Air if you value passive monitoring, automatic activity tracking, and Google’s health ecosystem. If your priority is athletic recovery without mandatory subscription costs, compare it carefully with the Amazfit Helio Strap before buying.

Final Verdict: Amazfit Helio Strap Vs. Fitbit Air

The Amazfit Helio Strap Vs. Fitbit Air comparison comes down to your fitness goals, preferred features, and budget. Both screenless fitness trackers offer a convenient way to monitor your health without smartwatch distractions, but they serve slightly different needs.

The Amazfit Helio Strap is worth considering if you prioritize workout tracking, recovery insights, longer battery life, and core features without a mandatory subscription. Fitbit Air may suit you better if you prefer Google’s Health ecosystem, automatic activity detection, and heart rhythm monitoring.

Before making your decision, compare their current prices, app features, smartphone compatibility, and subscription requirements. The best tracker is not necessarily the one with the most features. It is the one that supports your daily routine and helps you work toward your health goals.

Ultimately, choose the Amazfit Helio Strap for training-focused tracking or Fitbit Air for everyday wellness monitoring, based on your priorities. Either way, consistent use matters more than having the most expensive wearable.

Apple TV 4K 2022 vs. 2026: Is the new Apple TV 4K Worth It?

Apple TV 4K 2022 vs. 2026: Is the New Apple TV 4K Worth the Upgrade?

After four years, Apple has introduced a new generation of its flagship streaming device. The new Apple TV 4K features the A19 chip, built-in far-field microphones, and an upgraded Siri AI experience. It also introduces a smarter Siri Remote with Find My support and Precision Finding. These upgrades aim to improve streaming, gaming, and smart home control.

However, the new model costs $299 in the United States. That is a significant investment compared with the original launch price of the 2022 model. Many home entertainment enthusiasts may wonder whether the upgrade offers enough practical benefits. Some features also extend to older Apple TV models through software updates.

This comparison examines the differences between the 2022 and 2026 Apple TV 4K models. It covers performance, features, pricing, and everyday usability. You will also learn whether upgrading makes sense or whether your existing streaming device remains sufficient.

Is the 2022 Apple TV Better Than the 2026 Model?

The 2022 Apple TV 4K is not faster than the 2026 model, but it may offer better value for some buyers. The third-generation device uses the A15 Bionic chip, while the new Apple TV 4K features the A19 processor. Apple claims the newer chip delivers up to 50% faster CPU performance and twice the GPU performance. It also includes a dedicated AV1 decoder for more efficient video streaming.

The 2022 model still supports 4K streaming, Dolby Vision, HDR10+, and Dolby Atmos. It remains capable of handling popular streaming apps without difficulty. Casual viewers may not notice a major difference in picture quality when watching the same content on both devices. Your television’s panel technology also affects the viewing experience, so understanding OLED vs QLED display technology can help you decide whether upgrading your streaming device will make a noticeable difference.

Price-to-Performance Value in 2026

The 2022 Apple TV 4K remains worth considering if you want premium streaming without paying $299. Its A15 Bionic chip can handle everyday entertainment, including Netflix, Disney+, and Apple TV. The device also supports Apple’s wider ecosystem and smart home features.

The new model offers more processing power, hands-free Siri, and improved surround sound options. However, these benefits may not justify the price for everyone.

Consider these factors before buying:

  • Choose the 2022 model if you mainly stream films, television shows, and sports.

  • Consider the 2026 model if you want hands-free voice control, enhanced gaming performance, and four-speaker HomePod surround sound.

  • Check software compatibility before assuming every new Siri feature works on older devices.

Siri AI is also available in beta on Apple TV 4K models from the second generation onward. Therefore, the newer hardware is not the only way to access Apple’s updated assistant.

Is It Worth Buying Apple TV 4K in 2026?

Yes, the Apple TV 4K can be worth buying in 2026 if you value smooth navigation, a consistent interface, and integration with Apple devices. It offers access to streaming services, games, photos, and smart home controls through one device. Its tvOS interface also provides an alternative to the advertising-heavy home screens found on some smart TV platforms.

The new Apple TV 4K adds Siri AI, hands-free voice commands, and more advanced smart home features. It can help users discover shows, ask questions about programmes, and control compatible accessories. However, the value depends on your television, existing devices, and preferred streaming services.

If your current television already provides fast apps and all the streaming services you need, an external streamer may offer limited benefits. The upgrade becomes more appealing when your television software feels slow or you want stronger integration with Apple’s ecosystem.

Ecosystem Perks and Home Theater Upgrades

Apple’s ecosystem remains one of the device’s main advantages. If you use an iPhone, iPad, or HomePod, Apple TV can connect these products through shared services and features. You can access photos, make FaceTime calls using Continuity Camera, and control compatible smart home accessories. If music streaming is also part of your setup, comparing Spotify vs. Apple Music can help you choose a service that suits your listening preferences.

The 2026 model also introduces a four-speaker surround sound setup using compatible HomePod speakers. Users can pair four HomePod mini 2 or second-generation HomePod speakers with the device. Automatic calibration helps adjust audio timing and levels to the room.

Other benefits include:

  • Smart home control: Manage compatible accessories and scenes.

  • Improved Siri: Search for entertainment using conversational requests.

  • Privacy features: Benefit from Apple’s privacy-focused approach to microphone data and protected HomeKit Secure Video footage.

  • Personal entertainment: View photos, use screen savers, and make supported video calls.

These features are most useful when you already use Apple products. Buyers with a different ecosystem should compare compatibility before paying a premium.

Is There Going to Be a New Apple TV 4K in 2026?

Yes, Apple officially announced the fourth-generation Apple TV 4K in October 2026. Pre-orders begin October 15 in supported markets, and retail availability starts November 13. The US price is $299, while pricing varies by region. The new device also includes built-in far-field microphones for hands-free Siri control.

The launch follows a four-year gap since the previous generation arrived in 2022. The new model focuses on processing speed, smarter voice control, and home entertainment. It also supports a more immersive multi-speaker audio setup.

These improvements make the 2026 release a more substantial hardware update than a simple cosmetic refresh. However, buyers should distinguish officially announced specifications from rumours or assumptions. Features such as storage configurations and connectivity standards should be checked against the technical specifications for the market where you intend to buy the device.

Key Hardware Specs of the 2026 Release

The fourth-generation Apple TV 4K retains a compact set-top-box design. Its main upgrade is the A19 chip, which improves processing and graphics performance. Apple also includes a dedicated AV1 decoder to support more efficient video streaming.

Here are the key hardware highlights:

  • Processor: A19 chip.

  • CPU performance: Up to 50% faster than the previous generation, according to Apple.

  • GPU performance: Up to twice as fast as the previous generation.

  • Voice control: Three built-in far-field microphones with echo cancellation.

  • Streaming efficiency: Dedicated AV1 decoding.

  • Remote: Siri Remote with Find My support, Precision Finding, and an option to play a sound.

  • Audio: Support for a four-speaker HomePod surround sound configuration.

  • Smart home: Control compatible Apple Home accessories and scenes.

The new remote is also compatible with Apple TV HD and Apple TV 4K models. Find My support is available on the second-generation Siri Remote and later versions. This means some existing owners may be able to obtain the remote upgrade without replacing their entire streaming device.

Is the New Apple TV 4K Worth It?

The new Apple TV 4K is worth considering if you want the latest processor, hands-free Siri, and enhanced HomePod audio. These features make it more capable than the 2022 model. They may also help the device remain responsive as streaming apps and software become more demanding.

However, existing owners should not assume they need to upgrade. The 2022 model already supports 4K video, Dolby Vision, HDR10+, and popular streaming services. Siri AI support has also been announced for second-generation and later Apple TV 4K models, although availability and functionality can vary.

The $299 price makes the decision more difficult. If you mainly watch films and television shows, the difference may not justify replacing a working device. If you regularly use Apple Arcade, want hands-free controls, or plan to build a HomePod-based surround sound system, the new model may offer more practical value.

Conclusion: Should You Upgrade to the New Apple TV 4K?

The new Apple TV 4K brings faster performance, smarter Siri features, and improved home entertainment capabilities. However, these upgrades do not automatically make it the best choice for every buyer. Your decision depends on your budget, current streaming device, and how you use Apple’s ecosystem.

If you already own the 2022 Apple TV 4K, keeping it may be the better option. It still delivers excellent 4K streaming and supports popular entertainment apps. However, if you want hands-free Siri, enhanced gaming performance, and a more immersive HomePod audio setup, the 2026 model may justify the $299 price.

For buyers upgrading from an older Apple TV HD or a slow smart TV platform, the new Apple TV 4K offers a more capable entertainment experience. Before purchasing, review the official Apple TV 4K specifications to compare supported features and technical details.

Ultimately, compare the features you will actually use against the cost before making your decision. The best choice is the model that meets your entertainment needs without making you pay for upgrades you will rarely use.

Are Chromebooks Still Worth Buying After Googlebooks?

Are Chromebooks Still Worth Buying After the Googlebook Release?

Shopping for a budget-friendly laptop can be confusing when new devices enter the market. Google’s changing laptop lineup has raised an important question: Are Chromebooks still worth buying after the Googlebook release? Before spending your money, understand how these devices differ and which one suits your daily needs.

Chromebooks run ChromeOS, an operating system designed around web browsing, cloud applications, and productivity tools. Googlebooks represent a newer laptop category associated with Google’s Android ecosystem. Although both target everyday computing, their software experiences and application compatibility can differ.

Choosing between these devices depends on your budget, workload, and preferred applications. You should also consider battery life, hardware specifications, and long-term software support before purchasing a laptop.

In this guide, we’ll examine Chromebook relevance in 2026, Google’s hardware direction, and the lifespan of older models. We’ll also explain when a Chromebook remains a practical purchase and when another laptop might make more sense.

Are Googlebooks Replacing Chromebooks?

Googlebooks introduce another option for laptop buyers, but their arrival does not automatically mean Chromebooks are disappearing. These devices represent different approaches to Google’s computing ecosystem. Chromebooks run ChromeOS, while Googlebooks emphasize Android-based computing and closer integration with Android phones. Their software experiences and application compatibility can differ significantly. If you’re comparing your options, this Chromebook vs. laptop comparison can help you understand the differences in everyday use.

Chromebooks remain established choices for schools, businesses, and everyday users. They support browser-based workflows, Google Workspace, and compatible Android applications. Googlebooks provide an alternative for people interested in Android integration and newer laptop features.

If you’re asking, are Chromebooks still worth buying, consider your existing workflow before choosing a replacement. A familiar operating system, reliable applications, and long-term support matter more than a product’s name.

Software Services vs. Physical Hardware

Google’s product names can be confusing because its ecosystem includes digital services and physical devices. Understanding these differences helps you choose the right laptop without relying on rumors.

  • Google Play Books: A digital platform for purchasing, reading, and managing ebooks.
  • Chromebooks: Physical laptops running ChromeOS.
  • Googlebooks: A newer laptop category associated with Google’s Android-based computing direction.

Google Play Books does not compete with either laptop category. Instead, it provides reading services across compatible devices.

Chromebooks are available from manufacturers such as Acer, ASUS, HP, and Lenovo. Googlebooks offer a different software experience, so buyers should check application compatibility before purchasing.

The main distinction is the operating system, not simply the manufacturer. If you mainly use websites and browser-based tools, a Chromebook may meet your needs. For a closer look at ChromeOS features, compatibility, and setup, explore this ChromeOS guide covering features, comparisons, and installation. If you prefer Android integration, examine Googlebook compatibility with your essential applications first.

Are Chromebooks Still Relevant in 2026?

Yes, Chromebooks remain relevant in 2026, particularly for students, casual users, and people who work primarily online. They handle everyday activities such as browsing, document editing, video streaming, and online meetings without requiring expensive hardware. Their straightforward interface also suits users who prefer a simpler computing experience.

However, Chromebooks are not automatically the best choice for every budget. Windows laptops may offer broader compatibility with professional software, while Googlebooks provide another option for people interested in Android-based computing. If you are also considering a tablet for everyday tasks, compare Chromebooks and iPads as alternatives to Windows laptops before making your decision.

So, are Chromebooks still worth buying for everyday work? They can be, especially when your main activities involve web applications, online classes, and office documents. Look for sufficient memory, dependable battery life, and several years of remaining software support.

Before buying, compare available models and their total costs. A slightly more expensive laptop may deliver better long-term value if it supports your work more effectively.

The Rise of Chromebook Plus and AI

Chromebook Plus models offer stronger hardware and additional capabilities compared with many entry-level Chromebooks. Google’s published requirements include an Intel Core i3 processor from the 12th generation or newer, or an AMD Ryzen 3 processor from the 7000 series or newer. Eligible models also include at least 8GB of RAM, 128GB of storage, a Full HD IPS display, and a 1080p webcam.

These specifications make Chromebook Plus devices suitable for multitasking, video calls, and everyday creative work. Selected models also offer integrated AI features, depending on hardware, software version, region, and availability.

Before paying extra for a Chromebook Plus laptop, consider whether you need its additional performance. Basic browsing and document editing may work perfectly well on a standard Chromebook.

You can compare models on the official Chromebook website. Check individual specifications and supported features rather than assuming every model offers identical AI capabilities.

Is Google Phasing Out Chromebooks?

The arrival of Googlebooks does not, by itself, establish that Google is discontinuing Chromebooks. ChromeOS remains an established platform with a substantial education and business user base. Google also publishes software support information for existing devices, allowing buyers to check their expected update schedules.

However, it would be misleading to assume that every Chromebook will receive support indefinitely. Individual models have specific update deadlines, and older hardware may not support every newer feature. Google’s future product strategy could also evolve as its laptop ecosystem changes.

If you already own a Chromebook, there is no need to replace it solely because Googlebooks have appeared. First, check whether your device still receives updates and handles your daily tasks comfortably.

For new buyers wondering are Chromebooks still worth buying alongside newer alternatives, the answer depends on practical requirements. Compare application compatibility, hardware specifications, prices, and support commitments. These details offer a better basis for deciding than product rumors or assumptions about Google’s future plans.

Long-Term Enterprise and Education Commitments

Schools and businesses often choose Chromebooks because they are relatively straightforward to manage across many devices. Administrators can configure accounts, control access, and deploy applications using Google’s management tools. These capabilities make ChromeOS useful in environments where consistent settings and centralized administration matter.

Long-term support is another important consideration for organizations purchasing laptops in bulk. Google publishes automatic update deadlines for individual ChromeOS devices, helping administrators plan replacements and manage security requirements.

However, enterprise adoption does not guarantee that every model will remain supported forever. Organizations must evaluate each device’s update schedule, hardware condition, and compatibility with required applications.

For individual buyers, the same principle applies. A Chromebook with several years of remaining support may offer better value than a newer-looking model approaching its final update.

Google’s continued support for existing ChromeOS devices matters when assessing their value. Still, buyers should verify the specific model rather than relying on broad claims about the platform’s future.

Do Chromebooks Become Outdated?

Yes, Chromebooks eventually become outdated, just like Windows laptops and MacBooks. Their useful lifespan depends on software support, hardware condition, and the applications you need to run. A device may still function after its official update period ends, but continued use can involve security and compatibility risks.

Google calls its automatic update deadline the Automatic Update Expiration (AUE) date. After a device reaches its final supported update, it no longer receives regular ChromeOS and browser updates. Some applications or websites may eventually require newer software versions.

Google provides ten years of automatic updates for eligible Chromebook platforms, including devices released from 2021 onward under its extended support policy. The exact deadline depends on the device and its platform.

Before buying a used Chromebook, check its remaining support period. A low purchase price may not represent good value if updates are ending soon.

How to Check Your Device Update Schedule

You can check your Chromebook’s official update deadline through its settings. This is particularly important when purchasing a second-hand device or deciding whether to replace an older laptop.

Follow these steps:

  1. Turn on your Chromebook and select the time in the bottom-right corner.
  2. Open Settings.
  3. Select About ChromeOS.
  4. Open Additional details.
  5. Find the Update schedule section.

This section shows when your device is expected to receive its final automatic update. You can also check the model against Google’s official support information.

For a used Chromebook, verify the deadline before paying. A laptop with several years of updates remaining may offer better value than one approaching the end of its support period.

Remember that software support is only one part of the decision. Battery condition, available memory, storage, screen quality, and physical damage also affect whether an older device remains worth using.

Is a 5-Year-Old Chromebook Still Good?

Yes, a five-year-old Chromebook can still be useful in 2026, but its condition and update status matter more than its age alone. A device purchased in 2021 may still receive automatic updates under Google’s extended support policy. However, check the exact model and deadline rather than assuming every five-year-old Chromebook receives updates until 2031.

For basic tasks, an older Chromebook may still handle email, web browsing, document editing, and video streaming. Its performance depends on the processor, available memory, battery health, and demands of modern websites.

A model with 8GB of RAM will generally provide more flexibility for multitasking than one with 4GB. However, memory alone cannot guarantee good performance if the processor or battery is worn out.

Before buying a used device, inspect the screen, keyboard, charging port, and battery. Also, confirm that its update schedule suits your needs.

If the laptop remains supported, works reliably, and meets your requirements, keeping it may be more economical than upgrading unnecessarily.

Hardware Signs to Watch Out For

Software support cannot compensate for worn-out hardware. Before purchasing or continuing to use an older Chromebook, inspect its physical condition and test its everyday performance. Pay particular attention to battery life, and investigate why your laptop battery drains so fast if it loses charge unusually quickly.

Pay particular attention to these areas:

  • Battery health: Check whether the battery holds a charge and lasts long enough for your routine.
  • Memory: Four gigabytes may handle light tasks, but 8GB is preferable for heavier browsing and multitasking.
  • Charging port: Confirm that the charger connects securely and charges the laptop consistently.
  • Screen and keyboard: Look for display defects, damaged keys, and unreliable touchpad operation.
  • Performance: Open your usual websites and applications to check for excessive lag.
  • Software support: Verify the official update deadline before purchasing.

Do not buy an older Chromebook simply because it is inexpensive. A device nearing its final update may have a shorter practical lifespan than expected.

If repairs are expensive or essential applications no longer work properly, replacing the laptop may be more sensible. Compare repair costs with the price of a supported alternative before deciding.

Final Verdict: Should You Buy a Chromebook in 2026?

Are Chromebooks still worth buying? For students, casual users, and people who primarily work online, they can still be a practical and affordable option. Their simple interface, browser-based productivity tools, and support for everyday applications make them suitable for many common tasks.

However, the right choice depends on your needs. A Windows laptop may be more suitable for specialized desktop software, while a Googlebook may appeal to users who prioritize Android integration.

Before purchasing, compare the following:

  • Your essential applications and their compatibility.
  • Hardware specifications and battery life.
  • The remaining software support period.
  • The total price compared with competing laptops.

Avoid choosing a device based only on brand popularity or new features. Focus on how well it supports your daily activities and how long it should remain useful.

Ultimately, a supported Chromebook that meets your needs can still offer good value in 2026. Check the exact model, compare alternatives, and make your decision based on practical requirements rather than rumors.

Does Fast Charging Ruin Your Phone Battery?

Does Fast Charging Ruin Your Phone Battery?

Modern fast charging can feel like magic. You plug in a nearly dead phone, take a quick shower, and return to an 80% charge. That speed can also create concern. When your phone becomes warm during charging, you may wonder whether fast charging is damaging the battery.

The short answer is no. Fast charging does not destroy your phone battery under normal conditions. Modern smartphones, chargers, and power delivery systems include several layers of protection. They manage charging speed, voltage, current, and temperature. Apple’s guidance on charging and battery lifespan also highlights temperature and charging patterns as important factors in battery ageing. Apple Support: Charge and maintain your iPhone battery

However, fast charging is not completely free from battery stress. Heat, high voltage, and internal resistance can accelerate normal battery degradation. The effect becomes more important when the phone remains hot for long periods.

Understanding how fast charging works can help you charge more confidently. It can also help you develop simple habits that protect battery health without constantly watching the percentage.

Does Fast Charging Destroy Phone Batteries?

Fast charging does not normally destroy a phone battery. Modern lithium-ion and lithium-polymer batteries are designed to handle higher charging speeds within specific safety limits. Your phone does not simply receive maximum power until the battery reaches 100%. If you have heard conflicting advice about charging, it is also worth checking common phone charging myths before changing your habits.

Fast charging generally uses two stages:

  1. Constant Current Phase: When the battery is relatively empty, the charging system can deliver higher current. This allows the percentage to rise quickly while the battery can absorb energy efficiently.
  2. Constant Voltage Phase: As the battery becomes fuller, internal resistance increases. The charging system gradually reduces power to control voltage, heat, and chemical stress.

This is why the first part of a charge often feels much faster than the final portion. Your phone’s battery management system (BMS) continuously controls the charging process.

Standards such as USB Power Delivery and proprietary systems allow the phone and charger to negotiate suitable power levels. The phone therefore uses the power it is designed to handle rather than automatically accepting the charger’s maximum output.

The Real Culprit: Thermal and Chemical Stress

Fast charging itself is not automatically destructive. Excessive heat is the bigger concern. Electrical current passing through a battery creates heat because of internal resistance. Higher current can increase this heat, especially when the device is already warm.

Heat can accelerate chemical reactions inside lithium-ion batteries. Over time, this can contribute to electrolyte breakdown and changes in the protective SEI layer. These changes gradually reduce the battery’s ability to store and deliver energy.

Normal temperatures during charging are generally less concerning than sustained high temperatures. Problems become more likely when several heat sources occur together.

For example, avoid combining fast charging with:

  • Direct sunlight or a very hot environment
  • A thick case that traps heat
  • Intensive gaming or demanding applications
  • Poor ventilation while charging
  • High-power wireless charging in a warm location

The practical lesson is simple: manage heat rather than fearing charging speed itself. If your phone remains reasonably cool during charging, fast charging does not automatically mean serious battery damage. Features such as bypass charging can also help reduce battery heat during demanding tasks like gaming.

Is the 20/80 Battery Rule True?

The 20/80 rule has a real basis in lithium-ion battery chemistry. It recommends keeping your phone between roughly 20% and 80% when convenient. The goal is to reduce the amount of time the battery spends in higher-stress conditions.

Lithium-ion batteries gradually degrade as their electrodes undergo chemical and physical changes during charging and discharging. Higher charge levels generally create more voltage stress, while extremely low levels can also place additional strain on the cell.

Charging above 80% is not automatically harmful. However, keeping a battery near its maximum voltage for long periods can increase chemical stress. Similarly, repeatedly allowing the battery to reach extremely low levels is less desirable than using moderate charge ranges.

A practical comparison looks like this:

Charge Range General Stress Practical Consideration
0%–100% Higher More complete cycling
20%–80% Lower Useful range for battery longevity
40%–60% Lowest Battery-friendly but inconvenient

The key point is not to treat 20% and 80% as strict emergency boundaries. They are useful targets when battery longevity matters more than maximum daily capacity.

Is It Worth the Hassle?

The chemistry behind moderate charging ranges is useful, but constantly monitoring your battery is unnecessary. Modern smartphones already include software features that can reduce charging stress automatically.

Apple devices offer Optimized Battery Charging and, on supported models, an 80% charge limit. Optimized charging can delay the final part of charging based on your routine. This reduces the amount of time the battery remains fully charged.

Many Samsung and other Android devices also provide battery protection features. Depending on the model, these can limit the maximum charge to around 80% or 85%.

An 80% limit can be particularly useful if you plan to keep your phone for several years. It can help reduce prolonged high-voltage exposure without requiring manual monitoring. Understanding how different charging habits affect battery health can also help you avoid unnecessary concern about everyday charging.

However, convenience still matters. If you regularly need a full battery for work, travel, navigation, or long days, charging to 100% is reasonable.

The best approach is to use battery protection features when they fit your routine. Do not sacrifice practical battery capacity simply to follow a charging rule perfectly.

Is Fast Charging to 100% Bad?

Fast charging to 100% is not catastrophic. The bigger concern is leaving a fully charged battery at maximum voltage for many hours, especially in a warm environment.

Modern phones normally reduce charging power as the battery approaches full capacity. The phone does not continue receiving maximum fast-charging power all the way to 100%. Charging becomes progressively slower during the final portion.

This means the final percentage can take much longer than the earlier part of the charging process. The charging system is deliberately reducing power as the battery becomes fuller.

The main concern comes after the battery reaches full capacity. Two factors matter:

  1. Prolonged high-voltage exposure: A phone that reaches 100% before bedtime may remain near maximum charge for several hours.
  2. Repeated top-ups: A connected phone may periodically draw small amounts of power to maintain its charge.

If you charge to 100% and unplug the phone shortly afterward, the practical impact is limited. There is no need to avoid 100% completely.

The more useful habit is to avoid combining 100% charge, high temperature, and long periods of continuous charging whenever possible. If your phone supports optimized charging or a charge limit, those features can reduce unnecessary battery stress automatically.

Is 45W Too Much for a Phone?

No. A 45W charger is not automatically too powerful for a phone designed to support 45W charging. The important point is that the charger does not simply force its maximum wattage into the phone.

Power is requested by the phone, not blindly pushed into it. Charging systems communicate through protocols such as USB Power Delivery and PPS. The phone determines the voltage and current it can accept based on its charging design.

For example, a 45W or 65W charger can safely charge a phone rated for a lower power level. The phone can negotiate an appropriate charging level and avoid using the charger’s full capability. Understanding the difference between charging ratings such as 5V 1A and 5V 2A can also make charger specifications easier to understand.

A simplified example looks like this:

[65W Charger]  <── Power Negotiation ──>  [Phone]
Charger: "I can provide up to 65W."
Phone:   "I will request the power I support."
Result:  Charging occurs within the phone's limits.

The charger should still be compatible and meet appropriate safety standards. Using poor-quality accessories can create unnecessary electrical or thermal risks.

The key takeaway is simple: a higher-rated charger does not automatically damage a lower-rated phone. The phone’s charging hardware determines how much power it accepts.

How 45W+ Phones Handle the Load

Phones designed for 45W, 65W, or higher charging use additional engineering to manage the increased power. Manufacturers can use several approaches to control heat and improve charging efficiency.

One approach is dual-cell battery architecture. Some phones divide the battery into multiple cells, allowing charging power to be distributed across them rather than concentrating it in one cell.

Another approach involves advanced charging circuits. Efficient power-conversion hardware can reduce the amount of electrical energy that becomes unwanted heat inside the phone.

Some charging systems also move more voltage-conversion work into the charging adapter. This can reduce heat generated inside the handset.

These approaches help manufacturers deliver higher charging speeds while managing temperature and electrical stress.

However, higher wattage still requires proper thermal management. A phone designed for 65W charging is not equivalent to a phone designed for 20W charging.

For everyday use, follow the manufacturer’s charging specifications. Use compatible chargers and reliable cables, and avoid charging in excessively hot environments. Cable quality and construction can also matter when choosing accessories for modern high-speed charging systems.

The important distinction is between supported fast charging and forcing an unsupported setup. A properly designed 45W system is built to handle that power.

Is Charging 3 Times a Day Okay?

Yes. Charging your phone two or three times a day is generally fine. The number of times you connect the charger does not directly determine battery wear.

Battery degradation is more closely related to charge cycles and the conditions under which those cycles occur. One complete cycle represents using an amount of energy equivalent to 100% of the battery’s capacity. That use can happen across several smaller charging sessions.

For example:

  • Using 100% of the battery’s capacity over time represents about one full cycle.
  • Using 30% of the battery, charging it, and repeating that process three times represents about 0.9 of a cycle.

This means frequent top-ups are not automatically harmful. In some situations, shorter charging sessions can help you avoid extremely low battery levels and prolonged periods at maximum charge.

A practical routine might involve charging from 40% to 70% during the day and topping up again later when necessary.

The main exception is repeated heat exposure. Charging several times a day while gaming, using demanding applications, or charging in direct sunlight can increase thermal stress.

So, do not worry about plugging in your phone frequently. Focus instead on avoiding excessive heat and extreme battery levels when convenient.

Conclusion

Fast charging does not ruin your phone battery when the phone, charger, and charging system are designed to work together. Modern smartphones automatically adjust charging speed, voltage, and current to protect the battery as it fills.

The bigger concern is excessive heat and prolonged high charge levels, not fast charging itself. Charging to 100% occasionally is fine, and charging your phone several times a day does not automatically reduce battery life.

For better long-term battery health, avoid extreme heat, use reliable chargers and cables, and take advantage of battery protection features when available. Keeping your phone around 20% to 80% can also reduce battery stress when it is convenient.

Ultimately, you do not need to obsess over every charging percentage. Use fast charging when you need it, keep your phone cool, and let its built-in charging protections do the rest.

How to Safely Clean Your Electronics With Compressed Air

How to Safely Clean Your Electronics With Compressed Air

If you want to clean your electronics with compressed air, you need the right technique. Dust buildup can cause overheating, noisy fans, and reduced hardware performance. It can also collect inside keyboards, game consoles, desktop PCs, and other electronics.

A can of compressed air, often called canned air or a gas duster, is a convenient way to remove loose dust from hard-to-reach areas. Some products are specifically designed for cleaning electronics and sensitive equipment. For example, 3M’s compressed air cleaning product information explains its intended use and handling precautions.

However, these cans do not usually contain ordinary atmospheric air. They use pressurized chemical propellants that can become extremely cold during use. Incorrect spraying can also force liquid propellant onto sensitive components.

You also need to control how fans move during cleaning. A rapidly spinning fan can create unnecessary mechanical stress and electrical effects.

Learning how to clean your electronics with compressed air safely means more than pointing the nozzle at the dust. The right technique helps reduce risks to both your hardware and yourself.

Can I Use Compressed Air to Clean Electronics, and If So, How?

Yes, you can use compressed air to clean electronics when you follow the correct precautions. It works especially well for removing loose, dry dust from hard-to-reach areas, including headphones and other small devices. For better results, combine compressed-air cleaning with proper methods for cleaning and maintaining premium headphones.

The main advantage is simple. The airflow moves debris without requiring direct contact with delicate circuit boards, connectors, and other small components.

Before cleaning, turn the device off and disconnect it from power. Work in a well-ventilated area and keep the can upright. Use short bursts instead of holding the nozzle down continuously.

Avoid spraying extremely close to components. Follow the distance instructions printed on the specific product.

Fans also need special attention. Hold fan blades still while cleaning them to prevent excessive rotation.

The goal is to remove dust without introducing liquid propellant, excessive force, static, or unnecessary mechanical movement. These precautions make compressed air a practical option for routine electronics maintenance.

What Is Actually Inside the Can?

The phrase “compressed air” can be misleading. Many retail dusters do not contain ordinary atmospheric air. Instead, manufacturers fill them with liquefied gas propellant under pressure.

Common formulations include substances such as 1,1-difluoroethane (HFC-152a) or HFO-1234ze, although the exact contents vary by product. Always check the label or safety information for the can you use.

Inside the container, much of the propellant exists as a liquid. When you press the nozzle, the material expands and changes phase as it leaves the can. This process can make the can and spray extremely cold.

Improper handling increases the chance of releasing liquid propellant. Shaking, inverting, or tilting a can beyond the manufacturer’s recommended position can cause this problem.

Liquid propellant can leave an extremely cold residue on electronics. It can also create condensation when cold surfaces meet moisture in the surrounding air.

For that reason, keep the can upright and follow the manufacturer’s instructions. Different dusters can have different operating requirements.

Step-by-Step Procedure for Electronics

Use the following process when you need to clean your electronics with compressed air, especially when removing dust from devices such as laptops. If you regularly clean a laptop, these steps can complement other practices for cleaning laptop keyboards safely.

  1. Power down completely: Shut the device down and disconnect it from its power source. Remove a detachable laptop battery when appropriate.
  2. Choose a ventilated area: Clean outdoors, in an open garage, or in another well-ventilated location when practical.
  3. Keep the can upright: Follow the position specified by the manufacturer. Avoid turning the can upside down.
  4. Test the spray first: Point the nozzle away from the device and briefly spray into open space.
  5. Use short bursts: Apply controlled bursts instead of holding the trigger continuously.
  6. Keep some distance: Follow the product instructions and avoid placing the nozzle directly against components.
  7. Hold fans still: Prevent CPU, GPU, case, and laptop fans from spinning freely while you clean them.
  8. Work systematically: Move dust outward instead of pushing it deeper into the device.
  9. Let moisture clear: If liquid propellant or visible condensation appears, stop spraying. Let the affected area dry completely before reconnecting power.

These steps reduce the main risks associated with cold propellant, excessive airflow, and uncontrolled fan rotation.

Are You Allowed to Clean Yourself With Compressed Air?

No. Never use compressed air to blow dust from your skin, hair, clothing, or other parts of your body.

The risk depends on the equipment involved. Retail gas dusters contain pressurized chemical propellants, while industrial compressors can deliver air at much higher pressures. Neither product should serve as a personal cleaning tool.

A concentrated air stream can injure the eyes, ears, skin, or other soft tissue. A liquid propellant released from a duster can also become extremely cold and cause a cold-burn or frostbite-like injury.

Industrial environments have additional safety requirements for compressed-air use. For example, OSHA’s workplace rules address compressed-air cleaning and restrict certain unsafe practices.

If dust gets on you while cleaning electronics, use ordinary cleaning methods instead. Move to a ventilated area, remove loose dust manually, and wash exposed skin with soap and water.

The important distinction is simple: compressed air is a tool for cleaning suitable equipment, not your body.

Never point a high-pressure air stream toward your face or another person’s body.

The Dangers of Cleaning Yourself With Air

Different compressed-air products create different hazards, but neither type belongs in personal cleaning.

Retail gas-duster cans can create several problems:

  • Cold propellant: Tilting or inverting some cans can release liquid propellant. The liquid can become extremely cold and injure exposed skin.
  • Inhalation risk: Gas-duster products are not intended for breathing. Their ingredients and additives can irritate the eyes and respiratory system.
  • Eye exposure: A concentrated spray can irritate or injure the eyes, especially when it carries dust or debris.

Industrial air compressors present additional risks:

  • High-pressure injury: Compressed air can damage skin and soft tissue when you direct it at the body.
  • Eye injuries: Air can propel metal particles, dust, and other debris toward the eyes at high speed.
  • Ear damage: A strong air stream directed toward the ear can cause serious injury.

The safest approach is to keep compressed air away from your body altogether.

If dust gets onto your clothes or skin, use manual cleaning methods instead. Shake out clothing away from your electronics and wash your hands and face afterward.

These alternatives remove the need to expose yourself to unnecessary pressure or chemical hazards while you maintain your equipment.

Is WD-40 Just Compressed Air?

No. WD-40 and compressed-air dusters are different products with different purposes.

Standard WD-40 Multi-Use Product contains a liquid chemical formulation that comes from an aerosol container. It serves purposes such as water displacement, lubrication, corrosion protection, and loosening certain materials.

Compressed-air dusters serve a different purpose. They move loose dust and debris with a directed gas stream rather than applying a lubricating coating.

This difference matters when cleaning electronics. Applying a general-purpose lubricant to a motherboard, keyboard switch, connector, or other sensitive component can leave unwanted residue. If you are considering a chemical cleaner instead, learn whether it is safe to use alcohol to clean your PC before applying it to electronic components.

That residue may attract dust and interfere with surfaces that need to remain clean and dry. Some solvents can also affect certain plastics, rubber, coatings, or other materials.

Flammability also deserves attention. Always read the product label before using any chemical around electronics.

If your goal is simply to remove loose dust, use an appropriate electronics duster instead of a general-purpose lubricant.

Why Standard WD-40 Should Not Be Used for Routine Electronics Cleaning

Standard WD-40 should not serve as an electronics dusting product. Its formulation targets different jobs, and applying it to sensitive components can create problems.

One concern is residue. Unlike a dedicated dusting product, a general-purpose lubricant leaves protective properties on the treated surface. That residue can collect dust and grime over time.

Material compatibility creates another concern. Solvents and petroleum-based ingredients can interact differently with plastics, rubber, coatings, and other materials. Electronics contain many different materials, so an unsuitable chemical may cause unwanted swelling, softening, or surface changes.

Aerosol products also create a flammability concern. Applying flammable material around powered equipment, heat sources, or electrical contacts adds an unnecessary risk.

If you need to remove loose dust, use compressed air or an appropriate electric electronics blower. If a component requires chemical cleaning, choose a product specifically designed for that purpose.
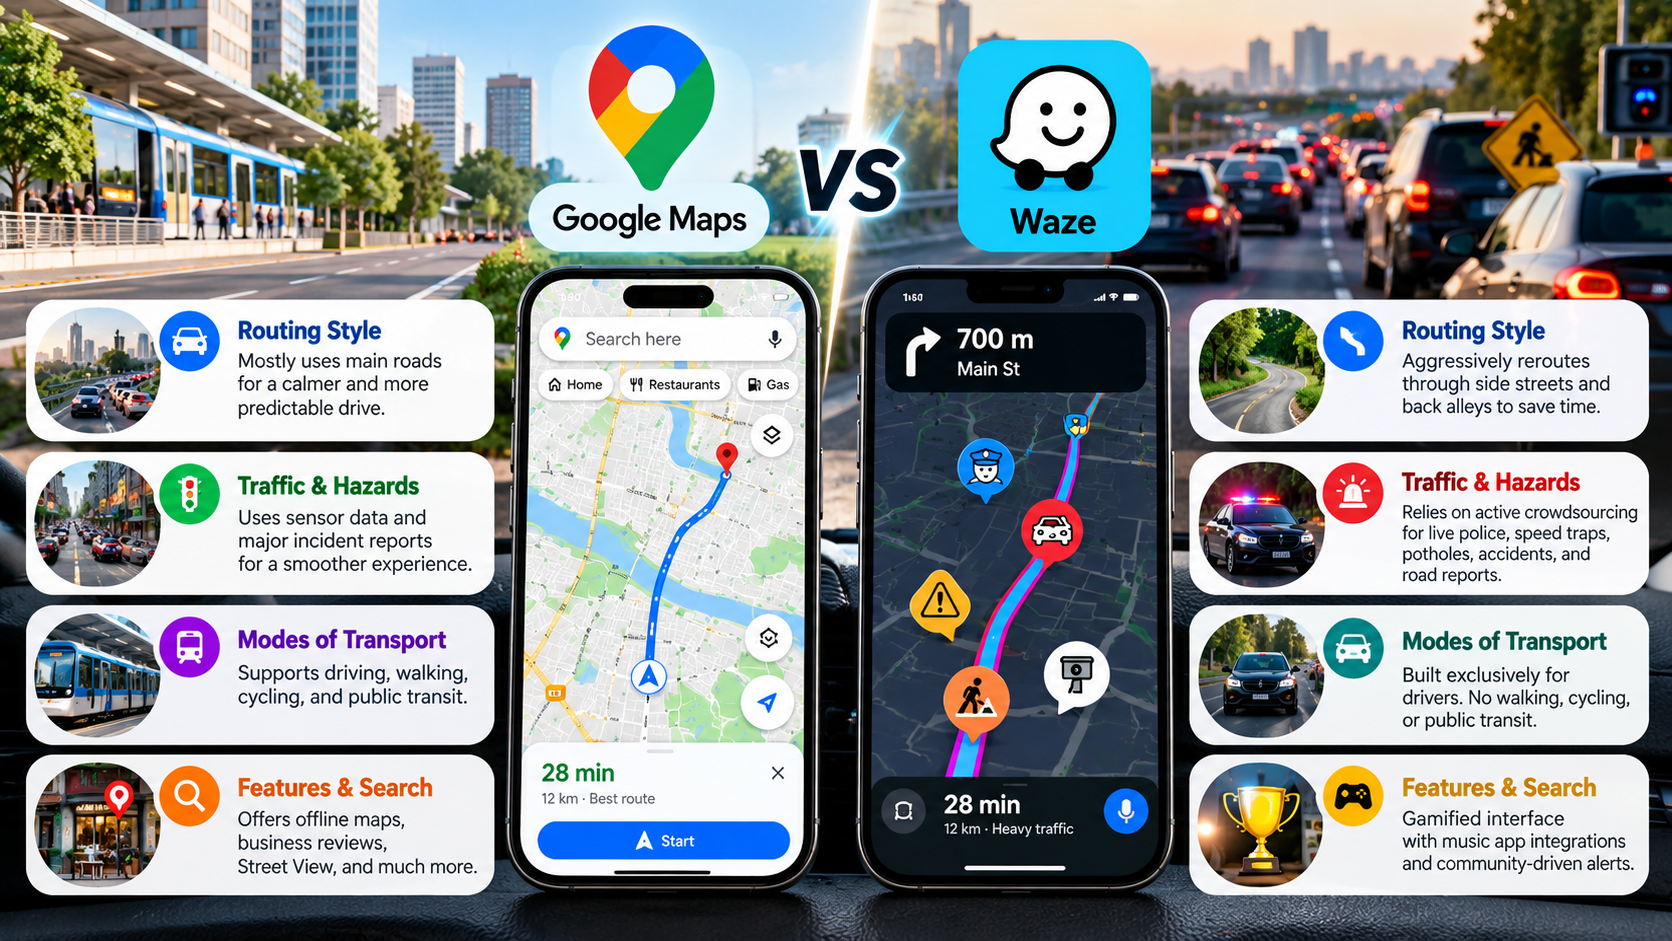
Never assume a product is electronics-safe simply because it comes in an aerosol can or carries a familiar brand name.

The Exception: WD-40 Specialist Contact Cleaner

The confusion often comes from the WD-40 brand name. The company also sells specialized products intended for electrical and electronic cleaning.

WD-40 Specialist Electrical Contact Cleaner differs from the standard WD-40 Multi-Use Product. Contact cleaners target specific cleaning tasks involving electrical contacts and related components.

These products can help remove contaminants such as oil, grime, and certain residues. They are not substitutes for ordinary dusters, however.

This distinction matters because different cleaning problems require different products. Loose dust inside a PC case usually does not require a solvent. A contaminated electrical contact may require a dedicated contact cleaner instead.

Always read the product label before applying any chemical to electronics. Check whether the product works with the specific material or component.

Also remember that contact cleaner is not a general-purpose compressed-air replacement. It targets grime and residue rather than loose dust inside heatsinks, fans, vents, or keyboards.

Using the correct product for the correct task reduces the chance of leaving residue or damaging sensitive materials.

Can I Use Compressed Air to Clean My PC While It’s On?

No. It is safer to clean a PC after you completely shut it down and disconnect it from power.

Cleaning a running computer introduces unnecessary electrical and mechanical risks. The fans are also operating, so compressed air can force them to spin faster than intended.

Another concern involves liquid propellant. If a duster releases liquid instead of mostly gas, the cold material can contact sensitive components. Rapid temperature changes and moisture condensation can create problems inside electronic equipment.

Dust can also become airborne and move across the motherboard, power supply area, and other components. Keeping the system powered off removes one source of electrical risk while you work.

Before cleaning a desktop, shut down the operating system. Turn off the PSU switch if the system has one, unplug the power cable, and disconnect other external connections as appropriate.

Do not reconnect the computer immediately after cleaning. Inspect the hardware first and check for visible moisture or loose debris.

Key Risks of Cleaning a Running System

Cleaning a powered PC with compressed air creates several avoidable risks.

  • Fan overspeed: Air can make cooling fans spin much faster than normal. Excessive rotation can place unnecessary stress on bearings and fan electronics.
  • Back-EMF: A fan motor can generate electrical energy when mechanical airflow drives it. Uncontrolled spinning can therefore create unwanted electrical effects.
  • Liquid propellant: Some gas dusters can release liquid when you use them incorrectly. The liquid can become extremely cold and may cause condensation on components.
  • Dust movement: Blowing dust through an operating system can move debris across energized components and connectors.
  • Flammability: Some gas-duster formulations are flammable. Check their labels before using them near electrical equipment.

For these reasons, power the computer down before cleaning.

After shutdown, unplug the system and give yourself enough working space. Hold fans still while spraying and use short bursts.

Do not spray continuously into one area. Move methodically through the case and direct dust away from sensitive components.

Finally, inspect the PC before restoring power. This check can catch visible moisture, trapped debris, or other problems before the system starts again.

Is It Better to Clean My Computer With a Vacuum or Compressed Air?

For routine internal PC cleaning, compressed air or a purpose-built electronics blower is generally more appropriate than a household vacuum.

A vacuum may seem convenient because it collects dust instead of blowing it around. However, a household vacuum does not target direct cleaning of sensitive electronic components.

Static electricity creates one concern. Plastic hoses and attachments can accumulate electrostatic charge as air and dust move through them. Bringing a charged nozzle close to exposed electronics can create an unwanted discharge.

Physical contact creates another problem. Household vacuum attachments often have rigid surfaces. Accidentally touching a motherboard, connector, capacitor, or other component can cause mechanical damage.

Compressed air avoids direct nozzle contact, although it has its own risks. Canned air can become very cold, especially when you use it incorrectly.

A purpose-built electric electronics blower provides another option for regular maintenance. Choose a device designed for electronics and follow its safety instructions.

For removable dust filters, however, a household vacuum can work well when you remove the filters from the computer first.

Comparison: Compressed Air vs. Vacuums for PC Cleaning

Feature / Factor Disposable Canned Air Household Vacuum Cleaner Electronics Air Blower
Static risk Generally low when used correctly Can create static through plastic components Designed for electronics use
Physical contact Non-contact cleaning Rigid nozzle can contact components Non-contact cleaning
Cold spray risk Possible if used incorrectly None Usually none from phase-change propellant
Ongoing cost Requires replacement cans Uses existing household equipment Usually a one-time purchase
Dust control Blows dust into the surrounding area Collects dust in the vacuum Blows dust into the surrounding area
Best use Detailed cleaning of vents, heatsinks, and keyboards Cleaning removed filters and surrounding areas Regular internal electronics maintenance

The right choice depends on the equipment and cleaning task.

For occasional maintenance, canned air can be convenient. For frequent PC cleaning, an electronics blower can reduce recurring can costs.

A household vacuum is better suited to floors, surfaces around the computer, and removable filters rather than direct contact with exposed electronics.

Audio vs. File Compression: What to Avoid for Better Sound

Audio vs. File Compression: What to Avoid for Better Audio Quality

Audio vs file compression can be confusing because the word “compression” describes two very different processes. In digital audio, it can refer to dynamic range processing or digital data compression. Understanding the difference helps you avoid unnecessary quality loss and choose the right audio format for storage, editing, and playback.

Dynamic range audio compression is a signal-processing technique. It reduces the volume difference between the quietest and loudest parts of an audio signal.

Digital data or file compression reduces the storage space or transmission bandwidth needed for an audio file. It can be either lossless or lossy.

When a producer says a track is “over-compressed,” they usually mean excessive dynamic processing. This can reduce punch, contrast, and perceived liveliness. When a listener complains about compressed audio quality, they may instead mean lossy data compression.

Understanding audio vs file compression helps prevent common mistakes. You can then choose suitable formats, export settings, and processing methods.

To preserve audio quality, it is important to understand how dynamic processing differs from digital encoding. You should also know which forms of compression permanently remove audio information.


How Can I Compress Audio Files Without Losing Quality?

To reduce the storage size of an audio file without losing its original data, use lossless audio compression. Lossless codecs reduce file size while allowing the original PCM audio to be reconstructed exactly during playback.

This differs from lossy compression. Lossy formats remove some audio information to achieve smaller files. Once that information is removed, converting the file back to WAV cannot restore it.

Lossless Audio Codecs

Lossless audio formats work somewhat like ZIP archives. However, their algorithms are optimized for digital audio data. They identify patterns and redundancies in the audio stream, then store the information more efficiently.

When decoded, the compressed file produces the same original PCM samples.

Common options include:

  • FLAC: An open, lossless format that commonly reduces WAV file sizes while preserving the original audio data.
  • ALAC: Apple’s lossless format, designed for strong integration with Apple devices and software.
  • WavPack and APE: Other lossless formats with different compression and compatibility characteristics.

The actual compression ratio depends on the recording. Complex or noisy audio may compress less efficiently than simpler material.

Archival Compression Formats

For backups and file transfers, general-purpose archive formats such as ZIP can also store WAV or AIFF files. However, dedicated audio codecs such as FLAC are usually more efficient for audio storage.

If you need to preserve the original recording, lossless compression is the safer choice. It reduces storage requirements without permanently changing the audio data.


Does Compression Reduce Audio Quality?

Compression does not automatically reduce audio quality. The result depends on which type of compression you use and how aggressively you apply it.

Lossless file compression, such as FLAC or ALAC, does not remove audio information. The decoded audio can match the original PCM source exactly.

Lossy file compression works differently. Formats such as MP3, AAC, and Ogg use perceptual coding to reduce the amount of stored data. They remove information considered less important to human hearing. The result can sound very good, but some source information is permanently discarded. Understanding how bitrate affects audio quality can also help you judge the trade-off between file size and perceived sound quality.

Dynamic range compression changes the level and envelope of an audio signal. It does not primarily reduce file size. Used carefully, it can control peaks and improve consistency. Excessive processing can instead produce pumping, reduced punch, and listening fatigue.

Compression Type Mechanism Quality Impact
Lossless file compression Efficient data storage No source-data loss
Lossy file compression Perceptual data reduction Permanent information loss
Dynamic range compression Changes signal dynamics Depends on processing

Why Lossy Data Compression Permanently Changes Audio

Lossy codecs such as MP3 and AAC use psychoacoustic models to reduce data. These models take advantage of characteristics of human hearing.

The encoder analyzes the audio and determines which information can be represented with fewer bits or removed with limited perceived impact. Masking is one important principle. A strong sound can make a nearby, quieter sound harder to hear.

The encoder can therefore reduce information that may contribute less to the perceived result. The exact process varies between codecs and encoding settings.

Once information has been removed, it cannot be recovered from the encoded file. Equalization or restoration software cannot recreate the original samples with certainty.

This is why repeatedly converting between lossy formats can create generation loss. Each encoding stage can introduce additional artifacts.

For example, converting an MP3 to AAC does not improve the source. The new encoder works from an already compressed signal.

For maximum preservation, keep the original lossless master and create lossy versions from that source. When preparing music for online listening, you can also explore how to get the highest-quality audio out of YouTube Music without unnecessarily reducing playback quality.

Why Dynamic Compression Alters Tonal Balance and Dynamics

Dynamic range compression changes the level of an audio signal rather than its file structure. A compressor reduces gain when the signal exceeds a selected threshold. Makeup gain can then raise the overall level.

This process can be useful. It can control peaks, improve consistency, and help instruments sit together within a mix.

The problem begins when dynamic compression is applied too aggressively. Heavy compression can reduce the contrast between quiet details and louder transients. Drums may lose impact, vocals can become overly dense, and the mix may feel less open.

This effect is often associated with discussions about the Loudness War, where excessive loudness processing reduced dynamic contrast in some recordings.

Dynamic compression also differs from lossy data compression. It does not simply delete digital bits from the file. Instead, it changes the amplitude relationships within the signal.

Good compression depends on the source material and settings. Threshold, ratio, attack, release, and makeup gain all affect the final result.


How to Enhance the Quality of an Audio File

An audio file cannot gain recording resolution that was never captured. However, careful restoration and processing can improve perceived clarity, balance, and usable headroom.

The right approach depends on the problem. Noise, clipping, excessive dynamics, frequency buildup, and poor gain staging require different solutions.

1. Surgical Frequency Cleanup

Muddy or harsh audio often has frequency problems rather than insufficient resolution. A carefully configured equalizer can reduce unwanted energy without damaging useful content.

A high-pass filter can remove unnecessary low-frequency rumble. For vocals, dialogue, and some acoustic instruments, this may free headroom for useful low-end information. The cutoff should depend on the recording rather than following one fixed frequency.

A narrow parametric EQ notch can also reduce an unwanted resonance. This is often better than broadly cutting or boosting large parts of the spectrum.

Avoid excessive high-frequency boosting when trying to create clarity. Boosting treble can make noise and harshness more noticeable.

The goal is controlled correction rather than aggressive tonal change. Always compare the processed signal with the original at matched listening levels.

2. Spectral Repair and Denoising

Restoration software can help when an audio recording contains unwanted background noise or damaged sections. Spectral tools display frequency information over time, making it easier to identify specific problems.

Broadband denoising can reduce steady sounds such as hiss, HVAC noise, or electronic background noise. Excessive noise reduction can create metallic or watery artifacts, so moderate settings are usually safer.

De-clipping tools can also attempt to reconstruct portions of waveforms damaged by excessive recording levels. Results depend heavily on the severity of the clipping and the restoration algorithm.

These processes cannot perfectly recover every missing detail. They are restoration techniques, not replacements for a clean original recording.

For important work, keep an untouched copy of the source. Then process a duplicate and compare the result carefully.

3. Dynamic Expansion

If an audio file has been heavily compressed, the original performance dynamics may not be fully recoverable. However, an upward expander or transient shaper can sometimes increase the perceived contrast.

An expander changes the level relationship between different parts of a signal. A transient shaper can emphasize the attack or sustain characteristics of suitable material.

These tools can make drums and other percussive sounds feel more pronounced. However, they do not recreate the exact dynamics that existed before destructive processing.

Use moderate settings and listen for unnatural peaks, increased noise, or exaggerated transients. Restoration should improve the perceived result without introducing new problems.

4. Controlled Gain Staging

Gain staging is important when preparing audio for distribution. Digital systems can experience inter-sample peaks when reconstructed waveforms exceed the level suggested by individual samples.

This matters because a file can appear below 0 dBFS while its reconstructed waveform produces higher peaks. A downstream encoder or digital converter may respond differently depending on its implementation.

For distribution, engineers often leave some true-peak headroom. A target around -1 dBTP is commonly used for many streaming-oriented workflows, although exact requirements vary.

Avoid treating one number as a universal rule. Always check the delivery specifications of the target platform.

Good gain staging reduces the risk of clipping during later processing or encoding. It also gives encoders more room to work with the source signal.


What Are Common Audio Compression Mistakes?

Whether you are using a hardware compressor or exporting audio from a digital audio workstation, several mistakes can reduce quality.

  • Transcoding lossy files repeatedly: Converting MP3 to AAC, or repeatedly re-encoding another lossy format, can introduce additional artifacts. Keep a lossless master whenever possible.
  • Over-compressing an already limited track: Heavy dynamic compression after brickwall limiting can further reduce remaining dynamics and increase distortion.
  • Using unsuitable attack times: Very fast attack settings can reduce the initial impact of drums and other transient sounds. The appropriate setting depends on the source and desired effect.
  • Ignoring inter-sample peaks: A master that is extremely close to 0 dBFS can create problems during later encoding or conversion. Leaving suitable true-peak headroom can reduce this risk.
  • Confusing bit depth with bitrate: Bit depth describes sample resolution in PCM audio. Bitrate describes the amount of data transmitted or stored per second.

These concepts are related to digital audio but describe different things. 16-bit and 24-bit refer to PCM bit depth, while 128 kbps and 320 kbps describe bitrate.

Understanding these differences helps prevent incorrect export settings and unnecessary processing.


Which Audio Compression Is Best?

There is no single best audio compression format for every situation. The appropriate choice depends on your purpose, required quality, storage limits, compatibility needs, and distribution platform.

For Archiving, Studio Mastering, and Critical Listening

FLAC is a practical choice for lossless music storage. It preserves the source audio while usually requiring less space than uncompressed PCM files. It also supports metadata and high-resolution audio.

ALAC provides similar lossless preservation and is especially useful within Apple-focused workflows.

For production, WAV and AIFF remain common uncompressed PCM formats. They are useful when compatibility with recording and editing software is the priority.

The important principle is simple: keep a lossless or uncompressed master before creating smaller distribution versions.

For Streaming, Mobile Distribution, and Bandwidth Conservation

AAC is widely used for lossy audio distribution and can provide good quality at moderate bitrates.

Opus is a modern, flexible lossy codec designed for applications ranging from speech to music. Its efficiency makes it useful when bandwidth is limited.

MP3 remains widely compatible with older hardware and software. It can still be useful when broad compatibility is more important than codec efficiency.

When using MP3, VBR can provide a useful quality-to-size balance. High-bitrate CBR is another option when predictable bitrate and compatibility are important.

Ultimately, the best format is the one that matches the intended use without unnecessary conversions. For listeners deciding how audio should be delivered to their devices, understanding wired vs wireless audio can also help clarify the trade-offs between connection methods and playback quality. Keep your highest-quality source separate from compressed delivery copies.


Conclusion

Understanding audio vs file compression is essential when you want to preserve sound quality while managing file size. Dynamic range compression changes the characteristics of an audio signal, while digital file compression changes how audio data is stored or transmitted.

For the best preservation, keep an original lossless or uncompressed master and create compressed copies for specific uses. FLAC and ALAC can reduce file size without permanently removing source data, while formats such as AAC, Opus, and MP3 use lossy compression to save more space.

For lossy distribution, formats such as AAC, Opus, and MP3 can reduce storage and bandwidth requirements. The IETF’s official Opus specification provides detailed technical information about how the Opus codec handles speech and music.

Avoid repeatedly converting between lossy formats, over-processing already limited audio, and confusing bitrate with bit depth. Choose your format based on the purpose, required quality, compatibility, and available storage or bandwidth.

The key principle is simple: compress files when you need efficiency, but preserve your lossless source whenever audio quality matters.

How to Choose the Right Keyboard Size

How to Choose the Right Keyboard Size: Complete Form Factor Guide

Choosing the right keyboard size depends on how you work, play, and use your desk space. Keyboard sizes are usually described by form factor percentages, rather than exact measurements. These percentages compare a keyboard with a traditional 104-key full-size layout.

A full-size keyboard gives you every standard key, including the numeric keypad. Smaller layouts remove certain keys to save desk space. Common options include full-size, TKL, 75%, 65%, and 60% keyboards.

Your ideal keyboard should balance key access, desk space, mouse movement, and typing comfort. Ergonomic factors are also worth considering, especially if you type for long periods. The ACM SIGCHI covers research and practice related to human-computer interaction and human factors.

Understanding what each keyboard size keeps and removes makes the decision easier. The right choice depends less on popularity and more on the keys you actually use.

What Size Keyboard Is Most Popular?

Tenkeyless (TKL) and 75% keyboards are popular choices among keyboard enthusiasts, remote workers, and gamers. Full-size keyboards remain common in traditional office environments. If you are choosing a mechanical keyboard for office work, factors such as noise, comfort, and layout also matter. A mechanical keyboard for your office can be a useful option when you want a more customizable typing experience.

A TKL keyboard removes the numeric keypad but keeps the function row, arrow keys, and navigation cluster. A 75% keyboard goes further by reducing the spacing between key groups. It keeps many important keys while using less horizontal desk space.

This makes smaller layouts useful for people who want better mouse clearance. They can also work well on compact desks.

However, popularity should not determine your choice. Your workflow matters more. Consider these common layouts:

Form Factor Approx. Key Count What It Keeps What It Drops Best For
Full-Size (100%) 104–108 Alphanumeric keys, F-row, arrows, navigation, numpad Nothing Accounting, data entry, office work
TKL (80%) 87–88 F-row, arrows, navigation Numeric keypad Office work, gaming, general use
75% 80–84 F-row, arrows, essential navigation Numpad and extra spacing Compact desks, productivity
65% 67–68 Arrows and basic navigation Numpad and F-row Gaming, compact setups
60% 61 Alphanumeric block and modifiers Numpad, F-row, arrows Minimalist setups, portability

Is a 65% Keyboard Too Small?

A 65% keyboard is not too small for general typing, programming, or gaming. It can be less convenient for spreadsheet work and software that relies heavily on function keys. For gaming, the choice also depends on whether you prefer mechanical or membrane switches. Understanding the differences between mechanical and membrane keyboards for gaming can help you choose beyond size alone.

A typical 65% layout keeps the main typing block, arrow keys, and several navigation keys. It removes the dedicated function row and numeric keypad.

That makes the keyboard considerably shorter than a TKL model. It also gives your mouse more usable desk space.

A 65% keyboard can work particularly well for FPS gaming. Lower mouse sensitivity often requires large mouse movements. A smaller keyboard reduces the chance of hitting its edge with your mouse.

It can also improve desk ergonomics. Your mouse can sit closer to your body instead of being pushed farther outward.

However, the compact design creates a trade-off. Many secondary functions require the Fn key.

For example, you may need Fn + 1 to access F1. This can become inconvenient if you frequently use function-key shortcuts.

A 65% keyboard is therefore best when compactness matters more than immediate access to every key.

When Does a 65% Keyboard Work Best?

A 65% keyboard works best when you mainly type, code, browse, or game without regularly using a numeric keypad. Its smaller footprint creates more room for your mouse and other desk accessories.

For competitive FPS gaming, this can be especially useful. A smaller keyboard leaves more space for wide mouse movements. That matters when players use low sensitivity for precise aiming. Some gamers also prefer wired connections for consistent performance, making it useful to understand why gamers prefer wired keyboards over wireless models.

The layout can also support a more neutral desk position. Your mouse can remain closer to your keyboard and body. This may reduce excessive outward shoulder movement during long sessions.

A 65% keyboard is also convenient for compact workstations. It can fit comfortably beside a laptop or monitor without consuming much desk space.

It is less suitable for workflows that depend on dedicated function keys. Developers, system administrators, and power users may frequently use F1 through F12.

Spreadsheet-heavy users may also miss the numeric keypad. Entering long sequences of numbers can become slower without dedicated number keys.

Before buying, identify the keys you use most often. If you rarely use the F-row or numpad, the compact design may not feel restrictive.

How Do I Know My Keyboard Size?

You can usually identify your keyboard size by checking three areas: the numeric keypad, function row, and arrow keys. These visual clues can quickly reveal the keyboard form factor.

Start on the right side. If you see a separate calculator-style number block, your keyboard is probably full-size or a compact 96% layout.

Next, check the top of the keyboard. A dedicated F1–F12 row with visible spacing usually indicates a TKL keyboard. On a 75% keyboard, the function row is generally integrated into a more compact grid.

Then check the bottom-right corner. Dedicated arrow keys usually indicate a 65% layout or larger. If the arrow keys are removed, you may have a 60% keyboard.

Use this quick guide:

  • Numpad + F-row: Usually full-size.
  • No numpad + F-row: Usually TKL.
  • No numpad + compact F-row: Usually 75%.
  • Arrow keys + no F-row: Usually 65%.
  • No dedicated arrows or F-row: Usually 60%.
  • Much smaller layout: Could be a specialized 40% board.

Some layouts vary by manufacturer, so key count is not always exact.

Do I Really Need a Full-Size Keyboard?

You need a full-size keyboard mainly when your daily workflow depends on fast numeric entry or dedicated keys. Accountants, bookkeepers, analysts, and data-entry workers often benefit from a physical numeric keypad.

A dedicated numpad lets you enter numbers quickly with one hand. It also provides convenient access to mathematical operators and decimal keys.

For many other users, the extra width may not provide much value. Writers, developers, general office workers, and gamers can often work comfortably with smaller layouts.

A full-size keyboard typically measures around 17 to 18 inches wide. Its numeric keypad extends considerably beyond the main typing area.

This can push your mouse farther to the right when the keyboard is centered. Some users may find that position less comfortable during long sessions.

However, this does not mean every full-size keyboard is ergonomically poor. Desk position, keyboard height, chair setup, and mouse placement also matter. Keyboard angle can also affect how your hands and wrists feel during long typing sessions, so understanding whether a physical keyboard should be flat or tilted can help you refine your setup.

If you occasionally need a numpad, consider a TKL or 75% keyboard with a separate numeric keypad. You can move the keypad aside when you do not need it.

This gives you dedicated number keys without keeping them permanently attached to your main keyboard.

What Is a Good Full-Size Keyboard?

If your workflow requires a full-size layout, look for a keyboard with reliable switches, comfortable key spacing, and suitable connectivity. Build quality also matters if you type for several hours each day.

The Keychron Q6 and Keychron V6 are examples of full-size mechanical keyboards. The Q6 uses an aluminum chassis, while the V6 uses a more accessible construction. Both support features such as hot-swappable switches and programmable layouts.

These features can appeal to users who want more customization. Compatibility with software such as QMK or VIA can also provide flexible key remapping.

For users who prefer a laptop-style typing experience, the Logitech MX Keys S takes a different approach. It uses low-profile scissor switches rather than traditional mechanical switches.

The MX Keys S supports Bluetooth and Logi Bolt connectivity. It can also connect with multiple devices.

When choosing a full-size keyboard, focus on your actual workflow. Consider switch type, key feel, connectivity, noise, build quality, and software support.

The best full-size keyboard is not necessarily the most expensive one. It should provide the keys and typing experience you actually need.

Keyboard Size Buying Decision Summary

Choosing a keyboard size becomes easier when you match the layout to your daily tasks. Full-size is the practical choice for frequent number entry, accounting, and spreadsheet-heavy work. TKL suits users who want dedicated function, arrow, and navigation keys without the numeric keypad.

A 75% keyboard is a strong middle ground. It saves desk space while retaining the F-row and dedicated arrows. Choose a 65% keyboard if you want more mouse room but still need physical arrow keys. A 60% keyboard makes the most sense when portability and maximum desk space matter more than instant access to secondary keys.

Use this quick decision guide:

  • Need a numpad? Choose full-size.
  • Want a familiar layout without the numpad? Choose TKL.
  • Want compactness without losing the F-row? Choose 75%.
  • Want dedicated arrows in a smaller layout? Choose 65%.
  • Want maximum compactness? Choose 60%.

The right keyboard size is the one that keeps your essential keys within easy reach while removing the keys you rarely use.

How Long Do Solar Panels Last With Proper Maintenance?

How Long Do Solar Panels Last With Proper Maintenance?

With proper care and routine inspections, modern residential solar panels typically last 25 to 35 years. Many panels can continue producing usable electricity beyond that period.

Solar photovoltaic (PV) modules have no moving parts. This makes them relatively durable compared with many mechanical systems. They do not suddenly stop working when they reach a specific age. Instead, their electricity output gradually declines over time.

The U.S. Department of Energy notes that modern solar modules are expected to last 25 years or more while continuing to produce more than 80% of their original power. U.S. Department of Energy: Solar Photovoltaic Cell Basics

This gradual decline is called solar panel degradation. UV exposure, temperature changes, moisture, weather, and other environmental stresses can affect long-term performance.

Most manufacturers provide performance warranties lasting around 25 years. These warranties define a minimum level of expected power output rather than an expiration date. Proper maintenance can help protect the panels, wiring, mounting system, and other equipment.

For homeowners, the practical question is not simply how long panels work. It is whether they still produce enough electricity to justify continued operation.

Do Solar Panels Stop Working After 25 Years?

Solar panels do not automatically stop producing electricity after 25 years. The 25-year milestone usually refers to a manufacturer’s performance warranty rather than the panel’s physical expiration date.

Solar modules gradually lose some generating capacity as they age. NREL research has found considerable variation between systems and technologies. A commonly used benchmark is around 0.5% degradation per year, although actual performance varies by technology, climate, installation quality, and other factors.

Performance warranties commonly guarantee that a panel will retain a specified percentage of its original output after 25 years. The exact guarantee depends on the manufacturer and model.

A panel can therefore remain operational after its warranty ends. However, its output may be lower than when it was new.

Homeowners may eventually replace panels for several reasons. Newer modules can offer higher efficiency, better warranties, or greater output from the same roof area. Replacement can therefore become an economic decision rather than a technical necessity.

How Much Do Solar Panels Degrade Over Time?

Solar panel performance normally declines gradually rather than suddenly. The rate depends on the module technology, manufacturing quality, installation environment, climate, and other conditions.

NREL’s research shows that reported degradation rates vary substantially. Its reviews have identified a median rate around 0.5% per year, while the historical average was higher at about 0.8% per year. Most reported rates were below 1% annually.

Using a simple 0.5% annual degradation assumption gives an approximate illustration:

System Age Approximate Output Remaining
Year 1 About 99.5%*
Year 10 About 95%
Year 25 About 88%
Year 30 About 86%

*Actual first-year performance can differ because some modules experience initial light-induced degradation.

These figures are estimates, not guarantees. A particular panel may degrade faster or slower.

The important point is that degradation is usually gradual. A 25-year-old system can still generate substantial electricity if the modules and supporting equipment remain in good condition.

How Often Need Maintenance?

Solar panels generally require less routine maintenance than many mechanical home systems. They have no moving parts, so homeowners usually do not need frequent servicing.

A professional inspection can help identify problems before they reduce system performance. The exact maintenance schedule depends on the installation, climate, roof conditions, and manufacturer’s instructions. For homeowners planning a new system, a residential solar panel installation guide can also help explain the equipment and installation process.

A professional inspection can examine:

  • Wiring and connections for damage, loose connections, or signs of overheating.
  • Racking and fasteners for movement, corrosion, or other installation problems.
  • Inverter performance and diagnostic warnings.
  • Panel surfaces for cracks, heavy dirt, shading, or other visible issues.
  • Roof conditions around mounting points and penetrations.

Cleaning is not always necessary. Rain can remove ordinary dust and light debris from tilted panels. More frequent cleaning may help where panels accumulate dust, pollen, bird droppings, or other deposits.

If cleaning is required, follow the manufacturer’s instructions. For homeowners considering household cleaning solutions, guidance on whether you can use vinegar to clean solar panels can help you choose a suitable approach without damaging the panel surface.

When Should You Clean?

Solar panels do not automatically need frequent cleaning. Whether cleaning improves production depends heavily on the local environment and how much material accumulates on the panel surface.

Cleaning may be more useful when panels are exposed to:

  • Dusty or arid conditions with long dry periods.
  • Agricultural areas where airborne particles accumulate.
  • Heavy tree cover that creates pollen, leaves, sap, or bird-dropping buildup.
  • Roof designs where debris remains on the panel surface.
  • Areas with limited rainfall or frequent dry weather.

Before cleaning, check the manufacturer’s instructions. Avoid abrasive materials that can damage the panel surface.

A soft brush or non-abrasive cleaning method is generally preferable to aggressive equipment. Tesla recommends rinsing its panels with water or using soapy water with a non-abrasive sponge.

You should also avoid climbing onto a roof unless you are trained and equipped to do so safely. Roof work creates fall risks that can exceed the value of cleaning the panels yourself.

In many homes, occasional inspection and cleaning when visibly necessary are more practical than following a rigid cleaning schedule.

What Is the 20% Rule for Solar Panels?

The 20% rule can be confusing because people use similar terminology for different solar topics.

When discussing panel lifespan, it can refer to a performance warranty that guarantees a panel will retain at least 80% of its original rated output after a specified period, often 25 years. The exact warranty threshold varies by manufacturer and product.

For example, if a 400-watt panel has an 80% end-of-warranty guarantee, its guaranteed output would be 320 watts under the warranty’s specified testing conditions.

This does not mean the panel suddenly loses 20% of its power at year 25. Degradation normally happens gradually.

The 120% rule is a different electrical-design concept. It relates to how solar equipment can be connected to certain electrical service panels under applicable electrical-code requirements. It should not be confused with the panel lifespan or degradation benchmark.

Because electrical requirements depend on the installation and applicable code edition, homeowners should have system sizing and interconnection decisions reviewed by a qualified solar or electrical professional.

How Long Do Tesla Solar Panels Last?

Tesla solar panels are covered by a 25-year performance warranty, but the warranty period should not be interpreted as the panel’s guaranteed physical lifespan. Tesla states that its solar panels and qualifying third-party panels are guaranteed by their manufacturers to retain at least 80% of nameplate power capacity for at least 25 years.

Tesla’s current solar-panel documentation also provides model-specific performance information. Its published panel datasheet lists a 25-year product and performance warranty, with at least 87.2% of nominal power through 25 years for that particular panel specification.

Tesla also sells a separate Solar Roof product. Its current U.S. warranty provides 25 years of product and weatherization coverage, with a separate module performance schedule.

Therefore, Tesla Solar Panels and Tesla Solar Roof should not be treated as identical products.

As with other PV systems, actual service life depends on climate, installation quality, maintenance, environmental exposure, and component condition.

What Is the Biggest Drawback of Solar Panels?

The biggest practical drawbacks of solar panels depend on the homeowner’s circumstances. Upfront cost, variable electricity production, and component replacement are among the most important considerations.

Solar systems require an initial investment for equipment, installation, permitting, and related work. The financial return also depends on electricity prices, incentives, financing costs, solar resource, and local utility rules. Homeowners comparing renewable-energy options can also examine solar vs wind costs before deciding which system fits their needs.

Solar generation is also variable. Panels produce electricity from sunlight, so output changes throughout the day and across seasons. Clouds, storms, snow, shading, and other conditions can reduce production. This is especially important for homeowners asking whether they can run a house on solar power completely.

Another consideration is the lifespan of supporting equipment. Solar panels can operate for decades, while some other components may require service or replacement sooner.

For example, an inverter can have a shorter service life than the panels. Battery storage also has its own warranty, degradation pattern, and replacement considerations.

Finally, a standard grid-connected solar system generally does not keep a home powered during a utility outage. Solar systems are designed to shut down during outages unless the installation includes appropriate backup equipment and controls.

Conclusion

Solar panels can last 25 to 35 years or longer when they are properly installed, monitored, and maintained. Reaching the 25-year mark does not mean your panels suddenly stop working. Instead, their electricity output gradually decreases as the modules age.

Regular inspections, appropriate cleaning, and prompt repairs can help protect your system and maintain reliable performance. It is also important to monitor supporting components, such as inverters, wiring, and mounting equipment, because they may need attention before the panels themselves reach the end of their useful life.

If you are wondering how long do solar panels last, the better question is how much useful electricity they can continue producing over time. Even older panels can remain productive beyond their warranty period. However, replacing an aging system may eventually make financial sense when newer technology offers significantly better efficiency or output.

With realistic expectations and proper care, solar panels can remain a valuable source of renewable electricity for decades.

The Biggest Drawbacks of Switching to Windows from Mac in 2026

THE BIGGEST DRAWBACKS OF SWITCHING TO WINDOWS FROM MAC

Switching to Windows from Mac can feel very different, even when the new PC offers better performance, gaming support, or hardware flexibility. Modern Windows laptops and desktops provide impressive capabilities, but the transition can introduce unexpected friction. Small differences in shortcuts, file sharing, window management, trackpads, system settings, and device integration can affect your daily workflow. Understanding these drawbacks before making the move can help you decide whether Windows fits your needs.

When you leave Apple’s ecosystem, you also leave behind a tightly integrated approach to hardware and software. Windows takes a more modular approach, with different manufacturers offering varied designs, components, and features. That flexibility creates more choice, but it can also create more variation.

That flexibility creates more choice, but it can also create more variation. Trackpads, drivers, sleep behavior, audio systems, and displays can differ between Windows computers.

Before replacing a MacBook or Mac Studio, consider how those differences affect your routine. The biggest drawbacks are usually not obvious specifications. They appear during everyday tasks, device switching, file transfers, window management, and software use.

This guide explains the main friction points to expect when switching to Windows from Mac. It also explains where Windows can make more sense.

Is it worth switching from Mac to Windows?

Switching from Mac to Windows can make sense when your workflow depends on software, gaming, or hardware options that macOS does not support well. It can also make sense if you want a wider range of laptop designs and desktop configurations. For students comparing the two platforms, factors such as software availability, portability, battery life, and price can make the decision more specific. A dedicated comparison of Mac or Windows for students can help clarify those trade-offs.

However, the switch may disappoint users who mainly want cheaper hardware without losing Apple’s software experience. Windows offers excellent devices, but the experience varies more between manufacturers.

When the Switch Makes Sense

Windows can be a practical choice in several situations. PC gaming remains one of its strongest advantages. Windows supports a much larger selection of PC games, graphics hardware, peripherals, and gaming-focused services. Compatibility also tends to be better for games that rely on Windows-specific technologies.

Specialized professional software can also influence the decision. Engineering, architecture, CAD, simulation, and enterprise applications often have stronger Windows support. Some applications may not have native macOS versions or may work differently through virtualization.

Hardware flexibility is another major advantage. Windows desktops can support replaceable graphics cards, additional storage, expansion cards, and different monitor combinations. Many Windows laptops also provide a broader range of ports, screen sizes, and form factors. Port selection can vary considerably between models, especially as manufacturers remove legacy connections from thinner laptops. This is worth considering if you rely on HDMI for external displays, since why some laptops don’t have HDMI ports can affect your choice of device.

When You Will Likely Regret It

The switch can feel frustrating if your daily routine depends heavily on Apple’s ecosystem. Services such as AirDrop, iCloud Keychain, Universal Clipboard, and device continuity are deeply integrated across Apple products.

Windows can replace many of these functions, but the experience may require additional applications or configuration. That matters if you frequently move files between an iPhone and computer or copy information across devices.

Hardware consistency can also be different. A MacBook gives you a relatively predictable combination of display quality, trackpad behavior, speakers, standby performance, and operating system integration. Windows laptops vary considerably in these areas.

Consideration macOS (Apple Silicon) Windows 11 / ARM and x86
Sleep and standby Generally consistent across Apple hardware Behavior can vary by device and driver
Audio routing Core Audio provides strong system-level integration Drivers and vendor software can affect workflows
Trackpad precision Consistently strong on MacBooks Quality varies by manufacturer
App interface Relatively consistent design language Mix of modern and legacy interfaces
System prompts Generally limited Windows may show recommendations or service prompts

What are the disadvantages of Mac over Windows?

Understanding why people leave macOS helps put the Windows transition into context. Apple hardware has several limitations that can push users toward Windows. The most important ones involve upgradeability, gaming, and hardware flexibility.

These limitations are especially relevant when comparing a Mac with a desktop PC. A Windows desktop can often be upgraded years after purchase. Users can replace individual components instead of replacing the entire computer.

Mac laptops take a different approach. Apple prioritizes compact designs, tightly integrated components, and unified memory. That can deliver strong performance and efficiency, but it reduces user control over internal hardware.

The trade-off is therefore straightforward. macOS offers a controlled and consistent hardware experience, while Windows offers considerably more choice.

Before switching to Windows from Mac, it is useful to understand whether Apple’s limitations actually affect you. If they do not, Windows’ additional flexibility may not justify the learning curve.

1. Prohibitive Upgrade Costs and Zero Modularity

One major limitation of modern Macs is limited internal upgradeability. Apple integrates memory and storage into its hardware designs, particularly across Apple Silicon Mac models. Users therefore need to choose their memory and storage configuration when purchasing the computer.

This can increase the initial purchase price when you need more capacity. After purchase, you generally cannot replace the internal memory or add a larger internal SSD yourself.

Windows offers much more variety. Many desktop PCs allow users to replace RAM, storage, graphics cards, and other components. Some Windows laptops also provide upgradeable memory or storage, although this depends heavily on the manufacturer and model. If your storage needs grow over time, it is worth checking how to add more storage to a laptop before buying a new device.

This difference matters most to users who expect their needs to change. A student may initially need modest storage but require more capacity later. A professional may eventually need additional memory for larger workloads.

With a Windows desktop, upgrading one component can extend the system’s useful life. With a Mac, buyers need to plan their configuration more carefully before purchase.

2. Extremely Limited Native Gaming

Gaming remains one of the clearest reasons users consider switching to Windows from Mac. Apple Silicon Macs deliver excellent efficiency and graphics performance for supported workloads. However, the macOS game library remains smaller than the Windows PC ecosystem.

Many major PC games are designed primarily for Windows. Compatibility can also depend on anti-cheat systems, graphics APIs, launchers, and developer support. Even when a game can technically run through compatibility tools, the experience may not match a native Windows installation.

Windows also provides broader hardware support for dedicated gaming components. Users can choose from a large range of NVIDIA and AMD graphics cards, gaming monitors, controllers, and other peripherals. Keeping those graphics components properly maintained also matters for gaming performance, so understanding what happens if you don’t update your graphics card drivers can help prevent avoidable problems.

Another advantage is upgradeability. A desktop gamer can replace the graphics card or add storage without replacing the entire system.

Mac gaming has improved, but it still does not offer the same combination of game availability, hardware choice, and upgrade flexibility. For serious PC gaming, this remains an important difference.

3. Display Scaling and Window Management Constraints

Display management is another area where the two platforms feel different. macOS generally works best when display resolution and scaling are well matched to Apple’s preferred configurations. Some external displays can produce less satisfying text clarity or interface scaling.

This does not mean every 4K monitor performs poorly with a Mac. The experience depends on display size, pixel density, scaling settings, and viewing distance. However, users who frequently connect several external monitors may notice differences in scaling behavior.

Window management is another consideration. Windows includes built-in Snap layouts that make it easy to arrange applications across a screen. macOS has improved its window management, but many users still prefer third-party utilities for more advanced layouts.

Tools such as Rectangle can provide additional controls without replacing the operating system. Mac users moving to Windows may therefore find some window-management tasks easier immediately.

The trade-off is that Windows provides more built-in flexibility, while macOS emphasizes a simpler and more controlled desktop experience.

Is it difficult to switch from Mac to Windows?

Switching from Mac to Windows is not technically difficult. The bigger challenge is changing habits that have developed through years of macOS use.

Keyboard shortcuts are usually the first source of friction. Mac users rely heavily on the Command key, while Windows uses Control for many common shortcuts. These changes are simple to understand but can take time to become automatic.

The second challenge is ecosystem separation. If you regularly use an iPhone, iPad, or Apple Watch with your Mac, some features will no longer work in the same way.

The third issue is interface consistency. Windows supports applications built with different frameworks and technologies. As a result, some menus and settings can look noticeably different.

Common Mac Feature Windows Equivalent Typical Friction
Command shortcuts Control shortcuts High at first
Spotlight Windows Search / PowerToys Run Low to moderate
AirDrop Quick Share / LocalSend Moderate
Time Machine File History / backup software Moderate
Quick Look Third-party Quick Look tools Low after setup

The transition becomes easier once these differences become familiar.

1. Muscle Memory and Shortcut Shifts

Keyboard shortcuts can make switching to Windows from Mac feel harder than expected during the first few weeks. The concepts are similar, but the physical layout and shortcut combinations differ.

Mac users commonly use Command for actions such as copying, pasting, saving, and closing applications. Windows generally uses Control for many of these commands.

Some shortcuts also have different meanings. On macOS, Command-Q quits an application. On Windows, Alt-F4 closes the active window or application. This requires a different hand position and becomes noticeable during repetitive work.

Application switching also behaves differently. Command-Tab focuses on applications, while Alt-Tab primarily switches between open windows. Users who work with many documents may therefore need time to adjust.

The good news is that this friction usually decreases through repetition. You do not need to relearn computing from scratch. You mainly need to rebuild keyboard habits.

Windows also provides tools such as PowerToys that can recreate or improve some familiar workflows. You can also expand your setup with productivity apps for Windows 11 that make common tasks easier. After several weeks of regular use, most common shortcuts become automatic again.

2. Rebuilding the Apple Continuity Ecosystem

The biggest adjustment may come from losing Apple’s Continuity features. These features connect Macs, iPhones, iPads, and Apple Watches with minimal setup.

AirDrop is a common example. Moving large files between an iPhone and Windows PC may require Microsoft’s Quick Share, LocalSend, cloud storage, or another transfer method.

Universal Clipboard can also be missed. Copying text on an iPhone and immediately pasting it on a Mac is extremely convenient. On Windows, achieving a similar workflow may require different apps or cloud-based services.

Apple Watch integration is another difference. A Mac can use Apple Watch-based unlocking in supported situations. Windows instead relies on features such as Windows Hello, including compatible fingerprint readers and infrared cameras.

None of these limitations makes Windows unusable. They simply add extra steps to workflows that previously felt automatic.

This matters most for people who own several Apple devices. If your phone and computer are from different ecosystems, you may need to choose replacement services carefully.

3. Audio, Subsystems, and UI Inconsistency

Windows 11 has a modern Settings application, but some advanced controls still connect to older system interfaces. This can make the operating system feel less consistent than macOS.

Mac users may notice this when managing networking, sound devices, storage, or hardware drivers. Windows has evolved over many years, so modern interfaces coexist with older components.

Audio workflows can also require adjustment. macOS uses Core Audio, which provides system-level audio support across applications and devices. Windows uses a different audio architecture and may depend more heavily on device drivers and professional audio software.

For recording and digital audio workstations, ASIO drivers are common. They can provide low-latency performance for compatible hardware and applications. The exact experience depends on the interface, driver, software, and configuration.

This does not mean Windows has poor audio support. In fact, Windows supports a huge range of professional hardware. The difference is that setup can vary more between manufacturers.

For users who value a consistent system interface, these small differences can become noticeable over time.

Which will be better in 2026, Mac or Windows?

There is no universal winner between Mac and Windows. The more useful comparison is how each platform handles the workloads you actually perform.

Apple continues to emphasize tightly integrated hardware, efficient processors, and close control over the operating system. Windows emphasizes hardware variety, software compatibility, gaming, and device choice.

Windows on ARM has also become more relevant. Modern Snapdragon-based Windows laptops can provide strong battery life and quiet operation. Microsoft has improved compatibility through its Windows on ARM software ecosystem and emulation technology.

Apple Silicon remains highly competitive for efficiency and integrated performance. Apple’s unified memory architecture can also benefit workloads that use large amounts of shared CPU and GPU memory.

AI features are another area of development. Windows Copilot+ PCs provide operating-system-level AI features on compatible hardware. Apple Intelligence takes a more integrated approach across supported Apple devices and applications.

The practical choice therefore depends on your priorities. Consider software compatibility, gaming, battery life, upgradeability, external displays, device integration, and privacy before deciding.

The Rise of Windows on ARM vs. Apple Silicon

Windows on ARM has changed the traditional comparison between Windows laptops and Macs. Earlier ARM-based Windows computers often faced significant application compatibility limitations. Newer systems have reduced some of those problems through better emulation and native application support.

Qualcomm Snapdragon processors have helped Windows laptops compete more directly with Apple Silicon in battery life and quiet operation. However, compatibility still depends on the specific application. Specialized software, older utilities, and certain drivers may behave differently on ARM hardware.

Apple Silicon also has important advantages. Apple’s processors combine CPU, GPU, and memory into a tightly integrated architecture. This can deliver strong performance per watt and efficient operation across supported workloads.

Memory capacity is another consideration. Some high-end Macs can use large amounts of unified memory that is shared between the CPU and GPU. Windows workstations can provide much larger dedicated GPU memory through professional graphics cards, but those systems can be considerably more expensive.

The important point is that neither architecture is ideal for every workload. Application compatibility and workload requirements should guide the decision.

Conclusion

Switching to Windows from Mac is not simply a matter of choosing a different operating system. It means adjusting to a different approach to hardware, software, shortcuts, device integration, and everyday workflows.

Windows offers clear advantages for users who need PC gaming, hardware flexibility, specialized software, upgradeable components, or broader device choices. However, the transition can also mean losing some of the seamless integration Mac users experience across Apple devices. Differences in trackpads, window management, system settings, file sharing, and keyboard shortcuts may also take time to adjust to.

The best choice depends on how you use your computer. Before making the switch, review the applications, accessories, devices, and workflows you rely on most. Check whether each one works natively on Windows or requires an alternative.

Ultimately, the goal should not be to choose the platform with the longest feature list. Choose the one that creates fewer compromises for your everyday work, entertainment, and productivity needs.

What Do the Green and Orange Lights on iPhone Mean?

What Do the Green and Orange Lights on iPhone Mean?

The green and orange lights on iPhone are privacy indicators that tell you when an app is using your camera or microphone. You may notice one of these small lights near the top of your iPhone screen while using certain apps or features.

Apple introduced these indicators with iOS 14 to make sensor access more visible. The orange light indicates microphone use, while the green light indicates camera use or camera and microphone use together, as explained in Apple’s guide to iPhone privacy indicators.

These lights are useful because they give you immediate information about sensitive sensor activity. You do not have to guess whether an app is accessing your microphone or camera.

If a light appears unexpectedly, you can use Control Center and your privacy settings to identify the app involved. Understanding these indicators can help you manage your iPhone privacy and recognize unusual activity.

What Do the Green and Orange Lights on iPhone Mean?

The green and orange lights on iPhone are built-in privacy indicators. They appear near the top of the screen when an app accesses the microphone or camera.

The orange light means that an app is using your microphone. You might see it during a phone call, voice recording, voice message, or Siri interaction.

The green light means that an app is using your camera. It can appear when you use the Camera app, FaceTime, a video meeting, or a camera feature inside another app.

When an app uses both the camera and microphone, iOS displays the green indicator. This makes it easy to recognize that camera access is active.

For accessibility, iPhone also includes Differentiate Without Color. You can find this option under Settings > Accessibility > Display & Text Size. When enabled, the microphone indicator appears as an orange square instead of a circle.

Indicator Shape Sensor Accessed Common Examples
Orange Circle or square Microphone Calls, Siri, voice memos, voice messages
Green Circle Camera or camera + microphone FaceTime, Camera, video calls, QR scanning

Does the Orange Light on iPhone Mean Someone Is Listening?

No. The orange light does not automatically mean someone is secretly listening to you. It means an app is accessing your microphone.

In most cases, there is a simple explanation. You may have started a phone call, recorded a voice message, used Siri, or opened another feature that needs audio input.

Some apps can also request microphone access for specific functions. Communication apps need it for calls, while other apps may use it for voice commands or recording features.

If the orange light appears when you are not using an obvious audio feature, check Control Center. iOS can provide information about the app that recently accessed your microphone.

Common reasons include:

  • You are on a phone or internet call.
  • You are recording a voice memo.
  • You are sending a voice message.
  • Siri or another voice feature is active.
  • A communication app is using the microphone.
  • An app is performing an audio-related function.

Therefore, an orange indicator alone is not evidence of hacking or spying. If an unfamiliar app repeatedly accesses your microphone, review its permissions and investigate further.

How to Identify the App Using Your Microphone

You can check Control Center when you want to find the app responsible for microphone activity. This is especially useful when the orange indicator appears unexpectedly.

On an iPhone with Face ID, swipe down from the top-right corner. On older models with a Home button, swipe up from the bottom of the screen.

Look near the top of Control Center for privacy information. iOS can show which app is currently using, or recently used, the microphone.

If the listed app is familiar, think about what you were doing immediately beforehand. For example, a messaging app may have accessed the microphone because you recorded a voice message.

If you do not recognize the app, review its permissions. Go to Settings > Privacy & Security > Microphone and examine the apps with microphone access.

You can turn off access for any app that does not need the microphone. Keep in mind that disabling permission may stop certain app features from working.

Does the Green Light on iPhone Mean Someone Is Watching You?

No. The green light does not automatically mean someone is watching you through your iPhone camera. It indicates that an app is currently accessing the camera.

You may see the green indicator when using the Camera app, FaceTime, video conferencing services, or camera features inside social media apps. If you are also comparing iPhone camera capabilities, you can explore this iPhone 18 Pro camera review for a closer look at Apple’s camera hardware and photography features.

Other apps can also require camera access. Banking apps may use the camera for document or check scanning. Payment apps and utilities may use it to scan QR codes.

Apps normally need your permission before accessing the camera. You can later review or revoke that permission through iPhone’s privacy settings.

If the green indicator appears unexpectedly, open Control Center and check the privacy information. This can help identify the app that recently accessed the camera.

Do not immediately assume that an unexpected green light means someone is remotely watching you. Instead, check which app triggered it and review its permissions.

Go to Settings > Privacy & Security > Camera to see which apps have camera access. You can disable access for apps that do not require this permission.

Does the Green Light Mean Someone Is Listening?

The green light can appear when an app uses both your camera and microphone. This commonly happens during video calls, video recordings, and other features that capture video with sound.

For example, a video conferencing app may need the camera to display your image and the microphone to transmit your voice. In this situation, iOS displays the green indicator.

The green indicator takes priority when both sensors are active. Therefore, you may not see a separate orange indicator at the same time.

This does not mean that every green indicator automatically confirms microphone use. The green indicator specifically tells you that the camera is being accessed.

If you want to check the details, open Control Center after noticing the indicator. The information displayed there can help identify the app involved.

You can also review camera and microphone permissions under Settings > Privacy & Security. If an app does not need either permission, you can turn it off.

Understanding this distinction prevents unnecessary concern while still giving you a practical way to investigate unexpected sensor activity.

How Can I Tell If Someone Is Listening to My iPhone?

If you are worried about unexpected microphone activity, iPhone provides several tools to help you investigate. These tools can show which apps have access to your microphone and help you review their activity.

Start with Control Center when you notice the orange indicator. It can provide information about recent microphone access and help identify the app involved.

Next, check your permissions. Open Settings > Privacy & Security > Microphone and review every app listed there.

You can also use App Privacy Report to examine app activity. When enabled, it provides information about access to certain sensors and data.

Do not assume that one unexpected indicator proves that someone is spying on you. Many normal iPhone features and third-party apps can legitimately access the microphone.

Instead, look for a pattern of unexplained activity. Useful things to check include:

  • Unexpected microphone or camera access.
  • Unfamiliar apps with sensitive permissions.
  • Unusual battery consumption.
  • Unexpected mobile data usage.
  • Unknown configuration profiles.
  • Other unexplained changes in device behavior.

These checks can help you determine whether the activity has a normal explanation or deserves further investigation.

1. Check Control Center Sensor Activity

Control Center is one of the quickest ways to investigate the green and orange lights on iPhone. When you notice an indicator, open Control Center and check the privacy information near the top.

The information can identify an app that is currently using, or recently used, the microphone or camera. This is particularly useful when the indicator disappears before you can identify its cause.

For example, you may finish recording a voice message and then notice the orange light disappear. Opening Control Center can help you determine which app recently accessed the microphone.

If the listed app is familiar and matches something you just did, the activity is probably expected.

If you do not recognize the app, investigate further. Go to Settings > Privacy & Security and review its microphone or camera permissions.

Control Center should be your first check because it is quick and does not require additional software.

It can provide useful context before you make assumptions about why an indicator appeared.

2. Audit App Permissions in Privacy & Security

Your iPhone lets you control which apps can access sensitive hardware. Reviewing these permissions is one of the simplest ways to improve your privacy. Keeping your iPhone running smoothly can also make everyday app management easier, so you may want to review these fast fixes for speeding up your iPhone.

Open Settings > Privacy & Security > Microphone. You will see apps that have requested permission to use your microphone.

Review each app and consider whether it genuinely needs microphone access. You can switch off access for apps that do not require it.

Next, return to Privacy & Security and select Camera. Review the apps that have camera permission.

Pay particular attention to apps you rarely use. A game, shopping app, or utility may not need microphone or camera access for its main purpose.

However, an unusual permission does not automatically mean that an app is malicious. Some apps include features that may require access you did not expect.

If you disable a permission, the related feature may stop working. You can always return to the same settings and enable access again.

Regular permission reviews can reduce unnecessary access and give you better control over your iPhone’s sensitive sensors.

3. Review the App Privacy Report

App Privacy Report can help you understand how apps interact with your iPhone. It provides information about certain app activity, including access to sensors such as the microphone and camera.

To find it, open Settings > Privacy & Security > App Privacy Report. If the feature is not active, follow the instructions to turn it on.

Once enough activity has been recorded, review the Data & Sensor Access section. Look for microphone and camera activity that you do not recognize.

The report is useful because it can reveal patterns over time. Instead of investigating only one unexpected indicator, you can review recorded activity from different apps.

For example, you may notice repeated microphone access from an app you rarely use. That information gives you a reason to review the app’s permissions and settings.

However, the report does not automatically prove that an app has misused your information.

Use it together with Control Center and your privacy settings. These tools provide a clearer picture of how apps interact with your iPhone’s sensitive sensors.

4. Watch for Other Unusual Device Activity

An unexpected green or orange indicator does not automatically mean that spyware is installed. If you are concerned about unauthorized activity, look for several unusual signs instead of relying on one symptom.

Unexpected battery drain can sometimes indicate increased background activity. However, poor signal strength, battery age, location services, and demanding apps can also reduce battery life. If your iPhone battery is draining faster than expected, these ways to improve iPhone battery life can help you identify common causes and possible solutions.

You can also check Settings > Cellular for unusual mobile data usage. Unexpected data consumption can have many causes, so check which apps used the most data.

Another area worth reviewing is Settings > General > VPN & Device Management. Look for configuration profiles or management entries that you do not recognize.

Do not remove an unfamiliar profile without understanding its purpose. Some profiles are legitimate and may come from an employer, school, or organization.
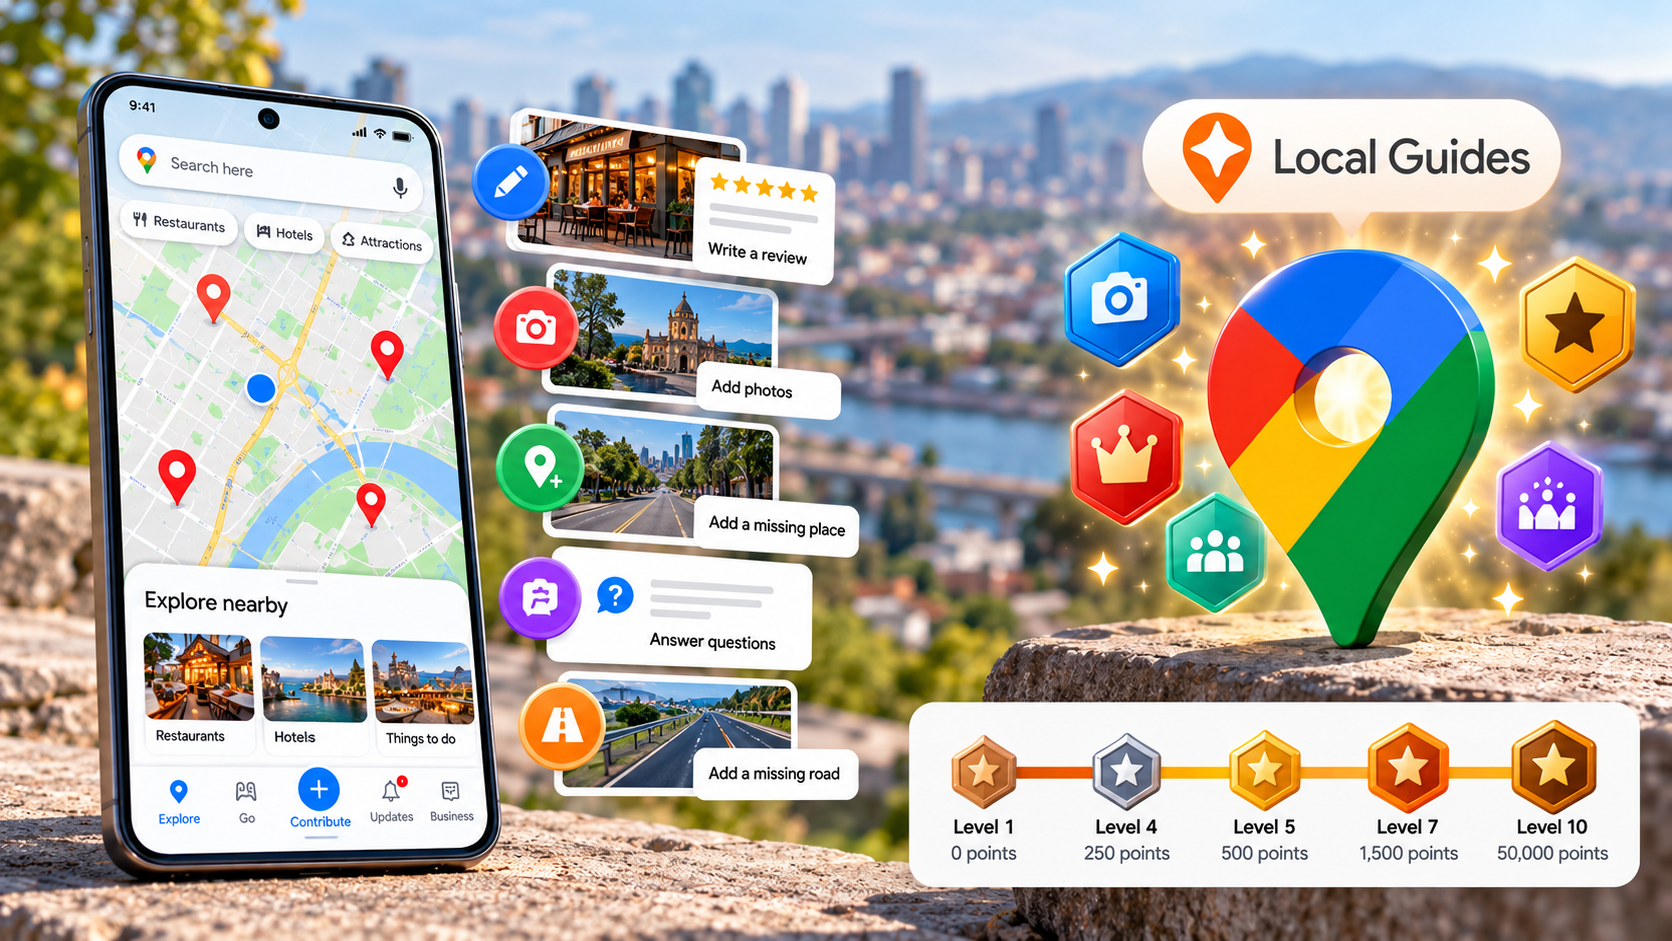
The key is to look for a pattern of unexplained behavior. A single indicator usually has a straightforward explanation.

If several unusual signs appear together, review your installed apps, permissions, device-management settings, and account security more carefully.

Conclusion

The green and orange lights on iPhone are designed to give you more visibility into camera and microphone access. The orange indicator means an app is using your microphone, while the green indicator means an app is accessing your camera or both the camera and microphone.

Seeing either light does not automatically mean your iPhone has been hacked or someone is spying on you. In most cases, the indicator appears because you are using a feature that needs camera or microphone access.

If an indicator appears unexpectedly, check Control Center to identify the app. You can also review camera and microphone permissions under Settings > Privacy & Security and use App Privacy Report to investigate app activity.

These simple checks can help you understand what your apps are doing and keep unnecessary sensor access under control. Instead of ignoring the indicators, use them as a practical privacy tool to stay informed about your iPhone.

Google Maps Vs. Waze: Which App Should You Choose?

Google Maps Vs. Waze: Which Navigation App Should You Choose?

Choosing between Google Maps vs Waze depends largely on how you drive. Both apps provide navigation, traffic information, and route planning. However, they are built around different priorities.

Google Maps is a broad travel and navigation platform. It combines driving directions with local business information, public transit, walking routes, cycling directions, and trip planning. It is also useful when you need information about a place before you arrive, including how Google Maps knows a business is busy.

Waze focuses much more heavily on driving. Its community-driven system uses reports from drivers to provide information about traffic, crashes, road closures, police presence, and other incidents. Google explains how the two navigation services share some incident information in its official Google Maps and Waze update.

That difference matters when choosing a navigation app. Google Maps vs. Waze is less about finding one universal winner. It is more about matching the app to your driving needs, travel habits, and preferred interface.

Is Waze Actually Better Than Google Maps?

Waze is not automatically better than Google Maps. Its advantages become more noticeable when real-time traffic and driver reports are your main priorities. Google Maps offers a broader collection of navigation and travel features.

For a daily commute through heavy traffic, Waze can be useful because its community reporting system provides frequent updates about conditions on the road. Drivers can report crashes, congestion, construction, police presence, lane closures, and other incidents.

Google Maps also supports incident reporting. Current Google documentation lists reports for crashes, traffic jams, mobile speed cameras, police, construction, lane closures, objects on the road, flooding, and other conditions.

The bigger difference is the overall experience. Waze is built primarily around driving and live road conditions. Google Maps combines navigation with local search and several transportation modes.

Route Optimization and Routing Style

Waze is designed around real-time driving conditions and frequent route adjustments. Its community contributes information about crashes, congestion, road closures, and other incidents. That information can influence the routes shown to drivers, while tools such as Android Auto Gemini voice commands can also make hands-free driving interactions more convenient.

This approach can be useful during busy commutes. When traffic changes suddenly, Waze may suggest an alternative route. However, drivers should not assume that every shortcut will be faster or more convenient.

Google Maps also uses live traffic information and alternative routes. Its broader navigation system considers road conditions and travel information while providing several route options. Google has also added features such as toll estimates for certain journeys.

Neither app should be described as simply “aggressive” or “conservative” in every situation. Routing can vary by location, traffic conditions, road data, and destination.

For drivers, the practical difference is simple. Waze emphasizes live community-driven road information, while Google Maps combines routing with a much broader travel ecosystem.

Road Hazards and Community Alerts

One of Waze’s defining features is its community reporting system. Drivers can contribute information about conditions they encounter on the road. That can include crashes, traffic, construction, road hazards, and police presence.

Waze says its community plays an important role in keeping road information current. Its volunteer community includes map editors and other contributors who help maintain the service.

Google Maps also has community-driven incident reports. Users can report crashes, congestion, mobile speed cameras, police, construction, lane closures, objects on roads, flooded roads, and low visibility. Other drivers can also confirm whether reported incidents are still present.

Google has also stated that some incident information shown in Maps comes from both Maps and Waze communities. Users can see the source of certain reports.

This means the gap between the two apps is smaller than it once was. Waze still places more emphasis on live driver reports, while Google Maps presents those reports within a broader navigation experience.

Travel Modes and Everyday Usability

Google Maps has a major advantage when your trip involves more than driving. The app supports multiple transportation options and is designed for everyday travel beyond the car.

Depending on location, Google Maps can provide directions for driving, walking, cycling, and public transportation. It also combines navigation with local search, making it useful when you need to find restaurants, shops, stations, or other places.

Waze is much more focused on road navigation. Its core experience is built around drivers and real-time road conditions. For iPhone users comparing alternatives, Apple Maps or Google Maps offers another useful navigation comparison.

Google Maps is also useful before a journey begins. You can research destinations, compare places, check business information, and plan routes. Google’s Maps product has increasingly emphasized exploring neighborhoods and discovering places, not just turn-by-turn navigation.

For people who mainly drive, Waze can provide a focused experience. For people who use several transportation modes, Google Maps offers considerably broader functionality.

Feature / Capability Google Maps Waze
Primary focus Navigation, travel, and local discovery Driving navigation and live road conditions
Traffic information Live traffic and incident reports Strong focus on community-reported incidents
Incident reporting Crashes, congestion, police, construction, and more Extensive community-based road reporting
Supported travel modes Driving, walking, cycling, and public transit Primarily road-based navigation
Offline maps Downloadable maps are available Does not offer Google Maps-style offline map downloads
Local discovery Extensive business and place information More limited
Interface Information-rich and map-focused Driving-focused with frequent alerts

Why Did People Stop Using Waze?

There is no single reason that explains why someone might move away from Waze. User preferences differ, and Waze continues to have a large global user base. In December 2022, Waze said it had about 150 million monthly active users worldwide.

One possible reason is the app’s strong focus on live driving information. Frequent alerts and route changes can be useful during congestion. However, some drivers may prefer a simpler navigation experience with fewer interruptions.

Another factor is that competing navigation apps have adopted more incident-reporting features. Google Maps now allows users to report several road incidents, including crashes, congestion, police, speed cameras, construction, and lane closures.

The distinction between the apps has therefore become less dramatic. Google Maps has adopted more community-based traffic information, while Waze remains focused on its driving-first experience.

Battery and data consumption can also vary based on device, network conditions, screen brightness, trip length, and how frequently the app recalculates routes. It is therefore too broad to claim that Waze will always drain more battery than competing navigation apps.

For some drivers, the decision comes down to interface preference. Waze emphasizes alerts and live driving information, while Google Maps provides a broader travel experience.

Which Navigation App Is Best?

There is no universal answer to the Google Maps vs. Waze question. The better choice depends on what you need from a navigation app.

Waze may suit you if:

  • You commute through heavy traffic regularly.
  • You value frequent community-reported road updates.
  • You mainly need driving navigation.
  • You want an interface centered on live road conditions.

Google Maps may suit you if:

  • You travel by car, bicycle, foot, or public transportation.
  • You frequently search for businesses and destinations.
  • You take road trips and need broader trip-planning tools.
  • You want downloadable offline maps.
  • You prefer navigation combined with local discovery.

Google Maps can also be useful when your journey involves several stops or activities beyond simply reaching a destination. Its local search capabilities make it easier to research places before and during a trip.

Waze can make more sense when the driving experience itself is the priority. Its community-based reporting system remains central to the product.

For iPhone users, Apple Maps is another option worth considering. It provides navigation and Apple ecosystem integration, although its feature availability can vary by country and region.

Instead of asking which app is objectively better, consider what you value most: traffic alerts, route flexibility, offline access, travel modes, or local information.

Is Waze Owned by Google?

Yes. Google owns Waze. Google announced that it had completed its acquisition of Waze in June 2013. At the time, Google said Waze’s product development team would remain in Israel and operate separately.

The two products remained separate consumer apps for years. Waze continued to maintain its own identity and community, while Google Maps developed its own navigation and mapping features. This distinction is also useful when comparing Google Maps and Google Earth, which are separate Google products with different purposes.

That organizational structure changed in December 2022. Waze announced that it was joining Google’s Geo organization, which also oversees products such as Google Maps, Google Earth, and Street View. Waze also confirmed that its consumer app would remain a standalone product.

This distinction is important. Google owns both services, but Google Maps and Waze are still separate apps with different user experiences.

The relationship between the products has also become closer. Google has said that some incident information shown in Maps comes from both Maps and Waze communities. Waze has also described collaboration between its teams and Google’s Geo organization.

So, if you were wondering whether Waze was simply renamed Google Maps, the answer is no. Waze remains a separate navigation product under Google’s ownership.

Is Waze on the Boycott List?

This question needs careful wording because different boycott campaigns use different criteria and target lists.

The BDS movement’s current published materials identify Google/Alphabet as a pressure or divestment target. Its materials cite Google’s involvement in Project Nimbus, a cloud contract involving the Israeli government and military.

Because Google owns Waze, someone following a campaign against Google services may also choose not to use Waze. However, that is different from saying that Waze itself appears as a separately named priority target on the BDS materials reviewed here.

Waze was founded in Israel and was acquired by Google in 2013. Its corporate history can therefore be relevant to people researching the issue. Google confirmed the acquisition in its 2013 announcement.

The connection to Project Nimbus comes through Google’s ownership, not through evidence that Waze is itself a contractor under that project. The BDS movement specifically identifies Google and Amazon in its materials concerning Nimbus.

For readers researching ethical or political consumer choices, it is useful to separate three facts:

  • Waze is owned by Google.
  • Google is identified by BDS as a campaign target.
  • That does not automatically mean Waze is separately listed as a BDS priority target.

Consumers who want alternatives can consider services such as OpenStreetMap-based navigation apps or platform-native navigation tools. The right alternative depends on the features and privacy model the user wants.

Google Maps vs. Waze: Which One Should You Choose?

The choice between Google Maps vs. Waze ultimately depends on how you travel. Waze is built around driving, live traffic conditions, and community-reported road incidents. It can be particularly useful for commuters who regularly deal with changing traffic.

Google Maps offers a broader experience. Along with driving directions, it provides public transit, walking and cycling routes, offline maps, and detailed information about businesses and destinations.

If your priority is real-time driving information, Waze may fit your routine better. If you want one app for navigation, travel planning, and local discovery, Google Maps offers a more complete range of features.

Rather than choosing based on which app is universally better, consider your typical journeys. The right navigation app is the one that provides the features, route information, and driving experience you actually need.

Can You Get Rewarded For Contributing To Google Maps?

Can You Get Rewarded for Contributing to Google Maps? Here’s What You Get

If you want to know whether you can be rewarded for contributing to Google Maps, you should first understand how Google’s Local Guides program works. Google gives contributors points when they share useful reviews, photos, ratings, edits, answers, and other information on Maps. Those points help contributors reach higher Local Guides levels.

However, Google does not treat Local Guides like a regular paid job. You do not receive a salary or guaranteed cash payment for writing reviews or uploading photos. Instead, Google offers recognition, badges, early access to selected features, and invitations to special events.

Google’s Local Guides program lets users contribute reviews, photos, ratings, answers, and other information to Google Maps. If you want to understand how the program works, including its contribution system and eligibility requirements, you can learn more about the Google Local Guides program directly from Google.

Also, Local Guides is different from Google Opinion Rewards. Opinion Rewards can provide rewards for completing surveys, while Local Guides focuses on improving information on Google Maps.

So, how does the system work? What contributions earn the most points? And can you actually make money from Google Maps? Let’s break down the details.

Can you earn by contributing to Google Maps?

Yes, Google rewards eligible Maps contributions with points. However, those points do not work like money. Instead, they help you progress through the Google Local Guides program and reach higher contributor levels.

You can earn points in several ways. For example, you can write reviews, rate places, upload photos, add videos, answer questions, edit place information, add missing places, and check facts. These contributions can also help Google Maps provide useful information about local businesses, including how busy a location may be at different times. You can learn more about how Google Maps knows a business is busy.

Google currently uses the following points system:

Google Maps contribution Points
Review 10
Review with more than 200 characters 10 bonus
Rating 1
Photo 5
Photo tag 3
Video 7
Caption in a photo update 10
Answer 1
Q&A response 3
Edit 5
Add a place 15
Add a road 15
Fact check 1
Report incorrect information 1

Therefore, your contribution type determines how quickly you collect points. Google also says your points can take up to 24 hours to appear.

Importantly, Google can remove points when a contribution violates its policies. So, simply posting large amounts of content will not guarantee higher rewards.

What Rewards Do Google Maps Contributors Receive?

The main Google Maps contributor rewards involve recognition and access rather than direct payment. As you collect points, you move through the 10 Local Guides levels. Google currently starts at Level 1 and ends at Level 10.

Your first Local Guides badge arrives when you reach Level 4 with 250 points. The badge appears with your eligible contributions and helps identify you as an established Local Guide.

Furthermore, Google says active contributors can receive benefits such as early access to Google features and invitations to special events. However, Google does not promise the same benefits to every contributor.

The main benefits include:

  • Local Guides badges for reaching qualifying levels.
  • Early access to selected Google features.
  • Invitations to special events.
  • Other rewards or benefits that Google may offer to eligible contributors.

However, you should be careful with older articles that promise specific gifts, discounts, merchandise, or subscriptions. Google does not guarantee a permanent reward catalog.

In other words, you can be rewarded for contributing to Google Maps, but you should not expect a fixed payment for every review, photo, or edit.

How Many Points Can You Earn on Google Maps?

Google gives different numbers of points for different types of contributions. Consequently, the type of content you create affects how quickly you can increase your Local Guides level.

For instance, a normal review earns 10 points. If your review contains more than 200 characters, Google adds another 10 bonus points.

Similarly, each photo earns 5 points, while each video earns 7 points. Adding a missing place or road earns 15 points.

Your total points determine your Local Guides level:

Level Points required
Level 1 0
Level 2 15
Level 3 75
Level 4 250
Level 5 500
Level 6 1,500
Level 7 5,000
Level 8 15,000
Level 9 50,000
Level 10 100,000

Google says your points and level can take up to 24 hours to update. Also, points do not normally expire, although Google can reduce them when it removes content for policy violations.

Therefore, think of points as a progress system rather than a payment system. More points can help you reach higher levels, but they do not convert into cash.

Can I get paid for using Google Maps?

No, ordinary Google Maps usage does not pay you. Searching for restaurants, checking directions, finding businesses, or using navigation does not automatically earn Local Guides points. If you regularly use mapping services, it is also useful to understand the difference between Google Maps and Google Earth, since the two products serve different purposes.

Instead, Google awards points for eligible contributions that you submit to Maps. These contributions include reviews, ratings, photos, videos, answers, edits, missing places, roads, and fact checks.

However, you can earn money from professional services related to Google Maps. For example, businesses may hire people to improve their local online presence or manage their Google Business Profile. If you also use mapping apps for personal navigation, you may want to compare Apple Maps and Google Maps to understand how their navigation features differ.

Possible professional services include:

  • Local SEO consulting
  • Google Business Profile management
  • Local search optimization
  • Business photography
  • 360-degree content services
  • Digital marketing
  • Software development using mapping technology

These activities differ from the Local Guides program. In those cases, a client pays you for a professional service.

Therefore, you should not confuse earning money around Google Maps with receiving money from Google for Local Guides contributions.

If your goal involves direct income, building a professional service can follow a different path from collecting Local Guides points.

Can We Earn Money by Giving Reviews on Google Maps?

No, you cannot use ordinary Google Maps reviews as a legitimate way to earn guaranteed money. Google does not pay users simply because they write reviews, rate businesses, or upload photos. Instead, the Local Guides program gives eligible contributors points and other forms of recognition.

More importantly, Google prohibits paid and incentivized reviews. Its policy says a review becomes prohibited when a payment, discount, free product, free service, or another benefit influences the contribution. Google also prohibits reviews that manipulate a business’s rating.

For example, a restaurant cannot legitimately offer you money in exchange for a five-star review. Likewise, you should not accept a discount in return for changing a negative review to a positive one.

Google can remove reviews that violate these rules. It can also take action against accounts that repeatedly post fake or misleading content. Businesses can face restrictions as well, including temporary limits on new reviews or the removal of existing reviews.

Therefore, if someone promises “get paid for every Google Maps review,” treat the offer with caution. An official Local Guides contribution does not work like a paid review job.

Instead, write reviews based on your genuine experiences. You can still earn Local Guides points while helping other people make better decisions.

Does Google Rewards Really Pay?

Yes, Google Opinion Rewards can provide real rewards, but it works separately from Google Maps and the Local Guides program. Google Opinion Rewards sends eligible users short surveys from market researchers. In return, Google provides a reward for qualifying completed surveys.

However, Google Opinion Rewards does not pay users for writing Google Maps reviews. If you want to be rewarded for contributing to Google Maps, you need to use the Local Guides program instead. Local Guides contributors earn points for eligible reviews, photos, edits, ratings, and other Maps contributions.

The reward from Opinion Rewards depends on the platform, location, survey, and other factors. Some users receive Google Play credits, while supported users can receive payments through PayPal.

Google also says survey frequency can vary. You cannot simply open the app and request unlimited surveys. Instead, Google sends notifications when eligible surveys become available.

That difference explains why people often confuse Opinion Rewards with Google Maps rewards. Some surveys can ask about places you recently visited, including stores, restaurants, or other businesses. However, Google rewards the eligible survey response, not a public Maps review.

Program What you do Reward
Local Guides Write reviews, upload photos, edit Maps information, and answer questions Points, levels, badges, and possible benefits
Google Opinion Rewards Complete eligible surveys Google Play credits or supported payments
Google Maps Search, browse, and navigate No direct payment

So, Google Opinion Rewards really can provide rewards, but it should not be confused with getting paid for Google Maps reviews. If you want to be rewarded for contributing to Google Maps, focus on genuine Local Guides contributions rather than paid reviews.

Conclusion

You can be rewarded for contributing to Google Maps, but Local Guides should not be treated as a regular income source. Google mainly rewards contributors through points, levels, badges, and occasional program benefits.

If you enjoy sharing useful reviews, photos, ratings, and local information, the Local Guides program can give your contributions added recognition. However, avoid offers that promise money for positive or incentivized reviews.

Also, remember that Google Opinion Rewards works differently. It can provide rewards for eligible surveys, but those rewards do not come from writing Google Maps reviews.

Ultimately, the safest approach is simple: contribute genuine information, follow Google’s policies, and view Local Guides rewards as recognition rather than guaranteed income.

What Is the 60-60 Rule for Headphones?

What Is the 60-60 Rule for Using Headphones?

The 60-60 rule for headphones is a simple listening guideline designed to help reduce the risk of noise-induced hearing damage. It recommends keeping your volume below 60% and taking regular breaks from continuous listening.

However, listening to loud audio for long periods can increase the risk of noise-induced hearing loss (NIHL). The World Health Organization’s safe listening guidance recommends keeping personal-audio volume below 60% of maximum and taking regular breaks.

The 60-60 rule for headphones provides a simple way to reduce that risk. It encourages listeners to keep volume below 60% of maximum and take regular breaks.

The rule is useful, but it should not be treated as an exact medical limit. The actual sound reaching your ears depends on your device, headphones, recording, and surroundings.

For better protection, combine the 60-60 approach with measured sound levels, shorter exposure at higher volumes, and regular listening breaks.

What Is the 60-60 Rule for Using Headphones?

The 60-60 rule for headphones is a simple safe-listening guideline. It recommends keeping your personal-audio volume below 60% of maximum and taking regular breaks from continuous listening.

The World Health Organization recommends keeping personal-audio volume below 60% of maximum. It also advises staying below about 80 dB average when sound exposure can be measured.

The second “60” is commonly interpreted as limiting continuous listening sessions to about 60 minutes. After that, taking a quiet break can reduce continuous exposure. WHO recommends taking frequent breaks, although it does not prescribe a universal 10- or 15-minute break after every 60 minutes.

A practical approach is:

  • Keep headphone volume below 60% of maximum.
  • Avoid listening continuously for long periods.
  • Take regular breaks in a quiet environment.
  • Reduce volume further in quiet surroundings.
  • Use noise-cancelling headphones when appropriate.
  • Monitor sound exposure when your device provides that feature.

The key idea is simple: lower volume and shorter exposure reduce hearing risk.

Why Does the 60-60 Benchmark Help Protect Hearing?

Hearing risk depends mainly on sound level, listening duration, and repeated exposure. Louder sounds require less exposure time before they become potentially harmful.

Inside the cochlea, sensory hair cells help convert sound vibrations into signals that the brain can interpret. Repeated exposure to excessive sound can damage these cells and other structures involved in hearing. Permanent noise-induced hearing loss can result from repeated or prolonged exposure to loud sounds.

This is why volume and duration should be considered together. A moderately loud sound may be tolerated for much longer than a very loud sound.

The 60-60 approach provides an easy habit for people who do not regularly measure sound levels. However, 60% volume does not equal a fixed decibel level. Different headphones and devices can produce very different sound levels at the same volume setting.

WHO’s current guidance gives a more measurable benchmark. Adults can generally listen to 80 dB for up to 40 hours per week under its safe-listening framework. At higher levels, the available listening time falls quickly.

So, the 60-60 rule works best as a practical starting point, not as a guarantee of safe exposure.

Is 70 dB Safe for Your Ears?

A sound level around 70 dB is generally well below the WHO adult leisure-listening limit of 80 dB. WHO’s safe-listening framework allows up to 40 hours of exposure at 80 dB per week.

The risk still depends on how often and how long you encounter the sound. A single sound level does not tell the complete story.

For perspective, WHO lists normal conversation at roughly 60 dB. Its examples place heavy traffic inside a vehicle around 85 dB and a hair dryer around 100 dB. These figures are approximate because real-world sound levels vary.

Sound level Example WHO weekly reference
30–40 dB Quiet room or library Generally unlimited
60 dB Normal conversation Generally unlimited
70 dB Moderate background sound Well below 80 dB
80 dB Loud everyday sound Up to 40 hours
90 dB Shouted conversation About 4 hours
100 dB Hair dryer About 20 minutes
110 dB Very loud sound About 2.5 minutes

The important point is that higher volume dramatically reduces safe listening time. WHO’s guidance shows that 90 dB allows far less weekly exposure than 80 dB.

What Is the 7-Day Limit for Headphones?

The so-called 7-day headphone limit refers to a weekly sound allowance. WHO and ITU’s safe-listening standard uses a cumulative exposure model rather than treating every listening session separately.

For adults, the WHO/ITU framework uses 80 dB for up to 40 hours per week. The exposure time decreases as sound levels rise. For example, WHO lists 83 dB for 20 hours, 86 dB for 10 hours, and 92 dB for 2.5 hours per week.

This approach is based on the relationship between sound intensity and exposure duration. With a 3 dB exchange rate, every 3 dB increase roughly halves the permitted exposure time.

NIOSH also uses a 3 dB exchange rate for occupational noise exposure. Its occupational recommendation is 85 dBA for an eight-hour workday, falling to four hours at 88 dBA and two hours at 91 dBA. However, NIOSH specifically notes that this workplace limit is not intended as a general environmental recommendation.

Modern devices can help users monitor sound exposure. Some devices can warn users or reduce volume automatically when exposure becomes excessive. These features are useful because they focus on total sound dose, not simply the device’s volume percentage.

How Many Hours a Day Is It Safe to Wear Headphones?

There is no universal number of hours that is safe for everyone. Hearing risk depends on sound level, exposure time, frequency, and individual circumstances.

For acoustic safety, WHO’s adult reference is more useful than a fixed daily headphone limit. It allows up to 40 hours per week at 80 dB. At 90 dB, that allowance falls to about four hours per week. At 100 dB, it falls to about 20 minutes per week.

Headphone comfort also matters. Wearing earbuds or headphones for long periods can cause discomfort even when the sound level itself is not excessive.

Potential problems include:

  • Earwax buildup: In-ear devices can interfere with normal earwax movement.
  • Moisture: Earbuds can create a warm, enclosed environment inside the ear canal.
  • Pressure: Tight headphones can cause soreness around the ears or head.
  • Temporary symptoms: Loud listening can cause muffled hearing or ringing.

A practical routine is to keep volume low, take regular breaks, and clean and maintain your headphones according to the manufacturer’s instructions. WHO also recommends taking frequent breaks from loud sounds.

If you experience persistent tinnitus, muffled hearing, or difficulty following conversations, consider getting your hearing checked by a qualified professional.

Why Are Gen Z Wearing Wired Headphones?

Wired headphones have become more visible among younger listeners, including some Gen Z users. The trend has both cultural and practical explanations, as explored in this guide to why Gen Z is using wired headphones.

One factor is nostalgia. Wired earbuds are associated with the aesthetics of the 2000s and early smartphone era. They can also work as a fashion accessory and create a recognizable retro appearance.

There are practical reasons, too. Wired headphones do not require a separate charging case or Bluetooth pairing. They can also be inexpensive to replace, which matters for people who frequently lose small earbuds.

Other advantages can include:

  • No battery requirement: Traditional wired models work without charging.
  • Simple connection: Plugging them in can be easier than pairing a wireless device.
  • Low latency: A wired connection can reduce noticeable audio delay.
  • Easy replacement: Basic wired earbuds are often inexpensive.
  • Consistent availability: They remain useful when wireless batteries are depleted.

However, wired headphones are not automatically safer for hearing. Volume and exposure time still determine much of the hearing risk, regardless of whether the connection is wired or wireless. WHO recommends keeping personal-audio volume below 60% and monitoring sound exposure when possible.

The resurgence of wired audio is therefore better understood as a mix of style, simplicity, cost, and convenience rather than a hearing-health solution.

Conclusion

The 60-60 rule for headphones offers a simple way to build safer listening habits. Keeping the volume below 60% and taking regular breaks can help reduce prolonged exposure to loud sound.

However, volume percentage alone does not tell you the exact sound level reaching your ears. Different headphones and devices can produce different decibel levels at the same setting.

For better hearing protection, keep your listening volume comfortable, avoid long periods of loud audio, and use your device’s hearing-safety features when available. If you notice persistent ringing, muffled hearing, or difficulty understanding conversations, consider having your hearing checked.

Wired or wireless, headphones can be part of your daily routine without becoming a hearing risk. If you are comparing the two formats, this guide to wired vs wireless audio can help you understand their differences. The key is to control volume, limit exposure, and give your ears regular breaks.

Google Pixel 10 vs OnePlus 15: Which Has Better Battery Life?

Google Pixel 10 vs OnePlus 15 Battery Life: Which Phone Lasts Longer?

The Google Pixel 10 vs OnePlus 15 battery life comparison highlights two different approaches to smartphone endurance. The OnePlus 15 focuses on a much larger battery, fast charging, and high-performance hardware. The Google Pixel 10 combines a smaller battery with Google’s Tensor G5 processor and software optimization.

Battery capacity is important, but it does not tell the whole story. Display settings, processor efficiency, network strength, background apps, and usage habits can all affect daily battery life.

Google rates the Pixel 10 for 24+ hours of battery life and lists a 4,970mAh typical battery with 30W USB-C PPS charging. You can check Google’s official Pixel 10 specifications for the complete battery and charging details.

The OnePlus 15 has a significant hardware advantage in battery capacity and charging speed. The Pixel 10 takes a different approach by focusing on software integration, AI features, camera processing, and long-term updates.

If battery endurance and fast charging are your main priorities, the OnePlus 15 has the stronger battery-focused specifications. However, the Pixel 10 can still provide dependable everyday battery life for users who prefer Google’s software experience.

Which One Is Better, OnePlus 15 or Pixel 10?

The answer depends on what you expect from your phone. The OnePlus 15 and Pixel 10 are both flagship-class smartphones, but they emphasize different areas. OnePlus focuses heavily on battery capacity, charging, performance, and gaming. Google focuses more on software integration, photography, AI features, and long-term support.

For the Google Pixel 10 vs OnePlus 15 battery life comparison, the hardware difference is particularly important. The OnePlus 15 uses a substantially larger battery than the Pixel 10. It also offers much faster wired charging in supported markets. If you want to understand how charging habits can affect battery health, see our guide to overnight charging and smartphone batteries. That combination can be useful for heavy users who frequently need to recharge during the day.

The Pixel 10 uses a smaller battery, but Google’s software optimization helps it deliver all-day use under normal conditions. Its lower charging speed means it is less focused on rapid battery recovery.

Feature OnePlus 15 Google Pixel 10
Battery technology Silicon NanoStack Lithium-ion
Battery capacity 7,300mAh 4,970mAh typical
Wired charging Up to 120W in supported markets 30W USB-C PPS
Wireless charging Up to 50W in supported markets Up to 15W
Processor Snapdragon 8 Elite Gen 5 Google Tensor G5
Display Adaptive high-refresh-rate display 60–120Hz OLED
Software OxygenOS Pixel software experience

Performance and Daily Endurance: OnePlus 15

The OnePlus 15 is designed for users who demand strong performance throughout the day. Its large battery gives it considerably more capacity than the Pixel 10. That extra capacity can be useful during gaming, video streaming, navigation, photography, and extended mobile data use. OnePlus users can also explore useful accessories for OnePlus phones to make everyday use more convenient.

The phone also combines its large battery with flagship-level processing hardware. This makes it suitable for demanding applications and games. Its high-refresh-rate display can make scrolling and gaming feel smoother, although higher refresh rates can increase power consumption.

Charging is another major part of the OnePlus approach. The phone supports very fast wired charging in supported markets. This means users can recover a significant amount of battery in a relatively short period.

The Google Pixel 10 vs OnePlus 15 battery life difference becomes especially noticeable for heavy users. A larger battery provides more capacity before the phone needs a charger. Fast charging also reduces the amount of time spent connected to a power outlet.

For users who frequently game, stream, travel, or use demanding applications, the OnePlus 15’s battery hardware is an important advantage.

Daily Software and Camera Experience: Google Pixel 10

The Pixel 10 takes a more software-focused approach to the smartphone experience. Its battery is smaller than the OnePlus 15’s, but Google combines it with the Tensor G5 processor and Android software designed specifically for Pixel devices.

Google claims the Pixel 10 can provide more than 24 hours of battery life under its testing conditions. Extreme Battery Saver can extend the claimed runtime significantly when enabled. Actual results depend heavily on how the phone is used.

The Pixel 10 also focuses strongly on photography and artificial intelligence. Google’s image-processing system is designed to improve photos without requiring users to manually adjust many camera settings.

The phone also benefits from Google’s software ecosystem. Pixel-exclusive features, AI tools, and long-term software support are important parts of its overall appeal.

For the Google Pixel 10 vs OnePlus 15 battery life comparison, the Pixel 10 does not compete through battery capacity. Instead, it combines a smaller battery with software optimization and a broader software experience.

Users who mostly browse the web, use messaging apps, take photos, stream content, and perform everyday tasks may find the Pixel 10’s battery sufficient for a full day.

Is the OnePlus 15 Battery Draining Fast?

A large battery does not guarantee that every user will experience excellent battery life. If your OnePlus 15 battery is draining quickly, the cause may be related to settings, applications, network conditions, or demanding workloads. Features such as bypass charging can also be useful when managing battery heat and charging during demanding tasks.

The display is one of the first things to check. High brightness and frequent use of high refresh rates can increase power consumption. Gaming can increase consumption even further because the processor, graphics hardware, display, and cooling system remain active for extended periods.

Mobile network conditions can also affect battery life. A phone operating in an area with weak cellular coverage may use additional power while maintaining a stable connection.

Background applications are another common cause. Social media, navigation, cloud services, and other applications may continue working after you stop actively using them.

Software updates can temporarily change battery behavior as well. Background optimization and application processing may increase activity for a short period.

Before assuming there is a hardware problem, check the phone’s battery-usage information. It can help identify whether a particular application or system feature is consuming an unusual amount of power.

Primary Causes of Battery Drain on OnePlus Devices

Several factors can cause faster-than-expected battery drain on the OnePlus 15. Understanding these causes makes it easier to identify the problem instead of changing random settings.

Display brightness is one of the most obvious factors. Keeping the display near maximum brightness for long periods can significantly increase power consumption. A high refresh rate can also use additional energy during demanding activities.

5G connectivity can affect battery life when coverage is weak. The modem may work harder when the phone repeatedly searches for or maintains a connection.

Gaming and demanding applications are another major factor. Graphics-intensive games place sustained demands on the processor and display. Video recording and editing can also increase power usage.

Background applications may continue syncing, tracking locations, or processing data when you are not actively using them.

After a major software update, temporary background activity may also increase consumption. However, not every battery problem is caused by an update.

The easiest way to identify the actual cause is to check the battery statistics. Look for applications that consume unusually high amounts of power compared with your normal usage.

How to Diagnose and Reduce High Battery Drain

Start by opening the phone’s Battery Usage section. Check which applications and system functions have consumed the most power. An application using an unusually large percentage may need attention. You can also explore hidden features on OnePlus phones that may help you get more from the device.

Next, review the display settings. Use adaptive brightness instead of keeping brightness manually near maximum. Adaptive refresh behavior can also help reduce unnecessary power consumption during lighter tasks.

You should also review background activity. Applications that do not need constant synchronization may not need unrestricted background access. However, avoid restricting essential messaging or communication applications if you rely on immediate notifications.

Network conditions can also influence battery life. If you frequently use your phone in an area with weak cellular coverage, higher power consumption may be unavoidable.

Gaming is another area where expectations matter. Long gaming sessions can consume battery quickly, even on phones with very large batteries.

Avoid regularly draining the phone to extremely low levels simply to calibrate the battery. Modern battery-management systems generally do not require routine full discharge cycles.

If battery drain remains unusually high after checking these factors, restart the phone and check for software updates. Persistent problems may require manufacturer support.

Which Phone Is Better, the Google Pixel or the OnePlus?

The broader Pixel-versus-OnePlus comparison involves more than battery life. Both brands offer different approaches to Android, and those differences can affect which phone fits your needs.

OnePlus places considerable emphasis on hardware performance. Its flagship phones typically focus on fast processors, high-refresh-rate displays, large batteries, rapid charging, and gaming features.

Google takes a more integrated approach. Pixel phones combine Google’s Android software with custom Tensor processors, computational photography, AI tools, and Pixel-exclusive features.

The Google Pixel 10 vs OnePlus 15 battery life comparison therefore represents only one part of the decision. The OnePlus 15 has a substantial battery-capacity advantage, while the Pixel 10 offers a software-focused experience.

Camera performance is another important difference. Google has built much of the Pixel identity around computational photography. OnePlus instead combines high-end camera hardware with its own processing and software features.

Software support is also important. Google has committed to long-term updates for the Pixel 10.

Your choice should therefore depend on your daily priorities. Battery capacity, charging speed, gaming, cameras, software features, and update support can all matter differently depending on how you use your phone.

Google Pixel Ecosystem: Software Integration and Imaging

Google’s Pixel strategy focuses on integrating hardware, Android, artificial intelligence, and photography. The Pixel 10 uses Google’s Tensor G5 processor and provides several features designed around Google’s software ecosystem.

Photography is one of the major Pixel strengths. Google’s computational photography processes images automatically to improve exposure, detail, color, and other aspects of everyday photos.

The Pixel 10 also includes AI-powered features designed to make everyday tasks easier. These features are integrated directly into the Pixel software experience rather than being treated as separate applications.

Another important consideration is software support. Google provides long-term software and security updates for Pixel devices, which can help users keep their phones for several years.

The Pixel approach is therefore different from simply maximizing hardware specifications. Google emphasizes how the processor, operating system, camera system, and AI tools work together.

For users who value a clean Android experience and Google’s software ecosystem, these features can be more important than having the largest possible battery.

However, the Pixel 10’s smaller battery and slower charging mean that it is not designed around maximum charging speed. Users who frequently need rapid top-ups may prefer the OnePlus approach.

The Google Pixel 10 vs OnePlus 15 battery life difference is therefore only one part of the larger ecosystem comparison.

OnePlus Ecosystem: Raw Speed and Power Engineering

OnePlus has traditionally focused on speed, responsiveness, charging, and performance. The OnePlus 15 continues that approach with a large battery, high-end processing hardware, and fast charging.

Its 7,300mAh battery provides substantially more capacity than the Pixel 10. OnePlus also supports high-speed wired charging in supported markets. This combination is particularly useful for people who spend long periods away from a charger.

The phone also focuses on gaming performance. Its high-refresh-rate display can provide smoother motion during supported gaming scenarios. However, using higher refresh rates and demanding graphics settings can increase power consumption.

Thermal management is another important part of the design. Sustained workloads generate heat, so cooling hardware helps the phone maintain performance during demanding activities.

OxygenOS also provides customization and multitasking features. Users who like changing interface settings or managing several applications may appreciate this flexibility.

For battery-focused users, the most important difference is simple: OnePlus prioritizes battery capacity and charging speed more heavily than Google does.

This does not mean every user will see the same battery results. Network strength, brightness, applications, refresh rate, and usage patterns still influence endurance.

Still, the hardware specifications make the OnePlus 15 particularly relevant for users who prioritize large battery capacity, fast charging, gaming, and sustained performance.

Which Is Better, OnePlus 15 or Google Pixel 10a?

The OnePlus 15 and Google Pixel 10a belong to different smartphone categories. The OnePlus 15 is a flagship model designed around high-end performance, battery capacity, charging, and gaming. The Pixel 10a targets users who want Google’s software experience at a lower price point.

That makes a direct comparison less straightforward. The OnePlus 15 has considerably more performance-focused hardware and a much larger battery. The Pixel 10a instead focuses on delivering Google’s core software and camera experience in a more affordable package.

Battery capacity is one of the clearest differences. The OnePlus 15 uses a 7,300mAh battery, while the Pixel 10a uses a smaller battery designed around its own hardware and software configuration.

Charging also differs between the two product categories. OnePlus focuses heavily on rapid charging, while Google’s A-series phones are generally positioned around more moderate charging speeds.

The Pixel 10a can still appeal to users who do not need flagship performance. Its camera processing, software features, and Google ecosystem remain important selling points.

Therefore, the comparison should focus on priorities rather than treating the two phones as direct competitors. The OnePlus 15 emphasizes hardware performance and endurance. The Pixel 10a emphasizes value and Google’s software experience.

Where the OnePlus 15 Outperforms the Pixel 10a

The biggest difference between the two phones is their hardware positioning. The OnePlus 15 is a flagship designed for demanding workloads, while the Pixel 10a is positioned as a more affordable Pixel device.

Battery capacity is one of the most obvious differences. The OnePlus 15 has a 7,300mAh battery, giving it substantially more capacity than the Pixel 10a.

Charging is another major difference. OnePlus supports much faster wired charging in supported markets. This can make a significant difference for users who regularly need to recharge their phone quickly.

Processing performance is also an important consideration. The OnePlus 15 uses Qualcomm’s flagship Snapdragon 8 Elite Gen 5 platform. The Pixel 10a uses Google’s Tensor G4 processor.

The OnePlus 15 also has a high-refresh-rate display and hardware designed for demanding workloads. These features make it more suitable for gaming and intensive multitasking.

However, higher performance can also mean higher power consumption during demanding tasks. Battery life still depends on how the phone is used.

For users who prioritize:

  • Large battery capacity
  • Fast charging
  • Gaming performance
  • High-refresh-rate display
  • Sustained hardware performance

the OnePlus 15 offers a more hardware-focused configuration.

Where the Google Pixel 10a Remains Compelling

The Pixel 10a focuses on delivering Google’s software experience without requiring users to purchase its most expensive flagship models. That makes it a different proposition from the OnePlus 15.

Camera processing is one of the Pixel A-series’ important features. Google’s computational photography can help the phone produce strong everyday photos without relying entirely on expensive camera hardware.

Software is another major consideration. Pixel devices provide Google’s Android experience and access to Pixel-specific features. Users who already prefer Google’s ecosystem may find this more important than raw specifications.

The Pixel 10a also targets users who do not need the highest processor performance. Browsing, messaging, social media, photography, streaming, and everyday applications do not always require flagship-level hardware.

Its lower position in Google’s product range can also make it more accessible to buyers who want Pixel features without moving to a flagship price.

The OnePlus 15 has advantages in battery capacity, charging, and performance hardware. However, those features may not justify choosing a flagship for someone with lighter usage needs.

The Pixel 10a is therefore better understood as an affordable Pixel experience, rather than a direct competitor to the OnePlus 15.

For buyers comparing these phones, price, camera features, software preferences, performance requirements, and battery expectations should all be considered together.

Google Pixel 10 vs OnePlus 15 Battery Life: Final Comparison

The Google Pixel 10 vs OnePlus 15 battery life comparison shows a clear difference in hardware strategy. OnePlus gives the 15 a much larger battery and significantly faster charging capability. Google uses a smaller battery and focuses more heavily on software integration and Pixel features.

The OnePlus 15’s 7,300mAh battery gives it a substantial capacity advantage over the Pixel 10’s 4,970mAh typical battery. Its high-speed wired charging also makes quick top-ups a major part of the phone’s design.

The Pixel 10 still targets dependable everyday battery life. Google claims more than 24 hours of battery life under its testing conditions, while Extreme Battery Saver can extend usage considerably in supported scenarios.

Real-world results will vary. Gaming, camera use, mobile data, brightness, refresh rate, background applications, and network strength can all change battery performance.

For this reason, battery capacity should not be treated as a guaranteed number of hours.

The practical difference is easier to understand through priorities:

  • OnePlus 15: Larger battery, faster charging, gaming-focused hardware, and high performance.
  • Google Pixel 10: Software integration, AI features, computational photography, and long-term updates.

If your main concern is battery capacity and charging speed, the OnePlus 15’s specifications are clearly designed around that requirement. If you care more about Google’s software ecosystem and Pixel features, the Pixel 10 offers a different balance.

Ultimately, the best choice depends on how you use your phone rather than battery capacity alone.

Ditching Windows for Mac: Why Switch?

Ditching Windows for Mac: Why People Are Switching From Windows Laptops

Ditching Windows for Mac has become an increasingly common consideration for professionals, developers, students, and remote workers. MacBooks now combine efficient Apple Silicon processors, long battery life, refined hardware, and strong integration with other Apple devices.

For decades, Windows dominated the laptop market through variety, customization, gaming support, and broad software compatibility. Apple’s macOS remained especially popular among creative professionals and users already invested in the Apple ecosystem.

That balance has changed as MacBooks have become more capable and efficient. However, switching platforms is not automatically the right decision. Windows still offers major advantages in gaming, hardware choice, upgradeability, and compatibility with specialized software.

The real question is not whether MacBooks are better than Windows laptops. It is whether a MacBook fits your workflow, software requirements, budget, and expectations.

Is It Better to Get a MacBook or a Windows Laptop?

Neither platform is universally better. The right choice depends on how you use your laptop every day. MacBooks are particularly appealing when battery life, silent operation, build quality, and Apple ecosystem features are important priorities.

A MacBook can be a strong fit if you need:

  • Long battery life for work, study, and travel.
  • Consistent performance across everyday workloads.
  • A high-quality trackpad, display, speakers, and microphone.
  • Unix-based development tools and terminal workflows.
  • Integration with an iPhone, iPad, or Apple Watch.
  • Long-term ownership and strong resale demand.

Windows remains more flexible for users who need:

  • PC gaming and broad DirectX compatibility.
  • NVIDIA or AMD discrete graphics.
  • Touchscreens and 2-in-1 designs.
  • More ports and hardware configurations.
  • Upgradeable components on selected laptops.
  • Windows-only business or professional software.

Students comparing both platforms can also explore Mac or Windows for students before making a decision.

Feature MacBook Windows Laptop
Battery efficiency Excellent on many Apple Silicon models Varies by processor and model
Gaming More limited game library Broad PC gaming support
Hardware choice Limited lineup Very wide selection
Upgradeability Generally limited Available on selected models
Ecosystem Strong with Apple devices Broad device compatibility
Development Strong Unix environment Broad compatibility and flexibility

The key is to compare specific laptops rather than treating either operating system as universally superior.

Is It Worth Ditching Windows for Mac?

Ditching Windows for Mac can be worthwhile, but the decision depends heavily on your software and workflow. Browser-based work, writing, programming, communication, and many creative applications transfer well between platforms.

Compatibility is the biggest issue to investigate before switching. Check every application you depend on, including work software, accounting tools, engineering applications, games, peripherals, and company-specific programs.

Windows users also need time to adjust to macOS conventions. File management works differently because macOS uses Finder instead of File Explorer. Window management also differs from Windows 11, where Snap Layouts make side-by-side multitasking familiar.

macOS provides Mission Control, Spaces, and Stage Manager. Some users also install third-party window-management utilities for additional control.

Keyboard shortcuts require another adjustment. Command replaces Control for many common actions, including copying and pasting. Most users can learn the basics quickly, but the first few days can feel unfamiliar.

Cost also matters. MacBooks generally have higher starting prices, while Windows offers more budget choices. Resale value varies by model, condition, age, and configuration.

Which Will Be Better in 2026, Mac or Windows?

In 2026, the Mac-versus-Windows comparison is less straightforward than it was several years ago. Apple Silicon continues to give MacBooks a strong combination of performance and efficiency, but Windows laptops have improved significantly.

Modern Windows laptops now include efficient ARM and x86 processors designed for longer battery life. Copilot+ PCs also bring dedicated neural processing units to many newer systems, allowing supported AI workloads to run locally.

This has reduced some of the efficiency advantage that helped Apple Silicon stand out when it first arrived.

The two platforms still take different approaches. macOS emphasizes Apple’s tightly integrated hardware and software ecosystem. Windows provides greater hardware variety and supports a wider range of manufacturers and form factors.

Windows also remains important for PC gaming, specialized applications, and legacy software. macOS continues to appeal to developers, creative professionals, and users who prioritize portability and ecosystem integration.

Rather than asking which platform will dominate in 2026, compare the features that matter to your workload. Ditching Windows for Mac makes more sense when macOS solves problems you regularly experience.

Is a MacBook Safer Than a Windows Laptop?

A MacBook is not immune to malware, phishing, or security vulnerabilities. However, macOS includes several security layers designed to make unauthorized software and system changes more difficult.

Apple’s Gatekeeper checks downloaded applications and verifies developer signatures. macOS also uses notarization to help identify potentially malicious software before users open it.

Another important protection is System Integrity Protection (SIP). It restricts even processes with high-level privileges from modifying protected parts of the operating system. This can limit the damage caused by certain attacks.

Modern Macs also include hardware-level security features through Apple Silicon and the Secure Enclave. These technologies support secure boot, encryption, and biometric authentication on compatible devices.

Windows is not fundamentally insecure. Microsoft includes protections such as Microsoft Defender, Secure Boot, hardware-backed security, and other Windows security features.

The practical difference is therefore more nuanced than saying Mac is secure and Windows is unsafe. Both platforms require good security habits. Users should install updates, use strong passwords, avoid suspicious downloads, and remain cautious about phishing messages.

Security should be treated as one factor in the decision, rather than the sole reason for ditching Windows for Mac.

Why Are People Ditching Windows for Mac?

The reasons for ditching Windows for Mac often have less to do with benchmark scores and more to do with everyday usability. A laptop can feel significantly better when small conveniences work consistently throughout the day.

Four factors commonly influence the decision:

  1. Efficient performance: Apple Silicon combines strong performance with relatively low power consumption.
  2. Refined hardware: MacBooks offer an integrated experience across the trackpad, display, speakers, keyboard, and chassis.
  3. Apple ecosystem: Features such as AirDrop and Universal Clipboard connect compatible Apple devices.
  4. Long-term ownership: Strong resale demand can reduce the effective cost of upgrading.

These advantages do not apply equally to every user. Someone who primarily plays demanding PC games may value Windows compatibility more. A professional using Windows-only software may also face unnecessary complications by switching.

The decision therefore comes down to friction. If your current Windows laptop creates problems that macOS can realistically solve, switching may be worthwhile.

If your frustrations are mainly related to a specific laptop’s hardware, however, buying a better Windows laptop could solve the problem without changing operating systems.

1. Consistent Performance on Battery

Apple Silicon changed expectations around laptop efficiency. Current MacBook Air models combine strong performance with a fanless design, which eliminates internal fan noise during normal operation.

Apple’s battery estimates can be useful for comparison, but real-world battery life depends on brightness, applications, network activity, workload, and other settings. Demanding tasks such as video rendering will also consume more power than light web browsing.

This makes MacBooks attractive to students, travelers, writers, developers, and remote workers who frequently work away from a charger.

However, Windows laptops have improved considerably. Newer ARM-based and efficient x86 systems can also deliver strong battery life and responsive performance.

The old assumption that Windows laptops always perform poorly on battery is no longer accurate. Some Windows models now compete closely with Macs in efficiency.

The more useful approach is to compare individual laptop models. Look at processor efficiency, battery capacity, display power consumption, cooling, and independent battery testing.

For users considering ditching Windows for Mac, battery performance should be compared against the Windows laptop they actually own.

2. Refined Hardware Experience

Apple puts considerable emphasis on the physical experience of using a MacBook. The trackpad, keyboard, speakers, display, microphone, and chassis are designed to work together as a complete system.

The Force Touch trackpad uses haptic feedback instead of relying entirely on a conventional mechanical click. This allows consistent feedback across the surface.

MacBook Air models also use a fanless design. That means there is no internal cooling fan producing noise during operation.

Premium Windows laptops can compete strongly in individual hardware categories. Some offer excellent OLED displays, high refresh rates, powerful speakers, comfortable keyboards, and precision trackpads.

The difference is often consistency across Apple’s lineup rather than an absolute hardware advantage.

MacBooks also have a relatively limited selection compared with Windows laptops. Windows buyers can choose from many manufacturers, sizes, designs, processors, graphics options, and price points. Port selection is another difference, especially for users who connect external displays, and understanding why some laptops don’t have HDMI ports can help when comparing different models.

For someone ditching Windows for Mac, hardware quality can be a compelling reason to switch. However, buyers should compare specific models rather than assuming every MacBook automatically beats every Windows laptop.

3. Apple Ecosystem Continuity

The Apple ecosystem can be one of the strongest reasons for ditching Windows for Mac. Its biggest advantage appears when someone already owns multiple Apple devices.

Compatible Macs, iPhones, and iPads can share several features through Apple’s Continuity system. AirDrop makes it easier to transfer files between devices. Universal Clipboard allows compatible content to be copied on one Apple device and pasted on another. If you also use Apple’s cloud storage, understanding iCloud Photos vs Google Photos can help you decide how to manage photos across your devices.

An iPad can also work as an additional display through Sidecar. Universal Control can allow compatible Macs and iPads to share a keyboard and mouse.

These features reduce small points of friction during everyday work. A person writing on a Mac can move a photo from an iPhone without using a cable or separate file-transfer service.

However, the ecosystem advantage is much smaller if you do not use other Apple products.

Windows also works with a broad range of phones, tablets, accessories, and cloud services. Android users may therefore have different priorities.

For existing Apple users, ecosystem integration can be a major part of the switching decision.

4. Resale and Long-Term Ownership

MacBooks often maintain strong resale demand, which can reduce the effective cost of ownership. However, it would be inaccurate to claim that every MacBook automatically retains more value than every Windows laptop.

Resale prices depend on several factors. These include the model, processor, memory, storage, age, physical condition, battery health, and local demand.

MacBooks also have limited user-upgrade options. Buyers should therefore choose memory and storage carefully when purchasing a new machine.

Windows offers more variation. Some laptops have soldered memory, while others allow users to upgrade RAM or storage later. If storage becomes a limitation, knowing how to add more storage to a laptop can help you evaluate whether an upgrade is practical before replacing the machine. Certain models also emphasize repairability and modular components.

The Framework Laptop, for example, is designed around modularity and user-replaceable components. This represents a different approach to long-term ownership.

The initial purchase price is therefore only one part of the calculation. Buyers should consider how long they expect to keep the laptop, potential repair costs, resale value, and upgrade requirements.

For someone ditching Windows for Mac, comparing total ownership costs is more useful than comparing launch prices alone.

MacBook vs. Windows Laptop: Which Fits Your Needs?

The main reason to consider ditching Windows for Mac is not that Windows has become obsolete. Modern Windows laptops remain capable and offer several advantages that MacBooks cannot easily match.

Apple Silicon provides strong efficiency, while macOS offers a Unix-based environment that appeals to many developers. Apple’s hardware integration can also be useful for people who already own an iPhone or iPad.

Windows offers far more hardware choices. It also provides broader PC gaming compatibility, more unusual form factors, and greater access to upgradeable laptops. If neither platform fits your needs, alternatives such as Chromebook vs iPad devices can also be worth considering for lighter computing tasks.

Before switching, check your essential applications and games. Confirm that your work software supports macOS and that your required peripherals work correctly.

Also consider your current hardware problem. If your main complaint is poor battery life, a noisy fan, or an uncomfortable trackpad, you may be able to solve it with a different Windows laptop.

If your main priorities are battery efficiency, Apple’s ecosystem, Unix-based development, and a consistent hardware experience, a MacBook may fit those needs better.

The right choice depends on your actual workflow. Ditching Windows for Mac makes sense when macOS offers practical advantages for the way you work, study, create, or communicate.

How Long Should Your Router Password Actually Be? Expert Guide

How Long Should Your Router Password Actually Be?

If you are setting up a home network or improving digital security, router password length matters. Your router controls access to your network and connects many of your devices.

If an attacker compromises your router, they may access network settings, connected devices, and poorly protected traffic. They may also change DNS settings or exploit vulnerable devices on the network.

So, how long should your router password actually be?

The answer depends on which password you mean:

  • Wi-Fi Network Password (WPA2/WPA3): Aim for at least 15 to 20 characters. WPA2 and WPA3 support passphrases between 8 and 63 ASCII characters. Longer, unique passwords provide stronger protection against guessing attacks.
  • Router Admin Password: Aim for 16 or more characters. Generate it randomly and store it in a password manager when possible. This password protects the router’s administration dashboard, where you manage DNS, firewall, and remote-access settings.

Here is how password length, entropy, and modern cracking methods affect router security.

What is the 8 4 rule for passwords?

The “8 4 rule” represents an older password policy that many organizations once used. It requires a password to contain at least eight characters and characters from four common groups.

Those groups include uppercase letters, lowercase letters, numbers, and special symbols.

The rule aimed to make short passwords harder to guess. However, users often follow predictable patterns when they create passwords under these rules.

For example, someone might capitalize the first letter, replace a letter with a number, and add an exclamation mark at the end. Attackers can account for these common patterns when they test passwords.

Modern password guidance places more emphasis on length and uniqueness. A long password or passphrase can provide stronger protection than a short password with several character types.

For router security, choose a long and unique password whenever your router supports it. Avoid names, addresses, dates, common words, and predictable patterns.

Why the Rule Is Outdated

The traditional 8 4 rule focuses heavily on character types. Modern password guidance places greater emphasis on password length, uniqueness, and resistance to common guesses.

The National Institute of Standards and Technology (NIST) advises against arbitrary password composition rules. These rules can encourage predictable patterns that attackers already understand. A broader password security guide can also help you understand how length, uniqueness, and password habits affect your overall digital security.

For example, users often capitalize the first letter and add a number or symbol at the end. They may also replace familiar letters with predictable numbers or symbols.

Attackers can include these patterns in password dictionaries and cracking rules. As a result, a short password can remain predictable even when it contains several character types.

A longer passphrase can offer better protection while remaining easier to remember. You should therefore prioritize length, randomness, and uniqueness instead of following a rigid character formula.

For your router, use a long password that you do not reuse anywhere else. A password manager can also generate and store a strong random credential.

Is a 20 character password strong?

Yes, a 20-character password can provide extremely strong protection when you choose the characters randomly. Longer passwords create more possible combinations and make exhaustive guessing harder.

However, length alone does not guarantee strength. A predictable sentence, repeated pattern, or previously leaked password can remain easy for attackers to guess.

Password strength often uses entropy to describe the number of possible combinations. A simplified formula is:

E = L × log₂(R)

Here, L represents password length, while R represents the size of the character pool.

For example, a randomly generated 20-character password can provide substantial theoretical entropy. A human-created password usually provides less because people choose familiar words and predictable patterns.

For a home router, combine a long password with secure configuration. Use WPA2 or WPA3, disable unnecessary remote administration, and keep router firmware updated.

A 20-character router password can provide more than enough protection for most home users when it remains genuinely unpredictable and unique.

The Mathematics of a 20-Character Password

Password entropy estimates how many possible combinations an attacker must consider. A simplified formula can help explain how length and character selection affect that number:

E = L × log₂(R)

Here, L represents password length, while R represents the size of the character pool.

A random 20-character password using 26 lowercase letters provides about 94 bits of theoretical entropy. A random password using 62 letters and numbers provides about 119 bits.

These figures assume genuinely random selection. Human-created passwords often provide much less effective entropy because people favor familiar words, names, patterns, and substitutions.

This distinction matters for router security. A password may look complex while following an obvious pattern. Attackers can recognize and test many such patterns automatically.

Focus on length, randomness, and uniqueness instead of trying to include a specific number of symbols. A password manager can generate strong credentials and store them securely.

Practical Context: Wi-Fi vs. Web Services

Wi-Fi passwords and web-service passwords face different attack conditions. An attacker near your network may capture authentication traffic and attempt password guesses offline.

The router cannot necessarily detect or block those offline guesses. This makes password quality especially important for WPA2 and WPA3 networks.

A long, unique, high-entropy Wi-Fi password can make guessing impractical when you also use secure network settings.

Web services often provide additional defenses. These systems can use rate limits, account lockouts, multi-factor authentication, and breached-password screening. These controls can reduce the number of guesses an attacker can make directly against an account. Using multiple authentication factors can add another layer of protection when a password becomes compromised.

For your home network, do not treat router password length as your only security measure. Use a modern Wi-Fi security mode and keep your firmware updated.

You should also disable unnecessary remote administration and review connected devices regularly. A strong password protects authentication, while secure configuration protects the wider network.

What is the longest password ever?

No single password holds the title of “longest password ever” across all computing systems. Each protocol, application, and authentication system can impose its own limit.

Wi-Fi provides a useful example. WPA2 and WPA3 commonly support passphrases up to 63 ASCII characters. A 64-character hexadecimal value can also represent a raw 256-bit key in relevant configurations.

Other systems can accept much longer input. Linux authentication tools and web applications may support hundreds of characters or more, depending on their configuration.

However, extremely long passwords do not automatically provide better security. Some systems may truncate long passwords or impose processing limits.

For home security, you do not need hundreds or thousands of characters. A long, random, unique password already provides a strong foundation.

Instead of chasing the maximum possible length, ask a more practical question: What strong password length does my router support?

Choose a credential that provides strong security without creating unnecessary usability problems.

Technical Upper Limits in Consumer Systems

Consumer systems use different password limits. Wi-Fi provides a clear example because WPA2 and WPA3 commonly support passphrases up to 63 ASCII characters.

A hexadecimal representation can also represent a 256-bit key in relevant configurations.

Linux and Unix systems can support long passwords, but their behavior depends on the authentication system and configuration. Older systems often imposed much shorter limits.

Web services and APIs also set their own limits. Developers may restrict input length for compatibility, resource management, or security reasons.

These limits do not mean you should always choose the maximum length. A strong, randomly generated password between 20 and 30 characters already provides substantial protection for most home users.

Before choosing a long password, check your router’s documentation. If the router rejects the credential, shorten it while preserving randomness and uniqueness.

Do not add predictable symbols simply to reach a specific character count. Strong randomness matters more than unnecessary complexity.

Notable Extreme Passwords in History

Security professionals have experimented with unusually long passphrases for decades. These examples demonstrate that some systems can handle far more text than ordinary users need.

Some Linux and Unix authentication configurations have supported passwords containing thousands of characters. The actual limit depends on the authentication framework, configuration, and hashing system.

Security guidance has also discussed memorable sentences as alternatives to short, complicated passwords. A memorable passphrase can help users create longer credentials without relying on complex character substitutions.

However, extreme length does not automatically create better security. A long quotation from a famous book, song, or speech may remain easy to guess.

Attackers can add common quotations and phrases to their wordlists. A shorter randomly generated password may therefore provide stronger protection than a very long predictable phrase.

For router security, focus on practicality. Choose a credential that offers sufficient length, strong randomness, and uniqueness.

A password manager can generate and store that credential, so you do not need to memorize an extremely long password.

What is the most commonly hacked password?

The password “123456” has repeatedly appeared near the top of public lists of the world’s most common passwords. Other common choices include “password,” “123456789,” “qwerty,” and repeated numbers.

Attackers do not need to guess these passwords randomly. Automated tools can test common passwords, leaked credentials, and familiar patterns very quickly.

If a password appeared in a previous data breach, attackers may already have it in their password lists. Reusing that password on your router creates another security risk.

Some routers have also used predictable administrative credentials. Manufacturers have historically shipped devices with default usernames and passwords that users sometimes leave unchanged.

Change your router’s default administrator password as soon as possible if the device allows it. Choose a unique credential that you do not use for email, banking, social media, or other accounts.

A strong password cannot solve every router security problem. Firmware updates, secure Wi-Fi settings, remote-access controls, and device configuration also matter. You should also understand how malware spreads so you can recognize the broader risks that follow a compromised device.

The safest approach combines strong router password length with secure configuration and current firmware.

The Top Router-Specific Weak Passwords

Weak router credentials often follow simple patterns. Users may keep factory defaults because they provide a convenient way to access the device.

Common examples include:

  • Username admin, password admin
  • Username admin, password password
  • Username root, password root
  • Username admin, password 1234
  • A blank username or password combined with a default value

These examples do not apply to every router. Manufacturers use different credentials and security systems across models.

Check your router’s documentation to identify its default credentials. Then change the administrator password during setup.

Keep your Wi-Fi password separate from your router administrator password. Each credential protects a different part of the system.

A unique administrator password can reduce the risk from reused or exposed credentials. A strong Wi-Fi password helps prevent unauthorized wireless access.

If your router supports password manager-generated credentials, use that option. Store the credential securely so you do not need to choose an easy password for convenience.

Never reuse your router administrator password on another service. If an attacker obtains that password elsewhere, they could try it against your router.

The Real Danger: Automated Botnet Scanning

Attackers and botnets can scan routers automatically for exposed services and weak credentials. These automated systems can examine large numbers of internet-connected devices without manually targeting each one.

The risk increases when a router exposes its administration interface directly to the internet. Attackers can identify open services and test common credentials against them.

A typical attack may follow these steps:

  1. The scanner identifies an accessible router service.
  2. It tests known default or weak credentials.
  3. If authentication succeeds, the attacker may change settings or install malicious software.
  4. The compromised router may then support additional attacks.

Changing default credentials removes one common attack path. However, an exposed or outdated router can still create security risks.

For stronger protection, disable remote administration unless you genuinely need it. Keep router firmware updated and disable unnecessary services. You should also understand malware protection tips that can help reduce the wider risks associated with compromised devices.

Use WPA2 or WPA3 and choose a long, unique Wi-Fi password. Router security works best as a layered system, rather than relying on password length alone.

Conclusion

Your router password length plays an important role in protecting your home network. However, a longer password does not automatically make your router secure.

For most users, a unique password of 15 to 20 or more characters provides a strong foundation. Choose a randomly generated credential whenever possible, and never reuse it on another service.

Avoid relying on outdated rules that focus only on uppercase letters, numbers, and symbols. Instead, prioritize length, randomness, and uniqueness.

Keep your Wi-Fi password separate from your router administrator password. This gives each security layer its own unique credential.

Password security represents only one part of router protection. Keep your firmware updated, use WPA2 or WPA3, disable unnecessary remote administration, and replace default administrator credentials.

The goal is not to create the longest password possible. The goal is to create a credential that attackers cannot easily predict.

When you combine a strong password with secure router settings, you can significantly reduce common attacks against your home network.

Is The Google Pixel 11’s Extreme Charging Mode Bad For Battery?

Is the Google Pixel 11’s Extreme Charging Mode Bad for Your Battery?

Extreme charging mode on the Google Pixel 11 is designed to recharge your phone faster when you need extra power quickly. However, faster charging can raise concerns about long-term battery health.

The Pixel 11 introduces Extreme Charging Mode, giving users a faster way to recharge when time is limited. Google says the feature works when the battery is at 50% or lower. The phone also manages temperature automatically during charging.

So, does Extreme Charging Mode damage the Pixel 11 battery?

The answer is more nuanced. Faster charging can create additional heat and battery stress. However, modern phones use charging controls to manage these conditions. Occasional use is different from relying on maximum charging speeds during every charging session.

Understanding how extreme charging mode works can help you decide when to use it and which settings can help protect battery health.

What Is Extreme Charging Mode?

Extreme Charging Mode is a Pixel feature designed to prioritize charging speed when you need power quickly. On Pixel 11 and later devices, Google says it becomes available when the battery level is 50% or lower. It can then remain active until the phone reaches a higher charge level or you disconnect the charger.

The feature is different from simply using a more powerful charger. The phone controls the charging process and adjusts its behavior based on conditions such as temperature.

When Extreme Charging Mode is active, Pixel temporarily pauses some background activities. For example, app updates can be paused while calls, texts, and notifications continue to work.

This approach helps the phone focus more of its available power on charging. It does not mean the charger continuously forces maximum power into the battery.

Google also states that the phone automatically manages temperature changes during Extreme Charging Mode. That protection is important because excessive heat can contribute to battery aging.

The feature is therefore best understood as a faster charging mode controlled by the phone, rather than an uncontrolled power surge.

Is Extreme Charging Mode Bad for Your Battery?

Using Extreme Charging Mode is not inherently harmful to your Pixel 11. Google designed the feature specifically for Pixel 11 and later devices and includes automatic temperature management.

However, charging speed is only one part of battery aging. Battery longevity is also affected by heat, charging habits, battery level, usage patterns, and time spent at high charge levels.

Fast charging can generate more heat than slower charging. Heat is an important factor in lithium-ion battery aging. This is why keeping a phone cool during demanding charging sessions is useful.

The Pixel 11 also does not use Extreme Charging continuously from empty to full under every condition. Google states that the feature is available when the battery is 50% or lower. The system can also disable it when the battery reaches a higher charge level or charging is disconnected.

For everyday use, there is little reason to avoid Extreme Charging when you genuinely need a quick top-up. The bigger concern is unnecessary heat and prolonged charging at high battery levels.

For better long-term battery health:

  • Use Extreme Charging when you need speed.
  • Avoid charging in direct sunlight or excessive heat.
  • Limit intensive phone use while charging.
  • Use compatible USB-C charging equipment.
  • Consider an 80% charging limit if you rarely need a full battery.

You can also review common phone charging myths to avoid habits that may unnecessarily affect battery health.

The important distinction is between occasional fast charging and consistently exposing the battery to unnecessary heat.

Does the Pixel 11 Support Reverse Charging?

The Pixel 11 supports wireless charging through Google’s Pixelsnap system. Google lists Qi2.2-certified wireless charging at up to 25W for the Pixel 11.

However, the original claim that the Pixel 11 can use Battery Share to reverse-charge earbuds, watches, or another phone should not be presented as a confirmed Pixel 11 feature without device-specific documentation.

This matters because wireless charging and reverse wireless charging are not the same feature. Wireless charging allows the phone to receive power from a compatible charging accessory. Reverse charging allows the phone itself to act as a wireless power source.

If your article is specifically about Pixel 11 features, it is safer to focus on Google’s documented Pixelsnap charging capabilities. Google confirms that the Pixel 11 can charge through a compatible Pixelsnap Charger at up to 25W.

Wireless charging can also produce additional heat compared with wired charging. The charging environment therefore still matters when battery longevity is the priority.

For readers, the practical advice is simple: use compatible wireless accessories when convenient, but keep the phone cool during charging. If the phone becomes unusually warm, reducing charging speed or moving it to a cooler location can help.

This section should not promise reverse charging capabilities unless Google specifically confirms them for the Pixel 11 model.

How to Make a Pixel Charge to 100%

If your Pixel stops charging at 80%, it may be using Google’s Charging optimization feature. Google provides an 80% charging limit to help prioritize long-term battery health. If you usually charge your phone overnight, it is also worth understanding whether overnight charging ruins your smartphone battery.

To allow the phone to charge to 100%, open:

Settings → Battery → Battery health → Charging optimization

From there, you can choose between Adaptive Charging and Limit to 80%. Google recommends the 80% option when you normally finish the day with battery remaining.

1. Turn Off the 80% Charging Limit

If Limit to 80% is enabled, switch to another charging option when you need a full battery.

Google states that turning off the 80% limit allows the phone to reach 100%.

This does not mean you should charge to 100% every time. A lower charging limit can reduce the time the battery spends at a high charge level.

2. Use Adaptive Charging

Adaptive Charging is useful when you regularly charge overnight. Pixel learns your charging habits and can delay the final part of charging until closer to when you normally unplug the phone.

Google says Adaptive Charging needs about 14 days to learn your charging habits.

This reduces the amount of time the phone remains fully charged.

3. Allow Battery Protection to Finish

Pixel can also temporarily limit charging when certain conditions are detected. Google says battery protection can limit charging to around 70%–80% during prolonged charging or high-temperature conditions.

If you need a full charge, Google provides a Charge to full option when battery protection is active.

Does the Google Pixel 11 Have Fast Charging?

Yes. The Pixel 11 supports fast wired charging through USB-C and USB Power Delivery. Google’s specifications state that the Pixel 11 can reach up to 55% in about 30 minutes using a 30W USB-C PPS charger or higher.

This is an important correction to the common assumption that a 45W or 65W charger automatically makes the Pixel 11 charge at those speeds. A higher-rated charger does not mean the phone will draw that full wattage. Understanding 5V 1A vs. 5V 2A charging can also help explain why different power ratings affect charging speed.

Google’s official specifications identify 30W PPS as the charging requirement for the Pixel 11’s advertised wired charging performance.

Fast Charging Requirements

For reliable fast charging, use:

  • A USB-C PPS charger rated at 30W or higher.
  • A compatible USB-C cable. If you are unsure about cable quality, understanding whether USB-C cables are more reliable than Lightning cables can help when choosing charging accessories.
  • A wall outlet rather than a slower power source such as some laptops.

Google also recommends compatible USB-C power adapters for Pixel charging.

Charging speed can still vary. Google notes that actual results depend on factors such as usage, battery age, and ambient temperature.

The Pixel 11 also supports Extreme Charging Mode when the battery is at 50% or below. This mode is designed for situations where getting more battery quickly matters.

Should You Use Extreme Charging Mode Every Day?

Extreme Charging Mode is useful, but you do not need to use it for every charging session. Its main purpose is to provide faster charging when you are short on time.

For normal overnight charging, Google’s Adaptive Charging feature is better suited to battery-conscious users. It can delay the final part of charging so the phone spends less time sitting at 100%.

If you usually finish the day with plenty of battery remaining, the 80% charging limit is another option. Google specifically provides this setting to prioritize long-term battery health.

A practical charging routine could look like this:

  • Need a quick boost: Use Extreme Charging Mode.
  • Charging overnight: Use Adaptive Charging.
  • Usually have plenty of battery: Consider the 80% limit.
  • Phone feels hot: Move it somewhere cooler and reduce intensive use.
  • Need maximum battery life for a long day: Charge to 100%.

The goal is not to avoid fast charging completely. Instead, avoid creating unnecessary heat and avoid keeping the battery at a high charge level for long periods.

Extreme Charging Mode is therefore a convenience feature, not something Pixel 11 owners need to fear.

What’s The Strongest 3D Printer Filament? (Material Guide)

What’s the Strongest 3D Printer Filament?

Choosing the strongest 3D printer filament is not as simple as finding the highest tensile-strength number. Different materials behave differently when exposed to weight, impact, heat, bending, and repeated stress.

A rigid material may support a heavy static load but crack when dropped. A tougher material may bend under pressure and absorb the impact without breaking. This difference matters when choosing filament for functional 3D-printed parts.

Before comparing materials, it helps to understand the basic printing process. If you’re new to the technology, our guide on how a 3D printer works explains how a digital model becomes a physical object through slicing, G-code, and layer-by-layer printing.

For FDM printing, engineers and makers usually consider several mechanical properties, including tensile strength, impact resistance, flexural strength, and interlayer adhesion. You can also compare these characteristics across common materials using Prusa’s Filament Material Guide.

  • Tensile strength: How much pulling force a material can withstand before stretching or breaking.
  • Impact resistance: How well a printed part handles sudden shocks, collisions, or drops.
  • Flexural strength: How well the material resists bending when a load is applied.
  • Interlayer adhesion: How strongly individual printed layers bond together along the Z-axis.

Interlayer adhesion is especially important because the connection between layers can become the weakest part of an FDM print.

Therefore, the strongest 3D printer filament for one project may not be the strongest choice for another. The right material depends on how the finished part will be used.

What Is the Strongest Filament for 3D Printing?

The strongest 3D printer filament options generally come from the PAEK family of high-performance polymers. PEEK and PEKK are two well-known examples, while ULTEM, or PEI, is another engineering-grade material used for demanding applications.

These materials can provide excellent mechanical strength, heat resistance, and chemical resistance. However, their impressive specifications come with significant printing requirements.

PEEK, for example, can offer tensile strength around 90–100 MPa. It can also withstand continuous operating temperatures above 250°C in suitable applications. Reinforced versions can provide even greater stiffness and dimensional stability.

The problem is accessibility. Printing these materials typically requires specialized hardware, high nozzle temperatures, heated build plates, and actively heated chambers.

For most desktop users, the strongest 3D printer filament is therefore more likely to be carbon-fiber-reinforced nylon or polycarbonate. These materials provide high mechanical performance without requiring the same industrial equipment as PEEK.

Your printer’s capabilities should always be considered before selecting an engineering filament.

Industrial High-Performance Polymers: PEEK and PEKK

PEEK and PEKK are among the strongest materials used in high-performance additive manufacturing. Their mechanical properties make them suitable for applications that require high strength, chemical resistance, and heat resistance.

PEEK can provide tensile strength of roughly 90–100 MPa. It can also maintain performance at temperatures far beyond common consumer materials such as PLA and PETG.

Carbon-fiber reinforcement can further increase stiffness and dimensional stability. This makes reinforced PEEK attractive for demanding engineering applications.

However, these materials require specialized equipment. Typical printing requirements can include:

  • Nozzle temperatures between 380°C and 450°C.
  • Heated build plates reaching approximately 120°C to 150°C.
  • Actively heated chambers reaching approximately 90°C to 140°C.

Without adequate temperature control, parts can experience severe warping or layer delamination.

For most consumer and prosumer printers, PEEK and PEKK are therefore impractical. They are better suited to industrial systems designed specifically for high-temperature engineering materials.

The strongest 3D printer filament on a technical data sheet is not automatically the most practical material for your printer.

The Strongest Practical Filaments for Desktop 3D Printers

For desktop machines, polycarbonate and carbon-fiber-reinforced nylon are among the strongest practical engineering materials.

Polycarbonate is one of the strongest unreinforced polymers commonly used on capable desktop printers. It can provide tensile strength around 65–75 MPa, high rigidity, and heat-deflection temperatures around 110–130°C.

However, polycarbonate generally requires an all-metal hotend and an enclosure. Controlling temperature is important because the material can warp during printing.

Carbon-fiber nylon combines nylon’s toughness with the stiffness provided by chopped carbon fibers. This reinforcement can improve rigidity and dimensional stability while reducing some of nylon’s tendency to deform.

Material Tensile Strength (MPa) Impact Resistance Heat Deflection Temp. Desktop Printer Feasibility
PEEK / PEKK 90–100+ Very High 250°C+ Industrial
Polycarbonate (PC) 65–75 High 110–135°C Prosumer
PA-CF 70–85 Very High 140–175°C Intermediate
PETG 45–55 Moderate 65–75°C Easy
Standard PLA 50–65 Low 50–55°C Entry-Level

This makes PC and PA-CF strong candidates when you need the strongest 3D printer filament that remains realistic for desktop manufacturing.

Is PETG or PLA+ Stronger?

When comparing PETG and PLA+, there is no single answer because strength depends on the type of load. A rigid component may benefit from PLA+, while a part exposed to impact may perform better with PETG.

PLA+ is usually formulated from PLA with additional modifiers. These formulations can improve toughness while maintaining much of PLA’s rigidity. For slow, steady loads, PLA+ can perform well.

PETG has greater ductility and elongation at break. Instead of failing suddenly, it can flex and deform before breaking. This behavior can be useful for parts exposed to vibration, impact, or repeated handling.

Heat resistance is another important difference. PLA+ can soften at relatively low temperatures. PETG generally provides better resistance to heat and outdoor conditions.

Therefore, neither material should automatically be called the strongest 3D printer filament in every situation.

For rigid indoor parts, PLA+ may be more suitable. For parts that experience impact or environmental exposure, PETG may provide better practical durability.

Key Performance Differences

PETG and PLA+ differ most when you look beyond basic tensile strength. Real-world performance depends on impact, layer bonding, heat, moisture, and the environment where the printed part will operate.

1. Impact resistance: PETG generally handles drops, vibration, and sudden shocks better than PLA+. PLA+ is tougher than standard PLA, but it can still behave as a relatively rigid material.

2. Layer adhesion: PETG can form strong bonds between printed layers when the material is printed at suitable temperatures. Good layer adhesion can reduce splitting along the Z-axis.

3. Thermal durability: PLA and PLA+ can soften at approximately 55°C–60°C. A PLA+ part left inside a hot vehicle may deform. PETG generally offers better heat resistance.

4. Environmental durability: PETG typically performs better in applications involving moisture and outdoor exposure.

The practical choice depends on your project. PLA+ can work well for rigid indoor brackets and fixtures. PETG can be better when the part must handle impact, vibration, sunlight, or higher temperatures.

So, if you are searching for the strongest 3D printer filament between these two materials, first define what “strong” means for your application.

Is PETG OK to Drink Out Of?

PETG should not automatically be considered safe for drinking just because PET is widely used for beverage containers. 3D-printed PETG introduces additional factors that do not exist in the same way with commercially manufactured bottles.

The FDM process creates microscopic ridges and gaps between extrusion lines. These areas can be difficult to clean completely and may retain moisture or organic material.

The filament itself can also contain additives. Pigments, processing aids, stabilizers, and other ingredients may vary between manufacturers.

The printer nozzle is another consideration. Many standard nozzles use brass, and some brass alloys contain trace amounts of lead.

If you plan to use a printed PETG object for food or beverages, evaluate the complete printing process rather than the polymer alone.

Use material with appropriate food-contact documentation when available. A suitable stainless-steel nozzle can also reduce concerns associated with brass.

A certified food-contact coating may help seal the printed surface. However, the coating must itself be appropriate for the intended application.

The strongest 3D printer filament is not necessarily the safest material for food contact. Strength and food-contact suitability are separate considerations.

1. The Microscopic Ridges Between Layers

FDM printing creates a part by depositing plastic in individual lines. These lines form visible ridges and microscopic surface imperfections. The effect can become important when the printed object is intended to hold food or liquids.

Even when a print looks smooth, the layer structure can create small areas that are difficult to clean. Moisture and organic residue may remain inside surface imperfections.

This is one reason a 3D-printed PETG container should not automatically be treated like a commercially manufactured beverage bottle.

Surface treatment can reduce these concerns. A properly selected food-contact-safe coating can cover the layer lines and create a smoother surface.

Print quality also matters. Under-extrusion, poor layer bonding, and printing defects can create larger gaps.

For repeated food or beverage contact, evaluate the entire finished object. Consider the filament, additives, nozzle, print settings, surface finish, and cleaning requirements.

A food-contact-compatible coating may provide an additional barrier, but it must be selected for the intended use.

Therefore, choosing the strongest 3D printer filament should never be confused with choosing the most suitable filament for food contact. Mechanical performance and hygiene are separate requirements.

2. Additives, Dyes, and Chemical Residues

The polymer is only one component of commercial 3D printing filament. Manufacturers may add pigments, processing aids, stabilizers, and other ingredients to change the material’s properties.

This matters when evaluating food-contact applications. A polymer that is commonly used in food packaging does not automatically make every filament product suitable for food contact.

Natural or uncolored filament may avoid certain pigment-related concerns. However, it does not automatically make the finished print food-safe.

The specific manufacturer’s documentation is more important. Look for information about food-contact certification, intended use, and recommended processing conditions.

This principle applies beyond PETG. Different filaments can contain different additives, and their suitability depends on the exact product.

If a manufacturer does not provide appropriate food-contact information, avoid assuming that the filament is suitable for repeated contact with food or beverages.

The strongest 3D printer filament may contain additives that are completely appropriate for engineering applications but unsuitable for food contact.

For that reason, select filament according to the intended application rather than relying on the base polymer’s reputation.

3. Nozzle Contamination: Lead and Heavy Metals

The printer nozzle is another factor to consider when producing objects intended for food or beverage contact.

Many FDM printers use brass nozzles because brass is inexpensive, easy to machine, and suitable for many common filaments. However, some brass alloys can contain small amounts of lead.

Using a suitable stainless-steel nozzle can reduce this particular contamination concern. Keeping the nozzle clean is also important.

However, replacing a brass nozzle does not automatically make a printed object food-safe. The filament, additives, printer cleanliness, print quality, and surface treatment still matter.

This is an important distinction when choosing the strongest 3D printer filament for a functional project. Mechanical strength tells you how a material performs under load. It does not tell you whether the finished object is appropriate for food contact.

For general mechanical parts, brass nozzles remain common and practical. The issue becomes more significant when the printed object will directly contact food or beverages.

If food safety is important, evaluate the entire production process. Use materials with appropriate documentation and follow the manufacturer’s recommendations for the specific application.

How to Make a PETG Print Food-Safe

If you intend to use a PETG print around food or liquids, several precautions can reduce potential contamination risks. However, these steps should not be treated as a universal guarantee of food safety.

Start with a filament specifically documented for food-contact applications. Do not assume ordinary PETG is suitable simply because PET is used in commercial beverage containers.

A suitable stainless-steel nozzle can reduce concerns related to potential metal contamination. The printer and nozzle should also be kept clean.

A certified food-contact coating may help seal the microscopic grooves created by FDM printing. This can make the surface easier to clean.

Important precautions include:

  • Use documented food-contact-compatible filament.
  • Use an appropriate stainless-steel nozzle.
  • Keep the printer and nozzle clean.
  • Maintain consistent extrusion and layer bonding.
  • Use a suitable certified coating when necessary.
  • Follow the coating and filament manufacturer’s instructions.

The intended use also matters. A decorative container has different requirements from a cup used every day.

Therefore, the strongest 3D printer filament should be selected based on mechanical requirements, while food-contact applications should be evaluated separately.

Is Nylon or PETG Stronger?

Nylon generally provides better performance than PETG for demanding mechanical applications. It is particularly useful when a part needs impact toughness, fatigue resistance, wear resistance, or flexibility.

PETG remains attractive because it is easier to print. It generally does not require the same level of moisture control as nylon and can often be printed without an enclosure.

Nylon behaves differently under stress. It can absorb energy and deform before breaking. This makes it useful for functional components that experience repeated movement or sudden loads.

Nylon also performs well in applications involving abrasion. Its properties make it useful for gears, bushings, sliding components, and snap-fit parts.

Chemical resistance is another potential advantage. Certain nylon formulations can provide strong resistance to oils, fuels, grease, and solvents.

However, nylon requires more careful preparation. It absorbs moisture quickly and can warp during printing.

Therefore, if you are looking for the strongest 3D printer filament between nylon and PETG, nylon generally has the advantage for demanding mechanical applications. PETG remains easier to print and may be sufficient for less demanding parts.

Why Nylon Outperforms PETG

Nylon’s main advantage is its combination of toughness, flexibility, wear resistance, and mechanical durability. These properties make it useful for functional parts that experience repeated movement.

Toughness and impact absorption: Nylon can stretch considerably before breaking. Under sudden torque or impact, it can absorb energy instead of immediately fracturing.

Wear and abrasion resistance: Nylon has a relatively low coefficient of friction. This makes it useful for gears, bushings, sliding tracks, and snap-fit mechanisms.

Chemical resistance: Depending on the formulation, nylon can resist various oils, fuels, greases, and solvents.

PETG remains useful because it is easier to print and handle. It requires less demanding material storage and printer preparation.

This creates a practical trade-off. Nylon is often the better option for demanding mechanical components, while PETG can be a more convenient choice for general functional parts.

Tensile Toughness & Shock Absorption:

PETG   █████████▒▒▒▒▒▒▒▒▒▒▒  Moderate
Nylon  ███████████████████▒  Exceptional
Abrasion Resistance:

PETG   ██████▒▒▒▒▒▒▒▒▒▒▒▒▒▒  Prone to surface wear
Nylon  ████████████████████  Excellent for moving parts

If mechanical durability is the main priority, nylon deserves consideration before PETG.

The Trade-Off: Printing Difficulty

Nylon’s mechanical advantages come with more demanding printing requirements. A printer that handles PLA and PETG easily may require additional preparation for nylon.

1. Moisture absorption: Nylon is highly hygroscopic. It absorbs moisture from surrounding air relatively quickly. Wet nylon can cause bubbling, foaming, stringing, inconsistent extrusion, and poor layer adhesion.

Nylon should be dried before printing and stored in a dry environment. A sealed container or dry box can help maintain low moisture levels.

2. Thermal warping: Nylon can contract as it cools. This can cause corners to lift from the build plate or produce dimensional inaccuracies.

A heated bed and enclosed build environment can help control temperature changes. Exact requirements depend on the specific nylon formulation.

3. Printer requirements: Some nylon and carbon-fiber nylon materials require high nozzle temperatures. Carbon-fiber-filled filaments can also wear standard brass nozzles quickly.

These requirements make nylon more demanding than PETG. Its mechanical advantages come with additional preparation.

So, while nylon can be a strong candidate for the strongest 3D printer filament, your printer must be capable of handling the material correctly.

What’s Illegal to 3D Print?

A 3D printer is a general-purpose manufacturing tool, but the law can still regulate the objects you produce. What you can legally 3D print depends on the object, purpose, location, and applicable regulations.

Many jurisdictions heavily regulate firearms and certain weapon components. Intellectual property laws can also restrict how you reproduce or commercially sell protected designs.

Other regulated categories include counterfeit currency and certain medical devices. 3D printing does not create an exception to existing manufacturing laws.

If a law restricts an object made through conventional manufacturing, that same law may apply when you produce the object with a 3D printer.

Rules also vary between countries, states, provinces, and municipalities. A restriction in one jurisdiction may not apply in another.

Before you manufacture or sell a potentially regulated object, check the laws that apply to your location and intended use.

The strongest 3D printer filament may work well for engineering applications, but the material itself does not determine whether the law permits the finished object.

1. Undetectable and Unlicensed Firearms

Firearms represent one of the most legally sensitive categories in additive manufacturing. In the United States, federal law sets specific requirements for undetectable firearms.

The Undetectable Firearms Act establishes detection requirements for firearms. Other federal and state laws may also regulate firearm manufacturing and specific components.

Some firearm components require licenses or additional legal compliance. Producing a component at home does not automatically exempt you from those requirements.

Firearm laws also differ internationally. The UK, Australia, Canada, and EU member states each have their own rules for firearms and firearm components.

The exact requirements depend on the object and jurisdiction. For that reason, do not treat general 3D-printing information as legal advice.

If you plan to manufacture a firearm or regulated firearm component, verify the laws that apply before proceeding.

The strongest 3D printer filament does not determine whether an object complies with firearm laws. Legal requirements generally depend on what you manufacture, where you manufacture it, and how you use or transfer it.

Commercial manufacturing can also create additional licensing and regulatory requirements.

2. Weapons Prohibited by State or Federal Statutes

Firearms are not the only objects that can face legal restrictions. Depending on your jurisdiction, laws may regulate the manufacture, possession, sale, or transfer of specific weapons.

Examples can include:

  • Switchblades and gravity knives.
  • Brass knuckles.
  • Throwing stars.
  • Certain concealed weapons.
  • Other objects that local law classifies as prohibited weapons.

The exact rules vary widely. One jurisdiction may prohibit an item while another may allow or regulate it differently.

The intended use can also affect how authorities classify an object. Some jurisdictions distinguish between ordinary tools, sporting equipment, replicas, and objects designed or intended as weapons.

3D printing does not create a special legal exception. If the law prohibits an object made through conventional manufacturing, the same restriction may apply when you produce it through additive manufacturing.

Check the laws in your specific jurisdiction before producing an object that could fall into a regulated category.

If you plan to sell or distribute such objects, additional requirements may apply.

The strongest 3D printer filament remains a material consideration. Whether the finished object complies with the law remains a separate question.

3. Intellectual Property, Counterfeiting, and Trademarks

3D printing can also create intellectual property issues. Owning a printer does not automatically give you permission to reproduce someone else’s protected design.

For example, making a replacement part for personal use can raise different legal questions from manufacturing and selling unauthorized copies.

Potential issues include:

  • Trademark counterfeiting: Producing branded products or logos with the intent to deceive buyers or sell unauthorized copies.
  • Patent infringement: Manufacturing a patented invention or mechanism without appropriate authorization.
  • Copyright infringement: Reproducing protected digital models, artwork, characters, or designs without permission.

The law may treat personal use, repair, modification, and commercial distribution differently.

Licensing also matters. A creator may allow you to download a 3D model while restricting commercial use. Always check the model’s license before selling a printed object based on someone else’s work.

Commercial manufacturers should review ownership rights and licensing terms before they produce or distribute a design.

Choosing the strongest 3D printer filament does not give you ownership of the design you print. Material selection and intellectual property rights remain separate issues.

For commercial projects, verify the model license and applicable intellectual property rules before production.

4. Controlled Medical Devices and Currency

Some 3D-printed objects fall into highly regulated categories because they can affect health, safety, or financial systems. Medical devices and currency-related objects require particular caution.

Currency and security items: Producing objects that you intend to pass as genuine currency or protected financial instruments can constitute counterfeiting or forgery. Laws vary by jurisdiction, but authorities treat intentional deception seriously.

Medical devices: Manufacturing a medical component for personal experimentation differs from manufacturing and distributing a device for patient use.

Products such as dental prosthetics, orthopedic implants, and respiratory components may fall under specific regulatory requirements.

In the United States, agencies such as the FDA regulate many medical devices. Commercial manufacturers may need to meet requirements for manufacturing, testing, labeling, quality, and approval.

A 3D printer does not remove these obligations. Successfully printing an object does not prove that regulators approve the finished product or consider it medically suitable.

The same principle applies when you select the strongest 3D printer filament. Mechanical strength alone cannot establish whether a finished product is safe, approved, or legal.

For regulated applications, verify the applicable requirements before you manufacture or sell the product.

Who Makes GPUs Besides Nvidia and AMD?

Who Makes GPUs Besides Nvidia And AMD?

Who makes GPUs besides Nvidia and AMD? While these two companies dominate the consumer graphics card market, they are not the only companies developing graphics processors. Intel, Apple, Qualcomm, ARM, and other semiconductor companies also design GPUs for PCs, smartphones, servers, and embedded devices.

However, Nvidia and AMD do not represent the entire GPU industry. Once you look beyond retail desktop graphics cards, the market becomes much more diverse. Millions of computers, smartphones, vehicles, servers, and embedded devices use GPUs designed by other technology companies.

The answer to who makes GPUs besides Nvidia and AMD depends on what you consider a GPU. Some companies build discrete graphics cards. Others design integrated GPUs for processors, smartphones, or laptops. Some create GPU intellectual property that other semiconductor companies license.

This distinction matters because companies such as Intel, Apple, Qualcomm, ARM, and Imagination Technologies participate in the GPU market in very different ways.

China also has several domestic GPU developers. India is developing its own semiconductor and accelerator ecosystem, although advanced GPU manufacturing remains dependent on overseas foundries.

Who Else Makes GPUs Other Than Nvidia?

The GPU market extends well beyond Nvidia and AMD. Companies such as Intel, Apple, Qualcomm, ARM, and Imagination Technologies design graphics processors or GPU architectures for different types of devices. Their products may appear inside CPUs, mobile SoCs, laptops, servers, cars, televisions, and embedded systems rather than traditional desktop graphics cards. For a closer look at what modern graphics processors can do beyond gaming, explore things your GPU can do besides playing games.

This means that asking who makes GPUs besides Nvidia and AMD requires looking at the entire graphics ecosystem. A company can participate by designing a complete GPU, integrating a GPU into an SoC, licensing GPU intellectual property, or developing specialized accelerators for artificial intelligence and other workloads.

Several Chinese semiconductor companies are also developing domestic graphics and compute processors. Their products are mainly aimed at local consumer, enterprise, scientific, and AI markets.

The following companies show how broad the GPU industry has become.

1. Intel: Arc and Xe Architectures

Intel is one of the world’s largest suppliers of PC graphics hardware by unit volume because its processors include integrated GPUs. These graphics processors are built directly into many desktop and laptop CPUs, giving Intel a huge presence even when users do not purchase a separate graphics card. Intel’s Core Ultra processors also combine CPU, GPU, and AI capabilities in a single platform.

Intel also develops discrete GPUs under the Intel Arc brand. Its Xe architecture family supports both integrated and standalone graphics products.

Key areas include:

  • Intel Arc: Discrete graphics cards designed for consumer PCs and gaming.
  • Xe architecture: GPU technology used across integrated and discrete products.
  • Xe2: The newer architecture family associated with Intel’s next-generation graphics products.
  • Datacenter graphics: Intel has also developed the Data Center GPU Max family for high-performance computing workloads.
  • Gaudi accelerators: Intel develops Gaudi processors for artificial intelligence workloads.

Intel therefore occupies several parts of the graphics market. It competes in discrete PC graphics while also supplying integrated graphics for its own processor platforms.

2. Apple: Custom GPU Designs

Apple develops custom GPUs as part of its Apple Silicon processors. These graphics processors are integrated into the company’s system-on-chip designs rather than sold as standalone graphics cards.

The approach became especially important after Apple moved away from Intel processors and discrete AMD graphics in its Mac lineup. Apple Silicon combines CPU, GPU, memory, and other processing components within a unified architecture.

Apple’s GPU technology appears across its M-series processors and A-series mobile chips. Higher-end M-series variants can include substantially more GPU resources for demanding workloads.

Apple’s custom graphics designs support features such as:

  • Hardware-accelerated ray tracing on supported generations.
  • Mesh shading for modern graphics workloads.
  • Integrated GPU resources that share unified memory with the CPU.
  • Dedicated neural-processing hardware for machine-learning workloads.

This makes Apple an important GPU designer even though it does not compete with Nvidia and AMD through traditional retail graphics cards.

3. Qualcomm: Adreno GPUs

Qualcomm develops Adreno GPUs, which are integrated into many Snapdragon system-on-chip platforms. Rather than selling standalone desktop graphics cards, Qualcomm combines its graphics technology with CPUs, AI processors, modems, and other components.

Adreno became particularly important in smartphones and other mobile devices. Qualcomm’s Snapdragon processors have used Adreno graphics across numerous generations of Android devices.

The company’s graphics technology has also expanded beyond smartphones. Snapdragon platforms are used in devices such as virtual-reality hardware and Windows-on-Arm computers.

Qualcomm’s PC strategy is especially relevant because integrated Adreno graphics allow thin and lightweight systems to provide GPU capabilities without requiring a separate graphics card.

The main distinction is therefore product design. Nvidia and AMD are major suppliers of discrete graphics cards, while Qualcomm primarily integrates its GPU technology into complete SoC platforms. This difference between integrated and discrete graphics can also affect performance, power consumption, and how a system handles demanding workloads.

For users asking who makes GPUs besides Nvidia and AMD, Qualcomm is an important example of a company whose GPU business is largely hidden inside other products.

4. ARM: Mali and Immortalis

ARM participates in the GPU industry differently from Nvidia, AMD, or Intel. it generally does not manufacture physical GPUs for consumers. Instead, it licenses GPU intellectual property to semiconductor companies that incorporate those designs into their own chips.

Two important ARM GPU families are Mali and Immortalis. Immortalis is designed for higher-end mobile graphics and supports hardware-accelerated ray tracing on compatible implementations.

ARM’s licensing model allows its GPU technology to appear across many types of products. Companies such as MediaTek and other semiconductor manufacturers can integrate licensed ARM GPU designs into their SoCs.

These GPUs can support workloads involving:

  • Smartphone and tablet graphics.
  • Mobile gaming.
  • Automotive displays and computing.
  • Smart televisions.
  • Embedded devices.

This makes ARM an important part of the GPU supply chain without requiring the company to sell traditional graphics cards.

The distinction between GPU designer and GPU manufacturer is important here. ARM supplies the underlying IP, while another semiconductor company typically produces the final physical chip.

5. Imagination Technologies: PowerVR and IMG GPUs

Imagination Technologies is a UK-based semiconductor IP company with a long history in graphics processing. Its GPU technology has appeared in mobile devices, embedded systems, automotive products, and other specialized hardware.

The company is best known for its PowerVR graphics technology. It now develops newer GPU families and modular graphics IP designed for different applications.

Unlike Nvidia or AMD, Imagination generally licenses its technology rather than selling consumer graphics cards under its own brand.

Its GPU IP can be used in areas such as:

  • Automotive dashboards and infotainment systems.
  • Embedded and IoT devices.
  • Mobile and low-power hardware.
  • Graphics and compute applications.
  • Specialized semiconductor designs.

This licensing model makes Imagination an example of a company that helps create GPUs without operating like a traditional desktop graphics-card manufacturer.

Its role also shows why GPU market comparisons can be misleading. A company does not need to sell a GeForce- or Radeon-style graphics card to be an important GPU technology provider.

6. Chinese Domestic GPU Manufacturers

China has developed several domestic GPU and general-purpose GPU companies. These firms have gained attention as the country seeks greater independence across advanced semiconductor technologies.

Moore Threads develops discrete graphics and compute products under its MUSA architecture. Its products target consumer graphics, professional workloads, and artificial intelligence applications.

Other companies focus more heavily on enterprise computing:

  • Biren Technology: Develops high-performance processors and accelerators for AI and computing workloads.
  • MetaX: Develops domestic GPU and accelerator technology for enterprise and AI applications.
  • Innosilicon: Has developed graphics-related semiconductor technology and products for domestic markets.
  • Zhaoxin: Has worked on domestic processor and graphics technologies for PCs and workstations.

These companies operate in a challenging environment. Software compatibility, semiconductor manufacturing access, performance, and developer ecosystems all influence the success of a GPU platform.

Their development is nevertheless significant because it demonstrates that the global GPU market is broader than the Nvidia-AMD duopoly visible in Western consumer graphics cards.

Manufacturer Core GPU Brand / Architecture Primary Form Factor Key Target Market
Intel Arc, Xe / Xe2, Gaudi Discrete, integrated, datacenter PCs, creators, AI clusters
Apple Apple Silicon custom GPU Integrated SoC Macs, laptops, mobile
Qualcomm Adreno Integrated SoC Smartphones, Windows-on-Arm PCs
ARM Immortalis, Mali Licensed GPU IP Mobile, automotive, smart displays
Moore Threads MUSA architecture Discrete PCIe cards Consumer PCs, AI inference
Imagination PowerVR / IMG series Licensed GPU IP Automotive, embedded, mobile

Can India Make Its Own GPU?

India can design its own GPU and accelerator architectures, but designing a processor is different from manufacturing it. Indian engineers and semiconductor organizations already work on processor architecture, chip design, and related technologies.

The more difficult challenge is advanced semiconductor fabrication. Modern high-performance GPUs require sophisticated manufacturing processes, advanced packaging, large production capacity, and a highly developed semiconductor supply chain.

India’s semiconductor ecosystem is expanding through government initiatives, private investment, academic research, and new fabrication and assembly projects. These efforts can support future domestic chip production.

However, building a complete high-end GPU ecosystem requires more than a successful chip design. It also requires software drivers, development tools, manufacturing capacity, packaging, memory technology, testing infrastructure, and a large developer ecosystem.

That distinction explains India’s current position. Domestic teams can work on GPU and accelerator designs, while advanced commercial fabrication remains dependent on established international foundries for many leading-edge applications.

Chip Design vs. Chip Fabrication

Chip design and chip fabrication are two different parts of semiconductor production. A company can design a processor without owning a factory capable of manufacturing it.

GPU design involves creating the architecture and translating that design into hardware description languages such as Verilog or VHDL. Engineers then develop physical layouts and optimize the processor for parallel workloads.

India has a substantial semiconductor engineering workforce. Major technology companies operate research and development centers in cities such as Bengaluru, Hyderabad, and Noida.

Fabrication is a separate challenge. Leading GPUs require highly advanced manufacturing processes and sophisticated lithography equipment. Only a limited number of companies operate foundries capable of producing chips at the most advanced commercial nodes.

Important global foundry companies include:

  • TSMC
  • Samsung Foundry
  • Intel Foundry

This distinction is critical when discussing whether India can make its own GPU. A domestic company can create the architecture and design, but manufacturing the finished silicon requires access to an appropriate semiconductor foundry.

Indigenous Indian GPU Initiatives

India has several semiconductor research and development efforts that contribute to its broader goal of developing domestic computing technology.

One example is the Shakti ecosystem, which originated from the open-source RISC-V processor project associated with IIT Madras. Indian academic and technology teams have used this ecosystem to develop processors, microcontrollers, and related computing technologies.

Another organization is C-DAC, or the Centre for Development of Advanced Computing. Under the Ministry of Electronics and Information Technology, C-DAC has worked on domestic processor architectures and high-performance computing initiatives.

India’s private semiconductor sector is also developing. Emerging fabless companies are working on specialized processors, AI accelerators, and compute-oriented intellectual property.

These projects do not all represent conventional gaming GPUs. Many focus on areas such as:

  • Artificial intelligence.
  • High-performance computing.
  • Edge computing.
  • Automotive vision.
  • Embedded systems.
  • Sensor processing.

Therefore, India’s progress should be viewed as a broader domestic semiconductor and accelerator ecosystem, rather than only a race to build a consumer graphics card.

The Manufacturing Reality

India’s semiconductor manufacturing ambitions are expanding through the India Semiconductor Mission (ISM) and private-sector investments. Projects include semiconductor fabrication and outsourced semiconductor assembly and testing facilities.

One major example is the Tata Electronics semiconductor fabrication project in Dholera, Gujarat, developed with Taiwan’s Powerchip Semiconductor Manufacturing Corporation. Other projects focus on packaging and testing rather than wafer fabrication.

However, building a factory does not automatically create the ability to manufacture the world’s most advanced GPUs. High-end processors require advanced process technology, specialized equipment, sophisticated packaging, and access to high-bandwidth memory.

This creates an important distinction between domestic semiconductor manufacturing and leading-edge GPU manufacturing.

India’s semiconductor facilities can strengthen the country’s electronics ecosystem and reduce dependence on overseas production over time. Yet advanced gaming and datacenter GPUs still depend heavily on international manufacturing infrastructure.

For the foreseeable future, an Indian company could develop its own GPU architecture while using an overseas foundry to manufacture advanced chips.

What GPU Does Elon Musk Use?

The question of what GPU Elon Musk uses has two different answers because his technology operations span personal computing and industrial-scale artificial intelligence infrastructure.

For ordinary computing, publicly discussed hardware has included high-end consumer PCs and gaming systems. These machines can use powerful Nvidia GeForce graphics cards for gaming and other GPU-intensive tasks.

At the infrastructure level, the picture is very different. Musk’s companies operate large-scale computing systems for artificial intelligence, autonomous driving, and other workloads.

xAI’s Colossus supercomputer is built around large numbers of Nvidia accelerators. These systems are designed to train large AI models such as the Grok family.

Tesla also develops specialized computing hardware for autonomous driving. Its vehicle computers use custom processors rather than conventional desktop graphics cards.

Tesla has additionally developed the Dojo D1 processor for its AI training infrastructure. The D1 is designed as a specialized processor for Tesla’s particular workloads.

This means there is no single answer to what GPU Musk uses. Consumer hardware, AI training systems, and Tesla’s automotive computers use different types of processors.

Does Samsung Make GPUs?

Samsung participates in the GPU industry, but not primarily as a company selling Samsung-branded desktop graphics cards. Its role spans mobile GPU technology, semiconductor manufacturing, and memory production.

Samsung’s mobile processors have used different GPU technologies over time. Some Exynos processors have used ARM Mali graphics, while Samsung has also partnered with AMD on its Xclipse GPU architecture.

The company is also one of the world’s major semiconductor foundries. This means Samsung can manufacture chips designed by other companies, including graphics and AI processors.

Samsung also produces high-speed memory used throughout the graphics industry. Technologies such as GDDR and HBM are critical to modern GPUs because processors need very high memory bandwidth for graphics and AI workloads.

Therefore, Samsung’s involvement is broader than simply designing a GPU. It participates at multiple points in the semiconductor supply chain.

This makes Samsung a useful example of why the question “who makes GPUs” needs careful wording. Designing a GPU, manufacturing one, and supplying its memory are separate roles.

1. The AMD Partnership: Xclipse GPUs

Samsung’s mobile GPU strategy changed significantly when the company partnered with AMD. Before that collaboration, Samsung’s Exynos processors commonly used ARM Mali graphics technology.

The partnership introduced AMD’s RDNA graphics architecture into Samsung’s mobile processors.

The first major implementation was the Xclipse 920, introduced with the Exynos 2200. It was based on AMD’s RDNA 2 architecture and brought features such as hardware-accelerated ray tracing to compatible mobile devices.

Samsung later introduced the Xclipse 940 in the Exynos 2400. This implementation used AMD’s RDNA 3 architecture and continued the partnership’s focus on higher-performance mobile graphics.

This approach gives Samsung access to AMD graphics technology while integrating it into Samsung’s own mobile processor platform.

Samsung has also continued research into semiconductor and processor technologies for different applications. These efforts can include low-power computing, automotive systems, and other edge workloads.

The partnership demonstrates another important point about the GPU market. A company can build a mobile GPU platform using licensed technology from another GPU architecture developer rather than designing every part of the graphics architecture independently.

2. Semiconductor Foundry Services: Fabricating Other GPUs

Samsung also participates in the GPU industry as a semiconductor foundry. In this role, it manufactures chips designed by other companies instead of selling those processors under the Samsung brand.

One major example is Nvidia’s GeForce RTX 30-series, based on the Ampere architecture. Nvidia used Samsung’s 8-nanometer process to manufacture these consumer GPUs.

The distinction between design and manufacturing is important. Nvidia designed the GPU architecture and product, while Samsung provided the manufacturing process used to produce the physical chips.

Samsung’s foundry business serves a wide range of semiconductor customers. These can include companies developing mobile processors, automotive chips, AI processors, and other specialized silicon.

This means Samsung can contribute to a GPU even when the final product carries another company’s name.

For consumers, the graphics card manufacturer and chip foundry can therefore be different companies. A GPU may be designed by one company, fabricated by another, packaged with memory from another supplier, and then assembled into a finished graphics card by a board partner.

Samsung’s role illustrates how interconnected modern GPU manufacturing has become.

3. High-Bandwidth Memory for GPUs

Samsung is also a major memory supplier for the graphics and artificial intelligence industries. Modern GPUs require extremely fast memory because graphics rendering and AI workloads can move enormous amounts of data every second.

For consumer graphics cards, Samsung produces memory technologies such as GDDR6 and GDDR7. These memory chips can be installed on graphics boards alongside the GPU.

For AI and datacenter accelerators, Samsung also develops High Bandwidth Memory (HBM) technologies. HBM uses stacked memory dies and a wide interface to provide very high bandwidth.

Memory is especially important for AI accelerators because large models can require enormous amounts of data to move between memory and compute units.

Samsung’s memory business therefore connects it directly to the GPU ecosystem even when Samsung is not designing the main processor.

The modern GPU supply chain can involve several specialized companies:

  • One company designs the GPU.
  • A foundry manufactures the processor.
  • A memory company supplies GDDR or HBM.
  • A packaging company combines the components.
  • A board manufacturer creates the finished product.

Samsung participates in several of these areas, making it a significant part of the broader GPU ecosystem.

5 Reasons to Skip Wireless Headphones and Return to Wired

5 Reasons to Skip Wireless Headphones and Return to Wired Audio

Bluetooth earbuds have become a normal part of commuting, workouts, calls, and daily entertainment. However, convenience does not always mean a better listening experience. Exploring the reasons to skip wireless headphones can reveal several practical drawbacks.

Battery management is one concern. Audio latency, connection problems, repairability, and replacement costs can also matter. Wired headphones avoid many of these issues because they connect directly to the audio source.

Sound quality is another consideration. Bluetooth audio uses digital transmission and codecs, although modern codecs can deliver excellent quality. The difference is not always noticeable during everyday listening.

For some listeners, these trade-offs explain the growing interest in the reasons to skip wireless headphones and return to traditional wired audio. Health is another consideration, particularly when listening at high volumes for extended periods. The World Health Organization’s guidance on safe listening highlights the importance of managing both sound levels and listening duration to reduce the risk of hearing damage.

Health also deserves careful consideration. The main established hearing risk comes from excessive sound exposure, not from whether headphones use Bluetooth or a cable. The World Health Organization recommends managing both listening volume and duration to reduce the risk of hearing loss.

This guide explores five practical reasons to skip wireless headphones. It also examines battery lifespan, connection reliability, charging, pricing, listening safety, and the renewed interest in wired audio.

1. Superior Audio Performance Can Favor Wired Headphones

One of the main reasons to skip wireless headphones is the desire for greater control over audio transmission. Wireless headphones send audio through Bluetooth, which requires encoding, transmission, and decoding. Depending on the codec, device, and settings, some compression may occur.

Wired headphones can avoid the Bluetooth transmission stage. A wired connection can provide a direct and consistent signal path from the source device to the headphones.

This does not mean every wired headphone automatically sounds better. Headphone drivers, tuning, amplification, source quality, and personal preferences have a much larger effect on perceived sound.

However, wired models can offer advantages for lossless audio and critical listening. Compatible wired connections can carry lossless digital audio or an uncompressed analog signal. For a deeper look at how audio data affects what you hear, see how bitrate affects audio quality.

Wireless headphones can also sound excellent. Modern Bluetooth codecs have improved considerably, and many listeners may not notice a meaningful difference during everyday listening.

For listeners who prioritize maximum control over the signal path, wired headphones remain an attractive option. They also avoid dependence on Bluetooth codec compatibility between the source and headphones.

2. Battery Lifespan Can Limit Wireless Headphone Longevity

Battery dependence is another important reason people consider the reasons to skip wireless headphones. Wireless headphones rely on internal rechargeable batteries. Like other lithium-ion batteries, these batteries gradually lose capacity through normal use and charging cycles.

The problem can be particularly noticeable with compact true-wireless earbuds. Their small batteries are usually integrated into sealed housings. This can make professional battery replacement difficult or uneconomical. Proper headphone care and maintenance can still help protect the parts that are easier to service.

That does not mean every wireless headphone becomes unusable after three to five years. Actual lifespan varies considerably. Battery quality, charging habits, usage, temperature, and construction all affect longevity.

Wired headphones have one major advantage here: they do not need an internal battery. A durable wired model can remain functional for many years if its drivers and other components remain in good condition.

Detachable cables provide another benefit. If the cable becomes damaged, users can often replace it without replacing the entire headphone.

For long-term ownership, look for:

  • Replaceable cables
  • Replaceable ear pads
  • Repairable construction
  • Durable connectors
  • Available replacement parts

These features can reduce waste and extend the useful life of the product.

3. Connection Reliability and Latency Can Favor Wired Audio

Connection reliability is another factor behind the reasons to skip wireless headphones. Bluetooth headphones add a wireless connection between the audio source and the headphones.

That connection can occasionally experience pairing problems, interference, or unexpected disconnections. If your Bluetooth connection keeps dropping, understanding the common reasons Bluetooth keeps disconnecting can help identify the underlying problem. Bluetooth operates in the 2.4 GHz band, which is also used by technologies such as Wi-Fi.

Modern Bluetooth systems use techniques designed to manage interference. Therefore, everyday dropouts are not inevitable. However, wireless performance can still vary between devices and environments.

Latency is a separate issue. Wireless audio requires processing, encoding, transmission, and decoding. These stages can introduce a delay between an action and the resulting sound.

For ordinary music listening, this delay is usually insignificant. It can matter more during competitive gaming, music production, live monitoring, or precise video editing.

Wired headphones can reduce the wireless transmission stage and provide a more predictable connection. They are not completely “zero latency,” because other digital processing can still introduce delays.

For users who prioritize low latency and connection simplicity, wired headphones can therefore be more practical.

4. Charging Hassles Make Wireless Headphones Less Convenient

Charging is one of the simplest reasons to skip wireless headphones. Wireless models need regular charging, which creates an additional maintenance task.

Forgetting to charge them can leave you without audio when you need it. This can become especially inconvenient during long workdays, flights, road trips, or extended meetings.

True-wireless earbuds add another component to manage. Both the earbuds and their charging case depend on battery power.

Wired headphones remove this particular limitation. They can usually be connected and used immediately without checking a battery indicator or carrying a charging case.

There are exceptions. USB-C wired headphones can draw power from the connected device, while some active wired headphones require their own battery. If your phone has a single USB-C port, using wired headphones without losing the charging port may require an adapter or another solution. Traditional passive wired headphones generally need no separate power source.

This makes wired audio particularly convenient for people who want plug-and-play listening.

Wireless headphones remain useful when cables get in the way. They can be convenient during workouts, commuting, and other activities where freedom of movement matters.

The trade-off is straightforward. Wireless headphones provide cable-free convenience but introduce battery management. Wired headphones provide a physical connection but remove charging from the equation.

5. Wireless Headphones Can Cost More for Added Features

Price is another factor behind the reasons to skip wireless headphones, especially for buyers focused mainly on sound quality.

Wireless headphones contain additional hardware that wired models may not require. Depending on the product, this can include Bluetooth radios, batteries, charging circuits, microphones, active noise cancellation hardware, amplifiers, and digital signal processing.

These components can increase manufacturing complexity and contribute to a higher retail price. However, it would be too broad to claim that wireless headphones always cost $50 to $100 more than equivalent wired models.

Prices vary significantly across brands, product categories, features, and sound quality. Some inexpensive wireless headphones cost less than premium wired models. High-end wireless headphones can also be considerably more expensive.

The more useful comparison is what you receive for your budget. A wired headphone at a given price may devote more of its design and manufacturing cost to drivers, materials, and acoustic performance. If you are comparing both connection types before buying, a broader wired vs wireless audio comparison can help you evaluate the trade-offs.

Wireless models may instead include features such as:

  • Bluetooth connectivity
  • Active noise cancellation
  • Transparency modes
  • Built-in microphones
  • Touch controls
  • Battery systems
  • Companion software

If you do not need these features, a wired model may provide a simpler way to spend your headphone budget.

Why Do People Avoid Wireless Headphones?

People avoid wireless headphones for several practical reasons. Battery dependence is one of the biggest drawbacks. Wireless headphones need regular charging, and their batteries gradually lose capacity.

Connection issues can also become frustrating. Bluetooth headphones may experience pairing problems, interference, or unexpected disconnections.

Audio latency is another consideration. Bluetooth processing can introduce a delay between an action and the resulting sound. Modern low-latency technologies can reduce this delay, but they do not eliminate it in every situation.

Wired headphones avoid most of these concerns because they connect directly to the source.

Common reasons people choose wired models include:

  • No headphone battery to recharge
  • No Bluetooth pairing process
  • No wireless connection to troubleshoot
  • Easier cable replacement on many models
  • Longer potential service life
  • Consistent performance without wireless transmission

For listeners who value simplicity and reliability, these differences can outweigh the convenience of going wireless.

The best choice still depends on how you use your headphones. Wireless models remain useful for mobility, workouts, commuting, and hands-free convenience.

Why Are Gen Z Using Wired Headphones?

Gen Z’s renewed interest in wired headphones combines fashion, nostalgia, simplicity, and practicality. Wired earbuds have become more visible in social media posts and everyday streetwear.

Their appearance often connects with Y2K fashion and other retro-inspired trends. The cable itself can become part of an outfit rather than simply being viewed as outdated technology.

The appeal is not purely visual. Wired headphones remove several small inconveniences associated with wireless models.

There is no charging case to remember. There is also no Bluetooth pairing menu or concern about an earbud running out of power.

Wired headphones can also be inexpensive. Losing one does not necessarily mean replacing an expensive charging case and a complete set of earbuds.

However, it would be inaccurate to assume that all Gen Z users prefer wired audio. Wireless earbuds remain extremely popular among younger consumers.

The renewed interest is better understood as a cultural trend rather than a universal preference. Some users simply like the combination of retro style and straightforward functionality. The broader trend is explored in more detail in why Gen Z is using wired headphones.

For these listeners, the reasons to skip wireless headphones can be as much about lifestyle and simplicity as technical performance.

What Is the 60-60 Rule for Headphones?

The 60-60 rule is commonly described as listening at no more than 60% volume for 60 minutes before taking a break. It is widely promoted as a simple listening-safety rule.

However, it should not be treated as a precise medical threshold. Volume percentages do not correspond to the same sound level across every phone, headphone, recording, or listening environment.

A better approach is to consider actual sound level and listening duration. The World Health Organization recommends keeping personal listening levels within safer exposure limits and taking regular breaks.

The risk of hearing damage increases with louder sound and longer exposure. This applies whether the headphones are wired or wireless.

Useful listening habits include:

  • Keep the volume at a comfortable level.
  • Take regular breaks during long sessions.
  • Use noise cancellation in noisy environments when appropriate.
  • Avoid increasing volume to overcome background noise.
  • Pay attention to ringing or muffled hearing after listening.

The key point is simple: wired headphones are not automatically safer for hearing.

Sound exposure matters far more than the transmission method. Therefore, hearing protection should remain a priority regardless of whether you choose wired or wireless audio.

What Are the Drawbacks of Wireless Headphones?

Wireless headphones introduce several technical trade-offs. Battery dependence is the most obvious. Unlike wired headphones, they cannot operate indefinitely without access to power.

Bluetooth audio also requires encoding, transmission, and decoding. Modern codecs can provide high-quality sound, and many listeners may not notice a meaningful difference from wired playback.

However, codec support and implementation vary between devices. This can make the wireless listening experience dependent on both the headphones and the source device.

Latency can be another drawback. Wireless audio may introduce processing delays that matter during gaming, live monitoring, music production, or video editing.

Connection reliability can also vary. Crowded radio environments, device compatibility, software problems, and physical obstacles can sometimes affect wireless performance.

Other drawbacks include:

  • Battery charging
  • Potential connection problems
  • Audio latency
  • Codec dependence
  • Greater electronic complexity
  • Difficult battery replacement on some models

These limitations help explain why some listeners continue searching for reasons to skip wireless headphones and return to wired designs.

Is It Better to Use Wired or Wireless Headphones for Health?

There is no general health rule stating that wired headphones are safer than wireless headphones. The strongest established hearing risk comes from excessive sound exposure, regardless of the connection method.

Bluetooth headphones transmit radiofrequency signals, but consumer Bluetooth devices operate at relatively low power. Claims that wired headphones are medically safer because they eliminate Bluetooth radiation are not supported by established evidence.

Physical ear hygiene is a separate issue. In-ear headphones can trap moisture and earwax, particularly when worn for long periods. Poor cleaning habits may contribute to irritation or infection risk.

The fit of the headphone also matters. Deeply inserted earbuds and tight-fitting models can create different comfort and hygiene issues from over-ear headphones.

For safer listening, focus on factors with stronger evidence:

  • Moderate listening volume
  • Reasonable listening duration
  • Regular breaks
  • Clean headphone surfaces
  • Appropriate earbud fit
  • Reduced exposure to loud environments

Ultimately, wired versus wireless is not the main health question. Listening habits, volume, duration, and hygiene matter more.

For readers comparing the reasons to skip wireless headphones, health should therefore be considered separately from convenience, sound quality, battery life, and connectivity.

iPhone 18 Pro Review: The Best Camera Smartphone Of 2026

iPhone 18 Pro Review: The Best Camera Smartphone Of 2026

Smartphone photography reaches another major milestone this year, and the iPhone 18 Pro camera is central to that change. Apple has introduced a variable-aperture main camera and expanded manual controls. These features give photographers more control over light, depth of field, and exposure.

Buying a flagship phone is a serious investment. An upgrade should offer noticeable benefits rather than small specification changes. That makes camera quality, low-light performance, zoom, and video capabilities important factors.

You can explore the complete camera specifications and features on Apple’s official iPhone 18 Pro page.

This review examines the iPhone 18 Pro camera, overall performance, and key differences from the previous generation. We also compare the Pro and Pro Max models to help you understand which version better fits different photography needs.

How good will the iPhone 18 Pro camera be?

The iPhone 18 Pro camera brings a major hardware change, but its biggest improvement is more specific than a simple resolution increase. The 48MP Fusion Main camera now uses a variable aperture with four settings: ƒ/1.48, ƒ/1.8, ƒ/2.8, and ƒ/4.0. This lets the camera adjust light and depth of field more naturally than a fixed-aperture system. Apple also adds Pro controls for aperture, shutter speed, white balance, and histogram viewing. The system includes 48MP Fusion Ultra Wide and 48MP Fusion Telephoto cameras. The telephoto reaches 4x optical zoom and 8x optical-quality zoom. ProRAW remains available for photographers who want more editing flexibility.

In practice, the variable aperture matters most in low light and scenes with subjects at different distances. It is a useful upgrade, although not every photo will look dramatically different from the previous generation. That makes it a strong mobile camera system for both casual users and creators.

Variable Aperture Makes Physical Depth Effortless

The variable aperture is the most distinctive feature of the iPhone 18 Pro camera. The main lens can switch between ƒ/1.48, ƒ/1.8, ƒ/2.8, and ƒ/4.0. A wider aperture allows more light to reach the sensor. That can help in darker scenes and create more natural background separation. A narrower aperture can keep more of a scene in focus.

This differs from software-only Portrait effects because the lens physically changes its aperture. Apple also lets users control the aperture manually through the Camera app’s Pro controls. However, expectations should remain realistic. Smartphone sensors are still much smaller than those in dedicated cameras. Therefore, stopping down the lens will not create the same depth-of-field changes as a full-size camera. The feature is most useful when you want more control over exposure, focus depth, and the look of portraits or close subjects. It adds flexibility rather than transforming every photo.

Which iPhone is best for photography in 2026?

For photography in 2026, the iPhone 18 Pro and iPhone 18 Pro Max share the same rear camera system. Both use a 48MP Fusion Main camera with variable aperture, a 48MP Fusion Ultra Wide camera, and a 48MP Fusion Telephoto camera. The telephoto offers 4x optical zoom and 8x optical-quality zoom. For a closer comparison, see our guide to iPhone 18 Pro vs iPhone 18 Pro Max before choosing between the two models.

The main differences are the physical size, display, and battery capacity. The standard Pro is easier to carry and use with one hand. The Pro Max provides a larger screen and longer battery life. For photographers, both models support ProRAW and the same core Pro camera controls. Your choice therefore depends more on ergonomics, screen size, and endurance than on image quality. If camera hardware is your only priority, the two Pro models offer a very similar foundation.

ProRAW Workflow Gives Creators Total Creative Freedom

ProRAW remains useful for photographers who want more control after capture. Unlike a standard compressed image, a RAW workflow preserves more image data for editing. That gives you greater flexibility when adjusting exposure, highlights, shadows, color, and white balance. If you also use an iPhone for organizing and editing images, new features in the iOS 27 Photos app can further improve the overall photography workflow.

ProRAW is not automatically better for every photo, though. The files are larger and usually require editing before they look their best. Casual users may prefer the convenience of Apple’s processed images. Creators who edit in professional software can benefit more from the additional control. For mobile photographers, the main advantage is flexibility. You can capture an image on the phone and still retain significant editing freedom later, without relying entirely on Apple’s default processing.

Is the iPhone 18 Pro good?

The iPhone 18 Pro is more than a camera upgrade. It combines the A20 Pro chip with a redesigned vapor chamber for sustained performance. Apple says the system is designed to support demanding workloads while maintaining high performance. If you’re also considering the phone’s construction, our guide to aluminum vs titanium phone frames explains how the two materials differ.

For creators, this matters during long photo sessions, video recording, and editing. The aluminum unibody also changes the material story from the previous titanium generation. Daily performance should feel fast, but buyers should separate performance claims from camera results. A faster processor does not automatically make photos better. Its value is more visible when you process media, edit files, run demanding apps, or use on-device AI features. The iPhone 18 Pro is therefore a well-rounded flagship, but its camera system remains the clearest reason for photography-focused buyers to consider it.

Thermal Efficiency Keeps Daily Performance Fast and Steady

The iPhone 18 Pro uses a next-generation vapor chamber alongside the A20 Pro chip. The goal is to spread heat more evenly during sustained workloads. This can help when recording video, processing large photo files, gaming, or running demanding applications for long periods. Better thermal management does not mean the phone will never become warm. Extended camera use in bright outdoor conditions can still raise temperatures.

The practical benefit is more consistent performance rather than a completely cool device. For creators, that distinction matters. A phone that maintains performance steadily can be more useful during longer shooting and editing sessions. Apple also connects the thermal design with the A20 Pro’s sustained performance. However, short everyday tasks such as messaging or casual browsing do not place enough load on the system to show the full benefit. The thermal upgrade is therefore more relevant to heavy users than ordinary smartphone owners.

Should I get the iPhone 17 Pro or 18 Pro?

The decision between the iPhone 17 Pro and iPhone 18 Pro depends heavily on how you use the camera. The 18 Pro introduces a 48MP Fusion Main camera with variable aperture and new Pro controls. It also adds the A20 Pro chip and a redesigned vapor chamber. These changes are meaningful for photographers and creators who want more control or spend long periods recording and editing.

However, the upgrade is less dramatic for someone who already owns the 17 Pro and mainly takes casual photos. The 17 Pro remains capable for everyday photography, social media, video, and general performance. The 18 Pro makes more sense when you specifically want the new aperture system, updated controls, improved low-light capability, or newer hardware. For 17 Pro owners, the decision is mainly about camera control rather than basic speed. That distinction matters when the existing phone already meets your daily needs.

Upgrading Decisions Depend Entirely on Real Camera Requirements

An upgrade should start with your actual camera needs rather than the number attached to the model. The iPhone 18 Pro adds hardware that can matter to serious creators, especially the variable-aperture main camera and expanded Pro controls. Those features give photographers more control over light and depth of field. If you’re comparing the cost of upgrading, our guide on whether the iPhone 18 will cost more can also help with your buying decision.

The iPhone 17 Pro can still produce high-quality images and video for those tasks. Keeping it may therefore make financial sense if the new controls do not fit your workflow. Creators may value the new system because they can use manual controls more often. Even then, the upgrade cost should be compared with the actual benefit to your work. A camera feature matters when it improves the images or workflow you regularly produce. Your shooting habits matter more than the model number.

Which version of iPhone is best?

The standard iPhone 18 Pro offers the same core rear camera system as the Pro Max in a smaller body. Both models have the 48MP Fusion Main camera with variable aperture, 48MP Ultra Wide camera, and 48MP Telephoto camera. The Pro Max does not provide a separate camera system that makes it automatically better for photography. Instead, it gives you a larger display and longer battery life.

The standard Pro is easier to carry and may be more comfortable during handheld shooting or one-handed use. The Pro Max can be useful for creators who edit on the phone or spend long periods reviewing footage. Its larger battery can also be valuable during extended travel or shooting days. Neither model is automatically the better camera choice. The decision is mainly about how you value portability, viewing space, and battery life. If portability matters most, the standard Pro is easier to live with. If screen space and battery life matter more, the Pro Max may fit your workflow better. That makes the smaller Pro a practical choice for many mobile photographers.

Balancing Form Factor Against Professional Hardware Features

Choosing between the Pro and Pro Max comes down to how you balance camera hardware, size, and endurance. Both models provide the same main, Ultra Wide, and Telephoto camera system. You also get the same core Pro camera controls, including aperture, shutter speed, and white balance adjustments.

The standard Pro is more compact, which can make handheld photography easier during long sessions. The Pro Max has a larger display, giving you more space to review photos, edit video, and manage timelines. Its larger battery can also be valuable during extended travel or shooting days. Neither model is automatically the better camera choice. The decision is mainly about how much you value screen size and endurance. If portability matters most, the standard Pro is easier to live with. If screen space and battery life matter more, the Pro Max may fit your workflow better.

Can You Run House on Solar Power Completely?

Can You Run House on Solar Power Completely?

Yes, you can run house on solar power completely, but the system must be designed around your home’s actual energy needs. Modern solar panels can generate electricity for many household appliances, while battery storage can provide power when solar generation drops. The U.S. Department of Energy’s Homeowner’s Guide to Solar explains how residential solar systems can supply some or all of a home’s electricity needs.

However, solar independence requires more than installing a few panels. You need to consider your daily electricity consumption, peak loads, available sunlight, roof space, and battery capacity. Appliances such as air conditioners, water heaters, pumps, and refrigerators can significantly increase the required system size.

A properly designed system can reduce or even eliminate your dependence on grid electricity. An off-grid system needs enough solar generation and battery storage for normal days and periods of poor sunlight. A hybrid system can keep the grid available as backup.

This guide explains how to run house on solar power reliably. It covers solar panel requirements, air-conditioning loads, battery storage, and inverter sizing. Understanding these factors can help you avoid an undersized or unnecessarily expensive system.

Can I run my whole house on solar?

Yes, you can run your whole house on solar power, but the system must match your home’s electricity consumption. Solar panels generate most of their electricity during daylight hours. An off-grid home therefore needs batteries to provide power at night and during periods of low solar production.

Start by calculating your home’s average daily electricity consumption in kilowatt-hours (kWh). Then identify the appliances that create the highest demand. Calculating your home’s solar energy needs can help estimate the system size more accurately. Air conditioners, water heaters, pumps, and other high-power appliances can affect both solar array and inverter sizing.

A complete solar setup usually includes:

  • Solar panels to generate electricity.
  • An inverter to convert DC electricity into household AC power.
  • Batteries to store excess solar energy.
  • A charge controller, depending on the system design.
  • Protection and distribution equipment for safe operation.

A hybrid system can use the grid as backup when solar generation or battery capacity is insufficient. A fully off-grid system needs additional capacity for cloudy periods.

Battery Storage and Peak Load Management

Battery storage becomes important when you want to run house on solar power beyond daylight hours. The battery should provide enough usable energy for your expected nighttime consumption. It should also have enough reserve for periods when solar generation is lower than normal.

Battery sizing should consider usable capacity rather than only the advertised battery capacity. Depth of discharge, conversion losses, and system efficiency can reduce the energy available for household use.

Peak demand is another important consideration. Several appliances may operate at the same time and push the system beyond its normal load. Air conditioners, pumps, and refrigerators can also create short-term starting demands.

Your inverter therefore needs sufficient continuous output and suitable surge capacity. A load-management system can help prevent overloads by temporarily switching off non-essential appliances.

For an off-grid home, battery capacity should also account for cloudy weather. This can make batteries one of the largest components of the overall solar investment.

How many solar panels are required for a 2bhk house?

There is no universal number of panels for every 2BHK house. The required number depends on daily electricity consumption, panel wattage, local sunlight, roof conditions, and system losses.

For example, a home using around 8–12 kWh of electricity per day could require roughly 2.5–4 kW of solar capacity in a location with good solar resources. Eight 450-watt panels would provide a nominal capacity of 3.6 kW.

However, panels do not produce their maximum rated output throughout the entire day. Heat, clouds, shading, dust, wiring losses, inverter losses, and panel orientation can reduce actual generation.

To estimate your requirements, start with your monthly electricity bills. Convert your average monthly usage into a daily figure. Then compare that figure with the expected solar production in your location.

Your system may need additional capacity if you regularly use:

  • Air conditioners
  • Electric water heaters
  • Water pumps
  • Induction cookers
  • Large refrigerators or freezers
  • Multiple computers and other electronics

Therefore, 6–10 panels may suit some 2BHK homes, but that range should not be treated as a fixed rule.

Accounting for Regional Sunlight and Roof Orientation

Solar generation varies significantly between locations and seasons. Two homes with identical electricity consumption can require different solar capacities because they receive different amounts of usable sunlight.

When planning a system to run house on solar power, consider your area’s peak sun hours, seasonal weather, temperature, shading, and roof characteristics. A roof with strong sunlight throughout the day will generally produce more energy than a heavily shaded roof.

Roof orientation also affects solar production. In many regions, positioning panels toward the equator provides strong exposure. However, the ideal orientation depends on your location and roof design.

Tilt angle matters too. Proper positioning helps panels receive useful sunlight throughout the year. Poor positioning can reduce production even when the panels themselves are efficient.

Before installation, evaluate:

  • Daily and seasonal electricity consumption
  • Available roof space
  • Roof direction and tilt
  • Nearby trees and buildings
  • Local solar irradiation
  • Expected system losses

These factors provide a more reliable estimate than simply counting the number of bedrooms.

How many AC can run in a 3kW solar system?

A 3 kW solar system can potentially run one efficient air conditioner, but the exact result depends on the AC’s electrical consumption and the other appliances operating at the same time.

A 3 kW system has a maximum panel rating of 3 kW under standard test conditions. Actual production varies throughout the day. Heat, clouds, shading, dust, and system losses can reduce the available output.

A modern inverter AC can reduce its power consumption after reaching the desired temperature. However, consumption can rise during extremely hot weather or when the compressor works harder to cool the room.

If you use an AC with a 3 kW solar system, you must also account for other household loads. Refrigerators, fans, lights, televisions, routers, and pumps all consume part of the available electricity.

Running two AC units may exceed the practical capacity of a 3 kW system. The inverter rating is also important because it must handle the home’s total simultaneous demand.

For reliable solar-powered cooling, check the rated input power of the AC, rather than relying only on its tonnage. Higher cooling demand may require a larger solar array, inverter, or battery system.

The Role of Variable Inverter Technology

Inverter air conditioners can make it easier to run house on solar power because their compressors can adjust their speed according to cooling demand. They do not always operate at maximum power.

After the room reaches the selected temperature, an inverter AC can reduce compressor speed. This can lower electricity consumption compared with continuously operating at full power.

However, inverter technology does not remove the need for proper solar system sizing. The AC can still consume significant electricity during very hot weather or when the room needs rapid cooling.

The solar inverter must also support the AC’s electrical characteristics. Modern inverter ACs generally have smoother power demand than older fixed-speed models. However, the home’s total simultaneous load must still remain within the inverter’s continuous output rating.

When planning solar-powered AC operation, consider:

  • AC rated input power
  • Minimum and maximum compressor consumption
  • Outdoor temperature
  • Room size and insulation
  • Solar generation during operating hours
  • Other appliances running simultaneously
  • Battery capacity for evening cooling

This approach is more reliable than assuming every 1.5-ton AC uses the same amount of electricity. Actual consumption varies between models and operating conditions.

Can I run AC on a solar panel?

Yes, you can run an AC using solar power, but a conventional household AC should not be connected directly to a solar panel. Solar panels produce variable DC electricity, while typical household air conditioners require regulated AC electricity.

A standard solar-powered AC setup therefore uses solar panels, an inverter, and the required electrical protection equipment. Residential solar panel installation also requires proper planning of these components. Battery storage can also be included when cooling is needed after sunset or during periods of low solar generation.

The inverter converts DC electricity from the panels into suitable AC power. It also manages changes in solar generation. If batteries are included, the system needs appropriate battery charging and management equipment.

The exact setup depends on the AC and solar system. Some specialized DC solar air conditioners can use solar DC power through compatible equipment. These systems differ from conventional AC units.

Before installing an AC with solar power, check its electrical specifications. Pay attention to rated input power, operating range, inverter compatibility, and expected daily energy consumption.

For homeowners planning to run house on solar power, these details help determine whether the solar system can support cooling reliably.

Dedicated Solar Air Conditioning Alternatives

Dedicated solar air conditioners are another option for homes that want to use solar energy specifically for cooling. Some models can use DC electricity from solar panels and may combine solar generation with grid electricity when necessary.

These systems can reduce conversion losses in certain configurations. Their control systems can also adjust operation when solar production changes. However, performance depends on the specific equipment and installation.

A dedicated solar AC is not automatically suitable for every home. You should consider your climate, cooling requirements, solar availability, installation cost, expected operating hours, and backup requirements. Comparing solar and wind energy costs can also provide broader context when evaluating renewable-energy options for a home.

A conventional inverter AC connected to a properly sized household solar system can also provide effective solar-powered cooling. This option may be practical when the solar system already supplies electricity to the rest of the home.

When comparing the two approaches, consider:

  • Solar capacity required
  • Battery requirements
  • AC efficiency
  • Installation complexity
  • Grid-backup availability
  • Expected daily cooling hours
  • Maintenance requirements

The best system depends on the home’s complete energy profile. Solar cooling works most reliably when the panels, inverter, battery, and AC are designed to work together.

How many solar panels for 1.5 ton AC?

The number of solar panels needed for a 1.5-ton AC depends on its actual electrical input rather than its cooling capacity alone. A 1.5-ton inverter AC may have a rated input around 1–2 kW, but its actual consumption changes with temperature, settings, efficiency, and compressor speed.

For example, four 500-watt panels provide a nominal solar capacity of 2 kW. Five panels provide 2.5 kW. However, the panels will not continuously produce their full rated output.

Real-world conditions can reduce solar production. Heat, clouds, shading, dust, orientation, and electrical losses all affect generation. Adding some solar capacity can therefore provide a useful operating margin.

Battery storage may also be necessary if you want the AC to operate after sunset. For daytime cooling, additional solar capacity can reduce the amount of energy that needs to come from the battery.

Before choosing the panel count, check:

  • AC rated power consumption
  • Average operating consumption
  • Local peak sun hours
  • Solar system losses
  • Desired cooling hours
  • Other household loads
  • Battery requirements

Rather than assuming every 1.5-ton AC requires four, five, or six panels, use the manufacturer’s electrical specifications. This provides a more accurate basis for system sizing.

Sizing Inverter Surge Capacity for Compressor Starts

The inverter must be sized for the home’s complete electrical load, not simply the total wattage of the solar panels. It must provide enough continuous output for appliances operating together.

Older fixed-speed compressors can create significant starting currents. Modern inverter ACs usually manage compressor speed differently and may have lower starting demands. However, the exact electrical requirement varies by model.

For this reason, do not automatically assume that a 3,000-watt inverter will support every 1.5-ton AC. Check the AC manufacturer’s specifications and the inverter’s continuous and surge ratings before installation.

Other appliances also contribute to the total demand. Refrigerators, pumps, fans, lights, computers, and kitchen appliances can all operate at the same time.

A suitable inverter should provide:

  • Sufficient continuous output
  • Appropriate surge capacity
  • Compatibility with the AC
  • Adequate battery support when required
  • Proper electrical protection

Correct inverter sizing can reduce overloads and unexpected shutdowns. The final specification should therefore consider the complete household load.

If your goal is to run house on solar power, sizing the solar panels, battery, and inverter together is more reliable than sizing each component separately.

Conclusion

Transitioning your property to run house on solar power is a proven, highly achievable milestone for modern homeowners. By matching your daily kilowatt-hour demand with an appropriately sized photovoltaic array and dedicated battery backup, you can eliminate grid dependence. As we have explored, running heavy cooling equipment like a 1.5-ton air conditioner is entirely practical when you design your array with sufficient wattage margins and modern inverter equipment.

A standard 2BHK home can achieve complete daytime energy freedom with a compact setup of 6 to 10 panels. When you supplement that capacity with lithium storage, you secure reliable power day and night. Evaluate your recent utility statements to calculate your true daily electricity needs. Invest in tier-one panels, choose an inverter that accommodates motor surge currents, and consult a certified solar professional to design a dependable system tailored to your property.

How Does Google Maps Know a Business Is Busy?

How Does Google Maps Know a Business Is Busy?

Have you ever checked Google Maps before visiting a restaurant, store, or other local business? You may notice a Popular Times graph or a live indicator showing how busy the place is. But how does Google Maps know a business is busy without someone counting customers?

Google uses aggregated and anonymized location data from users who have opted into location sharing. It combines this information with historical visit patterns to estimate how active a business is at different times.

You can learn more about how Google collects and displays this information in its official guide to Popular Times, wait times, and visit duration.

This data helps Google estimate popular times, live activity, typical visit duration, and wait times. It can also help people decide when to visit a business or avoid a crowded period.

The system is not simply counting every person inside a building. Instead, Google analyzes patterns from qualifying location signals and compares current activity with historical trends.

How does Google know if a business is busier than usual?

Google can estimate whether a business is busier than usual by comparing current activity with its typical patterns. The information comes from aggregated and anonymized data from users who have opted into location sharing.

For example, imagine a restaurant that normally receives its highest number of visits between 7 PM and 8 PM. Google can compare current activity with the restaurant’s usual activity for that period.

The important point is that Google does not publish an exact customer count. It provides a relative indication of activity instead. Google also requires sufficient visit data before displaying these insights.

Understanding how does Google Maps know a business is busy also requires looking at how Google compares current activity with historical patterns. This comparison helps the service identify whether a location is experiencing unusually high activity.

Real-Time Anomaly Detection Algorithms

Google’s system can identify changes between current activity and historical patterns. This helps Maps show whether a location is more or less active than it normally is.

A sudden event can change normal patterns. A local festival, promotion, sporting event, or unexpected disruption may bring more visitors than usual. Google can use current location signals to detect these changes.

However, the exact algorithms and thresholds Google uses for individual businesses are not publicly documented in detail. Therefore, it is more accurate to describe the process as pattern analysis rather than assume a specific device-counting formula.

Google also applies privacy protections to its busyness information. The company uses privacy-preserving techniques and does not display information when there is insufficient data for an accurate, anonymous result.

This means the “busy” indicator is an estimate, not a precise headcount of everyone inside the business.

How does Google Maps know when it’s busy?

Google Maps uses historical visit patterns to determine when a business is usually busy. Popular Times information is based on average popularity over recent months. If you want to understand how Maps compares with Google’s other mapping platform, the difference between Google Maps and Google Earth is worth exploring.

For example, a restaurant may consistently receive more visits on Saturday evenings than weekday afternoons. Google can use those recurring patterns to build its Popular Times graph.

The system can also provide live visit data. This shows how active a location is at the current time compared with its usual activity. The information can change as current activity changes.

So, how does Google Maps know a business is busy at a particular time? It compares current location activity with the business’s established historical patterns. This produces a relative estimate rather than an exact number of customers.

Differential Privacy and Data Aggregation

Privacy is an important part of Google’s approach. Popular Times, wait times, and visit duration rely on aggregated and anonymized information from opted-in users.

Google also uses differential privacy for certain busyness information. This is designed to prevent published data from being used to identify individual users.

Google does not publish the exact number of people inside a business. It also avoids showing busyness information when there is not enough data to provide an accurate, anonymous estimate.

This is why some businesses may have a Popular Times graph while others do not. A location needs enough qualifying visit information before Google displays these insights.

Why doesn’t China allow street view?

Google Street View is not broadly available in mainland China, but the explanation is more complicated than simply saying that China “forbids Google Street View.”

China has strict rules governing surveying, mapping, geographic information, and online map services. Foreign organizations and individuals conducting surveying activities in China must follow applicable laws and regulations. These rules also cover activities involving geographic information and national security.

Chinese regulations also govern internet map services. Providers must meet relevant surveying and mapping requirements and use approved geographic information.

These regulatory requirements help explain why Google’s global Street View model cannot simply operate in mainland China in the same way it does in many other countries.

Restrictions on Foreign Geographic Surveying

China’s restrictions extend beyond ordinary street photography. Foreign organizations and individuals conducting surveying or mapping activities must comply with the country’s regulatory framework. The rules are connected to the control of geographic information and national security.

This matters because Street View requires the collection, processing, and publication of large amounts of geographic imagery.

China also has technical and regulatory requirements for digital mapping. Online map providers must use approved maps and comply with requirements governing geographic information.

As a result, users in mainland China generally rely on domestic mapping services for detailed local mapping and street-level imagery rather than Google’s standard Street View coverage.

It is therefore better to describe the situation as a regulatory and mapping-access issue rather than claim that one specific law simply bans all foreign street imagery.

How does Google detect traffic jams?

Google Maps can detect traffic slowdowns by analyzing aggregated location data from drivers and other sources. When people navigate with Maps, aggregated location data can help Google understand traffic conditions on roads. Drivers can also use Android Auto Gemini voice commands to interact with navigation features while driving.

Suppose vehicles on a highway normally travel at highway speeds. If many location signals show that movement has slowed sharply along the same road segment, Maps can recognize a developing congestion pattern.

The system can then use that information to show traffic conditions on the map. Google also combines live traffic information with historical traffic patterns to improve its predictions.

The same general principle helps explain how does Google Maps know a business is busy. In both cases, Google looks for patterns in aggregated location information rather than relying on a person to manually report every change.

Crowdsourced Incident and Hazard Reporting

Google Maps does not rely only on passive location data. User reports and authoritative information can also contribute to the traffic picture.

Drivers can report incidents such as crashes, road closures, construction, and other disruptions. Real-time user feedback and information from local authorities can help Maps understand changing road conditions.

Google also works with traffic authorities and local partners in some regions to provide information about road closures and other disruptions.

Combining these sources helps Google distinguish ordinary slow traffic from unusual road disruptions. It can then update the map and adjust route recommendations when conditions change.

How accurate is Google Maps for traffic?

Google Maps can provide useful traffic estimates, but accuracy is not guaranteed to be the same everywhere. Traffic conditions can change quickly because of crashes, road closures, weather, construction, or unexpected congestion. These factors are also useful to consider when learning through activities that make geography memorable.

Google improves its estimates by combining current traffic conditions with historical traffic patterns. The system analyzes historical road speeds and combines them with live conditions using machine learning.

This allows Maps to recognize recurring patterns. For example, a road may regularly become congested during the morning commute. Historical information can help the system anticipate that pattern when similar conditions occur.

However, sudden incidents can still make an estimate inaccurate. Rural roads can also provide less information when fewer devices contribute usable location signals.

Predictive Machine Learning Models

Google uses machine learning to predict how traffic may change during a journey. The system combines historical traffic patterns with current road conditions to estimate future congestion.

Google has also used advanced machine learning research to improve traffic prediction. Its models use historical traffic information alongside current conditions to generate predictions.

This means Google Maps is not simply looking at traffic at this exact moment. It can also consider how traffic usually behaves on the same roads.

The prediction can help Maps estimate travel times and select routes. Still, no traffic model can perfectly predict unexpected events. A crash, sudden road closure, severe weather event, or unusual crowd can change conditions within minutes.

For that reason, a Google Maps ETA should be treated as a dynamic estimate, not a guaranteed arrival time.

Does Your Charging Port Feel Loose? This Might Be Why

Does Your Charging Port Feel Loose? This Might Be Why

Plugging in your smartphone should feel firm and secure. If the cable wiggles or disconnects easily, you may have a loose charging port. However, a loose-feeling connection does not always mean the port itself is damaged.

Pocket lint, dust, and other debris can collect inside the port. Over time, this material can become compacted and prevent the cable from seating properly. Samsung’s charging troubleshooting guide confirms that debris inside a charging port can prevent the cable from connecting properly.

Physical damage can also cause charging problems. Drops, repeated cable pulling, moisture, worn connectors, or damaged cables can affect the connection. A faulty cable can sometimes make a healthy port feel loose.

Before assuming the port needs replacement, inspect the port and test another compatible cable. Check whether the cable sits fully inside the connector. Also look for visible damage, corrosion, or debris.

This guide explains the common causes of a loose charging port. It also covers safe cleaning, USB-C troubleshooting, repair costs, and situations that require professional service.

Why does it feel like my charging port is loose?

A charging port can feel loose for several reasons. The most common cause is debris inside the port. Pocket lint and dust can become compressed at the bottom of the connector. This prevents the charging plug from seating completely.

A damaged or worn cable can create similar symptoms. The connector may no longer fit securely, even though the phone’s port is fine. Testing another compatible cable is therefore an important first step, especially when comparing USB-C and Lightning cable reliability.

Physical damage is another possibility. Repeated pulling, accidental drops, or pressure on the cable can damage the port or its internal mounting.

You can check a few things before seeking repair:

  • Does the cable sit fully inside the port?
  • Does another cable fit more securely?
  • Does charging stop when the cable moves?
  • Can you see dirt, lint, corrosion, or physical damage?
  • Does the port itself move inside the phone?

If cleaning and cable replacement do not help, the port may need professional inspection.

Recognizing Debris Versus Physical Socket Wear

Debris and physical damage can produce similar charging symptoms. The difference is important because cleaning may solve a blocked port, while hardware damage requires repair.

Start by disconnecting the charger and inspecting the port under good lighting. Look for compacted lint, dust, or other material that could prevent the plug from seating fully.

A cable that stops short of its normal position may indicate an obstruction. If the plug fits normally but still disconnects easily, the cable or port may have a physical problem. Understanding common phone charging myths can also help you avoid unnecessary repairs or incorrect troubleshooting.

You should also test a known-good compatible cable. If one cable feels loose while another fits securely, replacing the cable may solve the problem.

Watch for additional warning signs:

  • The port moves when the cable moves.
  • Charging repeatedly starts and stops.
  • The device charges only at certain angles.
  • The connector or port shows visible damage.
  • Several compatible cables have the same problem.

Do not force the cable into place. Excessive pressure can turn a minor connection problem into hardware damage.

How much does it cost to fix a loose phone charging port?

The cost of fixing a loose charging port varies widely. It depends on the phone model, the type of damage, the replacement part, and the repair provider.

A simple cleaning may cost little or nothing at some repair shops. However, prices increase when the charging assembly itself needs replacement. Some phones use a replaceable charging board or flex assembly. Others require more extensive disassembly.

Repair costs can also differ between independent shops and authorized service providers. Parts quality, labor rates, device construction, and warranty coverage all affect the final price.

Before approving a repair, ask the technician what caused the problem. A useful estimate should identify whether the issue involves:

  • Debris inside the port
  • A damaged charging cable
  • A worn or broken port
  • Damaged internal connections
  • Liquid or corrosion damage
  • A larger motherboard problem

Ask whether the quoted price includes parts and labor. Also ask whether the repair affects water resistance or the manufacturer’s warranty.

If the phone is still covered by a warranty or protection plan, check its terms before paying for third-party repair.

Warranty Coverage and Authorized Service Pricing

Warranty coverage depends on the manufacturer, device, purchase date, and cause of damage. A charging problem is not automatically covered simply because the phone is still within its warranty period.

Manufacturers commonly distinguish between manufacturing defects and accidental damage. Drops, liquid exposure, corrosion, and physical damage may receive different treatment.

Before visiting a repair shop, check your device’s warranty or protection-plan status. Use the manufacturer’s official support website when possible.

Authorized service centers may use manufacturer-approved parts and repair procedures. Independent repair shops can offer different pricing and repair options. However, the quality and warranty terms can vary between providers.

Ask these questions before approving any work:

  • What exactly is causing the loose connection?
  • Does the port need cleaning or replacement?
  • Is the replacement part original or third-party?
  • What does the repair warranty cover?
  • Will the repair affect water resistance?
  • Could the repair affect the manufacturer’s warranty?

Do not choose a repair based only on the lowest price. A cheap repair can become expensive if the wrong part causes additional problems.

If the port shows burning, melting, corrosion, or other serious damage, professional inspection is safer than home repair.

Can I fix my loose iPhone charging port?

Sometimes, yes. If debris is preventing the cable from seating correctly, careful cleaning may resolve the problem. However, you should not assume every loose iPhone port can be fixed at home.

First, disconnect the charging cable and turn off the iPhone. Inspect the port under a bright light. Look for visible lint or debris that could prevent the connector from fitting completely.

Avoid metal objects, liquids, and force. Do not scrape aggressively around the connector contacts. If you are unsure about safely removing debris, professional cleaning is a safer option.

After inspection, test the phone with a known-good compatible cable. If the connection remains loose, unstable, or sensitive to movement, the port may have physical damage.

You should seek professional service when:

  • The port itself moves inside the phone.
  • Multiple cables disconnect easily.
  • Charging works only at a particular angle.
  • The phone shows signs of liquid or corrosion damage.
  • Cleaning does not solve the problem.
  • The connector or port appears physically damaged.

Do not force a cable to maintain a connection. Continued movement can worsen an already damaged connector.

Safe Tools for Cleaning an iPhone Port

Cleaning a charging port requires more caution than it might seem. The connector contains small contacts that can be damaged by sharp or conductive objects.

Apple’s current cleaning guidance advises turning off the iPhone, disconnecting cables, avoiding moisture in openings, and avoiding compressed air. For that reason, do not automatically follow generic advice recommending compressed-air cleaning.

Avoid inserting these items into the charging port:

  • Safety pins
  • Sewing needles
  • Paperclips
  • Metal tweezers
  • Blades
  • Other conductive or sharp objects

Do not spray liquid cleaners directly into the port. Moisture can create additional problems, especially if it reaches internal components.

If debris is clearly visible but cannot be removed safely, consider professional cleaning. A repair technician can inspect the connector without relying on force.

After cleaning, test the connection with a compatible cable. If the cable still moves excessively, cleaning probably was not the real solution. The port or cable may require replacement.

How can I fix a loose USB-C port?

A loose USB-C connection does not always mean the phone’s USB-C port is broken. Start by checking the cable, because a worn or damaged connector can create a poor fit.

Turn off the device and inspect the USB-C port under good lighting. Look for visible debris, moisture, corrosion, or physical damage. Do not push objects deep into the port or apply force to its internal components.

Try another known-good USB-C cable that is compatible with the device. If the replacement cable fits securely, the original cable may be the problem.

If several cables feel loose, inspect the device more closely. A damaged port may also cause intermittent charging, slow charging, or charging that stops when the cable moves.

You should stop troubleshooting at home if you notice:

  • A bent or damaged internal component
  • Burning or melting
  • Corrosion
  • Liquid exposure
  • A port that moves inside the device
  • Charging that works only at certain angles

USB-C ports contain small contacts and mechanical components. Aggressive cleaning or bending can cause additional damage. If the problem continues after basic inspection and cable testing, professional repair is the safer option.

Protecting the Sensitive Center Connector Tongue

Many USB-C connectors contain a central tongue that carries electrical contacts. This area can be delicate, so avoid applying pressure while inspecting or cleaning the port.

Do not use a metal pick, needle, paperclip, or similar object. Avoid twisting tools inside the connector. You should also avoid spraying liquids or cleaning chemicals directly into the port.

If the port contains visible debris, follow the cleaning instructions provided by your device manufacturer. Different phones can have different cleaning recommendations. Do not assume that a technique suitable for one model is safe for another. If moisture may be involved, understanding IP67 vs. IP68 water resistance ratings can provide useful context.

You can reduce future charging-port problems by keeping the phone away from excessive dust and moisture. Avoid pulling the cable sideways while it is connected. Disconnect the cable by holding the connector rather than yanking the wire. If you regularly use wired accessories, learn how to use wired headphones without losing your charging port.

A few habits can also help:

  • Use compatible, good-quality charging cables.
  • Replace damaged cables promptly.
  • Avoid using the phone in ways that sharply bend the connector.
  • Keep the charging area reasonably clean.
  • Stop using a port that becomes hot or shows visible damage.

If the USB-C connection remains loose after basic checks, have the device professionally inspected.

Conclusion

A loose charging port does not always mean your phone needs an expensive repair. In many cases, dust, pocket lint, or a worn charging cable is the real cause. Start by checking the port carefully and testing another compatible cable.
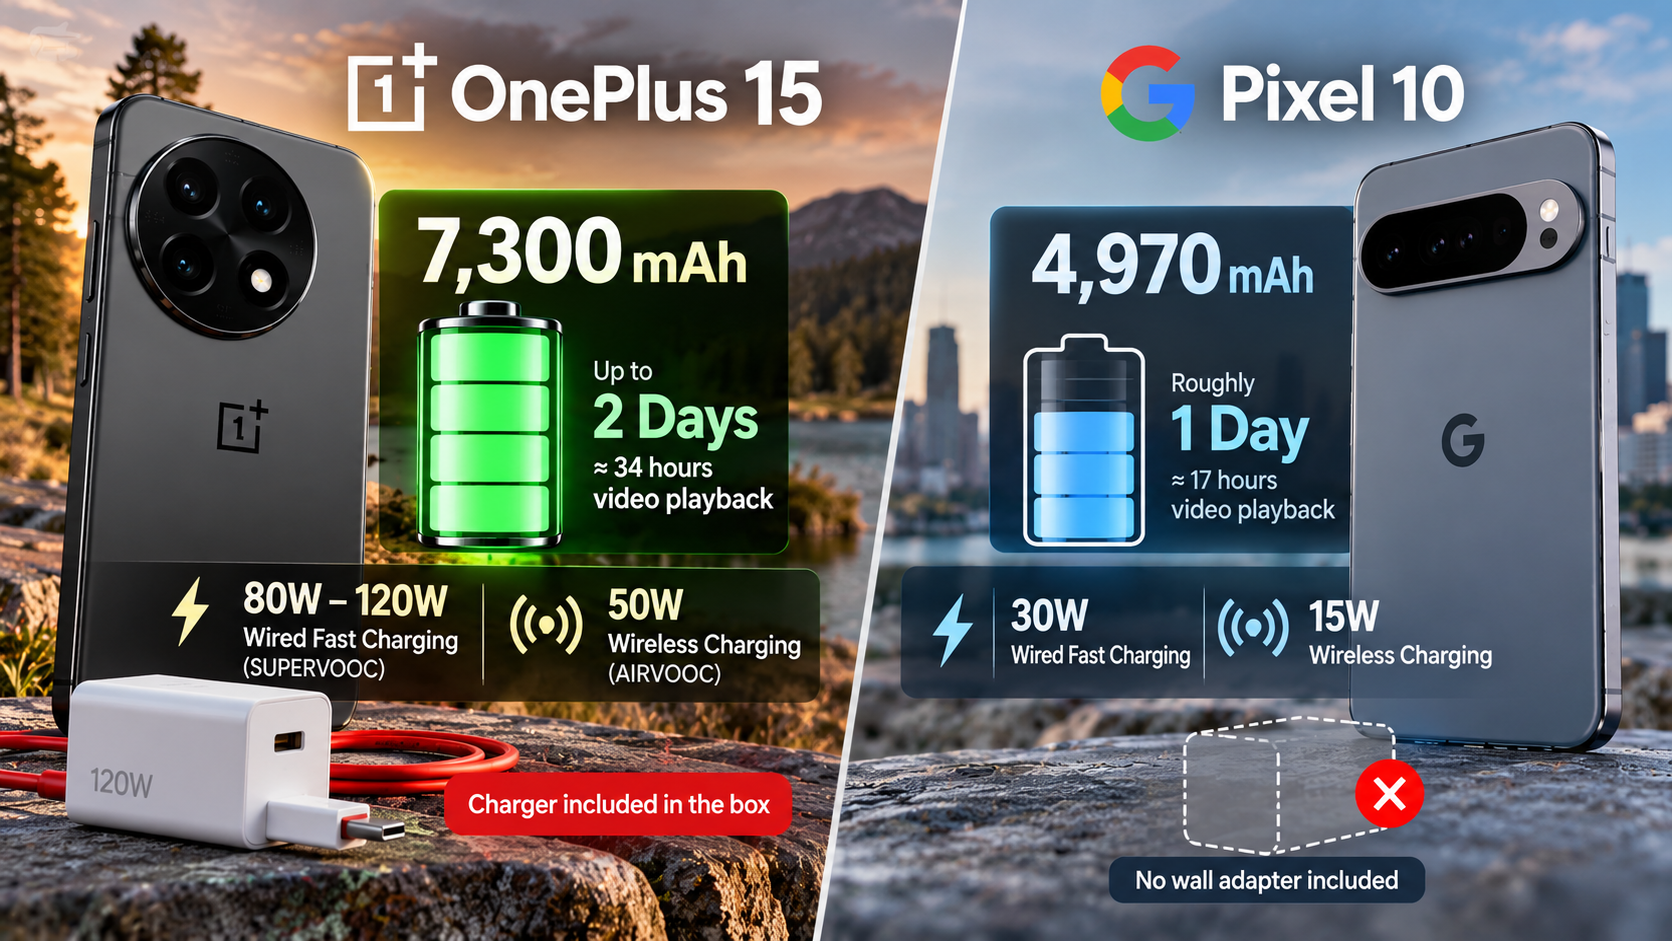
Avoid using sharp metal objects, liquids, or excessive force when cleaning the connector. These can cause more damage and turn a simple charging problem into a hardware repair.
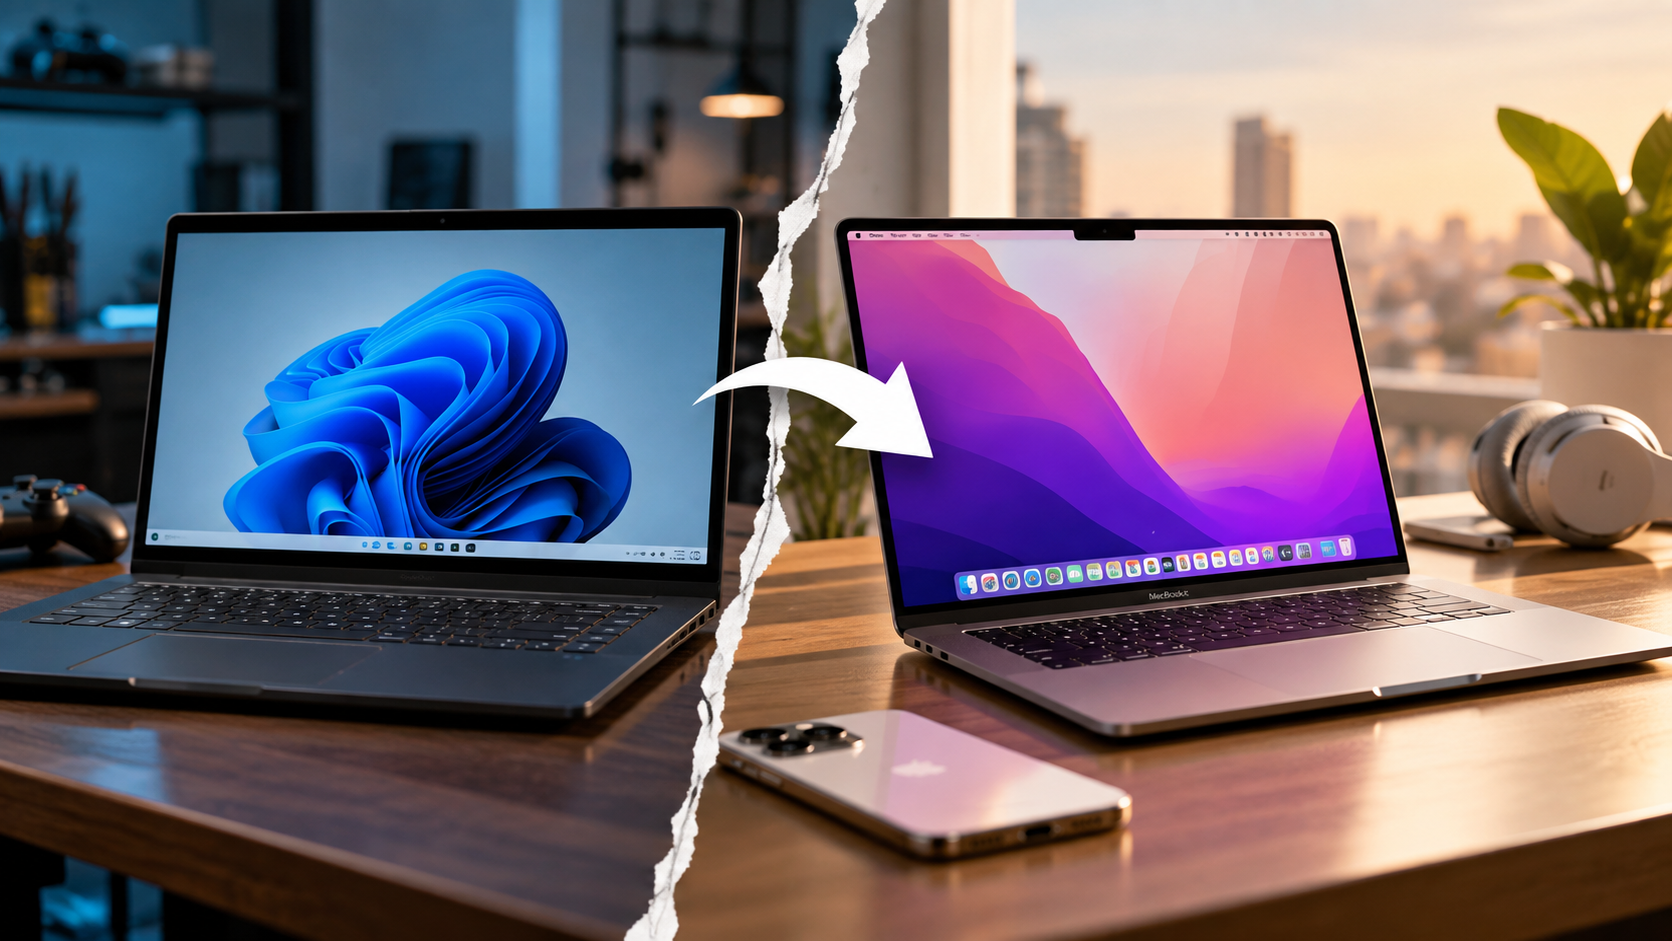
If the connection remains loose after basic checks, or the port shows physical damage, corrosion, or signs of overheating, professional inspection is the safer choice. Taking care of your charging port and cable can also help prevent future charging problems and extend the useful life of your device.