Category Archives: Technology

Posts are related to technology.

30-Day Rule for Buying New Gadgets: Save Money Smartly

What Is the 30-Day Rule for Buying New Gadgets?

Tech companies launch tempting devices every month. This makes impulse spending easy to justify. If you often add smartwatches, tablets, phones, or gaming accessories to your cart, a cooling-off period can help. The 30-day rule for buying new gadgets gives you time to separate genuine needs from temporary excitement.

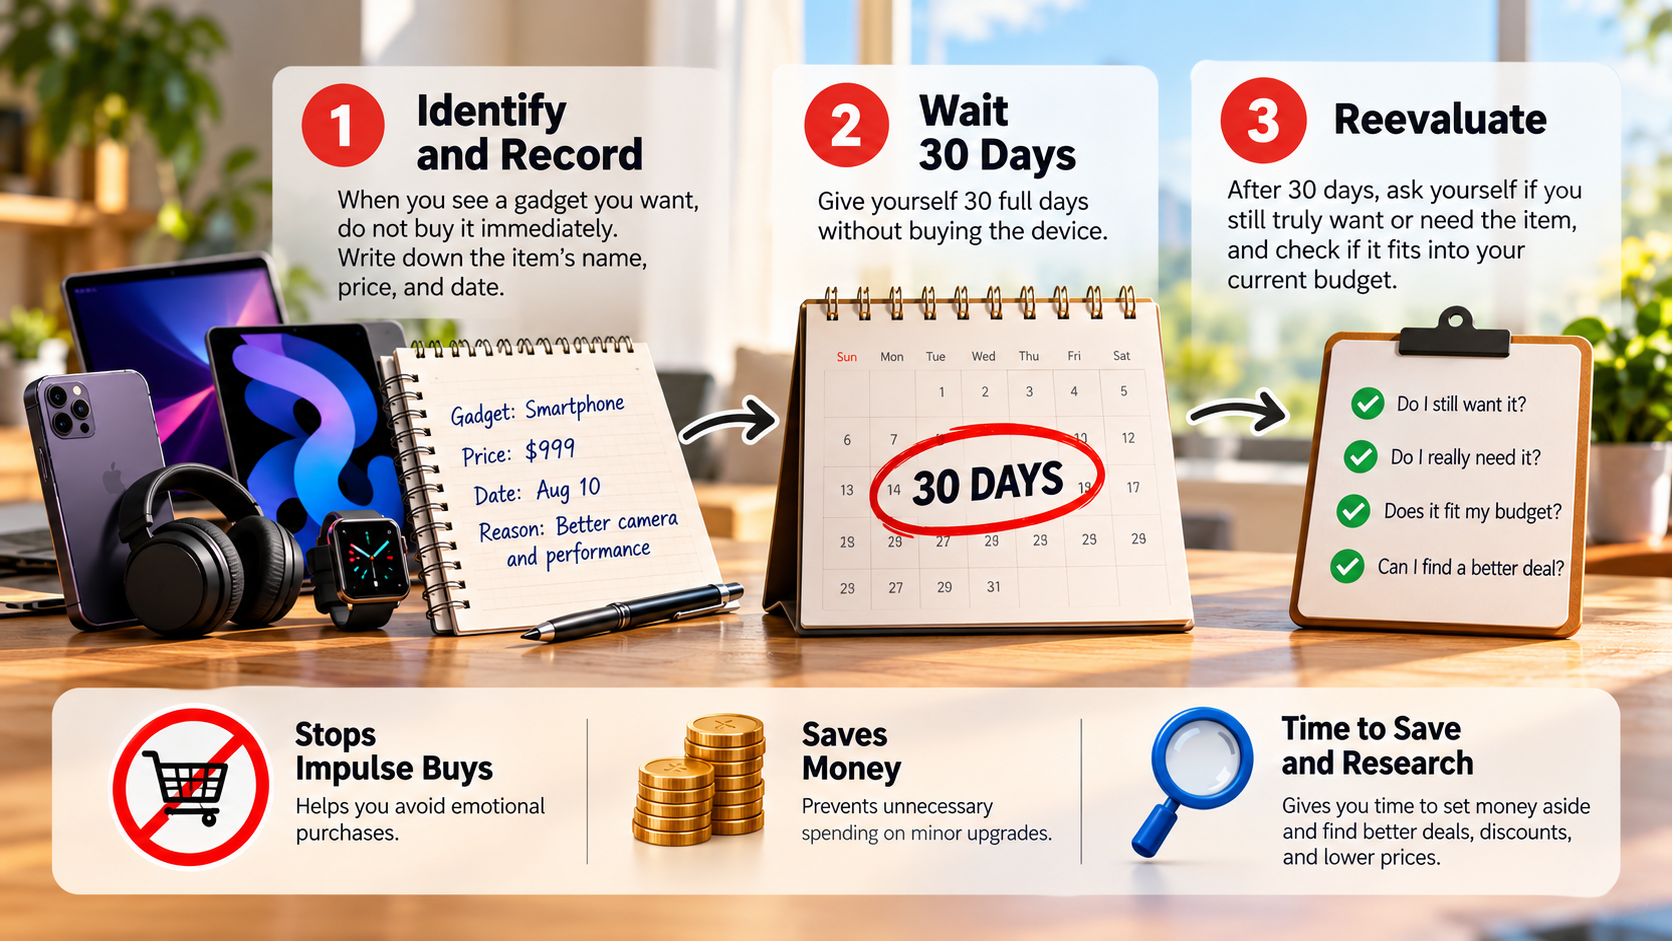
The basic idea is simple. When you want a non-essential gadget, write down its name, price, and reason for buying it. Then wait 30 days before making the final decision. This approach creates distance between the emotional urge and the financial decision. The Consumer Financial Protection Bureau’s guidance on financial well-being also highlights the importance of making deliberate financial choices.

The rule does not mean you can never buy new technology. It encourages more deliberate spending. You can use the waiting period to compare prices, read independent reviews, check your budget, and consider alternatives.

Throughout this guide, you will learn how the 30-day rule works. We will also cover shorter waiting periods, smartphone upgrades, the 48-hour shopping rule, and practical grocery budgeting.

What Is the 30-Day Rule for Saving Money?

The 30-day rule for saving money is a simple strategy for controlling impulse purchases. When you suddenly want a non-essential item, record the product and its price. Then wait 30 days before deciding whether to buy it. This pause creates distance between the emotional urge and the financial decision.

During the waiting period, ask why you want the item. Does it solve a recurring problem? Will you use it regularly? Can your current product perform the same task? Thinking about needs vs. wants when spending money can also help you determine whether the purchase is necessary or simply attractive because it is new.

The rule can also protect money intended for more important goals. Instead of spending immediately, you keep the money available while you evaluate the purchase. If the desire disappears, you avoid an unnecessary expense.

However, the rule is mainly designed for discretionary purchases. It should not delay essential items that you genuinely need for work, health, safety, or daily life.
Prioritizing Needs Over Fleeting Wants

After 30 days, return to the purchase note you created. Review the original reason for wanting the product. Then compare that reason with your current situation. This simple review can show whether the item still matters.

Consider whether you have enough money available after covering essential expenses. You should also check whether buying the product would interfere with savings, debt payments, or other financial goals.

If the purchase remains useful and affordable, you can make the decision with less emotional pressure. You may also find a better deal during the waiting period. New products sometimes receive discounts after their initial launch.

Another useful step is checking how frequently you expect to use the gadget. A device used every day may provide more value than one used occasionally. If you work remotely, you can also compare whether gadgets that increase productivity when working remotely provide enough practical value to justify the purchase. Think about cost per use, durability, warranty coverage, and compatibility with your existing devices.

The goal is not to avoid spending completely. It is to make spending more intentional and reduce purchases you later regret.

How Long Should I Wait Before Buying Something?

How long you should wait before buying something depends on the item’s price, importance, and effect on your budget. There is no universal waiting period that works for every purchase. A small discretionary item may not require the same consideration as an expensive laptop or smartphone.

For inexpensive purchases, a 24-hour waiting period can provide enough distance from an initial impulse. For moderately priced items, consider waiting several days. This gives you time to compare alternatives and decide whether the purchase is worth the money.

For expensive gadgets, the 30-day rule can provide a stronger safeguard. A longer pause gives you time to research specifications, read reviews, compare prices, and examine your budget.

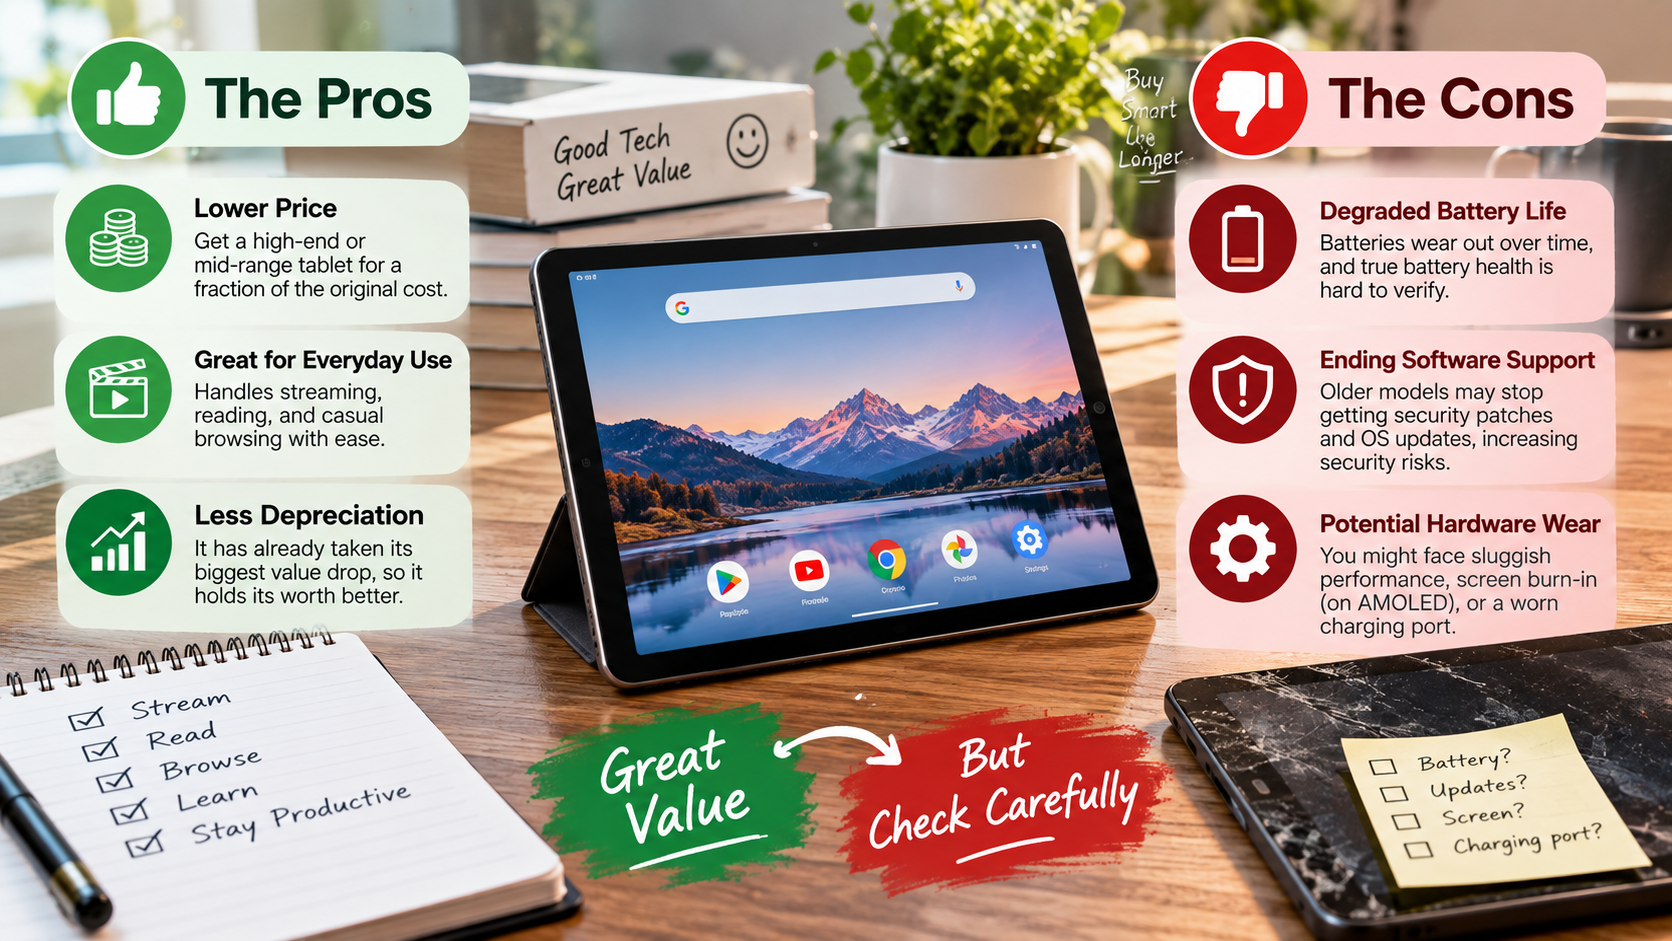
You should also consider whether the product replaces something you already own. For example, if you are considering a tablet as a laptop replacement, review its limitations before deciding. Understanding the disadvantages of using a tablet as a laptop replacement can help you determine whether an upgrade solves a real problem.

The important point is consistency. A personal waiting system can help prevent emotional purchases while still allowing reasonable spending when something genuinely provides value.

Matching Waiting Periods to Price Tags

A personalized waiting system can make the buying process easier. Instead of deciding when you feel tempted, establish your rules before shopping. This removes some of the emotion from the decision.

For example, you could use the following framework:

  • Under $50: Wait at least 24 hours before purchasing.
  • $50–$200: Consider waiting three to seven days.
  • $200–$500: Give yourself one to two weeks for research.
  • Expensive gadgets: Consider using the full 30-day rule.

These amounts are only examples. Your income, expenses, savings, and financial responsibilities should determine your actual limits.

During each waiting period, compare prices from different sellers. Check whether you already own something that performs the same function. Read independent reviews rather than relying only on promotional material.

You can also create a simple purchase checklist. Ask whether you need the item, whether you can afford it, and how frequently you will use it.

This approach turns a vague impulse into a structured decision. It also makes it easier to identify purchases that are driven mainly by excitement.

How Long Should I Wait Before Buying a New Phone?

There is no fixed replacement period that applies to every smartphone user. Many people can keep a phone for several years if its battery, hardware, software support, and performance remain adequate. Instead of upgrading according to a calendar, consider the condition and support of your current device.

If your phone still performs everyday tasks smoothly, replacing it simply because a newer model launched may provide limited value. However, serious battery degradation, physical damage, poor performance, or the end of security support can justify an upgrade.

The 30-day rule for buying new gadgets is especially useful after a major phone launch. Waiting 30 days gives you time to see independent reviews and real-world feedback. Early marketing often emphasizes new features without showing how useful they are in daily use.

Before upgrading, compare the new phone with your existing device. If you are considering a different form factor, such as a foldable model, review whether a foldable phone is worth it before making the purchase. Identify which features would actually change your daily experience and whether those improvements justify the cost.

Evaluating Software Support and Hardware Lifespans

Software support should be one of the first things you check before replacing a smartphone. Manufacturers provide different update periods, so the expected support lifespan varies by model and brand.

Check whether your current phone still receives security updates and operating system updates. If it remains supported and performs your normal tasks well, an immediate upgrade may not be necessary.

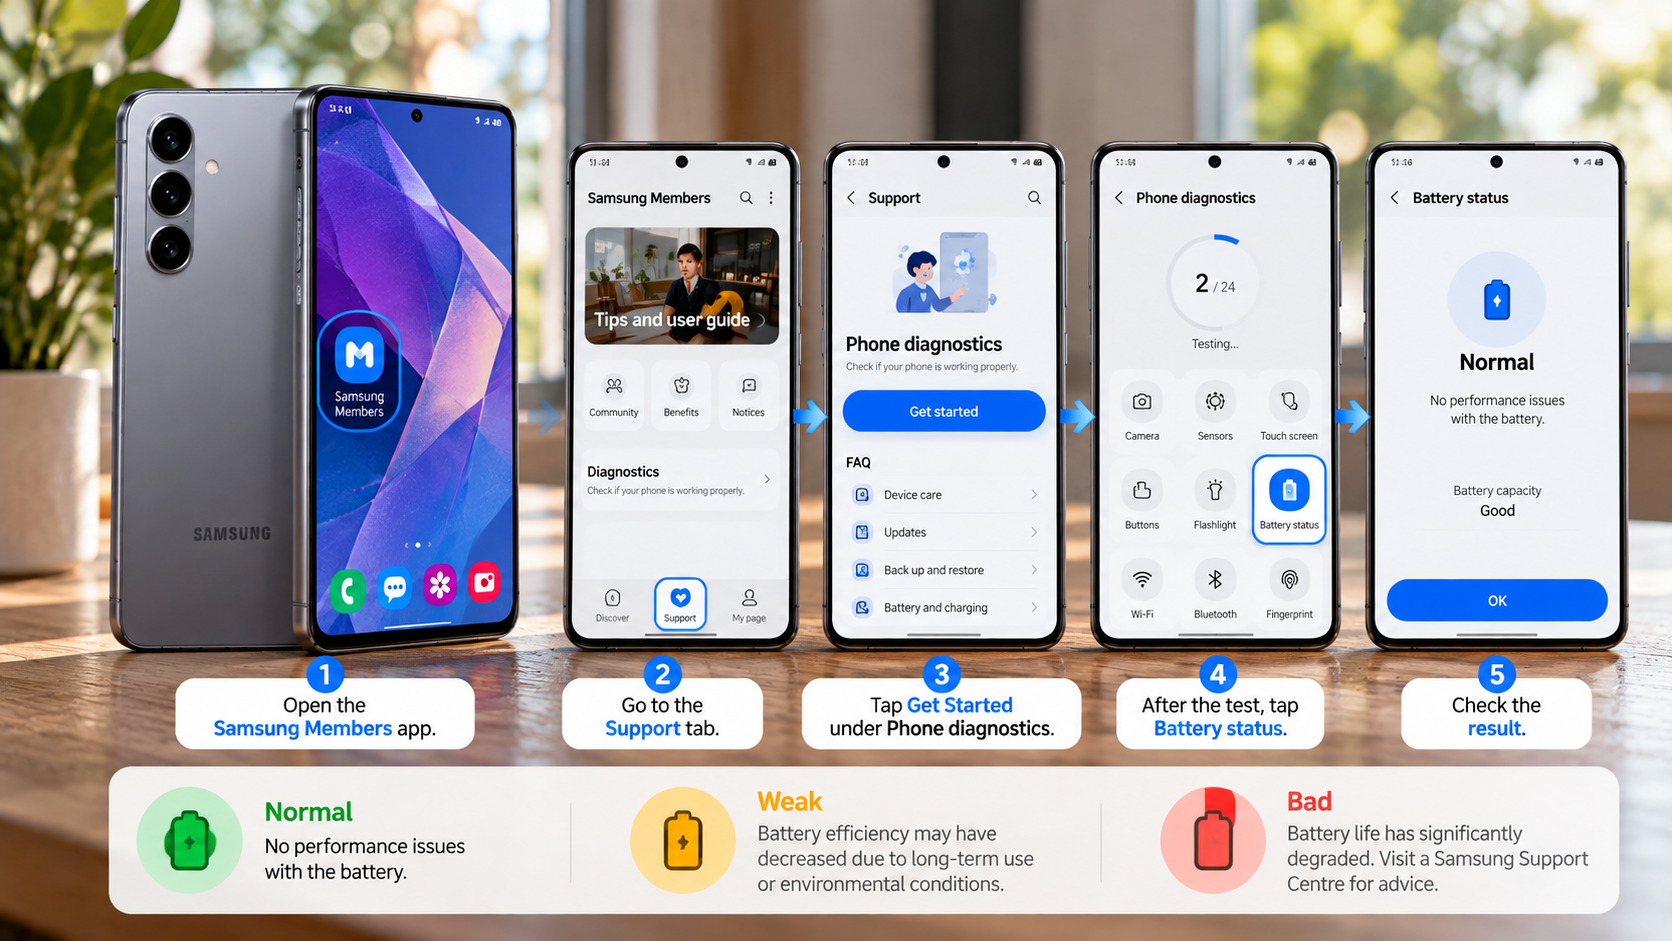
Battery health is another important factor. A battery that drains quickly can make an otherwise capable phone frustrating to use. In some cases, replacing the battery can extend the useful life of the device at a much lower cost than buying a new phone.

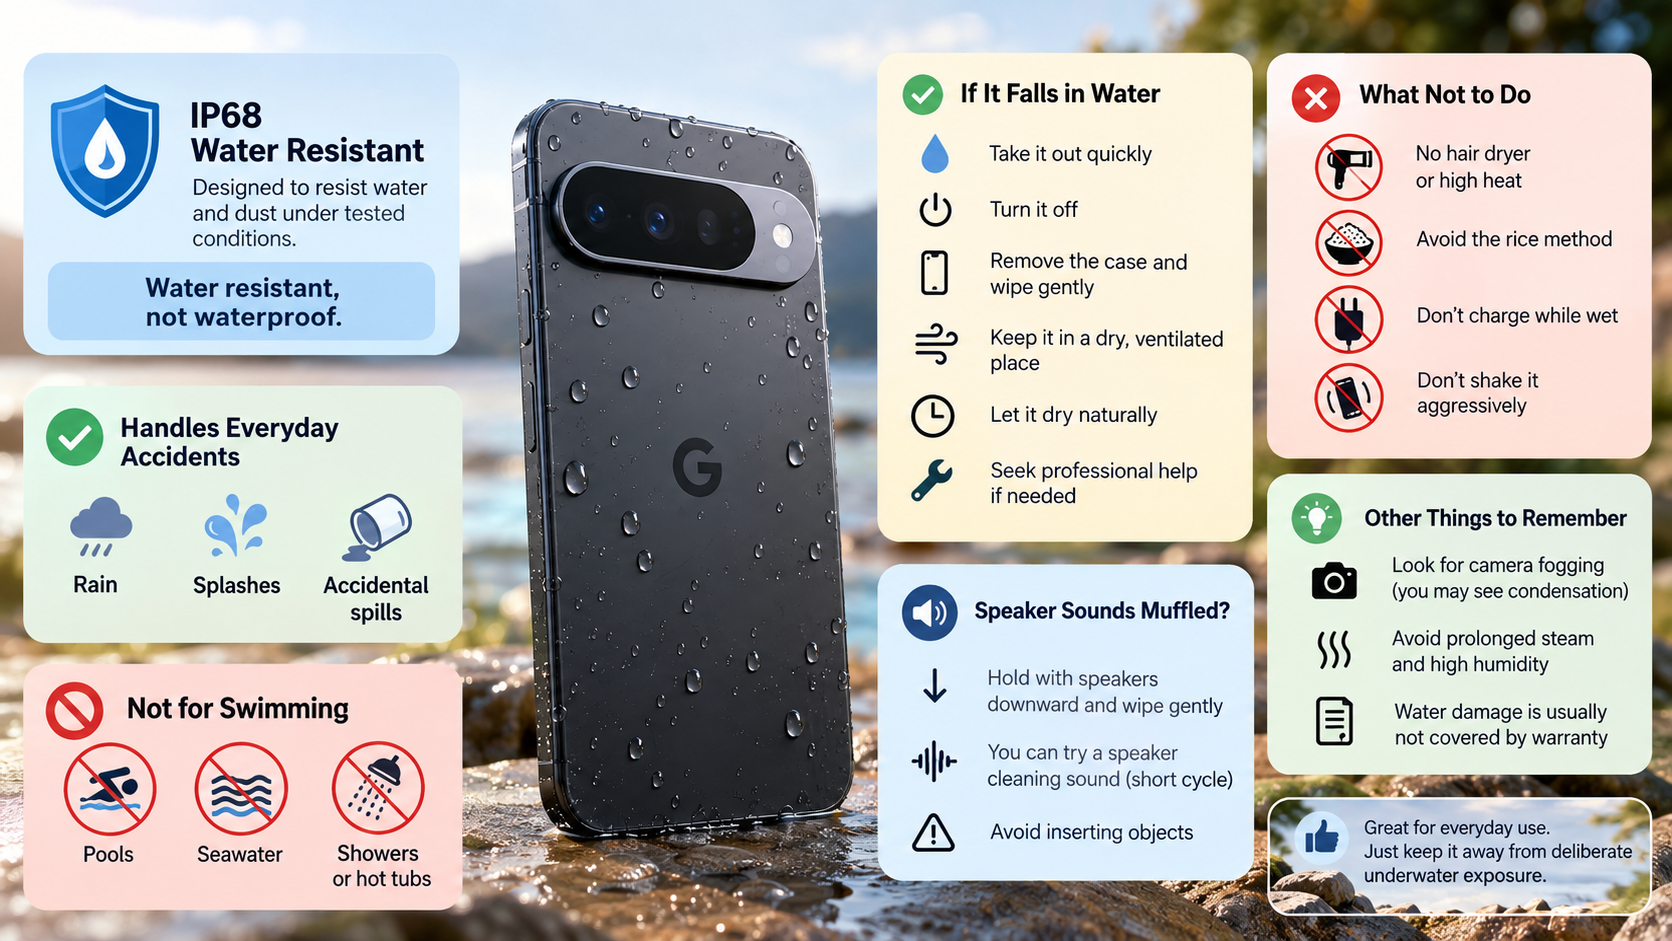
Also consider storage, camera performance, charging speed, and application compatibility. If durability matters, understanding IP67 and IP68 water resistance ratings can help you evaluate how well a device may handle exposure to water and dust. Focus on problems you actually experience rather than specifications you may never use.

If your current phone has reached the end of software support or has serious hardware problems, compare replacement options carefully. Waiting 30 days is still useful when the purchase is non-urgent. It gives you time to find a suitable model and avoid paying more than necessary.

What Is the 48-Hour Rule for Shopping?

The 48-hour rule for shopping is a shorter cooling-off strategy for discretionary purchases. Instead of buying an item immediately, you wait two days before completing the purchase. This approach can work well when a full 30-day waiting period feels excessive for a relatively inexpensive item.

Online shopping makes this strategy particularly useful. Retail websites often use discounts, countdown timers, personalized recommendations, and limited-stock messages. These features can create a sense of urgency and encourage quick decisions.

Adding an item to your cart without checking out gives you time to reconsider. After 48 hours, ask whether you still want the product. Check whether it fits your budget and whether you have a practical reason to own it.

The rule does not guarantee that every purchase will be unnecessary. Instead, it creates a small barrier between temptation and payment.

For more expensive electronics, the 30-day rule for buying new gadgets provides a longer research period. The 48-hour rule is better suited to smaller discretionary purchases where a shorter pause may be enough.

Breaking the Cycle of Digital Retail Triggers

Digital shopping platforms are designed to make purchasing convenient. That convenience can become a problem when every browsing session turns into a potential purchase.

A useful first step is removing saved payment details from shopping websites. This adds a small amount of friction to the checkout process. You can also disable promotional notifications that encourage frequent shopping.

When something catches your attention, place it on a 48-hour waiting list instead of purchasing immediately. Record its price and the reason you want it. After two days, review the item without opening promotional pages.

Be careful with phrases such as “limited-time offer” or “only a few left.” Sometimes these messages may reflect genuine inventory conditions, but they can also increase perceived urgency. Compare the product’s price with other sellers before assuming the discount is exceptional.

For expensive gadgets, extend the waiting period to 30 days. During that time, research alternatives and consider whether your current device already solves the problem.

The goal is to make buying a deliberate action rather than an automatic response to digital marketing.

Is $50 a Week Enough for Groceries for One Person?

Whether $50 a week is enough for groceries depends heavily on where you live, local food prices, dietary needs, and what the budget includes. It may be possible in some areas with careful planning, but it is not a universal grocery budget.

A strict weekly budget requires prioritizing affordable, filling foods. Whole grains, beans, lentils, eggs, seasonal vegetables, and other low-cost staples can help stretch your money. Buying ingredients instead of prepared meals can also reduce costs.

Meal planning is important because unplanned shopping often leads to unnecessary purchases. Create a list before visiting a store and organize it around meals you will actually prepare.

You should also distinguish groceries from other food expenses. A $50 grocery budget may not cover restaurant meals, delivery fees, household supplies, or specialty foods.

Tracking your spending for several weeks can give you a more realistic personal target. If your normal grocery costs are higher, cutting the budget too aggressively may create unnecessary stress.

The broader lesson is similar to the 30-day rule for buying new gadgets: intentional planning can reduce avoidable spending.

Leveraging Meal Prep and Bulk Staples

Meal preparation can make a limited grocery budget easier to manage. Start with affordable ingredients that can be used across several meals. Rice, oats, potatoes, lentils, beans, pasta, and seasonal vegetables are examples of versatile staples.

Buy larger quantities only when the price per unit is genuinely lower and you can use the food before it spoils. Bulk buying is not automatically cheaper if it creates waste.

Plan several meals before shopping. For example, one batch of cooked beans can become part of different meals during the week. Leftovers can also reduce the temptation to order expensive takeaway food.

Seasonal produce may offer better value than out-of-season options. Frozen vegetables can also be useful because they can last longer and reduce food waste.

Keep a simple record of what you spend. After a few weeks, you will see which foods consume the most money and where adjustments are possible.

A practical grocery budget should fit your actual location and needs. Use $50 as a planning example rather than a universal rule. This keeps the budget realistic while encouraging disciplined spending.

Conclusion

Buying a new gadget can be exciting, but excitement should not make the financial decision for you. The 30-day rule for buying new gadgets creates a simple pause between wanting a product and paying for it. That pause gives you time to consider your needs, compare alternatives, research the product, and review your budget.

Not every purchase needs a full 30-day wait. Smaller discretionary items may only require 24 or 48 hours, while expensive electronics deserve more careful consideration. For smartphones, check your current device’s performance, battery condition, and software support before deciding to upgrade.

The same principle applies to everyday spending. Planning your groceries, comparing prices, and avoiding unnecessary purchases can help you keep more money available for important financial goals.

The goal is not to stop buying things you enjoy. It is to spend intentionally instead of impulsively. Before your next gadget purchase, step back, wait, research, and ask whether the product will genuinely improve your daily life. If it still makes sense after the waiting period, you can buy it with greater confidence.

Here’s How to Enable Parental Controls on an Android Device

How to Enable Parental Controls on an Android Device

Handing a smartphone to your child opens a world of discovery. However, it can also expose them to inappropriate content, excessive screen time, and unwanted purchases. Learning how to enable parental controls on an Android device can help you create safer digital boundaries.

Android provides several tools for managing a child’s device. Depending on the Android version and manufacturer, you can use built-in parental controls, Google Play settings, or Google Family Link. These tools can help manage apps, screen time, purchases, and online content.

The exact menu names can vary between Android versions and phone brands. Therefore, do not worry if your device looks slightly different from the steps below.

This guide explains how to enable parental controls on an Android device, manage your child’s phone remotely, limit screen time, and use app pinning. It also explains the limits of these controls and how to choose settings that suit your child.

How Do I Set Parental Controls on Android?

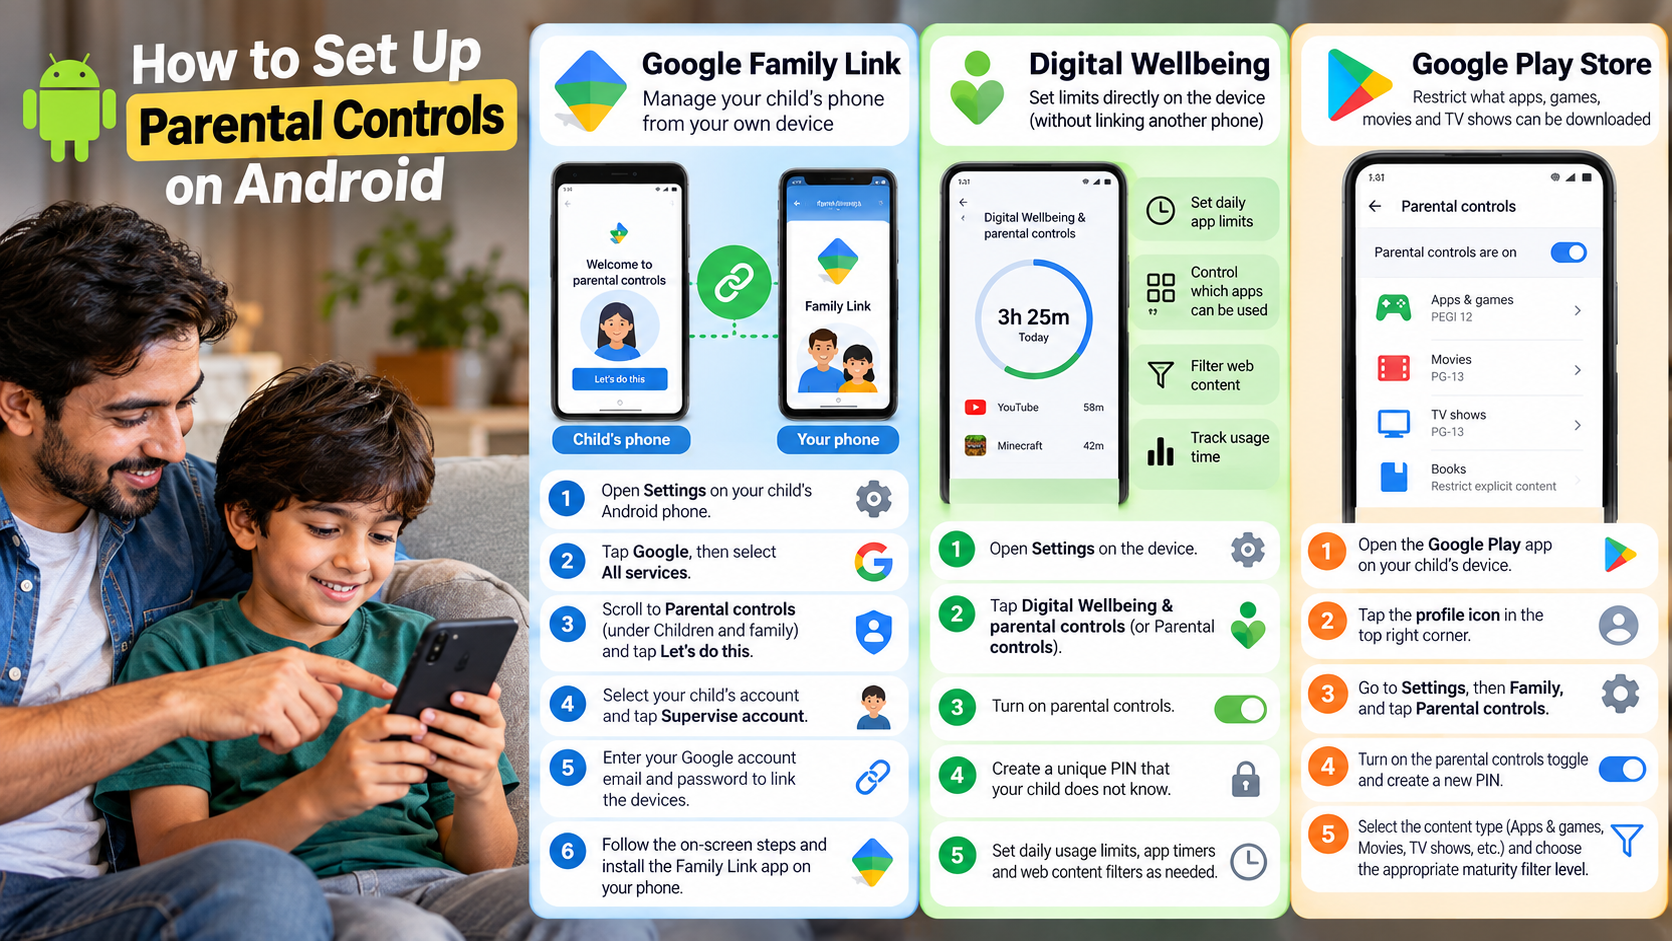
If you want to enable parental controls on an Android device, start by checking the parental control options in the Settings app. On supported newer Android versions, open Settings and look for Parental controls. Some phones may place these options under Digital Wellbeing & parental controls.

Depending on your device, you may be able to create a parental controls PIN and manage screen time, downtime, app limits, blocked apps, and web content. The available options depend on your Android version and manufacturer.

You can also use Google Play parental controls to restrict certain types of content. These controls can limit apps, games, movies, TV shows, and books based on available age ratings. Parents can also review the best free apps for Android users when choosing age-appropriate apps for their children.

For broader supervision, consider using Google Family Link. It connects a child’s supervised Google Account with a parent’s device.

When setting up controls, create a PIN that your child cannot easily guess. Review the settings regularly as your child’s age and digital needs change.

Choosing Age Ratings for Apps and Games

Age ratings can help parents control access to apps and games that may not be suitable for their child. The available rating system can vary by country, content type, and platform.

Google Play parental controls allow parents to restrict certain types of content based on maturity ratings. Family Link can also help parents approve or block app downloads on compatible supervised accounts.

However, an age rating should not be the only factor you consider. An app can have an appropriate rating while still containing advertisements, chat features, purchases, or other functions you may not want your child using.

When you enable parental controls on an Android device, review the available restrictions carefully. Consider checking these areas:

  • Apps and games
  • Movies and TV
  • Books
  • In-app purchases
  • App permissions
  • Download approvals

You should also review the apps already installed on the device. Parental controls reduce certain risks, but they cannot identify every inappropriate interaction.

For younger children, combine technical restrictions with simple conversations about safe downloads, strangers online, personal information, and responsible device use.

How Do I Control My Child’s Phone From Mine?

You can remotely manage many aspects of a child’s compatible Android device through Google Family Link. First, install Family Link on your own compatible device. Your child will also need a compatible supervised Google Account on their device.

After supervision is configured, parents can manage several settings remotely. Depending on the child’s device and account, these can include screen time limits, app limits, app approvals, blocked apps, and scheduled downtime.

Family Link can also show certain information about your child’s app activity. It can support location sharing when the necessary location settings are enabled on the devices.

The available features are not identical on every phone. Android version, manufacturer, account configuration, and regional availability can affect what you can manage.

Family Link is particularly useful when you want to manage your child’s device without physically accessing it every time. It can also be useful to explore iPhone and Android apps to simplify your routine when managing everyday family tasks across devices. However, parental controls should support family rules rather than replace communication.

Explain the limits to your child in simple terms. Clear expectations can make digital restrictions easier to understand and follow.

Setting Remote Screen Time and Bedtime Limits

Family Link allows parents to create daily screen time limits for compatible supervised devices. You can set different limits for different days, which can help separate school days from weekends.

You can also create scheduled downtime. For example, you could restrict device use during school hours or establish a nighttime schedule.

When the screen time limit is reached, the device can become locked. Some apps may remain available if they have been designated as unlimited. Phone and emergency features can also remain available on supported devices. Parents can also use these limits alongside healthy routines to beat sleep inertia and wake up without brain fog.

These controls give parents more flexibility than simply taking the phone away each evening. You can adjust the schedule when your child’s routine changes.

A practical setup could include:

  • Shorter limits on school days
  • Longer limits on weekends
  • Downtime during sleeping hours
  • Restricted access to distracting apps
  • Continued access to essential apps

When you enable parental controls on an Android device, avoid choosing restrictions simply because they are available. Consider your child’s age, school schedule, responsibilities, and current habits.

Review the limits periodically. A setting that works for a young child may become unnecessarily restrictive as they get older.

Can You Put Parental Controls on a Mobile Phone?

Yes. Modern Android phones provide several ways to add parental controls, although the exact features depend on the Android version, manufacturer, account type, and region.

Built-in Android controls can help manage screen time, app usage, blocked apps, web content, and other restrictions on supported devices. Google Family Link can provide additional supervision for compatible child accounts.

Google Play also provides content and purchase controls. These features can reduce access to unsuitable apps and media. However, no single parental control setting can block every possible source of inappropriate content.

Some mobile carriers may offer additional network-level filtering. Third-party parental control services can also provide extra monitoring and filtering features.

Before using a third-party service, check its privacy policy and requested permissions. Some services may collect sensitive information about the child’s device or activity.

The best approach is to combine several appropriate safeguards. These may include:

  • Screen time limits
  • App restrictions
  • Purchase controls
  • Web filters
  • SafeSearch
  • Location sharing

Parents should also teach children how to spot fake news and misinformation online, especially when they begin using websites and social platforms independently.

When you enable parental controls on an Android device, remember that these tools are not a substitute for parental guidance. Children should also learn why certain content, websites, and online interactions can be risky.

Carrier-Level Content Filters and Cellular Protections

Some mobile carriers offer optional content filtering and account-level safety features. These services can provide another layer of protection when a child uses mobile data.

Carrier features differ significantly. Some may filter categories of websites or services, while others may focus on account controls or spending restrictions. Availability depends on your country, carrier, and specific plan.

Network-level filtering can complement controls configured directly on the child’s Android phone. However, it should not replace device-level restrictions.

Before activating a carrier filter, check exactly what it blocks. Also determine whether it applies to every device on your account or only a specific phone number.

Parents should still configure the child’s Android device separately. Useful settings may include:

  • Screen time limits
  • App restrictions
  • Google Play purchase approval
  • Web content filtering
  • SafeSearch
  • Location sharing

Using several layers can provide broader protection. However, excessive restrictions may block legitimate websites or apps.

Review your settings regularly. If your child’s needs change, adjust the restrictions rather than leaving outdated controls active.

How Do I Lock an Android Phone for Kids?

Android may allow you to temporarily lock a phone to one application using App Pinning. This feature keeps a selected app on the screen until you complete the required unpinning process.

The exact steps vary between Android versions and manufacturers. Open Settings and search for App pinning or Screen pinning. The option may appear under Security or another device settings category.

After enabling the feature, open the app you want your child to use. Open the recent apps screen and select the pin option when it appears. The phone will then remain within that application.

To leave the pinned app, Android requires the appropriate unpinning action. Depending on the device, this may involve your PIN, pattern, password, or another security method.

App Pinning is useful when you temporarily give your phone to a young child. For example, you can pin an educational game or video application.

However, App Pinning does not provide full parental supervision. It only limits navigation during the current session.

For broader protection, combine App Pinning with other controls when you enable parental controls on an Android device.

Preventing Accidental Navigation and In-App Purchases

App Pinning can prevent a child from accidentally opening other apps while using your phone. This can be useful when you want to let a young child play a game without giving access to messages, photos, or other personal information.

However, pinning an app does not automatically make that app safe. Your child may still encounter advertisements, purchases, links, chat features, or unsuitable content inside the application.

Before giving a child access, check the app’s age rating and features. Review its permissions and determine whether it includes advertisements or in-app purchases. It is also useful to compare the best web browser apps for Android when deciding which browsing tools are appropriate for your child.

You should also configure Google Play purchase approval when your child uses a supervised Google Account. Remember that purchase approval applies to purchases made through Google Play’s billing system.

A simple safety checklist includes:

  • Pin only trusted apps
  • Review app permissions
  • Restrict unnecessary purchases
  • Check age ratings
  • Keep Android updated
  • Explain basic online safety rules

These measures work together. App Pinning limits navigation, while parental controls and Family Link provide broader device and account management.

No single setting can eliminate every digital risk. Regular supervision remains important.

Can Android Use Parental Controls?

Yes. Android supports parental controls through built-in device settings and Google’s family supervision tools. However, the exact controls are not identical across every Android phone.

On supported newer versions, Android can provide features such as daily limits, downtime, app limits, blocked apps, and content restrictions. Google Family Link can provide additional supervision for compatible child accounts and devices.

The available features depend on the Android version, manufacturer, account configuration, and regional availability. Older devices may have fewer options or different menus.

Family Link can help parents manage app approvals, screen time, and certain location-sharing features. Location tools require the appropriate settings and permissions to be enabled.

If you want to enable parental controls on an Android device, first check which Android version the phone uses. If you cannot find a particular option, use the Settings search feature or check the manufacturer’s support documentation.

Do not activate every available restriction automatically. Choose controls based on your child’s age and needs.

A balanced setup may include:

  • Age-appropriate content restrictions
  • Screen time limits
  • App controls
  • Purchase restrictions
  • Web protection
  • Regular conversations about online safety

Compatibility Across Manufacturers and Operating System Versions

Parental controls are available across many Android devices, but the experience can differ between manufacturers. Samsung, Google Pixel, Motorola, Xiaomi, and other brands may use different menus and terminology.

The Android version also matters. Newer versions can provide parental control features that older versions do not include. Manufacturer software can further change where specific options appear.

For this reason, instructions written for one Android phone may not work exactly the same way on another. If a setting is missing, use your phone’s Settings search feature first.

You can also check the manufacturer’s official support documentation for your specific model. This can help you find the correct menu without changing unrelated security settings.

Google Family Link can provide a more consistent way to manage compatible supervised accounts. However, its available features still depend on the child’s device and account configuration.

Before you enable parental controls on an Android device, check:

  • Android version
  • Device manufacturer
  • Child’s Google Account type
  • Family Link compatibility
  • Available parental control features

Keeping the phone updated is also important. Updates can improve security and sometimes introduce new parental control options.

The safest approach is to configure only the controls your child actually needs. Review them regularly as your child’s age, habits, and responsibilities change.

Conclusion

Learning how to enable parental controls on an Android device gives you practical ways to create a safer and more balanced digital experience for your child. You can manage screen time, restrict unsuitable content, control app downloads, limit purchases, and use Family Link for remote supervision.

Start with the controls that match your child’s age and daily routine. Avoid adding unnecessary restrictions, and review the settings regularly as your child’s needs change.

Remember that parental controls work best alongside open communication. Teach your child how to recognize unsafe content, protect personal information, and make responsible choices online.

With the right combination of Android parental controls, screen time limits, app restrictions, and family rules, you can give your child the benefits of a smartphone while reducing common digital risks.

Does Wrapping Your Phone in Aluminum Foil Block Signals?

Does Wrapping Your Phone in Aluminum Foil Really Block Wireless Signals?

You have likely seen the classic movie trope of someone wrapping a phone in aluminum foil. The goal is usually to block signals or avoid detection. The idea sounds simple, but smartphones use several radio frequency bands.

Understanding how metal affects wireless signals matters for privacy, connectivity, and emergency preparedness. The basic physics of electromagnetic shielding is well established by organizations such as the National Institute of Standards and Technology (NIST).

Modern smartphones communicate through several wireless technologies. These include cellular networks, Wi-Fi, Bluetooth, and GPS. Each technology uses different frequencies and signal characteristics.

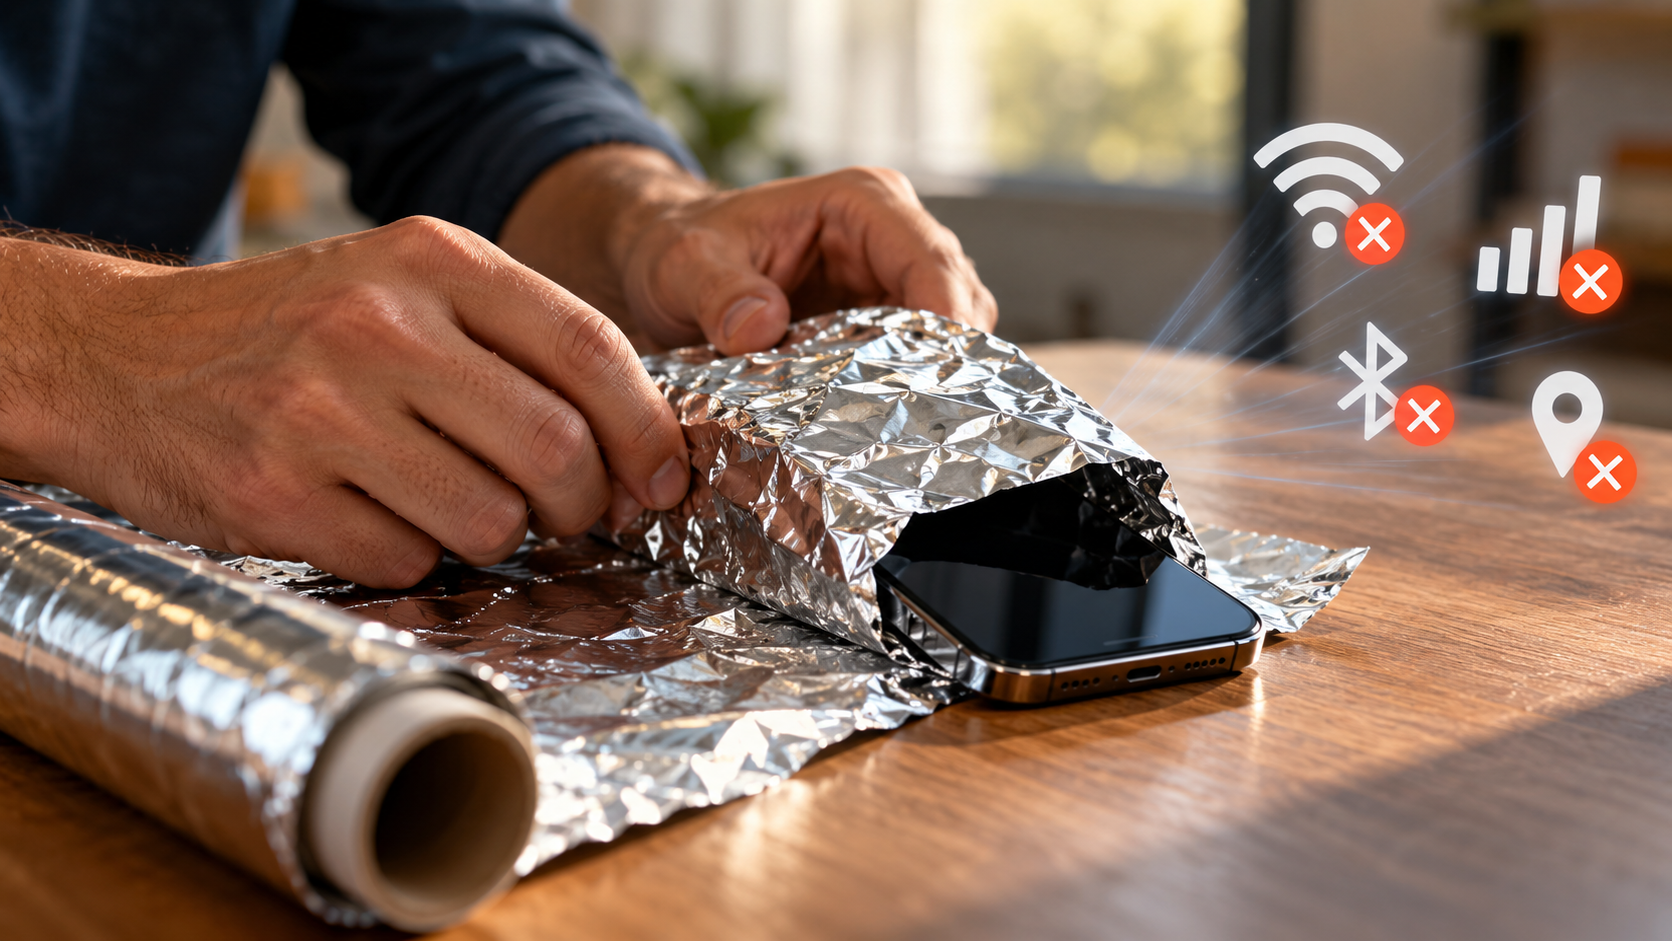
When you wrap a smartphone in aluminum foil, you create a basic form of a Faraday cage. A conductive enclosure can reduce electromagnetic energy reaching the device. However, the result depends heavily on the enclosure’s design.

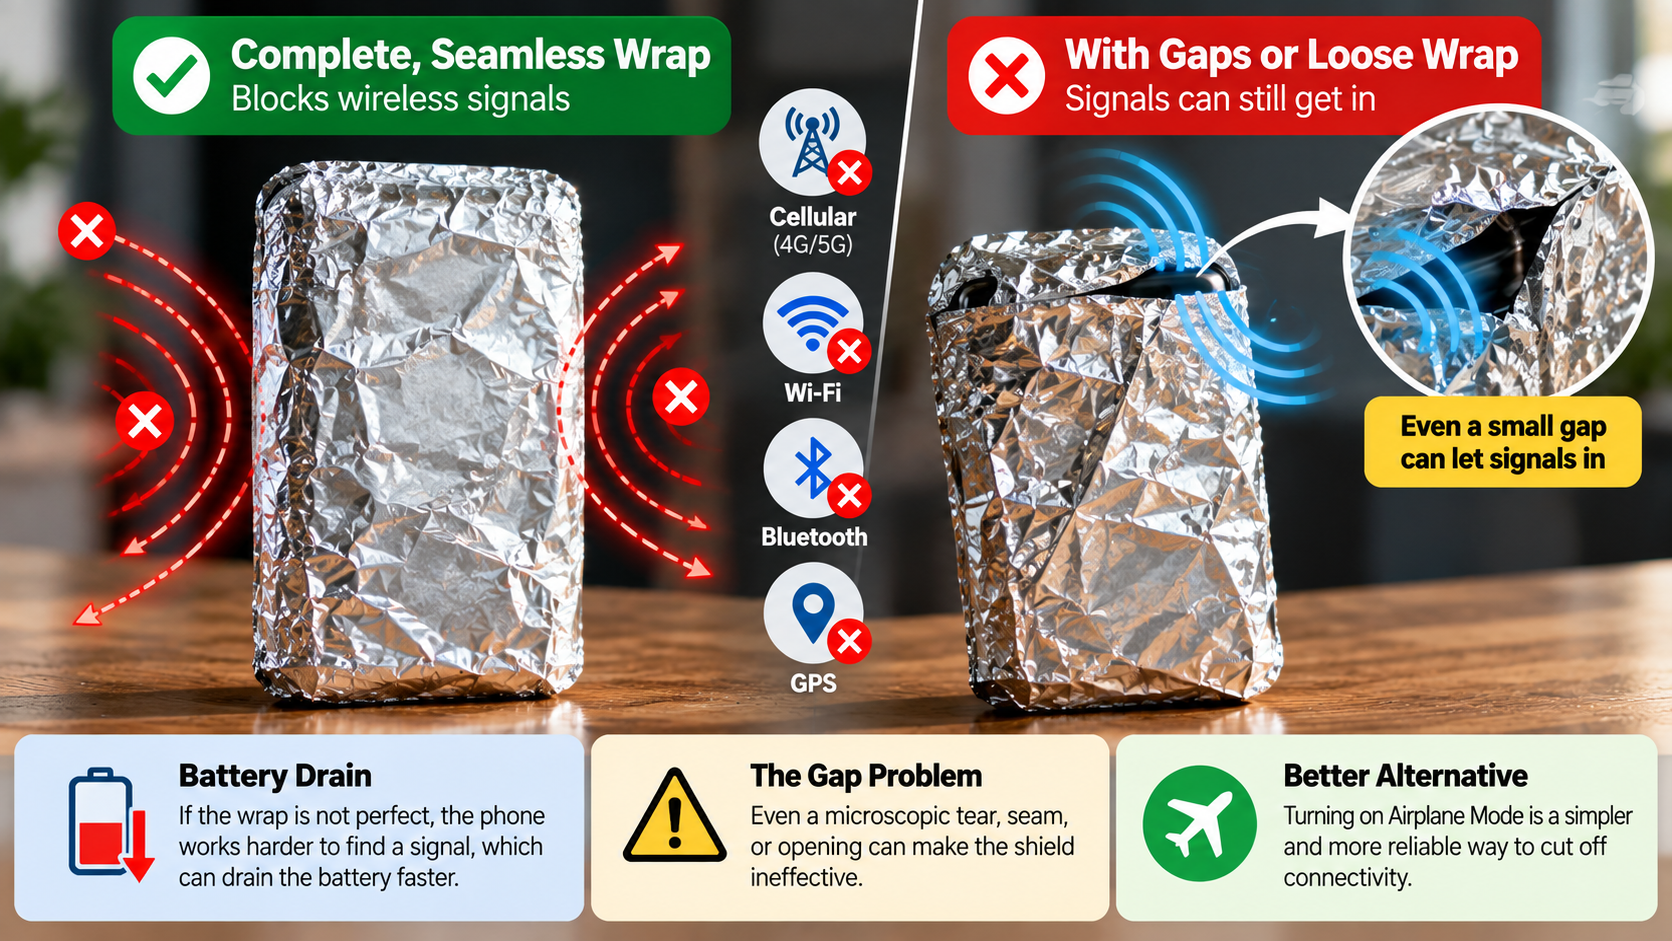
Small openings, gaps, or poorly sealed edges can reduce shielding effectiveness. The phone may also continue transmitting if enough signal reaches its antennas.

This guide explains what aluminum foil can and cannot block. It covers cellular signals, Wi-Fi, tracking, 5G, and signal reflection.

Can aluminum foil block phone signals?

Yes, aluminum foil can significantly reduce cellular signals when it forms a continuous conductive enclosure. However, saying that ordinary foil always blocks signals completely is too strong. The result depends on the frequency, enclosure design, gaps, and thickness.

Cellular networks use radio frequencies that interact strongly with conductive materials. Aluminum can reflect and absorb some electromagnetic energy. A properly constructed enclosure can therefore produce substantial signal attenuation.

The main weakness is incomplete coverage. A loose wrap may leave openings around the phone. Signals can then enter through those openings and reach the internal antennas.

A phone may also increase its transmission effort when reception becomes poor. This can increase battery use while the device continues searching for a usable connection.

For stronger shielding, the enclosure needs continuous conductive coverage. The important factors include:

  • Sealed edges and seams
  • Minimal openings
  • Continuous conductive material
  • Adequate coverage around the entire device

So, wrapping a phone in foil can reduce cellular reception. It should not be treated as a guaranteed signal blocker.

The Problem With Incomplete Seams

Gaps are one of the biggest problems with makeshift shielding. Radio waves can enter through openings in a conductive enclosure. The effectiveness of the shield therefore depends on its weakest point.

A loosely wrapped phone may still receive enough energy to communicate. This is especially possible when the nearby cellular signal is strong. A phone close to a cell tower may have an easier time maintaining connectivity.

The idea that a tiny gap automatically destroys all shielding is also misleading. Shielding does not behave like a simple on-or-off switch. Small openings usually reduce attenuation rather than instantly eliminating it.

The shape and size of an opening also matter. Its relationship to the wavelength affects how much energy can leak through.

For practical shielding, focus on continuous coverage rather than simply adding more foil. Multiple layers may improve durability, but they do not compensate for major openings.

A proper enclosure should therefore minimize:

  • Open seams
  • Torn foil
  • Exposed edges
  • Large gaps
  • Direct openings around ports

A phone can still appear connected when the shielding is incomplete. Testing the device is more reliable than assuming the foil works perfectly.

Does aluminum foil stop Wi-Fi signals?

Aluminum foil can greatly reduce Wi-Fi reception when it forms a continuous conductive enclosure around a phone. However, the exact amount of attenuation depends on several factors. These include frequency, foil coverage, gaps, and the strength of the original signal.

Wi-Fi commonly operates in the 2.4 GHz and 5 GHz bands. Newer Wi-Fi systems can also use higher-frequency bands. Aluminum can reflect electromagnetic energy across these frequencies.

A properly enclosed phone may therefore lose its connection to a wireless router. However, a loose sheet of foil does not guarantee complete isolation.

The 2.4 GHz band generally travels farther and penetrates obstacles better than 5 GHz. This does not mean it will always pass through foil. It means the overall signal environment can affect the result.

The phone’s distance from the router also matters. A very strong nearby signal can behave differently from a weak distant signal. Understanding what your Wi-Fi router can do can also help you troubleshoot connection and coverage issues.

For reliable shielding, pay attention to:

  • Complete conductive coverage
  • Sealed edges
  • Signal strength
  • Frequency band
  • Potential openings

So, aluminum foil can substantially weaken Wi-Fi signals. Complete disconnection depends on the specific shielding setup and surrounding radio environment.

Frequency Differences Between Wi-Fi Bands

Wi-Fi bands respond differently to obstacles because their frequencies and wavelengths differ. The commonly used 2.4 GHz and 5 GHz bands can therefore behave differently around physical barriers. This also relates to the differences between Wi-Fi 6 and Wi-Fi 7, which use newer wireless technologies.

The 2.4 GHz band generally has better range and obstacle penetration. It can travel farther through many ordinary building materials. However, conductive metal can still cause substantial attenuation.

The 5 GHz band generally has shorter wavelengths and less range. It can also experience greater attenuation from certain obstacles. A metal enclosure can reduce both bands significantly when coverage is continuous.

Still, frequency alone does not determine whether a phone remains connected. Signal strength, antenna placement, enclosure geometry, and openings all matter.

This is why simply adding another layer of foil does not provide a guaranteed result. A poorly sealed enclosure may perform worse than expected.

When evaluating Wi-Fi shielding, consider:

  • 2.4 GHz Wi-Fi
  • 5 GHz Wi-Fi
  • Router distance
  • Signal strength
  • Foil coverage
  • Gaps around the device

A continuous conductive enclosure can make Wi-Fi communication difficult or impossible. But the exact outcome must be tested under the conditions involved.

Can aluminum foil actually boost a Wi-Fi signal?

Aluminum foil can sometimes redirect Wi-Fi energy when it is positioned as a reflector. This is different from wrapping a phone in foil. A wrapped phone loses access to incoming radio energy rather than gaining signal strength.

A shaped metal reflector can redirect electromagnetic energy toward a particular area. For example, some DIY setups place conductive material behind a router antenna. The reflector can change the direction in which energy spreads.

This approach does not create additional wireless power. It simply changes the distribution of existing energy. The improvement depends heavily on the reflector’s shape, placement, antenna design, and surrounding environment.

A poorly designed reflector may provide little measurable benefit. It can also weaken coverage in other directions.

The key difference is the intended function:

  • Phone wrapped in foil: Reduces exposure to radio signals.
  • Foil reflector: Redirects some radio energy.
  • Unmodified router: Distributes energy according to its antenna pattern.

Therefore, wrapping your smartphone in aluminum foil will not boost reception. A properly positioned reflector can sometimes improve coverage in a specific direction.

Designing a Directional Foil Reflector

A foil reflector works by changing the direction of electromagnetic energy. It does not amplify the router’s actual transmission power. Its effectiveness depends on geometry, placement, and the router’s antenna pattern.

A curved reflector can help direct more energy toward a selected area. However, the exact shape is important. A random piece of folded foil may produce unpredictable results.

Placement also matters. The reflector should be positioned relative to the antenna and the area where stronger coverage is needed. This is easier to understand when you know why routers have external antennas, since antenna placement affects how wireless signals are distributed.

Keep in mind that directional reflection creates trade-offs. Improving coverage in one direction can reduce coverage elsewhere.

For experimentation, compare signal strength before and after adding the reflector. Test the same location and conditions each time.

The basic principle is simple:

  • Metal reflects electromagnetic energy.
  • A shaped surface can redirect that energy.
  • It does not generate additional transmission power.
  • Results depend on antenna and reflector geometry.

This makes foil more useful as a simple reflector experiment than as a phone signal booster.

Can your phone be tracked if you wrap it in aluminum foil?

A properly shielded phone may lose its ability to communicate through cellular, Wi-Fi, Bluetooth, or GPS radio signals. However, saying that foil makes a phone completely untrackable is too broad. Tracking depends on the technology being used and what happens before and after shielding.

A phone normally uses several systems for location and communication. These can include cellular networks, Wi-Fi, Bluetooth, and satellite positioning.

If radio communication is effectively blocked, the phone cannot send or receive data through those blocked channels. However, the device can still collect information internally.

Applications may store location-related information locally. Sensors can also continue operating while the phone is isolated. Once connectivity returns, stored information may be transmitted.

There are also tracking methods that do not depend directly on the phone’s own cellular connection. For example, a nearby device could observe physical presence without communicating with the wrapped phone.

Therefore, foil should not be treated as a complete privacy solution. It can reduce radio communication, but it does not erase previously collected data. For broader online privacy, understanding what a VPN is and why you might need one can provide useful context.

Understanding Stored Offline Location Data

A shielded phone can continue performing many internal functions. GPS reception may be unavailable inside an effective shield, but sensors can still operate. Applications can also continue storing information locally.

For example, an application may record activity using the phone’s accelerometer or gyroscope. Offline maps may also retain previously downloaded information.

The important distinction is between blocking communication and preventing data collection. Aluminum foil mainly affects electromagnetic communication. It does not automatically disable software or internal sensors.

When the phone reconnects to a network, applications may transmit information that was stored earlier. Whether this happens depends on the application, operating system, permissions, and network connection.

For better privacy, shielding should not be viewed as the only measure. Users can also review:

  • Location permissions
  • Background activity
  • Bluetooth settings
  • Wi-Fi permissions
  • Application data collection
  • Cloud synchronization

These controls address the software side of privacy. Physical shielding addresses the radio side.

The two are different problems. Blocking signals does not automatically delete historical location information.

Can 5G go through aluminum foil?

Aluminum foil can significantly attenuate 5G radio signals, but the statement that all 5G signals simply cannot pass through foil is too absolute. 5G covers a wide range of frequencies, from lower bands to much higher millimeter-wave frequencies.

Lower-frequency 5G signals can travel farther and generally penetrate obstacles better. Higher-frequency signals have shorter wavelengths and are more easily weakened by physical barriers.

Conductive aluminum interacts strongly with electromagnetic waves. A continuous metal enclosure can therefore provide substantial shielding across many radio frequencies.

However, real-world shielding is not determined by frequency alone. Openings, seams, enclosure geometry, material properties, and signal strength all affect performance.

Millimeter-wave 5G is especially sensitive to physical obstructions. Buildings, foliage, and other objects can weaken these signals significantly.

A tightly enclosed phone may therefore lose its 5G connection. But the exact result depends on the network band and the quality of the enclosure.

It is more accurate to say that aluminum foil can strongly attenuate 5G signals rather than claiming every 5G signal is automatically blocked.

Why Millimeter Waves Fail Instantly

Millimeter-wave 5G uses frequencies above roughly 24 GHz. These signals have very short wavelengths compared with lower-frequency cellular signals. They can therefore experience significant attenuation from many physical obstacles.

However, saying that millimeter waves “fail instantly” is misleading. Their behavior depends on the material, thickness, geometry, angle, and presence of openings.

A continuous conductive metal barrier can strongly reflect and attenuate electromagnetic energy. This can make communication difficult for a phone inside the enclosure.

The result becomes less predictable when the foil has gaps or poor contact between overlapping sections. Openings can provide paths for radio energy to reach the phone’s antennas.

The same principles apply across many wireless technologies. Shielding effectiveness depends on the complete enclosure, not simply the fact that the material is aluminum.

For practical purposes, remember these points:

  • Higher frequencies generally have shorter wavelengths.
  • Millimeter-wave signals can be strongly affected by obstacles.
  • Aluminum is electrically conductive.
  • Continuous metal coverage can provide substantial attenuation.
  • Gaps can reduce shielding effectiveness.

So, aluminum foil can be an effective barrier against many radio signals. It should not be described as an automatically perfect shield.

Conclusion

Wrapping a phone in aluminum foil can significantly reduce wireless signals, but it is not a perfect privacy solution. The effectiveness depends on the foil coverage, gaps, signal strength, frequency, and overall enclosure design.

If you wrap phone in aluminum foil carefully, you may block or greatly weaken cellular, Wi-Fi, Bluetooth, and other radio signals. However, incomplete seams or openings can allow signals to reach the phone.

It is also important to separate signal blocking from tracking protection. Foil can limit wireless communication, but it does not erase stored data or prevent apps from collecting information internally.

So, can you wrap phone in aluminum foil to block signals? Yes, it can work as a basic form of electromagnetic shielding. However, it should not be considered a guaranteed or complete method for digital privacy.

For more technical information, see the NIST research on electromagnetic shielding effectiveness.

Hate Deleted Messages? This Android Setting Can Reveal Them

How to Read Deleted Messages on Android Using a Native Setting

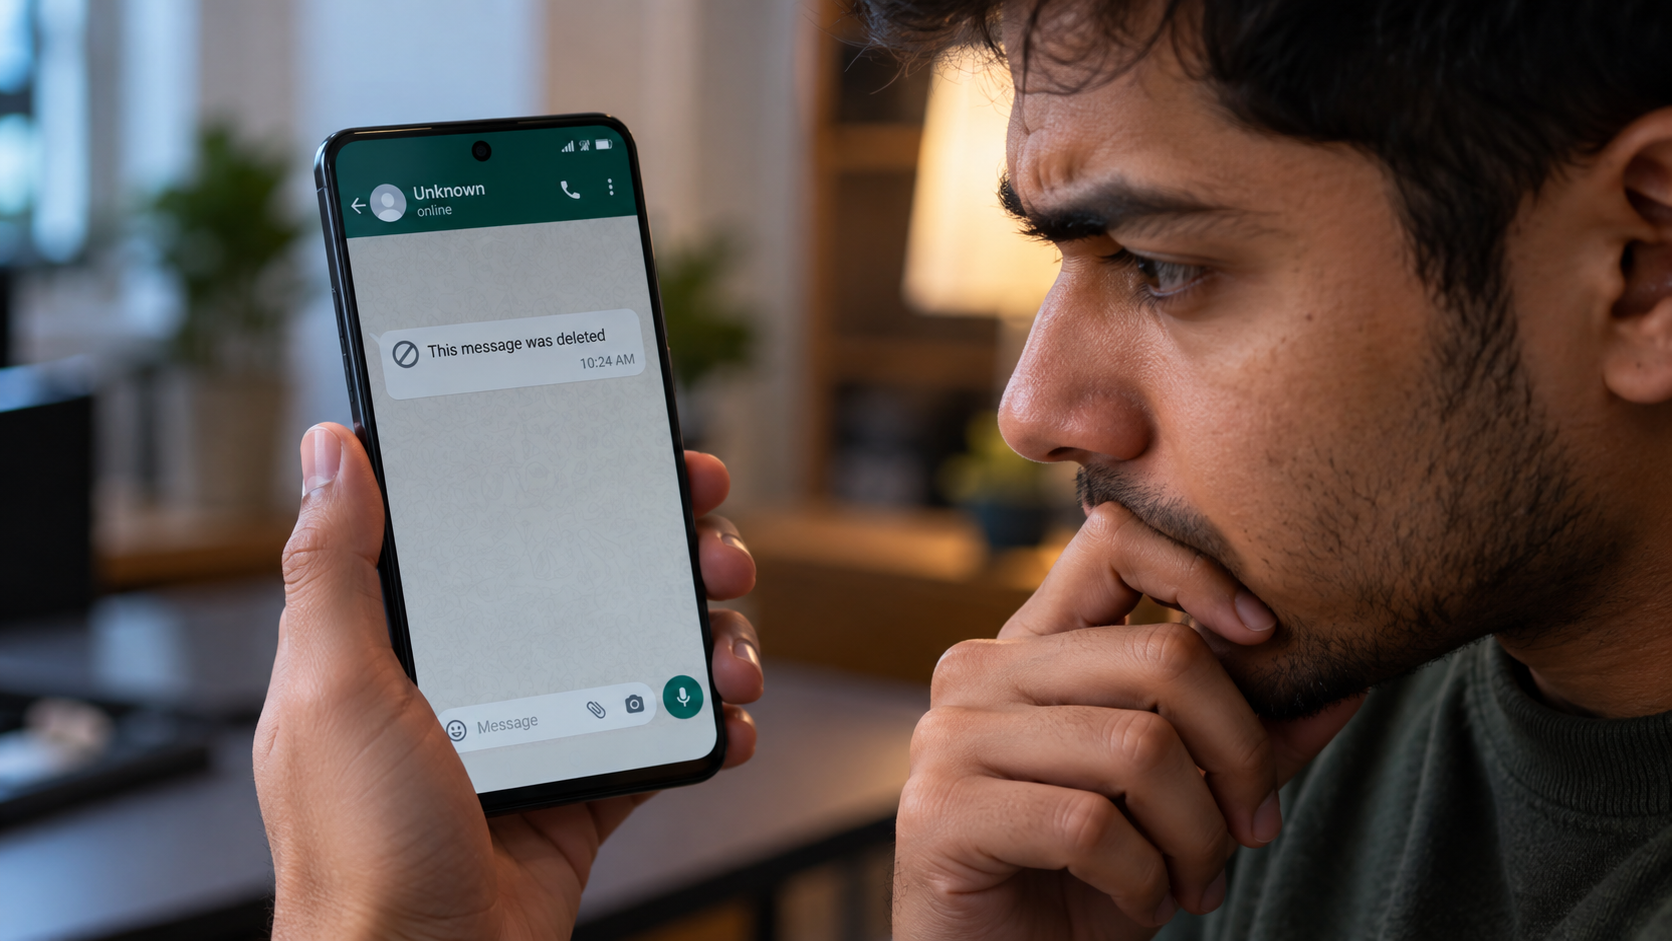
Few things spark curiosity like seeing “This message was deleted” in a chat. If you want to know how to read deleted messages on Android, your phone may already offer a useful built-in feature. A friend may have changed their mind, or someone may have removed a simple typo. Either way, the missing text can leave you wondering what it said.

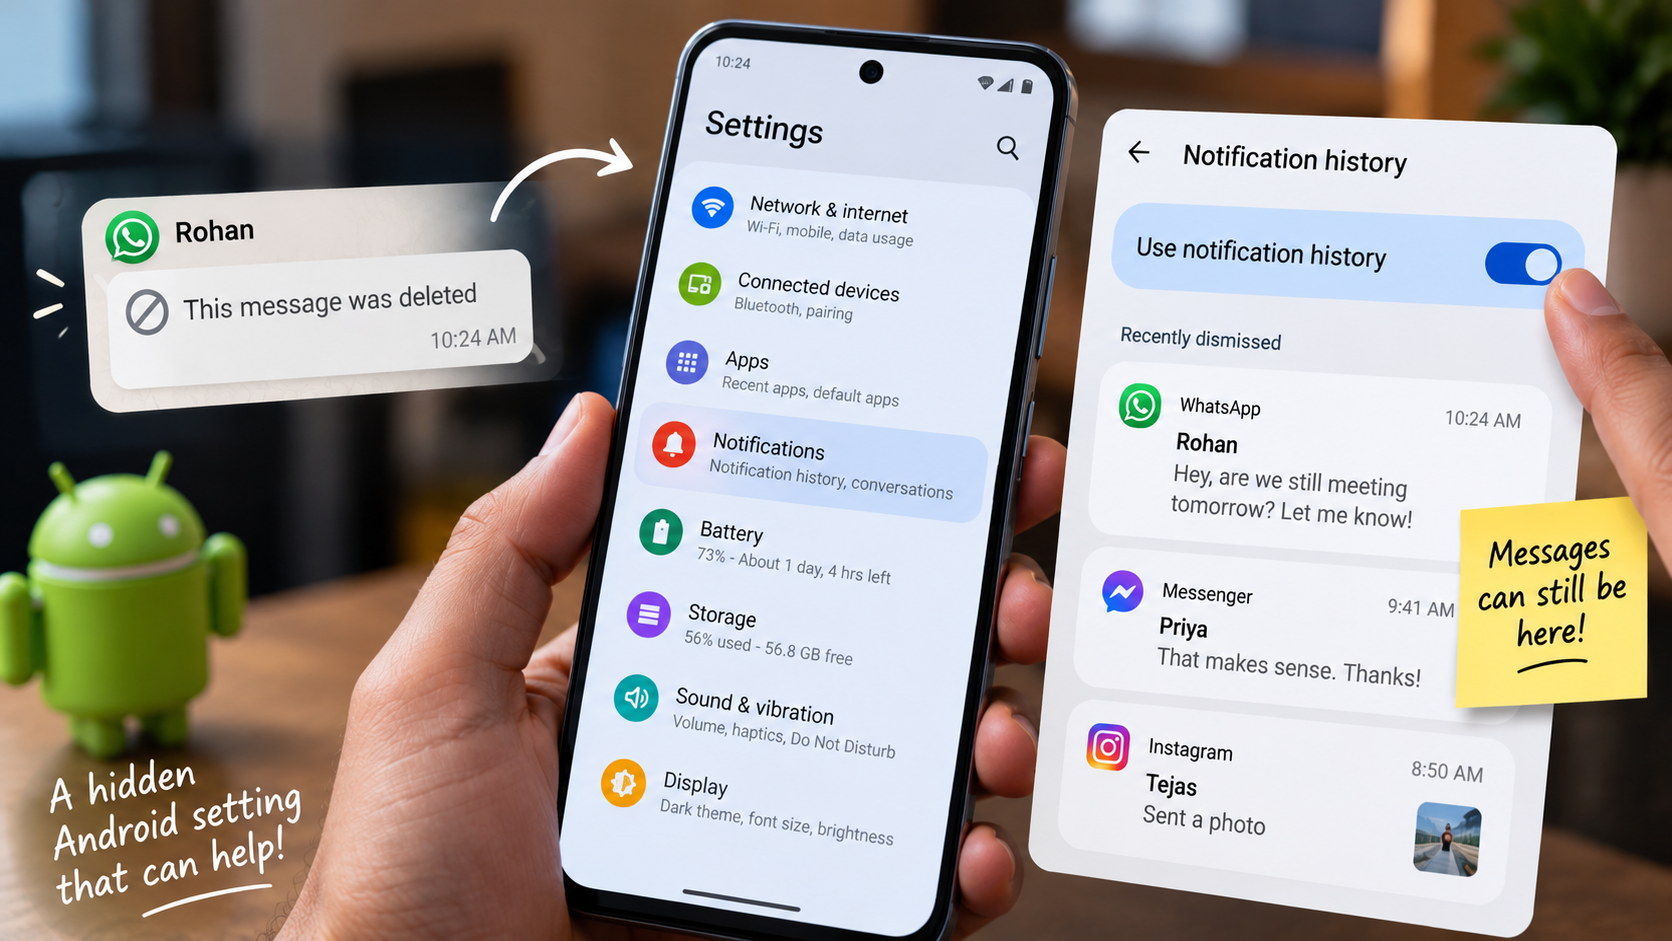
Fortunately, some Android phones offer Notification History. This feature keeps a record of recent notifications, including some message previews. According to the official Android Help Center, supported devices can show recently dismissed notifications and notifications from the last 24 hours.

Google also notes that Notification History availability varies by device. Some phones may not include the feature or may use different menu names.

In this guide, you will learn how to use Notification History to check deleted messages on Android. You will also learn when backups or third-party apps may help. Finally, we will cover the limits of each method.

Is There a Way to Read Deleted Messages on Android?

Yes, but Android cannot guarantee message recovery. You usually cannot retrieve a deleted message directly from the sender’s messaging app. Instead, Android’s Notification History may keep the notification preview that appeared before the sender deleted the message.

On supported phones, open Settings > Notifications > Notification History. Your phone may use slightly different menu names. Google also notes that some Android devices do not offer Notification History.

If you enabled the feature before the message arrived, you may find the earlier notification in the history. The notification can sometimes show the original text that appeared in the preview.

Several factors can affect the result:

  • Your phone must support Notification History.
  • You must enable the feature before the notification arrives.
  • The messaging app must send a notification.
  • The notification must show useful preview text.
  • Android may remove older notification records.
  • Media and disappearing messages may not appear completely.

Therefore, deleted messages on Android can sometimes remain visible through notification history. However, this method cannot recover every deleted message.

Activating Your Android Notification Log

First, check whether your Android phone supports Notification History. Open Settings and search for “Notification History” if you cannot find the option under Notifications.

On supported devices, open Settings > Notifications > Notification History. Then turn the feature on. Google says the feature can show recently dismissed notifications and notifications from the last 24 hours.

Timing matters here. If you turn on Notification History after someone deletes a message, Android cannot normally recreate that earlier notification. The feature needs to record the notification when it arrives.

Once you enable the feature, Android can keep recent notification information from your apps. If a messaging app displays a message preview, Android may save that preview in the history.

However, Notification History does not break encryption or open an app’s private database. It only gives you access to notification information that Android already recorded.

If your phone does not offer this setting, do not assume another hidden Android option can recover the message.

What Is the Best Secret Message App for Android?

No single private messaging app works best for every Android user. Your choice should depend on the privacy features you need and how you communicate. If you are comparing different Android applications more broadly, you can also explore these best free apps for Android users.

Signal remains a prominent option for private communication. Signal uses end-to-end encryption for conversations and calls. This prevents the service from accessing the contents of those communications. Signal also publishes its client and server source code for public inspection.

Signal supports disappearing messages as well. You can set a timer for individual conversations or new chats. However, disappearing messages cannot stop someone from making a separate copy.

For example, a recipient could photograph the screen before the message disappears. Signal itself warns users about this limitation.

When comparing private messaging apps, consider these features:

  • End-to-end encryption
  • Disappearing messages
  • Open-source software
  • Device and account security
  • Privacy controls
  • Backup options

A private messenger should offer more than automatic message deletion. You should also consider how the app handles encryption, devices, backups, and notifications.

Signal’s Privacy and Encryption Approach

Signal protects message contents with end-to-end encryption. According to Signal, its encryption system allows only the intended participants to access message contents. Signal also makes its client and server source code publicly available.

Signal also supports disappearing messages. When you enable the feature, Signal removes messages after the selected timer expires. For received messages, the timer starts after the recipient reads the message.

However, disappearing messages cannot guarantee permanent deletion. A recipient can photograph the screen before the timer expires. Signal specifically warns users about this possibility.

You should also avoid describing Signal as a completely “zero-knowledge” system without qualification. A more accurate description focuses on its approach to message privacy and its limited access to message contents.

Encryption also represents only one part of messaging privacy. Your device security matters too. Notification previews, backups, linked devices, and recipient behavior can all affect the privacy of a conversation.

If you want a private messaging app, examine its complete security model instead of focusing on one feature.

Is There Any Way to Read Deleted Messages?

Sometimes, but the available method depends on where the message still exists. Notification History can help when Android recorded the notification preview before deletion. A backup can also help when it contains an earlier version of the conversation.

WhatsApp says you may recover a deleted message if a backup contains that message. However, WhatsApp does not keep your complete chat history on its servers for restoration.

This distinction matters. Restoring a backup does not ask WhatsApp to retrieve a deleted message. Instead, you restore an earlier version of your own chat history.

You should also consider the risks before restoring an old backup. An older backup may not contain your newest conversations.

Other possible sources include:

  • A notification preview that Android already recorded.
  • A backup that you created before deletion.
  • Media that you saved separately.
  • A message that still exists on another authorized device.

If none of these sources contain the original content, you may not have a reliable recovery option.

Therefore, deleted messages on Android do not always disappear without a trace. However, you need an existing copy or notification record to recover anything.

Recovering Texts Through Existing Backups

A backup can sometimes help you recover a deleted message. The key factor is when you created the backup.

Suppose you created a WhatsApp backup before someone deleted a message. That backup may contain the earlier version of the conversation. WhatsApp says users can recover deleted messages when the relevant backup contains them.

However, restoring an older backup can affect your current chat history. Check the backup date before you start the restore process. Also consider which newer conversations may disappear from your current chat state.

The same principle applies to other messaging apps that offer backups. A backup can restore only the information that the app saved at that time.

Keep these points in mind:

  • Check the backup date first.
  • Confirm that the conversation existed at that time.
  • Protect newer conversations before restoring an older backup.
  • Follow the messaging app’s official restore process.
  • Do not assume every backup contains deleted messages.

Think of a backup as a previous snapshot of your chat history. It does not function as a special deleted-message recovery system.

Which App Automatically Deletes Messages After They Are Read?

Several messaging platforms support automatic deletion, but each platform follows different rules. Snapchat automatically deletes many Snaps after users view them or the Snap expires. it explains that most Snaps sent to friends follow this automatic deletion behavior.

Snapchat handles Chat messages differently. By default, one-on-one and group Chats generally disappear 24 hours after everyone views them, or 31 days after sending, whichever comes first. Users can change the setting to delete Chats after viewing, after seven days, or never.

Telegram also offers self-destruct timers through Secret Chats. Telegram says the timer starts when the recipient displays the message. The platform then removes the message when the timer expires.

These features support temporary communication. However, they cannot prevent every form of copying. Someone can capture the content before it disappears.

For that reason, do not treat disappearing messages as a guarantee that nobody can preserve the content. Always check the exact retention rules for the platform you use.

Setting Ephemeral Timers in Telegram Secret Chats

Telegram’s Secret Chats include a self-destruct timer for messages. To start one, open the contact’s profile, tap the menu, and select Start Secret Chat. Telegram says Secret Chats remain tied to the devices where users create them rather than syncing through the cloud.

After you start the Secret Chat, choose the timer option and select how long messages should remain available. Telegram starts the countdown when the recipient views the message. When the timer expires, Telegram removes the message from both devices.

Telegram also includes screenshot-related protections, but they cannot guarantee complete protection. Telegram says screenshot detection does not work perfectly on every platform. Someone can also use another device to photograph the screen.

Self-destruct timers therefore reduce how long a message remains available. They do not guarantee that nobody can preserve a copy.

Also remember that the timer applies to messages sent after you configure it. It does not automatically change the behavior of earlier messages in the conversation.

What App Can Reveal Deleted Messages?

Some third-party Android apps attempt to reveal deleted messages by saving notification content. WAMR is one example. Its Google Play listing says the app monitors notifications and creates local copies of incoming message information. If you regularly use third-party Android tools, it also helps to understand how Android apps can simplify your everyday life.

However, WAMR does not normally retrieve deleted messages directly from an encrypted messaging database. Instead, it relies on information that notifications already displayed.

This limitation can affect its results. If you disable notifications, hide their contents, or never receive a notification, the app may have nothing useful to save. Media recovery also depends on whether the device downloaded and stored the media.

Notification access also creates a privacy concern. An app with this permission may see information from many other applications.

Before installing a notification-monitoring tool, check:

  • The permissions it requests.
  • The information it stores.
  • The developer behind the app.
  • Its privacy policy.
  • Its Google Play listing.
  • Whether you actually need the feature.

When your phone provides Notification History, consider using that native option first. It avoids giving another app access to your notifications.

Safe Habits When Using Notification Scrapers

Notification-monitoring apps can help in some situations, but they create a clear privacy trade-off. These apps need notification access to perform their main function. Notifications can contain message previews, emails, authentication codes, and other private information.

WAMR’s Google Play listing explains that the app uses notification access to create copies of incoming message information. Before installing similar software, understand exactly what access you provide.

Follow these safety practices:

  • Download apps from the Google Play Store.
  • Avoid unknown APK websites.
  • Review every permission before granting access.
  • Read the developer’s privacy information.
  • Avoid unnecessary notification access.
  • Remove notification access when you stop using the app.
  • Never assume a third-party app can recover every deleted message.

These tools cannot recover content that never appeared in a notification. Their results depend on the notification information available to them.

For many Android users, Notification History offers a simpler starting point. When your phone supports it, the native feature can provide notification records without another app.

Treat every notification-monitoring app as a privacy-sensitive tool. It can potentially access far more information than the deleted message you want to recover.

Conclusion

If you want to read deleted messages on Android, start with Notification History. When you enable the feature before a message arrives, Android may save its notification preview. That preview can sometimes reveal text after the sender deletes the original message.

Backups offer another possible solution when they contain an earlier version of the conversation. Third-party notification apps can also save message previews, but they require access to sensitive notifications.

No method guarantees complete recovery. Your results depend on whether Android saved the notification, a backup contains the message, or another copy still exists.

Use Android’s built-in features before installing third-party recovery tools. Check app permissions carefully and understand what information each tool can access. Most importantly, remember that deleted messages on Android may remain visible only when another record already exists.

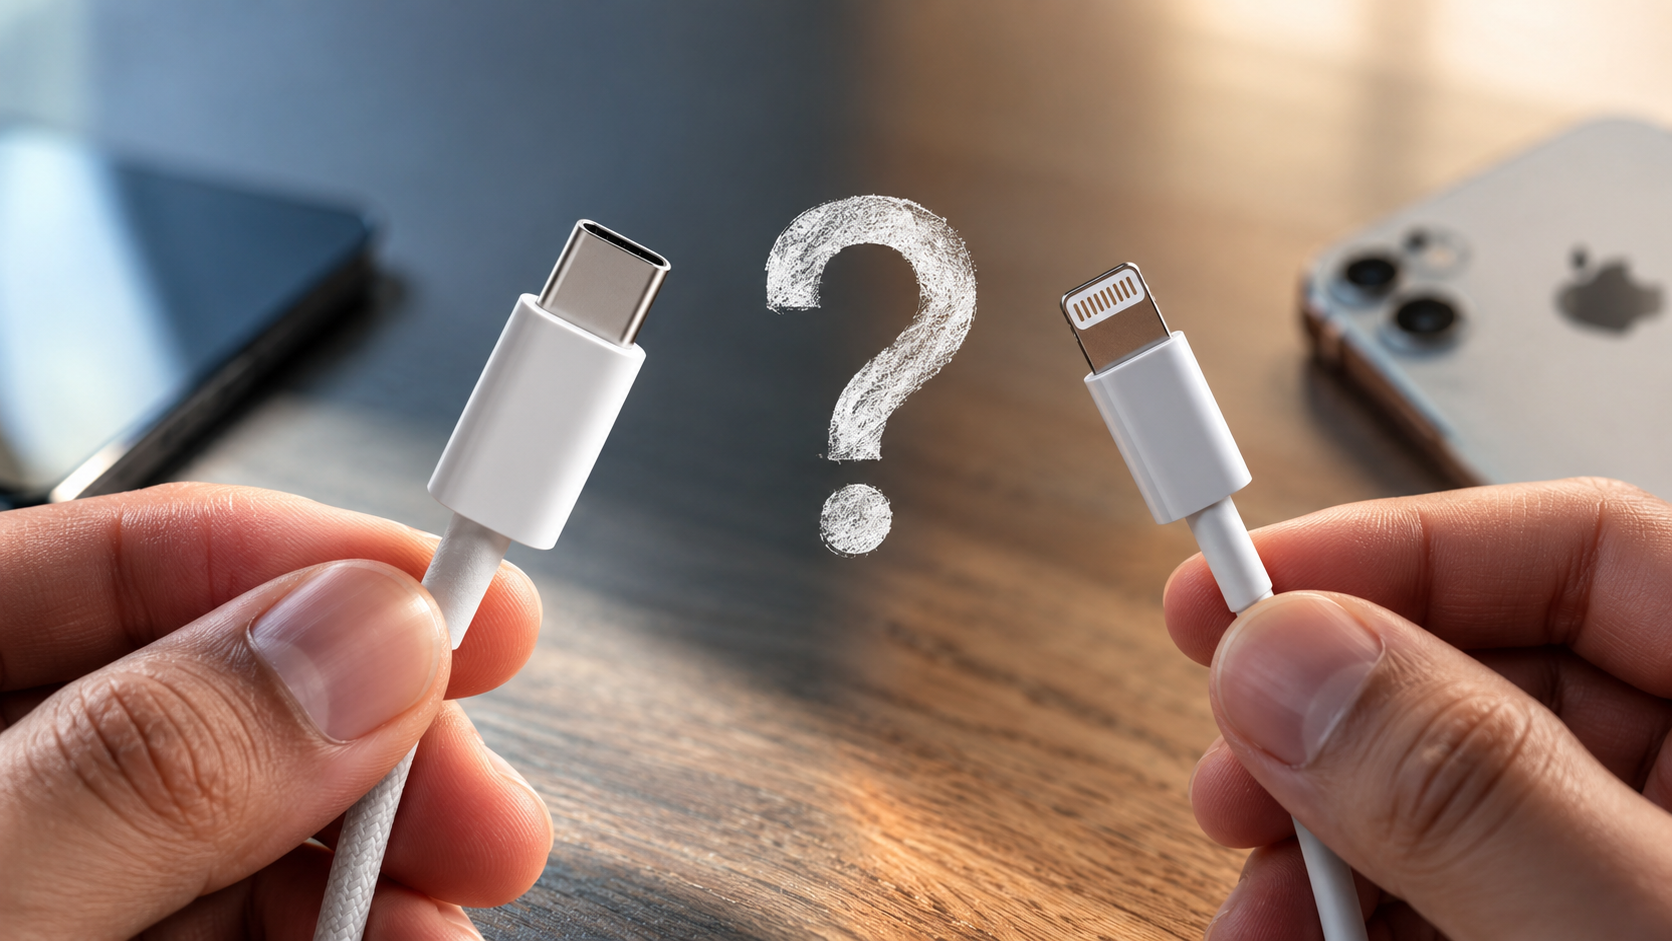
Are USB-C Cables More Reliable Than Lightning Cables?

Are USB-C Cables More Reliable Than Lightning Cables?

For more than a decade, Apple users relied on Lightning for its compact design and simple connection. Meanwhile, the wider technology industry moved toward USB-C as a universal connector. This shift has raised an important question: Are USB-C cables more reliable than Lightning cables?

Cable reliability depends on more than the connector itself. Physical wear, contact design, cable construction, bending, corrosion, and charging conditions all matter. USB-C and Lightning use different connector architectures, which gives each one distinct strengths and limitations.

The USB Implementers Forum (USB-IF) describes USB-C as a reversible connector designed for modern devices, with scalable power and performance capabilities. Its official USB Type-C specification also outlines the connector and cable requirements behind the standard.

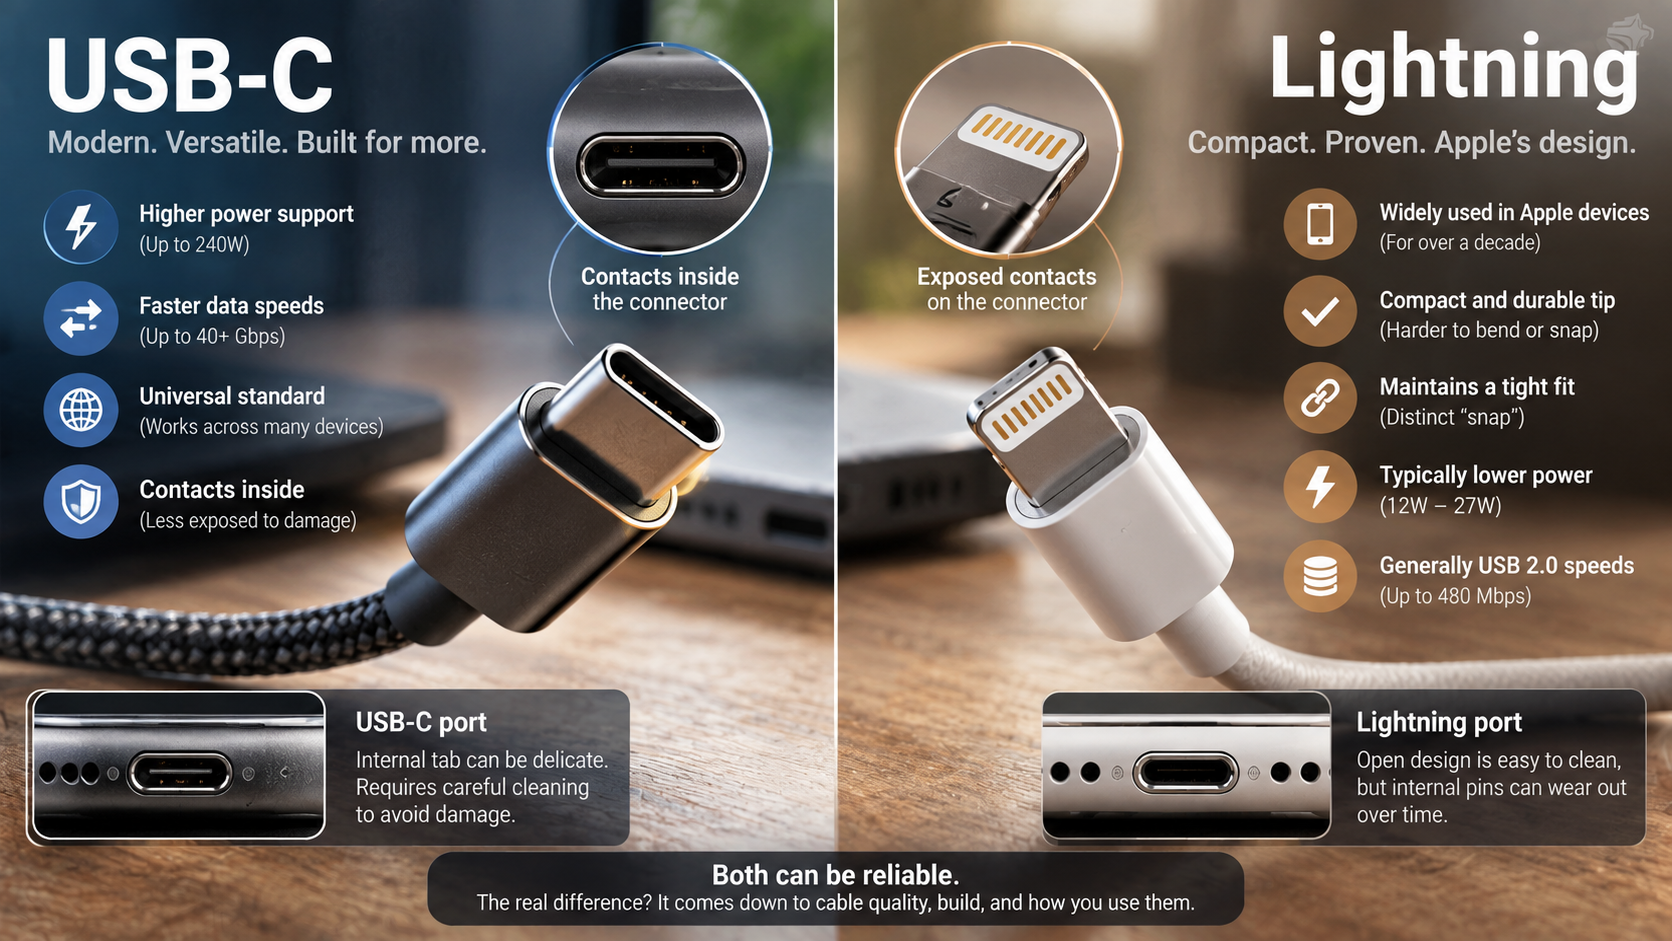
USB-C has a major advantage in versatility. Depending on the device and cable, it can support much higher charging power and faster data speeds. Lightning, by comparison, was commonly limited to USB 2.0 data speeds on older Apple devices.

However, connector design alone does not determine cable lifespan. A well-built Lightning cable can outlast a poorly made USB-C cable. Here is how the two standards compare in everyday use.

Is USB-C Really Better Than Lightning?

USB-C is generally more versatile than Lightning, but saying it is always more reliable would be too broad. USB-C cables more reliable than Lightning is a reasonable conclusion for many modern use cases. However, reliability still depends on cable quality, construction, and how the connector is used.

USB-C has a compact, reversible design with contacts positioned inside the connector. Lightning uses exposed contacts on the plug. This difference can affect how the connectors handle dirt, moisture, bending, and repeated insertion.

USB-C also supports modern standards such as USB 3.x and USB4 on compatible devices. Some implementations support very high data rates and power levels. However, not every USB-C cable supports these capabilities.

Lightning has practical advantages too. Its connector is small and remained reliable across many Apple products. A quality Lightning cable can handle extensive everyday use.

For a fair comparison:

  • USB-C: greater potential for power and data performance.
  • Lightning: compact design and long-established Apple compatibility.
  • Both: cable quality and connector care affect durability.

USB-C therefore has greater technical headroom, but the connector alone does not guarantee a longer lifespan.

Enclosed Pin Architecture vs. Exposed Contacts

One major difference between USB-C and Lightning is the position of their electrical contacts. Lightning places its contacts on the outside of the connector tongue. USB-C places its contacts inside the connector housing.

This design gives USB-C a physical advantage because its contacts are less directly exposed to external surfaces. However, that does not make USB-C immune to damage. Dust, moisture, repeated insertion, and mechanical stress can still cause connection problems.

Lightning connectors can also collect debris or experience contact wear. Dirt inside the device port can prevent the connector from making consistent electrical contact. In some cases, carefully cleaning the port can restore normal charging.

Claims that a particular Lightning pin will universally “burn out” are too broad. Connector failures can have several causes, including contamination, moisture, poor-quality accessories, and electrical problems.

The practical differences are easier to understand:

  • USB-C uses internally positioned contacts.
  • Lightning uses externally exposed contacts.
  • Both connectors can experience mechanical wear.
  • Both can be affected by moisture and debris.
  • Cable and port quality remain important.

The enclosed USB-C design can provide durability benefits, but it does not guarantee longer cable life.

Is USB-C Better Than an Apple Charger?

USB-C is not a charger by itself. It is a connector and interface standard used by chargers, cables, phones, tablets, computers, and other devices. A more accurate comparison is USB-C charging versus older Lightning-based charging systems. When choosing a compatible charger, it is also worth understanding whether a third-party charger is safe for your device.

Modern USB-C chargers commonly use USB Power Delivery (USB-PD). This standard allows compatible chargers and devices to negotiate suitable voltage and current levels. It makes USB-C suitable for everything from smartphones to laptops.

USB-C also supports much higher power levels than older Lightning charging setups. The exact charging capability depends on the charger, cable, device, and supported USB-PD version.

However, USB-C does not automatically mean faster charging. A basic USB-C cable connected to a low-power charger may charge more slowly than another charging system.

The complete setup matters:

  • USB-C: supports flexible standards such as USB-PD.
  • Lightning: remains compatible with Apple’s Lightning ecosystem.
  • Charging speed: depends on the charger, cable, and device.
  • Cable quality: affects safe and consistent power delivery.

For users asking whether USB-C cables more reliable than Lightning are worth choosing, charging capability is one important factor. However, higher power does not automatically mean greater physical durability.

Universal Cross-Device Compatibility Can Reduce Cable Clutter

One of USB-C’s biggest practical advantages is its broad compatibility. The same connector can be used across smartphones, tablets, laptops, headphones, cameras, displays, and other accessories. This is particularly useful for people who want to use wired headphones without losing their charging port.

This can reduce the number of cables and chargers people need to carry. It can also simplify travel because one compatible charger may power several different devices.

However, USB-C compatibility has an important limitation. A USB-C connector does not guarantee identical capabilities. Two cables can look almost identical while supporting different charging and data speeds.

Some cables support only USB 2.0 data. Others support USB 3.x or USB4. Power ratings can also differ substantially.

Before buying a USB-C cable, check:

  • Power rating for your charging requirements.
  • Data speed for large file transfers.
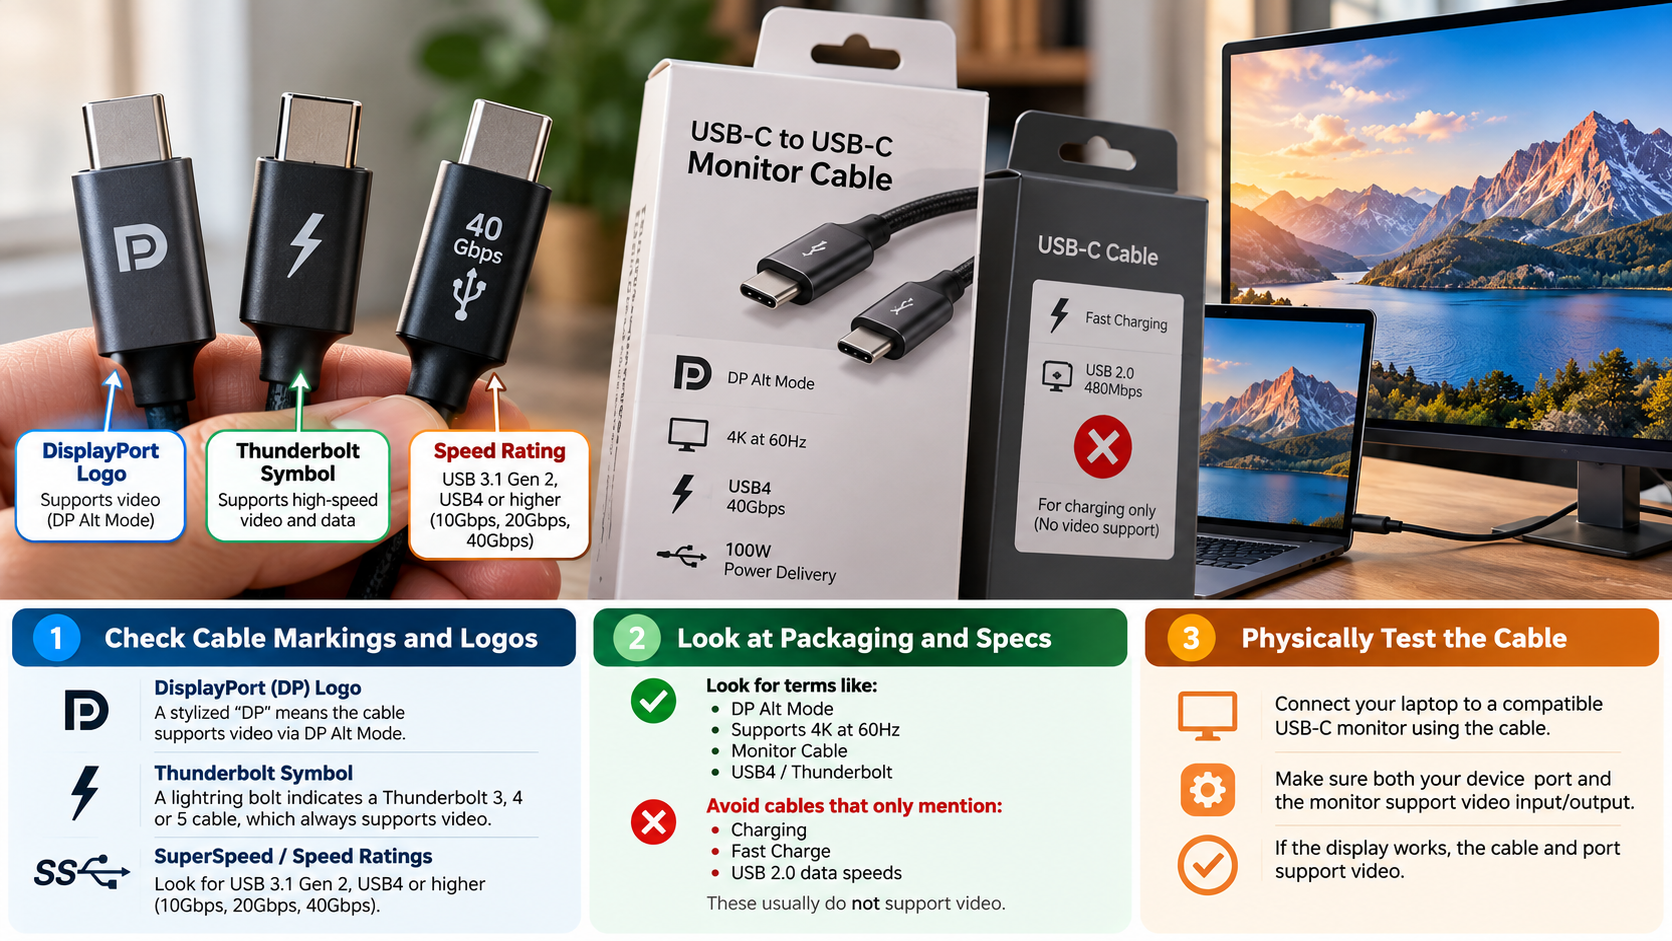
  • Video support when connecting displays.
  • Cable length for demanding connections.
  • Build quality for everyday durability.

USB-C makes cross-device compatibility easier, but consumers still need to check specifications. The connector shape alone tells you very little about actual performance.

Why Is Apple Getting Rid of the Lightning Cable?

Apple moved away from Lightning and adopted USB-C on newer iPhone models after the European Union introduced common-charging requirements. EU rules require certain electronic devices sold in the region to use USB-C for wired charging.

The move also gives Apple devices access to a broader industry-standard connector. USB-C can support higher data rates and charging capabilities than the Lightning implementations used on many older Apple devices.

However, it would be inaccurate to claim that Lightning itself could never support better performance. The actual limitation depends on the implementation. Many Lightning-equipped Apple devices were limited to USB 2.0 data speeds.

Newer USB-C devices can offer substantially faster transfers when the device and cable support higher-speed standards. This is especially useful for users who move large photos and video files.

The transition also makes accessory compatibility easier across Apple’s newer product lineup.

Apple’s move reflects several factors:

  • EU common-charging legislation
  • Wider industry adoption of USB-C
  • Higher potential data-transfer speeds
  • Greater charging flexibility
  • Compatibility with a wider accessory ecosystem

The switch was not simply a statement that Lightning was unusable. It reflected changing regulations, standards, and hardware requirements.

The Physical Limits of Apple’s Older Lightning Implementation

Lightning debuted with the iPhone 5 in 2012. Its small reversible connector replaced Apple’s older 30-pin interface and became standard across many Apple mobile products.

However, many Lightning-equipped devices used USB 2.0 data speeds. That limited transfer performance compared with newer USB-C implementations.

The difference became more noticeable as smartphones began producing larger files. High-resolution photos and video can consume substantial storage. Moving those files quickly requires greater bandwidth.

USB-C provides a broader path to modern high-speed standards. On supported devices, it can deliver substantially faster transfers than older Lightning implementations.

Still, the connector itself does not determine performance. The device hardware, cable specification, and connected equipment all matter.

For example, a USB-C cable can still be limited to USB 2.0 speeds. Another USB-C cable may support USB 3.x or USB4.

Therefore, users should look beyond the connector name. Checking the advertised data rate is more useful when large file transfers matter.

This is also why USB-C cables more reliable than Lightning should not be treated as a universal rule. USB-C provides greater technical flexibility, but the actual cable still matters.

Why Is Everyone Switching to USB-C?

USB-C has become widely adopted because it combines a compact reversible connector with broad technical capabilities. It can carry power, data, and video through the same physical interface.

That flexibility makes USB-C useful across many product categories. Smartphones, tablets, laptops, monitors, cameras, gaming devices, and accessories increasingly use the connector.

Another advantage is ecosystem compatibility. A single USB-C charger can often serve multiple devices. This can reduce the number of charging accessories people need.

However, USB-C is not a single performance standard. The connector can support different USB generations, power levels, and optional features. This creates confusion when shoppers compare cables, especially because USB ports can be color-coded for different capabilities.

A USB-C cable may support:

  • Basic USB 2.0 data speeds
  • Faster USB 3.x transfers
  • USB4 on compatible equipment
  • USB Power Delivery
  • DisplayPort video output
  • Higher power levels on supported cables

The exact features depend on the cable and connected devices.

For people comparing USB-C cables more reliable than Lightning, the wider USB-C ecosystem is an important consideration. Its compatibility with modern charging and data standards makes it useful across more types of hardware.

USB-C’s popularity therefore comes from flexibility, industry adoption, and performance potential rather than from the connector shape alone.

Less Cable Clutter and Simpler Everyday Charging

USB-C can reduce cable clutter because one connector type can serve several devices. Someone carrying a laptop, smartphone, tablet, and headphones may be able to use one charging ecosystem for all of them. This also makes chargers with multiple ports useful when several devices need to be powered at once.

This can simplify travel as well. Instead of packing several proprietary cables, users can often carry fewer USB-C accessories.

Standardization may also reduce unnecessary accessory production and replacement. However, the environmental benefit depends on consumer behavior and how quickly older accessories are replaced.

USB-C also provides consumers with a wider accessory market. Many manufacturers produce compatible cables, chargers, hubs, docks, and adapters.

Still, users should not assume that every USB-C accessory performs the same way. Some inexpensive cables have limited data speeds or power ratings.

Before purchasing a cable, check:

  • Maximum supported wattage
  • USB data standard
  • Video compatibility
  • Cable length
  • Build quality
  • Certification where relevant

USB-C can make everyday charging simpler, but informed purchasing remains important. The connector provides compatibility, while the cable’s specifications determine much of its performance.

Does USB-C Degrade Over Distance?

USB-C performance can decrease as cable length increases, especially at higher data rates. Longer cables introduce additional electrical resistance and signal loss. These effects become more important with USB4, Thunderbolt, and high-resolution display connections. When using USB-C for displays, it is also important to understand that not all USB-C ports support video.

However, it is incorrect to claim that every USB-C cable longer than one meter automatically loses performance. The practical limit depends on the cable’s construction and supported standard.

Some passive cables can maintain high-speed performance beyond one meter. Other applications may require active electronics to maintain signal integrity over longer distances.

Power delivery can also be affected by cable length. Longer conductors can create greater voltage drop, especially when carrying higher current. High-quality cables use suitable conductor sizes to reduce these losses.

For demanding connections, users should check the cable’s specifications instead of relying only on length.

Important factors include:

  • USB generation
  • Maximum data rate
  • Power rating
  • Cable construction
  • Passive or active design
  • Display requirements

For everyday charging, a longer cable may work perfectly well. For high-speed data or video, choosing a properly rated cable becomes more important.

This means USB-C cables more reliable than Lightning can still perform poorly when the cable is unsuitable for the required distance or workload.

Choosing Active, Passive, or Optical Cables for Longer Runs

For short connections, a quality passive USB-C cable is usually sufficient. These cables do not require additional signal-processing electronics and can provide reliable performance within their rated specifications.

Longer high-speed connections are more complicated. Signal attenuation increases with distance, especially with demanding USB4 and display applications. Active cables can use electronic components to maintain signal quality over longer runs. These display connections are also relevant when considering why some laptops don’t have HDMI ports and instead rely on USB-C for external displays.

Optical and active optical cables can extend certain high-speed connections even farther. They are designed for specialized applications where standard passive copper cables may not provide the required performance.

The right choice depends on the connection:

  • Short charging: a quality passive cable is usually sufficient.
  • High-speed data: check the cable’s certified data rate.
  • Long display connections: consider an active or optical cable.
  • High-power charging: verify the cable’s power rating.

An expensive cable is not automatically better or faster. Look for clear specifications that match your device and use case.

For most phones and laptops, a short, properly rated USB-C cable offers a strong balance of reliability, performance, and convenience. In practical terms, USB-C cables more reliable than Lightning can be a useful choice when you need modern charging, faster data, and broad device compatibility.

Final Verdict: Are USB-C Cables More Reliable Than Lightning?

USB-C is the better choice for most modern devices, but it is not automatically more reliable than every Lightning cable. Its main advantages are broader compatibility, higher potential charging power, faster data standards, and a connector design that keeps electrical contacts inside the housing.

Lightning still offers reliable everyday performance when paired with a well-made cable and compatible Apple device. Its smaller ecosystem and lower data capabilities are the bigger limitations today, rather than basic connector reliability.

When comparing USB-C cables more reliable than Lightning, the most important factor is the specific cable. A poorly built USB-C cable can fail sooner than a high-quality Lightning cable. Cable construction, strain relief, power rating, data standard, and proper handling all affect long-term performance.

For most new devices, USB-C makes more sense because it provides greater flexibility and supports the direction modern hardware is taking. If you already own a reliable Lightning setup, however, there is no need to replace it solely because USB-C exists.

In short: USB-C wins on versatility and performance potential, while actual reliability depends heavily on cable quality and usage.

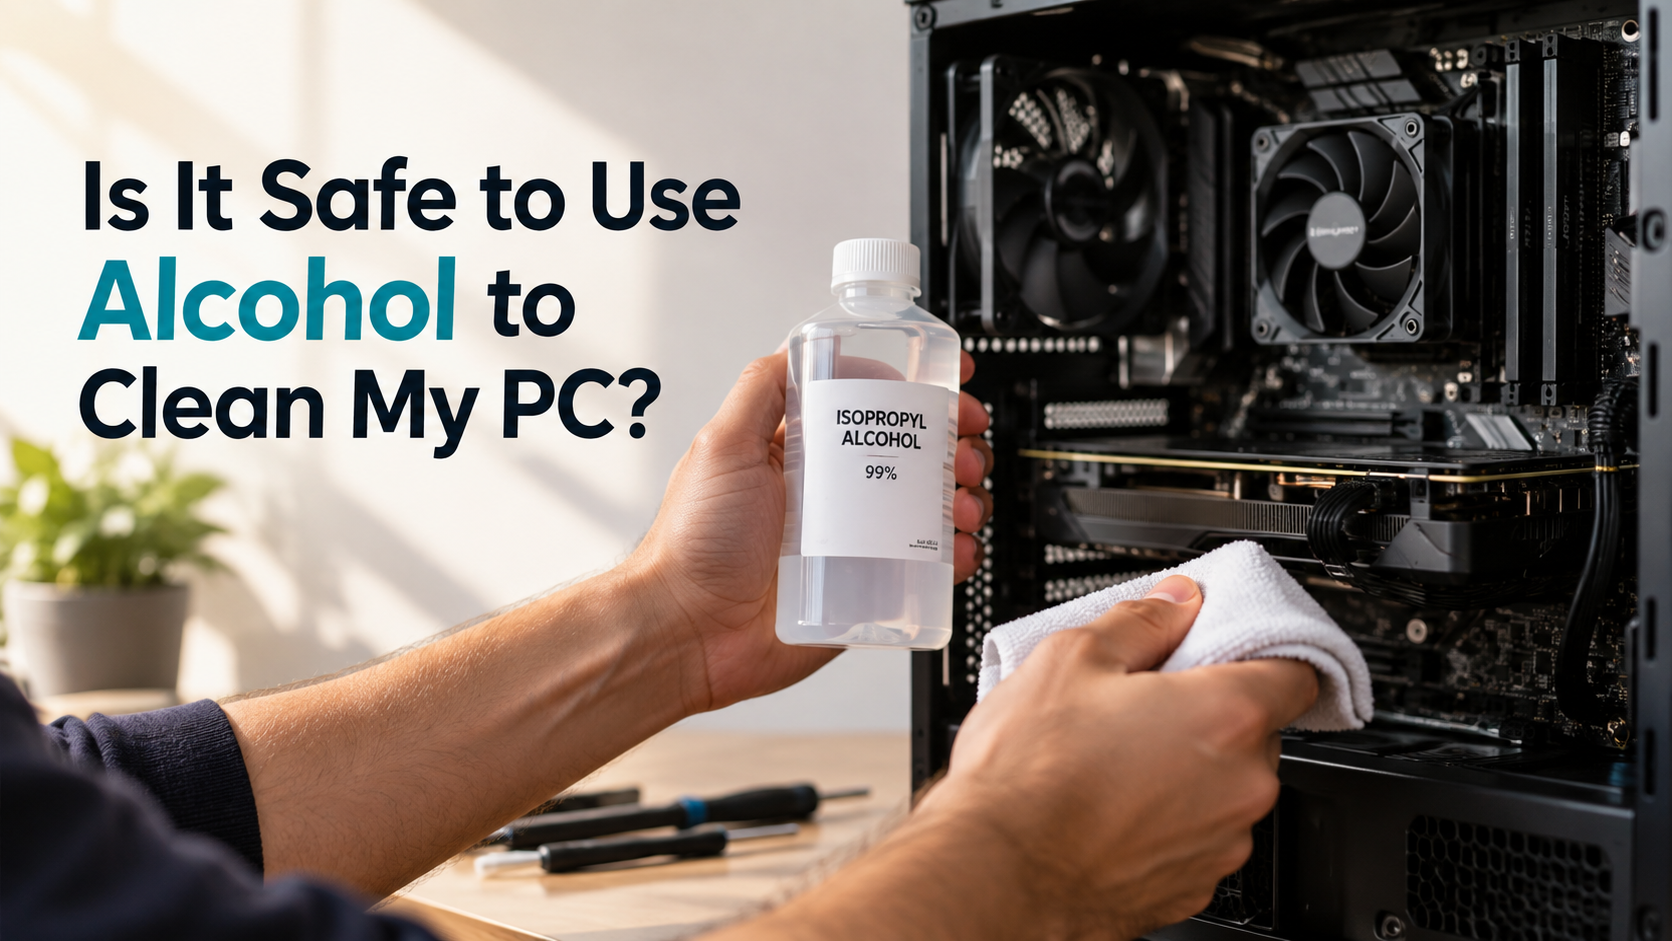
Is It Safe to Use Alcohol to Clean My PC?

Is It Safe to Use Alcohol to Clean My PC?

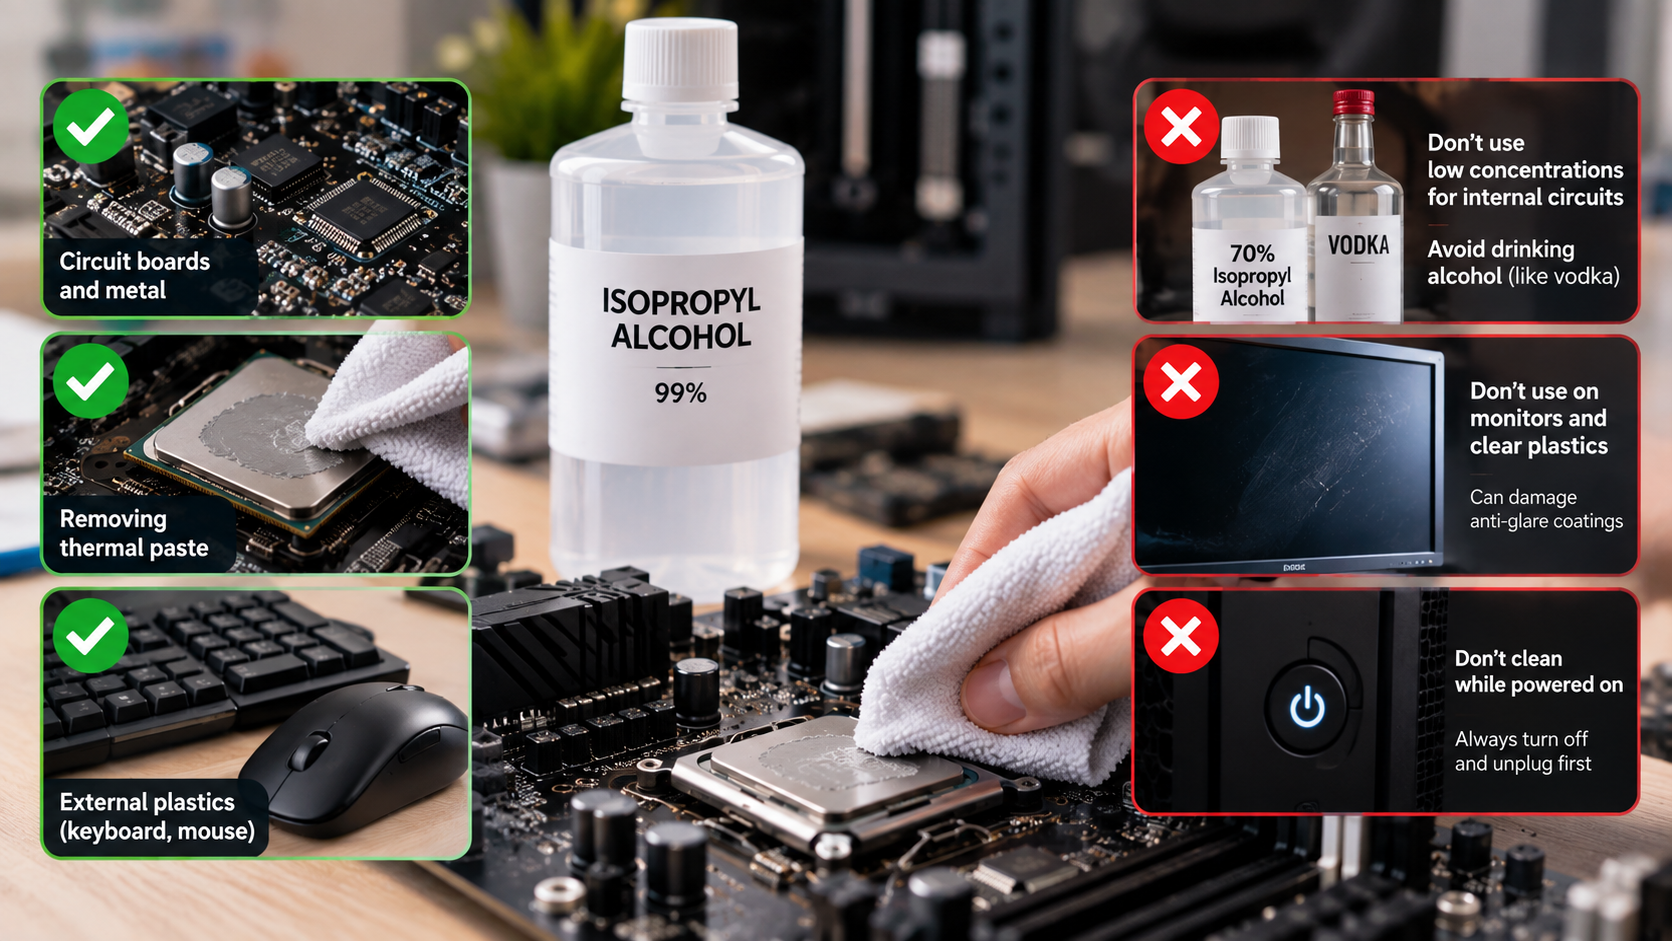
Dust, oils, fingerprints, and thermal paste can build up inside a computer. This often leads PC owners to ask, “Can I use alcohol to clean my PC?” The short answer is yes. Isopropyl alcohol (IPA) is commonly used to clean many PC components when applied correctly.

Isopropyl alcohol (IPA) is widely used for cleaning electronics because it can remove oils, fingerprints, flux residues, and other contaminants. For more information, see this guide to cleaning electronics with isopropyl alcohol from Chemtronics.

Before cleaning, shut down the PC completely and disconnect it from power. Never apply liquid directly to electronic components. Instead, use a small amount on a lint-free cloth or cotton swab.

In this guide, you will learn how to use alcohol safely on PC components. We cover keyboards, CPUs, motherboards, graphics cards, and thermal paste. You will also learn the differences between 70%, 91%, and 99% isopropyl alcohol.

Is It Safe to Use Alcohol to Clean My PC?

Yes, isopropyl alcohol is generally safe for cleaning PC components when used correctly. It can remove fingerprints, oils, thermal paste, and some residue from electronics. It also evaporates without leaving the same type of residue as many household cleaners.

Always shut down your computer before cleaning it. Disconnect the power cable and switch off the power supply. If possible, remove the battery from a laptop before performing internal cleaning.

Never spray alcohol directly onto a motherboard, graphics card, keyboard, or other component. Put a small amount of IPA onto a lint-free cloth or cotton swab instead.

Use only enough liquid to dampen the cleaning material. Avoid soaking components or allowing alcohol to pool around sockets and connectors. After cleaning, allow the component to dry completely before restoring power.

For internal electronics, 90% or higher IPA is often preferred because it contains less water. However, 70% IPA can also be useful for many surfaces when applied carefully.

Essential Drying Time and Static Precautions

Drying time depends on how much alcohol you used. A lightly dampened surface may dry within minutes, while liquid trapped inside a connector needs much longer.

Do not power the PC back on simply because the visible surface looks dry. Check connectors, slots, and recessed areas for remaining moisture.

When cleaning internal hardware, follow these precautions:

  • Work in a well-ventilated area.
  • Keep alcohol away from flames and high heat.
  • Use a lint-free cloth or suitable swab.
  • Avoid excessive liquid around sockets and connectors.
  • Give components enough time to dry completely.
  • Handle circuit boards by their edges when practical.

Static electricity can also damage sensitive components. Use an anti-static wrist strap or another appropriate ESD-safe method when working inside a PC.

Can I Use 70% Alcohol to Clean My Keyboard?

Yes, 70% isopropyl alcohol can be used to clean many keyboard surfaces. It is particularly useful for removing fingerprints, skin oils, and general grime from keycaps and external surfaces. If you are cleaning a laptop rather than a desktop keyboard, follow these additional laptop keyboard cleaning tips to avoid damaging delicate components.

However, the keyboard should never be soaked with alcohol. Liquid can enter mechanical switches, membrane layers, USB ports, or the keyboard’s internal circuit board. That can cause malfunction or leave moisture trapped inside.

Disconnect the keyboard before cleaning it. For external surfaces, lightly dampen a microfiber cloth with 70% IPA. Then wipe the keycaps and surrounding areas without allowing liquid to pool.

You can remove compatible keycaps for separate cleaning. Allow them to dry fully before reinstalling them.

Alcohol compatibility also depends on the material. Some printed legends, painted surfaces, rubber coatings, and custom finishes may react poorly to repeated alcohol exposure.

Protecting Delicate Keycap Coatings and Legends

Test the cleaning solution on a small, inconspicuous area first. This is especially important for inexpensive keyboards or custom keycaps with printed or coated surfaces.

ABS and PBT keycaps often tolerate IPA, but their finishes can vary. A manufacturer may also recommend a different cleaning method.

Avoid aggressive scrubbing. It can wear away printed legends even when the plastic itself remains unaffected.

For safer keyboard cleaning:

  • Disconnect the keyboard first.
  • Remove loose dust before using liquid.
  • Apply IPA to the cloth rather than the keyboard.
  • Avoid flooding switches and openings.
  • Check the manufacturer’s cleaning instructions.
  • Let everything dry before reconnecting the keyboard.

If your goal is disinfection rather than deep internal cleaning, 70% IPA can be useful. For electronic contacts and internal components, higher-purity IPA is often more convenient.

Can I Use 70% Alcohol to Clean My CPU?

Yes, 70% isopropyl alcohol can be used to clean a CPU’s metal heat spreader. The main drawback is its higher water content. This makes it evaporate more slowly than 90% or 99% IPA.

When removing thermal paste, 90% or higher IPA is usually more convenient. It dissolves oily thermal compound effectively and leaves less water behind.

You do not need to clean the CPU silicon itself during normal thermal paste replacement. Most desktop processors have a metal integrated heat spreader that you can safely wipe.

Apply a small amount of IPA to a lint-free cloth or suitable microfiber material. Gently wipe the old thermal paste from the heat spreader. Do not pour alcohol onto the processor.

If alcohol reaches the CPU socket, remove excess liquid and allow it to dry completely. Be especially careful with delicate socket pins, because physical damage can be far more serious than the cleaning process itself.

Safe Thermal Paste Removal on Processors

Start by removing most of the old thermal paste with a dry, lint-free cloth. Then use a small amount of IPA to remove the remaining residue.

For stubborn paste, repeat the process instead of applying excessive pressure. The goal is a clean metal surface, not aggressive scrubbing.

If 70% IPA is the only option available, you can still use it carefully. Simply use a small amount and allow additional drying time.

Follow these steps:

  1. Shut down and unplug the computer.
  2. Remove the CPU cooler carefully.
  3. Wipe away excess thermal paste.
  4. Dampen a lint-free cloth with IPA.
  5. Gently clean the CPU heat spreader.
  6. Allow the surface to dry completely.
  7. Apply fresh thermal paste before reinstalling the cooler.

Avoid unnecessary contact with the CPU’s underside and socket contacts. Once the heat spreader is clean and dry, you can install the cooler again.

Which Isopropyl Alcohol Is Better for Electronics, 91% or 70%?

For internal PC electronics, 91% or higher is generally more convenient than 70% IPA. The main reason is the lower water content. Higher concentrations usually evaporate faster and leave less moisture behind. Good airflow also matters when maintaining internal components, so choosing a PC case designed for effective air and liquid cooling can help with overall hardware maintenance.

This does not mean 70% IPA will automatically damage electronics. It can be used carefully on suitable surfaces. The important factors are the amount applied, the component being cleaned, and the drying time.

For motherboards, graphics cards, and other circuit boards, use a small amount of IPA. Never pour alcohol onto the board or spray it directly into connectors.

A 91% solution provides a useful balance between cleaning ability and evaporation. 99% IPA leaves even less water behind and is commonly chosen for more delicate electronics maintenance.

Disinfection Versatility Versus Circuit Board Safety

The best concentration depends on what you are cleaning. For example, 70% IPA can be useful for external surfaces where disinfection is also important.

For internal electronics, higher-purity IPA is often preferable because it reduces the amount of water introduced during cleaning.

A simple comparison looks like this:

Alcohol concentration Typical use Main consideration
70% IPA Keyboards and external surfaces Slower evaporation
91% IPA General electronics cleaning Good balance
99% IPA Circuit boards and thermal paste Very low water content

Regardless of concentration, technique remains important. Avoid excessive liquid and allow components to dry fully before applying power.

Is 100% Isopropyl Alcohol Safe for Electronics?

99% or anhydrous isopropyl alcohol can be useful when using alcohol to clean my PC, but saying that 100% IPA is completely safe for everything would be too broad. Electronics often tolerate IPA well, but some plastics, adhesives, rubber parts, labels, and protective coatings can react to concentrated alcohol.

For circuit boards and metal surfaces, high-purity IPA is useful because it contains very little water. It can remove oils, flux residue, and thermal paste while evaporating quickly.

However, not every component should be treated with concentrated IPA. Displays, painted surfaces, rubber coatings, and certain plastics may require different cleaning methods. Always check the material before applying alcohol.

Use the smallest amount necessary. Apply the alcohol to a lint-free cloth or suitable swab instead of pouring it directly onto the hardware.

Remember that isopropyl alcohol is highly flammable. Keep it away from flames, sparks, hot tools, and other ignition sources.

Safe Handling of Anhydrous Solvents

High-purity IPA should be stored in a tightly closed container. Isopropyl alcohol can absorb moisture from the surrounding environment, which may gradually reduce its concentration.

Good ventilation is also important because IPA vapors can accumulate in poorly ventilated areas. Never smoke or use an open flame while cleaning your computer.

When using alcohol to clean my PC, follow these basic precautions:

  • Keep the container tightly sealed.
  • Work in a well-ventilated area.
  • Keep IPA away from ignition sources.
  • Use only small quantities during cleaning.
  • Wear suitable gloves during prolonged exposure.
  • Check material compatibility before cleaning plastics or coatings.
  • Allow components to dry completely before restoring power.

For most PC maintenance, 91% or 99% isopropyl alcohol is a practical choice for internal electronics. Controlled application matters more than simply choosing the highest concentration available.

Conclusion

Using alcohol to clean my PC is generally safe when you choose the right product and use it carefully. Isopropyl alcohol (IPA) is a practical option for removing thermal paste, fingerprints, oils, and other residues from many computer components. However, the concentration and application method both matter.

For internal electronics, 91% or 99% IPA is usually the more practical choice because it contains less water and evaporates quickly. 70% IPA can still work for keyboards and some external surfaces, but it requires more drying time. Always apply a small amount to a lint-free cloth or swab instead of spraying alcohol directly onto your hardware.

Most importantly, shut down and unplug your PC before cleaning. Avoid excessive liquid, protect sensitive connectors and coatings, and make sure every component is completely dry before restoring power. With these precautions, alcohol can be a useful part of regular PC maintenance without unnecessarily risking your hardware.

AirPods on Android: Is It Really Worth Buying Them?

Is There Any Point in Using AirPods on Android?

Walk down any street and you will see white stems in ears everywhere. AirPods have become a familiar part of everyday tech. However, using AirPods on Android raises an important question. Do you get enough value without an iPhone?

The basic answer is yes. AirPods can connect to Android phones through Bluetooth, allowing you to listen to music, watch videos, and make calls. Apple’s official AirPods compatibility guide confirms that AirPods can work as Bluetooth headphones with non-Apple devices.

The bigger limitation is software integration. Android users do not get the same Apple ecosystem features available on compatible Apple devices. Siri support is unavailable, and some settings require an iPhone, iPad, or Mac.

This makes the buying decision less straightforward. AirPods can still sound good on Android. However, you may pay for features that your phone cannot fully access.

Should I Buy AirPods If I Have Android?

You can buy AirPods for an Android phone, but they are not automatically the best value. The earbuds still provide basic Bluetooth audio and calling. The main trade-off is the reduced access to Apple’s software features.

Features such as Siri integration, automatic switching across Apple devices, and some configuration options depend on Apple’s ecosystem. Settings such as certain control behaviors and automatic ear detection are managed through Apple devices. This can make long-term customization less convenient for Android users.

Third-party Android apps may provide battery information or additional controls. However, these apps are not official Apple solutions and may vary in reliability.

Before buying, consider what you actually value. If you already like AirPods’ fit, sound, or design, Android compatibility may be enough. If you want deep customization, an Android-focused pair may offer more control.

The key question is not whether AirPods work. They do. The question is whether you need the features you lose by leaving Apple’s ecosystem.

Better Alternatives for Your Device

Android users have many earbuds designed around Google’s and Samsung’s platforms. These products often include dedicated Android apps and broader customization.

Depending on the model, companion apps can provide equalizers, touch controls, firmware updates, battery information, and listening-mode settings. That creates a more integrated experience than using hardware designed primarily around Apple’s ecosystem.

Samsung users may also benefit from Galaxy Buds because Samsung can integrate them closely with compatible Galaxy phones. Google Pixel users can consider Pixel Buds for similar platform integration.

Sony, Bose, Nothing, and other manufacturers also offer Android-compatible earbuds. Their software support varies by model, so specifications should be checked before buying. If you are also considering wired options, comparing wired vs wireless audio can help clarify which setup better fits your needs.

This does not mean AirPods are automatically inferior. Their basic Bluetooth functionality remains useful on Android. The difference is the overall software experience.

If customization matters more than brand familiarity, compare the companion app, codec support, controls, microphone performance, battery life, and noise cancellation before purchasing.

What Is the 60/60 Rule for Using AirPods?

The 60/60 rule is a commonly repeated listening guideline. It suggests keeping headphone volume around 60% and limiting continuous listening to about 60 minutes. However, it should not be treated as a precise medical safety standard.

Hearing risk depends on both volume and exposure time. Louder sound can increase the risk of hearing damage, especially when exposure continues for long periods. Your phone’s percentage slider also does not directly represent a fixed sound level because different headphones produce different outputs.

A safer approach is to keep volume comfortable and avoid raising it simply to overpower background noise. If people nearby can easily hear your music, the volume may be unnecessarily high.

Taking regular breaks can also reduce listening fatigue. Noise-cancelling earbuds can help in loud environments because you may not need to increase the volume as much.

For persistent ringing, muffled hearing, or discomfort after listening, reduce exposure and consider speaking with a hearing professional.

Protecting Your Ears Long Term

Long-term listening habits matter more than following one simple percentage rule. Your Android phone may offer volume warnings or hearing-related controls, depending on the manufacturer and Android version.

Start by keeping your listening level comfortable. Avoid turning the volume higher when traveling through busy streets, trains, or other noisy environments.

Active noise cancellation can also help in suitable situations. It reduces surrounding noise, which may make moderate listening levels easier to maintain. However, noise cancellation does not make unlimited loud listening safe.

Regular breaks are another practical habit. Give your ears quiet periods instead of listening continuously for several hours.

You should also pay attention to warning signs. Ringing, muffled hearing, or discomfort can indicate that your ears have been exposed to excessive sound.

There is no universal volume percentage that guarantees safety for everyone. Instead, think about sound level, listening duration, and frequency of exposure together. This approach is more useful than treating the 60/60 rule as a strict medical formula.

Do AirPods Lose Quality on Android?

Not necessarily. AirPods on Android can still deliver good audio quality, and connecting them to Android does not automatically make the sound poor.

The experience can vary because Bluetooth audio depends on the codecs supported by both devices. AirPods have traditionally relied heavily on AAC and SBC for Bluetooth audio. Android also supports AAC, along with several other codecs, but manufacturers can configure codec priorities differently.

This means two Android phones may not behave identically with the same AirPods. Your phone, software, Bluetooth implementation, and listening environment can all affect the experience.

Some Apple-specific audio features also depend on Apple’s ecosystem. Spatial Audio and certain personalized settings may not work in the same way on Android. Apple confirms that AirPods function as Bluetooth headsets with non-Apple devices, but Siri is unavailable there.

Therefore, it is inaccurate to say that AirPods always sound worse on Android. The more important limitation is feature compatibility, rather than guaranteed audio degradation. Your streaming source also matters, so understanding how to get the highest-quality audio out of YouTube Music can help you get better results from compatible headphones.

Dealing With the Codec Gap

Bluetooth codecs can affect how audio is transmitted between your phone and earbuds. Android supports several codecs, including AAC, aptX, aptX HD, and LDAC. However, the available options depend on the phone and connected headphones.

AirPods do not simply switch to LDAC or aptX when connected to Android. Instead, they use the codecs supported by the AirPods and the phone.

This does not mean that your music will automatically sound compressed or muddy. AAC can provide good wireless audio quality when implemented well. Differences between phones can sometimes be more noticeable than the difference between codec names alone.

If audio quality is your priority, check your Android phone’s Bluetooth codec options and the earbuds’ supported codecs before buying.

Also consider the source quality. A low-quality streaming file cannot become high-quality simply because you use a more advanced Bluetooth codec. If sound quality is a priority, comparing music streaming service sound quality can also help you choose a suitable source.

For most listeners, fit, tuning, source quality, and listening environment can matter more than codec specifications alone.

Why Are People Ditching AirPods?

There is no single reason why someone might stop using AirPods. Cost, battery aging, device preferences, and competition can all influence the decision.

Wireless earbuds contain small rechargeable batteries. Like other lithium-ion batteries, these cells gradually lose capacity through use. Because the batteries are integrated into compact earbuds, replacement is not as simple as changing batteries in traditional headphones. This reflects a broader shift in consumer electronics, where manufacturers have increasingly moved away from removable batteries.

Competition has also changed the market. Many Android-focused earbuds now offer active noise cancellation, transparency modes, multipoint connectivity, companion apps, and customizable sound at different price points.

Some people also prefer wired earphones. Wired models remove the need to recharge the earbuds and can appeal to users who value simplicity.

However, saying that everyone is abandoning AirPods would be misleading. AirPods remain popular because of their design, convenience, sound, and integration with Apple devices.

For Android users, the more relevant question is whether AirPods provide enough value compared with alternatives designed for their phone. That depends on price, features, comfort, sound, battery life, and ecosystem compatibility.

The Growing Wireless Competition

The wireless earbud market now includes products from Sony, Bose, Samsung, Google, Nothing, Sennheiser, and many other brands. This gives Android users more choices than ever.

Many competing models provide dedicated Android applications. These apps can offer equalizers, firmware updates, control customization, battery information, and different listening modes.

Some models also support multipoint Bluetooth, allowing compatible earbuds to maintain connections with multiple devices. However, relying heavily on wireless connections can introduce other practical drawbacks, so it is worth understanding the disadvantages of using Bluetooth for everything. Availability and performance also vary by product, so specifications should be checked before purchase.

This competition changes how AirPods should be evaluated. Their strongest advantage is not universal Android integration. Instead, their value is closely connected to Apple’s ecosystem and the overall AirPods experience.

Android users should therefore compare products based on actual requirements. ANC performance, microphone quality, comfort, battery life, codec support, software features, and price are useful comparison points.

The best choice can differ between users. Someone who already owns Apple devices may value AirPods differently from someone whose entire setup is Android-based.

Why Do Gen Z Wear AirPods All the Time?

The popularity of AirPods among younger people cannot be explained by audio quality alone. Wireless earbuds have become part of everyday technology, fashion, communication, and personal routines.

For some users, wearing earbuds creates a sense of privacy in public spaces. They can listen to music, podcasts, or videos without using a phone speaker. An earbud can also signal that someone is occupied, although it does not guarantee that they want to avoid conversation.

Convenience is another major factor. Wireless earbuds are small, easy to carry, and quick to use. People can switch between music, calls, study sessions, and commuting without handling cables.

AirPods also became culturally recognizable through Apple’s large user base and distinctive design. That visibility helped turn them into more than simple audio accessories.

Still, it is too broad to say that all Gen Z users wear AirPods constantly. Preferences vary by person, budget, phone platform, and lifestyle.

What is clearer is that wireless earbuds have become everyday lifestyle devices, rather than products used only for dedicated music listening.

The Power of Transparency Mode

Transparency mode has helped turn wireless earbuds into more flexible everyday devices. Instead of completely blocking surrounding sounds, compatible earbuds use their microphones to pass environmental audio through to the listener.

This can make conversations easier without removing the earbuds. It can also help users remain aware of their surroundings in appropriate situations.

However, transparency mode should not be confused with perfect environmental awareness. Earbuds can change how surrounding sounds are perceived, and users should remain cautious around traffic, machinery, and other hazards.

On compatible AirPods models, Apple provides listening modes such as Active Noise Cancellation, Transparency, and Adaptive Audio. Spatial audio is another technology that can change how headphones create an immersive listening experience. The available features depend on the specific AirPods model, while some settings are managed through Apple’s devices and software.

For Android users, the physical listening controls may still provide useful functionality. However, the level of customization can differ from the Apple experience.

That distinction matters when evaluating AirPods for Android. The earbuds remain usable, but the complete feature set is closely tied to Apple’s ecosystem.

Conclusion

Using AirPods on Android is possible, but the experience comes with some important compromises. The earbuds still provide reliable wireless audio and calling, but Android users cannot access the same level of Apple ecosystem integration. Features, customization, and device-to-device convenience can be more limited than they are with an iPhone.

That does not make AirPods a bad choice for every Android user. If you already like their design, comfort, sound, or fit, they can still be practical wireless earbuds. However, Android users should compare them with alternatives that offer dedicated apps, broader customization, and deeper Android integration.

Ultimately, the decision comes down to what you value most. AirPods on Android make sense when you prioritize the earbuds themselves over ecosystem features. If you want maximum functionality from your Android phone, purpose-built Android earbuds may offer a more complete experience for your money.

Is Google Chrome Safer To Use Than Microsoft Edge?

Is Google Chrome Safer To Use Than Microsoft Edge?

Choosing the right browser matters because your browser handles passwords, downloads, websites, and sensitive accounts every day. Many users ask: is Google Chrome safer to use than Microsoft Edge? The answer depends on the security and privacy features you value most.

Both browsers use Chromium and include strong security technologies. Chrome uses Google Safe Browsing, automatic security updates, password protection, and Safety Check. You can learn more about these protections in Google’s official Chrome security guide. Edge uses Microsoft Defender SmartScreen, tracking prevention, and additional security features designed to protect users from phishing and malicious downloads.

Both browsers also use sandboxing to reduce the potential impact of malicious web content. However, security is only one part of the comparison. Privacy controls, extensions, account protection, operating system updates, and browsing habits also affect your overall safety.

This guide compares Chrome and Edge across security, privacy, performance, synchronization, and platform integration. It also explains what Apple actually says about Chrome and Safari. By the end, you can decide which browser better matches your needs.

Who Is Better, Chrome Or Edge?

There is no universal answer to whether Chrome or Edge is better. Both browsers receive regular security updates and use Chromium’s security architecture. They also provide protection against phishing, malware, malicious downloads, and compromised websites.

Chrome uses Google Safe Browsing to identify potentially dangerous websites and downloads. It also provides Safety Check, which reviews important browser security settings. Enhanced Safe Browsing can provide additional protection against suspicious websites and files.

Edge uses Microsoft Defender SmartScreen to check websites and downloads against known threats. It also provides tracking prevention with different protection levels.

For everyday users, the practical security difference may be smaller than expected. Browser updates and safe account practices matter more than brand preference.

So, is Google Chrome safer to use than Microsoft Edge? Neither browser can be described as universally safer. Both provide strong mainstream security, but they approach some protections differently.

Your operating system and online habits should therefore influence your choice.

Resource Efficiency And System Impact

Browser performance does not automatically determine browser security. However, resource usage can affect your overall experience, especially on laptops with limited memory or battery capacity. If Chrome is using unusually high processor resources, understanding why Google Chrome uses so much CPU can help identify performance problems.

Microsoft Edge includes Sleeping Tabs, which can pause inactive tabs and reduce resource usage. Microsoft designed the feature to help reduce CPU and memory consumption when many tabs remain open.

Edge also provides performance features such as Startup Boost. These tools can improve responsiveness when opening the browser or returning to regular browsing.

Chrome also includes memory-management features that can reduce resource usage from inactive tabs. Therefore, it is inaccurate to claim that Chrome always consumes more memory or that Edge is always faster.

Your actual results depend on several factors. These include the number of open tabs, installed extensions, websites, hardware, and browser settings.

If RAM usage and battery life matter to you, test both browsers on your own device. A clean browser installation with fewer extensions will usually perform better than one filled with unnecessary add-ons.

Performance should therefore be considered separately from security when comparing Chrome and Edge.

Why Do People Use Google Chrome Instead Of Microsoft Edge?

Google Chrome remains popular because it fits naturally into Google’s broader ecosystem. People who already use Gmail, Google Drive, YouTube, Google Password Manager, and Android may find Chrome convenient.

Chrome can synchronize supported information across devices when users sign into their Google account. Depending on the settings enabled, this can include bookmarks, passwords, settings, and open tabs.

Familiarity also plays a major role. Chrome has been widely used for years, and many websites, developers, organizations, and online tutorials support it extensively.

Its extension ecosystem is another reason people choose Chrome. Extensions can add productivity tools, password managers, accessibility features, development utilities, and other functions.

However, popularity does not prove that Chrome provides better security. Market share and browser security are different measurements.

Edge offers many comparable Chromium security technologies. It also adds Microsoft-specific protections such as SmartScreen and integrates closely with Windows.

The better choice depends on your ecosystem. Google users may prefer Chrome, while Windows and Microsoft 365 users may prefer Edge.

The Power Of Cross-Device Synchronization

Cross-device synchronization is one of Chrome’s most convenient features. When synchronization is enabled, Chrome can make supported browser information available across multiple devices.

Depending on your settings, this can include bookmarks, passwords, history, settings, and open tabs. This is useful when you regularly move between a desktop computer, laptop, smartphone, or tablet.

Chrome works across Windows, macOS, Android, and iOS, making it convenient for people who use several platforms. Android users who want to compare alternatives can also explore web browser apps for Android when choosing how they browse on mobile.

Edge provides a similar synchronization system through a Microsoft account. It can synchronize supported favorites, passwords, history, settings, extensions, and other browser information.

The main difference is therefore not that Chrome offers synchronization while Edge does not. The bigger difference is the ecosystem connected to each browser.

Google users may find Chrome more convenient because their existing services already use a Google account. Microsoft 365 and Windows users may prefer Edge for similar reasons.

Synchronization also creates security responsibilities. Only enable syncing on trusted devices. Protect your account with a strong password and multifactor authentication.

Convenience should never replace basic account security.

Which Is The World’s Safest Browser?

There is no single browser that can objectively be called the world’s safest for every person and situation. Security, privacy, anonymity, compatibility, and convenience are separate considerations.

Tor Browser is designed around anonymity and routes traffic through the Tor network. This makes it useful for specific privacy-sensitive situations. However, it can involve performance and compatibility trade-offs.

Chrome and Edge are mainstream browsers with extensive security protections. Chrome provides Safe Browsing, Safety Check, automatic updates, password protections, and additional security settings.

Edge provides SmartScreen, tracking prevention, password protection, and enhanced security options.

This means the answer to is Google Chrome safer to use than Microsoft Edge depends partly on what you mean by “safer.” Protection against malicious downloads is different from protection against tracking. Anonymous browsing is different from everyday malware protection.

Privacy also deserves separate consideration. A browser can provide strong malware protection while still collecting certain diagnostic or usage information.

Instead of looking for one universal winner, compare the specific security and privacy features that matter to you.

Sandboxing Defenses Versus Data Privacy

Browser security and browser privacy should not be treated as the same thing. Sandboxing helps isolate browser processes from other parts of the operating system.

This isolation can reduce the potential impact of malicious web content if an attack succeeds. Chrome and Edge both benefit from Chromium’s security architecture and related isolation technologies.

However, the browser is only one part of your security setup. Operating system updates, browser updates, account passwords, extensions, and browsing habits also influence your risk.

Privacy involves different questions. You may want to know how much information your browser collects, how tracking is controlled, and which data is shared with online services. Understanding first-party and third-party cookies can also help explain how websites remember users and track activity across the web.

Chrome provides privacy controls and different Safe Browsing options. Enhanced Safe Browsing can provide additional protection against dangerous websites and downloads, but it involves sending relevant browsing information to Google for protection.

Edge provides Tracking Prevention with Basic, Balanced, and Strict options. SmartScreen also checks potentially dangerous websites and downloads.

If privacy matters most, review the settings of both browsers rather than assuming security features automatically provide maximum privacy.

Should I Keep Microsoft Edge Or Use Google Chrome?

For many Windows users, there is no security requirement to replace Edge with Chrome. Edge already provides protection against phishing, malware, and dangerous downloads through features such as Microsoft Defender SmartScreen.

Chrome offers similarly strong mainstream protection through Safe Browsing, automatic updates, password checks, and Safety Check.

Your decision can therefore depend on the ecosystem you use most. Chrome may be convenient if you rely heavily on Google services, Android, or Google’s synchronization features.

Edge may be more convenient if you use Windows, Microsoft 365, or Microsoft’s security ecosystem. It also provides built-in features that can reduce the need for additional software.

Both browsers support modern websites and extensions. Edge can also install compatible extensions from the Chrome Web Store after enabling the appropriate setting.

Before switching browsers, review your existing security settings. Enable automatic updates, use strong passwords, activate multifactor authentication, and remove unnecessary extensions.

These habits can provide a larger security improvement than switching browsers without changing your security practices.

The important question is not simply is Google Chrome safer to use than Microsoft Edge. Instead, consider which browser gives you the features and controls you will actually use.

Taking Advantage Of Edge Extensions

Microsoft Edge supports extensions through its own add-on ecosystem and can also support compatible extensions from the Chrome Web Store. Students who use Chrome can also find useful Chrome extensions for students that support focus, productivity, and everyday study tasks.

This makes Edge easier to use for people who depend on specific Chrome extensions. Password managers, developer tools, productivity utilities, accessibility tools, and customization extensions may work across both Chromium-based browsers.

However, compatibility should not be assumed to be perfect. Extensions can behave differently because of permissions, browser policies, settings, or implementation differences.

Extensions can also create security risks. A malicious or compromised extension may access information covered by its permissions.

Before installing an extension, check the developer, permissions, reviews, update history, and reputation. Remove extensions you no longer need.

Fewer trusted extensions generally create a simpler security environment.

Edge’s built-in security protections continue to operate alongside supported extensions. SmartScreen can help identify dangerous websites and downloads. Tracking Prevention can also limit certain forms of online tracking.

The main advantage is flexibility. You do not necessarily need to install Chrome simply because you want access to a particular Chromium extension.

However, an extension’s availability does not guarantee that it is trustworthy. Treat every browser extension as software that deserves security scrutiny.

Why Does Apple Say Not To Use Chrome?

The original claim that Apple tells users not to use Chrome is too strong. Apple promotes Safari’s privacy, performance, and battery advantages, but that does not mean Apple has declared Chrome unsafe.

Apple’s Safari materials emphasize Intelligent Tracking Prevention, privacy protections, and performance on Apple devices. Apple also promotes Safari as a privacy-focused browser and encourages users to make it their default browser.

Apple publishes performance comparisons involving Safari and Chrome under specific testing conditions. These comparisons can highlight Safari’s battery efficiency, but they should be understood as Apple’s own product testing.

That evidence does not establish that Chrome is inherently insecure on Mac or iPhone. Chrome remains available on Apple’s platforms and includes its own security protections.

Chrome provides Safe Browsing, automatic updates, password management, Safety Check, and other security controls.

The more accurate comparison is therefore about privacy, performance, ecosystem integration, and security features.

So, when asking is Google Chrome safer to use than Microsoft Edge, Apple’s position should not be used as evidence that Chrome is unsafe. Safari’s advantages on Apple hardware are a separate issue.

Users should compare the features they actually need instead of treating Apple’s marketing comparisons as universal security conclusions.

System Optimization And Battery Endurance

Safari can be an attractive option for Apple users who prioritize platform integration and battery efficiency. Apple develops Safari specifically for its operating systems and hardware.

Actual battery performance can vary between users. Browser settings, extensions, websites, video playback, screen brightness, background activity, and hardware can all affect battery life. If your laptop battery is draining unusually quickly, understanding why your laptop battery drains so fast can help identify the underlying cause.

However, Safari’s optimization does not mean Chrome automatically creates a security problem on a Mac. Chrome provides its own security technologies, including Safe Browsing, automatic updates, password checks, and security settings.

Actual battery performance can vary between users. Browser settings, extensions, websites, video playback, screen brightness, background activity, and hardware can all affect battery life.

For Mac users, Safari may be suitable if battery efficiency and Apple’s privacy features are priorities. Chrome may be preferable for users who rely heavily on Google’s services or need Chrome-specific workflows.

The same principle applies when comparing Chrome and Edge on Windows. Performance differences should be measured on the device being used.

Ultimately, security and performance are separate considerations. A browser that uses fewer resources is not automatically more secure.

The best approach is to compare security controls, privacy settings, performance, and ecosystem compatibility together.

Conclusion

So, is Google Chrome safer to use than Microsoft Edge? There is no universal security winner. Both browsers provide strong protection against phishing, malware, malicious downloads, and other common online threats.

Chrome stands out for its Safe Browsing technology, Google ecosystem, and cross-device synchronization. Edge offers SmartScreen, tracking prevention, Windows integration, and useful performance features.

Your choice should depend on your devices, privacy preferences, and the services you use most. More importantly, keep your browser updated, use strong passwords, enable multifactor authentication, and install only trusted extensions.

For most users, either Chrome or Edge can provide a secure browsing experience when properly configured and regularly updated.

Is Google Pixel 11 Waterproof? IP68 Rating Explained

Is the Google Pixel 11 Waterproof?

Buying a premium smartphone is a major investment, so it is worth knowing how well it handles water. If you are searching for Google Pixel 11 waterproof protection, the key point is simple: the phone is water resistant, not waterproof.

The Google Pixel 11 has an IP68 dust and water resistance rating. However, this does not mean the phone can withstand every type of liquid exposure. Water resistance can also decline over time due to normal wear, physical damage, repairs, or disassembly.

This distinction matters during everyday accidents. Your phone may handle rain or an accidental splash, but that does not make it suitable for swimming or prolonged underwater use.

This guide explains the Pixel 11 water-resistance rating, swimming risks, emergency steps after water exposure, and safe ways to deal with moisture around the speakers. It also answers common questions about charging, steam, warranty coverage, and camera condensation.

Is Google Pixel 11 good?

The Google Pixel 11 is designed as a premium flagship smartphone with high-end hardware, Google’s Tensor platform, and advanced camera features. Its combination of hardware and software makes it suitable for everyday productivity, photography, communication, and entertainment.

The phone also combines a durable exterior with IP68 dust and water resistance. That rating adds useful protection against accidental liquid exposure, although it does not make the device waterproof. Water resistance can also diminish over time.

Flagship Hardware and Software Synergy

Google develops Pixel hardware alongside Android software to create a consistent user experience. Features such as on-device intelligence, camera processing, and system optimization support everyday performance.

The Pixel 11 also receives long-term software support, helping keep the device useful beyond its initial purchase. Its durability is another practical advantage.

The device uses premium materials and includes an IP68 rating. However, durability should not be confused with complete protection from water.

For everyday use, the Pixel 11 should handle ordinary environmental exposure well. You should still avoid deliberately exposing it to excessive liquid or underwater conditions.

Is Google Pixel 11 fully waterproof?

No. The Google Pixel 11 is not fully waterproof. It has an IP68 dust and water resistance rating under defined testing conditions. The phone is designed to resist water exposure, but that protection does not make it completely impervious to liquid.

An IP67 vs. IP68 water resistance rating comparison helps explain what these protection levels actually mean. An IP68 rating means the device has been designed and tested for a specific level of protection. It does not mean the phone can safely withstand every type of liquid exposure. Real-world conditions can also differ from controlled laboratory testing.

The True Meaning of Water Resistance

Water resistance is best viewed as protection against accidental exposure. Rain, splashes, or an unexpected spill may not immediately damage a phone with an intact IP rating.

However, resistance is not permanent. Drops, repairs, disassembly, and normal wear can affect the protective seals.

You should therefore treat the IP68 rating as a layer of protection, not permission to deliberately submerge the phone.

Can I swim with Google Pixel 11?

You should not swim with the Google Pixel 11, even though it has an IP68 rating. The phone is water resistant rather than waterproof, and its protection can diminish through normal wear or physical damage.

Swimming also creates conditions that differ from controlled water-resistance testing. Moving water, splashes, impacts, and repeated submersion can increase the chance of liquid reaching vulnerable areas.

Guarding Against Dynamic Liquid Pressure

Pool water also contains chemicals, while seawater contains dissolved salts. These environments are not ideal for a smartphone, even when it has a strong water-resistance rating.

Avoid taking the bare phone into pools, oceans, hot tubs, or showers. If underwater photography is important, use a properly rated waterproof case or pouch designed for that purpose. You can also review how underwater internet cables avoid breaking to understand how underwater equipment is designed to withstand challenging environments.

The safest approach is simple: keep the Pixel 11 away from deliberate underwater exposure. Its IP68 rating is protection against accidental exposure, not a swimming feature.

My Pixel 11 fell in water. What should I do?

If your Pixel 11 falls into water, remove it from the liquid as quickly as possible. For more detailed guidance, follow the first thing you need to do if your Android is water damaged. Disconnect any cable and avoid connecting the phone to a charger while moisture may be present.

Remove the case and gently wipe the exterior with a clean, soft cloth. Do not shake the phone aggressively, as unnecessary movement can spread liquid around openings.

Follow these basic steps:

  • Turn the phone off if it is still operating.

  • Remove the case and wipe away visible moisture.

  • Keep the USB-C port free from cables and accessories.

  • Place the phone in a dry, well-ventilated area.

  • Allow it to dry naturally before attempting to charge it.

  • Seek professional service if the phone shows unusual behavior after drying.

Critical Emergency Actions to Avoid

Do not use a hair dryer, heater, or other high-heat source. Excessive heat can damage components and adhesives.

You should also avoid the common rice-drying method. Rice does not reliably remove internal moisture and can introduce particles into openings.

Most importantly, do not immediately connect a charging cable to a wet phone. Give the device time to dry naturally and inspect the charging port before reconnecting accessories.

How do I eject water from Google Pixel?

If the Pixel 11 speaker sounds muffled after water exposure, begin with gentle drying. Hold the phone with the speaker openings facing downward and wipe away visible moisture with a soft, absorbent cloth.

You may find online speaker-cleaning tools that use sound vibrations to help move moisture from speaker openings. These tools can sometimes help with residual water around the speaker, but they should not be treated as a guaranteed method for removing internal moisture.

Avoid inserting objects into the speaker grilles. Do not use compressed air or apply excessive heat.

Safe Low-Frequency Sound Evacuation Methods

If you use a speaker-cleaning tone, keep the volume at a reasonable level and use a short cycle. Stop if the speaker produces unusual distortion or vibration.

The goal is to help remove surface or speaker-opening moisture, not to force water through the phone. Sound cannot safely remove liquid that has already reached internal components.

Afterward, let the phone dry naturally in a ventilated location. Do not connect a wired charger until the USB-C port is completely dry.

If muffled audio continues after the device has dried, professional inspection is safer than repeated cleaning attempts.

Frequently Asked Questions

Does Google warranty cover water damage?

Liquid damage is generally not covered by the standard limited warranty. An IP rating also does not mean the manufacturer automatically covers water-related repairs.

Normal wear, repairs, disassembly, or physical damage can reduce the phone’s water resistance. The IP68 rating therefore describes the phone’s designed protection under specific testing conditions.

If your Pixel 11 suffers liquid damage, check the warranty terms for your region. You should also avoid opening or disassembling the phone yourself. Doing so can affect its water resistance.

Can I charge my phone right after it gets wet?

No. Do not connect a wired charger while moisture may remain around the USB-C port.

Charging a phone with a wet port can cause electrical problems and may damage the device. Let the port dry naturally before connecting a cable.

Do not rely on a fixed drying period because moisture levels can vary. Inspect the port and wait until it looks completely dry.

Does steam from hot showers harm the device?

Yes, you should avoid prolonged exposure to steam and high humidity. A bathroom environment can expose the phone to more moisture than ordinary accidental splashes.

Do not treat the Pixel 11’s IP68 rating as protection against hot, humid environments. Keeping the phone outside the shower area remains the safer choice.

How do I know if moisture is inside the camera lens?

Look for fogging or condensation beneath the camera glass. Persistent condensation can indicate that moisture has entered areas that should remain dry.

If you notice internal fogging, avoid charging the phone and let it dry naturally. If the condensation does not disappear, consider professional inspection.

Conclusion

The Google Pixel 11 is water resistant, not waterproof. Its IP68 rating provides meaningful protection against dust and water exposure under specified testing conditions. However, water resistance is not permanent and can decrease after wear, damage, repairs, or disassembly.

That makes the Pixel 11 well suited to normal everyday use, but not deliberate underwater activities. Avoid swimming, prolonged submersion, and unnecessary exposure to pools, seawater, showers, and excessive moisture.

If the phone gets wet, act quickly but gently. Disconnect accessories, remove the case, wipe the exterior, and let the device dry naturally. Avoid heat, aggressive shaking, and the rice-drying method.

For muffled speakers, gentle drying is the safest first step. Sound-based speaker-cleaning tools may help with residual moisture near the speaker opening, but they cannot guarantee removal of internal water.

Treat the Pixel 11 water resistance as useful protection rather than complete waterproofing. That approach gives you the best chance of keeping the device reliable for years.

Used Android Tablet: Pros, Cons & Buying Guide (2026)

Buying a Used Android Tablet: Pros and Cons to Consider

Buying technology often means balancing performance with price. As new flagship devices become more expensive, a used Android tablet can offer excellent value. You may get a high-quality display, strong speakers, premium materials, and useful accessories for much less than the original retail price.

A pre-owned tablet can handle streaming, reading, browsing, schoolwork, video calls, and light productivity. However, older hardware can bring problems. Battery wear, damaged screens, outdated software, and missing security updates all deserve careful attention.

Keeping operating systems and apps updated is important because updates can include security protections. Before buying, it is worth reviewing the latest guidance on protecting your mobile device and personal information so you understand why software support matters.

This guide covers the key questions buyers ask. We will look at second-hand tablet value, everyday advantages, potential drawbacks, expected lifespan, recommended models, and RAM requirements. You will also learn what to check before buying.

Is it worth buying a second hand tablet?

A second-hand tablet can be worth buying when your main goal is getting more hardware for your money. Older premium models often offer better displays, speakers, processors, and build quality than similarly priced new budget tablets. That makes the pre-owned market especially attractive for streaming, reading, browsing, schoolwork, and light productivity.

However, price should never be your only consideration. Before buying, inspect the screen, battery, charging port, cameras, speakers, buttons, and overall frame. Check whether the tablet still receives security updates. Also confirm that your essential apps support its Android version.

A reputable retailer or certified refurbishment program can reduce some purchasing risks. Private sales may cost less, but they often provide fewer protections.

A used Android tablet makes the most sense when its remaining software support matches your expected ownership period. A cheap device with limited support may become expensive if you need to replace it soon.

Check Hardware and Software Cutoffs

Software support is one of the most important checks when buying a used Android tablet. Manufacturers eventually stop providing operating-system and security updates. The exact support period varies by manufacturer and model.

Start by identifying the tablet’s exact model number. Then check the manufacturer’s official support information. Do not rely only on a seller’s listing.

You should also check the installed Android version and security patch date. A tablet may still function after official support ends, but its long-term usefulness can decline.

Pay particular attention if you use:

  • Banking or payment apps

  • Work accounts

  • Password managers

  • School platforms

  • Video streaming services

  • Sensitive personal information

A lower purchase price is not a bargain if the tablet cannot safely or reliably run the apps you need. Choose a model with enough remaining support for your intended use.

What are the pros and cons of using a tablet?

Tablets combine portability with a larger screen than most smartphones. They are convenient for reading, watching videos, browsing websites, taking notes, drawing, and completing light work. If you are considering a tablet as a computer replacement, understanding the disadvantages of using a tablet as a laptop replacement can help you choose the right device. Many models also provide strong battery life and quick touch controls.

A used Android tablet can make these benefits more affordable. You may find premium displays, capable processors, stereo speakers, and stylus support without paying full retail prices. This makes older flagship tablets particularly appealing.

However, tablets have limitations. Their software may not offer the same multitasking flexibility as a traditional computer. File management can also feel less convenient. Glass screens are vulnerable to cracks, while older batteries may have noticeably reduced capacity.

The main advantages include:

  • Lower purchase prices

  • Portable designs

  • Large touchscreens

  • Strong media capabilities

  • Optional stylus support

Potential drawbacks include:

  • Battery degradation

  • Limited software support

  • Higher repair costs

  • Fewer desktop-style features

  • Greater risk when buying privately

The right choice depends heavily on how you plan to use the device.

Key Productivity and Ergonomic Limits

A tablet can bridge the gap between a smartphone and laptop, but it does not replace every computer. Simple tasks such as email, browsing, document reading, video calls, and note-taking work well. More demanding workflows can expose the limitations of tablet software, especially when comparing Chromebook vs iPad for everyday computing.

Long typing sessions are another consideration. An external keyboard can improve productivity, but it adds cost and reduces portability. Trackpads, stands, and other accessories can increase the total price further.

Multitasking can also feel restricted on smaller screens. Running multiple apps side by side is useful, but it may not match the workspace provided by a laptop or desktop monitor.

Before buying a used Android tablet, consider your daily workflow. Ask whether you need:

  • Extensive spreadsheet editing

  • Advanced photo or video production

  • Large file management

  • Specialized desktop software

  • Long typing sessions

For occasional productivity, a tablet can be highly practical. For demanding professional work, a laptop may remain more suitable. Your software requirements should guide the decision.

What is the average lifespan of an Android tablet?

There is no single lifespan for every Android tablet. Hardware quality, battery cycles, usage patterns, storage condition, and software support all affect how long a device remains useful. You can also explore how long Android tablets last to understand the factors that influence their usable lifespan.

A well-maintained Android tablet can remain physically functional for several years. However, usable lifespan and physical lifespan are not always the same. A tablet may still turn on while its battery, performance, or software support no longer meets your needs.

Battery aging is a major factor. Lithium-ion batteries gradually lose capacity through normal use and charging cycles. Heavy heat exposure can accelerate degradation.

Software support is another major limitation. Manufacturers eventually stop providing updates, which can affect security and app compatibility.

For used tablets, remaining support matters more than the original release date. A newer model with stronger update coverage may provide more useful years than an older flagship bought at a similar price.

Preserving Usable Lifespan Over Time

Good maintenance can help a used Android tablet remain reliable for longer. Battery care is particularly important because replacement batteries may be difficult or expensive to source for older models. Understanding the 80-20 rule for rechargeable batteries can also provide useful context when managing battery health.

Avoid exposing the tablet to excessive heat. Do not leave it in direct sunlight for long periods. Heat can accelerate battery aging and may affect other internal components.

You should also keep the operating system and apps updated while updates remain available. Software updates can contain important security protections.

Other practical habits can help:

  • Use a protective case.

  • Avoid completely draining the battery whenever possible.

  • Keep the charging port clean.

  • Use a compatible, reliable charger.

  • Remove unnecessary apps and files.

  • Back up important information regularly.

Storage management can also improve the experience. Keeping reasonable free space helps prevent unnecessary slowdowns.

Finally, avoid accessories that generate excessive heat during charging. Simple care will not stop normal aging, but it can help preserve the tablet’s battery, screen, and overall condition.

What is the best second-hand tablet to buy?

There is no single best second-hand tablet for every buyer. The right model depends on your budget, preferred screen size, software needs, and expected ownership period. If you are also considering Apple’s tablets, our guide to buying a used iPad covers similar advantages and drawbacks.

Samsung’s Galaxy Tab S series is a strong place to start when shopping for a used Android tablet. Models such as the Galaxy Tab S7 and Galaxy Tab S8 offer premium displays, capable processors, strong speakers, and stylus support. If you are comparing newer Android options, our OnePlus Pad Go 2 review can help you explore another tablet option.

For buyers with simpler needs, the Lenovo Tab P11 family can provide a practical alternative. These tablets can suit browsing, reading, video playback, and basic productivity without the cost of a premium flagship.

When comparing models, focus on more than the original specifications. Check the current Android version, security-patch status, battery condition, storage capacity, and accessory availability.

A slightly newer mid-range tablet can sometimes make more sense than an older flagship. The best used tablet is the one that still meets your software and performance needs.

Why Prioritize Samsung Flagship Lines

Previous-generation Samsung flagship tablets can offer strong value because premium hardware tends to remain capable for everyday tasks. The Galaxy Tab S7 and S8 families provide features that are useful beyond basic media consumption.

One notable feature is Samsung DeX, which provides a desktop-style interface on supported Galaxy devices. This can make multitasking and document work more convenient when paired with a keyboard, mouse, or external display.

Samsung’s S-series tablets also tend to include higher-quality screens, speakers, processors, and construction than many entry-level tablets. These features can make a noticeable difference after several years of use.

However, do not assume every older Samsung tablet has the same remaining support. Check the exact model and current software status before buying.

When comparing a used flagship, examine:

  • Display condition

  • Battery performance

  • Storage capacity

  • RAM configuration

  • Security-patch date

  • Included S Pen

  • Charging accessories

  • Seller return policy

The S Pen is especially important if you plan to draw or take handwritten notes. Replacing missing accessories can increase the final cost.

How much RAM do I need in a tablet?

RAM requirements depend on the apps you use and how heavily you multitask. For a modern used Android tablet, 4GB of RAM should be treated as a basic starting point, rather than an ideal target.

A tablet with 4GB can handle simpler activities such as browsing, reading, streaming, and basic productivity. However, heavier multitasking may cause apps to reload more often.

For most buyers, 6GB of RAM is a more comfortable target. It provides additional headroom for switching between apps, browsing multiple pages, using social media, and handling everyday productivity.

Power users should consider 8GB or more. Extra RAM can be useful for split-screen multitasking, larger documents, creative applications, and desktop-style workflows.

RAM alone does not determine performance. The processor, storage technology, Android version, app optimization, and device software also matter.

When comparing used Android tablets, consider the complete hardware package. A well-optimized tablet with 6GB of RAM can provide a better experience than a poorly optimized device with more memory.

Also check the exact configuration. Some models were sold with different RAM and storage combinations.

Avoiding Budget Device Memory Bottlenecks

Choosing the cheapest RAM configuration can create problems later. Android uses memory for active applications, background services, system functions, and cached processes.

When available memory becomes limited, the system may close background apps. Returning to those apps can then require a reload. This can become frustrating when switching between several tasks.

For many buyers, 6GB of RAM offers a sensible balance between price and everyday usability. It provides more headroom than basic 4GB configurations without necessarily requiring the higher cost of premium models.

Consider 8GB if you regularly:

  • Use split-screen multitasking

  • Edit large documents

  • Keep many browser tabs open

  • Run demanding applications

  • Use desktop-style interfaces

  • Switch frequently between several apps

However, do not buy a tablet based on RAM alone. A newer processor and better software support can matter just as much.

Storage is another important consideration. A tablet with limited internal storage may become inconvenient if you download large games, videos, documents, or offline media.

The goal is to find a balanced configuration that matches your actual workload.

Frequently Asked Questions

How can I check the battery health on an older tablet?

Android does not always offer a native battery health percentage menu like Apple devices. To inspect it accurately, download reputable diagnostics tools such as AccuBattery from the Google Play Store, or dial service codes like *#*#4636#*#* if supported by the manufacturer. Alternatively, inspect how rapidly the battery drops during fifteen minutes of HD video streaming.

Is a refurbished tablet safer to buy than a standard used one?

Yes, certified refurbished tablets are generally much safer than standard peer-to-peer used devices. Refurbished units undergo systematic hardware inspections, display cleanings, and component repairs before resale. They also typically come backed by a ninety-day or one-year merchant warranty and clear return policies, offering consumer protections that private sales never provide.

Will older Android tablets still run streaming apps like Netflix?

Most older tablets run streaming services without issue, provided their operating system version meets the service’s current minimum requirements. However, check that the tablet supports Widevine L1 certification. Without Widevine L1, apps like Netflix and Prime Video will restrict streaming playback to standard definition (480p), ruining the visual experience on large screens.

What accessories should I budget for when buying pre-owned?

When buying a pre-owned tablet, set aside funds for a fresh protective case, a tempered glass screen protector, and a verified high-wattage wall charger. Sellers frequently omit the original power brick or include damaged cables. If you plan to take handwritten notes or sketch, factor in the cost of an active stylus.

Conclusion

A pre-owned tablet can be an effective way to get capable technology without paying full retail price. A carefully chosen used Android tablet can provide a strong display, good speakers, reliable performance, and useful productivity features for everyday tasks.

The key is to look beyond the purchase price. Check the battery, screen, charging port, storage, RAM, Android version, and security-patch status. Confirm that the tablet supports the apps and services you rely on.

Software support deserves particular attention. Streaming compatibility also matters. A tablet may have excellent hardware but still provide limited app support or video quality if it lacks the necessary software and DRM support.

For many buyers, older Samsung Galaxy Tab S models can provide a strong mix of hardware and productivity features. Lenovo’s Tab P11 family may also suit buyers with simpler needs.

Take your time, compare the exact model, inspect its condition, and verify the seller’s return policy. The best deal is not always the cheapest tablet. It is the device that offers the right combination of price, performance, software support, and condition for your needs.

What Happens If You Don’t Update Your Graphics Card Drivers?

What Happens If You Don’t Update Your Graphics Card Drivers?

Running outdated software may seem harmless when your PC still starts normally. However, old graphics drivers can create compatibility, stability, and performance problems over time. If you refuse to update your graphics card drivers, you may encounter crashes, visual glitches, game launch failures, or security vulnerabilities.

Modern games and creative applications often depend on driver updates. These updates help graphics cards work correctly with newer operating systems, applications, rendering technologies, and game engines. Manufacturers such as NVIDIA, AMD, and Intel regularly release drivers with fixes, optimizations, and security improvements. You can check the latest official drivers through NVIDIA’s driver download page, AMD’s support page, or Intel’s graphics driver resources.

Ignoring these updates can gradually leave your system behind current software requirements. Newer games may stutter, display graphical errors, or fail to launch correctly. Professional applications can also experience rendering problems or unexpected crashes.

This guide explains the main risks of outdated graphics drivers. It also covers FPS improvements, update frequency, GPU lifespan, and signs of possible hardware failure.

What are the risks of don’t updating a graphics driver?

Failing to update your graphics driver can create compatibility problems between your operating system, applications, and GPU. New games often receive driver optimizations around launch. Without those changes, you may experience crashes, graphical glitches, poor frame pacing, or game launch problems. For systems with different GPU configurations, understanding integrated and discrete graphics can also help explain how graphics hardware handles demanding applications.

Driver updates can also address known security vulnerabilities. Some graphics-driver flaws can allow attackers to access protected system resources or cause other security issues. The actual risk depends on the specific driver version and vulnerability involved.

Outdated drivers can also contain unresolved bugs. These bugs may cause application freezes, display-driver crashes, or system instability during demanding workloads. However, old drivers do not automatically mean your GPU is physically overheating or failing.

Key risks include:

  • Game and application compatibility issues

  • Display-driver crashes and system instability

  • Missing performance optimizations

  • Visual glitches and rendering problems

  • Exposure to known security vulnerabilities

Keeping your graphics driver reasonably current reduces these software-related problems.

Security Vulnerabilities and Application Instability

Graphics drivers operate with deep access to system hardware and software. Because of this access, security flaws in a driver can create meaningful risks. Manufacturers sometimes release updates specifically to address documented vulnerabilities in their graphics software.

Outdated drivers can also cause application instability. A game may freeze when loading a new scene, while a video editor may crash during rendering. These problems often appear after operating-system or application updates introduce new compatibility requirements.

Updating your driver can resolve known bugs and improve communication between Windows and your graphics hardware. However, an update is not a guarantee against every crash. Hardware problems, overheating, faulty memory, corrupted applications, and other software conflicts can produce similar symptoms.

For that reason, treat driver updates as one part of regular PC maintenance. If a problem begins immediately after an update, you can also consider returning to a previous stable driver. Always use official manufacturer sources when downloading graphics drivers.

Will updating my GPU increase FPS?

Updating your graphics driver can increase FPS, but the improvement varies significantly by game and hardware. Manufacturers often release optimized drivers for newly launched games. These updates can improve rendering performance, compatibility, and frame pacing. Features such as ray tracing can reduce FPS in some games, so driver updates are only one factor affecting gaming performance.

Performance gains can sometimes be noticeable in newer games. However, there is no reliable percentage that applies to every GPU or game. Some updates may produce a measurable improvement, while others may have little effect on average FPS.

Older games may see minimal gains because their rendering paths are already well optimized. In some cases, a new driver can even introduce a temporary performance regression. This is why major driver releases should be evaluated against your specific games and applications.

Driver updates can also improve minimum frame rates and stutter behavior. A smoother frame-time pattern can make gameplay feel better, even when average FPS changes very little. Your monitor can also affect how these improvements appear, which is why understanding FreeSync and whether to enable it on your monitor can be useful for smoother gameplay.

Before updating, check the driver’s release notes. Look for support for your games, known issues, performance fixes, and compatibility improvements.

Day-One Patches and Game Engine Optimizations

Graphics manufacturers frequently release drivers around major game launches. These releases may include game-specific profiles and rendering optimizations. They are designed to help newer titles work correctly with supported GPUs.

A launch-day driver can address problems that developers and GPU manufacturers identified during testing. It may improve shader handling, rendering compatibility, memory behavior, or frame pacing. The results depend on the game, GPU model, driver version, and system configuration.

That means updating your graphics driver before playing a new title can be worthwhile. It is especially relevant when the game developer recommends a specific driver version.

However, the newest driver is not automatically faster in every situation. Some releases may contain bugs or regressions that affect certain hardware configurations. Checking release notes and early stability reports can help you decide when to install an update.

For competitive gaming, testing a new driver before an important event is also sensible. A stable, well-tested configuration can matter more than a small theoretical performance improvement.

Is it good to always update GPU drivers?

Keeping your GPU driver reasonably current is generally useful, but you do not need to install every release immediately. New drivers can introduce fixes and optimizations, but they can occasionally contain bugs or compatibility problems.

If your computer works reliably and you are not affected by a known issue, waiting briefly before installing a major release can be reasonable. This gives manufacturers time to identify and correct unexpected problems. However, you should still update your graphics card drivers regularly enough to avoid missing important compatibility and performance improvements.

However, some updates deserve faster attention. Security patches should not be ignored when they address vulnerabilities affecting your system. The same applies to updates that fix serious compatibility problems with software you use regularly.

Your update schedule can therefore depend on how you use your PC:

  • Gamers: Check drivers around major game launches.

  • Creative professionals: Prioritize stable drivers tested for your applications.

  • General users: Updating periodically is usually sufficient.

  • Security-conscious users: Install important security fixes promptly.

You should also create a restore point or otherwise keep a recovery option available before major driver changes. That makes troubleshooting easier if a new release causes unexpected problems.

The Value of Stable Studio and Game Ready Drivers

GPU manufacturers may offer different driver branches for different workloads. NVIDIA, for example, provides Game Ready Drivers and Studio Drivers for supported hardware.

Game-focused drivers typically prioritize support for new games and gaming-related optimizations. Studio-oriented drivers emphasize stability and compatibility with supported creative applications.

Your choice should match your primary workload. Someone who mainly plays new games may prioritize gaming-focused releases. A video editor or 3D artist may prefer a driver branch validated for their professional applications.

Neither option guarantees complete stability. Software combinations differ across PCs, and new releases can still contain unexpected issues. Application developers and GPU manufacturers also publish compatibility information that can help with troubleshooting.

If your current driver works well, you do not necessarily need to switch branches without a reason. Instead, check the release notes and your application’s recommended configuration. This approach helps you update your graphics card drivers without making unnecessary changes to a stable system.

What is the lifespan of a GPU?

A graphics card does not have a fixed expiration date. Many GPUs can remain operational for five years, eight years, or longer, depending on build quality, workload, temperatures, maintenance, and usage conditions.

Physical failure is only one reason to replace a GPU. A working graphics card may eventually become unsuitable for newer games or applications because of limited performance, video memory, or support for newer graphics features.

Mechanical components can also wear out. Cooling fans contain moving parts that may become noisy or fail after prolonged use. Thermal interface materials can change over time, although replacement is not automatically required on a fixed schedule.

Good maintenance can help reduce unnecessary thermal stress. Keep dust under control and make sure the case has adequate airflow. Monitor temperatures if you notice unusual fan behavior or performance changes.

Driver updates do not directly extend the physical lifespan of GPU silicon. They can, however, improve software compatibility and efficiency during the card’s usable life.

Thermal Maintenance and Hardware Durability

Heat is an important factor in long-term hardware reliability. Consistently excessive temperatures can increase stress on electronic components and may contribute to premature failure.

Good airflow is therefore an important part of GPU maintenance. Clean dust from filters, fans, and heatsinks when needed. Avoid blocking case vents, and make sure the GPU’s cooling system can operate properly. Choosing the right PC case for air and liquid cooling can also help provide adequate airflow for components that generate significant heat.

You do not need to replace thermal paste on every graphics card every three years. The correct interval depends on the card, its temperatures, usage, and the condition of the existing thermal material. If temperatures remain normal, replacement may not be necessary.

Watch for changes rather than following an arbitrary schedule. Increasing temperatures, unusually loud fans, thermal throttling, or sudden performance drops can indicate a cooling problem.

Remember that driver problems and hardware problems are different. Updating a driver can fix software issues, but it cannot repair damaged memory, failing fans, or physical GPU components.

How do I know if my GPU is dying?

A failing graphics card can produce several warning signs, but none proves hardware failure on its own. Visual artifacts are one important symptom. These can appear as strange shapes, colored blocks, corrupted textures, flashing pixels, or unexpected lines.

Frequent display-driver crashes can have multiple causes. Faulty hardware is one possibility, but corrupted drivers, unstable overclocks, overheating, defective system memory, and software conflicts can produce similar symptoms.

Other warning signs include black screens during demanding workloads, sudden system shutdowns, persistent graphical corruption, or abnormal fan behavior. If these problems appear repeatedly, troubleshooting should begin with temperatures, driver installation, power connections, and system stability.

Blue-screen errors mentioning files such as nvlddmkm.sys or amdkmdag.sys indicate a problem involving the graphics driver stack. They do not automatically prove that the GPU is dying.

Useful troubleshooting steps include:

  • Return GPU settings to their default values.

  • Check GPU temperatures and fan operation.

  • Perform a clean driver installation.

  • Test the GPU with another system when practical.

  • Check power cables and the power supply.

  • Run appropriate hardware diagnostics.

Testing several components helps separate a driver problem from genuine hardware failure.

Identifying Persistent Visual Artifacts and System Freezes

Persistent artifacts deserve attention, especially when they appear across multiple applications. If corruption appears during normal desktop use, gaming, and other graphical workloads, investigate the GPU and its supporting components.

Start by checking whether the problem disappears after a clean driver installation. Also remove any GPU overclock and monitor temperatures during demanding workloads. Unstable memory or inadequate power delivery can create symptoms that resemble GPU failure. If you are trying to improve GPU performance without increasing clock speeds, getting more out of your GPU without overclocking can provide additional options.

If artifacts remain after software and temperature checks, test the graphics card in another compatible system when possible. You can also test a known-good GPU in the original PC. These comparisons can help identify whether the problem follows the card.

Do not assume every graphical glitch means the GPU is failing. A damaged display cable, faulty monitor, unstable RAM, driver conflict, or defective power supply can create similar symptoms.

A consistent pattern across different systems provides stronger evidence of a hardware problem. If the card is still under warranty, document the symptoms before contacting the manufacturer.

Frequently Asked Questions

Can an outdated driver cause my monitor to go black?

Yes, an outdated or incompatible graphics driver can sometimes cause a black screen. Driver problems may appear when changing resolutions, waking the computer from sleep, or installing system updates. If you update your graphics card drivers to the latest compatible version, you may be able to resolve these issues and improve display stability.

Should I remove my old graphics driver before updating?

In most cases, you do not need to uninstall your existing graphics driver before updating. Standard driver installers are designed to update the previous version automatically. However, if you experience repeated crashes, installation errors, or problems after changing graphics hardware, a clean driver installation may help. Specialized tools can be useful for removing persistent driver files before reinstalling the appropriate driver.

Do graphics drivers update automatically through Windows?

Windows can automatically install and update graphics drivers through Windows Update. However, these drivers may not always include the latest game optimizations, features, or vendor-specific controls. If you want access to newer features and performance improvements, check the graphics card manufacturer’s official driver releases or use its driver-management software. You can also learn more about what your GPU can do besides play games, especially if you use your computer for creative or productivity workloads.

Conclusion

Keeping your graphics driver reasonably up to date can help maintain system stability, application compatibility, and gaming performance. You do not necessarily need to install every driver release immediately, but leaving your driver unchanged for years can mean missing important bug fixes, compatibility improvements, and game-specific optimizations.

Graphics-intensive games and productivity applications rely on drivers to communicate efficiently with your GPU. If you decide to update your graphics card drivers, check your current driver version first and review the release notes for the latest compatible version. Driver maintenance is only one part of keeping a graphics card healthy, though. Adequate cooling, regular dust removal, proper airflow, and avoiding excessive temperatures are also important for long-term reliability.

If the latest release addresses a problem you are experiencing or adds useful compatibility or performance improvements, installing it can be worthwhile. Regularly checking whether you should update your graphics card drivers can help you avoid running outdated software for unnecessarily long periods.

Bypass Charging Explained: Safety, Devices, and Brands

Bypass Charging Explained: How It Works, Device Support, and Safety

Bypass charging is a smartphone power-management feature designed to reduce battery charging during demanding tasks. Modern users often run games, GPS navigation, and video-editing apps for long periods. These activities can generate significant heat, especially when the phone is charging at the same time.

Fast charging has made smartphones more convenient, but heat remains a concern for battery health. Bypass charging addresses this issue by changing how power reaches the phone’s internal components. On supported devices, the charger can supply power directly to the system while reducing or pausing battery charging. Samsung’s official explanation of Pause USB PD charging

Instead of relying primarily on the battery while the phone is under heavy load, supported devices can route charger power toward the system. This can reduce battery charging during demanding activities. Samsung describes its Pause USB PD feature as a method that supplies power directly to the system rather than charging the battery.

This guide explains what bypass charging is, how it works, whether it is safe, and which phones support it. It also covers iQOO’s Direct Drive Power Supply and how its approach compares with OnePlus.

What Is Bypass Charging and How Does It Work?

Bypass charging is a power-management feature that can supply a phone’s system directly from a connected charger. The goal is to reduce or pause battery charging while the device performs demanding tasks. This differs from normal charging, and understanding common charging misconceptions can help put the technology in context. See these charging myths to stop believing before comparing different power-management features.

The exact implementation varies between manufacturers. Some systems can route charger power directly to the phone’s components while maintaining the battery at its existing level. Others may allow limited battery charging when the connected adapter provides more power than the system needs.

The main benefit is reduced battery heat during heavy workloads. Samsung describes its Pause USB PD feature as supplying power directly to the system instead of charging the battery.

This matters most during activities such as:

  • Extended mobile gaming
  • High-performance applications
  • Long navigation sessions
  • Video streaming or rendering on supported devices

By reducing unnecessary battery charging, bypass charging can help manage heat and battery wear during these workloads.

Reduce Heat During Heavy Loads

Heat is one of the main concerns when a phone performs demanding tasks while charging. Gaming can already push the processor and graphics hardware. Charging the battery at the same time can add another source of heat.

Bypass charging can reduce this additional battery-related heat by directing available charger power toward the phone’s system. Samsung specifically states that its direct system power feature can help reduce heat buildup and support peak performance during gaming.

Lower temperatures can also help reduce the conditions that contribute to battery degradation. However, bypass charging does not guarantee a completely cool phone. The processor, display, modem, and other components can still generate substantial heat.

It also does not guarantee higher frame rates. Performance depends on the game, chipset, cooling system, software, and temperature limits.

For gamers, the practical advantages can include:

  • Less battery charging during gameplay
  • Lower battery-related heat
  • More consistent performance under sustained workloads
  • Reduced charging and discharging activity

The feature therefore works mainly as a thermal and battery-management tool, rather than as a performance boost by itself.

Is Bypass Charging Safe to Use on a Smartphone?

Bypass charging is generally designed to be safe when the manufacturer provides the feature and the phone meets its operating requirements. However, calling it completely risk-free would be inaccurate. The phone still manages voltage, current, temperature, and battery conditions through its charging hardware and software.

Samsung, for example, specifies requirements for its Pause USB PD feature. On supported models, the phone needs a compatible PD charger, sufficient battery charge, and an active game.

Bypass charging can reduce battery-related heat during demanding tasks. Yet the processor and other components can still become warm. Environmental temperature also matters.

For safer operation, use the manufacturer’s recommended charger and cable. Choosing the right accessory also matters because third-party charger safety can vary depending on its quality and compatibility. Samsung also advises using approved charging accessories and notes that charging behavior can change when the device becomes too hot.

So, bypass charging should be viewed as a battery-protection feature, not a guarantee against all charging or heat-related problems.

May Help Battery Lifespan

Lithium-ion batteries gradually lose capacity through normal chemical aging. Heat and repeated charging activity can contribute to that degradation. Understanding how everyday charging habits affect battery health, including overnight charging and battery wear, can help you make better decisions about battery care.

Bypass charging is useful because the phone can use external power while limiting battery involvement. Samsung says its direct system power feature can reduce degradation associated with heat generated during charging.

The benefit becomes more relevant during long gaming sessions. Without a bypass feature, the battery may repeatedly receive and supply small amounts of power while the phone remains connected. A supported bypass mode can reduce that activity.

However, bypass charging cannot stop normal battery aging. Batteries still degrade with time, usage, temperature, and charge history.

You can further protect battery health by:

  • Avoiding excessive heat
  • Using compatible chargers and cables
  • Keeping the phone’s software updated
  • Avoiding unnecessary heavy workloads while charging
  • Using battery protection features when available

Charger specifications can affect how quickly and safely a device receives power, so it is useful to understand the difference between common charging ratings.

Therefore, bypass charging is best understood as one part of broader battery-care practices.

Which Phones Have Bypass Charging in 2026?

Bypass charging is no longer limited to a small group of gaming phones. Several manufacturers now provide direct-power or bypass features on selected models. However, support varies by model, software version, region, charger, and usage conditions.

Samsung documents Pause USB PD charging when gaming on selected Galaxy devices. Its current support information includes Galaxy S24, S25, and S26 series models, along with selected Z Fold, Z Flip, and Galaxy A devices.

iQOO also offers the feature on supported gaming-focused models. Its iQOO 13 documentation describes Direct Drive Power Supply as bypass charging and explains that it can power the phone directly during gaming.

OnePlus also provides bypass charging on selected devices. Its community documentation shows the feature expanding beyond gaming on supported OxygenOS versions.

Other brands, including ASUS ROG and Nubia RedMagic, have also focused heavily on gaming-oriented power management.

Because support changes with software updates, users should check their exact model and software version before assuming the feature is available.

Expanding Beyond Dedicated Gaming Phones

Manufacturers increasingly treat bypass charging as a broader power-management feature. Gaming remains the most common use case because long sessions can place significant thermal demands on a phone.

However, newer implementations can support additional workloads. OnePlus community documentation, for example, describes system-wide bypass charging on supported OxygenOS software for activities such as streaming and navigation.

This expansion could make bypass charging useful for people who keep their phones connected for long periods. Navigation, video playback, livestreaming, and other demanding tasks can generate sustained power consumption.

Still, users should not assume that every supported phone offers system-wide bypass charging. Some implementations remain restricted to gaming modes or specific applications.

Before using the feature, check:

  • The exact phone model
  • The installed software version
  • Supported charger requirements
  • Minimum battery percentage
  • Whether the feature works outside games

Samsung, for example, requires a compatible PD charger and a battery level above 20% for its documented gaming feature.

Therefore, device-specific support matters more than the brand name alone.

Does iQOO Have Bypass Charging?

Yes. iQOO offers bypass charging on supported smartphones under the name Direct Drive Power Supply. iQOO’s own community documentation identifies the feature as bypass charging and explains that it can power the phone directly from the charger during gaming.

The iQOO 13 is a confirmed example. Its Ultra Game Mode includes Direct Drive Power Supply, which users can enable while a game is running and the phone is connected to a charger.

This feature is designed to reduce battery involvement during demanding gameplay. That can help reduce battery-related heat and charging activity.

The exact experience can still depend on the charger, game, software version, and device workload. Users should therefore avoid assuming that the battery percentage will always remain perfectly fixed.

To use the feature, open a supported game and access the Ultra Game Mode controls. Then locate the Direct Drive Power Supply option and enable it.

This makes iQOO’s approach particularly relevant for users who spend long periods gaming while connected to power.

How to Enable Direct Drive Power Supply on iQOO

The exact menu can vary slightly between iQOO models and software versions. On the iQOO 13, iQOO’s documented process uses Ultra Game Mode and its in-game tools.

Start by connecting the phone to a compatible charger. Then launch a supported game and open the Ultra Game Mode panel from the screen edge.

Next, open Game Tools and look for Direct Drive Power Supply. Turn the feature on if it is available on your device.

Once activated, the phone can use charger power directly for the system during supported gaming sessions. This reduces the need to continuously charge the battery while the game is running.

If the option does not appear, check the following:

  • Your exact iQOO model
  • Your software version
  • Whether Ultra Game Mode is enabled
  • Whether the charger is connected
  • Whether the feature is supported in your region

Do not assume that every iQOO phone has the same implementation. Feature availability can differ between generations.

If the battery percentage changes slightly, that does not automatically mean the feature has failed. Power-management systems can behave differently depending on system demand and available charger power.

Is iQOO Better Than OnePlus?

There is no single objective winner because iQOO and OnePlus use different approaches across their devices. The more useful comparison is feature-specific. Buyers should compare the exact models rather than judging both brands as a whole.

iQOO has placed strong emphasis on gaming features. Its iQOO 13, for example, includes Direct Drive Power Supply through Ultra Game Mode.

OnePlus also offers bypass charging on supported phones. Its implementation can vary by model and OxygenOS version, and newer software has expanded the feature beyond some gaming-only situations.

For someone choosing between the two, relevant factors include:

  • Bypass charging availability on the exact model
  • Charger requirements
  • Gaming performance
  • Cooling hardware
  • Software features
  • Camera and everyday-use priorities
  • Update support

OnePlus owners may also want to consider useful accessories for OnePlus phones when comparing the overall experience. The feature alone should not determine the purchase. A phone with bypass charging may still differ substantially in cameras, display quality, software, battery capacity, and thermal design.

Therefore, compare the specific iQOO and OnePlus models you are considering rather than assuming one brand always provides a better experience.

Choosing Between Gaming Features and Everyday Smartphone Needs

Your priorities should determine how you evaluate iQOO and OnePlus. Bypass charging matters most if you regularly perform demanding tasks while keeping the phone connected to power.

For heavy mobile gaming, examine the complete thermal system. Look at the chipset, cooling hardware, display, sustained performance, charging requirements, and available gaming controls.

For everyday use, other factors may matter more. Camera performance, software design, update support, build quality, battery endurance, and connectivity can have a larger impact on daily ownership.

Bypass charging should therefore be treated as one feature within a larger smartphone package. It can help reduce battery involvement during supported workloads, but it does not automatically make one phone better for every user.

Before buying, check the manufacturer’s current specifications for the exact model. Software updates can also change how the feature works.

If gaming is your main priority, confirm whether bypass charging works with your preferred games. If you use navigation or video apps heavily, check whether the phone supports bypass charging outside gaming.

This approach gives you a more accurate comparison than relying on the feature name alone.

How to Tell If a USB-C Cable Supports Video

How to Tell If a USB-C Cable Supports Video

Few tech problems are more frustrating than connecting a modern laptop to a monitor and seeing a blank screen. The reversible USB-C connector makes cables look identical, but their internal capabilities can differ significantly. Learning how to tell if a USB-C cable supports video can save time and prevent you from buying incompatible hardware.

The USB Implementers Forum (USB-IF) defines the USB Type-C specifications, but cable packaging does not always make capabilities easy to understand. Some USB-C cables support only USB 2.0 data and charging, while others support high-speed data, video, and higher power levels.

Video support also depends on the USB-C port on your computer or phone. The cable cannot create video output if the source device does not support it.

So, what should you check before connecting a display? This guide explains USB-C video support, DP Alt Mode, cable markings, 4K requirements, and the type of cable you should choose.

Can USB-C cables carry video?

Yes, USB-C cables can carry video, but not every USB-C cable supports video. Video can travel through USB-C when the source device supports DisplayPort Alternate Mode, USB4 display tunneling, or another compatible display technology. The cable must also provide the required high-speed connections.

DisplayPort Alternate Mode, commonly called DP Alt Mode, allows a USB-C connection to carry DisplayPort signals to a compatible display, dock, or adapter. Some USB-C cables support these high-speed lanes, while basic USB 2.0 cables do not.

The USB-C connector itself does not guarantee video support. A laptop may have a USB-C port that supports charging and data but no display output. For more detail, see whether all USB-C ports support video before choosing a cable. Therefore, you need to check both the device port and cable specifications.

For direct monitor connections, look for explicit support for DisplayPort Alt Mode, USB4, or Thunderbolt. Also check the monitor or adapter requirements before buying.

DisplayPort Alternate Mode Explained

DP Alt Mode allows compatible USB-C ports to carry DisplayPort signals through the connector. It uses high-speed lanes that can otherwise carry USB data. The exact configuration depends on the device, cable, and supported DisplayPort version.

This technology does not mean every USB-C cable automatically carries video. The source device must support DP Alt Mode, and the cable must have suitable high-speed conductors.

For example, a USB-C laptop with DisplayPort output can connect to a DisplayPort monitor using a compatible USB-C cable and adapter. The connection can carry both video and audio.

A charging-focused USB-C cable may still fit perfectly but fail to produce an image. Software updates usually cannot solve this limitation because the required physical connections may not exist.

When checking compatibility, treat USB-C as the connector type, not as a guarantee of video capability. Always verify the supported display standard for the specific device and cable.

How to check if USB-C supports display?

The most reliable way to check USB-C display support is to examine the device specifications, cable specifications, and connector markings. Do not rely on the USB-C shape alone.

On a laptop, phone, or tablet, look for references to DisplayPort Alt Mode, Thunderbolt, USB4, or video output. Some manufacturers also place a DisplayPort symbol or Thunderbolt lightning icon beside compatible ports. However, symbols vary between manufacturers, so the product manual remains more reliable.

Next, check the cable packaging or manufacturer’s specifications. Look for explicit information about display support, DisplayPort compatibility, USB4, or Thunderbolt. A speed rating such as 20Gbps or 40Gbps describes data capability, but it does not always prove that a particular setup supports video.

You can also test the connection with a compatible monitor. If the display works, the complete setup supports the required video path.

Deciphering Connector Bandwidth Icons

USB-C cable markings can provide useful clues, but they need careful interpretation. A 40Gbps or 20Gbps label usually identifies supported data bandwidth. It does not, by itself, guarantee video output.

Thunderbolt cables commonly use the Thunderbolt lightning symbol. USB4 cables may include USB4 branding or speed information. DisplayPort-compatible products may mention DisplayPort directly on their packaging or specifications.

Do not assume that a basic USB symbol means the cable cannot carry video. USB logos and markings have changed over time, and manufacturers do not always print complete information on the connector. Understanding why USB ports are color-coded can also help you interpret different USB connections more accurately.

The safest approach is to check the manufacturer’s specifications for the exact cable model. Confirm its supported data rate, display standards, and power capabilities.

Also check the source device. A high-speed cable cannot add video output to a USB-C port that supports only charging or USB data.

When markings are unclear, product documentation provides a more dependable answer than visual inspection alone.

Can USB-C transmit 4K video?

Yes, USB-C can transmit 4K video, including 4K at 60Hz and higher refresh rates in suitable configurations. However, the result depends on the source device, display, cable, adapter, and supported DisplayPort or USB4 capabilities.

A 4K display requires considerably more bandwidth than a standard 1080p screen. The exact requirement depends on refresh rate, color format, bit depth, compression, and the display protocol being used.

For example, DisplayPort 1.4 can provide enough bandwidth for many 4K high-refresh configurations. Display Stream Compression (DSC) can also help support higher resolutions and refresh rates within available bandwidth.

A basic USB 2.0 cable cannot provide the high-speed video path required for direct USB-C display output. A suitable USB-C cable with the necessary high-speed conductors is required.

Before buying, check the complete connection. Confirm the laptop’s maximum display output, monitor requirements, cable capabilities, and any adapter or dock specifications. If you plan to use a portable display, also consider the pros and cons of portable USB monitors for laptops. This prevents common problems such as reduced refresh rates, blank screens, or limited resolution.

Refresh Rates and HDR Demands

Higher refresh rates and HDR increase the demands placed on a video connection. A 4K display running at 60Hz requires less bandwidth than the same display running at 120Hz with higher color depth.

The supported DisplayPort version therefore matters. DisplayPort 1.4, for example, provides greater bandwidth than older DisplayPort versions and can work with DSC for demanding display configurations.

HDR can also increase the amount of information transferred because compatible displays may use greater color depth. The actual requirements vary by monitor and configuration.

When choosing a USB-C cable, check the manufacturer’s stated display capabilities rather than relying only on a generic speed number. A cable advertised as 40Gbps may be capable of high-performance display connections, but the complete system still determines the final resolution and refresh rate.

If your monitor flickers, drops frames, or falls back to a lower resolution, check the cable, source port, adapter, and display settings. Replacing the cable may help, but it is not always the root cause.

What USB-C cable do I need for video?

For video, choose a USB-C cable that explicitly supports the display technology required by your setup. Depending on the equipment, this could include DisplayPort Alt Mode, USB4, or Thunderbolt.

Avoid choosing a cable based only on phrases such as “fast charging.” Charging performance does not automatically indicate video support. Likewise, a 40Gbps label describes data capability but should not be treated as a universal guarantee for every display configuration.

For a simple monitor connection, check whether the manufacturer lists DisplayPort support and the required resolution and refresh rate. If your laptop lacks a dedicated HDMI port, USB-C may provide another way to connect an external display. Learn more about why some laptops don’t have HDMI ports when choosing your connection method. For Thunderbolt systems, use a certified Thunderbolt cable that meets the requirements of the computer and display or dock.

Power delivery is another specification to consider if the same connection charges a laptop. A cable may support video while having a different power rating from another cable.

The safest buying approach is to match the cable to the complete setup. Check the laptop port, monitor input, resolution, refresh rate, adapter or dock, and cable specifications before purchasing.

Selecting the Right Video Cable

Start by identifying your display requirements. A basic 1080p monitor has different bandwidth needs from a 4K 120Hz display or a multi-monitor workstation.

For many standard USB-C display setups, a properly specified USB 3.x or USB4 cable can work when the source and display support the required video mode. However, the cable’s stated display capability matters more than the connector shape.

For Thunderbolt systems, use a compatible certified Thunderbolt cable. This can provide high-speed data, display connectivity, and power delivery through one connection when supported by the host and peripherals.

Before buying, check these specifications:

  • Display resolution and refresh rate
  • DisplayPort or Thunderbolt support
  • USB data speed
  • Power Delivery rating
  • Cable length
  • Compatibility with your dock or adapter

Do not automatically buy the most expensive cable. Choose one that meets the requirements of your specific setup. A correctly specified cable is more important than a premium label alone.

Are there two types of USB-C cables?

USB-C cables are not limited to only two technical types. They exist across a wide range of capabilities, including USB 2.0, USB 3.x, USB4, and Thunderbolt-compatible designs. Some support charging and basic data, while others support high-speed data and display connections.

This difference explains why two cables with identical USB-C connectors can behave differently. A cable designed primarily for USB 2.0 data may work perfectly for charging and simple file transfers but lack the high-speed connections needed for video.

Other cables are designed for much higher performance. Depending on their specifications, they can support high-speed USB data, display output, and higher power levels.

The important distinction is therefore not simply charge-only versus video cable. Instead, think of USB-C cables as having different combinations of power, data, and display capabilities.

When learning how to tell if a USB-C cable supports video, focus on the specifications rather than the physical connector. The USB-C shape tells you how the cable connects, not everything it can do.

The Internal Pin Difference

USB-C connectors contain up to 24 contacts, but cable construction and supported functions vary. Not every cable implements every high-speed connection in the same way.

USB 2.0-focused cables use dedicated USB 2.0 data connections and power connections. They may omit the high-speed wiring required for USB 3.x, USB4, or DisplayPort-based video operation.

Higher-performance cables include additional high-speed conductors. These connections allow compatible devices to transfer data at higher speeds and, where supported, carry display signals through technologies such as DisplayPort Alt Mode.

This physical difference is one reason a cheap charging cable may fit a laptop perfectly but fail to connect it to a monitor.

However, the cable is only one part of the system. The source USB-C port must also support video, and the monitor or adapter must accept the corresponding signal. This is especially important when adding USB-C connectivity to a desktop, where the available ports may have different capabilities. Before upgrading, consider whether you should add USB-C ports to your desktop PC.

Therefore, do not judge a cable’s video capability from its connector appearance. Check the manufacturer’s specifications and match them with your device’s supported display standards.

Conclusion

Knowing how to tell if a USB-C cable supports video can save you from blank screens, compatibility problems, and unnecessary purchases. The USB-C connector alone does not guarantee display support. You need to check the cable, source device, monitor, and supported display standard.

Look for specifications such as DisplayPort Alt Mode, USB4, or Thunderbolt. Also check the required resolution, refresh rate, data speed, and power rating. Do not assume that fast charging or a 40Gbps label automatically means video support.

When in doubt, check the manufacturer’s specifications for both the device and cable. Choosing a cable that matches your complete setup is the simplest way to get reliable video output.

Should You Replace a Samsung Tablet Battery?

Should You Replace a Samsung Tablet Battery?

Few hardware problems feel as frustrating as a tablet that drops from 80% to zero within minutes. If you need to replace a Samsung tablet battery, you may wonder whether repairing your Galaxy Tab is worth the cost. Your tablet may die during a movie, require frequent charging, or take hours to reach a full charge.

Deciding whether to replace a Samsung tablet battery depends on several factors. Repair cost, tablet age, performance, software support, and battery condition all matter.

Lithium-ion batteries naturally lose capacity as they age. Repeated charging and discharging gradually reduce the energy they can store. Samsung also notes that reduced battery capacity cannot be restored once the battery has deteriorated.

This guide explains when a Galaxy tablet battery needs replacement. It also covers battery lifespan, replacement costs, repair considerations, and ways to decide if the repair is worthwhile.

Can a Samsung tablet battery be replaced?

Yes, you can replace a Samsung tablet battery, but most Galaxy tablets do not have user-removable batteries. If you are wondering why modern devices use sealed batteries, see our guide to why tech companies stopped using removable batteries. Samsung identifies some Galaxy Tab models as having non-removable batteries and recommends using a service provider or authorized repair agent for replacement.

Modern tablets use tightly fitted displays and internal adhesive. Opening the device requires careful disassembly. A technician may need to separate the display before accessing the battery and other internal components.

That process creates several risks for inexperienced users. Excessive heat or force can damage the display, cables, connectors, or battery.

For that reason, professional repair is usually safer than attempting a battery replacement without suitable tools or experience. Samsung also recommends professional inspection when a Galaxy device shows battery problems or reduced performance.

Before booking a repair, check the exact Galaxy Tab model. Battery availability, repair procedures, parts, and service pricing can differ between models.

Why Certified Technicians Matter for Sealed Galaxy Tabs

Opening a sealed Galaxy tablet is more complicated than removing a conventional battery cover. The display and internal components can be delicate, while the battery is secured inside the chassis.

A trained technician has the appropriate tools and experience to separate these components safely. This reduces the chance of damaging the screen or internal connectors during the repair.

Professional service can also provide additional benefits:

  • Proper battery handling: Lithium-ion cells require careful removal and installation.
  • Correct replacement parts: Service centers can use compatible batteries for the specific model.
  • Diagnostic testing: Technicians can check whether the battery is actually causing the problem.
  • Repair protection: Authorized service may provide warranty or after-service support.

Samsung recommends service-center inspection when a Galaxy device experiences unexpected shutdowns, rapid battery drain, or charging problems.

DIY replacement may appear cheaper, but a damaged screen can quickly make the repair more expensive. If you lack repair experience, professional service is the safer option.

What is the lifespan of a Samsung tablet battery?

A Samsung tablet battery does not have one fixed lifespan. Usage patterns, charging habits, temperature, software activity, and the tablet model all affect battery aging. For broader context, learn how long Android tablets typically last and what can affect their useful life.

Lithium-ion batteries gradually lose capacity through repeated charging and discharging. Samsung describes the battery as a consumable component whose capacity decreases over time.

Many users may notice meaningful battery degradation after several years. However, the exact point varies considerably. Heavy gaming, high screen brightness, frequent charging, and hot environments can increase battery wear.

Common signs of an aging tablet battery include:

  • Battery percentage falling unusually quickly.
  • Unexpected shutdowns during normal use.
  • The tablet requiring frequent charging.
  • Charging behavior becoming inconsistent.
  • Much shorter runtime than when the tablet was new.

Battery drain does not always mean the battery itself has failed. Background apps and system activity can also increase consumption. Samsung recommends checking the device before assuming that a replacement battery is necessary.

Practical Tips to Maximize Galaxy Tablet Battery Health

You can reduce unnecessary battery wear by changing how you charge and store your Galaxy tablet. Samsung provides Battery Protection features that manage charging behavior on supported Galaxy devices. You can also learn more about the 80-20 rule for rechargeable batteries and how charging habits relate to battery longevity. Available options can vary by model and software version.

Depending on your device, Battery Protection may allow you to set a maximum charging level below 100%. Current Samsung guidance lists several possible limits, including 80%, 85%, 90%, and 95% on supported software.

Other useful habits include:

  • Keep the tablet away from excessive heat.
  • Avoid leaving it fully discharged for long periods.
  • Use a compatible charger and power adapter.
  • Avoid keeping the tablet at 100% for extended periods.
  • Store an unused tablet around 50–70% charge.

Samsung recommends charging a device to approximately 50–70% for long-term storage. It also advises occasional charging during extended storage.

These habits cannot stop battery aging, but they can help manage long-term battery wear.

What does it cost to replace a Samsung tablet battery?

The cost to replace a Samsung tablet battery varies significantly by model, country, battery availability, and repair provider. A single universal price does not apply to every Galaxy Tab.

Independent repair shops may charge less than authorized service centers. However, the cheapest quote may not include the same parts, warranty, diagnostics, or repair standards.

Before approving the repair, ask for a complete estimate. Confirm whether the quoted price includes the battery, labor, adhesive, diagnostics, taxes, and any additional parts.

You should also check the exact Galaxy Tab model. A battery replacement for an older budget tablet may have a very different cost from one for a premium Galaxy Tab S model.

Samsung provides service-center support for tablets and lets customers check service options and parts information.

Avoid choosing a replacement solely because it has the lowest price. A damaged display or poor-quality battery can create additional costs. Compare the repair quote with the tablet’s current value and remaining software support before deciding.

Breaking Down Labor Expenses Versus Component Pricing

The battery itself is only one part of the total replacement cost. Labor can account for a significant portion because technicians must carefully access the internal battery.

Sealed tablets require more disassembly than devices with removable rear covers. A technician may need to separate the display, disconnect internal cables, remove adhesive, replace the battery, and reassemble the device.

Your final repair quote may therefore include:

  • Replacement battery: The compatible battery for your specific Galaxy Tab model.
  • Labor: Time required to safely open and reassemble the tablet.
  • Adhesive: Materials used to secure components during reassembly.
  • Diagnostics: Testing to confirm proper charging and battery operation.
  • Additional repairs: Possible costs if the inspection finds other damaged components.

Samsung recommends professional inspection when battery problems appear because rapid drain or shutdowns can have causes other than battery degradation. If charging behavior is also a concern, understanding whether third-party chargers are safe can help you avoid blaming the battery for every charging problem.

Always request the total repair price before authorizing the work. This makes it easier to compare repair costs with buying another tablet.

Is it good to replace a Samsung battery?

Replacing a Samsung tablet battery can make financial sense when the rest of the device still performs well. A new battery can restore much of the tablet’s original runtime when capacity has significantly declined.

However, battery replacement does not upgrade the processor, display, storage, cameras, or software capabilities. That distinction matters when deciding whether to repair an older Galaxy Tab.

Consider a battery replacement when:

  • The tablet still handles your everyday apps smoothly.
  • The display and charging port remain in good condition.
  • You like the tablet’s size and features.
  • The repair cost is reasonable compared with another device.
  • You expect to keep using the tablet for several more years.

Replacement becomes harder to justify when the tablet has multiple hardware problems. An aging processor, limited storage, poor software support, and a worn battery can make a new device more practical.

Samsung recommends professional battery inspection when devices show rapid drain, unexpected shutdowns, or charging problems.

Environmental and Financial Benefits of Device Repair

Repairing a working tablet can extend its useful life and delay the need for another device. That can reduce the amount of electronic waste generated when functioning hardware gets replaced.

A battery replacement also lets you keep the tablet’s existing display, processor, memory, storage, and other components. If those parts still meet your needs, replacing one worn component may be more practical than replacing the entire device. Before deciding whether to repair or replace the tablet, consider the disadvantages of using a tablet as a laptop replacement if you rely on it for more demanding work.

There are also financial considerations. A battery repair can cost substantially less than purchasing another tablet, but the comparison depends on the repair quote and your tablet’s current value.

Before making a decision, compare:

  • Battery replacement cost
  • Tablet’s current condition
  • Remaining software support
  • Performance for your everyday tasks
  • Cost of a suitable replacement tablet

Do not repair a tablet solely because the battery is replaceable. Consider the entire device.

If the screen, processor, storage, and software remain suitable, a battery replacement can extend its useful life. If several major components are aging, putting money toward another tablet may make more financial sense.

Conclusion

The decision depends on more than battery life. Repair cost, tablet age, performance, software support, and overall condition all matter. Samsung explains that rapid battery drain, unexpected shutdowns, and other battery problems can indicate that a battery needs inspection or replacement. Samsung’s battery replacement guide

Before booking a repair, check these factors:

  • Replace the battery if the tablet works well but has poor battery life or unexpected shutdowns.
  • Consider repairing it if the screen, charging port, storage, and other hardware remain in good condition.
  • Compare costs carefully if the repair quote approaches the price of a suitable replacement tablet.
  • Consider upgrading if the tablet has several hardware problems, poor performance, or limited software support.
  • Get a professional inspection if the battery is swollen, overheating, or behaving unpredictably.

A battery replacement does not make an old tablet new. It only restores the battery component. However, when the rest of the Galaxy Tab still meets your needs, replacing the battery can extend its useful life without replacing the entire device.

The simplest rule is this: if the battery is the main problem and the tablet still meets your needs, repair it. If several major problems exist, compare the total repair cost with a replacement before spending money.

5 Cool New Features To Try In The iOS 27 Photos App

5 Cool New Features To Try In The iOS 27 Photos App

Your iPhone camera can capture incredible photos, but taking the picture is only half the job. Finding the right image, fixing an awkward composition, or removing an unwanted person can take much longer than expected. The iOS 27 Photos app aims to make those tasks easier with several useful new tools.

Apple has added new AI-powered editing options alongside better ways to organize your growing photo library. You can now change the perspective of an existing picture, generate extra space around an image, and remove distracting objects. You can even turn a favorite moment from a video into a standalone photo. For a broader look at the update, check Apple’s official iOS 27 overview.

The update also gives you more control over your library. Star ratings and custom keywords make it easier to identify and find important photos later.

Whether you take hundreds of pictures every month or simply want faster editing tools, these features are worth exploring. Here are five iOS 27 Photos app features that can make your everyday photo workflow easier.

1. Reframe Your Photos After Taking Them

Getting the perfect composition is not always possible when you are taking a photo. A subject might be slightly off-center, or you may wish you had captured the scene from a different perspective.

The Reframe tool in the iOS 27 Photos app gives you a way to adjust the perspective after taking the picture. Instead of simply cropping the image, you can reposition the scene and create a different visual angle.

Apple Intelligence generates additional image content where necessary. This allows the photo to maintain a natural-looking composition after the perspective changes.

To try the feature, open a photo in Photos and select Edit. Go to Tools, then choose Reframe. Move the image until you find a composition you prefer.

You can compare the modified version with the original before saving it. If you later dislike the result, you can return to the original photo through the editing controls.

This makes Reframe particularly useful for travel photos, portraits, and shots where the original framing was not quite right.

2. Extend the Edges of a Photo

Sometimes a photo looks good, but it does not have enough empty space around the subject. This can become a problem when you want to use the image as wallpaper, a social media post, or another design.

The Extend tool addresses this problem by expanding the visible area beyond the original photograph. Instead of simply stretching the existing pixels, Apple Intelligence generates new content around the edges.

Open the image you want to modify and enter the Edit interface. Select Tools, then choose Extend. Adjust the image to determine how much additional space you want.

Photos will process the selected area and attempt to continue the surrounding scene naturally. You can then review the result before saving it.

This feature can be especially useful for photos with simple backgrounds. It can also help when the original composition feels too tight.

If you want to experiment without changing the original, create a duplicate first. That gives you a separate copy for testing different extensions.

3. Remove Unwanted Objects With Clean Up

Unwanted objects can easily ruin an otherwise useful photograph. A stranger walking behind your subject, a distracting sign, or another background element can pull attention away from the main scene.

The Clean Up tool in the iOS 27 Photos app helps remove these distractions directly from your iPhone. Instead of opening a separate editing application, you can work on the image within Photos.

Open a picture and enter the editing tools. Select Clean Up, then identify the part of the image you want to remove. The tool processes the selected area and generates replacement content based on the surrounding scene.

The updated Clean Up experience is particularly useful for busy backgrounds. It can help make travel photos, street photography, and everyday snapshots look cleaner.

However, AI-generated edits are not guaranteed to be perfect. Complex backgrounds can sometimes produce visible inconsistencies.

For the best results, inspect the edited area carefully before saving. If the result looks unnatural, you can undo the change or return to the original image.

4. Save a Video Moment as a Photo

A video can contain a perfect moment that you never captured as a separate photograph. Until now, taking a screenshot was one of the simplest ways to save that moment.

The Save Video Frame as Photo option makes the process much cleaner in iOS 27. You can select a specific frame from a video and save it directly to your Photos library as an image.

Start by opening a video in Photos. Move through the recording until you reach the exact moment you want to capture. Pause the video, then open the three-dot menu and select Save Video Frame as Photo.

The selected frame is saved as a separate photo. You can then edit, share, organize, or delete it like any other image.

This can be useful for action shots, family videos, vacations, and spontaneous moments. You may also find it helpful when someone records an event instead of taking photographs.

The biggest advantage is convenience. You no longer need to take a screenshot and crop away unwanted interface elements afterward.

5. Organize Your Library With Star Ratings and Keywords

Managing a large photo library becomes easier when you can add your own labels. iOS 27 introduces star ratings and custom keywords, giving you more control over how you organize photos and videos. If you also use cloud storage for your library, comparing iCloud Photos and Google Photos can help you choose how to store and access your collection.

You can rate individual media files from one to five stars. This is useful when sorting through several similar images and deciding which ones deserve to stay in your collection.

You can also add custom keywords to make certain photos easier to find later. For example, you could use terms such as family trip, work project, birthday, or 2026 vacation.

To use ratings, enable the relevant rating controls in the Photos settings. You can then assign a star rating while viewing a photo or video.

Keywords can be added from the information panel for individual media. Later, search for a keyword to find the photos and videos connected to it.

These tools are especially useful for large libraries. Instead of relying only on albums or Favorites, you can create a more flexible personal organization system.


What are the new photo features in iOS 27?

The iOS 27 Photos app introduces several tools designed to make photo management faster and more intuitive. Smarter visual organization can help you browse large libraries without manually checking every image. Improved search also makes it easier to locate specific photos using descriptive terms.

The app can recognize visual details and organize related content. This can reduce the time needed to find pictures from trips, events, or everyday activities.

Editing also becomes more convenient with tools designed for quick adjustments. Background and object controls can help you focus on the parts of an image that matter most.

Key improvements include:

  • Smarter photo organization for large libraries.
  • Natural-language search for more specific queries.
  • Object isolation for separating subjects from backgrounds.
  • Memory features for creating engaging photo collections.
  • Cleanup tools for removing unwanted elements.

Together, these features make everyday photo management simpler and faster.

What are the new iOS 27 features?

The Photos app is only one part of the broader iOS 27 experience. The update also introduces changes across the system, including widgets, customization, communication, battery management, and privacy controls.

Interactive widgets can provide more information without requiring you to open the associated app. This can make simple tasks faster during everyday use.

The system also expands customization options for the Lock Screen. Users can adjust the information displayed and make it better suited to their daily routines.

Other areas receive improvements as well. Translation tools can help with communication across supported apps, while battery features are designed to manage charging more intelligently.

Privacy remains another important part of the update. More detailed controls can help users understand how apps access certain device features.

Some notable areas include:

  • Interactive widgets for quicker actions.
  • Lock Screen customization for more control.
  • Translation features across supported apps.
  • Battery optimization based on usage patterns.
  • Expanded privacy controls for connected features.

These changes extend the update beyond photography.

What is the 3 finger trick on iPhone?

The three-finger gesture is a useful iPhone shortcut for editing and managing content. It can reduce the need to open menus when performing common actions.

A three-finger pinch inward can copy selected content. Repeating the appropriate gesture can cut content, while an outward three-finger pinch can paste it.

You can also use three-finger gestures for undo and redo. Swiping three fingers to the left can undo an action. Swiping three fingers to the right can redo an action.

These gestures are especially useful when working with text. They can also become helpful during certain editing tasks, depending on the app and supported content.

Common gestures include:

  • Three-finger pinch inward: Copy.
  • Three-finger pinch again: Cut.
  • Three-finger spread outward: Paste.
  • Three-finger swipe left: Undo.
  • Three-finger swipe right: Redo.

It may take a little practice at first. Once familiar, these gestures can make everyday iPhone interactions faster and more natural.

What are the new features in the latest iOS update?

The latest iOS update also focuses on broader improvements beyond photo management. These include system efficiency, communication features, accessibility tools, and deeper integration with on-device intelligence.

Communication features can improve calls in noisy environments. Audio processing can help separate speech from surrounding sounds, making conversations easier to follow.

Voice-related tools can also help users work with recorded information. Transcription and organization features can reduce the effort required to review longer recordings.

Safari receives additional tools designed to provide a cleaner browsing experience. Accessibility improvements also expand the ways users can interact with their iPhones.

Other areas of interest include:

  • Voice isolation for clearer conversations.
  • Voice transcription for easier note-taking.
  • Safari controls for reducing unwanted page distractions.
  • Accessibility improvements for different interaction needs.
  • On-device intelligence for supported system features.
  • Enhanced connectivity tools for supported devices and locations.

These changes show that the latest update is not limited to the Photos app. Instead, Apple continues to improve different parts of the iPhone experience through smaller system-level enhancements.


Conclusion

The iOS 27 Photos app is more than a place to store your pictures. Its latest tools make everyday editing and organization more flexible, especially when you have a large library.

Features such as Reframe and Extend can help fix composition problems after you take a photo. Clean Up can remove distracting elements, while the video-frame tool lets you save a specific moment as a separate picture.

For organization, star ratings and keywords give you another way to sort and find important media without relying entirely on albums or Favorites.

You do not need to use every feature immediately. Start with the tools that solve your most common photo problems. Once you become familiar with them, they can make managing your iPhone photo library considerably easier.

How Bitrate Affects Audio Quality

How Bitrate Affects Audio Quality: Everything You Need to Know

Have you ever heard a song that sounded muddy or muffled? Then you changed the quality setting and noticed clearer instruments. Understanding how bitrate affects audio quality can help you choose better settings for music, podcasts, recordings, and streaming.

Bitrate describes how much digital audio data is processed each second. It is usually measured in kilobits per second (kbps). With lossy formats, lower bitrates require stronger compression, which can remove some audio information. For a helpful overview of bitrate, compression, and digital audio, see Adobe’s guide to understanding audio bitrate.

Higher bitrates give an encoder more data to work with. However, a higher number does not always produce an audible improvement. The audio format, codec, encoder, source quality, and listening environment also affect the final result.

Understanding how bitrate affects audio quality becomes especially useful when choosing between common settings. This guide explains what bitrate means, whether 3,000 kbps is useful for recording, and how 128 kbps, 256 kbps, and 320 kbps compare.

Is a Higher Bitrate Better for Audio Quality?

A higher bitrate usually improves sound quality when comparing the same lossy format and encoder. More data gives the encoder greater flexibility when representing the original recording. This can reduce compression artifacts and preserve more subtle audio details. If you want to optimize playback quality on YouTube Music, you can also explore how to get the highest-quality audio out of YouTube Music.

At lower bitrates, an encoder must remove more information to keep the file small. You may notice weaker high frequencies, blurred transients, or watery sounds. These problems can become easier to hear during complex musical passages.

However, higher bitrate does not guarantee better sound. Once a lossy file reaches a level that sounds transparent to a listener, additional bitrate may provide little audible improvement.

This is why understanding how bitrate affects audio quality requires more than comparing numbers. Codec efficiency also matters. For example, 256 kbps AAC and 320 kbps MP3 should not be judged by bitrate alone.

The Point of Diminishing Sonic Returns

Higher bitrates can reduce compression problems, but audible improvements eventually become smaller. This is especially true with efficient codecs and well-designed encoders.

There is no single bitrate where every listener reaches transparency. Music content, encoder quality, playback equipment, and individual hearing can all affect the result.

Complex recordings can expose compression artifacts more easily. Cymbals, orchestral passages, electronic music, and dense mixes often contain details that challenge aggressive compression.

Good headphones or speakers can also make differences easier to notice. However, better equipment cannot restore information already removed by lossy compression. Your choice between wired and wireless audio can also affect how you approach playback quality and equipment.

For everyday listening, extremely high bitrates may therefore offer limited benefits. A practical choice should consider your codec, storage, bandwidth, and listening habits.

The key lesson is simple: understanding how bitrate affects audio quality helps you avoid both unnecessary compression and unnecessary file sizes.

What Exactly Does Bitrate Mean for Sound Quality?

Bitrate describes how much digital data represents audio during each second of playback. It is commonly expressed in kilobits per second (kbps). A 128 kbps file therefore contains less data per second than a 320 kbps file.

Bitrate matters most when discussing lossy audio formats, including MP3 and AAC. These formats reduce file sizes by removing information that the codec considers less important.

Lower bitrates generally require more aggressive compression. That can affect high-frequency detail, transients, stereo information, and other parts of the recording.

However, bitrate does not work alone. Codec efficiency, encoder quality, sample rate, and source quality also influence the final result.

Uncompressed PCM audio works differently. CD-quality stereo PCM uses 16-bit samples at 44.1 kHz. Its raw data rate is about 1,411 kbps without lossy compression.

Understanding how bitrate affects audio quality therefore requires knowing whether you are dealing with compressed or uncompressed audio.

How Compression Shapes What You Hear

Lossy codecs use psychoacoustic techniques to reduce data. They analyze audio and remove information that may be difficult for people to perceive.

At aggressive compression settings, these decisions can become audible. High-frequency sounds may become less natural, while complex passages can develop metallic or watery artifacts.

You may also notice changes around sharp transients. Cymbals, percussion, consonants, and other fast sounds can expose compression more easily.

Higher bitrates give the encoder more room to preserve these details. However, that does not mean every high-bitrate file will sound better.

The original recording also matters. A poor recording cannot become high-quality simply by increasing its bitrate. The same principle applies when using accessories, so it is useful to understand whether headphone splitters hurt audio quality before adding them to your setup.

Similarly, converting a low-bitrate MP3 into a higher-bitrate MP3 does not restore information that compression already removed.

This is why how bitrate affects audio quality should always be considered alongside the codec and source.

Is 3,000 Bitrate Good for Recording?

A 3,000 kbps bitrate is not automatically better for audio recording. Professional recording usually does not use an arbitrary compressed bitrate as its main quality setting.

Instead, recording engineers commonly use uncompressed PCM with settings such as 24-bit depth and 48 kHz or 96 kHz sample rates. These settings describe sample resolution and sampling frequency.

For example, stereo 24-bit/48 kHz PCM has a raw data rate of about 2,304 kbps. Stereo 24-bit/96 kHz PCM has a raw rate of about 4,608 kbps.

These numbers differ from MP3 or AAC bitrates. Lossless and uncompressed recording formats preserve the original audio data differently from lossy formats.

A 3,000 kbps setting can also appear in broadcasting or streaming software. In that situation, the number may refer to video or total stream bandwidth rather than dedicated audio quality.

Audio Bitrates Versus Video Streaming Settings

Streaming software often provides separate bitrate settings for video and audio. A setting of 3,000 kbps may therefore describe video bitrate rather than audio bitrate.

For example, a livestream could use 3,000 kbps for video while using a much smaller bitrate for audio. The exact configuration depends on the streaming platform and software.

For dedicated audio recording, focus on the sample rate, bit depth, and recording format. WAV and AIFF are common production formats because they can store audio without lossy compression.

If you need a smaller file for delivery, you can encode the finished recording into AAC, MP3, or another suitable format.

This workflow also gives you greater flexibility during editing. Avoid repeatedly converting between lossy formats because each conversion can introduce additional quality loss.

So, when considering how bitrate affects audio quality, do not treat 3,000 kbps as a universal quality target.

Is 256 Audio Bitrate Good?

Yes, 256 kbps can provide very good audio quality, especially when using an efficient codec such as AAC. For many listeners, a well-encoded 256 kbps file can sound very close to the original source.

The codec still matters. A 256 kbps AAC file and a 256 kbps MP3 file do not necessarily produce identical results. Different codecs use different compression techniques.

Source quality also matters. A clean, well-mastered recording gives the encoder better material to process. Poor source audio will remain poor regardless of bitrate.

For everyday music listening, 256 kbps can provide a practical balance between quality and file size. It offers more data than 128 kbps while requiring less storage than many higher-quality settings. If you are comparing streaming platforms, you can also explore which music streaming service has the best sound quality.

However, you should not assume that every listener will hear a major difference between 256 kbps and 320 kbps. The result depends on the codec, recording, playback equipment, and listener.

This is another reason why understanding how bitrate affects audio quality is more useful than simply choosing the largest number.

The Efficiency of Modern AAC

AAC can provide strong audio quality at relatively modest bitrates. Its compression system differs from older formats such as MP3.

This makes direct bitrate comparisons between codecs misleading. A 256 kbps AAC file may sound different from a 256 kbps MP3 file, even though both use the same numerical bitrate.

AAC can preserve important musical information effectively at common streaming settings. However, claims that one bitrate is always indistinguishable from another should be treated carefully.

Human hearing varies between listeners. Music content and playback equipment can also affect what people notice.

For everyday streaming, 256 kbps AAC can be a sensible option. For editing or archiving, use an uncompressed or lossless format instead.

The important distinction is between delivery and production. A convenient compressed file is not necessarily the right format for preserving an original recording.

Which Music Quality Is Best: 128k, 256k, or 320kbps?

When comparing MP3 files made from the same source and with the same encoder, 320 kbps uses the least aggressive compression of these three settings.

That can reduce audible compression artifacts compared with lower settings. However, 320 kbps is not automatically the best choice for every listener or situation.

A well-encoded 256 kbps file can sound extremely close to a 320 kbps file. Some listeners may have difficulty detecting a difference, especially with everyday playback.

At 128 kbps, compression becomes more aggressive. Artifacts can become easier to notice during complex music, sharp percussion, and high-frequency passages.

Your choice can therefore depend on your priorities:

  • 128 kbps: Smaller files and lower bandwidth requirements.
  • 256 kbps: A strong balance between quality and file size.
  • 320 kbps: Higher data rate with less aggressive MP3 compression.

For archiving, neither 256 nor 320 kbps is ideal when you need to preserve the original source. A lossless format such as FLAC retains the original audio data without lossy compression.

Why Context Dictates the Right Choice

The right bitrate depends on how you plan to use the audio. A podcast does not necessarily need the same settings as a music collection.

Spoken-word recordings can often use lower bitrates while maintaining acceptable clarity. Music usually benefits more from higher-quality encoding because it contains broader frequency content and more complex sounds.

Storage and internet bandwidth also matter. Smaller files consume less storage and require less data during playback.

For music, 256 kbps can offer a useful balance when using an efficient codec. If you specifically want high-quality MP3 encoding, 320 kbps provides a higher data rate. Your choice of streaming service can also influence the available audio quality, so it is worth comparing Spotify vs. Apple Music before deciding where to listen.

For editing and long-term preservation, choose lossless or uncompressed audio instead. Increasing the bitrate of an already compressed file will not restore lost information.

Ultimately, how bitrate affects audio quality depends on more than bitrate alone. Codec, source, encoding method, and playback equipment all influence the final listening experience.

Conclusion

Understanding how bitrate affects audio quality makes it easier to choose the right audio settings. Higher bitrates can preserve more information in lossy formats, but they do not guarantee a noticeable improvement in every situation.

For everyday music listening, 256 kbps can provide a strong balance between sound quality and file size. A 320 kbps MP3 uses less aggressive compression, while 128 kbps prioritizes smaller files and lower bandwidth use.

For recording, editing, and long-term preservation, lossless or uncompressed formats are usually more appropriate. These formats avoid the information loss associated with lossy compression.

The most important point is that bitrate is only one part of audio quality. Codec efficiency, source quality, encoding settings, and playback equipment all matter.

Once you understand how bitrate affects audio quality, you can choose settings based on your actual needs instead of simply selecting the highest number.

What’s The Difference Between Google Maps And Google Earth?

What’s the Difference Between Google Maps and Google Earth?

Understanding the difference between Google Maps and Google Earth starts with their different purposes. Both use extensive geospatial data, but they serve different needs. Google Maps focuses on navigation, directions, traffic, and local business discovery. Google Earth focuses on exploring the planet through satellite imagery, 3D terrain, and geographic visualization.

Choosing the right platform can save time. Google Maps works better when you need directions, nearby businesses, or traffic information. Google Earth is more useful for exploring landscapes, examining terrain, and viewing locations from a global perspective. You can also explore Google’s official features and guidance through the Google Earth Help Center.

The two services also differ in how they present geographic information. Maps emphasizes roads, routes, addresses, transit, and places. Earth provides a more immersive view of landscapes and geographic features.

This guide explains the key differences between Google Maps and Google Earth. It also answers common questions about accuracy, professional mapping tools, the Titanic, planets, and viewing your home.

Which Is More Accurate, Google Maps or Google Earth?

The answer depends on what you mean by accuracy. Google Maps generally works better for everyday navigation because it focuses on roads, routes, addresses, traffic, and local places. Its navigation data can also reflect reported road changes, closures, and traffic conditions.

Google Earth focuses more on visual and geographic accuracy. It combines satellite and aerial imagery with terrain and elevation data. This makes it useful for understanding landscapes, mountains, coastlines, and large geographic areas.

For driving, Google Maps is usually the more appropriate choice. It provides route planning, turn-by-turn navigation, traffic information, and road-related details. If you are comparing navigation platforms, Apple Maps or Google Maps can help you understand how the two services differ. Google Earth is better suited to visual exploration and geographic study.

How Data Updates Affect Accuracy

The two platforms also handle updates differently. Google Maps can reflect changes to roads, businesses, traffic, and other local information relatively quickly. Google Earth imagery can remain available for longer periods before newer imagery replaces it.

This means a road may look different in Google Earth than it does in Google Maps. Imagery dates can also vary between locations. Neither platform should be treated as a continuously updated photographic record of the entire planet.

Are There Better Maps Than Google Earth?

There is no single best alternative to Google Earth for every purpose. The right platform depends on what you need to accomplish. Google Earth is designed mainly for geographic exploration and visual storytelling. For students and educators, exploring geography can also become more engaging through activities that make geography memorable. Other platforms provide deeper tools for mapping, spatial analysis, or community-generated geographic data.

Professional GIS software such as ArcGIS and QGIS provides tools for analyzing geographic datasets. Users can create custom layers, examine spatial relationships, and work with specialized environmental or infrastructure data. These capabilities go far beyond basic geographic exploration.

OpenStreetMap takes a different approach. It is a community-driven geographic database containing roads, paths, trails, buildings, and other mapped features. In some areas, contributors provide detailed information that may be useful for hiking and local mapping.

Google Earth remains useful when you want an accessible 3D globe and satellite imagery experience. Professional GIS tools are more appropriate when you need advanced spatial analysis.

When Should You Choose Professional GIS Software?

Choose dedicated GIS software when your project requires detailed geographic analysis. These tools can work with multiple data layers and specialized datasets.

Common use cases include:

  • Environmental analysis and land-use studies
  • Infrastructure and urban planning
  • Mapping natural resources
  • Examining geographic changes over time
  • Creating custom geographic datasets
  • Analyzing relationships between different locations

Google Earth can help you understand a location visually. GIS platforms provide more control over the underlying geographic data and analysis.

For casual exploration, Google Earth is usually simpler. For professional spatial research, specialized GIS software offers more analytical capabilities.

Is the Titanic Visible on Google Earth?

You cannot view the Titanic wreck directly through satellite photography in Google Earth. The wreck lies about 3,800 meters below the surface of the North Atlantic Ocean. Visible-light satellite imagery cannot photograph the shipwreck through that depth of seawater.

Google Earth can still display information about the Titanic’s location. Its ocean visualization uses bathymetric data to represent parts of the seafloor. This creates a digital representation of underwater terrain rather than a photograph of the wreck itself.

The Titanic’s approximate location is 41.73° N, 49.95° W. When you explore this area, you should not expect to see detailed images of the ship. You may instead encounter geographic information, ocean-floor data, or user-created markers.

Actual images and surveys of the wreck come from specialized underwater exploration. Researchers use remotely operated vehicles, autonomous systems, and crewed submersibles for detailed inspections.

How Marine Bathymetry Represents the Ocean Floor

Bathymetry measures the depth and shape of underwater terrain. Researchers commonly collect bathymetric information using sonar systems mounted on ships or underwater equipment.

Google Earth can use available oceanographic datasets to create a visual representation of the seafloor. The result helps users understand underwater ridges, trenches, and other geographic features.

However, this representation should not be confused with underwater photography. A digital seafloor model shows geographic elevation and depth rather than the physical appearance of objects sitting on the seabed.

To see detailed photographs or video of the Titanic, you need sources from marine expeditions and underwater exploration projects.

Can I See Planets on Google Earth?

Yes, Google Earth has offered ways to explore celestial bodies and astronomical imagery. Google Earth Pro has historically included options for exploring the Moon and Mars, while its Sky feature provides views of astronomical objects and the night sky.

These features let users move beyond Earth’s surface. Depending on the version and available imagery, you can explore lunar landscapes, Martian terrain, and astronomical objects through specialized visual datasets.

The imagery comes from scientific and space-observation missions rather than ordinary Earth satellite photography. Space agencies have collected much of the underlying data used for these types of visualizations.

Google Earth can therefore function as more than a conventional mapping application. It can also provide an educational way to explore geographic and astronomical environments.

However, available features can change between versions and platforms. If a specific celestial mode is missing, check Google’s current documentation for availability.

How to Access Google Earth’s Celestial Features

In supported versions of Google Earth, celestial exploration can be accessed through the application’s available planet or astronomy options. The exact interface may vary between Google Earth versions.

You can use these features to explore:

  • The Moon and its surface features
  • Mars and its terrain
  • The night sky and astronomical objects
  • Images and information associated with space missions

These modes provide an educational way to explore locations beyond Earth. They should not be confused with live astronomical observations.

Can I See My House in Real Time on Google Earth?

No. Google Earth does not provide a live satellite view of your house. The imagery shown on the platform comes from satellite and aerial sources collected at different times.

This means the image you see represents a particular point in time. It may be weeks, months, or even years old, depending on the location and available imagery.

Google Earth can therefore help you examine your neighborhood from above. It cannot function like a live security camera pointed at your property.

Imagery also varies by location. Some areas receive newer imagery more frequently than others. Google combines imagery from different sources and dates to provide broad geographic coverage.

If you need current information about roads or traffic, Google Maps is usually more useful. However, even Google Maps should not be treated as a live satellite-video service.

Why Live Satellite Views Are Not Available

Continuous live satellite imagery of every property would require enormous amounts of data and infrastructure. Satellites also move along their orbits rather than remaining fixed above one location.

Clouds and atmospheric conditions can further limit optical satellite imagery. A satellite may also pass over a location only at particular intervals.

For these reasons, consumer mapping services generally provide periodically collected imagery, not continuous live video.

If you want to check the age of imagery, Google Earth can provide imagery information for supported locations. This helps you understand when the displayed image was captured.

In short, Google Earth shows geographic imagery from specific collection dates. It does not provide a real-time view of your home.

Conclusion

The difference between Google Maps and Google Earth mainly comes down to what you want to do. Google Maps is designed for practical tasks such as finding places, planning routes, checking traffic, and navigating unfamiliar roads. Google Earth takes a more visual approach, helping you explore satellite imagery, 3D terrain, landmarks, and geographic features around the world.

Neither platform replaces the other. Google Maps is the better fit for everyday navigation, while Google Earth is better for geographic exploration and visual learning. Their imagery and data can also vary by location and update time, so neither should be treated as a live view of the planet.

If you need directions or current road information, start with Google Maps. If you want to explore landscapes, compare locations, or understand Earth’s geography, Google Earth is the more suitable tool. Knowing this distinction makes it easier to choose the right platform for each task.

Can You Use Vinegar to Clean Solar Panels?

Can You Use Vinegar to Clean Solar Panels?

Homeowners often ask, can you use vinegar to clean solar panels without damaging the glass? Vinegar works well on many household surfaces. That does not mean it is suitable for photovoltaic modules.

Solar panels are designed to handle outdoor conditions. However, their glass surfaces and coatings can still require careful maintenance. Some modules also have manufacturer-specific cleaning requirements.

Dust, pollen, bird droppings, and other debris can accumulate on photovoltaic modules. This buildup can reduce energy production, particularly when panels remain heavily soiled. The U.S. Department of Energy’s solar operations and maintenance guidance explains that regular maintenance helps reduce soiling and maintain PV system performance.

Cleaning can restore some lost production when soiling becomes significant. However, using the wrong cleaner or tool can scratch the glass or damage a surface coating.

The safest approach is simple. Use the cleaning method recommended by your panel manufacturer. When those instructions allow wet cleaning, use clean water and a soft, non-abrasive tool.

What Is the Best Thing to Clean Solar Panels?

The best cleaning method depends on your solar panel manufacturer and module design. For many standard glass modules, clean water and a soft, non-abrasive cleaning tool provide a simple starting point.

A microfiber cloth or soft cleaning pad can help remove loose dust. A soft squeegee may also work when the manufacturer permits it. Avoid tools that can scratch the glass or damage a surface coating.

Before cleaning, check the manufacturer’s maintenance instructions. Some panels have specialized coatings that require specific cleaning methods. For example, First Solar provides different requirements for certain anti-reflective-coated modules.

For difficult-to-reach rooftop systems, an extendable cleaning pole can reduce the need to climb onto the roof. If you are planning a new system, understanding the basics of residential solar panel installation can also help you consider panel placement and maintenance access. However, the attachment should remain soft and non-abrasive.

Follow these basic principles:

  • Use clean water when possible.
  • Choose a soft, non-abrasive cleaning tool.
  • Rinse away loose dirt before wiping.
  • Avoid dragging dry grit across the glass.
  • Follow the panel manufacturer’s instructions.

The goal is to remove dirt without creating scratches or damaging the module surface.

Soft Cleaning Tools Help Prevent Scratches

A soft microfiber cloth or approved cleaning pad can reduce the risk of scratching solar-panel glass. This matters because dirt can contain tiny particles that behave like abrasives during wiping.

Do not immediately scrub a dusty panel with a dry cloth. First, loosen and rinse away loose particles when the manufacturer’s instructions allow wet cleaning. This reduces the amount of grit dragged across the surface.

Also, keep your cleaning equipment clean. A dirty cloth can collect sand, dust, and other particles during previous cleaning jobs. Those particles can then create fine scratches during the next pass.

Avoid wire brushes, abrasive pads, scouring powders, and stiff cleaning equipment. These tools can damage the glass or surface treatments.

However, do not assume every panel allows the same cleaning technique. Some specialized modules have stricter requirements. First Solar, for example, prohibits certain wet-contact cleaning methods on specific anti-reflective-coated modules.

For that reason, the safest rule is simple: check the manufacturer’s cleaning instructions before choosing a tool. A soft tool is generally preferable, but the manufacturer’s approved method takes priority.

What Is the Best Cleaner for Solar Panels?

For routine cleaning, clean water is usually the simplest starting point. The exact type of water depends on the manufacturer’s instructions and the mineral content of your local water supply. Choosing the right maintenance approach is also important when managing the long-term performance of a home solar system.

If a panel has stubborn contamination, check the manufacturer’s instructions before adding any detergent. Some manufacturers permit mild cleaning solutions, while others specify particular products or prohibit certain chemicals.

Avoid assuming that a product marketed as a glass cleaner is automatically safe for solar modules. Household glass cleaners can contain ingredients that are unnecessary for photovoltaic glass. They may also leave residue behind.

NREL’s solar operations guidance recommends avoiding solvents, abrasives, harsh detergents, and high-pressure water during PV cleaning.

If your manufacturer approves a specialized solar-panel cleaner, follow its dilution and application instructions carefully. Do not use more cleaner simply because the panel looks heavily soiled.

A suitable cleaning process should:

  • Remove dirt without scratching the surface.
  • Avoid leaving a visible residue.
  • Remain compatible with the module surface.
  • Follow the manufacturer’s maintenance requirements.

The important point is that more cleaning chemicals do not necessarily mean better cleaning. For most routine dirt, careful cleaning with an approved method is more important than using a powerful chemical.

Choose Cleaning Products Made for PV Modules

A cleaner designed specifically for photovoltaic modules can be appropriate when the manufacturer permits chemical cleaning. However, the label alone should not replace the module manufacturer’s instructions.

Solar panels can have different glass types, coatings, frames, and seals. A product that works on one module may not be appropriate for another. This is particularly important when panels use anti-reflective or other specialized surface treatments.

Avoid cleaners that contain abrasive particles. Also avoid products that leave a heavy film after drying. Residue can attract additional dust and reduce the cleanliness of the glass.

Biodegradable formulas may be preferable from an environmental perspective, but biodegradable does not automatically mean panel-safe. Compatibility with the module remains the key consideration.

Before buying a solar-panel cleaning product, check:

  • Whether the manufacturer permits chemical cleaners.
  • Whether the product is intended for photovoltaic modules.
  • Whether it contains abrasives.
  • Whether it requires dilution.
  • Whether it leaves residue after rinsing.

When the panel manufacturer recommends water-only cleaning, follow that instruction instead. A specialized cleaner is not automatically better than plain water.

For routine residential maintenance, simple cleaning methods are often enough. Save stronger cleaning products for situations where the manufacturer specifically permits them.

What Chemical Can I Use to Clean My Solar Panels?

Do not assume that a common household solvent is safe for solar panels. Isopropyl alcohol, vinegar, ammonia, and other chemicals should only be used when the module manufacturer specifically allows them.

The original advice to use diluted isopropyl alcohol for tree sap or paint is too broad. NREL’s PV maintenance guidance recommends avoiding solvents during general module cleaning.

Some manufacturers may provide specific procedures for unusual contamination. Those instructions should take priority over general cleaning advice.

For sticky substances such as tree resin, begin with the least aggressive approved method. Use clean water and an approved soft cleaning tool if the manufacturer’s instructions permit it. Do not immediately reach for a chemical solvent.

If a substance cannot be removed safely, contact the panel manufacturer or a qualified solar professional. This approach is especially important when dealing with paint, construction residue, chemical deposits, or other unusual contamination.

Remember these rules:

  • Do not experiment with household chemicals.
  • Check the module cleaning instructions first.
  • Avoid solvents unless specifically approved.
  • Never mix different cleaning chemicals.
  • Do not spray chemicals around electrical connections.

The safest chemical cleaner is often the one you do not need to use.

Handle Sticky Tree Resin With Care

Tree sap and resin can be harder to remove than ordinary dust. However, aggressive scrubbing can create a bigger problem than the original stain.

Start by checking your panel manufacturer’s cleaning instructions. If wet cleaning is permitted, use clean water to soften the residue. Then use only an approved soft cleaning tool.

Do not use a knife, razor blade, abrasive sponge, or scouring pad to scrape the resin. These tools can scratch the glass or damage a surface coating.

If the residue remains after gentle cleaning, check whether the manufacturer recommends a particular cleaning solution. Some module designs have strict restrictions on chemicals and contact cleaning.

Avoid spraying an unknown solvent directly across the entire module. Even when a chemical appears harmless on ordinary glass, the same product may not be suitable for a photovoltaic surface.

After removing an approved cleaning solution, rinse according to the manufacturer’s instructions. The objective is to remove the contaminant without leaving chemical residue.

If the stain is caused by paint, tar, construction material, or another unusual substance, professional assistance may be safer. Protecting the module surface is more important than removing one stubborn spot quickly.

What Should You Not Clean Solar Panels With?

You should not clean solar panels with abrasive powders, wire brushes, scouring pads, harsh detergents, or unapproved solvents. High-pressure water should also be avoided unless the manufacturer specifically permits it.

NREL recommends avoiding high-pressure water, brushes, solvents, abrasives, and harsh detergents for PV module cleaning.

The answer to can you use vinegar to clean solar panels therefore needs some qualification. Vinegar contains acetic acid, but there is not a universal rule that it damages every solar-panel coating. The bigger concern is that manufacturers can specify different cleaning requirements.

If your manufacturer does not approve vinegar, do not use it simply because it works on household glass. The same principle applies to bleach, ammonia, and other household cleaners.

Also avoid scraping dried bird droppings with hard objects. Soften the material first using an approved cleaning method.

Hard water can create mineral deposits after drying. If your local water contains many dissolved minerals, consider whether your manufacturer recommends deionized or otherwise treated water.

The safest products to avoid include:

  • Abrasive cleaning powders.
  • Wire or stiff brushes.
  • Unapproved solvents.
  • Harsh household chemicals.
  • High-pressure water.
  • Sharp scraping tools.

When in doubt, use the manufacturer’s approved method rather than experimenting with household cleaning products.

Avoid Cleaning During Extreme Heat

Timing matters when cleaning solar panels. Avoid cleaning very hot modules when possible, especially if your cleaning method involves cooler water.

A large temperature difference between the glass and cleaning water can create thermal stress. The risk depends on the module, temperature difference, water temperature, and other conditions. It is therefore misleading to say cold water will automatically shatter tempered glass.

A safer approach is to clean during early morning, late afternoon, or cooler overcast conditions. The glass should not be extremely hot when you begin.

Cleaning during cooler conditions also makes the work more comfortable. Water is less likely to evaporate immediately, which can make it easier to rinse away dirt and avoid visible mineral deposits.

Always follow the manufacturer’s instructions. Some manufacturers specify particular temperature or cleaning requirements.

Before cleaning:

  1. Check the module manufacturer’s instructions.
  2. Avoid extremely hot glass when possible.
  3. Use water at a reasonable temperature.
  4. Do not use sudden, extreme temperature changes.
  5. Allow the panels to cool before starting if they are very hot.

These precautions reduce unnecessary thermal stress and make the cleaning process easier. They also help prevent rushed cleaning when water dries before you can rinse the surface properly.

What Is the Best Cleaning Liquid for Solar Panels?

For routine cleaning, clean water is usually the simplest starting point. The exact type of water depends on the manufacturer’s instructions and the mineral content of your local water supply.

Hard water contains dissolved minerals. When droplets dry on the glass, those minerals can leave visible spots or deposits. Repeated buildup may become difficult to remove.

Deionized or distilled water contains far fewer dissolved minerals. This can help reduce spotting during cleaning, especially when the water is allowed to dry on the module.

However, you should not assume that every system requires distilled water. A normal water supply may be suitable when the manufacturer’s instructions permit it and the water does not leave significant mineral deposits.

For heavier dirt, use only a cleaning solution approved by the manufacturer. Do not automatically add dish soap or household detergent. Some detergents can leave residue or may not be compatible with the module surface.

A practical approach is:

  • Start with clean water.
  • Use a soft, approved cleaning tool.
  • Rinse thoroughly.
  • Consider low-mineral water if spotting is a problem.
  • Use approved cleaners only for stubborn contamination.

The objective is not to make the water chemically powerful. It is to remove dirt without leaving deposits or damaging the module.

Deionized Water Can Reduce Mineral Spots

Deionized water can help produce a cleaner finish because it contains very few dissolved minerals. That makes it useful when ordinary tap water leaves white spots on solar-panel glass.

Professional cleaning operations may use water-treatment systems to reduce mineral deposits. However, homeowners do not always need specialized equipment.

If your local tap water is relatively soft and does not leave visible residue, it may be suitable for routine cleaning. If it leaves noticeable spots, consider using deionized or distilled water when the manufacturer’s instructions permit it.

Do not rely on the idea that pure water will automatically clean every type of contamination. Water can remove loose dust and many ordinary deposits, but hardened bird droppings, tree resin, and other contaminants may require an approved cleaning procedure.

Also avoid letting dirty water dry on the panel. Rinse thoroughly after cleaning when required.

Most importantly, follow the module manufacturer’s maintenance instructions. Solar panels differ in their surface coatings and cleaning requirements.

Clean water, gentle tools, and the correct cleaning method matter more than using a strong chemical. Regular inspection can also help you decide when cleaning is actually necessary. NREL notes that cleaning needs vary with local soiling conditions, rainfall, and other site factors.

Conclusion

So, can you use vinegar to clean solar panels? It is better not to use vinegar unless your panel manufacturer specifically approves it. Vinegar contains acetic acid, and different solar modules can have coatings or surface treatments with specific cleaning requirements.

For routine maintenance, start with clean water and a soft, non-abrasive cleaning tool. If your panels have stubborn stains, check the manufacturer’s instructions before using any detergent or chemical cleaner. Avoid abrasive materials, harsh household chemicals, sharp tools, and high-pressure water.

Cleaning your panels does not need to be complicated. The safest approach is to use the least aggressive method that effectively removes the dirt. By following the manufacturer’s recommendations, you can keep your solar panels clean while reducing the risk of scratches, residue, or surface damage. Regular inspection can also help you determine when cleaning is actually necessary.

Bluetooth Range Explained: How Far Does It Really Reach?

Bluetooth Range: How Far Does It Really Reach?

We rely on wireless accessories every day, yet connection dropouts can happen when we move into another room. Understanding bluetooth range helps you position smart home devices, wireless headphones, and speakers for stable performance. According to the Bluetooth Special Interest Group (SIG), Bluetooth supports different power levels and features for applications ranging from personal devices to industrial systems.

Manufacturers often advertise maximum distances on product packaging. However, real-world performance can fall well below those theoretical figures. Walls, furniture, radio interference, device power, antenna design, and Bluetooth features all affect connection stability.

Your environment also makes a noticeable difference. Moving wireless earbuds away from a phone or taking a portable speaker outdoors can produce very different results.

This guide explains how far Bluetooth can reach in everyday conditions. It also covers walls, Wi-Fi comparisons, long-range Bluetooth technology, and practical ways to improve weak connections.

How far can Bluetooth range go?

Most everyday Bluetooth devices provide a practical range of around 10 meters (33 feet) under typical conditions. This distance is common with Class 2 hardware used in smartphones, keyboards, mice, earbuds, and other consumer devices. However, this figure should not be treated as a fixed limit. When devices regularly move beyond their practical range, connection problems can occur, similar to the issues covered in 5 Reasons Your Bluetooth Keeps Disconnecting.

Open outdoor spaces can provide much greater distances when compatible hardware uses higher transmit power, suitable antennas, and long-range Bluetooth features. Bluetooth 5 introduced capabilities that can significantly extend range under favorable conditions. The actual result still depends on both connected devices.

Indoor environments usually reduce the effective bluetooth range. Walls, furniture, people, and electronic interference can weaken the signal. Your phone may also behave differently from a dedicated Bluetooth transmitter.

The Role of Device Power Classes

Bluetooth power classes describe maximum transmit power rather than guaranteeing a specific connection distance. Class 1 devices can reach around 100 meters under suitable conditions, while Class 2 devices typically reach about 10 meters. Class 3 devices use much lower power and generally support very short-range connections.

Most consumer Bluetooth products use Class 2 because it balances range and battery consumption. This balance is one reason Bluetooth can be useful for everyday accessories, although there are also  Disadvantages Of Using Bluetooth For Everything. Actual performance can still vary because antenna quality, receiver sensitivity, obstacles, and interference affect the connection.

Can Bluetooth signal go through walls?

Yes, Bluetooth signals can pass through walls, but each wall can reduce signal strength. Bluetooth operates in the 2.4 GHz radio band, which can pass through many common household materials. Thin drywall, wood, and glass usually create less interference than dense construction materials.

Concrete, brick, metal, and reinforced structures can weaken Bluetooth signals much more significantly. Metal can also reflect radio waves and create areas with poor reception. This can make a connection unstable even when the devices appear relatively close.

The number of obstacles matters as well. One interior wall may cause only a small reduction, while several walls can create noticeable dropouts. Human bodies can also absorb some radio energy when they block the direct path between devices.

For reliable performance, keep the transmitter and receiver as close to an unobstructed path as possible.

Minimizing Common Indoor Wall Interference

You can improve indoor bluetooth range by changing the position of your devices. Keep Bluetooth transmitters away from thick concrete walls, metal objects, and large appliances whenever possible.

Placing a speaker or transmitter on a shelf can provide a clearer path than keeping it behind furniture. Open doors can also reduce physical obstruction between connected devices.

Try to keep your phone, computer, or Bluetooth transmitter in an open location. Avoid placing it inside a drawer, cabinet, or crowded bag. These small changes can improve connection stability without requiring new hardware.

If a connection repeatedly drops in one particular room, test the devices from several positions. A small change in placement may move the signal away from a reflective surface or obstruction.

You should also keep both devices reasonably close together. Bluetooth does not need a perfect line of sight, but fewer obstacles generally produce a more reliable connection.

Which has longer range, Bluetooth or Wi-Fi?

Wi-Fi generally has a longer practical range than standard Bluetooth in typical homes. A residential Wi-Fi network can often cover multiple rooms, while many everyday Bluetooth devices are designed for much shorter distances. Bluetooth can still provide useful connectivity when Wi-Fi is unavailable, including through What Exactly Is Bluetooth Tethering?

The difference comes partly from how the technologies are designed. Wi-Fi usually operates with higher power and supports communication across larger areas. Home routers also use antennas designed to distribute signals throughout a building.

Bluetooth focuses more heavily on low power consumption and convenient device-to-device connections. This makes it suitable for wireless earbuds, keyboards, fitness trackers, smart tags, and similar accessories.

However, neither technology has one universal range. Wi-Fi coverage depends on router power, antenna design, frequency band, building materials, and network configuration. Bluetooth performance depends on device classes, transmit power, antennas, Bluetooth features, and environmental interference.

Specialized Bluetooth Low Energy configurations can achieve much longer distances than ordinary consumer connections. Therefore, comparing only the technologies does not tell the whole story.

Power Consumption Versus Transmission Distance

Bluetooth and Wi-Fi make different trade-offs between power consumption and range. Wi-Fi devices generally use more power because they support higher data rates and broader network coverage. These trade-offs are also important when choosing between wired and wireless listening, as explained in Wired vs Wireless Audio: Which Option Is Right For You?

This makes Wi-Fi practical for laptops, televisions, phones, and other devices that need continuous network access. Many Wi-Fi routers also remain connected to mains power.

Bluetooth is designed for lower-power connections. Bluetooth Low Energy can allow devices such as fitness trackers, sensors, and smart tags to operate for long periods using small batteries.

That efficiency comes with trade-offs. A small battery-powered Bluetooth device may not provide the same range as a powered Wi-Fi router.

Bluetooth Low Energy can still achieve impressive distances when suitable hardware and long-range features are used. The bluetooth range therefore depends on more than the Bluetooth name alone.

The right technology depends on the application. Wi-Fi suits broader network coverage, while Bluetooth works well for nearby accessories and low-power devices.

What is the highest Bluetooth range?

There is no single maximum distance that applies to every Bluetooth device. Under suitable conditions, specialized Bluetooth systems can achieve hundreds of meters, while some long-range Bluetooth Low Energy implementations can reach much farther than ordinary consumer devices.

Bluetooth 5 introduced features such as the LE Coded PHY, which can increase communication range by adding stronger error correction and using more robust signaling. The trade-off is lower data throughput compared with faster configurations.

Actual range depends on transmit power, receiver sensitivity, antenna design, radio conditions, and whether the connection has a clear line of sight. Specialized equipment can therefore achieve distances that ordinary smartphones and earbuds cannot.

Some industrial and research applications have demonstrated Bluetooth connections over very long distances. These setups can use carefully positioned antennas, elevated equipment, and favorable outdoor conditions.

For everyday users, these figures should not be confused with normal consumer performance. A smartphone and pair of earbuds will usually operate over a much shorter distance.

Industrial Hardware Versus Everyday Consumer Gadgets

Industrial Bluetooth equipment can use specialized hardware to achieve longer bluetooth range than ordinary consumer accessories. These systems may use stronger transmitters, better antennas, optimized receivers, and long-range Bluetooth configurations.

Industrial sensors can use Bluetooth Low Energy to transmit information across warehouses, agricultural areas, and other large environments. Long-range modes can be useful when devices need to communicate over substantial distances while conserving energy.

Consumer devices have different priorities. Wireless earbuds, smartwatches, and phones need compact antennas, low power consumption, and convenient operation. Manufacturers therefore do not normally optimize them for extreme distances.

Long-range communication can also reduce data rates. This makes it more suitable for sensor readings and control information than demanding applications such as high-quality audio.

As a result, advertised maximum distances from specialized equipment should not be used as a realistic expectation for everyday Bluetooth accessories.

Is it possible to extend the range of Bluetooth?

Yes, but the most effective method depends on the device and the type of Bluetooth connection. A compatible long-range Bluetooth adapter can improve coverage when the original transmitter has limited power or antenna performance.

Some desktop computers and audio systems can use external Bluetooth adapters with better antenna designs. This can provide more reliable connections than an internal adapter hidden behind a computer case or other equipment.

Bluetooth range extenders and specialized receivers may also help in certain audio and smart-home setups. However, compatibility matters. Not every Bluetooth device supports repeaters or long-range communication.

For larger homes, another practical option is choosing smart devices designed around a suitable mesh technology. Bluetooth mesh can allow compatible devices to communicate through multiple nodes rather than relying on one direct connection.

Before buying additional equipment, identify the actual problem. Moving the transmitter, reducing interference, or updating outdated hardware may solve the issue without extra equipment.

Simple Fixes to Maximize Existing Reception

You can often improve bluetooth range without buying new hardware. Start by moving the transmitter and receiver closer together. Remove large physical obstacles between them whenever possible.

Keep Bluetooth devices away from sources of 2.4 GHz interference. Wi-Fi routers, microwave ovens, and other wireless equipment can contribute to congestion in the same frequency band.

Avoid placing your phone or Bluetooth adapter inside bags, drawers, or enclosed cabinets. Your body can also weaken the signal when it blocks the direct path between devices.

Try these practical adjustments:

  • Reduce distance: Keep connected devices closer together.
  • Remove obstacles: Avoid thick walls, metal objects, and large furniture.
  • Change positioning: Place transmitters in open, elevated locations.
  • Reduce interference: Keep devices away from crowded wireless areas.
  • Update hardware: Use newer Bluetooth versions when practical.
  • Check compatibility: Make sure both devices support the required Bluetooth features.

These simple changes can make a noticeable difference without replacing your entire setup.

Conclusion

Bluetooth range depends on more than the Bluetooth version alone. Device power, antenna quality, obstacles, interference, and connection settings all affect real-world performance. Most everyday Bluetooth devices work reliably within about 10 meters, but compatible long-range hardware can reach much farther under suitable conditions.

Walls, metal objects, furniture, and other wireless devices can reduce signal strength. Simple changes, such as moving devices closer, removing obstacles, and reducing interference, can often improve connection stability.

For longer distances, consider hardware that supports Bluetooth Low Energy long-range features or suitable external adapters. Understanding these factors helps you choose the right setup and get more reliable Bluetooth performance at home, at work, or outdoors.

Why You Must Avoid Scanning an Unknown QR Code Today

Why You Must Avoid Scanning an Unknown QR Code Today

You should avoid scanning an unknown QR code when you cannot verify its source or destination. QR codes are convenient for restaurant menus, parking payments, event tickets, and mobile applications. However, that convenience can create security risks when criminals replace legitimate codes with fraudulent ones.

A tampered QR code may send you to a phishing website, fraudulent payment page, or malicious download. The Federal Bureau of Investigation (FBI) has warned about criminals tampering with legitimate QR codes to redirect victims to malicious websites.

A QR code also hides its destination until your phone reads it. This makes it harder to judge the link before interacting with it. Scammers can use this uncertainty to create a false sense of trust.

This guide explains the main QR code security risks and practical ways to stay safe. You will learn how to identify suspicious codes and verify links before opening them. You will also learn which actions to avoid after scanning.

Is it safe to scan an unknown QR code?

It is not always dangerous to scan an unknown QR code, but you should treat it with caution. The main risk comes from the destination and what the code asks you to do. A fraudulent code can lead to a fake website, malicious download, or payment request.

Public QR codes deserve extra attention because criminals can replace genuine stickers with counterfeit ones. This can happen on posters, parking meters, restaurant tables, payment machines, and other public displays.

Before you avoid scanning an unknown QR code, inspect the code and its surroundings carefully. Look for tampered stickers, unusual branding, spelling mistakes, or labels placed over an original code.

If you decide to scan it, do not immediately open the displayed link. Check the complete web address first. Make sure the domain belongs to the expected organization.

If the destination looks unfamiliar, close the page. You can also visit the company’s official website manually. This avoids relying on an unverified QR destination and follows the same principle as clicking on a suspicious link: verify the destination before interacting with it.

Physical Tampering of Public Codes

Physical tampering is one of the simplest QR scams to recognize. Criminals can place a fake sticker over a legitimate QR code. The replacement may look convincing, especially in a busy public location.

Check the physical surface before scanning. Look for raised edges, damaged printing, mismatched colors, or another sticker covering the original code. A recently attached sticker deserves additional attention.

This risk is particularly important at payment locations. A criminal may replace a merchant’s payment code with one that directs money elsewhere. Similar tampering can send customers to fake websites or fraudulent payment pages.

If something looks unusual, do not scan the code. Ask the business or property operator to verify it instead.

You should also avoid relying only on appearance. A professional-looking sticker can still lead to a fraudulent website. The destination URL provides a more useful security check.

When possible, use the organization’s official app or manually enter its verified website address. This reduces your dependence on an unfamiliar QR code.

What are four best practices you should follow to avoid unsafe QR codes?

You can reduce QR code security risks by following four simple habits. These steps do not make every QR code safe, but they give you more control over what happens after scanning.

  1. Inspect the physical code. Look for stickers, damaged signs, strange branding, or other signs of tampering.
  2. Preview the destination. Check the complete URL before opening the website. Watch for misspellings, unfamiliar domains, and suspicious shortened links.
  3. Avoid unexpected downloads. Never install an application simply because a scanned QR code tells you to.
  4. Use official sources for sensitive actions. Open your bank, payment service, or company’s verified website manually when possible.

You should also keep your phone’s operating system, browser, and security software updated. Updates often include fixes for known security vulnerabilities. For additional protection, review these malware protection tips  to reduce the risk of malicious software.

Finally, do not allow urgency to override caution. Scammers may claim that you must act immediately to receive a reward, prevent account closure, or complete a payment.

If you cannot verify a QR code’s source, avoid scanning an unknown QR code altogether. Taking a few seconds to verify the source can prevent a much bigger security problem later.

Disabling Automatic Browser Redirects

Some devices and applications offer settings that control how links are handled after scanning. Where your device provides such an option, review those settings carefully. Avoid automatic actions that you do not understand.

The goal is simple: see the destination before interacting with it. A QR scanner may display a website address before you open the page. Use that opportunity to inspect the domain.

Look for small spelling differences. Scammers may create domains that resemble legitimate businesses without actually belonging to them. Shortened URLs can also make the final destination harder to identify.

However, disabling automatic redirects is not a complete security solution. Modern browsers and operating systems provide protections against many known threats. You should still verify the destination before continuing.

Keep your browser and operating system updated. Security updates can address vulnerabilities that criminals might otherwise exploit.

If a scanned link opens a security warning, do not ignore it because the QR code appeared on a legitimate-looking sign. Close the page and verify the request independently.

What are the risks of scanning a QR code?

The risks depend on where the QR code leads and what you do afterward. One common threat is quishing, a term used for phishing attacks delivered through QR codes. A fraudulent website may imitate a bank, payment service, delivery company, or other trusted organization.

Another risk is malware. A QR code can direct you to a website that tries to persuade you to download a malicious application or file. Understanding how malware spreads can help you recognize why unexpected downloads from QR codes deserve caution. Modern phones have security protections, but users can still be tricked into installing unsafe software.

QR scams can also lead to fraudulent payments. A fake payment page may request card details, banking credentials, or other sensitive information.

Other QR codes may trigger actions such as opening a messaging service, starting a phone call, or composing a message. These actions can become dangerous when combined with deceptive instructions.

If you avoid scanning an unknown QR code when its source cannot be verified, you reduce these risks. When you do scan a code, verify its destination before entering information or approving a transaction.

Drive-By Exploits and Data Interception

A malicious QR code can direct your browser toward a website containing harmful content. In some cases, attackers may attempt to exploit vulnerabilities in outdated browsers or operating systems.

These attacks do not automatically compromise a device simply because someone scanned a code. Modern mobile platforms include several security protections. The greater everyday risk is often social engineering, where scammers persuade users to provide information or install software.

A fraudulent website may request passwords, payment information, verification codes, or personal details. If you provide them, an attacker may use that information for account theft or financial fraud.

Keeping your operating system and browser updated reduces exposure to known vulnerabilities. You should also download applications through official app stores whenever possible.

Do not install an application solely because a QR code recommends it. Search for the application independently and verify its developer.

If a website asks you to disable security protections, install an unknown configuration profile, or ignore a browser warning, stop immediately. These requests are strong warning signs.

Which of the following should you not do when scanning a QR code?

When you scan a QR code, avoid taking sensitive actions until you verify the destination. Never assume that a code is trustworthy simply because it appears in a familiar location.

Do not enter banking credentials, passwords, card details, or verification codes into a website reached through an unexpected QR code. You should also avoid downloading applications from unfamiliar websites. These precautions are especially important when dealing with phishing attempts designed to steal account information.

Never ignore a browser or operating system security warning. These warnings can indicate that a website or download may be unsafe.

Avoid rushing because a QR-linked page claims that you have limited time. Scammers commonly use urgency to pressure people into making mistakes.

Be particularly cautious with QR codes received through unexpected emails, messages, flyers, or social media posts. Promises of prizes, refunds, discounts, or urgent account verification can be warning signs.

If you need to make a payment, open the company’s official app or manually enter its verified website address. This provides a safer alternative to trusting an unfamiliar QR destination.

When you cannot verify the source, avoid scanning an unknown QR code. A short delay is safer than entering sensitive information into a fraudulent website.

Refusing Sensitive Financial Transactions

Do not make a financial transaction simply because a QR code says payment is urgent. This is especially important when the code appears on an unfamiliar sticker or unexpected message.

A fraudulent payment QR code can redirect money to an account controlled by a scammer. The payment page may look legitimate while using different recipient information behind the scenes.

Before paying, verify the merchant name, payment recipient, amount, and website. If anything looks different, stop the transaction.

For parking, restaurant, delivery, or utility payments, consider opening the provider’s official application or website manually. You can then confirm the correct payment process independently.

Never provide your banking password or one-time verification code to complete a QR payment. Using multi-factor authentication can provide another layer of protection if an account password is compromised. Legitimate payment services generally do not require you to share confidential authentication information with another person.

If you believe you sent money to the wrong recipient, contact your bank or payment provider as soon as possible. Quick reporting may help them investigate the transaction.

The same principle applies to cryptocurrency payments. Verify the destination wallet and payment request through an independent, trusted source before approving a transfer.

Can someone steal my information if I scan a QR code?

Yes, but scanning the code alone does not automatically give someone access to all your information. The greater danger usually occurs when the QR code takes you to a fraudulent website and you interact with it.

A malicious QR code can redirect you to a phishing page that imitates a legitimate service. The page may ask for your username, password, card number, or other personal information.

If you submit those details, criminals can potentially use them to access accounts or conduct fraud. A malicious website may also attempt to persuade you to download unsafe software.

Some sophisticated attacks can exploit software vulnerabilities, although these attacks generally require specific conditions. Keeping your phone and browser updated can reduce exposure to known vulnerabilities.

Never assume a QR code is trustworthy because it appears on an official-looking sign. Verify the destination independently before entering sensitive information.

If a QR code unexpectedly requests credentials, payment details, or software installation, close the page. Then access the relevant service through its official app or website.

When you cannot verify a QR code’s destination, the safest choice is to avoid scanning an unknown QR code.

Session Hijacking Through Deceptive Portals

Session hijacking is a more advanced type of attack. In certain circumstances, stolen authentication information or session tokens can help attackers access an account without repeatedly entering the password. Understanding how long these authentication-related cookies remain active can help explain the broader session-security risk.

However, a QR scan does not automatically give an attacker your session cookies. The outcome depends on the website, device, browser, vulnerabilities involved, and information provided by the victim.

Phishing remains a common concern for everyday QR scams. A fake login page can capture usernames and passwords when users enter them.

Some attacks may also attempt to steal authentication tokens through technical vulnerabilities. Keeping browsers and operating systems updated helps reduce this exposure.

Use multi-factor authentication (MFA) wherever available. MFA can provide additional protection if a password is compromised, although some phishing attacks can target authentication processes too.

If you accidentally enter sensitive information on a suspicious website, act quickly. Change the affected password through the legitimate service and monitor the account for unusual activity.

For financial accounts, contact your bank or payment provider if you suspect unauthorized access or transactions.

Conclusion

QR codes make everyday tasks faster, but convenience should never replace caution. When you cannot verify the source or destination, avoid scanning an unknown QR code.

Before scanning, inspect the code for signs of tampering. After scanning, check the URL carefully before opening the website. Never enter passwords, banking details, or verification codes on an unfamiliar page.

Keep your phone, browser, and apps updated to reduce exposure to known security vulnerabilities. For payments and sensitive accounts, use the organization’s official app or website whenever possible.

A QR code itself is not automatically dangerous. The real risk comes from the destination and the actions you take afterward. Pause, verify, and think before you tap. A few seconds of caution can help protect your accounts, money, and personal information from QR-based scams.

How Can You Add More Storage to a Laptop?

How to Add More Storage to a Laptop: Complete Guide

Running out of storage can disrupt everyday laptop use. Low disk space can prevent updates, limit new installations, and make file management harder. Learning how to add more storage to a laptop can extend its useful life without replacing the entire computer.

The best upgrade depends on your laptop’s design. Some models provide an accessible M.2 slot or 2.5-inch drive bay. Others have soldered storage that cannot be replaced easily. In those cases, an external SSD, USB drive, or memory card can provide additional space.

Before buying anything, check your laptop’s exact model and maintenance documentation. You need to confirm the supported storage type, physical size, interface, and maximum capacity. Resources from Crucial’s official storage and memory center can also help identify compatible upgrades.

This guide explains how to expand laptop storage and choose between 256GB, 1TB, and 2TB. It also covers internal SSD upgrades and external storage options.

Is it possible to add more storage to my laptop?

Yes, but the available upgrade method depends on your laptop’s hardware. Many Windows laptops include an M.2 slot for an NVMe SSD. Some older models use a 2.5-inch SATA drive instead. Certain laptops also provide a second storage slot, allowing you to add another drive without removing the existing one.

However, not every laptop supports internal upgrades. Thin laptops and some premium ultrabooks may use soldered storage. In that situation, replacing the internal drive may not be practical. You can still add more storage to a laptop with an external SSD, USB flash drive, or compatible memory card.

Before purchasing an internal drive, check your manufacturer’s specifications. Look for the supported interface, drive dimensions, and installation requirements.

Your main options include:

  • Internal NVMe SSD: Fast and suitable for supported laptops.
  • 2.5-inch SATA SSD: Useful for compatible older laptops.
  • External SSD: Easy to install and move between devices.
  • USB flash drive: Convenient for smaller storage needs.
  • MicroSD card: Useful when your laptop provides a compatible card slot.

Internal Expansion Slots vs. High-Speed External Drives

Internal and external storage solve the same problem, but they work differently. An internal NVMe SSD connects directly to the laptop’s motherboard. This usually provides lower latency and avoids carrying an additional device. It can also make your setup cleaner because everything remains inside the laptop. Learn more about NVMe SSDs and their benefits before choosing this type of upgrade.

An external SSD offers a different advantage. You can connect it through USB and start using it without opening the laptop. This makes external storage useful when your laptop has soldered storage or when you want to avoid hardware modifications.

Actual external SSD performance depends on both the drive and your laptop’s USB port. A fast SSD connected to a slower port cannot reach its advertised maximum speed.

Consider an internal upgrade when:

  • Your laptop supports an additional or replacement SSD.
  • You want permanent storage.
  • You regularly work with large local files.
  • You want to avoid carrying another device.

Choose external storage when:

  • Your laptop does not support an internal upgrade.
  • You want portability.
  • You need temporary or backup storage.
  • You want a simpler installation.

Is 1TB overkill for a laptop?

For many users, 1TB is a practical storage capacity rather than excessive space. The right amount depends on what you store locally. Browsing, office work, streaming, and cloud-based documents generally require less storage. Games, videos, photographs, development environments, and creative projects can consume much more.

A 1TB SSD also provides more room for future files. You can keep applications, documents, photos, and other frequently used content on the same drive. This reduces the need to constantly move files to external storage.

However, buying more capacity does not automatically improve laptop performance. A larger SSD can provide more usable space, but speed depends on the drive, interface, controller, and workload.

When deciding whether 1TB suits you, consider:

  • Office and browsing: 256GB may be enough.
  • General use: 512GB to 1TB provides more flexibility.
  • Gaming: 1TB or more can be useful.
  • Photo and video work: 1TB or 2TB may be more practical.
  • Large local archives: Consider 2TB or external storage.

For many users, 1TB provides a comfortable balance between capacity, cost, and convenience.

Why Drive Headroom Matters for Solid-State Storage

Leaving some free space on an SSD is useful for normal operation. SSDs continuously manage data internally through processes such as garbage collection and wear leveling. Having available space can give the drive more flexibility when moving and organizing data. You can also learn how much free space to leave on an SSD to avoid keeping the drive unnecessarily full.

However, the claim that an SSD becomes significantly slower at exactly 80% capacity is too broad. Performance depends on the SSD model, controller, workload, and how much free space remains. Some drives may experience noticeable slowdowns when nearly full, while others handle high utilization differently.

Keeping reasonable free space is still a sensible habit. It also gives your operating system room for temporary files, updates, applications, and downloads.

You can maintain storage headroom by:

  • Removing applications you no longer use.
  • Deleting unnecessary temporary files.
  • Moving large media libraries to external storage.
  • Using cloud storage for files you rarely access.
  • Checking storage usage regularly.

A nearly full drive can also make everyday file management frustrating. Maintaining unused capacity helps prevent that situation. Instead of following a strict percentage rule, focus on keeping enough free space for your normal workload.

Is 256 GB a lot of storage on a laptop?

256GB is an entry-level capacity for many modern laptops. It can work well for users who mainly browse the web, use office applications, and store documents in the cloud. However, available space becomes much smaller after installing the operating system, applications, updates, and personal files.

The advertised capacity also does not equal the space you can actually use. The operating system and manufacturer software occupy part of the drive. Temporary files, updates, recovery data, and application caches can consume additional space over time.

A 256GB laptop can become restrictive if you regularly store large files. Games, video projects, photographs, phone backups, and downloaded media can fill the drive quickly. If you are considering an upgrade, understanding whether an expensive SSD is worth buying can help you balance performance, capacity, and cost.

Consider 256GB if you mainly use your laptop for:

  • Web browsing and email.
  • Online learning.
  • Office documents.
  • Cloud-based applications.
  • Streaming services.
  • Small personal files.

Consider a larger SSD if you regularly keep large files locally. A 512GB or 1TB SSD provides considerably more flexibility.

If your current laptop has 256GB, you can still expand it. Check whether the model supports an internal SSD replacement or additional drive. Otherwise, an external SSD can provide a simple storage upgrade.

Managing Local Caches on Entry-Level Laptop Drives

Small laptop drives need more active storage management. Operating systems and applications create temporary files, caches, downloads, and other data during normal use. These files can gradually consume a noticeable amount of available space.

Windows and macOS both provide built-in storage management tools. These tools can help identify large files, unused applications, temporary data, and other storage categories. Reviewing these areas periodically can prevent unexpected storage shortages.

Browser caches are another source of temporary data. Although clearing them can recover some space, constantly deleting caches is not a replacement for having sufficient storage. Caches often return as applications continue operating.

Instead, focus on larger and less useful files first:

  • Remove old downloads.
  • Uninstall unused applications.
  • Delete duplicate files.
  • Move large videos and photos elsewhere.
  • Empty the recycle bin or trash when appropriate.
  • Review large game installations.

Avoid manually deleting unfamiliar system folders. Removing important operating system files can cause errors.

If storage remains consistently low after cleanup, adding more capacity is usually more practical than repeatedly deleting files. A larger SSD or external drive can give you the space needed for normal use without constant maintenance. Cloud storage and external hard drives can also provide additional space without replacing your internal drive.

Can I put a 1TB SSD in my laptop?

You can install a 1TB SSD if your specific laptop supports that drive type and capacity. The key issue is compatibility, not simply whether the operating system can recognize 1TB of storage.

Modern laptops commonly use M.2 SSDs, but the exact specification matters. An M.2 drive can use different interfaces and physical sizes. For example, an M.2 2280 drive measures approximately 22mm wide and 80mm long. Some compact devices use smaller formats, such as 2230.

Older laptops may instead use a 2.5-inch SATA SSD. Some laptops also provide a second M.2 slot, allowing you to keep the original drive. If your laptop uses SATA, understanding whether a SATA SSD is still worth it can help you choose the right upgrade.

Before buying a 1TB SSD, verify:

  • Form factor: M.2 or 2.5-inch.
  • Interface: NVMe PCIe or SATA.
  • Physical size: Such as 2280 or 2230.
  • Supported capacity: Check the manufacturer’s documentation.
  • Installation requirements: Check whether screws, brackets, or adapters are needed.

If the laptop supports the drive, a 1TB SSD can provide substantial additional space. You may also need to clone the existing drive or reinstall the operating system when replacing your primary storage.

Choosing the Correct Physical Form Factor and Interface

Choosing an SSD based only on its capacity is a common mistake. A 1TB drive may have the wrong interface, connector, or physical dimensions for your laptop. You should also know how to spot fake SSDs before buying an upgrade, especially from unfamiliar sellers.

M.2 describes the physical connector and form factor, not necessarily the storage interface. An M.2 slot may support NVMe PCIe drives, SATA drives, or a specific combination. You should confirm the supported interface before ordering.

Physical dimensions also matter. M.2 2280 drives are common, but compact laptops can use shorter drives. A drive that is electrically compatible may still fail to fit inside the chassis.

The safest approach is to check your laptop manufacturer’s documentation. You can also review the existing drive specification if the laptop is designed for user replacement.

Pay attention to:

  • M.2 keying and interface support.
  • PCIe generation supported by the laptop.
  • SATA compatibility when applicable.
  • Drive length and mounting position.
  • Available clearance inside the chassis.

A newer PCIe SSD may work in a laptop that supports an earlier PCIe generation, but its performance can be limited by the laptop’s interface.

Do not assume every M.2 slot accepts every M.2 SSD. Confirm compatibility before purchasing.

Is 2TB overkill for a laptop?

A 2TB SSD may be unnecessary for light laptop use, but it can be valuable for people who store large amounts of data locally. Browsing, email, office work, streaming, and cloud documents rarely require that much internal capacity.

The situation changes when your laptop handles large files. Modern games can occupy substantial storage, while video projects and raw photographs can consume hundreds of gigabytes. Software developers may also need space for virtual machines, containers, SDKs, build files, and local development environments.

A 2TB drive can reduce the need to constantly archive or uninstall files. It can also make a laptop more convenient for users who travel and need their files available offline.

Consider 2TB when you regularly work with:

  • Large video projects.
  • High-resolution photographs.
  • Multiple large games.
  • Virtual machines and development environments.
  • Large local datasets.
  • Extensive offline media libraries.

For ordinary productivity, 1TB may provide enough room. For storage-heavy workloads, 2TB can be a practical choice rather than unnecessary capacity.

The best capacity depends on your current usage and expected growth. Buying additional space makes sense when it solves a real storage problem.

When Creative Workflows Justify Premium Drive Capacity

Creative workloads can consume storage much faster than ordinary office tasks. A single video project can contain camera footage, proxy files, project files, previews, exports, and backups. High-resolution photographs and audio sessions can also accumulate quickly.

A 2TB internal SSD can make these workflows easier by keeping frequently used project files immediately available. This is particularly useful when you work away from a desk or frequently move between locations.

However, internal storage should not necessarily be your only storage. Important creative projects should have separate backups. If an internal SSD fails, its larger capacity does not protect your files.

A practical setup can combine internal and external storage:

  • Internal SSD: Operating system, applications, and active projects.
  • External SSD: Large project archives and working backups.
  • Cloud storage: Off-site copies of important files.
  • Separate backup drive: Additional protection against hardware failure.

Before buying a 2TB SSD, estimate how much space your projects currently use. Then consider how quickly that amount grows.

If you regularly manage hundreds of gigabytes of creative files, 2TB can reduce storage pressure. If your projects are small, a lower-capacity SSD plus external storage may be more economical.

Conclusion

Learning how to add more storage to a laptop does not always mean replacing the entire computer. The right solution depends on your laptop’s hardware, storage needs, and budget. If your device supports an internal M.2 or SATA SSD, upgrading the drive can provide a permanent increase in capacity. An external SSD is a practical alternative when internal upgrades are unavailable or inconvenient.

For everyday users, 512GB to 1TB can provide a comfortable balance between capacity and cost. A 256GB drive can still work for light tasks, but it requires more careful storage management. Users who work with large games, videos, photographs, or development projects may benefit from 2TB or more.

Before buying an SSD, always check your laptop’s supported interface, form factor, dimensions, and maximum capacity. Choosing a compatible drive ensures that your storage upgrade works properly and gives your laptop more useful life.

4 Bluetooth Myths You Should Stop Falling For Today

4 Bluetooth Myths You Should Stop Falling For

Wireless audio gear, smartwatches, and hands-free car connections are part of everyday life. Yet, persistent Bluetooth myths still circulate across social media and online forums. Some people worry about radiation, battery drain, hearing damage, or wireless hacking.

These misconceptions can create unnecessary stress. They can also encourage users to change settings without understanding the actual risks.

Bluetooth uses low-power radiofrequency signals to connect nearby devices. Consumer devices must comply with applicable radiofrequency exposure and transmission requirements. The Federal Communications Commission (FCC), for example, regulates radiofrequency exposure from wireless devices in the United States.

Health questions about radiofrequency exposure are also studied by the World Health Organization (WHO). WHO explains that radiofrequency fields are part of the non-ionizing portion of the electromagnetic spectrum and continues to assess the available scientific evidence.

Understanding how Bluetooth works makes it easier to separate genuine limitations from internet rumors. Some concerns have a practical basis, while others are based on misunderstandings about wireless technology.

This guide examines four common Bluetooth myths. You will learn about Bluetooth security, wireless headphones, radiofrequency exposure, and practical reasons to disable Bluetooth. You will also discover the limitations that Bluetooth users may actually notice.

1. Bluetooth Battery Drain: Does Leaving Bluetooth On Waste Your Battery?

One of the most common Bluetooth myths is that leaving Bluetooth enabled quickly drains your smartphone battery. This belief comes partly from older wireless technologies that were less power-efficient than modern Bluetooth.

Today, Bluetooth Low Energy (BLE) is designed to use very little power. It is widely used in smartwatches, fitness trackers, keyboards, earbuds, and other connected devices.

When Bluetooth is switched on but not actively communicating with an accessory, its battery impact is generally small. However, the exact amount of power used varies between devices and usage patterns. If your phone battery is draining unusually fast, other factors may also be involved, such as background apps or battery health. You can also learn more about why your laptop battery drains so fast when investigating broader battery problems.

Your phone model, Bluetooth version, connected accessories, signal strength, and communication frequency can all affect battery consumption. Therefore, claims that Bluetooth always uses a specific percentage of battery should not be treated as universal.

Active Bluetooth connections can use more power than simply leaving the Bluetooth radio enabled. Even so, most users are unlikely to notice dramatic battery loss from Bluetooth alone.

Turning Bluetooth off can provide a small saving when your battery is critically low. Under normal conditions, however, battery drain is not a strong reason to avoid Bluetooth.

2. Health Risks and Cancer: Does Bluetooth Radiation Cause Cancer?

Health concerns are among the most persistent Bluetooth myths found online. One common claim suggests that wireless earbuds cause cancer or brain tumors because they transmit radiofrequency radiation.

Bluetooth uses radiofrequency electromagnetic energy, which is classified as non-ionizing radiation. Unlike ionizing radiation from X-rays, these signals do not have enough energy per photon to directly ionize atoms or break chemical bonds.

Bluetooth devices also generally transmit at relatively low power. However, it would be inaccurate to claim that wireless technology has absolutely no biological interaction under every possible exposure condition.

Radiofrequency exposure continues to be studied, and safety standards are designed around established exposure limits. For ordinary Bluetooth use, current evidence does not establish that Bluetooth earbuds cause cancer or brain tumors.

There is a more established concern with headphones: excessive sound exposure. Listening to loud audio for extended periods can damage hearing, regardless of whether headphones use Bluetooth or a cable. If you are deciding between the two connection types, understanding the differences between wired and wireless audio can also help you choose the right option for your listening habits.

For safer use, keep your volume comfortable and take regular listening breaks. These practical habits matter more than worrying about unsupported Bluetooth radiation claims.

3. Wi-Fi Interference: Can You Use Bluetooth and Wi-Fi Together?

Another common example of Bluetooth myths involves Wi-Fi interference. Some people believe Bluetooth and Wi-Fi cannot operate properly at the same time because both technologies can use the 2.4 GHz frequency band.

The reality is more practical. Bluetooth and Wi-Fi are designed to coexist, although they can sometimes interfere with each other when the wireless environment becomes crowded.

Bluetooth uses frequency-hopping techniques to communicate across different parts of its available spectrum. Wi-Fi uses its own channels and interference-management methods. Modern devices also include coexistence techniques that help manage simultaneous wireless activity.

This means you can normally use Bluetooth headphones while your phone remains connected to Wi-Fi. For example, you can stream music through Bluetooth while browsing the internet over Wi-Fi.

Problems can still appear in environments containing many wireless devices. You may experience occasional audio stuttering, slower connections, or temporary dropouts. If your Bluetooth connection repeatedly fails or disconnects, understanding the reasons your Bluetooth keeps disconnecting can help you identify and fix the problem.

Distance, network congestion, device quality, and physical obstacles can also affect performance. Moving closer to your Bluetooth accessory may improve the connection.

So, Bluetooth and Wi-Fi can work together. Sharing the same frequency band does not mean you must choose one technology over the other.

4. Walls Block Bluetooth Signals: Does Bluetooth Stop Working Behind a Wall?

The idea that Bluetooth immediately stops working behind a wall is another one of the common Bluetooth myths. In reality, Bluetooth signals can pass through many ordinary building materials, although walls can weaken the signal.

Several factors determine how well a Bluetooth connection performs. These include distance, device power, antenna design, obstacles, and interference from other wireless equipment.

A thin interior wall may have only a modest effect on signal strength. Thick concrete walls, reinforced structures, and metal barriers can have a much stronger effect.

Distance remains another important factor. Bluetooth is designed mainly for short-range communication, so moving farther away from the connected device generally increases the chance of a weaker connection.

The practical range also varies between products. Some Bluetooth devices can maintain connections beyond the commonly quoted 10-meter range under favorable conditions. Obstacles can reduce that range considerably.

If your connection drops when you move between rooms, the wall may not be the only cause. Distance, interference, antenna placement, and building materials can all contribute.

Therefore, walls can weaken Bluetooth signals, but they do not automatically block them. Connection quality depends on the entire wireless environment.

Is Bluetooth Risky?

Bluetooth is generally considered safe for typical everyday use, but that does not mean it is completely risk-free. Like other wireless technologies, it can have security vulnerabilities. This is one reason why some Bluetooth myths about hacking and privacy continue to spread.

Modern Bluetooth devices can use encryption, authentication, frequency hopping, and privacy features. The exact protections depend on the Bluetooth version, operating system, device, and connection method.

Most users can reduce security risks by keeping their devices updated. They should also avoid accepting unexpected pairing requests or connecting to unfamiliar devices.

Security vulnerabilities such as bluebugging have existed, but they usually require specific conditions or exploitable weaknesses. Simply leaving Bluetooth enabled does not automatically expose your phone to attackers.

For safer everyday use:

  • Keep your phone and Bluetooth accessories updated.
  • Avoid unknown pairing requests.
  • Remove devices you no longer use.
  • Be cautious with unfamiliar public devices.
  • Disable discoverability when it is unnecessary.

Understanding these basic precautions is more useful than worrying about exaggerated Bluetooth myths.

Are Bluetooth Headphones Unhealthy?

Bluetooth headphones are not known to cause health problems simply because they use wireless signals. They transmit non-ionizing radiofrequency energy at relatively low power levels.

One of the most common Bluetooth myths is that wireless earbuds expose the brain to dangerous radiation. Bluetooth generally operates at much lower transmission power than a smartphone during cellular communication.

Current evidence has not established that normal Bluetooth exposure causes the cellular or genetic damage often claimed online. However, research into radiofrequency exposure continues, so absolute claims should be avoided.

The more established concern with headphones is excessive sound exposure. Listening to loud audio for extended periods can damage hearing. This applies to both wired and wireless headphones.

For safer listening:

  • Keep the volume at a comfortable level.
  • Take regular listening breaks.
  • Avoid prolonged exposure to very loud sounds.
  • Use noise cancellation when it helps you avoid increasing volume. Understanding how noise cancellation works can also help you use this feature effectively without simply increasing the volume.

Therefore, managing listening volume is a more practical concern than worrying about unsupported Bluetooth radiation claims.

What Does Bluetooth Do to the Human Body?

Bluetooth devices communicate using radiofrequency electromagnetic fields. These signals are classified as non-ionizing radiation. They do not have enough photon energy to directly ionize atoms like X-rays can.

X-rays are an example of ionizing radiation. At sufficient exposure levels, they can damage biological tissue. Bluetooth operates at much lower photon energies and uses relatively low transmission power.

Radiofrequency energy can interact with biological tissue. At sufficiently high exposure levels, its established effect is heating. Consumer Bluetooth devices operate at power levels intended for short-range communication.

However, saying Bluetooth has absolutely zero biological effect would be too broad. Research into radiofrequency exposure continues, while safety standards are based on established exposure limits and available evidence.

For everyday users, the important distinction is between ionizing and non-ionizing radiation. Bluetooth should not be treated like an X-ray source.

Normal Bluetooth use also does not provide established evidence that it causes genetic mutations or cellular breakdown. Such claims remain among the more serious Bluetooth myths found online.

What Are the Disadvantages of Bluetooth?

Bluetooth is convenient, but it has some practical disadvantages. These limitations are often more relevant to users than many common Bluetooth myths about health or safety. Issues such as battery dependence, pairing problems, latency, and compatibility are discussed in more detail in our guide to the disadvantages of using Bluetooth for everything.

One issue is audio latency. A small delay can become noticeable during gaming, musical performance, or other activities requiring precise synchronization. Modern Bluetooth standards and codecs can reduce latency, but they cannot eliminate it in every situation.

Audio quality can also vary. Bluetooth uses codecs to transmit audio efficiently, and the result depends on the codec, source device, headphones, and settings.

Interference can cause another problem. Bluetooth operates in the 2.4 GHz frequency band, which is also used by Wi-Fi and other wireless devices. Crowded environments can sometimes cause connection problems or audio interruptions.

Other disadvantages include:

  • Battery dependence for many wireless accessories.
  • Pairing problems between devices.
  • Compatibility differences between operating systems.
  • Delays when switching between devices.
  • Loss of use when an accessory runs out of power.

Modern Bluetooth has improved considerably. Still, wired connections can remain useful when you need reliable performance, very low latency, or continuous operation.

Why Should I Turn Off Bluetooth?

You generally do not need to turn off Bluetooth because of radiation concerns. Many Bluetooth myths suggest that disabling it protects your health, but ordinary Bluetooth use is not a reason to constantly switch the feature off.

There are practical reasons to disable Bluetooth temporarily. Turning it off can stop unwanted connections, prevent accidental connections, and eliminate the small amount of power used by an active wireless connection. If you are using Bluetooth to share an internet connection rather than connect accessories, understanding what Bluetooth tethering is can help you decide whether you actually need the feature enabled.

It can also help when troubleshooting pairing problems. If your phone repeatedly connects to the wrong accessory, switching Bluetooth off can interrupt those connections.

Privacy can be another consideration. Limiting discoverability can reduce unnecessary connection requests. However, leaving Bluetooth enabled does not mean strangers can automatically access your phone.

You might turn Bluetooth off when:

  • You are not using Bluetooth accessories.
  • Your battery is critically low.
  • A device keeps connecting incorrectly.
  • You are troubleshooting connection problems.
  • You want to reduce unnecessary wireless activity.

For most users, Bluetooth can remain enabled when needed. The practical reasons to disable it involve battery, connectivity, privacy, or troubleshooting, not unsupported health fears.

Why These Bluetooth Myths Continue to Spread

These Bluetooth myths often survive because wireless technology is invisible. Users cannot see radio signals, so technical explanations can easily be replaced by assumptions or exaggerated claims.

Some myths also contain a small amount of truth. Bluetooth can consume power, wireless signals can experience interference, and radiofrequency exposure is a legitimate area of scientific research. The problem begins when these facts are exaggerated into claims that Bluetooth is inherently dangerous.

Understanding the technology provides a more useful perspective. Modern Bluetooth is designed for short-range, low-power communication. It also includes security and coexistence features that help it work alongside other wireless technologies.

That does not mean Bluetooth is perfect. Battery consumption, connection problems, interference, latency, and hearing damage from excessive volume are genuine issues users may encounter.

The best approach is therefore to separate real Bluetooth limitations from unsupported Bluetooth myths. Keep your devices updated, use reasonable listening volumes, and manage wireless connections carefully.

You do not need to constantly disable Bluetooth because of ordinary health fears. Instead, base your decision on practical factors such as battery life, connectivity, privacy, and whether you actually need the connection.

Does a Factory Reset Remove a Computer Virus?

Does a Factory Reset Remove a Computer Virus?

When malware takes control of your computer, starting over can seem like the simplest solution. But does a factory reset remove a computer virus completely?

In most cases, a proper factory reset removes common viruses, Trojans, spyware, and other malware from Windows. The reset removes applications and system changes before reinstalling Windows. However, the result depends on the reset method and the type of infection.

Microsoft explains the available Windows recovery options, including resetting the PC and reinstalling Windows, in its official Windows recovery options guide. Understanding these options can help you choose the appropriate recovery method.

Some recovery options keep personal files. That can leave potentially infected files on the computer. More advanced threats may also target areas outside the normal Windows installation.

If you are asking does a factory reset remove a computer virus, you should understand what a reset actually removes. You should also know how to protect your files before starting.

This guide explains when a factory reset can remove malware, when a clean Windows installation is better, and how to handle suspicious backups safely.

Do Viruses Go Away After a Factory Reset?

If you are wondering does a factory reset remove a computer virus, the answer is usually yes for common malware. A complete reset removes the existing Windows installation, applications, settings, and other selected data.

Most ordinary malware lives within the operating system or installed applications. Removing those components can therefore eliminate the infection.

However, not every reset works in exactly the same way. Windows may offer different recovery choices, including options that preserve personal files.

Keeping personal files does not automatically mean that malware will survive. However, suspicious files could remain and become a problem later.

For a serious infection, consider a clean Windows installation from trusted installation media. This provides a fresh operating system environment.

A reset can remove many types of malware, including the threats discussed in these malware protection tips:

  • Common computer viruses
  • Many Trojans
  • Spyware and unwanted programs
  • Malicious startup entries
  • Browser hijackers
  • Malware-related Windows changes

Before resetting, disconnect the computer from the internet if you suspect active malware. Also avoid restoring unknown programs afterward.

A factory reset is therefore useful, but the recovery method matters. You should choose the option that matches the severity of the infection.

Choosing the Complete Clean Drive Option

Windows recovery settings can provide several options for removing data. You should understand these options before starting a reset.

The Remove everything option removes personal files, applications, and settings from the Windows installation. You may also see an option to clean the drive.

Cleaning the drive is mainly designed to make deleted data harder to recover. This can be useful when selling or giving away a computer.

It is not always necessary simply because you suspect malware. For ordinary virus removal, creating a clean Windows environment is usually more important.

If you are still asking does a factory reset remove a computer virus, remember that the reset method matters. A reset that preserves files is different from a clean installation.

For stronger cleanup, you can create Windows installation media using a trusted computer. You can then boot the affected PC from that media and reinstall Windows.

Before doing this, back up only files you trust.

Keep these differences in mind:

  • Remove everything deletes personal files and installed applications.
  • Clean the drive makes deleted data harder to recover.
  • A clean installation replaces the existing Windows environment.
  • Backup files should be scanned before restoration.

Do not assume that every recovery option provides the same level of protection.

How to Permanently Remove a Virus From a PC?

If you are asking does a factory reset remove a computer virus, a reset is one possible solution. However, you should first determine whether the infection can be removed without wiping the computer.

Start by disconnecting the PC from the internet. This can limit communication between malware and external servers.

Next, run a full scan with a reputable security product. Microsoft Defender can detect and remove many common malware threats, while these steps to remove malware from Windows 11 safely can provide additional guidance.

If normal Windows scanning does not work, use Microsoft Defender Offline. An offline scan runs outside the normal Windows environment.

If the malware continues returning, consider reinstalling Windows from trusted installation media. A clean installation removes the existing Windows environment.

Before wiping the computer, protect your important files. Do not copy suspicious programs or unknown installers.

After reinstalling Windows:

  1. Install Windows security updates.
  2. Update your security software.
  3. Reinstall applications from trusted sources.
  4. Change important passwords from a clean device.
  5. Enable multifactor authentication.
  6. Restore only trusted personal files.

If malware may have stolen passwords, removing the malware is not enough. You must also secure the affected accounts.

A factory reset can remove common malware, but no single method guarantees removal of every possible threat. Firmware-level or highly specialized attacks require different investigation.

For most home users, however, a clean Windows installation provides a strong recovery method when normal malware removal fails.

Isolating System Recovery With Offline Media

A clean Windows USB installer can provide a stronger recovery option for persistent malware. Create the installation media using a trusted, uncompromised computer.

The affected computer can then boot directly from the USB drive. This allows Windows Setup to operate independently of the existing Windows installation.

During installation, you can remove the existing Windows partitions when appropriate. This creates a fresh location for the new operating system.

However, this process should not be described as a guaranteed solution for every malware infection. It removes the existing Windows environment, but specialized threats can target components outside Windows.

Before starting the installation, make sure you have your important files and recovery information.

Follow these precautions:

  • Back up essential personal files only.
  • Avoid suspicious executable files.
  • Create installation media on a trusted computer.
  • Disconnect unnecessary external storage.
  • Keep important license or recovery information available.
  • Scan backups before restoring them.

After installing Windows, immediately install security updates. Then reinstall applications from legitimate sources.

If the computer still behaves strangely after a clean installation, investigate other possible causes. These could include hardware problems, compromised accounts, browser extensions, or firmware-related issues.

For ordinary Windows malware, however, offline installation media provides a reliable way to rebuild the operating system from a clean starting point.

Should I Wipe My PC?

Whether you should wipe your PC depends on the severity of the infection. If you are wondering does a factory reset remove a computer virus, a full reset can be appropriate when security software cannot remove the threat. You should also know the signs your computer has malware before deciding how serious the infection may be.

A wipe is not always necessary. Many malware infections can be removed with reputable security software.

Consider a reset or clean installation when:

  • Malware repeatedly returns after removal.
  • Security software cannot remove the infection.
  • Windows has become seriously unstable.
  • You suspect ransomware or persistent spyware.
  • You no longer trust the current Windows installation.
  • You have reliable backups of important files.

A complete wipe removes applications, settings, and potentially personal files. Therefore, prepare before starting the process.

Do not copy everything from an infected computer without checking it first. Suspicious installers, scripts, and executable files could reintroduce malware.

Photos, videos, documents, and other personal files can often be preserved. However, they should still be scanned before being restored.

After reinstalling Windows, install security updates first. Then reinstall your applications from trusted sources.

You should also change important passwords from a separate device. Enable multifactor authentication wherever possible.

A clean installation can save time when an infection is difficult to diagnose. But it should not be treated as the automatic answer to every slow or unstable computer.

Verifying File Backups Before You Wipe

Backing up your files before a reset is important. However, an unsafe backup can reintroduce malware after the installation.

Start by identifying the files you actually need. Personal photos, videos, documents, and spreadsheets are usually easier to review.

Be more careful with executable files. These include .exe, .msi, .bat, .cmd, scripts, cracked software, and unknown installers.

Do not assume a file is safe because it worked normally before the infection. Malware can hide inside legitimate-looking files or compromised software.

Before restoring your backup, scan it with updated security software.

You should also avoid restoring old system folders. Reinstall applications from their official sources instead.

A safer backup process includes:

  • Copy only essential personal files.
  • Avoid suspicious software and installers.
  • Scan the backup before restoration.
  • Reinstall applications from trusted sources.
  • Keep an offline backup when possible.

Cloud synchronization also requires caution. If malware changed files, those changes could potentially synchronize across connected devices.

After reinstalling Windows, restore your files gradually. This makes suspicious behavior easier to identify.

If you were specifically asking does a factory reset remove a computer virus, remember that restoring infected files afterward can undermine the cleanup.

The reset itself may be successful, but unsafe backups can bring the problem back.

How Can I Remove a Trojan Virus From My Computer?

A Trojan can be difficult to identify because it often looks like legitimate software. Some Trojans can steal information, create persistence, or download additional malware. Understanding how malware spreads can also help explain how a Trojan reaches and affects a computer.

Start by disconnecting the infected computer from the internet. Then run a full scan using reputable security software.

If normal scanning does not work, use an offline security scanner. Microsoft Defender Offline can help identify threats that are difficult to remove while Windows is running.

Avoid randomly deleting registry entries or system files. Removing the wrong component can make Windows unstable.

You can review recently installed applications and browser extensions. Remove software that you do not recognize, especially if it appeared shortly before the suspicious behavior.

For a persistent Trojan, reinstalling Windows may be safer than attempting extensive manual cleanup.

After removing the infection:

  • Install Windows updates.
  • Update your security software.
  • Change important passwords.
  • Enable multifactor authentication.
  • Check sensitive online accounts.
  • Avoid pirated or suspicious software.
  • Scan external drives before opening files.

If the Trojan may have stolen credentials, malware removal alone is not enough. Secure your accounts from a separate, trusted device.

A factory reset can remove many Trojans because it removes their installed components. However, the result depends on the reset method and whether infected files are restored afterward.

For serious infections, a clean Windows installation provides a more controlled recovery process.

Checking Persistent Startup Services and Registry Keys

Some malware tries to launch automatically whenever Windows starts. It may use startup folders, scheduled tasks, services, or registry settings.

Windows provides tools for reviewing startup applications. You can check these entries for programs you do not recognize.

However, an unfamiliar entry is not automatically malicious. Windows and legitimate applications use many background services and startup processes.

Do not delete registry keys simply because their names look strange. Research suspicious entries before changing system settings.

Security software is generally safer for identifying known malicious persistence mechanisms. Keeping Windows updated can also reduce security risks, so it is worth understanding what happens to your computer if you skip Windows updates. If malware continues returning, consider reinstalling Windows instead of manually changing many system settings.

A cautious approach includes:

  1. Disconnect the computer from the internet.
  2. Run a reputable security scan.
  3. Use an offline scan if necessary.
  4. Review suspicious startup applications.
  5. Remove confirmed unwanted software.
  6. Reinstall Windows if the infection persists.

Do not disable random Windows services. Some are required for normal system operation.

If you are unsure about a startup entry, leave it alone until you can verify it.

For ordinary users, a clean Windows installation can be safer than extensive registry editing. It removes the need to identify every malicious modification manually.

Can a Trojan Destroy My PC?

A Trojan usually cannot physically destroy modern computer hardware. Software can cause serious system problems, but hardware has protections against many forms of software-controlled damage.

The greater risk is logical damage. Malware can delete files, corrupt Windows, encrypt documents, change settings, or make the operating system unusable.

Some Trojans also download additional threats. These can include ransomware, spyware, credential stealers, and destructive malware.

Firmware attacks are possible, but they are uncommon compared with ordinary Windows malware. They also require different techniques from typical Trojans.

The biggest concern is often data and account security. Malware can steal passwords, browser sessions, financial information, and private documents.

If malware makes your computer unusable, you may need to:

  • Reinstall Windows.
  • Restore clean personal backups.
  • Update firmware when appropriate.
  • Change compromised passwords.
  • Enable multifactor authentication.
  • Contact financial institutions if sensitive information was exposed.

A damaged Windows installation does not necessarily mean the processor, memory, or motherboard is physically damaged.

If you were wondering does a factory reset remove a computer virus, the reset can address malware inside the Windows environment. It does not repair every possible firmware or hardware problem.

In most ordinary infections, the computer hardware can continue working after the compromised software environment is replaced.

The Threat of Irreversible Data Destruction

Malware can cause permanent data loss even when it does not physically damage your computer. Ransomware is a major example because it can encrypt personal files, so understanding how ransomware can infect a computer through email attacks is important for preventing these incidents.

Some destructive malware can also overwrite or corrupt data. Recovery may become extremely difficult when there is no clean backup.

This makes reliable backups an important part of computer security.

A backup should ideally exist separately from the computer. If ransomware infects the PC, a permanently connected backup drive could also become affected.

A safer backup strategy includes:

  • Keeping multiple copies of important files.
  • Maintaining at least one disconnected backup.
  • Testing backups regularly.
  • Scanning files before restoration.
  • Keeping important documents in trusted storage.

Do not assume that paying a ransom guarantees file recovery. Attackers may not provide working decryption tools.

If malware has encrypted important files, avoid unnecessary changes to the affected storage. Depending on the malware, professional recovery options may exist.

The best protection is preparation. A clean backup can make a serious malware infection much easier to recover from.

So, does a factory reset remove a computer virus? For most ordinary Windows malware, a properly performed reset or clean installation can remove the infected operating system environment. The key is choosing the correct recovery method and avoiding unsafe file restoration.

If the infection is persistent or involves sensitive data, treat the incident as a broader security problem. Removing the malware is only one part of recovering safely.

Conclusion

So, does a factory reset remove a computer virus? In most cases, yes. A complete reset or clean Windows installation can remove common viruses, Trojans, spyware, and other malware by replacing the infected operating system.

However, the reset is only part of the solution. Choose the appropriate recovery option, back up only trusted files, scan your backups, and reinstall applications from legitimate sources. If malware may have stolen your passwords, change them from a clean device and enable multifactor authentication.

For persistent or serious infections, a clean Windows installation can provide a more reliable fresh start. Rare threats that affect firmware or other components may require additional investigation.

The safest approach is to combine malware removal, secure backups, software updates, and strong account protection. This helps ensure that your computer stays clean after the reset rather than becoming infected again.

Why Are Standard iPads Cheaper Than the iPad Mini?

Why Are Standard iPads Cheaper Than the iPad Mini?

The question why are standard iPads cheaper than the iPad mini becomes clearer when you compare their hardware. The standard iPad costs less because Apple builds it around everyday tablet needs and a lower entry price. The current model has an A16 chip, an 11-inch Liquid Retina display, and 128GB of starting storage. It also works with a range of iPad accessories that can expand its usefulness for work, study, and entertainment.

However, size is only one factor in a tablet’s price. Apple also considers the processor, display technology, connectivity, cameras, internal design, and product positioning. The current standard iPad uses an A16 chip and an 11-inch Liquid Retina display. The iPad mini uses the A17 Pro chip and a fully laminated 8.3-inch Liquid Retina display. You can compare the models and their features on Apple’s official iPad comparison page.

So, why are standard iPads cheaper than the iPad mini? The main reason is that Apple positions the standard iPad as its everyday tablet. The mini combines premium hardware with an unusually compact design.

This guide explains the key differences. You will also learn which iPad is cheaper, whether the mini is worth its premium, and how long each model can remain useful.

Why Is the iPad Cheaper Than the iPad Mini?

The question why are standard iPads cheaper than the iPad mini becomes clearer when you compare their hardware. The standard iPad costs less because Apple builds it around everyday tablet needs and a lower entry price. The current model has an A16 chip, an 11-inch Liquid Retina display, and 128GB of starting storage. It offers sRGB color support and True Tone.

The iPad mini takes a different approach. Its 8.3-inch Liquid Retina display has 326 pixels per inch, P3 wide color, True Tone, full lamination, and an anti-reflective coating. It also uses an A17 Pro chip, which supports Apple Intelligence and delivers stronger graphics performance.

That means the mini is not simply a smaller version of the standard iPad. It is a premium compact tablet with different priorities.

Apple also prices products according to their market position. The standard iPad targets everyday users, students, families, and general productivity. The mini targets buyers who value portability, premium display features, and high performance.

Advanced Engineering in Compact Spaces

Miniaturizing powerful hardware can increase engineering complexity. Apple must fit the processor, battery, cameras, speakers, display, and other components into a much smaller enclosure.

The iPad mini measures just 195.4 by 134.8 millimeters and weighs 293 grams in its Wi-Fi configuration. Despite its compact dimensions, it includes an A17 Pro chip, stereo speakers, USB-C connectivity, and support for Apple Pencil Pro. Its USB-C port also makes it useful with compatible accessories, including options designed to use wired headphones without losing the charging port.

Compact products also leave less internal space for component placement. Engineers must carefully manage the arrangement of batteries, logic boards, antennas, cameras, and thermal components.

The standard iPad has a larger 11-inch chassis. That gives Apple more room for internal components and makes the design less constrained.

This does not mean the mini is expensive simply because it is difficult to manufacture. Its higher price reflects a combination of premium specifications, compact engineering, and product positioning.

In other words, fewer physical materials do not automatically mean lower production costs. A smaller premium device can require more specialized design work than a larger mainstream product.

Is the iPad Mini Better Than Regular iPads?

The iPad mini offers stronger hardware in several important areas, but that does not make it better for every user. Its A17 Pro chip is more advanced than the A16 chip in the current standard iPad. The mini also supports Apple Intelligence, Apple Pencil Pro, and a P3 wide-color display.

Its 8.3-inch display provides 326 pixels per inch. The standard iPad’s larger 11-inch display is less dense at 264 pixels per inch. However, the standard model gives users significantly more screen space for documents, video, multitasking, and typing.

The mini is also much easier to hold for long periods. Its smaller footprint works well for reading, handwritten notes, travel, navigation, and gaming.

The standard iPad has a different advantage. Its larger display is more comfortable for productivity and shared entertainment.

Therefore, the better choice depends on how you use a tablet. Performance and portability favor the mini, while screen size and a lower purchase price favor the standard iPad.

Display Quality and Creative Precision

Display technology is one of the clearest differences between the two models. The iPad mini has a fully laminated Liquid Retina display. It also offers P3 wide color, True Tone, an anti-reflective coating, and Apple Pencil hover support.

Full lamination places the display components closer together. This creates a more direct visual connection between the image and the glass surface. It can also make writing with a stylus feel more natural.

The standard iPad uses a Liquid Retina display with sRGB color and True Tone. It does not have the same fully laminated display specification or anti-reflective coating as the mini.

These differences can matter to artists, designers, photographers, and frequent note-takers. The mini’s higher pixel density also makes text and graphics appear particularly sharp at close viewing distances.

However, the larger standard iPad remains useful for creative work. Its bigger canvas provides more room for documents, illustrations, presentations, and split-screen workflows.

So, display quality favors the mini in several technical areas, while usable screen area favors the standard iPad.

Which Version of iPad Is the Cheapest?

The standard iPad is Apple’s lower-priced mainstream iPad line. The current model uses the A16 chip, starts with 128GB of storage, and has an 11-inch Liquid Retina display. Apple positions it for everyday activities such as studying, browsing, note-taking, streaming, and general productivity.

By comparison, the current iPad mini starts at ₹69,900 in India. It begins with 128GB of storage and uses the A17 Pro chip. Buyers should also keep broader pricing changes in mind, especially when Apple increases Mac and iPad prices in India.

Older standard iPad generations can sometimes cost less through retailers or the refurbished market. However, prices and availability vary, so buyers should compare the exact generation, storage capacity, warranty, and condition.

The standard iPad also supports Apple Pencil USB-C and the first-generation Apple Pencil, although compatibility differs from the mini’s Apple Pencil Pro support.

For budget-conscious buyers, the standard iPad therefore provides a straightforward entry point into Apple’s tablet ecosystem.

It is especially practical for students, families, casual users, and anyone who values a larger display without paying for premium compact hardware.

Is the iPad Mini Still Worth Buying?

The iPad mini can make sense for users who value portability above screen size. Its 8.3-inch display and 293-gram Wi-Fi weight make it considerably easier to carry than a full-size tablet.

The current mini also combines its compact design with an A17 Pro chip. It supports Apple Intelligence, Apple Pencil Pro, Apple Pencil USB-C, and USB-C connectivity.

That combination makes it useful for reading, handwritten notes, mobile gaming, travel, navigation, and quick productivity tasks. It can also serve as a portable second screen for some workflows.

However, the compact size creates trade-offs. The smaller display gives you less room for side-by-side apps, long documents, spreadsheets, and extended typing.

The standard iPad is therefore more practical for people who prioritize screen space and lower cost.

The mini is more specialized. Its premium makes sense when small size, high performance, and portability are central to your daily routine.

For someone who regularly carries a tablet between meetings, classrooms, flights, or appointments, those advantages can matter more than having a larger screen.

What Is the Lifespan of an iPad Mini?

An iPad mini can remain useful for many years, but Apple does not guarantee a fixed software-support period. Actual longevity depends on the model, battery condition, software support, storage, and how heavily you use the device.

The current iPad mini uses the A17 Pro chip and supports Apple Intelligence. That gives it a strong hardware foundation for demanding apps and future iPadOS features.
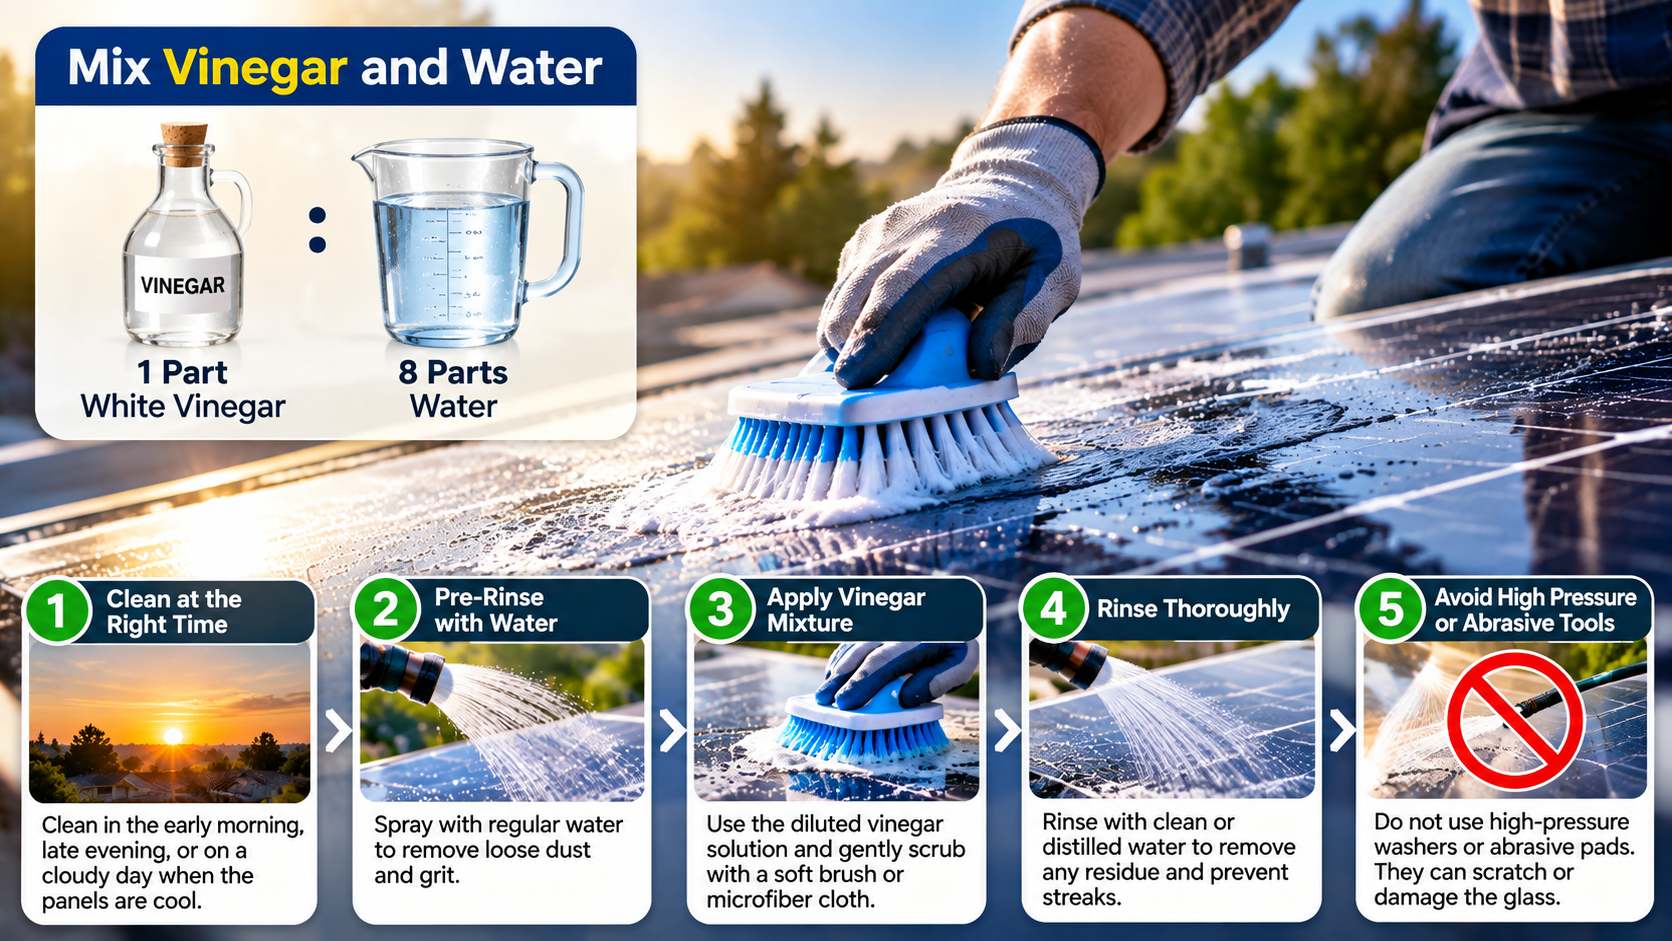
Battery capacity naturally declines over time. Heavy daily use and repeated charging cycles can reduce battery performance after several years. Understanding the 80-20 rule for rechargeable batteries can also help explain why battery capacity changes with repeated use. Battery service can extend the device’s practical life when battery health becomes the main limitation.

The physical hardware can also remain useful after major software updates end. Older iPads may still work well for reading, streaming, note-taking, children’s apps, or smart-home controls.

However, buyers should not assume that every iPad will receive updates for exactly five, six, or seven years. Apple determines software compatibility by model and operating-system requirements.

For that reason, a better expectation is to view the mini as a long-term tablet investment, while recognizing that its exact useful lifespan depends on future software support and battery condition.

Extended Value Through Hardware Longevity

Understanding why are standard iPads cheaper than the iPad mini also requires looking at long-term hardware value. A premium tablet can retain practical value for years when its hardware remains capable. The iPad mini’s A17 Pro chip gives the current model substantial performance headroom for demanding applications.

Its compact design can also give the device a longer role in a household. Even after it stops being someone’s primary tablet, it can still serve as a reading device, media screen, travel companion, or dedicated note-taking tool.

Battery condition becomes increasingly important as a device ages. If the battery becomes the main weakness, professional battery service may restore much of the tablet’s usefulness.

Resale value is harder to predict. It depends on storage capacity, physical condition, battery health, software support, and demand for that particular generation.

For buyers focused on long-term value, the processor matters. A stronger chip can help a device remain capable as apps become more demanding.

The current iPad mini combines A17 Pro performance with a compact premium design, giving it a strong technical foundation. Still, buyers should treat resale value as variable rather than guaranteed.

Frequently Asked Questions

Does the iPad mini have better battery life than the standard iPad?

No, both devices deliver roughly the same battery performance. Apple officially rates both the standard iPad and the iPad mini for up to 10 hours of web surfing on Wi-Fi or video playback. The iPad mini utilizes a physically smaller battery cell to fit its frame, but its power-efficient silicon balances consumption against the larger battery found inside the baseline iPad.
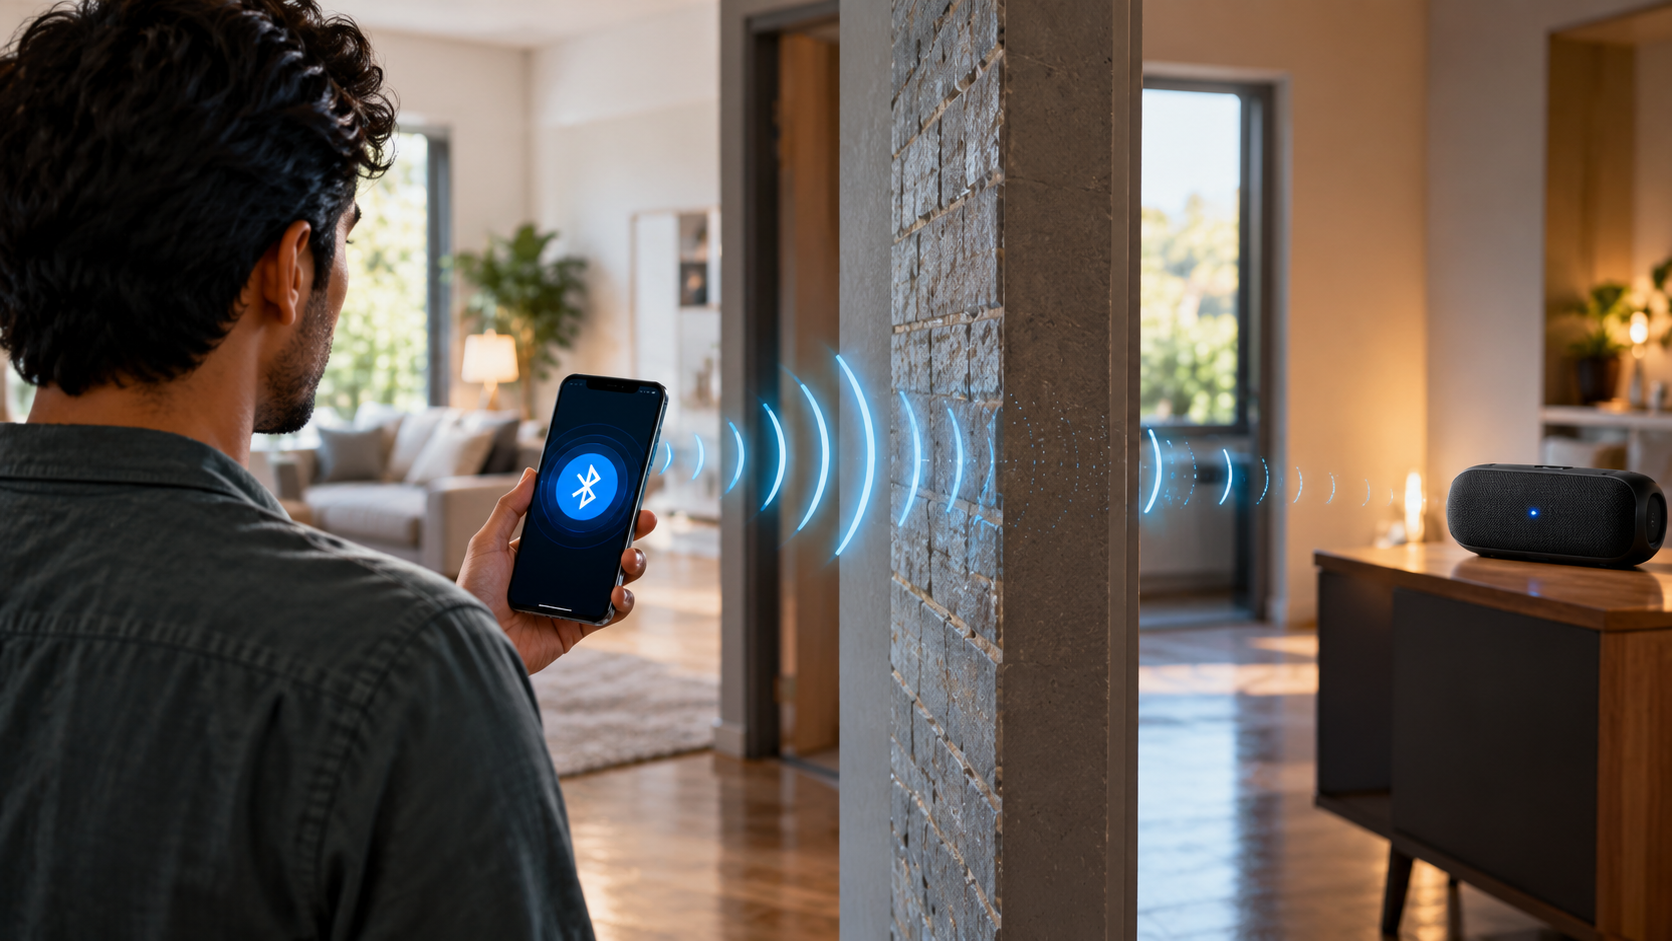
Can the iPad mini replace an everyday laptop for work?

The iPad mini can handle light email, document review, and task management, but it rarely replaces a laptop entirely. Its compact 8.3-inch display makes side-by-side multitasking and extensive typing cramped. This is one reason to consider the disadvantages of using a tablet as a laptop replacement before making the switch. While it supports external Bluetooth keyboards, users wanting a true laptop alternative should consider larger options like the iPad Air, iPad Pro, or standard iPad with keyboard folios.

Why do smaller tech gadgets sometimes cost more than larger ones?

Miniaturization requires advanced engineering, tighter manufacturing tolerances, and specialized components that carry higher production expenses. Fitting premium displays, intricate heat dissipation systems, and robust processors into dense enclosures requires custom fabrication. Large devices have ample internal space, allowing manufacturers to use standard, cheaper components without experiencing heat issues or structural integrity concerns.

Does the standard iPad support the newest Apple Pencil models?

The standard iPad has limited stylus integration depending on the generation. The 10th-generation iPad supports the USB-C Apple Pencil and the older 1st-generation model via an adapter, lacking magnetic wireless pairing. In contrast, modern iPad mini units support advanced magnetic stylus pairing and charging along the edge, offering a far cleaner and more integrated workflow.

Conclusion

Understanding the differences between the two models explains why are standard iPads cheaper than the iPad mini. The price gap is not simply about screen size or the amount of material used.

The current standard iPad uses an A16 chip and an 11-inch Liquid Retina display. It focuses on everyday productivity, entertainment, education, and general tablet use.

The iPad mini uses an A17 Pro chip and an 8.3-inch fully laminated Liquid Retina display. It adds P3 wide color, an anti-reflective coating, Apple Pencil Pro support, and Apple Intelligence.
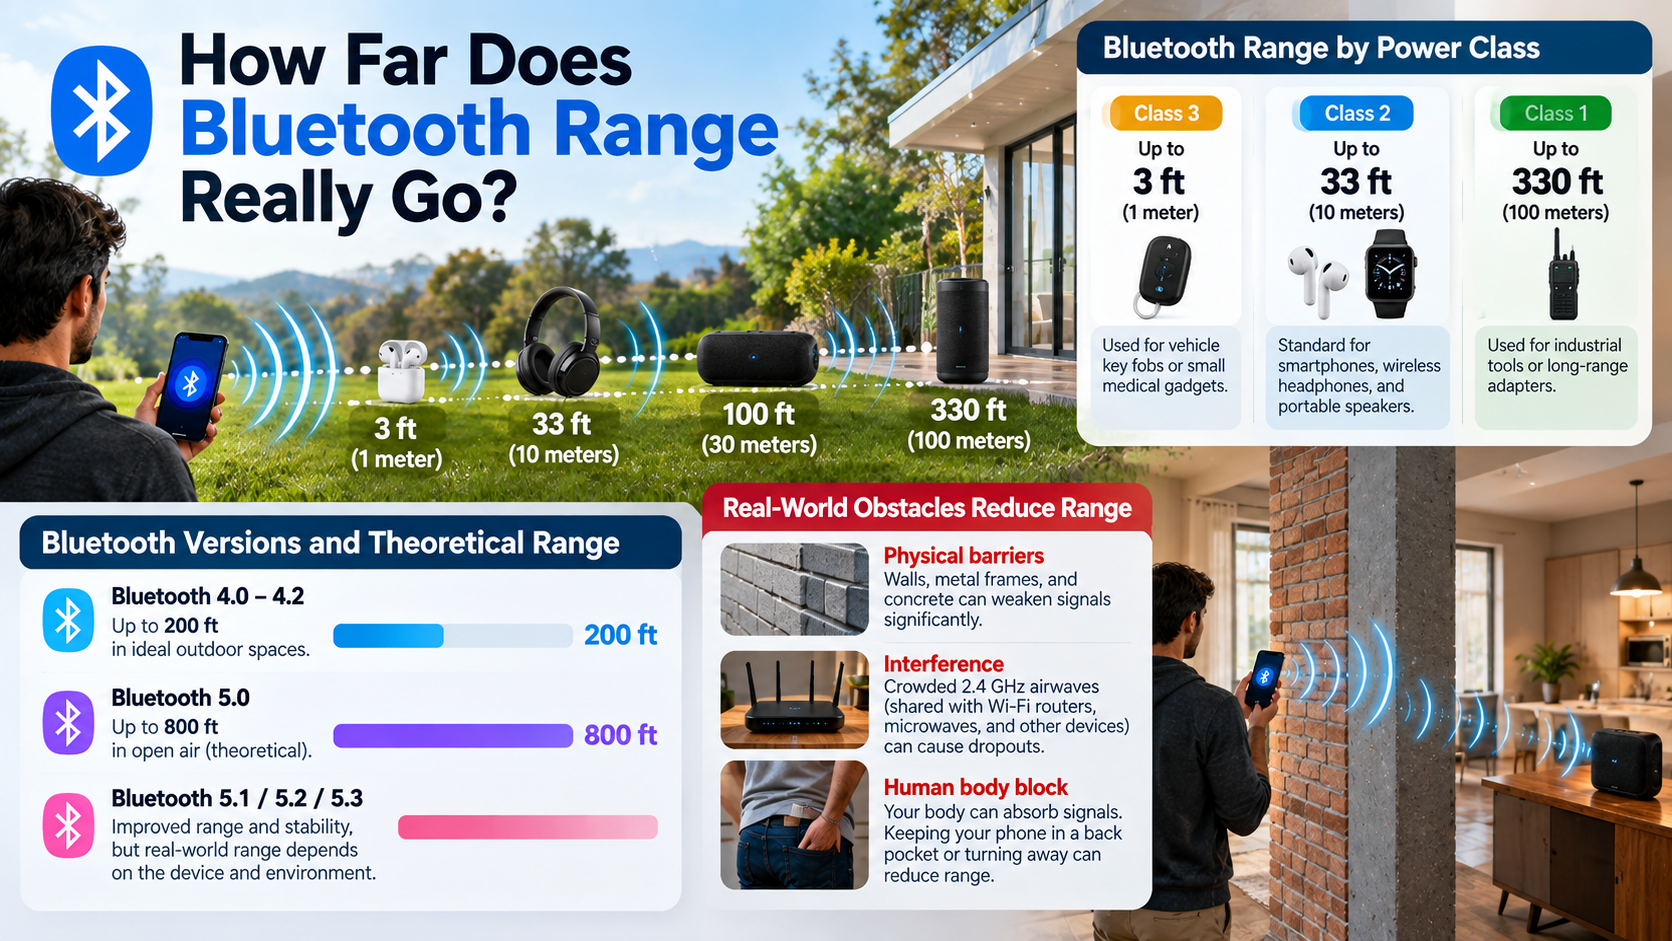
That combination explains why a smaller tablet can carry a higher price.
If you want a larger display and a lower entry price, the standard iPad is designed around those priorities. If you value portability, premium display technology, and higher performance in a compact body, the iPad mini offers a different experience.
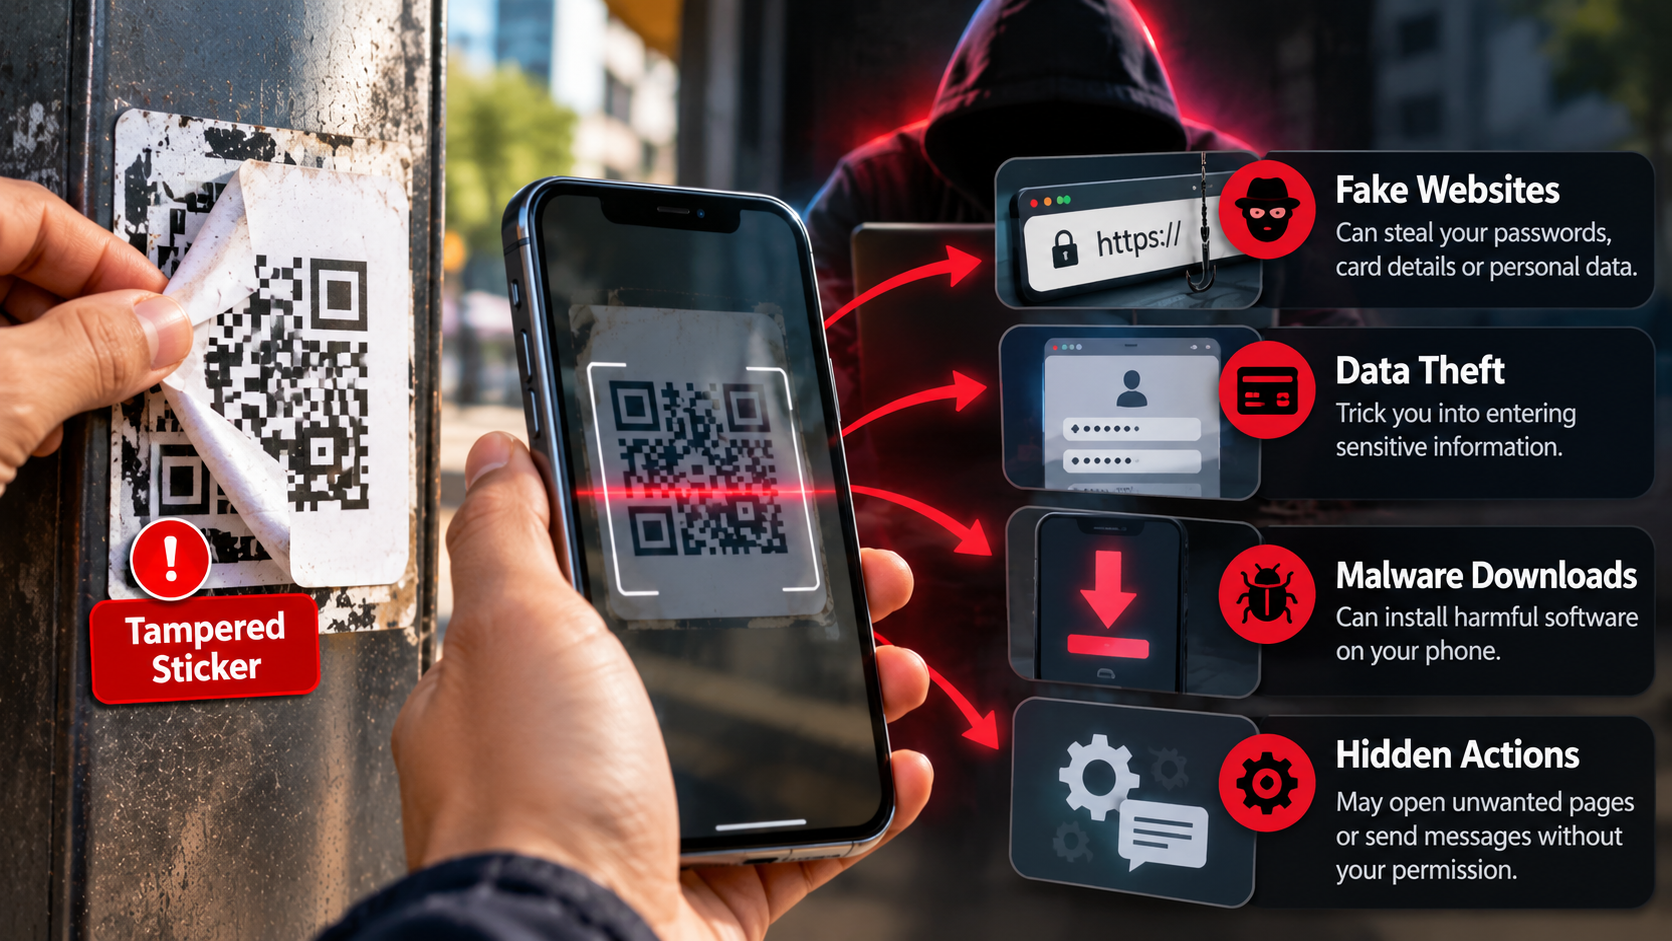
The right choice depends on your daily workflow, budget, and preferred tablet size. Comparing those factors will help you choose the model that fits your needs rather than judging value by dimensions alone.

What Exactly Is Bluetooth Tethering And When Should You Use It?

What Exactly Is Bluetooth Tethering and When Should You Use It?

Staying connected while traveling often means turning your smartphone into an impromptu modem. Most people use portable Wi-Fi hotspots, but phones also support a quieter alternative: Bluetooth tethering. So, what is Bluetooth tethering? It lets your phone share its cellular internet connection with another device, such as a laptop or tablet, through Bluetooth.

Unlike a Wi-Fi hotspot, Bluetooth tethering does not create a traditional wireless network. Instead, it uses a short-range Bluetooth connection to provide internet access to a paired device. This approach typically uses less power, making it useful when your phone needs to stay connected for longer.

Bluetooth tethering works best for light internet activities. You can use it to check emails, browse simple websites, send messages, or work on cloud-based documents. It is less suitable for large downloads, high-resolution video streaming, or other data-heavy tasks.

It can also be useful when you want internet access without carrying a USB cable. If battery life and convenience matter more than connection speed, Bluetooth tethering can be a practical option.

What Is the Point of Bluetooth Tethering?

The main benefit of Bluetooth tethering is lower power consumption. A Wi-Fi hotspot actively creates a wireless network and can use considerable battery power. Bluetooth generally requires less power, especially when devices remain close together.

This makes Bluetooth tethering useful when you need internet access without quickly draining your smartphone battery. If your phone frequently loses charge faster than expected, understanding why your laptop battery drains so fast can also help you manage power more effectively across your devices. You can connect a laptop or tablet for light tasks without carrying a cable. It also keeps your phone free from the higher power demands associated with maintaining a Wi-Fi hotspot.

Bluetooth tethering works well for activities such as:

  • Reading and replying to emails

  • Checking documents and spreadsheets

  • Sending messages

  • Browsing lightweight websites

  • Syncing calendars and cloud services

Maximizing Battery Life During Remote Work

Bluetooth tethering can be helpful when you work away from a charger. A Wi-Fi hotspot may consume more battery during extended use. Bluetooth can reduce that additional power demand, although actual battery savings vary by device and network conditions.

For remote work, Bluetooth tethering is best suited to light productivity tasks. It is less appropriate for activities that require substantial bandwidth. Keeping both devices nearby can also help maintain a stable connection. If the Bluetooth connection repeatedly drops during work, checking why your Bluetooth keeps disconnecting can help identify common connection problems.

Is Bluetooth Tethering Safe?

Bluetooth tethering is generally suitable for everyday internet use when you pair devices securely and keep their software updated. Modern Bluetooth connections use security features designed to prevent unauthorized access. However, security depends on the Bluetooth version, pairing method, device settings, and operating system.

When pairing two devices, you may need to confirm a code or accept a connection request. Once paired, the devices can communicate without creating an open Wi-Fi hotspot. This can reduce exposure compared with joining an unsecured public Wi-Fi network.

However, Bluetooth tethering is not completely risk-free. No wireless connection provides absolute protection from every threat. You should still use secure websites, update your devices, and avoid accepting unknown pairing requests.

The Value of Hidden Device Visibility

After pairing your devices, consider disabling Bluetooth discoverability when your phone does not need to be found. This can reduce unwanted connection attempts in crowded places and is part of good Bluetooth device management. If you regularly use Bluetooth across several devices, understanding its broader limitations can also help you avoid unnecessary connections.

For additional protection, use strong device security and keep your operating system updated. If you handle sensitive information, a VPN can provide another layer of protection while using mobile data.

Is Bluetooth Tethering Faster Than Wi-Fi?

No. Bluetooth tethering is generally much slower than Wi-Fi tethering. Bluetooth was designed for low-power, short-range communication rather than high-bandwidth internet access. Wi-Fi can use wider channels and newer standards to deliver much higher throughput.

Actual Bluetooth tethering speeds depend on the Bluetooth version, device hardware, connection quality, and operating system. Older Bluetooth configurations can provide relatively low data rates, while newer technologies may perform better. This difference reflects the broader trade-off between wired and wireless connections, where convenience and mobility can come with different performance characteristics. Even so, Bluetooth remains less suitable than Wi-Fi for demanding internet activities.

Bluetooth tethering can handle lightweight tasks without much trouble. These include checking email, reading web pages, sending messages, and syncing small files. Large downloads and media streaming can expose its bandwidth limitations quickly.

Understanding Bandwidth Limits for Media Consumption

If you need to stream high-resolution video or download large project files, Wi-Fi tethering is usually more practical. Bluetooth may struggle with sustained high-bandwidth workloads.

For basic browsing and administrative work, however, its lower speed may not matter. Its lower power usage and cable-free setup can make it useful when performance is not the main priority.

Which Is Better for Tethering, Bluetooth or USB?

Whether Bluetooth or USB tethering is better depends on what you need from the connection. USB tethering usually provides higher performance and a more consistent connection. It can also charge your phone while connected to a compatible computer, depending on the hardware and setup.

Bluetooth tethering offers a different advantage: convenience. You do not need to keep your phone physically connected to the laptop. You can leave the phone in a pocket or nearby bag while completing simple online tasks.

Choose USB tethering when you need:

  • Higher and more consistent speeds

  • A stable physical connection

  • Lower wireless interference

  • Long sessions with compatible charging support

Choose Bluetooth tethering when you value:

  • Cable-free convenience

  • Lower additional power consumption

  • Simple browsing and messaging

  • Light productivity tasks

Choosing the Right Tool for Your Workflow

For video calls, large downloads, and other demanding activities, USB tethering is often more practical. For checking email at an airport café, Bluetooth can provide enough connectivity without another cable.

What Are the Disadvantages of Tethering?

Tethering has several disadvantages, including battery usage, heat generation, slower performance, and mobile data limits. Sharing a cellular connection makes your smartphone work harder than normal. Extended tethering can therefore increase battery consumption and device temperature.

Your mobile carrier may also apply restrictions to hotspot or tethering data. Some plans include separate hotspot allowances or reduce speeds after a specific usage threshold. Check your plan before relying on tethering for heavy internet use.

Another concern is unexpected data consumption. A connected laptop may treat the tethered connection like a normal internet connection. It can then download updates, synchronize cloud folders, or perform other background tasks.

Managing Hidden Background Data Consumption

Before tethering, enable your computer’s metered connection setting when available. This can help limit automatic downloads and unnecessary background activity.

You should also pause large cloud synchronizations and operating system updates when possible. Monitor your mobile data usage during longer sessions.

For light browsing, Bluetooth tethering can be practical. For intensive workloads, USB or Wi-Fi tethering may provide better performance.

Frequently Asked Questions

Can I share internet with multiple devices using Bluetooth?

Yes, you can theoretically connect multiple client devices simultaneously using the Bluetooth Personal Area Network profile, but you should avoid doing so. Unlike robust Wi-Fi routers, your phone’s Bluetooth chip possesses limited bandwidth. Splitting that narrow transmission pipe across several devices degrades connection quality, slows loading speeds dramatically, and frequently causes dropped data packets for every connected user.

Does Bluetooth tethering consume more data than a standard hotspot?

No, Bluetooth tethering does not consume more data than an equivalent Wi-Fi hotspot. Both networking methods use the exact same cellular data plan to route internet traffic to your connected machine. However, because Bluetooth is much slower, you naturally consume less total data over time simply because your computer cannot download background files as quickly.

Why won’t my laptop connect to my phone’s Bluetooth internet?

Connection failures usually happen when devices are improperly paired or lack matching network profiles. To fix this, unpair both devices completely and restart them. Pair them again, ensuring you confirm the security codes on both screens. Finally, open your computer’s network adapters, locate the Bluetooth device, and manually click “Connect using Access Point.”

Can I make phone calls while Bluetooth tethering is active?

Yes, you can place and receive voice calls while tethering your internet connection. Modern cellular networks support simultaneous voice and data transmission over VoLTE and 5G channels. However, your internet speed may drop slightly during an active call if your device needs to share system processing power between voice audio and active data routing.

Conclusion

Understanding what is Bluetooth tethering allows you to manage your mobile hardware and cellular data far more effectively. While it cannot rival the blazing speeds of local Wi-Fi hotspots or the raw transmission stability of physical USB connections, it provides an invaluable compromise between wire-free convenience and extreme power conservation.

When your phone battery drops low and you lack an AC wall outlet, switching off power-hungry Wi-Fi hotspots in favor of Bluetooth keeps your crucial work moving forward. It delivers the exact level of connectivity you need for emails, documents, and lightweight internet communication without shutting your handset down prematurely.

Next time you head out to work from a transit hub, park, or coffee shop, test this connection method yourself. Pair your devices beforehand, enable metered connection modes on your laptop, and enjoy reliable, battery-friendly internet access wherever your day takes you.

Why Does Google Chrome Use So Much CPU?

Why Does Google Chrome Use So Much CPU?

Few things disrupt daily work faster than a loud computer fan and a browser that keeps stuttering. Many users find that their browser is responsible for a large share of system resource usage. If you wonder why does Google Chrome use so much CPU, you are not alone.

Modern websites behave more like desktop applications than simple documents. They run JavaScript, video, animations, web apps, and background services that can place significant demands on your processor.

Google Chrome uses a multi-process architecture to improve browser stability, security, and responsiveness. Chromium’s official documentation explains how the browser separates different functions into multiple processes. This design helps isolate problematic web pages and allows Chrome to manage tabs and other browser components independently. However, running multiple processes can also contribute to higher resource usage when many demanding tabs or web applications are active.

High CPU usage can cause several problems, especially on laptops where processor-intensive tasks can affect battery life. If your battery is also draining unusually fast, you may want to investigate why your laptop battery drains so fast:

  • Slower browser performance

  • Loud fan noise

  • Higher system temperatures

  • Faster battery drain

  • Lag while using other applications

Understanding what causes Chrome’s CPU usage makes troubleshooting much easier. The following sections explain common causes and practical ways to reduce Chrome CPU usage without giving up essential browsing features.

Why Does Google Chrome Use So Much CPU?

If you are wondering why does Google Chrome use so much CPU, several browser activities could be responsible. Google Chrome can use significant CPU resources because modern browsing involves many processes and demanding tasks. Chrome separates important browser functions into multiple processes. This approach helps prevent one failed tab from crashing the entire browser.

However, every active tab can still create additional work for your computer. Websites may run JavaScript, animations, video playback, advertisements, and real-time updates. Some web apps also perform continuous calculations in the background.

Browser extensions can add another source of CPU usage. An extension with inefficient code may repeatedly perform tasks even when you are not actively using it.

Chrome may also use CPU resources for features such as preloading, page rendering, security checks, and background activity. The impact depends on your tabs, extensions, hardware, and browsing habits.

CPU usage becomes more noticeable when several demanding websites run together. Video calls, online editors, streaming services, and complex web applications can quickly increase processor activity. If your CPU remains heavily loaded even during normal tasks, it can also help to understand how to tell if your CPU is bottlenecking.

If Chrome suddenly uses excessive CPU, identifying the specific process is the best place to start.

How Can You Identify Hidden Chrome Processes?

Understanding why does Google Chrome use so much CPU starts with identifying which tab or extension is creating the workload. Background activity can explain high Chrome CPU usage even when you are not actively using a particular tab. In some cases, unusual background activity can also indicate security problems, so it is useful to recognize the signs your computer has malware. Some websites continue running scripts, playing media, syncing data, or handling notifications in the background.

Chrome includes a built-in Task Manager that makes these processes easier to identify. Press Shift + Esc while Chrome is open to launch it. You can then view CPU, memory, network, and other resource usage for individual tabs and extensions.

Look for processes with unusually high CPU percentages. A single website or extension may be responsible for most of the load.

You can use Chrome Task Manager to identify:

  • Resource-heavy tabs

  • Extensions using excessive CPU

  • Background web applications

  • Pages with unusually high memory usage

  • Processes that have stopped responding

After identifying the source, select the process and choose End process. This closes that specific Chrome process without requiring you to restart the entire browser.

If the same process repeatedly causes problems, investigate the related website or extension. Removing the underlying cause is more effective than repeatedly ending the process.

How Do I Stop Chrome From Using So Much CPU?

You can reduce Chrome CPU usage by removing unnecessary workloads and reviewing browser settings. Start by opening chrome://extensions and disabling extensions you rarely use. Remove extensions completely if you no longer need them.

Next, review Chrome’s Performance settings. Memory Saver can deactivate eligible inactive tabs, which reduces the amount of resources those tabs need while they remain available for later use.

You should also check hardware acceleration. Chrome can use your graphics processor for certain rendering tasks when hardware acceleration is enabled. This can reduce CPU work in some situations, although results vary by hardware and graphics drivers.

Other useful steps include:

  • Close tabs you no longer need.

  • Update Chrome to the latest available version.

  • Restart Chrome after unusually long browsing sessions.

  • Check Chrome Task Manager for problem processes.

  • Test whether a specific extension causes the spike.

  • Close unnecessary background applications.

Clearing cached data can help with certain browser problems, but it is not a universal CPU fix. Focus first on identifying the process responsible for the high usage.

Which Chrome Performance Settings Should You Optimize?

Chrome provides several built-in options that can help manage resource consumption. The most useful starting point is the Performance section in Chrome settings.

Memory Saver is designed mainly to reduce memory usage. It deactivates eligible inactive tabs and reloads them when you return. This can indirectly reduce overall system pressure when many tabs are open.

Hardware acceleration is another setting worth checking. When enabled, Chrome can use your GPU for supported graphics and rendering tasks. This may reduce CPU workload during video playback or graphics-heavy browsing. If you want to explore other ways to improve graphics performance, learning how to get more out of your GPU without overclocking can provide useful context. However, an outdated driver or incompatible hardware can sometimes cause problems.

You can test the setting by opening Chrome’s system settings and changing hardware acceleration. Restart Chrome afterward and compare performance.

For better results, combine these settings with sensible tab management. Avoid keeping dozens of demanding web applications open when you do not need them.

Performance optimization works best when you identify the actual source of the problem. Changing every setting at once makes it difficult to determine what helped.

Does Chrome Use More CPU Than Other Browsers?

Chrome can use substantial CPU resources, but there is no universal rule that it always uses more CPU than every competing browser. Resource usage depends heavily on the websites, extensions, settings, operating system, and hardware involved.

Chrome uses a multi-process architecture designed to improve stability, security, and responsiveness. It also performs background tasks that can add to resource usage during certain browsing activities.

Other browsers use different process and resource-management strategies. Mozilla Firefox also uses multiple processes, while Safari is closely optimized for Apple’s platforms. Microsoft Edge uses the Chromium engine and therefore shares many architectural foundations with Chrome.

CPU usage can vary significantly between browsers during the same workload. One browser may perform better on a particular website, while another may handle a different workload more efficiently.

Factors that influence browser CPU usage include:

  • Number of open tabs

  • Website complexity

  • Video and graphics activity

  • Installed extensions

  • Hardware acceleration

  • Background processes

  • Computer hardware

Therefore, comparing browsers based on CPU usage alone can produce misleading results. Testing the same websites under similar conditions provides a more useful comparison.

Why Can Chrome Use 20 GB of Memory?

Chrome can use very large amounts of memory when many tabs, extensions, and demanding web applications are running simultaneously. A figure such as 20 GB of RAM does not automatically mean Chrome has a memory leak.

Modern websites can consume substantial memory. Graphics-heavy applications, online spreadsheets, video services, development tools, and social media feeds may all maintain large amounts of active data. When this heavy workload also produces excess heat, knowing how to cool your laptop without a cooling pad can help you manage higher system temperatures.

Chrome may also keep data in memory to improve responsiveness. This can make the browser appear to consume more RAM when plenty of system memory is available.

However, unusually high memory usage can sometimes indicate a problematic website, extension, or process. Memory leaks are another possible cause. In these cases, memory usage may continue increasing instead of stabilizing.

If Chrome approaches 20 GB of memory usage, check which processes are responsible. Chrome Task Manager can help identify unusually heavy tabs and extensions.

You can then close unnecessary tabs or disable problematic extensions. If memory usage repeatedly grows over time, restart Chrome and test the browser without extensions.

The key distinction is that high memory usage is not always a problem. The impact matters more than the number alone.

How Can You Identify and Reduce Memory Leaks?

A memory leak occurs when software continues holding memory that it no longer needs. In a browser, poorly optimized websites or extensions can sometimes contribute to this behavior.

A common warning sign is memory usage that keeps increasing during normal browsing. The usage may remain high even after you stop interacting with the affected website.

Chrome Task Manager can help you investigate these situations. Watch individual tabs and extensions while browsing normally. If one process continues growing unusually large, close it and observe whether system performance improves.

You can also test Chrome with extensions disabled. If the problem disappears, enable extensions one at a time to identify the source.

Useful troubleshooting steps include:

  • Restart Chrome after prolonged sessions.

  • Update Chrome and your extensions.

  • Disable unnecessary extensions.

  • Close tabs with unusual resource usage.

  • Test problematic websites individually.

  • Monitor memory usage through Chrome Task Manager.

Restarting Chrome clears active browser processes and can temporarily restore normal memory usage. However, repeated growth usually deserves further investigation.

Remember that memory usage and CPU usage are different problems. A tab can consume significant RAM without heavily using the CPU, while another process may cause high CPU usage with moderate memory consumption.

Why Are Some Ethernet Cables Blue?

Why Are Some Ethernet Cables Blue?

Have you ever wondered why blue Ethernet cables are so common behind routers, switches, and computers? Many people assume the bright outer jacket indicates better performance. In reality, Ethernet cable color is mainly used for identification and organization.

Network engineers rely on standards established by organizations like the Telecommunications Industry Association to keep complex data centers tidy and manageable. Industry standards and structured cabling guidelines support organized installations, while individual organizations may create their own color schemes. Because manufacturers commonly produce blue patch cords for general network connections, blue Ethernet cables have become a familiar choice for workstations and home networks.

Color coding can also reduce mistakes during maintenance. Technicians can quickly identify different connections without tracing every cable through a crowded rack.

The jacket color does not indicate faster speeds or better wiring. Instead, performance depends on the cable’s internal construction and category rating.

In this guide, we explain what blue Ethernet cables mean, whether color affects speed, and whether Cat6 is suitable for home networking.

Are Blue Ethernet Cables Faster?

No. Blue Ethernet cables are not inherently faster than Ethernet cables in other colors. The color of the outer jacket does not determine how quickly data travels through the cable. Instead, the cable’s internal construction and category rating determine its networking capabilities.

Ethernet signals travel through twisted copper wire pairs inside the cable. The outer PVC or other jacket material mainly protects those internal conductors from physical damage. Its color does not change the electrical characteristics of a properly manufactured cable.

For example, a blue Cat6 cable and a grey Cat6 cable with the same specifications can provide the same performance under equivalent conditions. The same principle applies to black, yellow, white, red, and other jacket colors.

When shopping for Ethernet cables, check the category rating, cable length, conductor material, and shielding. These specifications matter far more than appearance.

Cable Category Dictates Actual Bandwidth

Ethernet performance depends on factors such as conductor quality, pair twisting, cable construction, and shielding. The Ethernet cable category also sets important performance specifications. Cat5e supports Gigabit Ethernet under standard conditions, while Cat6 offers higher bandwidth and can support 10Gbps Ethernet over shorter runs.

Cat6 is generally rated for bandwidth up to 250 MHz. Its improved construction can also provide better protection against crosstalk than older cable categories.

Cable length matters, too. With copper Ethernet, longer runs can experience greater signal loss and other transmission limitations. A cable that meets its category specifications should still be selected with the intended distance in mind.

If you want better network performance, do not choose a cable based on color. Instead, look for the appropriate Cat5e, Cat6, or Cat6a rating for your network.

For many homes, Cat6 provides useful performance headroom without requiring expensive specialized cabling.

Is Cat6 Overkill for Home Use?

Cat6 is not necessarily overkill for modern home networks. For many households, it offers a practical balance between performance, availability, and cost. However, it is also worth considering the drawbacks of using Ethernet cables for home internet before choosing a wired setup. Cat5e remains capable of supporting Gigabit Ethernet, so upgrading is not essential for every internet connection.

However, Cat6 provides higher rated bandwidth and can support faster networking over appropriate distances. It supports bandwidth up to 250 MHz and offers improved resistance to crosstalk compared with Cat5e. Cat6 can also support 10Gbps Ethernet over runs up to about 55 meters under specified conditions.

This can be useful for homes with multi-gigabit internet, network-attached storage, gaming systems, or large local file transfers. It also provides additional capacity for future network upgrades.

Cat6 is backward compatible with older Ethernet standards. That means you can connect Cat6 cables to equipment designed for slower Ethernet standards without compatibility problems.

For new installations, choosing Cat6 can therefore provide useful future-proofing without dramatically increasing complexity.

Long-Term Value for Busy Smart Homes

Modern homes can contain dozens of connected devices. Streaming devices, computers, gaming consoles, smart televisions, security systems, and network-attached storage can all share the same network.

Cat6 cabling provides enough capacity for many demanding home networking tasks. It can be especially useful when large files move between local devices. Examples include computer backups, media libraries, and transfers to network-attached storage.

However, faster cabling does not automatically make your internet connection faster. Your internet plan, router, switches, network adapters, and other equipment can all limit performance. If your internet seems fast but file transfers remain slow, understanding why downloads can be slow despite fast internet may help identify the actual bottleneck.

The main benefit of Cat6 is its higher networking capability and future flexibility. It can support Gigabit Ethernet today while leaving room for faster local connections later.

For homeowners installing new permanent Ethernet runs, Cat6 can be a sensible choice. It avoids some limitations of older cabling while remaining widely available.

For simple connections using existing Gigabit equipment, however, replacing working Cat5e cables may provide little practical benefit.

Can I Use a Yellow Ethernet Cable for Internet?

Yes. A yellow Ethernet cable can be used for an internet connection just like a blue, grey, black, or white cable. The jacket color does not determine whether the cable can carry internet traffic.

Inside a typical Ethernet cable are twisted copper pairs designed to transmit network signals. Standard RJ45-style Ethernet connections allow compatible devices to communicate regardless of the cable’s exterior color.

Yellow cables are sometimes assigned a particular purpose within an organization’s cable management system. For example, an administrator might use yellow cables to identify a specific connection type, device group, or network path. However, these meanings are not universal across every organization.

The important specifications are the cable’s category rating, construction, length, and compatibility with the network equipment.

A yellow Cat6 cable can therefore provide the same type of network connectivity as a blue Cat6 cable when both meet equivalent specifications.

Simply choose the color that suits your installation, then verify the technical specifications that matter.

Universal Compatibility Across Networking Gear

Ethernet standards define important electrical characteristics and connection requirements. Because of this, compatible networking equipment does not care whether the connected cable has a blue, yellow, grey, black, or purple jacket.

A router, switch, computer, game console, or access point can use an Ethernet cable that meets the appropriate specifications. The cable’s color does not restrict the type of network traffic it can carry.

For most standard Ethernet connections, you simply connect the cable to the device’s Ethernet port. The equipment then negotiates a supported connection speed based on the capabilities of both devices and the cable.

Color can still have an important practical role. Businesses often assign specific colors to particular network functions. This makes large installations easier to inspect and maintain. For home networks, wired Ethernet is also only one part of the overall setup, alongside newer wireless standards such as those discussed in Wi-Fi 6 vs Wi-Fi 7.

At home, you can use the same approach. For example, you might use blue cables for computers, yellow cables for specific network equipment, and white cables for visible runs.

The scheme is yours to define, provided it remains consistent.

Does It Matter What Color Ethernet Cable I Use?

From a technical perspective, Ethernet cable color does not determine network performance. A properly manufactured cable can transmit network data regardless of whether its jacket is blue, red, green, black, white, or another color.

The important factors include the cable category, internal construction, shielding, length, and quality. Your network equipment also affects the final connection speed.

Color does matter, however, when you are managing multiple cables. IT technicians often use different jacket colors to identify connections quickly. This can make maintenance easier in crowded server racks, patch panels, and equipment cabinets.

The same idea can help at home. You could assign different colors to computers, gaming equipment, televisions, access points, or other devices. This makes it easier to identify a cable when troubleshooting a connection.

A simple color scheme can prevent accidental disconnections and reduce confusion. The key is to use colors consistently rather than relying on an industry-wide meaning.

So, choose the color you prefer for performance. Choose a color system for organization.

Streamlining Troubleshooting Through Visual Organization

A consistent cable-color system can make network troubleshooting much easier. Instead of following every cable through a crowded workspace, you can identify its purpose from the jacket color.

For example, you might reserve blue cables for ordinary network connections and another color for specific equipment. The exact scheme does not matter as much as maintaining consistency.

This approach can be particularly helpful when several devices sit behind the same desk or entertainment center. If visible cables are becoming difficult to manage, these ways to hide Ethernet cables around the house can also keep your setup cleaner. It can also help technicians working inside network cabinets or patch panels.

Color coding does not improve signal strength or increase bandwidth. Its value comes from faster identification and simpler maintenance.

Before creating a color scheme, document what each color means. This prevents confusion when another person needs to troubleshoot the network later.

Avoid assuming that every organization uses the same meanings. A red cable may indicate a critical connection in one installation but serve a completely different purpose elsewhere.

For home networks, a simple scheme is usually enough. Choose a few colors and assign them to device groups or connection types. Keep the system easy to remember and update.

Are All Ethernet Cables Blue?

No. Ethernet cables are available in many different colors, including blue, grey, black, white, yellow, red, green, and more. Blue is simply one of the most common choices for general network connections.

Manufacturers produce different jacket colors because businesses and consumers use them for organization and identification. A large network installation may use several colors to distinguish equipment groups or connection types.

There is no universal rule requiring Ethernet cables to be blue. In fact, color conventions can vary between organizations, installers, and industries. A blue cable may represent a standard network connection in one facility and have a different meaning elsewhere.

Home users can choose any color they prefer. White and beige cables may blend into walls and baseboards, while brighter colors can make connections easier to identify.

When purchasing Ethernet cables, do not confuse color with technical capability. Two cables can look completely different while offering identical performance if their specifications match.

Always check the category marking and other technical details before making a purchasing decision.

Common Industry Color-Coding Schemes

Network administrators often create color-coding schemes to make structured cabling easier to manage. However, these schemes are generally organizational conventions rather than universal Ethernet requirements.

Some installations use blue or grey cables for ordinary network connections. Other colors may identify special equipment, network segments, security systems, or other connection types.

Red cables are sometimes reserved for connections that administrators consider important or that require extra attention. Yellow cables may also identify particular connection types in some facilities. These meanings can vary significantly between organizations.

For that reason, never assume that a cable’s color tells you exactly what it connects to. Check the organization’s documentation or cable labels when working on an unfamiliar network.

For home installations, you can create your own simple system. For example:

  • Blue: General network connections

  • Yellow: Selected network equipment

  • Red: Connections requiring extra attention

  • White: Visible or decorative runs

The goal is clarity, not compliance with a universal color standard. A consistent system makes future maintenance easier.

Frequently Asked Questions

Why are blue cords so common in server rooms?

Blue cords became dominant in enterprise environments because major manufacturers historically produced standard patch cables in blue as their baseline stock color. Network administrators adopted this trend widely, using blue to represent regular network drops and general data connections. Over decades of bulk commercial purchasing, blue established itself as the default visual signature for everyday computing connections worldwide.

Can different colored cables cause network interference?

No, the outer plastic color has zero effect on electromagnetic interference or signal attenuation. Interference resistance depends entirely on internal construction, such as overall shielding, foil layers, individual pair twists, and physical separation splines. A fully shielded black cable shields against interference identically to an identically shielded blue cable manufactured to the same rigorous engineering standards.

Does the length of an Ethernet cable affect connection speed?

Yes, excessive cable length can degrade signal quality and reduce overall transmission speeds. Standard twisted-pair copper Ethernet cables maintain full performance up to a maximum distance of 100 meters (328 feet). Exceeding this distance causes packet loss and forced drops in network speed, regardless of cable category rating or outer jacket color.

What do red Ethernet cables usually mean?

Red Ethernet cables typically signify mission-critical, emergency, or high-priority connections within commercial data centers. Network administrators often route red cables to firewall appliances, uninterrupted power supplies, emergency backup circuits, or core server interfaces. This distinct, high-visibility color signals to field engineers that disconnecting the line will disrupt vital systems or trigger emergency protocols.

Conclusion

Blue Ethernet cables are not faster simply because they are blue. Their color primarily serves as a visual identifier for cable management and organization.

Network performance depends on factors such as cable category, internal construction, shielding, length, and connected equipment. Cat5e, Cat6, and Cat6a cables have different performance specifications, so the category marking is far more important than the jacket color.

You can use blue, yellow, grey, black, white, or red Ethernet cables for compatible network connections. The color will not change how your router, switch, computer, or other device handles network traffic.

For new home installations, Cat6 can provide useful future flexibility. It supports Gigabit Ethernet and can support 10Gbps Ethernet over shorter distances when the equipment and installation meet the necessary requirements.

Ultimately, choose cable colors that make your network easier to understand and maintain. For a connected home, it is also important to consider broader security practices when managing multiple devices and connections. A secure home network guide for remote engineers can provide additional guidance on protecting a wired and wireless setup. Then focus on the technical specifications that actually affect performance.

Is Performance Mode Worth Using on Your PC?

Your PC Likely Has ‘Performance Mode’ – But Is It Actually Worth Using?

Most modern computers offer built-in power settings that prioritize performance over energy efficiency. You can adjust these settings through Windows power and sleep options using Microsoft Support. However, enabling performance mode does not turn an average PC into a high-end workstation.

Operating systems normally balance performance, power consumption, heat, and battery life. Performance-focused settings can reduce some power-saving behavior and allow hardware to respond more aggressively during demanding workloads. The actual benefit depends heavily on your processor, cooling system, graphics hardware, and workload.

Before changing your power plan, consider what you actually do on your computer. Gaming, video editing, 3D rendering, and large development projects can benefit more than basic browsing. This guide explains when performance mode is useful, whether 32GB RAM is excessive, and how well seven-year-old computers can still handle modern tasks.

Is performance mode worth using?

Performance mode is useful when your computer regularly handles demanding workloads that benefit from consistent responsiveness. Depending on the system, this setting can reduce aggressive power-saving behavior and allow the processor to maintain higher performance states for longer periods. This can help during gaming, video editing, rendering, compiling, and other CPU-intensive workloads.

The difference is usually much smaller during ordinary tasks. Browsing websites, writing documents, watching videos, and checking email rarely require sustained maximum performance. In these situations, performance mode may increase power consumption and fan activity without producing an obvious speed improvement.

Laptops require extra consideration because performance-focused settings can reduce battery life. If your laptop already loses power quickly, understanding the causes of laptop battery drain can help you decide whether a performance-focused setting is worthwhile. They may also increase operating temperatures when the system is unplugged or working under heavy loads.

For most people, the practical approach is simple:

  • Use performance mode for demanding workloads.
  • Use Balanced for everyday computing.
  • Switch settings based on your current workload when necessary.

Real-World FPS and Latency Differences

Performance profiles do not automatically produce large increases in gaming frame rates. Your GPU, CPU, game settings, resolution, and thermal limits usually have a much greater effect on average FPS. Your graphics card also handles far more than gaming, including tasks such as video processing, rendering, and certain creative workloads. Learning about what your GPU can do besides play games can help put its broader capabilities into perspective. If your graphics card is already operating at its normal performance level, changing the Windows power plan may produce only a small difference.

The more noticeable benefit can appear in frame-time consistency and responsiveness. A performance-focused profile may reduce some power-state transitions and help the CPU respond more consistently during demanding moments. This can matter in competitive games where small latency changes are noticeable.

However, results vary significantly between systems. Modern processors already adjust their clock speeds dynamically. Some desktops and laptops therefore show little measurable improvement after changing the power plan.

If gaming performance is your priority, check actual benchmark results rather than assuming the setting works. Monitor average FPS, 1% low FPS, frame times, temperatures, and power consumption before and after making the change.

Is 32GB RAM overkill for Windows 11?

For many Windows 11 users, 32GB RAM is not overkill, but it is not necessary either. The right amount depends on your applications and multitasking habits. People who use many browser tabs, virtual machines, creative software, development tools, or demanding games can benefit from the additional memory capacity.

For basic tasks, 16GB remains sufficient for many users. Web browsing, office applications, video streaming, and everyday communication generally do not require 32GB. Moving to 32GB becomes more useful when several memory-heavy applications run simultaneously.

Additional RAM also gives Windows more room to keep active applications and cached data in memory. This can reduce the need to move data between RAM and slower storage when memory pressure becomes high.

Consider 32GB if you regularly:

  • Run multiple demanding applications together.
  • Edit high-resolution photos or videos.
  • Use virtual machines or development environments.
  • Play demanding games while running other applications.
  • Want additional memory headroom for future software.

Future-Proofing for Modern Computing Demands

Software requirements generally increase over time, although the pace varies between applications. Additional RAM can therefore provide useful headroom as browsers, creative applications, games, and development tools become more demanding.

A 32GB system gives you more flexibility when running several applications simultaneously. For example, you could keep a browser, code editor, database tools, communication software, and virtual machine open without approaching the limits of a 16GB configuration as quickly. When deciding whether an older PC can handle these demands, it is also useful to understand how to safely upgrade to Windows 11 without losing data.

However, buying more RAM does not automatically make a computer faster. If your workload rarely uses more than 16GB, additional memory may provide little noticeable improvement. Other components can become the actual bottleneck.

Before upgrading, check memory usage in Task Manager while performing your normal workload. Consistently high memory usage is stronger evidence for an upgrade than simply wanting more capacity.

For users building a new PC, 32GB can also provide a comfortable margin for multitasking. For existing systems, upgrading makes more sense when current workloads regularly approach available memory.

Is a 7 year old computer still good?

A seven-year-old computer can still handle many everyday tasks, especially when it has an SSD and sufficient RAM. Office applications, web browsing, streaming, email, and basic cloud services can remain perfectly usable on older hardware.

Replacing a mechanical hard drive with an SSD can make an older computer feel significantly more responsive. Boot times, application launches, and general file access can improve substantially compared with an aging HDD.

The limitations become clearer with demanding workloads. Modern games, advanced video editing, 3D rendering, and newer software can place heavy demands on older processors and graphics hardware. Older systems may also lack support for newer hardware-based security requirements.

Before replacing a seven-year-old PC, consider what you actually need it to do. If it handles your daily tasks reliably, an upgrade may not be necessary.

An older computer can remain useful when:

  • It has adequate RAM.
  • Storage has been upgraded to an SSD.
  • The operating system remains supported.
  • Your applications still meet the hardware requirements.
  • Performance remains acceptable for your workload.

Overcoming Modern Operating System Limitations

Age-related software compatibility can become a bigger problem than raw performance. Some older processors and motherboards lack the hardware features required for officially supported versions of newer operating systems. Windows 11, for example, has specific hardware and security requirements that can exclude some older PCs.

TPM 2.0, supported processors, Secure Boot, and firmware configuration can all affect compatibility. A computer that performs well may therefore still face an operating system upgrade limitation.

Instead of replacing an otherwise functional computer immediately, check whether the manufacturer provides compatible firmware updates or supported upgrade paths. You should also verify the official requirements for the operating system you plan to install.

Lightweight Linux distributions can be another option for older hardware when appropriate. They can provide a modern environment for browsing, documents, media, and administrative tasks. However, software compatibility and hardware support should be checked first.

Avoid treating unsupported operating system installations as automatically safe. Security updates, driver support, and application compatibility should remain important considerations when extending an older PC’s lifespan.

Should you set your PC to high performance mode?

You should use High Performance mode when your workload genuinely benefits from sustained responsiveness. This can include CPU-heavy compilation, rendering, certain workstation applications, and workloads where frequent power-state changes affect performance consistency.

However, High Performance mode is not a universal speed boost. Modern processors dynamically manage their frequency and power according to workload, temperature, and hardware limits. Changing the power plan cannot overcome an underpowered CPU, weak GPU, insufficient RAM, or thermal throttling.

On everyday laptops, keeping the system in High Performance mode can also increase power consumption, fan noise, and heat. The additional performance may be difficult to notice during basic browsing or office work.

A practical approach is to use different settings for different situations. Keep Balanced mode for normal work and switch to a performance-focused plan when running demanding applications.

Also remember that the exact behavior varies by Windows version and manufacturer. Some laptops use custom power-management software instead of relying entirely on standard Windows power plans.

Managing System Temperatures and Fan Noise

Performance-focused settings can increase power consumption during sustained workloads. More electrical power eventually becomes more heat, which means the cooling system may need to work harder. This can result in faster fan speeds and greater operating noise. If your PC also takes longer to start or shut down, understanding Fast Startup on your PC can help you distinguish power-management behavior from startup-related settings.

Heat management depends on more than the Windows power plan. CPU and GPU workload, ambient temperature, cooling design, dust buildup, thermal paste, and fan condition can all influence temperatures.

For desktops, adequate case airflow helps move warm air away from the processor and graphics card. Laptops have less cooling capacity, so performance settings can have a more noticeable effect on temperatures and battery life.

If your PC becomes unusually hot, changing the power plan should not be the only solution. Check temperatures under load and inspect the cooling system for dust or restricted airflow.

Balanced settings are often sufficient for everyday computing because modern processors already adjust performance dynamically. Use maximum-performance settings when the workload justifies them rather than leaving them enabled without a specific reason.

Frequently Asked Questions

Does performance mode damage your PC over time?

Performance mode does not normally damage a modern computer by itself. Processors and other components include thermal and power protections designed to prevent operation outside safe limits. However, a performance-focused power plan can increase power consumption and heat under certain workloads.

Higher temperatures sustained over long periods can contribute to faster component aging. This does not mean that enabling performance mode will suddenly shorten your computer’s lifespan. The actual effect depends on the hardware, cooling system, workload, and operating environment.

Laptop users should pay particular attention to battery temperature and battery health. Heat is an important factor in battery aging, especially when the system is frequently operating under heavy loads.

Good maintenance can reduce unnecessary thermal stress:

  • Keep cooling vents clear.
  • Clean accumulated dust from fans and heatsinks.
  • Avoid blocking laptop ventilation.
  • Monitor CPU and GPU temperatures during heavy workloads.
  • Use Balanced mode when maximum performance is unnecessary.

The key issue is sustained heat, not the name of the power plan itself. Modern hardware is designed to manage normal performance workloads safely.

Why does my PC feel hot when performance mode is active?

Your PC may feel hotter because performance-focused settings can reduce some power-saving behavior. Instead of allowing the processor to spend as much time in lower-power states, the system may maintain higher performance states more readily during activity.

Higher electrical power consumption produces additional heat. The cooling system then has to remove that heat from the processor and other components. As a result, fans may run faster, and the laptop chassis or desktop exhaust may feel warmer. If your PC also behaves differently when entering or leaving low-power states, comparing Sleep Mode vs Shutdown can help explain those differences.

The effect is more noticeable during demanding tasks such as gaming, rendering, video editing, or software compilation. On a desktop with strong cooling, the temperature increase may be relatively modest. On a thin laptop, the difference can be more obvious because the cooling system has less thermal capacity.

Performance mode is therefore not necessarily causing a problem. A warmer system can be expected when it is using more power.

Still, unusually high temperatures should not be ignored. Check your CPU and GPU temperatures, clean blocked vents, and investigate cooling problems if temperatures remain excessive.

Can performance mode increase download and internet speeds?

Performance mode does not increase the maximum bandwidth provided by your internet connection. Your download speed is primarily determined by your internet plan, network conditions, router, Wi-Fi connection, server capacity, and other factors.

Changing the Windows power plan therefore will not turn a 100 Mbps connection into a 500 Mbps connection. Network hardware and the quality of your connection remain the primary factors.

However, CPU performance can affect certain tasks that happen after or during a download. For example, software may need to decompress files, verify packages, encrypt data, or write large amounts of information to storage. A faster-performing system can sometimes complete these processing tasks sooner.

That does not mean the internet connection itself became faster. It simply means the computer may process downloaded data more efficiently.

If downloads are slow, investigate the network before changing the power plan. Test your connection speed, check Wi-Fi signal quality, restart network equipment when appropriate, and compare results across different servers or devices.

Is the Ultimate Performance mode safe for everyday desktop use?

The Ultimate Performance power plan is generally safe to use on compatible desktop hardware. However, safe does not mean useful for every workload. The plan is designed to reduce certain power-saving behaviors and prioritize sustained performance.

For demanding workloads, these settings can be useful when consistent responsiveness matters. Examples include workstation applications, rendering, some development workloads, and other sustained computational tasks.

For basic browsing, document editing, email, and media playback, the additional power consumption usually provides little practical benefit. Modern processors already manage their performance states dynamically, so an aggressive power plan is not required for normal responsiveness.

Desktop cooling also matters. A system with adequate airflow can handle higher sustained power more comfortably than a poorly ventilated machine. Performance settings should therefore be considered alongside your hardware’s thermal design.

If your computer is mainly used for everyday tasks, Balanced mode is generally sufficient. If you regularly perform demanding workloads, compare actual performance, temperatures, fan noise, and power consumption before deciding whether Ultimate Performance provides a measurable advantage.

Conclusion

Built-in Windows power configurations can be useful when matched to the right workload. Performance mode may help maintain more consistent responsiveness during demanding tasks, but it does not automatically deliver a major speed increase.

For gaming, rendering, software compilation, and other intensive workloads, a performance-focused profile can be worth testing. For browsing, office work, and media consumption, Balanced mode is often sufficient while using less power and producing less heat.

Memory capacity also matters. 32GB RAM provides useful headroom for demanding multitasking, creative applications, development environments, and some modern games. However, 16GB remains adequate for many everyday users.

A seven-year-old computer can also remain useful when its hardware meets your needs. An SSD, sufficient memory, supported software, and reasonable thermal performance can extend its practical lifespan.

Ultimately, power settings should complement your hardware rather than substitute for necessary upgrades. Monitor actual performance and temperatures, identify the real bottleneck, and choose the setting that fits your workload.

How to Get the Highest-Quality Audio Out of YouTube Music

How to Get the Highest-Quality Audio Out of YouTube Music

To get the highest-quality audio out of YouTube Music, open the app and check its audio settings. On Android, tap your profile picture, choose Settings, then Data saving. From there, open the audio-quality settings for Wi-Fi and mobile networks. You can select High or Always High, depending on your needs.

YouTube Music lists 256 kbps AAC and OPUS for the Always High setting. The app also offers Normal at up to 128 kbps and Low at up to 48 kbps. Always High is designed to maintain the selected high quality when the connection becomes poor.

Streaming platforms make music discovery effortless, but default configurations may not deliver the highest available quality. If you want the highest-quality audio out of YouTube Music, start by checking your playback settings. YouTube Music’s official audio-quality guide explains how High and Always High settings work and what bitrates are available.

For offline listening, open Settings > Download & storage > Audio quality. Select High if you want downloads at 256 kbps. Previously downloaded tracks do not automatically change quality. You must download them again after changing the setting.

These settings provide the highest-quality audio out of YouTube Music through the standard YouTube Music controls.

How to Get High-Quality Audio From YouTube Music

To get the highest available streaming quality, open the YouTube Music app and check its audio settings. On Android, tap your profile picture, choose Settings, then Data saving. From there, open the audio-quality settings for Wi-Fi and mobile networks. You can select High or Always High, depending on your needs.

YouTube Music lists 256 kbps AAC and OPUS for the Always High setting. The app also offers Normal at up to 128 kbps and Low at up to 48 kbps. Always High is designed to maintain the selected high quality when the connection becomes poor.

For offline listening, open Settings > Download & storage > Audio quality. Select High if you want downloads at 256 kbps. Previously downloaded tracks do not automatically change quality. You must download them again after changing the setting.

These settings provide the highest quality currently offered through the standard YouTube Music controls.

Enable Persistent High-Bitrate Streaming

The Always High setting is useful when you want YouTube Music to prioritize high-quality playback. According to YouTube Music’s current help documentation, this setting maintains 256 kbps AAC or OPUS even when your connection becomes poor. That makes it different from settings that can reduce quality to save data.

The trade-off is increased data consumption. High-quality streaming uses more data than Normal or Low quality. This matters most when you frequently stream music over a limited cellular plan.

For unlimited or generous mobile data, Always High can be convenient. For restricted plans, consider using High or Always High mainly over Wi-Fi. You can also enable the app’s Stream via Wi-Fi only option when you want to prevent mobile-data streaming.

Remember that higher bitrate does not automatically mean dramatically better sound. Your headphones, speakers, listening environment, and the original recording also affect what you hear.

The important goal is simple: choose the highest setting that fits your data usage without creating unnecessary restrictions.

How to Get Better Audio Quality on YouTube Music

Changing YouTube Music’s bitrate is only one part of improving sound quality. Your playback equipment can also influence the final listening experience. Start with headphones or speakers that produce a balanced sound rather than relying only on software adjustments.

If you are deciding between wired and wireless headphones, Wired vs Wireless Audio explains the key differences between these two listening options. Bluetooth audio quality varies by device, codec, and connection. A more expensive codec does not automatically guarantee a dramatic improvement.

You should also check whether your phone or headphones apply an equalizer, sound enhancer, bass boost, or other processing. These features change the sound rather than increasing the source bitrate. Some listeners prefer them, while others prefer a flatter presentation.

Volume normalization can also change perceived loudness between tracks. If you dislike its effect, compare playback with the setting enabled and disabled.

The best approach is to make one change at a time. Set YouTube Music to High, use familiar tracks, and then evaluate your headphones or speakers. This makes it easier to identify what actually improves your listening experience.

Connect a Dedicated External DAC

A DAC, or digital-to-analog converter, converts digital audio into the analog signal used by headphones or speakers. Many smartphones already include a DAC internally, so adding an external model is not automatically an upgrade.

An external DAC can be useful when your existing audio hardware has problems. These may include noticeable noise, poor amplification, or limited compatibility with demanding headphones. A good DAC can provide a cleaner output when the phone’s built-in hardware is the limiting factor.

However, a DAC cannot turn YouTube Music’s compressed stream into a lossless recording. The source remains the source. If YouTube Music provides a 256 kbps AAC or OPUS stream, an external DAC simply converts that available digital signal for playback.

For most casual listeners, upgrading headphones may produce a more noticeable difference than buying an expensive DAC. Your headphones have a direct influence on frequency balance, detail, comfort, and soundstage.

If your current setup already sounds clean, an external DAC may offer little practical benefit. Consider one when you have a specific hardware limitation to solve.

Does YouTube Music Offer 320kbps?

YouTube Music’s current Android help documentation lists 256 kbps AAC and OPUS as the maximum bitrate for its High and Always High streaming options. It does not list a 320 kbps streaming option in those settings.

This does not mean 256 kbps AAC and 320 kbps MP3 are directly interchangeable in every technical situation. Different codecs use different compression methods. A bitrate number alone cannot fully describe perceived audio quality.

YouTube Music also supports OPUS at its listed high-quality bitrate. Therefore, describing the service simply as a 256 kbps AAC platform is incomplete. The current documentation identifies AAC and OPUS for the available quality tiers.

For Premium members, the practical takeaway is straightforward. Select High or Always High when you want the highest available streaming quality. Free users do not get the same Premium quality controls described in YouTube Music’s current help documentation.

You also do not need to chase a 320 kbps number simply because another service advertises it. Codec efficiency and the quality of the original source both matter when comparing music streaming services.

Understanding AAC and OPUS Versus MP3

Bitrate is only one part of digital audio quality. AAC, OPUS, and MP3 use different encoding technologies, so identical bitrate numbers do not guarantee identical results.

YouTube Music currently identifies AAC and OPUS as formats used by its quality settings. Its High and Always High options reach 256 kbps.

That means comparing YouTube Music’s 256 kbps setting directly with another platform’s 320 kbps setting can be misleading. Spotify vs. Apple Music also shows why streaming quality comparisons involve more than bitrate alone. The codecs may produce different results at the same bitrate. The original master, encoder settings, playback hardware, and listener can also affect the result.

For everyday listening, the more useful question is whether your current setup sounds good to you. If you notice harsh treble, weak bass, or other problems, changing headphones may help more than focusing on bitrate alone.

You should also avoid assuming that higher numbers always produce audible improvements. Once compression becomes sufficiently transparent for a particular listener and recording, further increases may be difficult to notice.

For YouTube Music users, selecting High or Always High is the practical way to access the platform’s highest listed streaming quality.

Does YouTube Music Offer High-Resolution Audio?

YouTube Music’s current audio-quality documentation lists streaming options up to 256 kbps AAC and OPUS. It does not document a lossless or high-resolution streaming tier in its standard quality settings.

That distinction matters because high-resolution audio is not simply another bitrate setting. High-resolution services typically offer formats with higher sample rates, greater bit depth, or both. Lossless formats also preserve the original audio data rather than using lossy compression.

YouTube Music’s highest listed quality remains a compressed streaming option. Therefore, listeners specifically looking for documented lossless or high-resolution catalogs may need to consider services that explicitly offer those formats.

However, the absence of high-resolution streaming does not make YouTube Music unsuitable for everyday listening. A properly encoded compressed stream can still sound clear and detailed through good headphones or speakers.

The most useful approach is to match the service to your priorities. If convenience, catalog access, recommendations, and video integration matter most, YouTube Music can remain practical. If lossless or high-resolution files are essential, check whether your chosen service explicitly supports them.

Hardware Limitations With Compressed Catalogs

Expensive audio hardware cannot restore audio information that has already been removed by lossy compression. This is an important limitation when building a high-end listening setup around YouTube Music.

A powerful amplifier, premium DAC, or expensive headphones can still change what you hear. Better headphones may provide improved frequency balance, separation, imaging, and comfort. A clean DAC or amplifier can also help when existing hardware has measurable or audible limitations.

But these improvements should not be confused with increasing the source resolution. If the stream is delivered at YouTube Music’s listed 256 kbps maximum, the hardware receives that compressed signal. It cannot reconstruct the exact original master from the missing information.

This does not mean high-quality equipment is pointless. It means the equipment should be chosen for the improvements it actually provides.

For most listeners, a sensible upgrade path is simple. First optimize the YouTube Music settings. Then use good headphones or speakers. Only consider additional equipment when you can identify a specific limitation that needs fixing.

Will YouTube Music Ever Get Lossless Audio?

There is no current YouTube Music help documentation announcing a lossless streaming tier. The service’s current documented quality controls continue to top out at 256 kbps AAC and OPUS.

That makes future lossless support difficult to predict. Google could change the service later, but there is no reliable basis for stating when that might happen. Speculation about future products should therefore be separated from the features available today.

Lossless streaming would also involve more than simply increasing a bitrate number. It would require suitable source files, delivery infrastructure, storage considerations, and a product strategy that supports the feature.

Bluetooth is another consideration, although its capabilities vary by codec and device. Some wireless systems apply their own compression, so a lossless source does not always mean lossless transmission to the headphones.

For now, YouTube Music users should focus on the options that are actually available. Set streaming quality to High or Always High, choose High for downloads, and use suitable headphones or speakers.

If Google introduces a lossless tier, its official documentation will be the appropriate source for confirming the format, bitrate, availability, and subscription requirements.

Competitive Pressure and Future Developments

Competition can influence how streaming services develop their audio features, but it cannot reliably predict what YouTube Music will launch next. If you are still deciding whether the platform fits your listening needs, Why You Should Switch To YouTube Music Today explores the broader reasons to use the service. Other music platforms may offer lossless or high-resolution options, creating additional choices for listeners who prioritize those formats.

YouTube Music’s current documentation still lists 256 kbps AAC and OPUS as the highest quality for its standard streaming settings. This is the clearest reference point for users deciding what the service currently provides.

Future developments could include new codecs, higher bitrates, lossless formats, or other audio features. However, none should be presented as confirmed until Google announces them.

For now, users can make the most of the existing platform by choosing the highest available quality. Premium members can control streaming and download quality through the app’s settings.

It is also worth considering whether you can actually hear a meaningful difference before changing services. Your headphones, listening environment, and preferred music can have a larger practical effect than theoretical specifications.

If lossless audio is a non-negotiable requirement, compare services based on their currently documented formats. Do not base the decision on rumors about possible future upgrades.

Frequently Asked Questions

Does YouTube Music sound worse than Spotify?

YouTube Music does not inherently sound worse than Spotify. At top settings, YouTube Music streams 256kbps AAC, whereas Spotify delivers 320kbps Ogg Vorbis to premium subscribers. Because AAC is an extremely transparent codec, both services sound nearly identical in blind listening tests. Sound discrepancies usually stem from volume normalization settings or different master track uploads.

How much cellular data does YouTube Music use at top quality?

At the Always High setting, YouTube Music consumes roughly 115 megabytes of cellular data per hour of playback. In comparison, standard 128kbps streaming uses around 58 megabytes per hour. If you maintain a restricted mobile data plan, download your playlists over home Wi-Fi to preserve your cellular allowance.

Does using the web browser player decrease audio fidelity?

The web browser player limits output fidelity depending on your network conditions and browser codecs. While premium subscribers can access 256kbps AAC in modern browsers like Chrome, background tab management can occasionally force downsampling. For consistent acoustic playback, install the official progressive web app and explicitly set quality to High.

Can an equalizer really make YouTube Music sound cleaner?

A device equalizer cannot restore lost sonic detail stripped away by lossy compression, but it can balance your audio hardware. Tweaking the frequency bands smooths out harsh treble or boomy bass caused by consumer headphones. This tuning allows instruments to sound more natural, significantly improving perceived fidelity during listening sessions.

Conclusion

Getting the highest-quality audio out of YouTube Music does not require an expensive audio system. Start with the settings that directly control the stream. YouTube Music currently lists 256 kbps AAC and OPUS as the highest bitrate for its High and Always High options.

Premium members can open the app’s audio settings and select High or Always High for streaming. For offline music, choose High under the download-quality settings. Remember that existing downloads must be downloaded again after changing their quality.

Your playback hardware also matters, but expensive equipment cannot restore information removed by lossy compression. Good headphones or speakers can still make the available signal sound more balanced and detailed.

An external DAC can help when your device has a genuine audio-output limitation. It should not be treated as a way to turn compressed YouTube Music streams into lossless recordings.

Finally, focus on the changes you can actually hear. Optimize the app settings first, use capable headphones, and adjust equalization only when needed. This approach gives you the highest practical quality from the service without spending money where it may not make a noticeable difference.

4 Ways Scammers Are Using AI To Trick You

4 Ways Scammers Are Using AI to Trick You

Modern cybercriminals are becoming harder to spot because scammers are using AI to create convincing and highly personalized fraud. They use artificial intelligence to produce realistic emails, clone voices, generate deepfake videos, and create fake online personas. These AI scams can appear through phone calls, social media, emails, dating platforms, and business communications.

The Federal Trade Commission has warned consumers about scams involving artificial intelligence and impersonation. Generative AI allows criminals to create personalized deceptive content faster and at lower cost.

Understanding these threats can help protect your identity, money, and family. AI voice cloning, deepfake video, automated phishing, and personalized scams can make traditional warning signs harder to recognize.

This guide explains how scammers use AI to manipulate victims. You will learn how AI scams work, how criminals can clone voices, and how automated tools improve traditional fraud. You will also learn safer ways to handle suspicious calls and messages.

1. AI Voice Cloning and Audio Tricks

AI voice cloning allows scammers to imitate the voice of a real person. They may collect short audio clips from social media, public videos, podcasts, voicemail recordings, or other online sources. Modern systems can generate increasingly realistic speech from relatively small audio samples, although the amount required varies by tool and recording quality.

The scammer can then use the generated voice during a phone call. They may pretend to be a family member facing an emergency or a trusted professional handling a financial transaction. A fake emergency might involve an arrest, accident, kidnapping, or urgent medical situation.

These scams work because hearing a familiar voice can create a strong sense of trust. Criminals then add urgency and pressure to prevent careful verification.

Protect yourself by:

  • Calling the person directly using a trusted number.
  • Creating a private family safe word or verification phrase.
  • Avoiding immediate money transfers during unexpected emergencies.
  • Treating voice recognition as only one part of identity verification.

A familiar voice should never be the only reason you trust an urgent request.

2. Sophisticated and Flawless AI Phishing

AI has made phishing scams easier to personalize and scale. Older phishing emails often contained obvious clues, such as spelling mistakes, poor formatting, generic greetings, or unusual wording. Generative AI can help criminals produce polished messages that look much more professional. For a deeper look at this evolving threat, see how AI phishing attacks are becoming more dangerous.

Scammers can also combine AI with publicly available information. They may use details about your location, workplace, interests, professional relationships, or recent activities. AI can then turn those details into personalized messages that appear relevant to your situation.

A fraudulent message might imitate a colleague, financial institution, company executive, or government agency. The message may ask you to open a link, download an attachment, provide credentials, or approve a payment.

Be cautious when a message creates unexpected urgency. Pay particular attention to:

  • Payment or bank-account changes
  • Unexpected password-reset requests
  • Requests for confidential documents
  • Suspicious links or attachments
  • Unusual requests from familiar contacts

Instead of replying directly, verify the request through a separate trusted channel. Perfect grammar does not prove that a message is legitimate.

3. Deepfakes and Real-Time Face Swaps

Deepfake scams use manipulated or AI-generated audio and video to impersonate real people. Unlike traditional text-based scams, these attacks can make victims believe they are seeing and hearing a trusted person. Understanding how deepfake technology works and how it can be detected can make these impersonation attempts easier to evaluate.

Scammers may create fake videos featuring celebrities, executives, public figures, or other recognizable individuals. They can use these videos to promote fraudulent investments, products, or financial opportunities. Some criminals can also use real-time face manipulation during video calls.

Businesses face another risk through business email compromise (BEC) and related impersonation attacks. A criminal may attempt to imitate an executive or business partner during a virtual meeting. The goal may be to persuade an employee to transfer money or change payment instructions.

Do not assume a video call proves someone’s identity. Watch for unusual requests and verify important instructions independently.

For high-risk transactions:

  • Confirm the request through another communication channel.
  • Contact the person using a known phone number.
  • Follow established financial approval procedures.
  • Never bypass normal verification because someone appears familiar on video.

AI-generated video can look convincing, so independent verification remains essential.

4. AI-Powered Chatbots and Fake Personas

Generative AI can help scammers create convincing fake online personas at a much larger scale. Instead of manually building one fictional identity, criminals can use AI to generate professional biographies, profile descriptions, images, messages, and other supporting content.

These fake identities may appear on dating platforms, social networks, marketplaces, or professional websites. Scammers can combine them with AI chatbots that maintain natural conversations over long periods. This makes it increasingly important to develop strong digital literacy skills when evaluating online identities and conversations.

Romance scams are one potential use. A criminal may create a believable profile and build trust before eventually requesting money. Similar techniques can appear in fake buyer or seller transactions, where the victim is pushed toward an unusual payment method or rushed through normal checks.

AI-generated conversation can make the scam feel personal. However, a natural conversation does not prove that the person is genuine.

Watch for:

  • Requests to move conversations quickly to another platform.
  • Reluctance to meet or verify identity.
  • Unusual payment requests.
  • Investment opportunities promising unrealistic returns.
  • Profiles with inconsistent personal information.

Before sending money or sensitive information, verify the person’s identity independently. Take extra care when an online relationship develops unusually quickly.

How Do You Trick a Scammer Safely?

Trying to trick a scammer can feel satisfying, but engaging with them carries unnecessary risks. The safer goal is to protect yourself, verify the claim, and end the interaction. You do not need to waste the scammer’s time or prove that you recognized the fraud.

If you receive a suspicious call, avoid sharing personal information. Do not confirm your name, address, account details, passwords, or security codes. Instead, ask who is calling and why they need the information. You can then end the call and follow these steps if you click a suspicious link before contacting the organization independently.

How Do People Get Tricked by AI?

People can fall for AI scams because artificial intelligence makes deceptive content more convincing and easier to personalize. Generative AI can produce realistic emails, messages, images, audio, and video in seconds. Learning how to spot fake news and misinformation online can also help people question suspicious digital content before trusting or sharing it.

Traditional scams often contained obvious warning signs. Messages might have poor grammar, generic greetings, or unusual wording. AI tools can reduce those signs by producing polished content that resembles normal communication.

Scammers can also use publicly available information to create convincing stories. They may reference your workplace, relatives, interests, recent activities, or professional relationships. This creates a sense of familiarity that makes the request seem genuine.

How Is AI Perfecting Scamming Techniques?

AI is helping criminals make traditional scams more personalized. Instead of sending the same message to thousands of people, scammers can create different messages for specific targets.

Criminals may gather information from public social media profiles, company websites, professional directories, and other accessible sources. AI can then help organize that information and generate a message that appears relevant to the target.

For example, a fraudulent email might mention a real workplace project or imitate the communication style of a manager. The message may then request an urgent payment or sensitive information.

How Can Scammers Use My Voice?

Scammers can use AI voice cloning to create speech that resembles another person’s voice. They may obtain audio from public videos, social media posts, podcasts, voicemail recordings, or other sources.

Modern voice-generation systems can produce increasingly realistic speech from relatively small audio samples. However, the amount of audio required varies by technology and recording quality. A claim that every system needs only three to five seconds is too broad.

Once a voice model has been created, criminals may generate phrases that sound like the targeted person. They can then use the audio during phone calls or other communications.

What Should You Never Say to a Scammer?

There is a common warning that you should never say “yes” during an unfamiliar call. However, simply saying the word “yes” is not generally enough to authorize a transaction or create a valid contract. The larger risk is sharing information or confirming details that criminals can use.

Scammers may ask questions designed to collect personal information. They might request your full name, account number, password, one-time code, or other identifying details. Using two-factor authentication can add another layer of protection if a password is exposed.

Avoid providing information simply because the caller sounds convincing. Caller ID can also be spoofed, so the displayed number is not reliable proof of identity.