
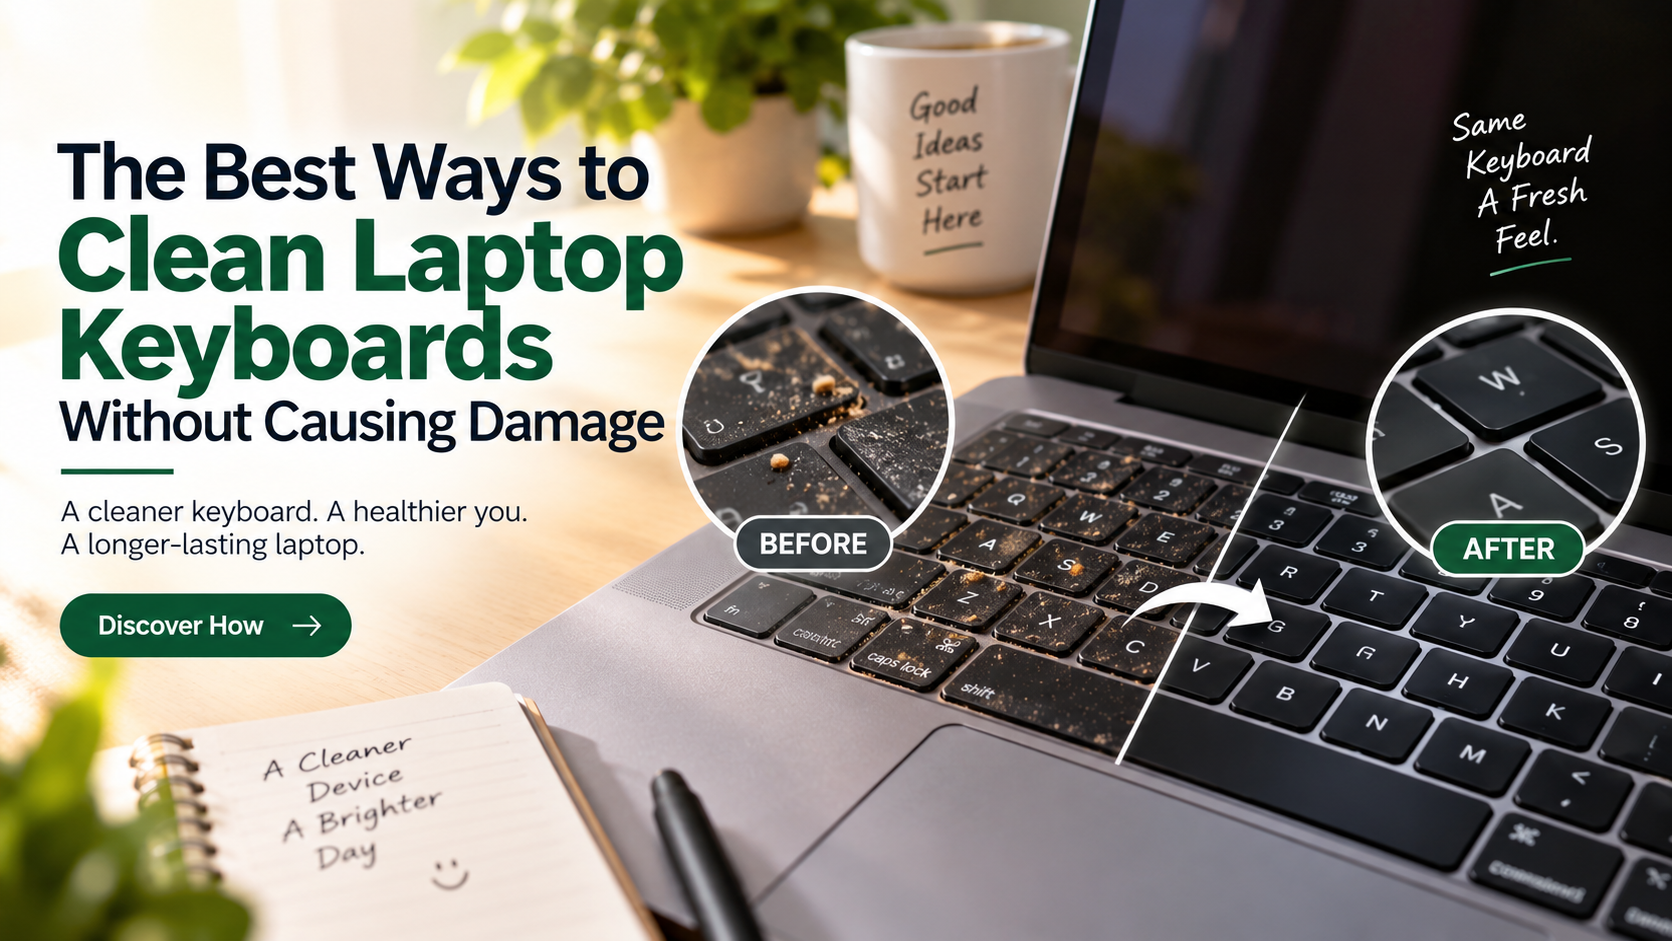
The Best Ways to Clean Laptop Keyboards Without Causing Damage
Learning how to clean laptop keyboards safely helps remove dust, crumbs, skin oils, and everyday grime. Regular cleaning also keeps keys comfortable, responsive, and more hygienic during daily use.
Dust, food crumbs, and skin oils can quickly build up between laptop keys. Daily typing pushes debris into small gaps around the keycaps. Over time, this buildup can cause sticky keys, poor responsiveness, and hygiene concerns.
Proper laptop keyboard cleaning also helps protect sensitive internal components. You can remove most surface dirt without taking the laptop apart. The key is to use gentle tools and keep moisture away from openings. For additional guidance, check Apple’s official cleaning recommendations before you clean laptop keyboards.
Before you start, shut down the laptop and disconnect its power cable. Avoid aggressive scrubbing, excessive moisture, and unsuitable household cleaning products.
In this guide, you will learn how to clean laptop keyboards safely and effectively. We will cover dust removal, disinfection, moisture control, and keycap care. You will also learn which common cleaning methods can damage your laptop.
What is the best way to clean a laptop keyboard?
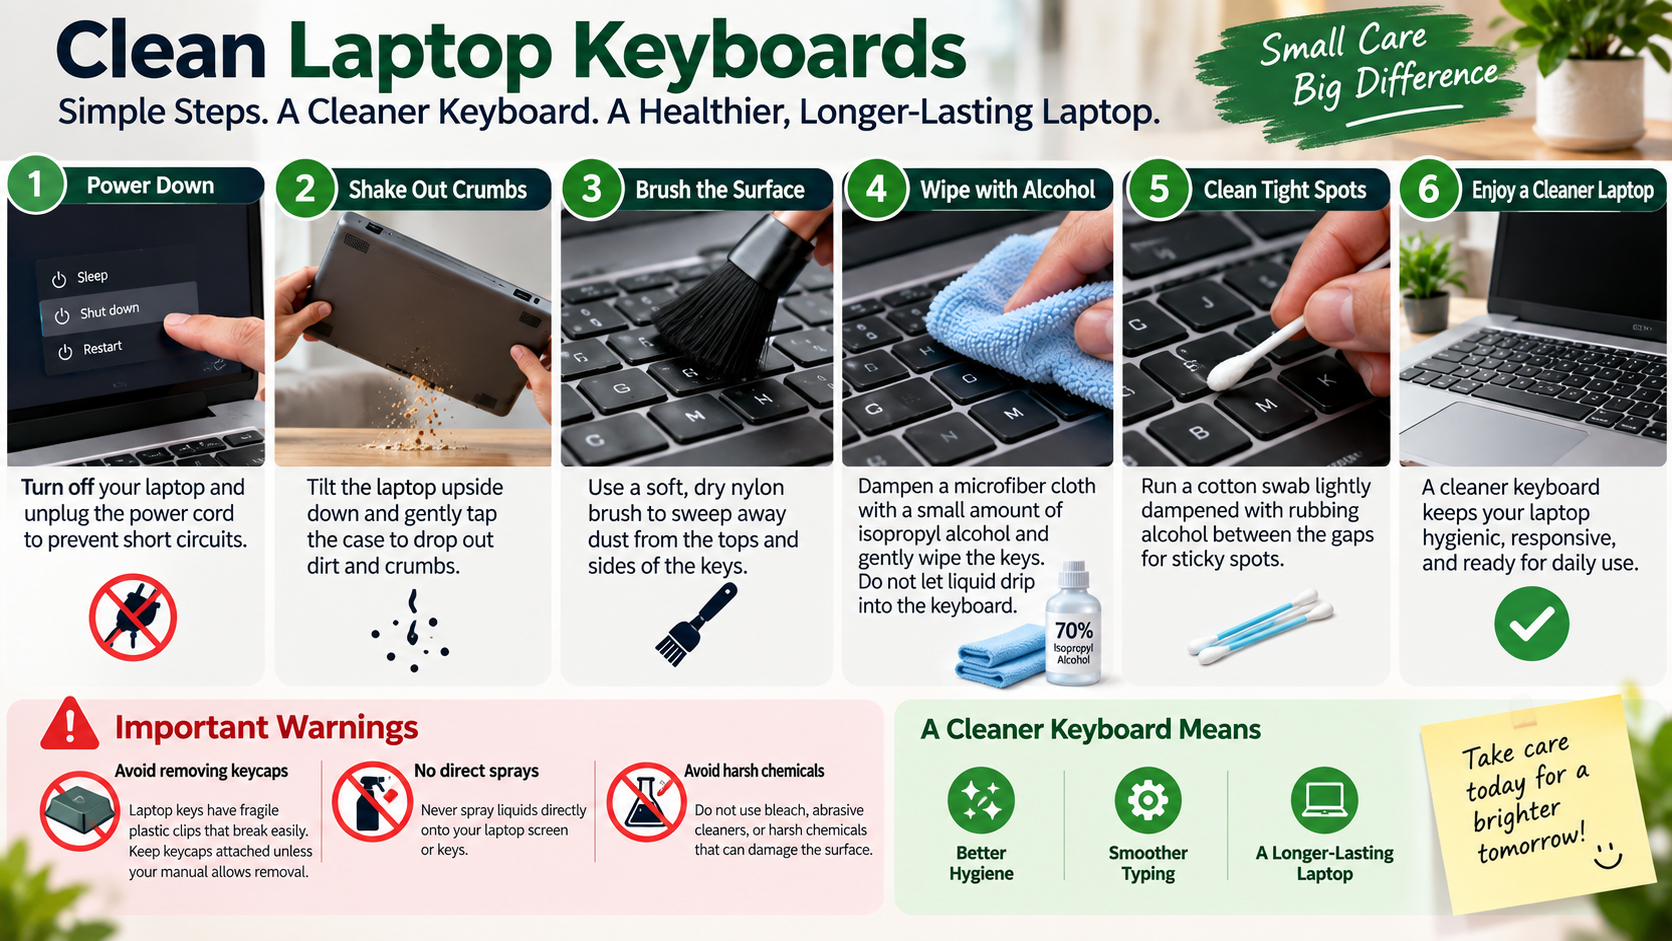
The safest way to clean laptop keyboards starts with completely shutting down the computer. Disconnect the charger and any other connected accessories before beginning. This simple step reduces electrical risks during cleaning.
Hold the laptop at a slight angle or turn it upside down carefully. Gently tap the base to release loose crumbs and dust. Do not shake the device forcefully, as this could stress internal components.
Next, use compressed air to loosen debris around the keys. Keep the can upright and use short bursts. Move across the keyboard rather than concentrating air on one area.
After removing loose debris, wipe the key surfaces with a lint-free microfiber cloth. For sanitizing, use a cloth or wipe lightly dampened with 70% isopropyl alcohol. Never spray liquid directly onto the keyboard.
This routine removes common dirt while limiting moisture exposure. It also avoids unnecessary pressure on delicate scissor mechanisms and membrane components. Regular laptop keyboard cleaning can help prevent grime from becoming harder to remove. For more information about keyboard design, see Mechanical vs Membrane Keyboard for Gamers: Which Wins?

Proper Compressed Air Technique
Compressed air can remove dust and crumbs that a cloth cannot reach. However, it should be used carefully when you clean laptop keyboards. Improper use can force debris deeper into the device or introduce liquid propellant.
Keep the compressed-air canister upright during use. This helps prevent liquid propellant from reaching the keyboard. Use several short bursts instead of one long blast.
Hold the nozzle several inches above the keyboard surface. A distance of around four inches can provide useful airflow without excessive pressure. Follow the manufacturer’s instructions for the specific product you use.
Move the airflow across the rows rather than directly into one key for an extended period. This approach helps loosen trapped particles without putting unnecessary stress on the key mechanisms.
Avoid turning the laptop upside down while aggressively spraying compressed air. Use a stable position that lets debris fall away naturally.
For best results, combine compressed air with a soft detailing brush. This provides a gentle way to lift remaining particles without removing keycaps. These techniques make cleaning laptop keyboards safer and more controlled. You can also learn more about Boost Your Wireless Keyboard’s Lifespan With One Easy Habit for additional keyboard care tips.
Can I use alcohol wipes on my laptop keyboard?
Yes, 70% isopropyl alcohol can be suitable for cleaning many laptop keyboard surfaces. However, the cleaning method matters as much as the product itself. Excess moisture can enter the spaces around the keys and damage internal components.
Choose a pre-moistened electronics-safe wipe or lightly dampen a microfiber cloth. The cloth should feel damp, not wet or dripping. If necessary, squeeze out excess liquid before touching the keyboard.
Gently wipe the tops of the keys and other exterior surfaces. Avoid pressing liquid toward the edges of individual keycaps. Never pour alcohol onto the keyboard or spray it directly onto the laptop.
Isopropyl alcohol evaporates quickly and helps remove fingerprints and skin oils. It can also provide surface disinfection when used correctly.
Avoid cleaning products that contain bleach, abrasive ingredients, or harsh chemicals. Some manufacturers provide specific cleaning instructions, so check your laptop’s support documentation when available.
Use a clean, dry microfiber cloth afterward if moisture remains. This extra step helps keep liquid away from the openings around the keys.
When you clean laptop keyboards with alcohol, controlled application is essential. A small amount on a suitable cloth is safer than applying liquid directly.
Managing Moisture During Wiping
Moisture control is one of the most important parts of cleaning laptop keyboards. Even a suitable cleaning solution can cause problems if too much enters the device. The goal is to clean the surface without allowing liquid to travel beneath the keys.
Before wiping, inspect the cloth or cleaning wipe carefully. It should be lightly damp, not saturated. Excess liquid can collect around key edges and potentially reach internal components.
Work across small sections instead of covering the entire keyboard with one wet pass. Use gentle pressure and avoid pushing the cloth into gaps between keys. This keeps most of the cleaning solution on the exterior surface.
After wiping, use a dry microfiber cloth to remove remaining moisture. Allow the keyboard to air-dry completely before turning the laptop back on.
Never use a hair dryer or heat gun to speed up drying. High temperatures can damage plastics, adhesives, displays, or internal components.
If liquid accidentally spills into the keyboard, stop using the laptop. Follow the manufacturer’s spill-response instructions. Do not assume that visible dryness means the interior is safe.
Good moisture control helps clean laptop keyboards without creating unnecessary liquid exposure.
Can I wash my keyboard with water?
You should not wash a laptop keyboard with water. Laptop keyboards are integrated into the computer and sit above sensitive electronic components. Water can travel through gaps around the keys and reach internal circuitry.
Unlike some removable desktop keyboards, most laptop keyboards are not designed to be rinsed. Even when a laptop has some spill resistance, that does not mean it can safely be washed under running water.
Tap water also contains minerals that can remain behind after evaporation. These deposits may contribute to corrosion or unwanted electrical connections. Moisture trapped inside the keyboard can create problems even after the surface appears dry.
Never hold a laptop under a tap or wipe its keyboard with a wet sponge. Avoid pouring water onto the keys for any reason.
Instead, use a dry microfiber cloth, soft brush, or controlled compressed air for routine cleaning. When sanitization is needed, use a compatible 70% isopropyl alcohol wipe or lightly dampened cloth.
If water or another liquid has already entered the laptop, stop using it. Disconnect power and follow the manufacturer’s spill instructions. Professional inspection may be necessary after a significant spill.
Safe laptop keyboard cleaning relies on controlled moisture rather than rinsing or soaking.
Understanding Liquid Ingress Hazards
Liquid exposure can damage laptop keyboards in several ways. Moisture may reach electrical contacts, connectors, or other components beneath the keyboard. If the laptop remains powered, liquid can increase the risk of short circuits and electrical damage.
Even after shutting down the device, moisture can remain trapped inside. This is why simply wiping the outside may not solve a significant spill.
Water can also leave mineral deposits after it evaporates. Those deposits may contribute to corrosion over time. Other liquids can leave sugars, salts, oils, or chemical residues that create additional problems.
Keyboard membranes and scissor mechanisms can also be affected by liquid. Moisture or sticky residue may interfere with normal key movement and responsiveness.
If a substantial amount of liquid reaches the keyboard, do not keep testing the keys. Continued use can make the damage worse.
Disconnect the charger and any removable power source when it is safe to do so. Then follow the manufacturer’s recommended spill procedure.
For serious spills, professional repair is often safer than attempting to open the laptop yourself. Internal liquid damage can be difficult to identify from the outside.
Understanding these risks is essential when learning how to clean laptop keyboards safely.
Can I remove laptop keyboard keys to clean?
You should generally avoid removing laptop keyboard keycaps unless the manufacturer specifically provides instructions for doing so. Laptop keys often use small scissor mechanisms, retaining clips, or membrane components. These parts are much more delicate than many mechanical desktop keyboard switches. Understanding 5 Disadvantages Of Using A Mechanical Keyboard can also help explain how laptop and desktop keyboard designs differ.
Prying a key upward with a tool can break the retaining clips. It can also damage the scissor mechanism underneath the keycap. Once these components break, replacing an individual key may not always be possible.
Instead of removing keycaps, use compressed air and a soft detailing brush. These methods can remove many particles without disturbing the key mechanisms.
For surface grime, wipe the key faces with a lightly dampened microfiber cloth. Use controlled movements around the edges rather than pushing liquid into the gaps.
Some laptop manufacturers do provide procedures for removing specific keys. If your model has official instructions, follow them carefully instead of relying on generic removal techniques.
If a key remains stuck after cleaning, do not force it upward. A damaged mechanism can turn a simple cleaning problem into an expensive keyboard repair.
When you clean laptop keyboards, non-invasive methods are usually the safest choice. Keep keycaps in place unless official instructions say otherwise.
Cleaning Around Delicate Retaining Clips
Dust often collects around the edges of laptop keys. Fortunately, you can clean these areas without removing the keycaps. A soft detailing brush is useful for lifting particles from narrow spaces.
Choose a brush with very soft bristles. Cosmetic brushes or electronics-cleaning brushes can work well when they do not shed fibers. Move the brush gently around the perimeter of each key.
For stubborn oily residue, lightly dampen a microfiber cloth or suitable cleaning swab with 70% isopropyl alcohol. Do not saturate the material. Excess liquid can migrate beneath the keycap.
Avoid pushing a swab deep between the keys. Laptop scissor clips and membrane components can be fragile. Excessive pressure may bend or dislodge these parts.
A useful approach is to loosen dry debris first. Follow with gentle surface cleaning once most particles have been removed. For additional advice on comfortable keyboard positioning, see Should Your Physical Keyboard Be Flat Or Tilted?
Take extra care around keys that already feel loose or uneven. Their retaining mechanisms may already be damaged.
This method provides a safer alternative to keycap removal. It keeps delicate components intact while allowing you to clean visible grime and dust from difficult areas.
These careful techniques make cleaning laptop keyboards easier without disturbing fragile retaining clips.
Can I clean my laptop keyboard with hand sanitizer?
You should avoid using hand sanitizer as a routine laptop keyboard cleaner. Many hand sanitizers contain ingredients designed to protect or moisturize skin. These can include glycerin, aloe vera, oils, fragrances, and other additives.
Those ingredients are not intended for electronic surfaces. They may leave a sticky or oily film after the alcohol evaporates. That residue can attract additional dust and make key surfaces feel unpleasant.
Some hand sanitizers are also gel-based and contain substantial amounts of water. Applying a thick gel around laptop keys increases the chance of moisture entering small openings.
For routine keyboard disinfection, use a suitable 70% isopropyl alcohol wipe or a microfiber cloth lightly dampened with isopropyl alcohol. Always follow your laptop manufacturer’s cleaning guidance first.
Do not pour sanitizer onto the keyboard or attempt to spread it across the keys. If sanitizer has already been applied, remove visible residue carefully with an appropriate lightly dampened cloth.
The main goal is to use a product that evaporates cleanly without leaving unnecessary ingredients behind. Proper moisture control is equally important when you clean laptop keyboards.
The Problem With Sanitizer Additives
Hand sanitizer is formulated for skin, not laptop keyboards. Ingredients that feel useful on your hands can behave differently on electronic surfaces. Glycerin, aloe, moisturizers, oils, and fragrances may leave residue behind after application.
This residue can create a tacky film on plastic keycaps. Dust and other particles may then stick to the surface more easily. Over time, the keyboard can feel grimy even after repeated cleaning.
Gel-based sanitizers also introduce more moisture than a properly controlled electronics cleaning wipe. Liquid can collect around key edges and potentially move beneath the keyboard.
If sanitizer leaves a residue, avoid aggressive scrubbing. Excessive pressure can damage the key surfaces or mechanisms.
Instead, use a clean microfiber cloth that is appropriate for electronics. A lightly dampened cloth with 70% isopropyl alcohol can help remove oily residue from compatible surfaces.
Always check the manufacturer’s cleaning recommendations before using alcohol. Some finishes or coatings may have specific care requirements.
The safest approach is simple: use electronics-compatible cleaning materials and keep moisture tightly controlled. This approach helps you clean laptop keyboards without unnecessary residue or damage.
Frequently Asked Questions
How often should I clean my laptop keyboard?
Light cleaning can be done once a week if you use your laptop regularly. Wipe the surface with a dry microfiber cloth to remove dust and fingerprints. A soft brush can help loosen debris around the key edges.
Can I vacuum crumbs out of my laptop keyboard?
It is generally better to use compressed air or a soft brush for routine laptop keyboard cleaning. Some household vacuums can create static electricity, and their suction may be unnecessarily strong for delicate components.
If you prefer a vacuum, choose one specifically designed for electronics and follow its instructions. Avoid forcing a large nozzle between keys.
Why do my laptop keys feel sticky after cleaning?
Sticky keys may result from spilled liquid, food residue, or cleaning-product buildup. Hand sanitizer and other products containing moisturizers can also leave a sticky film. Clean the affected surface carefully without forcing the key.
What type of cloth works best for laptop surfaces?
A lint-free microfiber cloth is the best general choice. It traps dust and absorbs oils without leaving much residue. Avoid abrasive towels, tissues, and rough household cloths that may scratch surfaces or leave fibers behind.
Conclusion
Keeping a laptop keyboard clean does not require harsh chemicals or risky disassembly. A simple routine can remove dust, crumbs, fingerprints, and surface grime while protecting delicate components.
Start by shutting down the laptop and disconnecting its power cable. Gently remove loose debris, then use controlled bursts of compressed air when appropriate. Finish by wiping compatible surfaces with a lightly dampened microfiber cloth or 70% isopropyl alcohol wipe.
The most important rule is to keep liquid away from the keyboard openings. Never wash a laptop keyboard with water or pour cleaning products directly onto the keys. Avoid hand sanitizer because its added ingredients may leave residue.
You should also resist the temptation to pry off keycaps. Laptop scissor mechanisms and retaining clips can break easily. Use soft brushes and non-invasive cleaning methods instead.
With regular maintenance, you can keep your keyboard cleaner, more comfortable, and more responsive. A careful cleaning routine also reduces the risk of accidental damage and unnecessary repair costs.