Do not immediately discard that worn-out piece of hardwood furniture. By removing the old finish and painting it with a new color, you can easily give that wooden chair or table a new lease on life. Follow the steps below to learn how to repaint wood furniture and get professional advice on how to achieve the best results. For our chair, we chose oil-based paint, but the same steps would apply if you went with water-based paint.
-
Following are a few points to refinish and paint furniture:
It’s crucial to remember that paint-stripping chemicals might be hazardous before you start. Before beginning this project, make sure you carefully read the manufacturer’s instructions. To make old pieces of furniture look brand-new again, follow our instructions on how to strip and paint wood furniture.
Toll needed:
- a scraper
- a palm sander
- pads
- tack cloth
- a nylon bristle brush
- safety equipment,
- and sandpaper of different grades
- Spray-on oil-based clear sealer
- oil-based paint
- and spray-on oil-based primer
Check the condition of furniture
Examine every component of the object to determine whether any repairs are required. Additional materials like epoxy and wax filling compound can be required. Epoxy putty can cover both little and major defects because it is a glue-like, sticky substance. Sticks of wax filler are available for small to medium-sized holes.
Check for lead paint
Check to be sure the paint you are removing is not lead paint before you begin. At your neighbourhood big-box retailer, you can get cheap lead testing kits. Only goods with paint that has a lead test result of zero must follow these instructions.
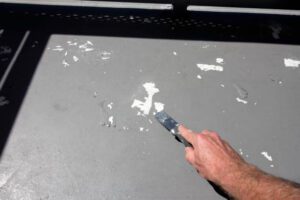
Remove loose paint
 (Photo from iStock)
By holding the scraper parallel to the wood and exerting steady pressure, scrape off any loose paint while being careful not to gouge the wood.
Smoothen the surface
With a palm sander, smooth off the surface of the chair as a whole. Sand the chair completely first using 80 to 100 grit sandpaper. Then, to get a smooth surface (sandpapers with higher numbers have finer grit), switch to finer sandpaper, ranging from 150 to 200 grit. Sanding advice: Always work with the direction of the wood’s grain.
Take care of crevices
To reach the crevices, you might have to sand by hand. After you’re done, use a tack cloth to clean the chair to get rid of the dust.
Apply primer
 (Photo from iStock)
For clean, uniform coverage, use a spray primer. For uniform coverage, use a white primer beneath paint in light colours and a darker primer under paint in darker colours. Start by cleaning the chair’s seat. To prevent drips and over-spray, spray slowly for an even distribution of liquid. Follow the chair’s natural lines by moving back and forth. Apply 2 to 3 light coats, letting each coat dry completely between applications. Because drying times for primers vary greatly, check the label.
Use sand if important
Once the final coat of primer has dried and the surface feels coarse, softly sand with very fine sandpaper and then wash the surface with a tack cloth once more to eliminate dust.
Painting the furniture
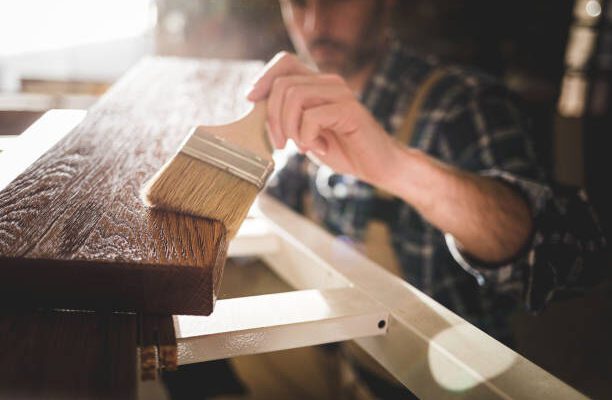
 (Photo from iStock)
Following the piece’s natural lines, paint it in with lovely, flowing strokes. For optimal results, apply a high-quality nylon bristle brush. For an even finish, lightly re-brush the previous stroke. If you experience a drop, just smooth it out by lightly dragging the brush over the area to stop the run. Apply 2 to 3 light coats, letting each one completely dry before moving on to the next. The drying times for different products will vary, so read the label on your paint can.
Applying clear coat
A polyurethane clear coat gives the paint an additional layer of shine, hardens it, and protects it. Water-based top coats should be matched with water-based paint, while oil-based top coats should be matched with oil paint. Spray back and forth while maintaining a distance of 10 to 12 inches from the can. To evenly coat the chair, adhere to its natural contours. Before spraying on the final layer, softly smooth the surface using 200-grit or finer sandpaper to give it a professional polish after the first clear coat has dried.
Let it dry
Give your furniture at least 24 hours to fully cure in a warm, dry, well-ventilated environment before using it. You’ll realize all kinds of items have hidden potential once you learn how simple it is to repaint wood furniture!
SOME BONUS TIPS:
- To avoid stains bleeding through fresh paint, it is best to prime all painting surfaces.
- Your choice of paint must be compatible with the primer. Use a satin or semigloss finish in either latex or oil-based paint on furniture for the greatest results. You should never paint over priming.
- A latex primer is a great option for the majority of usage if you decide to use latex paint. It doesn’t smell like an oil-based primer and applies smoothly while blocking the majority of stains.
- Although oil-based primers can be used with latex paints, oil-based paints must be used with an oil-based primer. Oil-based primers have a strong odor but provide better adhesion and stain resistance. Make sure your room has adequate room ventilation if you’re using oil-based primers and paints.
- Start painting at the top and work your way down, smoothing paint drips as you go.
- There are several sheens available for latex paint, including flat, low sheen or satin, acrylic semigloss, and oil-based enamel. Both interior and exterior trim work can be painted with oil-based paint, which is also incredibly durable and cleanly.
Cleaning your furniture without damaging:
 (Photo from iStock)
- Here are some tips for cleaning wood furniture without harming the finish:
- To get rid of surface filth, dust the furniture. Light soiling can now be removed.
- Use the mildest cleanser first, then stronger ones if necessary. A mild mixture of water and dish-washing soap might work.
- To clean the entire item, dunk a soft cloth in the solution, wring it out, and wipe. Instead of a moist cloth, you need a damp one.
- Avoid over wetting the wood, and frequently rinse your cloth.
- Dry the item completely with a second, clean cloth.
Reference:
HGTV
Looking for perfect age gap between siblings, click on the link below for some prior knowledge:
What should be siblings ideal age gap?


