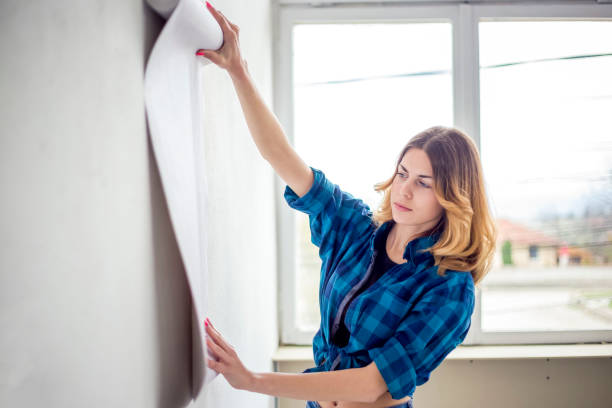
Traditional wall coverings can be replaced with DIY-friendly, reasonably priced peel-and-stick wallpaper. Since the self-adhesive backing doesn’t require any messy paste, you may remove it and start over if you apply it incorrectly. Instead, this item includes a backing made of adhesive material that may easily cling to walls.
Simply measure the space, align the wallpaper, remove the backing, and apply the removable or peel-and-stick wallpaper to the wall, smoothing any bubbles with a smoothing tool. You can learn how to hang peel and stick it by following the more in-depth instructions that are provided below, even if this is the fundamental method.
But applying temporary wallpaper is more complicated than just removing the backing and adhering it to the wall. To make sure it sticks to the wall properly, you’ll need to conduct some preparation work. You’ll also need a few tools and techniques to create the best finish you can. Apply peel-and-stick wallpaper according to these detailed directions for bubble-free, long-lasting results.
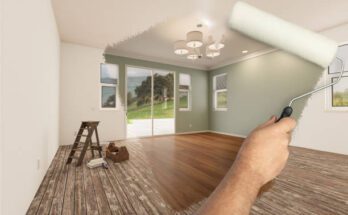
How to Install Peel-and-Stick Wall-coverings
 (Photo from iStock)
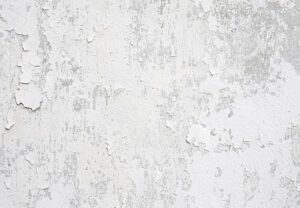
Before you begin, remember that peel-and-stick wallpaper frequently adheres to walls best when they have a smooth texture and an eggshell, satin, or semi-gloss finish. Check the manufacturer’s directions to make sure the wallpaper will stick to the specific type of walls you have.
To ensure you obtain the appropriate amount of removable wallpaper, carefully measure the area you intend to cover. Buy a little bit more than you think you’ll need to allow for errors and tricky locations like windows, doors, or little nooks.
Following are a list of directions that you need to follow to install wallpaper:
-
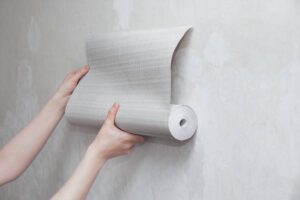
Prepare the Wall Surface
 (Photo from iStock)
Before you start hanging the wallpaper, make sure the wall has been sufficiently prepped. Before trimming the wallpaper to suit the aperture, remove the face-plates from any switches or outlets. With a damp sponge or cloth and a mild, non-abrasive cleaner, clean the wall’s surface. Give the area at least 24 hours to totally dry.
Observe the directions that the manufacturer has supplied. Additionally, some temporary wallpaper needs to match the decor of the space. Use a mild cleaning solution and a sponge or towel to wipe off the surface of the walls to avoid debris from getting in the way of the glue.
-
Set up a guideline
Making a guideline for the first strip of wallpaper is one of the most crucial phases in the installation process. This will act as a guide to make sure every other strip of wallpaper is lined up correctly. You can begin in the middle of a wall or at the corner, but the guide must be straight.
To determine the wallpaper’s width, use a steel ruler. (Its usual width is 20 1/2 inches.) Measure 20 1/2 inches (or the width of the wallpaper) starting from the room’s leftmost corner or from a predetermined location in the wall’s middle.
From here, use a level or another straight edge to create a vertical guideline that is perpendicular to the ceiling and the baseboard. However, some homes may have a small variation due to the fact that baseboards, ceilings, and even room walls are not always perfectly straight and level.
Remember that if you began your measurement in the middle of the wall, it could be helpful to draw a second guideline to show where you began. This will make it easier to guarantee that the wallpaper is absolutely straight when it is applied.
-
Apply Peel-and-Stick Wall-coverings
 (Photo from iStock)
Peel around 12 inches of the wallpaper’s adhesive backing starting at the tallest point you plan to wallpaper, and then align the wallpaper with your lines. Working your way from top to bottom, smooth and press the wallpaper to the wall while removing the remaining backing.
After drawing the guideline on the wall, you are now ready to hang the first strip of wallpaper. In order to overlap the baseboard and the border of the ceiling, the wallpaper strip needs to be somewhat longer than the height of the wall. Utilize a smoothing tool and, if necessary, a ladder to flatten, smooths, and removes any air bubbles or air pockets from the wallpaper.
-
Pattern matching and repetition
When adding additional pieces, align the wallpaper’s design for a seamless effect. Overlap the second piece just a little bit with the first piece to ensure that the seam lays as flatly as possible. Repeat as necessary, cutting the bottom as necessary, to cover the entire surface.
If the wallpaper drapes over a door-frame, window frame, electrical outlet, light switch, or any other type of permanent obstruction, just cut the wallpaper so that it may be fitted around the obstruction. This method should be used to hang each wallpaper strip until the room is complete.
-
Don’t Avoid Windows and Outlets at All Costs
 (Photo from iStock)
Let the wallpaper overlap any window frames, door frames, or outlet when you come to them. Using a straightedge and utility knife. Trim and remove any extra material once the piece has been applied. The paper should then be smoothed against the wall all the way around the outlet or window. Use a utility knife to carefully cut away the paper covering the aperture. While keeping the power off for electrical outlets and switch plates. The switch plate or outlet cover will conceal the majority of flaws. So don’t worry about the rough edges around the hole. For a seamless appearance, you can also cover flat plates with paper.
-
Look for Air Bubbles
If there are still any air bubbles. Poke a tiny hole in the centre of each one with a pin or the point of your utility knife. After that, press firmly to expel any trapped air and smooth the wallpaper.
-
Clean the walls and reinstall the face-plates
 (Photo from iStock)
Reinstall the face-plates on the electrical outlets and light switches throughout the room once you have completed cutting, applying, and trimming the wallpaper and are pleased with the results. The freshly put wallpaper should next be cleaned. With a moist cloth or sponge. Just be careful not to get the cloth too wet because that could ruin the peel-and-stick wallpaper.
Reference:
Better Homes and Gardens
Click on the link below, to grab some amazing ideas for decoration:
Share homemade holiday decorations ideas