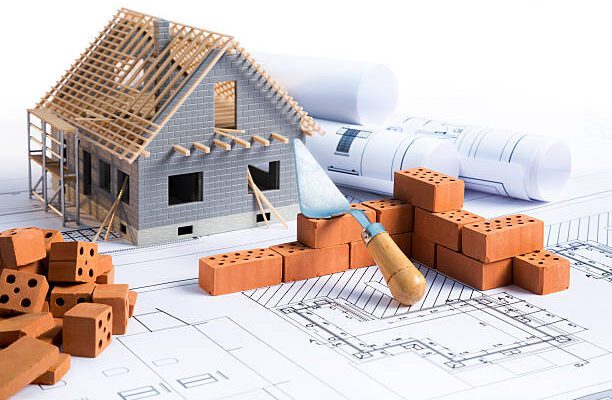
Building your own house offers numerous advantages, including the ability to customize every aspect of your living space. From the layout to the colors, flooring, and more, every decision is in your hands. Additionally, a new home comes with the latest technology and energy-efficient features. However, it is essential to be aware of the potential challenges and costs that come with building a house from scratch.
Site Preparation for a house
 (Photo from istock)
Before construction can begin, proper site preparation is crucial. This involves several key steps to ensure a solid foundation for your new home.
-
Clearing the Land
The first step in site preparation is clearing the land of any vegetation or debris. This process involves removing trees, shrubs, and other plants, as well as clearing away any rocks or large objects that could interfere with construction.
-
Land Surveying
Once the land is clear, it’s important to have a professional land surveyor stake out the lot based on the original plot drawings.
-
Altering Topography
In some cases, it may be necessary to alter the topography of the site to ensure proper water flow and drainage. This can involve grading the land or creating slopes to redirect water away from the house.
-
Temporary Utilities
Before construction begins, it is essential to arrange for temporary utilities such as electricity and plumbing. This ensures that the construction site has the necessary power and water supply during the building process.
Pouring Concrete Footings and Foundations for a house
This provides a solid base for the structure and ensures stability and durability.
-
Excavation and Inspection
The excavation contractor will dig trenches for the footings, ensuring they are deep enough to prevent frost heave. After excavation, an inspection is conducted to verify the dimensions of the footing trenches.
-
Forming and Pouring Footings
The next step is to form and pour the footings. Footings are typically made of concrete and provide support for the foundation walls. The concrete is poured into the forms and left to cure for a few days.
-
Curing and Stripping Footings
After the footings have cured, the forms are stripped, and the foundation specialist can begin forming and pouring the foundation walls. It is crucial to wait for the footings to cure properly to ensure their structural integrity.
-
Forming and Pouring Foundations
The foundation walls are formed and poured using concrete or other materials such as cinder blocks or insulated concrete forms (ICFs). These walls provide structural support and act as a barrier against moisture.
-
Waterproofing and Drainage
Once the foundation walls are complete, it is important to waterproof them to prevent moisture infiltration. This can be done by applying a waterproofing membrane or a drainage mat. Additionally, a weeping tile system is installed to direct water away from the foundation.
Installing Plumbing and Electrical in house
 (Photo from istock)
With the footings and foundations in place, it’s time to install the plumbing and electrical systems.
-
Rough-in Plumbing
Plumbers will lay out the pipes for the plumbing system, including water supply lines, drainage pipes, and any other necessary fixtures. It is essential to have these rough-in pipes properly positioned before pouring the concrete slab.
-
Electrical Installation
Electricians will install the electrical wiring, outlets, switches, and lighting fixtures throughout the house.
Pouring the Concrete Slab
 (Photo from istock)
The concrete slab serves as the foundation for the main floor or basement of the house. Depending on the climate and construction timeline, this step may occur after the framing and roofing stages.
-
Preparing for Slab Pour
Before pouring the concrete slab, it is crucial to ensure that all necessary plumbing and electrical work is in place. This includes rough-in pipes and electrical wiring for bathrooms, main services, and in-floor radiant heating, if applicable.
-
Installing Gravel and Vapor Barrier
This helps with drainage and provides stability. A plastic vapor barrier is then installed above the footing to prevent moisture from seeping into the concrete.
-
Ordering and Pouring Concrete
The concrete is poured and spread evenly across the area, ensuring a minimum thickness of 4 inches. It is important to give the slab ample time to cure before proceeding with further construction.
Framing, Siding, and Roofing
 (Photo from istock)
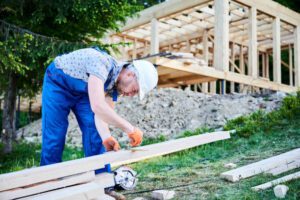
With the foundation in place, it’s time to start framing the house. This process involves constructing the basic structure, including the floors, walls, and roof.
-
Framing the House
The framing carpenters will arrive to put up the lumber framework for the floors, walls, and ceilings. This is when the house starts to take shape, and you can see the layout and dimensions of each room.
-
Installing Windows and Doors
Alternatively, a manufacturer’s crew may come in to complete this task.
-
Sheathing and Siding
This involves covering the framework with plywood or oriented strand board (OSB) to provide structural support and a base for the siding.
-
Roof Installation
With the sheathing complete, the roofers can start installing the roof. This includes applying roof flashing, underlayment, and the final roofing material, such as shingles or metal panels. A properly installed roof is essential for protecting the house from the elements.
Interior Work
With the exterior structure complete, it’s time to focus on the interior of the house. This stage involves various tradespeople working together to bring your vision to life.
Masonry Work
If your home design includes a chimney, this is the stage where masons will build it. This typically involves applying brick or stone veneer over a concrete block base.
Rough-in of Electrical, Plumbing, and HVAC
Electricians and plumbers return to the site to complete the rough-in work for electrical circuits, plumbing pipes, and HVAC system duct-work. This work is easier to accomplish before the walls, flooring, and ceiling surfaces are in place.
-
Insulation Installation
This helps regulate temperature and improve energy efficiency.
-
Hanging Drywall and Trim
With insulation in place, drywall can be hung throughout the house. The seams are taped, muddied with joint compound, and finish sanded.
-
Finishing Touches
As the interior takes shape, it’s time to add the finishing touches that will make your house feel like a home. This stage involves finalizing various installations and adding aesthetic elements.
-
Painting Walls and Ceilings
With the drywall and trim in place, the painters can start painting the walls and ceilings. This is a task that homeowners can tackle themselves to save money, but it can be time-consuming for larger areas.
-
Installing Countertops and Cabinets
Specialty contractors will install countertops and cabinets in the kitchen, bathrooms, and other areas. These fixtures provide storage and functionality while enhancing the overall design of the space.
-
Finalizing Electrical and Plumbing Fixtures
Electricians and plumbers return to complete the final connections of electrical fixtures (such as light fixtures and outlets) and plumbing fixtures (such as sinks, toilets, and showers). It is crucial to ensure that all connections comply with local building codes.
-
Installing Flooring
The final step in the interior work is to install the flooring. There is various options available, including carpeting, hardwood, laminate, tile, luxury vinyl plank, and engineered wood.
Exterior Landscaping
With the interior nearing completion, it’s time to turn your attention to the exterior landscaping. Evidently, this stage involves designing and implementing the landscape around your new home.
-
Designing the Landscape
 (Photo from istock)
Before starting any landscaping work, it is essential to have a clear plan in place. This includes deciding on the layout, selecting plants and materials, and considering factors such as drainage, irrigation, and landscaping elements like patios and walkways.
Final Inspections and Completion
As the construction process comes to an end, it’s time to arrange for final inspections and complete any remaining tasks to ensure the house is ready for occupancy.
-
Final Walk-through
If you have hired a general contractor, it is customary to schedule a final walk-through of the house. Moreover, this allows you to check for any remaining issues or concerns before accepting the completed project.
-
Completing Exterior Landscaping
Once the inspections are complete, you can finalize the exterior landscaping. This involves planting trees and shrubs, installing irrigation systems, building patios and walkways, and adding any other finishing touches to the outdoor spaces.
Reference:
the spruce
Searching for tips to recycle the construction waste, what are you waiting for, click on the link below:
How to recycle and reuse construction waste


