Category Archives: Architecture

Posts are related to architecture.

A guide to Commercial Construction Process

Building a business facility entails considerably more than simply assembling building components. In actuality, the construction phase of the project is just one tiny stage. Prior to design and construction, planning is essential for avoiding problems before they develop.

Construction management experts recognize the importance of these planning procedures and make the most of them to minimize issues that may arise throughout the construction project. After the building is finished, the procedure is continued to make sure it meets the client’s expectations and the law. Let’s go through the construction process step by step.
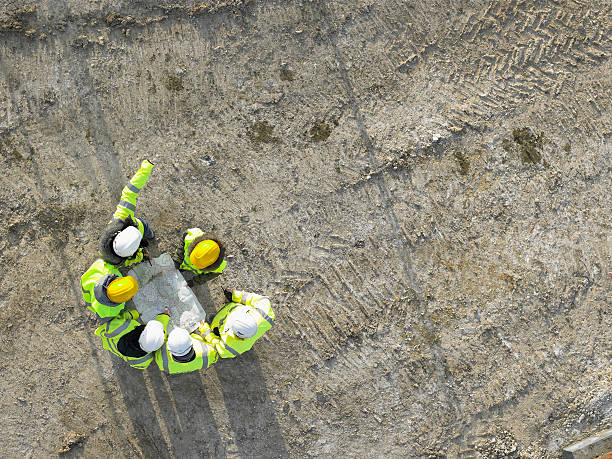
Finding location

A guide to Commercial Construction Process (Photo from iStock)

In real estate, the cost of the project is significantly influenced by location. The cost of the property and subsequent building is heavily influenced by its location. Land prices for construction are higher in high-demand locations. But these locations might be perfect for the building and the businesses that will occupy it.

The location chosen for the building must be easily accessible to users. Customers and staff must be able to access the area with ease, especially for establishments that offer in-person services, such restaurants or the offices of medical specialists.

For the kinds of construction that are allowed, several cities have rigorous zoning regulations. Therefore, learn about the permitted building kinds before buying the property and beginning construction. Some real estate contracts have provisions that ban new construction.

In situations involving environmental preservation, these bans can be either temporary or permanent. A protected plant, animal, or habitat, for example, may be present on a site and must be preserved from development. A brief suspension of construction could give the town or city the time it needs to approve the design and make sure any adjacent people who might be impacted are on board with the project.

Setting budget

The first stage in generating a construction budget is to understand the expenses of various building structures across the country. The price per square foot of a new commercial building is impacted by its size and location. In New York City, for example, the price per square foot for a single-story commercial structure is from $373 to $448, while that for a high-rise ranges from $854 to $1,026. A high-rise building in Los Angeles typically costs between $458 and $688 per square foot, compared to $327 to $395 per square foot for a single-story commercial structure.

Predesign-phase

(Photo from iStock)

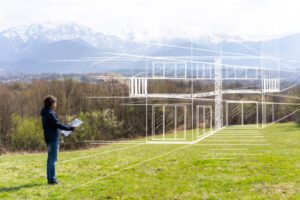
Due to the fact that both phases entail defining the project’s expectations and goals, several pre-design phase steps also appear in the development and planning phases. Some may schedule the meeting between the architect and general contractor at the planning stage, while others may wait until the pre-design stage. Some people regard the design phase to be the second step of the commercial building development process, integrating pre-design and planning into a single stage.
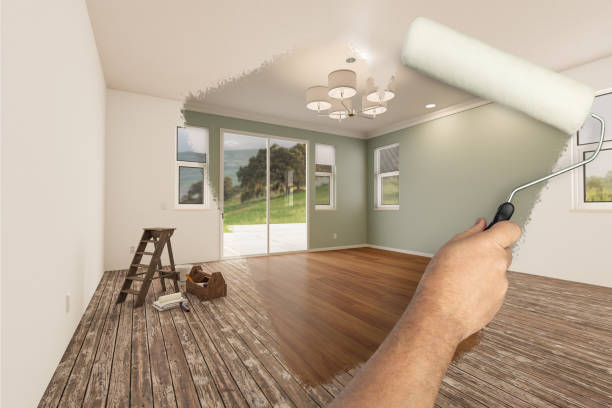
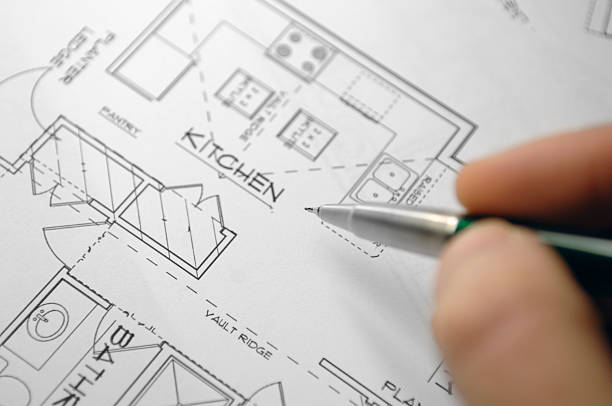
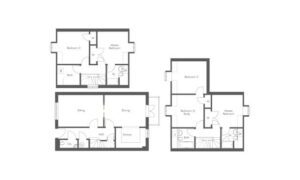
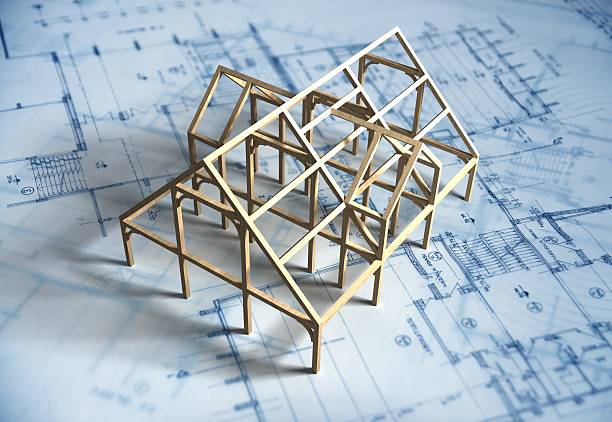
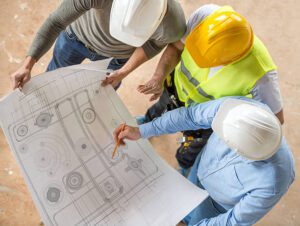
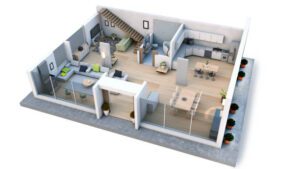
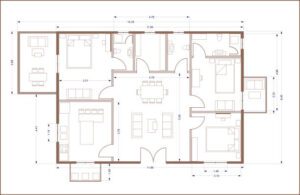
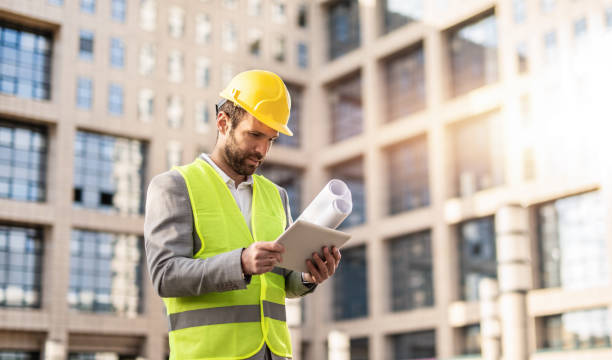
The design-phase

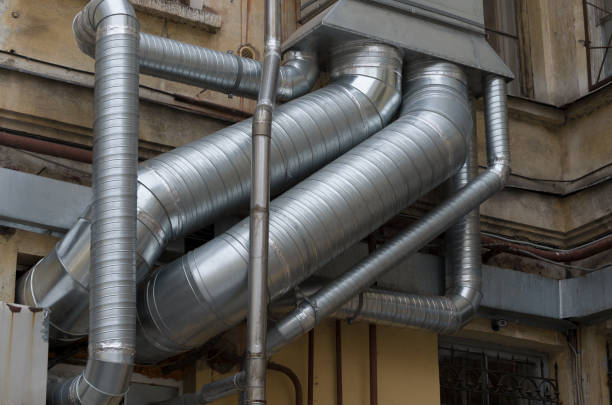
In order to verify the building’s structural integrity and code compliance throughout the commercial construction design phase, precise blueprints and drawings of the structure are required. The plumbing and HVAC system, as well as other internal building structures, are verified by a mechanical engineer.

Structural engineers examine the designs for structural integrity. Electrical engineers design the complete electrical system of a facility. Parking lots and linkages to the neighbourhood infrastructure are designed by civil engineers. The bulk of the construction project can start after this stage.

Pre-construction phase

(Photo from iStock)

Pre-construction is the stage of building a business structure where the most documentation is dealt with. Your project must obtain the necessary licenses and insurance for those on the site during this phase. In order to make sure the procurement phase adheres to your budgetary goals; you will also collect vendor bids during this step.

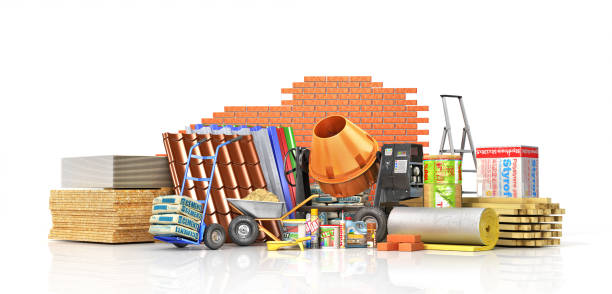
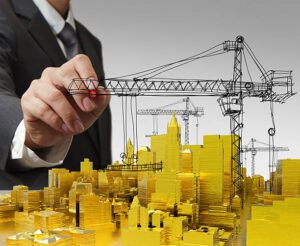
The procurement phase

The procurement step is critical to keeping the project on budget. However, the calibre of the service providers and the materials utilized in construction are important as well.

As a result, you must strike a balance between staying within your budget and utilizing long-lasting building materials. Similarly, you should select subcontractors with a proven track record of success. A general contractor frequently handles the procurement stage. To avoid problems caused by misunderstandings or a lack of understanding of expectations, open communication is essential.
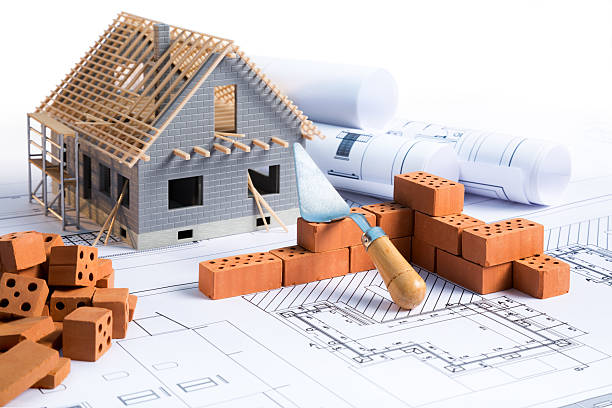
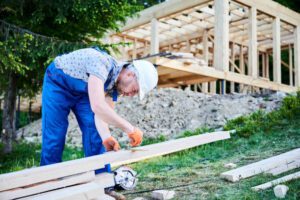
Construction phase

Everything done thus far serves to set up the actual construction process. The project will include a sizeable chunk of site preparation for the structure.  As a result, builders should not scrimp on quality during this initial stage.
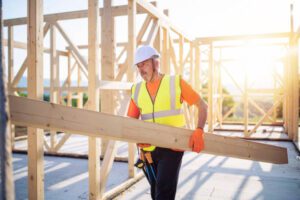
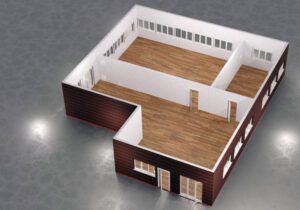
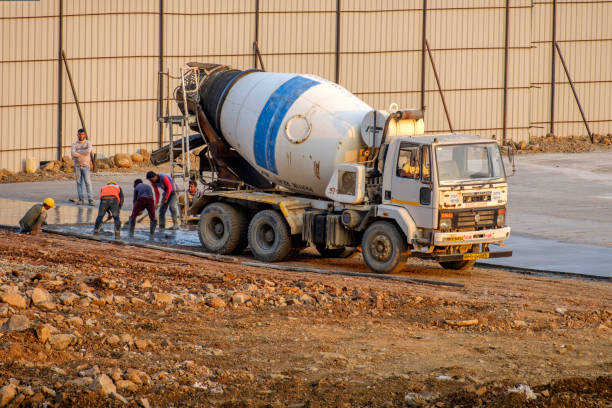
Construction

(Photo from iStock)

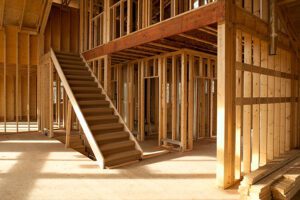
The site is now ready to start the commercial construction process. The phase of construction that requires the most care is the building’s erection.  Concrete is first poured to build the foundation. The frame includes the inner elements of the building that provide structural support.

Post-construction phase

As part of the post-construction process, the general contractor must accompany you on a tour of the building. Throughout this voyage, you will evaluate the project’s quality. If you or the other inspectors discover any faults or signs of inadequate work, put them on a punch list.  Additionally, it permits a formal building inspection to authorize occupation.

Reference:

JRM Construction Management
Making your home fireproof is important, searching for some effective tips?, your wait is over click on the link below:
Tips to make your home fireproof

How to add value to your house

A wise investment is to increase the value of your house, especially if you intend to sell it. You can provide value by doing a variety of things. Even though some solutions are more expensive than others, you must choose the ones that best suit your house, your requirements, and your budget.

The first impression

Since this will be people’s initial impression of your property, make sure it appears tidy and welcoming. Additionally, keep your grass well-kept and add bushes and plants. Add plant pots with lots of flowering plants if your front yard is insufficient or non-existent. Verify the condition of your entrance way, lights, and any additional features.

Grooming backyard

(Photo from istock)

A beautifully maintained garden provides additional area to enjoy during the summer. Clean up your yard and, if you have the space, plant some native trees and floral bushes. There isn’t a lot of money required. Just show off your yard’s potential and bring it up to neighborhood standards.

Try to ensure your grass is in good shape, with no noticeable dry or dead spots, to get the best value for your money. In the front, where they will be seen the most, put some bushes or flowers.

Cleaning the exterior

Cleaning the exterior of your house will improve its appearance and increase its worth. Utilizing a pressure washer, which can effectively clean external surfaces and sprays water at a very high velocity, is one alternative for cleaning home exteriors.

Utilizing a hand-pump garden sprayer filled with water and oxygen bleach (not chlorine bleach) is another alternative for cleaning the exterior of your house. All you have to do is spray it on, let it sit for ten minutes, and then rinse it off with water from the garden hose. Because the pressure washer’s high-intensity water spray can enter cracks where it shouldn’t, some people prefer this approach to power washing.

Modernizing your kitchen

(Photo from istock)

Your kitchen should be roomy and have plenty of accessible storage space in addition to brand-new, high-quality hardwood cabinets, countertops, and flooring. If you have the money, choose a pricey stone counter, but make sure the materials you choose are appropriate for the style of your house.

A gas top stove, a refrigerator with ice and water functions in the door and all stainless-steel equipment are popular preferences among customers. If you have the money, these are the most crucial appliance updates to make. As many conveniences as your space would allow, such as a breakfast bar and the newest appliances, should be included.

Updating bathroom

In the event that you have a “en suite,” this is particularly crucial. Bathrooms are frequently a major selling point, much like kitchens. Any improvement, no matter how modest, can make a great impression on prospective buyers.

In your master suite bathroom, give a whirlpool or spa tub some thought. Double sinks, separate showers with several jets, and a separate toilet area are all additional conveniences that add value.

A relatively cheap upgrade that can have a major impact is replacing an outdated toilet. If required, update your water pipes, but keep in mind that this won’t increase the value of your home much because purchasers anticipate that items like this will be in good operating order.

Interior lightning

(Photo from istock)

Your home’s worth might increase significantly if you install new lighting or replace any that are outdated. The majority of first-time home buyers prefer homes that feel airy and sunny, so having appropriate inside illumination is important. Recessed lighting in the kitchen is extremely beneficial for raising your home’s value.

Painting rooms

Any space can be made livelier by just adding a fresh coat of paint. If you perform the painting yourself, be sure to properly paint the edges and trim. Poor painting will most likely seem worse than the previous coating.

If you decide to sell your home in the future, try to choose neutral colours that the majority of prospective purchasers will find appealing to avoid having to repaint.

Flooring of the house

(Photo from istock)

Make the most of your hardwood flooring if you have it. If you have real hardwood flooring throughout your house, it can significantly raise the value of your house. There are also possibilities like brand-new carpets or superior laminate flooring. Consider using neutral, natural hues and materials.

Add throw rugs for some colour and comfort if it gets chilly in the winter and finish the flooring (whether it is carpet, laminate, or hardwood) in pristine shape.

Create space

To create a more open floor layout, open up some of the rooms. By tearing down a few walls, you can give your house a more open atmosphere. Before making any major choices, talk with a qualified contractor about your possibilities.

Prior to making any preparations, be essential to consider the walls that serve as the foundation’s security and prepare accordingly. If the pillar is safe enough and complements the style of your house, you can add it.

Finishing basement

(Photo from istock)

If you have a basement that isn’t finished, think about finishing it to add a room. The expense will be justified because this will always increase a home’s value. Even just completing the walls and carpeting the floor can keep things straightforward. The value of your property will almost always increase if you expand livable floor space.

Adding insulation

If your attic has useful space, you should make the most of it by using it as much as you can. In order to make the most of the space you can use for your project, work around any existing ducts and equipment.

This could involve converting an unfinished attic into a completely new room in your house by installing sheet rock and flooring. Alternately, you might simply want to add insulation and some flooring to your existing attic space to create a new storage alternative for your house.

Reference:

wikiHow
Making your home fireproof is important, searching for some effective tips?, your wait is over click on the link below:
Tips to make your home fireproof

Classical décor ideas for your home office

If you have an office at work, you’ll probably be working there a lot. Given how much time you’ll be spending there, it may be a good idea to furnish and design your office with perfect décor ideas in a way that inspires and relaxes you. You should carefully evaluate how each décor item will impact your office and what message it will convey to others.

Décor with plants

(Photo from iStock)

Making your workspace feel more natural, cozy, and private can be accomplished by adding a few tiny plants. Some plants can provide your workspace a nice scent or a distinctive pop of colour. Try choosing some of your favorite plants and placing them in your office if it feels empty or dull.

Check to see if you have adequate room to store your plant. Consider whether the plant’s colour and shape will go well with the other decorations. Ensure that your workspace has the proper lighting and temperature for your plant. After you’ve introduced your plant to your workspace, don’t forget to water it.

Adding photos

Even if you might not be able to bring your family to work with you, you might bring some pictures of your family instead. Family images can be hung up to make your office feel more like home and to show off your family to clients or employees. If you want to make your workspace more inviting and private, consider adding some family photos.

To readily be reminded of home, you can consider having some pictures near your desk. To make others feel more comfortable at your office, try hanging larger family photos throughout the space.

Using contact paper as a décor

(Photo from iStock)

If you are able to, putting contact paper to your office furniture or other items can be a quick and simple way to give your workspace some fun colour and design. You may choose the pattern or colour that works best for your office thanks to the wide range of styles available for contact paper. Spend some time looking through your favorite contact paper styles to help make your office area stand out.

The majority of contact paper varieties require you to remove the backing before sticking the paper to whatever surface you choose. Moreover,  contact paper is simply trimmed to fit the contours of the surface it will be applied on.

Art display

Many people who work in offices like to hang up pieces of art that inspire or motivate them. Any area, including offices, may be changed in feel, style, and mood by artwork. To personalize your workspace, think about hanging a few of your favorite works of art there.

Avoid any artwork that wouldn’t be considered suitable for your place of employment. Choose pieces of art that reflect the mood of your professional function as best you can. Anyone who visits your office can get a sense of your personality by seeing art on display. To foster a sense of community, you might ask regional artists to exhibit their work in your place of business.

Colours to set mood

(Photo from iStock)

Despite their apparent simplicity, colours can significantly affect how your office environment feels. When someone enters your office, colours can create a variety of moods or conjure up specific images. Indeed, you should carefully consider how the colours of your office are influencing the atmosphere of the space or how visitors might feel.

For law or banking offices, white or beige can be good options. Bright or brilliant colours might be advantageous at a graphic artist’s workspace. Choose a colour palette that complements your profession.

Know the limit

Even while you’ll want to personalize your workspace, you’ll still need to abide by any business policies. Not every decoration or change will fit with your workplace’s general mission or culture. To prevent any disputes, be certain that any decorations you intend to add will be accepted.

To find out more about the decoration policies at your firm, try contacting a co-worker, secretary, manager, or human resources. It is fine to omit a decoration if you are unsure about how guests will react to it.

Think what décor presents

(Photo from iStock)

Every piece of décor you install will provide you a chance to express your personality and attitudes to anybody who enters your business. Before adding décor items to your workspace, you should be sure they are conveying the desired message.

Your decorations should, in theory, strike a balance between expressing you professionally and personally. Colours with a lot of life might make you seem passionate or inventive. Certainly, colours that are neutral may convey a more conservative and direct demeanour.

Making the space yours with décor

You should try to make your office feel like a personal area, as long as you are communicating the proper message and abiding by office policies. Your workplace should be welcoming to both you and your guests while also displaying your personal style. Whatever accents you decide to use, make sure they truly reflect your sense of fashion and individuality.

Feel free to create a welcoming and motivating workspace at your office. Your personality should come through in your decorations.

Consider storage

(Photo from iStock)

You must organize your belongings to manage your office space and make it work for you. Your office can easily get cluttered or disorganized if you forget to put things away after using them or if there are too many of them. To assist maintain your home tidy, organized, and clean, you should practice proper storage methods.

Keep your desk clear of paper piles. When you are finished with anything, try to file it away right immediately. When trying to organize or store away the items in your office, containers may be a huge assistance. Evidently, items that you don’t use frequently may make effective storage choices. Smaller containers for the objects or papers may be useful.

Manage wires and cables

Even though most modern technological devices are wireless, some could still require a plug. These gadgets can make a mess, requiring you to manage frayed cords or wires. You should manage any wires or cords in your office appropriately to maintain it organized and clutter-free. Wires can be bundled together using cable ties. Eventually, try to hide cords under furniture or behind desks.

Reference:

wikiHow
Making your home fireproof is important, searching for some effective tips?, your wait is over click on the link below:
Tips to make your home fireproof

Tips in choosing the right type of kitchen sink

One of the most crucial choices you’ll make during your home interiors journey is choosing the proper kind of washbasin because it’s not something you can replace in a flash. Given the significance of kitchen sink designs, it would be helpful to be familiar with the fundamentals of sink design before settling on one.

Configuration of kitchen sink

(Photo from iStock)

Nowadays, the kitchen sink is available in a range of configurations, each of which is tailored to a particular multitasking style. It is no longer a single-basin object. Because they make it possible to wash many large items at once, single-basin sinks are the most popular. Almost every sort of kitchen can use this style of washbasin.

You can prepare food for cooking and clean up in the same area thanks to the kitchen double sink’s two basins. With offset kitchen sink designs, where one basin is somewhat smaller than the other, a similar appearance can be achieved. These work best in tiny kitchens where there may not be much countertop space.

Shape of the kitchen sink

Despite the fact that you may not be installing a costly marble sink, the contour of your kitchen basin design is still important. Many home owners discover that sinks with rounded edges are simpler to clean when determining which sink to choose for the kitchen. This is because rounded corners, as opposed to corners with distinct edges, don’t trap dirt and food.

A contemporary kitchen sink’s sharp top edges and rounded bottom corners can kill two birds with one stone. In this case, you get from a nice design and practical utility. Any type of home would benefit from a contemporary kitchen sink with an integrated drainboard. But make sure there’s enough room on the countertop for it!

The right material

When selecting a washbasin, stainless steel is always a popular option. It is resilient, long-lasting, and nearly unbreakable. Even if hard water stains may start to appear from your taps, using the washbasin won’t be significantly impacted.

Kitchens decorated in a farmhouse or vintage design look better with porcelain sinks. But beware of chipping! Although stone and granite are also visually appealing options, over time they may prove to be costly and require a lot of upkeep.

Kitchen sink accessories

(Photo from iStock)

Taps are usually the first item that springs to mind when thinking of kitchen sink accessories. They may make or ruin your experience, even if it may seem like a simple stylistic choice. This is because the positioning and aesthetics of your kitchen sink accessories may interfere with the room’s ability to function.

Even if you choose a traditional two-knob tap, think about installing an extending spray or shower arm to make it easier to fill large pots and clean up the sink’s farthest corners.

Standard height of sink

The first modular design components to become standardized were the washbasin and countertop. However, the height of the person using the kitchen may affect the height of the counter.

There should be roughly a 15 cm gap between the countertop and your elbow height. For obvious reasons, the washbasin is hence typically at the same height as the kitchen counter. The recommended sink depth, however, is 56 cm.

Appropriate size

You must take into account a number of factors when deciding the size of your kitchen sink. Typically, sinks are 22″ x 30″ in dimension. Single bowl sinks can be up to 36 inches wide, whereas double bowl sinks can be up to 48 inches wide.

The depth of the washbasin is another factor you should take into account. Sinks can range in depth from 6 to 12 inches. If you frequently overflow the sink with dirty dishes, get a sink with more depth.

Drainboard sinks

(Photo from iStock)

Sinks with a drainboard feature have an attached element that opens into the sink from one side. The extra water drains into the washbasin as soon as you lay your wet dishes inside of this appliance.

Since it’s simple to dry utensils in one of these sinks, you won’t have to worry about where to store your wet cutlery again.

Sink strainer

Don’t you just detest it when while you are washing the dishes, little particles of leftover food get stuck in your washbasin? Therefore, a washbasin strainer is something you should buy.

A sink strainer is, as its name implies, a strainer that you can use in the sink to wash dishes, vegetables, etc. Any little parts will get caught in the strainer, which you can quickly discard later. A washbasin strainer is a kitchen necessity that is readily available on any e-commerce website!

See if cabinets need adjustment

Consider your cabinets as the building blocks for your sink; there is much more to think about than just cabinet fronts and where to get the best kitchen hardware. Unless you’re planning a complete makeover, you need to carefully choose the style based on what is currently there.

The most important factor to take into account is whether the new washbasin will fit in the current cabinets, given their depth and weight. The cabinets must be strong enough to support items like a porcelain farmhouse sink that can easily weigh over 100 pounds when full with water.

Single or double side?

(Photo from iStock)

Have you ever come across someone who complained that their washbasin was too big? In our opinion, no. Consider a double-bowl washbasin if you have the room and the money. It facilitates clean-up by allowing you to distinguish between unclean dishes and usable washbasin area. It also allows you more time before you have to wash the dishes, which is ideal if you enjoy entertaining or have a large family that uses a lot of dishes each day.

If you like a huge washbasin with just one bowl and no middle divider, that is an alternative. This is perfect if you frequently wash large pans or service ware. Consider your cleaning and cooking procedures first.

Reference:

Real Simple
Making your home fireproof is important, searching for some effective tips?, your wait is over click on the link below:
Tips to make your home fireproof

Creating the Perfect Home office

A home office must be both practical and effective in order to be successful. It is crucial to make this setting as pleasant as you can because you will be working here for a number of hours every day. By taking a few steps to identify the ideal location, furnish it, and optimize its use, you may create a functional and comfortable home office.

Separating your workspace

(Photo from iStock)

Put up a wall between you and the rest of your family. To be productive in your workplace, keep everything you need for work at your office. To assist you maintain a work-life balance, keep everything linked to work out of the other areas of your house.

Even if you live alone, you still need a place where you can strike a balance between work and life. Find a quiet spot away from domestic noise and other distractions in a crowded house. Work from a room with a separate entry or one that is extremely close to an exterior door if you will be meeting with clients.

Efficient use of space for office

You may still set up a productive home office even if you live in a flat or a small house without an additional room. Any separate area that you can set aside specifically for work. Compared to working from your couch or bed, this is preferable.

Remove the doors from your closet and put up a small table, a chair, some shelves and sufficient lighting to create an office there. Set up a workspace in a corner of your kitchen or another room of the house with a desk, chair, shelves, and lighting. In order to preserve the ideal feeling of work-life balance, avoid working from your bedroom.

Comfortable surroundings

(Photo from iStock)

If natural light is significant to you, look for a location with a window. Put your workplace in a room of your house that has a temperature that you can work in comfortably all day. If you need to isolate yourself from the rest of your home, find an office space with a door.

Setting your desk as a office

Consider your posture when selecting your desk. Your shoulders should be relaxed, and your back should be straight or slightly curved. Look for a desk that allows you to sit with your forearms and thighs at a 90-degree angle to the floor. When reading, keep your head level and slant your gaze downward towards the screen. If you prefer having the option to stand and sit while you work, think about getting a stand-sit desk.

A suitable chair

(Photo from iStock)

You should look for a chair with strong lower back support that is between 17 and 19 inches (43 and 48 centimetres) deep. Consider a chair with lumbar support that is height-adjustable. Get a footrest or adjust your chair so that your feet are on the floor to maintain parallel knees.

Your chair should allow you to align your forearms and wrists. To promote circulation, make sure you can easily adjust your seating posture throughout the course of the workday.

Bookshelves and containers for home office

You’ll need bookshelves and other storage in your home office to keep all of your supplies, resources, and work items organized. Start by assembling similar work supplies first. Next, locate the shelves and other storage options that can accommodate the tools you need for your project.

Shelving can be hung or bookshelves can be used. Hang filing and storage systems on your walls or the backs of your doors to make the most of your available space. To make it simple to retrieve documents, create a sensible filing system.

Investing in right computer

(Photo from iStock)

To ensure you can operate effectively, you will at the very least need a computer with enough memory and processing speed. Make sure you frequently run and update your antivirus program. Plan routine system and file backups.

To prevent clutter in your area, organize your wires and ancillary equipment. Get tables with integrated cable management for this. These tables have openings or lids that can be opened from the desktop for cable wiring. Some have a socket built into them. Buying amusing cord managers to wrap around the cord group and keep it together is another option, though they might not conceal the cords as well as tables with cord management.

Reliable internet connection

You’ll require dependable high-speed internet for your home office. A faster speed is needed if multiple devices in your home are using the internet simultaneously. Create a home network that can support a variety of devices, including printers.

Get a wireless router that can support multiple connections, a cable modem, and network wires for your home network. Your modem and router must both have Ethernet ports if you plan to connect over Ethernet.

Positioning your monitor correctly

(Photo from iStock)

You may prevent eye and neck strain by placing your display correctly. You ought should be able to look at your computer screen directly without having to crane your neck.

Maintain a 20-inch (51-centimeter) distance between your eyes and the centre of your monitor. When your eyes line up with the address bar in your internet browser, your monitor is at the proper height. By slightly lowering the monitor, glare can be avoided.

Working beside a window in your home office

You will require adequate lighting to work effectively and efficiently. Create your room with a window in mind. Exposure to daylight enhances your work environment and raises your quality of life in general.

To avoid shadows at any time of the day, position your workstation to face north or south. Put yourself close to the window so you can take in the scenery without glare on your screen. Purchase quality window coverings to reduce glare and preserve the space from warming on particularly sunny days.

Artificial lightning source

(Photo from iStock)

To augment natural lighting, you need additional light sources. Set up a nice overhead or ambient light source to illuminate your entire workspace. Task lighting is necessary for close work, such as reading.

If your workstation lacks a window, at night, or on days when it is overcast, a smart blend of artificial light sources can make up for it. Find task lights that you can dim to fit any task.

Reference:

wikiHow
Making your home fireproof is important, searching for some effective tips?, your wait is over click on the link below:
Tips to make your home fireproof


Ways to brighten your garden

It’s not necessary to spend a lot of money or time gardening. There are numerous inexpensive solutions to brighten up your outside area. Many inventive and affordable garden ideas can help you accomplish your objectives, whether you want to add a splash of colour or some light to your backyard.

We’ll reveal our top recommendations for the most inexpensive garden design ideas in this post. We’ll go over everything, from simple DIY projects to inexpensive garden additions that will liven up your outside environment. Let’s get started if you’re prepared to use your imagination to spruce up your outdoor space.

Decorative planters

(Photo from istock)

Using colourful planters is one of the simplest ways to make your outdoor space more cheerful. They come in a variety of hues and designs, from the traditional to the contemporary. You can use them to display tiny trees, herbs, or flowers. For a special touch, think about upcycling or DIYing antique containers like teapots, tin cans, or even worn-out shoes into planters. Old pallets can also be used to make a tiered planter that will add vertical interest to your landscape.

Lightening your garden

Solar lanterns are a fantastic choice for creating atmosphere in your garden at night. They come in a variety of sizes and forms. Energy-efficient and without requiring any wiring, solar lights are a low-maintenance and environmentally beneficial solution. To create a cosy and welcoming ambiance, you can also add string lights, outdoor candles, or fairy lights.

Install wind chimes

(Photo from istock)

The wonderful sound that wind chimes produce might help you unwind and relax. They come in a variety of materials, including bamboo and metal. You can hear their tranquil songs if you hang them somewhere where they can catch the breeze. Recycled materials like beads, discarded keys, or shells can also be used to make wind chimes.

Suncatchers

Suncatchers are a lovely and affordable way to spruce up your outdoor area with colour. They can be hung from trees, hooks, or even be fashioned into a sun catcher mobile using twine or wire. The are often made of glass or acrylic and available in a variety of forms and styles. They will reflect the sun and produce a stunning array of colours in your garden.

Garden statue

(Photo from istock)

Your outdoor environment can become more opulent and sophisticated by adding garden statuary. There are several statues to pick from, such as animals, angels, and even abstract shapes.

Colourful urn water

A water feature is a brilliant method to give your yard colour and mood. It’s easy to find a few vibrant urns to put up a wonderful display, and bubbling water can be so soothing. Just be sure to surround them with a few river rocks to help with drainage.

Decorative sitting area

(Photo from istock)

If you have room, consider including a vibrant outside sitting option. Each plant that surrounds the seating area adds colour to the highlights.

Garden craft

Make one of these lovely rock caterpillars if you have kids or even if you just want to embrace your inner child. You can make it whatever long or short you like!

Decorative stepping stones

(Photo from istock)

Adding a few beautiful stepping stones to the garden will help your various displays feel more cohesive. Consider creating your own out of shattered crockery or customising a concrete stepping stone.

Grow scented flowers

Many gorgeous flowering plants, including viburnums, chimonanthus, Daphne’s, mahonia’s, and sarcococcas, emit a heady smell. If they are hidden behind barriers, they will go unnoticed and be undervalued. Instead, place them where you can easily enjoy their mouth-watering aromas, like at the front entrance, in the front garden, or beside to a route that is frequently travelled. Since many of these shrubs thrive in pots, they can be placed front and centre for the winter and then moved to a less noticeable spot for the summer.

Add seasonal pots

(Photo from istock)

The greatest method to add a seasonal pop of colour right where you need it is in pots. Choose plants like cyclamen, heathers, hellebores, pansies, and variegated ivy that work well together. Add a shrubby evergreen plant, like sarcococcas or rosemary, to a huge pot to give it some backbone. All of these plants are readily available in tiny pots at this time of year in garden centres, making it simple to mix and match.

Change window outlook

Winter is a period when most of us spend more time indoors, so having beautiful views out your windows is very beneficial. Think about what you may change to enhance the composition of your garden without completely redesigning it. What a little seasonal moving can accomplish. Consider moving any eye-catching items that are easily transportable, such planter displays and garden décor, so they can be clearly viewed from the windows. Or trim back a couple of a tree’s lowest branches to provide an eye-catching view of what lies beyond.

Bug hotels

(Photo from istock)

Nothing beats a project that both improves the garden’s aesthetics and aids animals. Any size and any type of bug hotel is acceptable. Consider the nooks and crannies. Bamboo canes should be trimmed into short lengths and left with their hollow ends exposed so that ladybirds and lacewings have the perfect places to hibernate. Put them in an old wooden box, or just tie them together into a little bundle without the frame. Eventually, to accomplish the same task, leftover pieces of wood can be drilled with holes, and if laid out on the ground, beetle larvae will eat the rotting, dead wood.

Painting your garden

It might be challenging to provide lasting colour to a landscape solely by planting, but painting or staining will instantly bring colour exactly where you need it to accent plantings or serve as a backdrop.

Reference:

Gardeners’ World
Making your home fireproof is important, searching for some effective tips?, your wait is over click on the link below:
Tips to make your home fireproof

Durable building materials for commercial construction

Any substance used to construct a structure is referred to as a building material. The construction business uses a variety of materials for construction. Depending on their structural capacity, we employ various materials. Building materials used in construction are governed by regional and national standards. On the other hand, architects select building materials based on cost and beauty. By selecting the best material for your project, you may improve and extend its lifespan. Below is a list of some of the most typical building supplies.

Concrete

(Photo from iStock)

A very popular building material is concrete. It is made of a composite substance that combines cement and water with fine and coarse aggregate as a binder. Then allowed to cure and set for a while. In general, concrete needs 28 days to reach its optimum strength after seven days of curing. Concrete that has steel inserted in it to boost the structural tensile strength is known as reinforced concrete and is most frequently used in construction.

Concrete is available in a variety of forms, including waterproof and light-weight varieties. The kind of concrete used is determined by the kind of project. The ability to pour concrete into any form and have it cure into a material resembling stone is one of the material’s greatest benefits.

Concrete is a widely used material in construction due to its low cost and adaptability. Concrete is utilized for
  • Foundations
  • building residential structures
  • development of commercial structures
  • construction of bridges
  • sewers and culverts.

Steel for building

(Photo from iStock)

As a result of our discovery of steel as a reinforcement material, the building of skyscrapers exploded. Steel is highly functional and strong.  In comparison to other building materials, it is also less expensive to freight, lightweight, and simple to deal with. Steel does not easily deform unless we apply a lot of weight to it, and even when bent, it maintains its structural integrity.

Steel stands out thanks to its great strength to weight ratio. Compared to concrete, it takes less time to install, and we can do it anywhere. However, corrosion might occur if steel is not fitted properly. Steel’s propensity to degrade at high temperatures is one of the material’s major disadvantages for use in building. The type of steel determines how fire resistant it is.

The following are some common uses of steel in construction:
  • To boost the tensile strength of structural parts, we employ steel as reinforcing bars.
  • We utilise it to create interior fixtures like railings and stairs.

Wood

(Photo from iStock)

It is readily available, economical, powerful, long-lasting, and flexible in every way.  You shape them according to your own choices and enjoy that process.

In addition to being durable, wood is an environmentally friendly material.  Steel, stone, and aluminium all operate well with it. Wood is relatively lightweight and straightforward to standardize in size when compared to other building materials. It is effective in insulating and soundproofing, and it has a high tensile strength.

In the following sectors of building, we employ wood:
  • Building of the ceiling, floors and walls
  • building interior features including door and window frames
  • structures’ frames in buildings and bridges
  • Thermal defence
  • acoustical protection

Stone used for building

(Photo from iStock)

The most durable building material is stone. It is available in a wide range of colours and finishes, from smooth to rough.  Although common stone is inexpensive, expensive finishes are available. Quality and colour affect the price and length of manufacture for marble countertops.

Stone has some shortcomings. Because of its weight and the impact of its density, moving it is challenging. Stone is a poor insulator as well, making it useless for insulation in cold climates.

In the following ways, stone is used in construction:
  • as a construction-related rough aggregate
  • For walls, dams, and bridge piers in masonry
  • as railway ballast
  • To prevent dampness on exterior walls
  • Marble and other stones make superb polish finishes.

Bricks

(Photo from iStock)

Despite having a great compression resistance, they are easily breakable.  Durable and fire-resistant is masonry. We utilise it to build load-bearing walls due of its strong compressive strength. Masonry can support multi-story structures when reinforced with concrete, making it a cost-effective material for construction.

Masonry is used in a variety of building materials, including:
  • applied to walls
  • used to construct masonry foundations
  • In places that are prone to flooding, gabion building also uses masonry.

Construction foam for building

(Photo from iStock)

Unique and having a high strength-to-weight ratio is bamboo.  Furthermore, Its strong tensile strength and compressive strength are comparable to those of concrete, brick, and wood. This is a tough alternative that one should adhere to.

To prevent air intrusion and offer thermal insulation, buildings use this plastic foam material.

Glass

(Photo from iStock)

Glass is more aesthetically pleasing and lighter than brick and masonry. Durable building materials are a fundamental requirement for commercial construction projects. First and foremost, concrete stands as a stalwart option, offering unrivalled strength and longevity. Additionally, steel reinforcement bolsters concrete’s resilience, ensuring stability in high-stress areas. Moreover, the use of steel-framed structures provides excellent load-bearing capacity, which is imperative in commercial construction.

Conclusion

Transitioning to exterior materials, brick and stone offer timeless durability while adding an aesthetic touch. Furthermore, the use of high-quality glass for windows not only contributes to a building’s energy efficiency but also guarantees long-term clarity and resistance to environmental factors. When discussing roofing materials, durable options such as metal or synthetic slate prove essential for protection against the elements. Likewise, composite materials, like fibre cement, make for exceptional siding choices due to their resistance to rot and insect damage. In conclusion, in the world of commercial construction, the selection of durable building materials is paramount, and the careful transition from foundation to façade ensures that structures can withstand the test of time while meeting safety and aesthetic standards.

Reference:

Proest
Making your home fireproof is important, searching for some effective tips?, your wait is over click on the link below:
Tips to make your home fireproof

Tips on making a kitchen renovation

Although remodelling a kitchen is a significant undertaking, it should not be intimidating. Establishing a budget and developing a plan with a designer or contractor are necessary steps to achieving the place of your dreams. You’ll also need to decide where you’ll stay while the renovation is being done if you want to endure it. You will have a place to show off to everyone in the neighbourhood once you have installed each component of the kitchen one at a time.

Finalizing the features of your kitchen

(Photo from iStock)

Spend some time considering how you want to enhance your current cooking area. If you have enough room is one of the most crucial queries. Your kitchen might need to be expanded. Choose the new elements you want after deciding on the available space.

For instance, your ideal kitchen might not include a conventional stove but rather an island hob. Keep a copy of any kitchen images you like. Use them to decide what characteristics your perfect kitchen should have.

  • Your budget

Set a limit on the amount of money you’re willing to spend on the renovation. Investigate how your designs fit within your budget when you design your kitchen. Online furniture estimate searches, trips to furniture stores, and consultations with designers and contractors are all effective ways to accomplish this.

  • Costs for the designer and contractor should also be included.

(Photo from iStock)

You’ll typically need to adjust your plans or budget because remodelling generally costs more than you’d anticipate. The layout and utilities need to be perfected as a top priority. The following section includes cabinets and countertops. The majority of your largest costs will be made up of them.

Planning floor space for kitchen

Spend some time planning out your kitchen. The location of your refrigerator and other equipment should be decided. Include the cabinets and counters. You can see how much room you have to work with in a complete sketch. To keep adequate open space in the kitchen, you might have to choose smaller appliances, countertops, and cupboards.

Remember where your future utility lines will be. The configuration is impacted by plumbing, gas lines, and electrical outlets. Ask the contractor to leave them in their current location to save money.

Your kitchen’s style

(Photo from iStock)

Most likely, you already have a vision for the kitchen’s design. Perhaps you prefer a modern appearance for your kitchen than one that is classic. It might be made entirely of wood or have a colour scheme. Choosing a design entail concentrating on the kitchen’s overall appearance rather than individual components.

For instance, a modern kitchen might feature marble walls, a lot of reflective surfaces, and a colour scheme of black, grey, or white. Appliances may be made of metal, and furniture may have a very clean, modern appearance.

A cottage kitchen could contain vintage or white appliances, wood floors, checked light blue or yellow patterns, and colourful accents. Wooden furniture and floors go well in a country kitchen. Red, yellow, blue, or white are all acceptable colour choices. Appliances made of stone and brick can also give off a rustic vibe.

Construction plan

Even if you want to construct the kitchen yourself, consulting a designer is a smart move. You may finalize your remodelling plans while staying within your budget with the aid of kitchen designers and architects. Utility and structural work is outlined by construction firms.

To submit a building permit application, you must have these plans.

  • Estimate from the contractor

(Photo from iStock)

Electrical wiring and furniture installation are only two of the many components that go into major renovations. Typically, you may hire just one contractor to take care of all your needs. Obtain quotes from at least three businesses.

You should discuss your design plans with each contractor and receive an estimate. Determine whether you need to alter your plans to stay inside your budget using the estimate. To locate feedback from previous clients, use a web search for the contractor’s name.

  • Construction permits

To determine which permits you require, speak with your local government. The majority of jobs won’t require a permit.

You’ll probably require a permit if your remodelling design calls for installing or removing walls, window openings, or utility lines. This can be handled by designers, architects, and contractors.

Arranging living plans

(Photo from iStock)

It can be frustrating and take weeks to remodel. While the building is taking place, you will need to make plans for where you will live and eat. Put your refrigerator and cooker in a different room. Spend the day away from home on the noisiest and dustiest days, such as when walls and flooring are being torn down. The summer months are ideal for building. You may spend time outside and cook outside while it’s warm out.

De-clutter your kitchen

Your kitchen’s majority of items can be uninstalled without a contractor’s assistance. Pull up the cabinetry and floors if you’re handy around the house. Take out any furniture and light fixtures that won’t fit in your new space.

Doing this on your own can save you money if you haven’t already engaged a professional. If you don’t, you might be without a refrigerator or cooker for weeks. You might want to keep some of the appliances until the new ones arrive.

New kitchen accessories

  (Photo from iStock)

It can take weeks for these kitchen accessories to arrive. Ordering everything you need in advance will prevent you from becoming trapped in the middle of a remodel.

The cost of purchasing these features can be high.

Inspect the work

Rough-in work refers to the installation of your utilities but not their connection. They’ll check to see that your house complies with all regulations. Before they worsen, you or your contractor can take care of the violations. Inspect your work this way.

Reference:

wikiHow
Making your home fireproof is important, searching for some effective tips?, your wait is over click on the link below:
Tips to make your home fireproof

Tips to consider when moving to your new house

One of the most gratifying experiences is moving into a new home and having your own private area. However, there are a few obstacles to overcome before you get there. For example, looking for a property can be stressful if you don’t have an agent’s contact information, the phone numbers you are obtaining online are scammers, or you don’t know where to start.

When relocating to a new home, there are many things to take into account, many of which are influenced by your preferences and situation. So, before moving into a new home, be sure to verify the following:

Location of the new house

(Photo from istock)

When seeking to move into a new home, this is typically the most important factor to take into account. The location should comfortably accommodate your needs; ideally, you want the majority of the locations you frequently visit—from your workplace to the children’s schools—to be close to your home. This reduces transit costs while also avoiding lengthy commutes and/or pointless traffic.

Think of additional amenities including medical centers, grocery stores, and entertainment venues. Most importantly, great locations bring people of a particular class closer together, allowing for networking opportunities.

Choose a place that suits your needs and achieves your objectives. Keep in mind that location is crucial because rent varies greatly depending on where you are. Therefore, you might wish to look into a location that fits inside your spending limit, which takes us to the following point.

Cost

Rent shouldn’t be more than 20% of your total income, as a general rule of thumb. By doing this, you may pay your rent and still have money left over for other expenses without putting an excessive amount of strain on your finances. A financial audit is crucial for homeowners to assess how much they can truly afford to spend and whether they can get financing to cover the expense.

Financial restraint is essential in this situation; look for a nice home that fits your needs without breaking the bank. People frequently uproot themselves to bigger houses or swankier neighborhoods just for the bragging rights at the expense of their budgets.

Security in the new home

(Photo from istock)

Everyone wants to live in an area that is safe and secure, where they can rest easy knowing their family is safe. A place where, even if you worked late, you could still safely return home. If you can’t find peace of mind, investing in a new home might as well be for nothing.

For instance, gated communities and places within the UN Blue Zone typically have strict security standards, and the presence of a police station or other government or diplomatic activity typically increases an area’s security. Tight security manifests itself in other ways as well. CCTV cameras and the presence of security guards are two key elements that encourage tight security in apartment complexes. The other thing you can do is talk to locals about the security of the neighborhood; this will give you a first-hand account from someone who lives there.

Water supply

Life is water. Before opting to reside somewhere, be aware of the water supply there. Is the municipal water system trustworthy? Does water rationing take place there? Do you need to dig a borehole or purchase a tank? How is the water supply affected during the dry season? You may plan yourself and prevent unpleasant surprises by asking yourself these questions.

Electricity

(Photo from istock)

You’ll be excused if you don’t give electricity much thought because it appears obvious in the modern world. But not everywhere is like that.

Does the home and the neighborhood where you’re relocating frequently experience blackouts? If the answer is yes, you should think twice. If this is a compromise, you’re willing to make, you might want to think about switching to a backup power source. An unstable electrical supply may be fatal in a world where many people work from home and the fridge is loaded down with tonnes of food.

Repair and maintenance of new place

You are curious about the climate in the general vicinity of the new home. Is it too chilly? Do you need to buy a heater? Does the area flood when it rains? You don’t want to reside in a flood-prone or riparian environment. Investigate how various weather patterns may impact the neighborhood of the house you want to move into.

When searching for homes to move into, keep these points in mind generally. From there, there are some further details for repair and maintenance to focus on.

Repairs and maintenance

(Photo from istock)

This is a crucial consideration when relocating to older homes. They could necessitate more meticulous upkeep of the home’s original fixtures or features, which is typically more expensive. Before considering purchasing a new home, find out what the servicing fees would be.

Another crucial factor is the standard and condition of a home’s finishes. There are certain things that may be ignored, and there are some that you might be prepared to modify, but there are some homes where the finishing is so subpar that the cost of renovation is out of reach.

Leaks and fixtures

Look for any plumbing or water leaks. You don’t want to go to sleep at night and discover your home is flooded. Make sure you are familiar with where the gas and water shutoff valves are before moving in. Check the locations of the circuit breakers and the fuse boxes for all the lighting fixtures. In order to make sure everything is in working order and that you are aware of them in case of an emergency, do this.

Surroundings and environment

(Photo from istock)

We have relocated folks to a new place that was really beautiful, yet they had to leave after only a few months for the reasons listed below:

Evenings are not quiet on the street. There is too much activity in the vicinity, such as a busy nightclub close by, which prevents any sense of tranquilly. The home is on property that is in dispute (with the government, NEMA, etc.) and is occasionally slated for demolition.

There is a persistent sewage line leak in the vicinity that fills the house with a foul smell. During the wet season, the compound is vulnerable to floods.

Reference:

LinkedIn
Making your home fireproof is important, searching for some effective tips?, your wait is over click on the link below:
Tips to make your home fireproof

Famous Architect Styles of All Time

These well-known builders have left their imprint on the world for millennia. Their distinct architect styles can be seen in everything. From Mies Van der Rohe’s minimalist design to Antoni Gaud’s elaborate works to Frank Gehry’s glossy, undulating forms. By reflecting the fashions of the moment, architecture can characterize an era.

These are the most well-known architects, whether or not you appreciate their styles. Use our guide to learn more about these industry heavyweights. And if you get the chance, pay a visit to any of these landmark buildings in person. Even if these structures look incredible in pictures, nothing compares to actually viewing the creations of renowned architects.

Antoni Gaudi

(Photo from iStock)

There, over the course of his whole career, Gaud erected the most well-known of his creations, the 1883 cathedral known as La Sagrada Familia. Which is still under construction today. His ornate design, which combined aspects of Baroque, Gothic, Moorish, and Victorian architecture. Typically featured beautiful tile work and took its cues from organic shapes. Both the undulating facade of another of his well-known works. The apartment building known as the Casa Milla (influenced by the multi-peaked mountain just outside of Barcelona called Montserrat). And the tree-like columns that support the large interior of his church can be recognized as examples of these influences. Later modernist generations would be significantly influenced by Gaud’s work.

Frank Lloyd Wright

Wright, a native of Wisconsin, revolutionized 20th-century architecture, and his upbringing in the Midwest significantly influenced the way he perceived the world. Wright developed the Prairie House style in opposition to the dominant Victorian aesthetic. This emphasized dark décor and ornate ornamentation both inside. And out and was inspired by the low-lying buildings that dot the American plains. Wright replaced it with simple geometries that put a focus on horizontal planes. His most well-known structure, Falling Water, a mansion in Bear Run, Pennsylvania. That he constructed in 1935 for Pittsburgh department store tycoon Edgar Kaufmann, has stacked rectangular balconies that appear to hover over the natural waterfall integrated into the house. Wright would adopt curvilinear aspects later in his career.

Mies Van der Rohe

(Photo from iStock)

Known for believing that “less is more,” German architect Mies Van der Rohe reduced building to its most basic geometric forms, paving the path for minimalism. In order to define the appearance of his buildings. He eliminated all signs of embellishment and instead relied on the inherent properties of materials like steel and plate glass. This strategy evolved from another tenet—form equals function—promoted at the Dessau Bauhaus. Where he served as the final director until the Nazis shut it down. His plans prioritized efficiency and rationalism as the path to beauty. An approach epitomized by The Barcelona Pavilion, created to host Germany’s exhibit for the 1929 International Exposition in Barcelona.

Philip Johnson a famous architect

Johnson had a significant influence on the industry as the department’s first director, serving as a gatekeeper who helped to mould architectural trends from 1935 onward. He was a designer in his own right. However, it’s fair to argue that he improved on rather than created anything entirely new. But in a few instances, most notably in the house he constructed for himself in 1949. His creations became famous. Mies Van der Rohe’s philosophy is distilled in the home, and Johnson himself said it was “more Mies than Mies.” The Glass House blurs the lines between inside and out.

Eero Saarinen

(Photo from iStock)

The International Style, which has become the standard aesthetic for new corporate headquarters. And governmental office buildings worldwide, was born out of the Bauhaus’s emphasis on straight lines throughout the post-war period. In this context, Eero Saarinen’s mid-century designs acted as a welcome corrective to the modernist ideal of simplicity Which had essentially turned into a sort of corporate conformity. Saarinen used swooping curves instead of the uniform box used by the International Style. Giving his architecture a sense of lofty transcendence—particularly in his 1962 JFK terminal for the now-defunct TWA airlines. Its gull-wing roof and exhilarating interior are still thrilling, but Saarinen’s signature sensation of architecture taking flight permeates the entire structure.

Richard Rogers a well known architect

Leading advocates of the look included British architect Richard Rogers. With its heating and plumbing systems exposed as the façade and an external escalator with a glass enclosure scaling the height of the building. This building, intended to serve as Paris’s primary institution for Modern and Contemporary Art. Like a structure turning inside out. When designing the headquarters for Lloyd’s of London, another of Rogers’ famous structures, he followed a similar strategy.

Norman Foster

(Photo from iStock)

British architect Norman Foster began his career as a co-worker of Buckminster Fuller, the famed futurist and inventor of the geodesic dome. Foster later supported Frank Lloyd Wright, Ludwig Mies van der Rohe, and Le Corbusier. Foster’s most famous skyscrapers share comparable façade surface treatments, suggesting that the latter’s tessellated pattern of triangle forms served as inspiration. A prime example is the commercial skyscraper called The Gerkin, which was built in 2004 and opened in the financial district of London at 30 St Mary Axe. Hence,  in the same way that the Eiffel tower is linked with Paris, its pickle-like shape that tapers to a point has made it an iconic landmark.

Santiago Calatrava a dignified architect

If such things existed, his constructions frequently resemble the rib-cages of robotic ancient dinosaurs. He certainly drew international notice for his projects, which also earned him a reputation for astronomical cost overruns. But there’s no doubting that Calatrava is one of the most distinctive architects now at work, as seen by his best-known design, the Transit Hub for the World Trade Centre.

Reference:

Time Out
Making your home fireproof is important, searching for some effective tips?, your wait is over click on the link below:
Tips to make your home fireproof

Tips on designing your backyard

If your backyard is thoughtfully planned, you’ll always have a spot to unwind, host guests, and take in the outdoors. Whether your backyard is a sizable suburban lot or a huge acre, you may design a getaway that you’ll enjoy for many years. Simply consider the features you want or need the most, such as a grilling space or a garden shed, and then construct around those.

Native plants and grass

(Photo from iStock)

You can reduce the amount of time you need to spend caring for a plant by selecting native species to your region. Because native plants are usually the most suitable for your soil and climate, you won’t typically need to worry about modifying the soil or applying fertilizer on a regular basis.

If you’re reseeding your lawn, native grass is another alternative that requires less upkeep.

Use planters to add greenery

You don’t have to forgo gardening because your backyard is small. You may utilise your small space by using planters, and the planters themselves frequently give a pleasant decorative touch.

The best method to utilise vertical space is with tiered planters. To make a small patio appear unified, try adding identical pots on either side.

Include plenty of seating

(Photo from iStock)

The seating will be one of the most crucial elements of your comfort, whether you intend to entertain frequently or just want a cozy place to hide away. Your choice of seating will depend on how you want to use the area. Consider folding chairs that you can hang from pegs while they aren’t in use if you expect to have a large number of guests over. If you don’t have much room, you might choose an outdoor bench or couch that hides a storage area.

Install dining table in backyard

You’ll need a durable outdoor table if you enjoy the thought of enjoying a freshly grilled burger on your back patio. Choose a table that can accommodate an extra person or two so that you will always have space for visitors!

For instance, if you have a family of 4, an outside table that seats roughly 6 people would be ideal.

Even if you prefer not to eat outside, you might still want some little accent tables for your room so you have somewhere to sit your drink, book, or whatever else you bring outside.

Add a fire pit

(Photo from iStock)

Consider installing a fire pit to your backyard so you can enjoy your outdoor space even in chilly weather. Instead of having a fire in the open, these offer a safer option to put it out. You can either purchase pre-made fire pits or construct your own out of materials like brick or field stone that are fire-safe.

Of course, put fire safety first! Keep children and dogs a safe distance from the fire pit and avoid lighting a fire on days with strong winds. Don’t ever put anything combustible in the fire pit, either.

Building a patio in backyard

When you’re relaxing, you’ll have to contend with dirt, muck, and mosquitoes if you set up your lawn chairs right in your backyard. To avoid that, you can construct a wooden deck or create a concrete patio next to your house, then utilise that area for entertaining, grilling, and other activities.

If you’d like, you could even create a patio with stone pavers.

Grilling area

(Photo from iStock)

Since you’ll need to store your grill when it’s not in use, it’s preferable to have a special place set aside for it. If you cook on your grill frequently, you could even want to create a built-in grilling area where you can keep your cooking utensils and any other items you might need.

To shield your grill from the elements, you could wish to erect a small awning above this area.

Lightning

A porch light can be sufficient if your gathering place is close to your home. If not, you’ll need outdoor lights so that you may use your backyard when the sun sets. To light your path at night in an environmentally friendly manner, install solar-powered lights along the sidewalk.

For a festive touch, drape string lights across a patio. Or encircle the base of a tree with them. Use motion-activated floodlights in your backyard to increase safety.

Building a pool in backyard

(Photo from iStock)

You should make an early decision about whether you want a pool because it will take up a lot of room. Choose a sunny location for your pool that is free of any trees or bushes. You won’t have as many leaves to remove from your pool each day as a result.

If you would rather to have a warm, soothing dip, you may also include a hot tub. Compared to a pool, these often occupy less space. Do not feel obligated to incorporate a pool in your backyard because they require a lot of maintenance and are a costly investment.

Playing area for the kids

No matter your financial situation, you can make an enjoyable outdoor play area for your children. For example, you could construct a sandbox for next to nothing. Or dangle a rope swing from a strong tree branch! You may construct a playhouse or a tree-house for your children if you have more money.

Children enjoy playing outside, which is a terrific method for them to exercise. You’ll encourage children to be active. And healthy by designing a unique area for them. Build or create a cover to go over your sandbox once the kids are done playing to keep animals out.

Space for outdoor games in backyard

(Photo from iStock)

Leaving a large section of your yard open when designing your outdoor space is sometimes the best option. It will be less likely that you will inadvertently hurt yourself or damage your property. And you won’t risk crushing your flower bed if you need space to throw a ball around, perform sprints, or design an obstacle course.

You may even construct a ball court if you have enough room and love sports a lot!

Reference:

WikiHow
Making your home fireproof is important, searching for some effective tips?, your wait is over click on the link below:
Tips to make your home fireproof


Planning a stylish and affordable house

When they first start producing money, one of the key goals many Indians have is to one day acquire a house. In homes, families grow and memories are made. Many families are hesitant to build their own self-contained home because they fear it would be costly. While this may be true in some cases, it is still possible to build a single-story home in India on a limited price. All you require is a plot of your choice, keeping in mind the fundamental design structure.

These homes are also known as single-story house plans. With the proper blueprint arrangement, you may develop a comfortable structure even with home plans for 10 lakhs. You may utilise our straightforward, affordable single-floor house plans to create a custom one-story home. Additionally, India is home to a variety of architectural styles, so you can pick what you like.

Open low-budget single floor design

(Photo from iStock)

The open structure is among the greatest low-cost single-floor home designs ever created. A larger space is created by combining two or more spaces in an open floor design. Using floor-to-roof glass windows and doors, an open floor plan creates the illusion that the room is larger than it actually is. The main advantage of the house is that it receives a lot of sunlight and fresh air. Furthermore, everything may be viewed from a single area.

Single floor with multiple sections

If you have the luxury of a large plot, it makes sense to build the house in portions throughout the plot rather than using numerous storeys. The main house is single-story in style. By doing this, you can have extra carpet without having to pay to build a new floor.

Single floor with open deck

(Photo from iStock)

Most people don’t have enough room in their homes for a full-fledged outdoor garden. In such circumstances, you can design a floor plan that has an open deck that will function as a miniature garden area. Consider the layout shown here. In order to provide much-needed seclusion, the open terrace is tucked away at the back of the house. The open layout allows for plenty of sunlight and fresh air in any season. Your low-cost single-floor house design with an open deck can accommodate informal gatherings and parties.

L-shaped house design

Most popular among the list of cost-effective house designs are the 10 lakh budget house plans. This list begins with a simple, plain L-shaped house. The plan below makes the best use of the rectangular land by designing an L-shaped, one-story house at one end and a garden area in front. You can do this if you want an open garden but don’t have enough room.

Elevated single floor house

Assume your plot is located in a flood-prone area during the rainy season. In that case, it is critical to elevate your residence. The water will flow this way rather than that from the house to the road. Another advantage of being higher is having a better view of the surroundings. Take a look at this charming compact low-cost single-floor home design on an elevated place.

House plan with attic space

A house’s attic is the area located between the ceiling and the roof. Some homeowners cleverly transform the typically wasted space between the roof and ceiling into a storage area or even an extra bedroom. The only thing left to do is reinforce the ceiling and install a window. You may now use it as a hidden storage room or even a little bed when you have visitors. Attics are common in Western countries.

Single floor house with patios

You might not have enough room for open gardens. However, don’t forget to include open patios in your low-cost single-story house design. An open patio can be used for a variety of purposes. Place some furniture there to enjoy the evenings outside. During inclement weather, the area can also be utilized to store bicycles, set up shoe racks, and dry belongings.

Box and strip budgeted house

Say you don’t have the resources to devote to a complex framework and conventional house building.

If this is the case, you should definitely check the box and remove any home plans that cost less than 10 lakh. In a box and strip construction, an ordinary-sized wooden block is utilized instead of frames, cement, and other standard materials.

The framework is constructed by nailing the wood blocks together, and the roof is quickly installed on top. A benefit of such homes is that they may be taken down and rebuilt somewhere in a couple of days.

House with exposed bricks

Exposed bricks are popular among families and are often used while building homes. In an exposed brick design, the bricks are left unpainted or unplaster and are left visible. Check out the modest, pleasant house below that has exposed brick on the exterior. The benefit is that you may save money on materials and labour costs by using these bricks because they never go out of style. A single level home with such a low cost can be built rapidly, allowing you to move in sooner.

Attached single floor design

(Photo from iStock)

Consider a scenario in which you currently own a multi-story home and wish to construct a more compact, low-cost single-story home to rent out or use as a guesthouse. You can use one of your existing walls as a foundation for the smaller house. Money will be saved greatly as a result. Simply expand the three walls and add roofing is all that is required. If you need to build a whole home but are on a very tight budget, give this a try.

Simple single floor design

A straightforward, low-cost single-story home design is a fantastic option. Easy access is guaranteed by the unusual single-floor dwelling design. Additionally, it allows for a tonne of outside space, as seen in the picture above. The external colours of the Indian single-story home are a timeless combination of white, brown, and a dash of orange.

Reference:

magic bricks
Making your home fireproof is important, searching for some effective tips?, your wait is over click on the link below:
Tips to make your home fireproof


List of important tools for an architect

A career like architecture cannot be fulfilled inside the confines of a single room. Due to the fact that an architect must make timely site visits in order to accomplish the assignment in the required manner, this imaginative and fascinating industry is much more than that. In this extremely creative field, going beyond books and drawings is a crucial step. A designer cannot enter the premises unarmed. To examine the ongoing site work, one needs to carry a variety of tools.

Laser distance measurer

This instrument is essential for ongoing indoor and outdoor measurements as well as for recording finished work. Because of its stylish and durable design, it is very simple to carry in a pocket. The battery has a long lifespan and speeds up work. Area and volume calculations may be completed quickly thanks to the ability to alter measuring units as needed.

Sketch book

(Photo from iStock)

The ideal tool for providing clear and understandable site information for workers. It consists of premium sheets inside that are suitable for a variety of media.

It is Impressive and top-notch quality complements artists with enthusiasm. The lightweight and weatherproof, making it a sturdy product.

Pencil is a basic architect tool

The ideal tool for professionals who need to create artwork right away. These extra-fine pencils enable seamless shading and doodling without any restrictions, adding dimension to the work.

Used perfectly for hatching, detailing, and many mixed techniques works in addition to sketching. These pencils have an ergonomic grip that is comfortable for lengthy working hours.

Messenger bag

(Photo from iStock)

Perfect for transporting numerous portable tools needed on-site, like drafting pencils, notepads, sketchbooks, measuring tapes, small cameras, etc.

A smaller pocket for stationery, a secure pocket for a camera, a square or rectangular pocket for A4 or A3 notepads, etc., are just a few of the many items it may carry.

Both strong and water-resistant, this bag. Above all, this bag has a beautiful appearance. It exudes an architect’s grace and elegance.

Camera

The greatest tool for taking images from the site in a manner that is professional and aids in maintaining the record.

This camera has good photo quality and a respectable battery life. Most efficient and svelte in size, and readily transportable. Additionally, it boasts an easy-to-use UI and takes excellent photographs even in dim lighting.

Measuring tape is important architect tool

(Photo from iStock)

For measurements at small scales, fairly accurate. The tape does not budge up to 5 to 6 feet without support, allowing for quiet work alone.

The design of this high-quality tape is strong and long-lasting. Recoil is incredibly convenient to use and works like magic.

Coloured pencils

With this tool, you can quickly distinguish between distinct aspects when sketching and give your work more vitality. Sharp, distinct strokes are produced by these pens. These colours are all sufficiently pigmented to result in precise work.

Value for money and works best on smooth, textured paper.

An i-pad

When it comes to instantly providing the client with references, technology can never be incorrect. It has a strong, elegant design with a flawless display screen.

The split-screen capability is excellent and expedites work. A superb battery life, flawless touch functionality, and sophisticated security are all crucial for an architect’s work.

Calculator is significant architect tool

(Photo from iStock)

Time saver for addition and subtraction calculations performed on-site with clients and laborers. It has body with curved sides and a beautiful display that is sleek and fashionable.

It has a robust product with buttons printed with wear-resistant ink. That is portable and lightweight, with excellent battery life.

Square graph notebook

The best approach to produce sketches quickly and on a large scale. With its time-saving quality binding feature, it is simple to use. Both high-quality and low-quality pencil strokes adhere perfectly to all types of paper. Since it is acid- and chlorine-free, the product is both budget- and environment-friendly.

Compass as an architect tool

(Photo from iStock)

A pair of compasses or a compass is a technical drafting instrument used by architects to engrave arcs and circles. On occasion, they might use a compass to create lines on a map that represent distances. A compass helps architects create drawings and blueprints with a high degree of accuracy.

Cutting board

Architects prepare the different parts they need for 3D model creation using cutting boards and cutting mats. These mats are useful for a variety of cutting tasks, including paper, cardboard, foil, and even thin plastic. If you’re about to make a cutting board purchase, think about opting for a self-healing mat instead because it might last longer. Prepare a variety of cutting boards in different sizes so you may use them to work on both small- and large-scale models.

Desk lamp

You can appropriately illuminate your work area with a desk lamp. When looking for one, think about selecting a lamp with a movable arm that you can fasten to your desk. When working on substantial undertakings, a lamp of this kind enables you to alter the light’s direction. You can select a warm or cool light bulb depending on your preferences or the requirements of a project.

Drafting tape is necessary as a architect tool

You can use drafting tape as an architect to attach model components to the cutting board. When you are adding information to your projects, it also enables you to block entire sections of them. You can use drafting tape when painting to keep the paper in place even while you’re using big paintbrushes or other tools to add texture or shadows.

Scale ruler

(Photo from iStock)

Using a scale ruler, architects can measure their work and transfer measurements at a specific length ratio. A scale ruler typically has two to six or eight sides, with each side denoting a different scale. It can be used to measure a wall’s length and establish how long it actually is. For instance, a wall that appears to be 10 cm long on a 1:20 project is actually two meters long. You may automatically transfer the measurement using a scale ruler rather of making the calculations in your brain.

Reference:

indeed
Making your home fireproof is important, searching for some effective tips?, your wait is over click on the link below:
Tips to make your home fireproof


Benefits of a storm door

A storm door could be the ideal addition to your doorway if your home’s comfort and safety are among your top considerations. However, what exactly is a storm door and how can it help you and your family? Learn more about what a storm door does and the advantages of having one installed in your home before deciding which model is best for you.

What is a storm door?

(Photo from iStock)

What is a storm door, then? Most of us are certainly familiar with the fundamental concept: It adds an additional layer of security to your existing entry door. But it goes far deeper than that.

You can also inquire, “What is the function of a storm door?” Well, there are multiple goals. These are frequently built to provide a home with lighter and ventilation in addition to providing an additional layer of protection. They shield your pets from the elements and pests while also keeping them inside. These, however commonly confused with screen doors, have a glass panel and a set of latching or locking handles for added security.

Why do you need a storm door?

For families, storm doors may be used to listen to and monitor youngsters playing outdoors, which is impossible with a solid entry door. Your goal can be to boost ventilation and light levels while making a barrier against pests if you prefer being outside and in the sun.

Because they can aid in insulating against air leaks, storm doors typically have an energy-saving focus from a purely financial perspective. Additionally, they make a pocket of air that retains heat or cold between them and your front entrance, successfully preventing unfavourable temperatures from entering your house.

You probably also want to know some of the specific advantages of installing this door. In addition to the question of what a it is used for. The top benefit is improving the energy efficiency of your outer door, but many advantages are directly related to the function of storm doors.

Protects against elements

The prevention of damage to your front door from snow, ice, and rain is one of the key advantages of them. In the event of floods, storm doors can also prevent water damage inside your home.

Keeping bugs out

These are an excellent alternative if you want the sensation of an open door. Without letting in insects or mosquitoes. Without having to worry about undesirable animals, you can leave your front door open and let cool air through.

Extra security with a storm door

  (Photo from iStock)

Consider  them as an added layer of security against intruders. To make it more difficult for burglars to enter, each storm door has its own lock-set and glass.

Energy efficiency

Your home’s heating and cooling systems don’t have to work as hard to maintain the desired temperature. When the seals around your property are properly installed. These keeps your house energy-efficient. Helping you to reduce your long-term electricity costs. Consider this door as an added layer of security against intruders. To make it more difficult for burglars to enter, each has its own lock-set and glass.

Reduces noise

These form a barrier that lessens the amount of noise entering your home, including traffic, trash collection, and even construction, because they are made up of three solid layers.

Natural light pathway

Your hallway entrance can be instantly brightened by installing a storm door. Your children and animals are free to roam and enjoy the sunshine. Without having to worry about them running out the door.

Extra insulation with storm door

The materials used in doors deteriorate over time and start to let air through. Air is prevented from leaving. Or entering the house by the barrier created by storm doors. By shielding it from the harshness of the sun or the cold, they also increase the lifespan of your front door.

Adds beauty

These may give your room a little more character. Because they are available in a variety of styles and colours. For a distinctive and contemporary look, think about painting your storm door the same shade as your front door.

Better ventilation with storm door

The ones, which have retractable screen panels, are a great way to increase airflow. This may be the ideal answer for increasing the amount of airflow in a home with few windows.

Adds to the value

Their installation is one of the cheapest home improvement tasks that has numerous advantages for homeowners. It not only adds protection to your entrance but also increases curb appeal. These can occasionally come to mind as being plain or uninviting. They can, however, be so much more than that.

You can buy a door with a full view if you require a storm door that lets your front entrance shine. You can alter the door’s colour to make your entrance stand out. Or match the hues to the exterior of your house for a sleek, high-end appearance.

Saves money

(Photo from iStock)

When it comes to energy savings, a storm door produces multiple advantages. It makes an insulating pocket that shields the warm air inside your house where it belongs from the cold air that enters throughout the winter. These greatly cut down on energy loss! Enjoy the benefits of energy efficiency that come with installing a storm door. Your heater and air conditioner will work less hard and last longer if your home is properly sealed.

Keeps home comfortable

One of the main areas where air enters homes is through entry doors. Without a storm door, the chilly winter air that sneaks into your house. Might create an unfavourable indoor climate. Installing a new storm door can be the best remedy for a draughty entrance. They provide the continuous warm comfort you want in your house and work fantastically on side doors, back doors, and front doors.

Reference:

Thompson Creek
Making your home fireproof is important, searching for some effective tips?, your wait is over click on the link below:
Tips to make your home fireproof


Ideas of garage storage systems

What are the finest garage storage solutions to keep this most challenging of home areas organized when garages become catchalls for anything from garden supplies to seasonal decorations?

We spoke with professionals to find the best garage organization advice that will help you make the most of every square inch of the garage in order to resolve this conundrum and others. This involves thinking vertically and installing hooks to hang equipment from walls or figuring out how to fit ingenious items, like storage benches, that serve as organizational elements and reduce dust accumulation.

Make the most of your garage with the help of these suggestions for garage storage. Create a room for all of your household tools and materials using the shelving unit as a blank canvas. Or learn how to turn the bare floor of your garage into a chic showcase by finding space for all of your bicycle storage, motorcycles, and electric car accessories. The greatest garage storage solutions (including product recommendations) are included below, along with some organizing tips to help you get started on your garage makeover.

A tool racks in garage

(Photo from istock)

You don’t want to experience what was depicted in those old comedy sketches where characters stepped on rakes and hit themselves in the head. Get those tools off the ground with a garden storage rack by copying this design. To avoid digging into sharp tool drawers, you can also find smaller versions of screwdrivers, hammers, and chisels.

Using pegboard

One of the most adaptable garage storage options available is a pegboard. Which is ideal for the variety of items we need to keep in our garages. Use a hook-equipped one to hang your best paintbrushes, rollers, and cleaning supplies, and add pegs to hang brooms or garden tools. Small shelves can also be added to them with ease.

Multitask shelf brackets

(Photo from istock)

Choose hooked shelf brackets that can handle some of your more uncomfortable necessities to make the most of a set of shelves. The brackets can be used to hang hoses and power equipment. You can even thread garden tools through to support them at either end.

Fitted cabinets of garage

Consider making your garage more like your kitchen if you use it frequently. You will need cabinets for storage, counters, and, of course. A washbasin for washing your hands, used paintbrushes, and tools in order to set up an effective garage storage system. A professional garage storage firm will be able to do this for you if you have the money.

Strong racking shelves

(Photo from istock)

One of the most well-liked garage storage solutions is racking since it is versatile, durable, and reasonably priced. Racks can be installed on the whole rear wall of a single garage for a reasonable price. Small drawer units, toolboxes, and storage bins can then be added for a flexible and affordable solution to all your storage needs.

Overhead storage to save space

It may seem as though there isn’t much room for anything else because your automobile dominates the garage and cupboards occupy what little space is available. But folks, look up and reconsider. Another place to store items is on overhead racks that hang from the ceiling. Just watch out that they don’t block your up-and-over door.

To avoid the dangers of lifting anything large over your head or up a ladder, they are better suited to lightweight things. Additionally, you may use them to hold up longer objects that shouldn’t be placed on the ground, such wood planks, skis, or boat oars.

Horizontal yard storage

It’s important to keep your garage’s floor clear of anything so you don’t trip or run over anything when you drive your car in. The answer? To make the most of the available space and keep necessities out of the way, choose specialized horizontal garden tool racks.

Locking your tools in your garage

Whether you’re a skilled mechanic or just enjoy tinkering on the weekends. It’s important to keep your tools secure and organized. Choose storage solutions that meet this requirement because the greatest storage always combines shelves and drawers. Another helpful suggestion is to purchase anything lockable for security, just in case there are break-ins.

Motorized shelves

(Photo from istock)

Utilizing every square inch of space in your garage storage ideas is always worthwhile. But there are times when it seems impractical. Or, you have to take the danger of carrying a large package while climbing ladders, neither of which are safe or ideal. Undoubtedly, a motorized shelf might fix the issue. Simply place your boxes on the shelves, and the superior motor will elevate them for you using a remote control. So simple.

Custom built storage for garage

Supporting regional artisans is always a good idea. And a custom tool storage container will give you a special storage solution that will last for years. Here are some ideas to get you started. Though you should choose a method that works for you. This clever cordless drill organizer features compartments. Specifically designed for screws, drills, chargers, and batteries. That’s a lot of ingenuity, to be sure.

Neat cabinets

(Photo from istock)

Like inside your home, it’s important to have cabinets in your garage storage options. So you can close the doors on your belongings for a cleaner appearance. Items can be placed within closed boxes. Or left free on shelves inside. Look for features like adjustable feet so the cabinets may be leveled on an uneven floor when adding cabinets to the garage.

Make time to do the job

Even though it might seem obvious, occasionally people get so eager to start a DIY  storage project at home. That they do so without a strategy or adequate time set aside in their day (or days). Don’t start organizing your garage at 10 p.m. unless you have the coffee ready and no early alarm the next morning because it can take a long time.

As a best practice, allocate a weekend, a full day. Or at least five to six hours to allow for cleaning, organization, minor repairs, and trips to the hardware store.

Reference:

Pods
Making your home fireproof is important, searching for some effective tips?, your wait is over click on the link below:
Tips to make your home fireproof


Step by step guide to bungalow house planning

Designing your dream bungalow house is an exciting journey that requires careful planning and consideration. Bungalows are known for their single-story layout, functional design, and charming aesthetics. Whether you’re building a new bungalow or renovating an existing one, this step-by-step guide will walk you through the process of bungalow house planning. Hence, helping you create a space that reflects your vision, needs, and lifestyle.

Further, planning and designing a bungalow house is an exciting journey that involves turning your dreams into reality. Moreover, bungalows are known for their single-story design, offering convenience, accessibility, and a sense of charm. Whether you’re building a new bungalow or renovating an existing one, this step-by-step guide will help you navigate through the intricate process of bungalow house planning.

Step 1: Define Your Vision and Goals

(Photo from istock)


Before you start the planning process, it’s important to have a clear vision of what you want to achieve with your bungalow. Moreover, consider factors such as:

  • Aesthetic Preferences:

Determine the architectural style, interior design, and overall theme you want for your bungalow.

  • Functionality:

Identify how many bedrooms, bathrooms, living spaces, and other rooms you need. Hence, think about your lifestyle and how you want to use the space.

  • Outdoor Space:

Consider whether you want a garden, patio, or other outdoor features and how they’ll integrate with the design.

  • Budget:

Establish a realistic budget for your project. This will guide your decisions throughout the planning process.

Step 2: Research and Gather Ideas

Explore various sources of inspiration to gather ideas for your bungalow design:

  • Architectural Magazines and Websites:

Look for bungalow designs that resonate with your preferences.

  • Visit Model Bungalows:

Attend open houses or visit model bungalows to get a sense of different layouts and features.

  • Online Platforms:

Utilize online platforms like Pinterest and Houzz to collect images and ideas that inspire you.

Step 3: Choose a Design Professional

(Photo from istock)

Depending on your skills and the complexity of your project, you may need to hire an architect, designer, or both. Further, professionals can provide valuable insights, create detailed plans. And ensure that your vision aligns with structural and regulatory requirements.

Step 4: Site Selection and Assessment

If you’re building a new bungalow, the site selection is crucial. Factors to consider include:

  • Location:

Choose a location that suits your lifestyle, offers convenience, and aligns with your aesthetic preferences.

  • Topography:

Understand the land’s slope, soil quality, and drainage patterns to make informed design decisions.

  • Orientation:

Optimize your bungalow’s orientation for natural light, ventilation, and energy efficiency.

Step 5: Preliminary Design and Layout

Work with your chosen design professional to create a preliminary design and layout for your bungalow.  Hence, this stage involves:

(Photo from istock)

  • Floor Plan:

Develop a floor plan that includes room layouts, sizes, and spatial relationships.

  • Exterior Design:

Determine the bungalow’s facade, roof style, windows, doors, and other exterior elements.

  • Interior Spaces:

Define the flow between rooms, considering factors like privacy, circulation, and functionality.

Step 6: Detailed Design and Specifications

As you move forward, the design will become more detailed:

  • Materials and Finishes:

Choose materials for flooring, walls, countertops, and other surfaces. Further, consider both aesthetics and durability.

  • Color Palette:

Decide on a color scheme that reflects your design preferences and creates a cohesive look.

  • Fixtures and Fittings:

Select fixtures such as lighting, plumbing fixtures, and hardware that complement your design.

Step 7: Structural and Engineering Considerations

Ensure that your bungalow’s design adheres to structural and engineering requirements:

  • Foundation:

Choose the appropriate foundation type based on the soil conditions and structural needs.

  • Roof Structure:

Determine the roofing material and style that align with your design and provide adequate protection.

  • Utilities and Systems:

Plan for electrical, plumbing, heating, and cooling systems in accordance with local codes.

Step 8: Obtain Necessary Approvals

Before construction begins, you’ll need to obtain the necessary permits and approvals from local authorities. Moreover, this includes zoning, building permits, and any other regulatory requirements.

Step 9: Contractor Selection and Construction

  (Photo from istock)

Select a reputable contractor to bring your bungalow design to life:

  • Contractor Bids:

Moreover, obtain bids from multiple contractors, considering their experience, track record, and pricing.

  • Construction Oversight:

Throughout the construction process, maintain regular communication with your contractor and monitor progress.

Step 10: Interior Design and Furnishing

The interior design phase involves:

  • Furniture and Decor:

Select furniture, decor, and accessories that complement your design style and enhance the functionality of each room.

  • Lighting:

Plan for ambient, task, and accent lighting to create the desired ambiance and functionality.

  • Personalization:

Incorporate personal touches that make the space uniquely yours. Such as family photos or artwork.

Step 11: Landscaping and Outdoor Spaces

Complete your bungalow’s look by designing the outdoor areas:

  • Landscaping:

Create a landscaping plan that includes plants, pathways, and outdoor features that complement your bungalow’s style.

  • Outdoor Living:

Design outdoor living spaces like patios, decks, or porches that seamlessly connect with the interior.

Step 12: Final Inspections and Finishing Touches

Further, before moving in, conduct final inspections to ensure everything meets quality and safety standards:

Quality Control:

Review the construction and finishing work to ensure it aligns with the design and specifications.

Punch List:

Create a punch list of any minor adjustments. Or finishing touches that need to be addressed.

Conclusion

  (Photo from istock)

Designing a bungalow house is a rewarding endeavor that involves careful planning, creativity, and attention to detail. By following this step-by-step guide, you can navigate the complexities of bungalow house planning, from defining your vision to finalizing the finishing touches. Hence, remember that each step contributes to the overall success of your project, resulting in a bungalow that not only meets your needs but also reflects your unique style and personality.

Remember that the planning phase sets the foundation for a successful project, so invest time and effort in getting it right. Hence, with proper planning and execution, your bungalow house can become a haven of comfort and style for years to come.

Reference:

Nobroker

Searching for tips to recycle the construction waste, what are you waiting for, click on the link below:

How to recycle and reuse construction waste


How to select the best construction materials

When embarking on a construction project, whether it’s a new home, a commercial building, or a renovation, selecting the right construction materials is paramount to the success and longevity of the structure. The materials chosen can impact everything from structural integrity and energy efficiency to aesthetics and overall cost. This guide aims to provide a comprehensive overview of the factors to consider when selecting the best construction materials for your project.

Understand the Project Requirements

Before delving into material selection, it’s crucial to have a deep understanding of the project’s requirements. Consider the purpose of the structure, its location, environmental factors, and the intended lifespan of the building. For instance, materials suitable for a residential home might differ from those used in a high-rise commercial building.

Evaluate Structural Performance

The structural integrity of any construction project is of utmost importance. The materials chosen must be capable of supporting the intended load and withstanding environmental pressures such as wind, earthquakes, and other potential hazards. It’s advisable to consult with structural engineers who can recommend materials that align with the project’s specifications.

Consider Durability and Longevity

Longevity is a key consideration when selecting construction materials. Durable materials can significantly reduce maintenance and repair costs over the lifespan of the building.

Evaluate Environmental Impact of construction

In an era of increasing environmental awareness, selecting eco-friendly construction materials is not only a responsible choice but can also contribute to cost savings over time.

Analyze Energy Efficiency

Energy-efficient materials can contribute to reduced utility bills and a smaller carbon footprint. Insulation materials, windows with proper glazing, and roofing materials with high reluctance can all play a role in optimizing energy efficiency. Look for materials with high R-values (thermal resistance) and low U-values (thermal transmittance) to ensure effective insulation.

Factor in Aesthetics and Design of construction

The visual appeal of a building often depends on the materials used. Different materials can give rise to varying architectural styles, from modern to traditional. Consider the desired aesthetics and how the chosen materials will contribute to achieving the desired design.

Assess Maintenance Requirements

Some materials require more maintenance than others to retain their appearance and functionality. Wood, for example, may need regular sealing or painting to prevent deterioration, while materials like steel might require anti-corrosion treatments. Assess the long-term maintenance requirements and associated costs before making a decision.

Budget Considerations

Construction budgets are a significant constraint for most projects. While it’s tempting to opt for the least expensive materials, it’s essential to find a balance between cost and quality. Cheaper materials may lead to higher maintenance and replacement costs in the long run. Obtain quotes from multiple suppliers and consider the total cost of ownership over the building’s life cycle.

Availability and Lead Times

The availability of construction materials can impact project timelines. Some unique or specialized materials might have longer lead times or be subject to delays due to manufacturing or shipping issues. It’s advisable to choose materials that are readily available to avoid project slowdowns.

Regulatory and Code Compliance

Building codes and regulations set forth by local authorities play a critical role in material selection. Different materials have varying fire resistance ratings, load-bearing capacities, and other factors that must align with legal requirements. Ensure that the chosen materials meet or exceed these regulations to avoid potential legal issues.

Consultation with Experts for construction

Collaborating with architects, engineers, and contractors is essential when selecting construction materials. These professionals bring their expertise to the table, helping you navigate the intricate decisions involved in material selection. Their insights can lead to informed choices that align with the project’s goals and requirements.

Material Options for construction

There is a wide array of construction materials available, each with its advantages and disadvantages. Here are some common materials used in construction:

1. Concrete

Concrete is a versatile material known for its strength and durability. It’s used in foundations, walls, and floors. There are various types of concrete mixes, each with specific properties suited for different applications.

2. Steel

Steel is prized for its high tensile strength and is commonly used in structural frameworks, beams, and columns. It’s also used in roofing, reinforcing bars, and other applications.

3. Wood

Wood is a traditional construction material valued for its aesthetic appeal. It’s commonly used in framing, flooring, and finishing elements. Different types of wood have varying degrees of strength and durability.

4. Brick and Masonry

Brick and masonry materials offer excellent durability and fire resistance. They’re often used in walls, facades, and architectural detailing.

5. Glass

It allows natural light to enter spaces and can contribute to energy efficiency when properly insulated.

6. Insulation Materials

Insulation materials like foam, fiberglass, and cellulose help regulate indoor temperature and improve energy efficiency.

7. Metals

Aside from steel, other metals like aluminum, copper, and titanium find use in roofing, cladding, and decorative elements due to their corrosion resistance and aesthetic qualities.

8. Composites

Composite materials, such as fiber-reinforced polymers (FRP), offer high strength-to-weight ratios and are used in applications where traditional materials might fall short.

9. Sustainable and Recycled Materials

Materials like bamboo, reclaimed wood, recycled steel, and recycled glass are gaining popularity due to their Eco-friendliness and unique aesthetic appeal.

Conclusion

Selecting the best construction materials for a project involves a careful consideration of numerous factors, ranging from structural performance and durability to aesthetics and budget. By understanding the project requirements, consulting with experts.

And thoroughly evaluating available materials, you can make informed decisions that lead to a successful and enduring construction endeavor. Remember, each material choice contributes not only to the physical attributes of the building but also to its environmental impact and long-term sustainability.

Reference:

Buildbinder

Searching for tips to recycle the construction waste, what are you waiting for, click on the link below:

How to recycle and reuse construction waste


How to select a sustainable roof system

In an era where environmental concerns are at the forefront of decision-making, the choice of a roof system holds significant weight in determining the sustainability of a building. A sustainable roof system not only reduces a building’s environmental impact but also enhances energy efficiency, indoor comfort, and overall longevity. This article aims to provide a comprehensive guide to selecting a sustainable roof system, covering essential considerations, available options, and the benefits of making an environmentally conscious choice.

Understanding Sustainable Roofing

Sustainable roofing goes beyond traditional considerations of aesthetics and functionality. Moreover, it encompasses a holistic approach that considers the entire lifecycle of the roof, from material sourcing and production to installation, maintenance, and eventual disposal. Key aspects of sustainable roofing include:

(Photo from istock)

  1. Energy Efficiency: A sustainable roof should have high thermal resistance (R-value) to minimize heat transfer between the interior and exterior, reducing the need for excessive heating and cooling.
  2. Durability and Longevity: Long-lasting roof systems minimize the need for frequent replacements, reducing resource consumption and waste generation over time.
  3. Material Selection: Sustainable roofing materials are often recycled, recyclable, or made from renewable resources. The use of locally sourced materials further reduces the environmental footprint.
  4. Reflectivity and Cool Roofs: Cool roofs with high solar reactance and thermal remittance reduce the urban heat island effect and lower cooling energy demand.
  5. Water Management: Proper drainage systems and rainwater harvesting features help manage water runoff effectively.
  6. Adaptability: A sustainable roof should be adaptable to future changes, such as the installation of solar panels or green roofing systems.

Factors to Consider When Selecting a Sustainable Roof System:

  1. Climate and Location: The local climate greatly influences the choice of roof system. For example, cool roofs are more beneficial in hot climates, while sloped roofs might be more appropriate for regions with heavy rainfall.
  2. Roof Slope and Design: Different roof slopes and designs require specific roofing materials. Some sustainable options are better suited for flat roofs, while others work best on steep slopes.
  3. Roofing Materials: Consider eco-friendly materials like metal, clay or concrete tiles, sustainable wood, recycled shingles, and synthetic membranes. Research the environmental impact of the chosen materials and their potential for recycling.
  4. Insulation: Adequate insulation improves energy efficiency and thermal comfort. Choose insulation materials with high R-values and minimal environmental impact.
  5. Cool Roof Options: Reflective and emissive materials can help reduce energy consumption by reflecting sunlight and heat away from the building.
  6. Green Roofing: In some cases, installing a living green roof with vegetation can provide natural insulation, reduce storm-water runoff, and contribute to local biodiversity.
  7. Solar Compatibility: If solar panels are a future consideration, ensure that the roof structure can support the additional weight and that the roofing material won’t hinder installation.
  8. Life Cycle Cost Analysis: Evaluate the long-term costs of the chosen roof system, factoring in installation, maintenance, energy savings, and potential replacements.
  9. Local Regulations and Incentives: Research local building codes, regulations, and potential incentives for installing sustainable roofing systems.
  • Installer Experience

Choose reputable contractors experienced in installing the chosen sustainable roof system to ensure proper installation and performance.

Types of Sustainable Roofing Systems:

  1. Metal Roofing: Metal roofs are durable, lightweight, and recyclable. They reflect sunlight, reducing heat absorption and cooling loads. Copper, aluminum, and steel are popular choices.
  2. Clay and Concrete Tiles: These tiles are made from natural materials, are long-lasting, and provide good thermal insulation. They are particularly suitable for warm climates.
  3. Slate Roofing: Slate is a natural stone that offers longevity and fire resistance. It’s durable and can be recycled, but it may have a higher upfront cost.
  4. Recycled Shingles: Made from materials like rubber, wood fiber, and plastic, recycled shingles are eco-friendly. And offer versatility in terms of style and color.
  5. Sustainable Wood Shingles and Shakes: Choose certified sustainably harvested wood to ensure responsible sourcing. Cedar and redwood are commonly used for their durability and natural appearance.
  6. Single-Ply Membranes: These synthetic materials, such as TPO (thermoplastic ole-fin) and PVC (polyvinyl chloride), are lightweight, reflective, and recyclable.
  7. Green Roofs: These living roofs are covered in vegetation, providing natural insulation, storm-water management, and improved air quality.
  8. Cool Roofs: Typically made from reflective materials, cool roofs reduce heat absorption, lower cooling costs, and extend the life of the roof.

Benefits of Selecting a Sustainable Roof System:

(Photo from istock)

  1. Energy Savings: A well-insulated and reflective roof can significantly reduce heating and cooling energy consumption, leading to lower utility bills.
  2. Environmental Impact: Sustainable roof systems minimize resource depletion. Waste generation, and carbon emissions associated with traditional roofing.
  3. Improved Indoor Comfort: Proper insulation and reduced heat transfer contribute to more consistent indoor temperatures. And enhanced occupant comfort.
  4. Longevity: Durable and high-quality sustainable roof systems have longer lifespans. Reducing the need for frequent replacements.
  5. Reduced Urban Heat Island Effect: Cool roofs reflect sunlight and heat away from buildings. Helping to mitigate the urban heat island effect and create more comfortable outdoor spaces.
  6. Local Biodiversity: Green roofs support local biodiversity by providing habitat for plants and insects, enhancing urban ecosystems.
  7. Property Value: Sustainable features, including roofing systems, can increase the resale value and marketability of a building.
  8. Regulatory Compliance: Choosing sustainable roofing materials can help meet or exceed building codes and regulations focused on energy efficiency and environmental impact.

Conclusion:

Selecting a sustainable roof system is a crucial decision that goes beyond mere aesthetics. Hence, it has a direct impact on a building’s energy efficiency, environmental footprint, and overall performance.

By considering factors such as climate, roofing materials, design, and long-term costs, building owners. And professionals can make informed choices that contribute to a more sustainable built environment. As the world continues to prioritize sustainable practices, opting for environmentally friendly roofing solutions is not only a responsible choice but also an investment in a greener and more resilient future.

Reference:

American Way Exteriors

Searching for tips to recycle the construction waste, what are you waiting for, click on the link below:

How to recycle and reuse construction waste


How to achieve air tightness in buildings

In an era where environmental concerns and energy efficiency are paramount, achieving air tightness in buildings has emerged as a crucial goal for architects, engineers, and builders. Air tightness not only contributes to energy savings but also enhances indoor comfort, indoor air quality, and overall building durability. This article delves into the importance of air tightness, the benefits it offers, and practical strategies for achieving it in both residential and commercial buildings.

Understanding Air tightness:

Air tightness, in the context of building construction, refers to the resistance of a building envelope to the infiltration of outdoor air and the infiltration of indoor air. It is the ability of a building to minimize uncontrolled air leakage through gaps, cracks, and openings in its structure. While some level of controlled ventilation is essential for maintaining indoor air quality, uncontrolled air leakage can lead to energy wastage, discomfort, and even moisture-related issues.

The Significance of Air tightness:

(Photo from istock)

Air tightness plays a pivotal role in the overall energy efficiency of a building. When a building envelope is not airtight, uncontrolled air infiltration and infiltration occur, leading to various issues. During cold seasons, uncontrolled air leakage can result in heat loss, causing higher energy consumption for heating systems to maintain desired indoor temperatures. Conversely, during hot seasons, unwanted air infiltration can lead to increased cooling loads, driving up energy consumption for air conditioning.

Furthermore, air tightness is closely linked to indoor air quality. Uncontrolled air infiltration can introduce outdoor pollutants, allergens, and moisture into indoor spaces, degrading indoor air quality and potentially causing health problems for occupants. By achieving air tightness, building owners can ensure better control over the indoor environment, allowing for proper ventilation and air purification systems to effectively operate.

Benefits of Air tightness:

  • Energy Efficiency

Airtight buildings significantly reduce the amount of heated or cooled air that escapes from the interior, thereby reducing the need for constant heating or cooling. This results in lower energy consumption and utility bills.

  • Indoor Comfort

Air tightness prevents drafts, cold spots, and temperature fluctuations, providing a more comfortable indoor environment. It also helps in maintaining consistent humidity levels, contributing to better occupant comfort.

  • Improved Indoor Air Quality

Air tightness allows for better control of indoor air quality. With controlled ventilation systems, fresh air can be introduced in a controlled manner, preventing the infiltration of pollutants, allergens, and outdoor contaminants.

  • Durability

Uncontrolled air leakage can lead to moisture accumulation within walls, which can cause mold growth, wood rot, and structural damage. Air tightness helps maintain the integrity of the building envelope and promotes its longevity.

  • Noise Reduction

Airtight buildings also tend to be quieter, as they limit the transmission of outdoor noise into indoor spaces.

Strategies for Achieving Air-tightness:

(Photo from istock)

Achieving a high level of air tightness requires a combination of thoughtful design, proper materials, and meticulous construction practices. Here are some strategies to consider:

  1. Design Phase:

    • Continuous Insulation: Utilize continuous insulation to minimize thermal bridging and create a continuous barrier against air infiltration.
    • Simplified Building Shapes: Complex building shapes with numerous corners and angles are more prone to air leakage. Designing simpler building shapes can help minimize the potential for leaks.
    • Plan for Air Barriers: Incorporate a well-defined air barrier system into the building design. This involves identifying and detailing the locations of the air barrier, such as the building wrap, sheathing, and membranes.
    • Minimize Penetrations: Design the building to have fewer openings, penetrations, and gaps. Minimize the number of doors, windows, and joints that can potentially contribute to air leakage.
  2. Material Selection:

    • High-Quality Sealants and Adhesives: Choose high-quality sealants and adhesives to seal joints, gaps, and openings. These materials should be compatible with the building materials being used.
    • Airtight Membranes: Consider using airtight membranes or tapes to create continuous air barriers at critical junctions such as wall-to-roof connections and window installations.
    • Weather stripping: Select effective weather-stripping materials for doors and windows to prevent air infiltration around these openings.
  3. Construction Phase:

    • Skilled Workmanship: Air tightness requires meticulous attention to detail during construction. Ensure that the construction crew is trained to implement air tightness strategies properly.
    • Sealing and Taping: Apply sealants, tapes, and membranes according to manufacturer guidelines. Pay special attention to joints, corners, and transitions where air leakage is likely to occur.
    • Blower Door Testing: Conduct blower door tests during and after construction to quantify the air tightness level of the building. This helps identify areas that require additional sealing.
  4. Ventilation Strategies:

    • Controlled Ventilation Systems: Implement mechanical ventilation systems that provide controlled, filtered, and conditioned outdoor air to maintain indoor air quality while minimizing uncontrolled air leakage.
    • Heat Recovery Ventilation (HRV) and Energy Recovery Ventilation (ERV): These systems recover heat or energy from outgoing stale air and transfer it to incoming fresh air, further improving energy efficiency.

Common Air-tightness Challenges and Solutions:

(Photo from istock)


  • Windows and Doors: Properly install and weather strip windows and doors to prevent air infiltration around their frames. Consider using European-style windows with multiple gaskets and advanced locking mechanisms for better air tightness.
  • Electrical and Plumbing Penetrations: Seal gaps around electrical outlets, switches, and plumbing penetrations with appropriate sealants or foam to prevent air leakage.
  • Wall-to-Roof Transitions: Use airtight membranes, tapes, or flashing to create a continuous air barrier at the junction between walls and roofs.
  • Duct-work and Vents: Seal duct joints and connections meticulously. Avoid placing vents in exterior walls, as they can compromise air tightness.

Conclusion:

Achieving air tightness in buildings is a multifaceted endeavor that requires collaboration among architects, engineers, contractors, and building occupants. The benefits of air tightness, including energy efficiency, improved indoor comfort, and enhanced durability; make it an essential consideration in modern building design and construction.

By incorporating thoughtful design, appropriate materials, and meticulous construction practices, it is possible to create buildings that not only meet high standards of air tightness but also contribute to a sustainable and comfortable built environment.

Reference:

green building store

Searching for tips to recycle the construction waste, what are you waiting for, click on the link below:

How to recycle and reuse construction waste


How to build a modern farmhouse plan

The allure of a modern farmhouse plan lies in its perfect blend of classic charm and contemporary elegance. This architectural style marries the cozy, rustic appeal of traditional farmhouses with the sleek lines and modern amenities of today’s homes. If you’re captivated by the idea of creating a space that exudes warmth, character, and functionality, building a modern farmhouse might be the perfect project for you. In this guide, we’ll take you through the essential steps of bringing your modern farmhouse dream to life.

  • Here area few tips to make the plan for your modern farmhouse:

Define Your Vision

Before you break ground, it’s crucial to define your vision for the modern farmhouse. Determine the size of the home, the number of bedrooms and bathrooms, the layout of the living spaces, and any specific architectural features you desire. Are you drawn to a more traditional farmland exterior with a gable roof and a wrap-around porch? Or do you lean towards a minimalist farmland aesthetic with clean lines and a simpler facade? Establishing a clear vision will guide your decisions throughout the building process.

Choose the Right Location

The location of your modern farmhouse is pivotal. Consider factors such as the landscape, views, proximity to amenities, and the orientation of the sun. The surrounding environment can greatly influence the overall feel of your home. A picturesque countryside setting or a spacious suburban lot can provide the perfect backdrop for your modern farmland.

Collaborate with Architects and Designers

Creating a modern farmhouse requires a skilled team of architects and designers who understand the intricacies of this style. Collaborate with professionals who can bring your vision to life while ensuring that modern features are seamlessly integrated with traditional elements. They will work with you to design a layout that maximizes functionality and optimizes space utilization.

Focus on Open Floor Plans

(Photo from istock)

Modern farmhouses are known for their open, airy layouts that facilitate seamless movement between spaces. A spacious kitchen that flows into a dining area and living room is a hallmark of this design style. Embrace the concept of open floor plans to create a sense of connection and shared living within your home.

Incorporate Rustic Elements

The rustic charm of a modern farmhouse is often defined by its use of natural materials and textures. Exposed wooden beams, reclaimed wood accents, and stone elements can infuse a sense of authenticity into your home. Consider incorporating these materials in both the interior and exterior to capture the essence of a farmland.

Choose the Right Color Palette

(Photo from istock)

A neutral and warm color palette is quintessential to the modern farmhouse style. Whites, creams, soft grays, and earthy tones create a cozy and inviting atmosphere. These colors also provide a clean backdrop for the natural materials and textures to shine.

Iconic Farmhouse Exteriors

The exterior of your modern farmhouse should be a captivating representation of the style. Traditional gable roofs, board-and-batten siding, and front porches contribute to the iconic farmland look. Additionally, large windows and glass doors can bring in abundant natural light and provide a seamless connection to the outdoors.

Embrace Minimalism

While traditional farmhouses can be adorned with decorative details, modern farmlands often lean towards a more minimalist approach. Clean lines, simple silhouettes, and uncluttered spaces define the modern aspect of the design. Consider the mantra of “less is more” when choosing your interior decor and furnishings.

Incorporate Modern Amenities

Though the exterior and many design elements pay homage to the past, a modern farmland should offer the convenience and amenities of contemporary living. High-end appliances, energy-efficient systems, and smart home technology can be seamlessly integrated while maintaining the farmhouse’s charm.

Prioritize Natural Light

(Photo from istock)

Ample natural light is a key factor in creating an inviting and airy atmosphere. Optimize window placement to capture the surrounding views and infuse your interiors with sunlight. Consider large windows, sliding glass doors, and strategically positioned skylights.

Focus on Functionality

A modern farmhouse should not only be aesthetically pleasing but also highly functional. Well-designed storage solutions, built-in cabinetry, and multi-functional furniture can help keep your space organized and clutter-free, contributing to the overall comfort of your home.

Sustainable Design

Modern farmlands have the opportunity to embrace sustainable design practices. Incorporate energy-efficient appliances, solar panels, and materials with low environmental impact. Creating an eco-friendly home aligns with the farmland ethos of practicality and resourcefulness.

Landscaping and Outdoor Living

Extend the modern farmhouse experience outdoors by creating captivating landscaping and outdoor living areas. Patios, decks, and outdoor kitchens can become extensions of your living space, providing a place to relax, entertain, and enjoy the natural surroundings.

Attention to Details

The beauty of a modern farmhouse lies in its attention to detail. Consider elements like farmland sinks, vintage-inspired fixtures, and unique door hardware. These small touches can contribute significantly to the overall charm and character of your home.

Regular Maintenance

Building your modern farmhouse is just the beginning. Regular maintenance and upkeep are essential to preserve its beauty and functionality. Set up a routine for cleaning, repairs, and updates to ensure that your farmhouse continues to be a cherished haven for years to come.

In conclusion, building a modern farmhouse is an exciting journey that combines the best of both worlds – timeless charm and contemporary comforts. By defining your vision, collaborating with professionals, embracing rustic elements, and prioritizing functionality, you can create a home that captures the essence of the modern farmhouse style while catering to your unique needs and preferences. With careful planning and attention to detail, your dream modern farmland can become a reality, offering a haven of warmth, comfort, and style.

Reference

Houseplans

Searching for tips to recycle the construction waste, what are you waiting for, click on the link below:

How to recycle and reuse construction waste

How to create an ultimate indoor living space

Your living space is a reflection of your personality, a sanctuary where you retreat to relax, recharge, and entertain. Designing the ultimate indoor living space goes beyond mere decoration – it’s about creating an environment that encapsulates your lifestyle, preferences, and comfort. Whether you have a spacious loft or a cozy apartment, here’s a comprehensive guide to help you craft an indoor oasis that’s both functional and stylish.

In an increasingly fast-paced world, our indoor living spaces have become more than just a shelter from the elements. They are our sanctuaries, our places of solace and rejuvenation. Designing an ultimate indoor living space goes beyond mere aesthetics – it’s about crafting an environment that seamlessly blends comfort, functionality, and personal style. Whether you’re starting from scratch or looking to revamp your current space, here’s a comprehensive guide to help you create an indoor oasis that truly resonates with your lifestyle.

  • Some important tips for creating a living room space:

Define Your Style and Purpose

(Photo from istock)

Before diving into the design process, take some time to define your style and the purpose of the space. Are you drawn to minimalist aesthetics, rustic charm, or contemporary elegance? Understanding your style preferences will guide your decisions on furniture, color schemes, and decorative elements. Additionally, consider how you intend to use the space – will it primarily serve as a relaxation zone, an entertainment hub, or a home office?

Optimize Layout and Flow in living space

Efficient space utilization is key to creating a comfortable indoor living area. Start by assessing the layout of the room and arranging furniture in a way that encourages easy movement and interaction. Consider the placement of windows and natural light sources when arranging seating areas to maximize daylight exposure.

Choose Comfortable and Functional Furniture

Invest in high-quality, comfortable furniture that complements your style. Sofas and chairs with plush cushions and ergonomic support enhance the comfort of your living space. Multi-functional furniture, such as storage ottomans and sofa beds, are excellent choices for optimizing space in smaller areas. Don’t forget to consider the scale of the furniture – oversized pieces can overwhelm a small room, while too-small furniture might look out of place in a spacious area.

Set the Mood with Lighting at your living space

(Photo from istock)

Lighting can dramatically influence the ambiance of your indoor living space. A combination of ambient, task, and accent lighting creates a well-balanced atmosphere. Incorporate overhead fixtures, such as chandeliers or pendant lights, for ambient lighting. Task lighting, like adjustable desk lamps, is essential for reading, working, or other focused activities. To add a touch of elegance, use accent lighting to highlight artwork, plants, or architectural features.

Play with Colors and Textures

Colors and textures play a significant role in setting the tone of your living space. Choose a color palette that resonates with your style and evokes the desired mood. Soft, neutral tones create a serene atmosphere, while vibrant colors inject energy and personality. Incorporating textures through textiles, such as plush rugs, cozy throws, and decorative pillows, adds depth and visual interest to the space.

Integrate Nature Indoors

Bringing nature indoors through plants not only enhances the aesthetics but also contributes to a healthier environment. Incorporate a variety of houseplants that thrive indoors and align with your maintenance preferences. Larger plants can serve as statement pieces, while smaller ones can be placed on shelves, window sills, or hanging planters. The presence of greenery creates a sense of tranquility and freshness.

Personalize with Art and Decor

(Photo from istock)

Artwork and decorative elements offer a glimpse into your personality and interests. Select pieces that resonate with you, whether they’re paintings, sculptures, or photographs. Arrange them thoughtfully on walls and shelves to create a visually pleasing display. Personal mementos, travel souvenirs, and unique finds add a personal touch that makes the space uniquely yours.

Create Functional Zones in living space

If your indoor living space serves multiple purposes, consider creating distinct functional zones. For instance, if you’re working from home, designate a corner as your home office with a functional desk and ergonomic chair. A reading nook can be established with a comfortable armchair and a bookshelf. By delineating different areas, you maintain organization and optimize the space for various activities.

Invest in Smart Technology

Integrating smart technology can elevate your indoor living experience. Smart thermostats, lighting systems, and voice-controlled assistants offer convenience and efficiency. You can adjust the ambiance with a simple voice command or control the temperature remotely through a smartphone app. However, ensure that the technology seamlessly blends with your overall design aesthetic.

 Maintain Clutter-Free Spaces

An ultimate indoor living space exudes a sense of tranquility, which can be disrupted by clutter. Implement storage solutions that keep your belongings organized and out of sight. Built-in shelves, hidden storage compartments, and furniture with storage options help maintain a clean and clutter-free environment.

Embrace Technology

Incorporate technology that enhances your comfort and entertainment. Consider smart home systems that allow you to control lighting, temperature, and entertainment systems with ease. Just ensure that these devices don’t dominate the space visually.

Mindful Maintenance of your living space

(Photo from istock)

Creating the ultimate indoor living space is not just about the initial design; it’s about ensuring that the space remains inviting and functional. Choose materials that are easy to clean and maintain, and establish routines for regular cleaning and organization.

In conclusion, designing the ultimate indoor living space is a creative journey that requires a balance of comfort, functionality, and style. By defining your style, optimizing the layout, choosing furniture thoughtfully, and incorporating elements of nature, art, and technology, you can transform any space into a haven that reflects your personality and enhances your quality of life. Remember, the key is to create an environment that not only looks beautiful but also resonates with your soul and promotes your well-being.

Reference:

bartleby

Searching for tips to recycle the construction waste, what are you waiting for, click on the link below:

How to recycle and reuse construction waste


How to build a house from scratch

Building your own house offers numerous advantages, including the ability to customize every aspect of your living space. From the layout to the colors, flooring, and more, every decision is in your hands. Additionally, a new home comes with the latest technology and energy-efficient features. However, it is essential to be aware of the potential challenges and costs that come with building a house from scratch.

Site Preparation for a  house

(Photo from istock)

Before construction can begin, proper site preparation is crucial. This involves several key steps to ensure a solid foundation for your new home.

  • Clearing the Land

The first step in site preparation is clearing the land of any vegetation or debris. This process involves removing trees, shrubs, and other plants, as well as clearing away any rocks or large objects that could interfere with construction.

  • Land Surveying

Once the land is clear, it’s important to have a professional land surveyor stake out the lot based on the original plot drawings.

  • Altering Topography

In some cases, it may be necessary to alter the topography of the site to ensure proper water flow and drainage. This can involve grading the land or creating slopes to redirect water away from the house.

  • Temporary Utilities

Before construction begins, it is essential to arrange for temporary utilities such as electricity and plumbing. This ensures that the construction site has the necessary power and water supply during the building process.

 Pouring Concrete Footings and Foundations for a house

This provides a solid base for the structure and ensures stability and durability.

  • Excavation and Inspection

The excavation contractor will dig trenches for the footings, ensuring they are deep enough to prevent frost heave. After excavation, an inspection is conducted to verify the dimensions of the footing trenches.

  • Forming and Pouring Footings

The next step is to form and pour the footings. Footings are typically made of concrete and provide support for the foundation walls. The concrete is poured into the forms and left to cure for a few days.

  • Curing and Stripping Footings

After the footings have cured, the forms are stripped, and the foundation specialist can begin forming and pouring the foundation walls. It is crucial to wait for the footings to cure properly to ensure their structural integrity.

  • Forming and Pouring Foundations

The foundation walls are formed and poured using concrete or other materials such as cinder blocks or insulated concrete forms (ICFs). These walls provide structural support and act as a barrier against moisture.

  • Waterproofing and Drainage

Once the foundation walls are complete, it is important to waterproof them to prevent moisture infiltration. This can be done by applying a waterproofing membrane or a drainage mat. Additionally, a weeping tile system is installed to direct water away from the foundation.

Installing Plumbing and Electrical in house

(Photo from istock)

With the footings and foundations in place, it’s time to install the plumbing and electrical systems.

  • Rough-in Plumbing

Plumbers will lay out the pipes for the plumbing system, including water supply lines, drainage pipes, and any other necessary fixtures. It is essential to have these rough-in pipes properly positioned before pouring the concrete slab.

  • Electrical Installation

Electricians will install the electrical wiring, outlets, switches, and lighting fixtures throughout the house.

Pouring the Concrete Slab

(Photo from istock)

The concrete slab serves as the foundation for the main floor or basement of the house. Depending on the climate and construction timeline, this step may occur after the framing and roofing stages.

  • Preparing for Slab Pour

Before pouring the concrete slab, it is crucial to ensure that all necessary plumbing and electrical work is in place. This includes rough-in pipes and electrical wiring for bathrooms, main services, and in-floor radiant heating, if applicable.

  • Installing Gravel and Vapor Barrier

This helps with drainage and provides stability. A plastic vapor barrier is then installed above the footing to prevent moisture from seeping into the concrete.

  • Ordering and Pouring Concrete

The concrete is poured and spread evenly across the area, ensuring a minimum thickness of 4 inches. It is important to give the slab ample time to cure before proceeding with further construction.

Framing, Siding, and Roofing

(Photo from istock)

With the foundation in place, it’s time to start framing the house. This process involves constructing the basic structure, including the floors, walls, and roof.

  • Framing the House

The framing carpenters will arrive to put up the lumber framework for the floors, walls, and ceilings. This is when the house starts to take shape, and you can see the layout and dimensions of each room.

  • Installing Windows and Doors

Alternatively, a manufacturer’s crew may come in to complete this task.

  • Sheathing and Siding

This involves covering the framework with plywood or oriented strand board (OSB) to provide structural support and a base for the siding.

  • Roof Installation

With the sheathing complete, the roofers can start installing the roof. This includes applying roof flashing, underlayment, and the final roofing material, such as shingles or metal panels. A properly installed roof is essential for protecting the house from the elements.

Interior Work

With the exterior structure complete, it’s time to focus on the interior of the house. This stage involves various tradespeople working together to bring your vision to life.

Masonry Work

If your home design includes a chimney, this is the stage where masons will build it. This typically involves applying brick or stone veneer over a concrete block base.

Rough-in of Electrical, Plumbing, and HVAC

Electricians and plumbers return to the site to complete the rough-in work for electrical circuits, plumbing pipes, and HVAC system duct-work. This work is easier to accomplish before the walls, flooring, and ceiling surfaces are in place.

  • Insulation Installation

This helps regulate temperature and improve energy efficiency.

  • Hanging Drywall and Trim

With insulation in place, drywall can be hung throughout the house. The seams are taped, muddied with joint compound, and finish sanded.

  • Finishing Touches

As the interior takes shape, it’s time to add the finishing touches that will make your house feel like a home. This stage involves finalizing various installations and adding aesthetic elements.

  • Painting Walls and Ceilings

With the drywall and trim in place, the painters can start painting the walls and ceilings. This is a task that homeowners can tackle themselves to save money, but it can be time-consuming for larger areas.

  • Installing Countertops and Cabinets

Specialty contractors will install countertops and cabinets in the kitchen, bathrooms, and other areas. These fixtures provide storage and functionality while enhancing the overall design of the space.

  • Finalizing Electrical and Plumbing Fixtures

Electricians and plumbers return to complete the final connections of electrical fixtures (such as light fixtures and outlets) and plumbing fixtures (such as sinks, toilets, and showers). It is crucial to ensure that all connections comply with local building codes.

  • Installing Flooring

The final step in the interior work is to install the flooring. There is various options available, including carpeting, hardwood, laminate, tile, luxury vinyl plank, and engineered wood.

Exterior Landscaping

With the interior nearing completion, it’s time to turn your attention to the exterior landscaping. Evidently, this stage involves designing and implementing the landscape around your new home.

  • Designing the Landscape

(Photo from istock)

Before starting any landscaping work, it is essential to have a clear plan in place. This includes deciding on the layout, selecting plants and materials, and considering factors such as drainage, irrigation, and landscaping elements like patios and walkways.

Final Inspections and Completion

As the construction process comes to an end, it’s time to arrange for final inspections and complete any remaining tasks to ensure the house is ready for occupancy.

  • Final Walk-through

If you have hired a general contractor, it is customary to schedule a final walk-through of the house. Moreover, this allows you to check for any remaining issues or concerns before accepting the completed project.

  • Completing Exterior Landscaping

Once the inspections are complete, you can finalize the exterior landscaping. This involves planting trees and shrubs, installing irrigation systems, building patios and walkways, and adding any other finishing touches to the outdoor spaces.

Reference:

the spruce

Searching for tips to recycle the construction waste, what are you waiting for, click on the link below:

How to recycle and reuse construction waste


How to read a floor plan

Are you in the process of building your dream home? As you embark on this exciting journey, one important document that you’ll encounter is the floor plan. However, deciphering the language of floor plans can be a daunting task.

Fear not! In this comprehensive guide, we will walk you through the essential elements of a floor plan, equipping you with the knowledge to understand and visualize your future home. Whether you’re working with home builders in Edmonton or anywhere else, this guide will provide you with the tools you need to make informed decisions and bring your dream home to life.

Understanding the Basics: What is a Floor Plan?

(Photo from istock)

Before we dive into the intricacies of reading a floor plan, let’s start with the basics. A floor plan is a visual representation of a home’s layout, showcasing the arrangement of rooms, walls, windows, and other architectural elements.

Think of it as a blueprint for your dream home. Traditionally, floor plans were presented as physical blueprints, but nowadays, they are more commonly delivered as digital files that can be viewed on a screen or printed out for review.

A floor plan is typically part of a larger set of documents known as a plan set, which includes a site plan, building notes, floor plans for each level of the house, framing and roofing plans, electrical plans, plans for mechanical systems, and construction details. For the purpose of this guide, we will focus primarily on design drawings, which are floor plans that communicate the overall layout and flow of the home.

Walls, Windows, and Doors: Symbols and Features for floor plan

(Photo from istock)

When you first look at a floor plan, the walls will be the most prominent visual elements. They are represented by parallel lines and can be solid or filled with a pattern. Breaks in walls indicate the presence of doors, windows, and openings between rooms.

Doors are typically depicted as thin rectangles, sometimes with an arc to indicate the swing direction. If the door slides into the wall (known as a pocket door) or opens partially alongside a wall (like a barn door), it will be represented accordingly. Windows are shown as breaks in the walls with thin lines representing the glass and frame. Swinging windows may have a line or an arc to indicate the direction in which they open.

Stairs: Ascending and Descending

Stairs are an integral part of multi-level homes. On a floor plan, stairs are typically represented as a series of rectangles, with a direction arrow indicating whether they travel up or down. If the stairs rise more than three feet above the floor, they will be cut with a diagonal line. Stairs above this “cut line” will be shown with dashed lines. Pay attention to the placement of stairs, as they can greatly impact the flow and accessibility of your home.

Room Sizes: Dimensions that Matter

(Photo from istock)

When reviewing a floor plan, it’s important to understand the dimensions of each room. Room dimensions are typically presented in feet and inches, with width and length measurements. For example, a room with dimensions of 12′ x 16′ means it is 12 feet wide and 16 feet long. Keep in mind that rooms are not always square, so take the time to visualize the space and compare it to rooms in your current home. This will help you gauge the size and functionality of each room in your future home.

Kitchen and Bathroom Details: The Heart of the Home floor plan

The kitchen and bathrooms are vital spaces in any home. When examining a floor plan, pay close attention to the details provided for these areas. Kitchen details will include the location of appliances such as the range, oven, fridge, microwave, sink, and dishwasher. Look for labeled upper cabinet locations, flush eating bars, and cabinet voids. The goal is to envision how you will utilize the space and ensure that it aligns with your lifestyle and preferences.

Similarly, in the bathrooms, review the location and length of vanities, the presence of one or two sinks, the type of tub (built-in or freestanding), and the inclusion of a separate water closet. Take note of the shower details, such as whether it is an acrylic drop-in, tiled walls, or fully tiled with additional features like a bench, shampoo niche, or rain head. Understanding these details will help you visualize the functionality and design of these essential spaces.

Feature Details: Showcasing Your Style

(Photo from istock)

To add personal touches and enhance the aesthetics of your home, floor plans may include feature niches, shelving, or specific detailing.

These areas provide opportunities to display cherished items or create focal points in your home. During the planning stages, consider how you can utilize these features to showcase your unique style and create a space that truly feels like yours.

Ceiling Heights: Creating Impactful Spaces

Ceiling heights play a significant role in the overall ambiance and perception of space within a home. Taller ceilings tend to create an airy and more spacious feel. While lower ceilings can evoke a sense of coziness. With dashed lines representing specific ceiling features such as raised or stepped ceilings. Tray ceilings, vaulted ceilings, or areas that are open to below. Understanding the ceiling heights and features of your future home will help you visualize how each room will look and feel.

Bringing It All Together: Experiencing the Plan

As you review floor plans, it’s essential to envision yourself and your daily activities within the space. Consider how you will experience the home on a day-to-day basis, from walking in the front door for the first time to engaging in everyday tasks like cooking. Relaxing with family, or entertaining guests. Pay attention to the flow and functionality of the layout, and ensure that it aligns with your lifestyle and needs. A successful home is one that feels great every day, so take the time to evaluate the design from both practical and emotional perspectives.

Conclusion: Your Dream Home Awaits

(Photo from istock)

Deciphering a floor plan may initially seem overwhelming, but with a little practice and the knowledge gained from this guide. You’ll be able to read a floor plan like a pro. Remember to consider the size and layout of each room. Pay attention to kitchen and bathroom details, envision how feature details will align with your style. And understand the impact of ceiling heights. By visualizing yourself in the plan and evaluating it from various perspectives.

Reference:

Houseplans

Searching for tips to recycle the construction waste, what are you waiting for, click on the link below:

How to recycle and reuse construction waste


How to preserve and maintain ancient structures

Preserving and maintaining ancient structures is not an easy task, but it is a crucial one. These buildings hold historical, cultural, and architectural significance, and they provide a link to our past. In this comprehensive guide, we will explore the steps and considerations involved in saving and protecting these precious structures. From determining their significance to securing funding and finding partners, we will cover it all. Let’s embark on this journey to preserve and maintain our heritage for future generations.

Understanding the Significance of Ancient Structures

(Photo from istock)

Before starting any preservation project, it is important to determine the significance of the ancient structure. Consider its historical, cultural, and architectural importance. Was the building witness to significant events? Does it hold unique architectural features? Understanding the significance will help raise awareness, apply for grants, and meet preservation guidelines. Collaborate with local historians, community leaders, and past owners to gather information and consider getting the building listed on local, state, and federal historic registers.

 Finding the Purpose of the Ancient Structure

To save an ancient structure, it is essential to identify its future purpose. Without a clear vision, the building may fall into disrepair and lose its value. Explore various options such as residential, commercial, museum, or nonprofit use. The new purpose should preserve the historic characteristics while adapting the building for modern needs. Once you have identified the purpose, you can proceed with the physical preservation steps.

Building Partnerships for Preservation

Preserving an ancient structure is not a solo endeavor. Seek partners who share your passion and can contribute to the project’s success. Historical groups, community organizations, local government, state historic preservation officers, and developers can all play vital roles. Historical societies and preservation groups can provide expertise and connections, while local government can offer support in navigating regulations and provide financial assistance. Building a strong coalition will increase your chances of success.

 Securing Funding for Preservation of Ancient Structures

(Photo from istock)

Funding is often the biggest challenge in preserving ancient structures. Restoration and maintenance can be costly, so explore different sources of financing. State grants specifically allocated for historic preservation are available in many states. Tax credits and exemptions can also help reduce costs, especially for nonprofit organizations and developers involved in adaptive reuse projects. Private foundations, philanthropic trusts, individual donors, and community donations are additional sources of funding. Plan and execute fundraising campaigns to generate awareness and support for your project.

Learning from Success Stories

Gaining inspiration from successful preservation projects can provide valuable insights and guidance. Reach out to historical societies and preservation groups that have completed similar projects. Their experiences and advice can help you navigate challenges and learn from their achievements. By studying success stories, you can gain practical knowledge and apply proven strategies to your own preservation project.

Identifying Threats to Ancient Structures

Understanding the threats faced by ancient structures is crucial for effective preservation. Common threats include disrepair, abandonment, developers’ plans, community growth, and weather damage. Neglect and lack of maintenance can lead to gradual deterioration and eventual condemnation. When a building remains unused or abandoned, it becomes vulnerable to damage from the elements and intruders. Developers often prioritize modernization over preservation, putting historic structures at risk. Additionally, changes in community planning and severe weather events can pose significant challenges to the preservation of ancient structures.

Preservation Methods: Exploring Different Approaches

Preservation methods vary depending on the unique circumstances of each ancient structure. Here are six common approaches to consider:

  • Preservation

Preservation focuses on protecting and conserving the historical significance of the building. Original materials are prioritized, which can add to the cost and limit future uses.

  • Restoration

(Photo from istock)

Restoration aims to return a historic building to its original state during a specific time period. Historic documents and original building materials and techniques are utilized to recreate the building’s original appearance.

  • Rehabilitation

Rehabilitation involves making necessary repairs and alterations to keep the building functional and useful. Upgrades and additions are allowed, while retaining portions of historical or cultural value.

  • Adaptive Reuse

(Photo from istock)

Adaptive reuse modifies the building’s original purpose to accommodate new uses while preserving its historic characteristics.

  • Mothballing

Mothballing is a temporary solution when restoration is not immediately feasible. The building is closed and protected to prevent further damage until resources or a clear vision for its future become available.

  • Building Relocation

In cases where preservation in the original location is not possible, physically moving the building to a new location may be the only option. While this can be costly and pose challenges, it saves the structure from destruction.

 Moving Ancient Structures: Considerations and Tips

Moving an ancient structure requires careful planning and consideration. Here are some important factors to keep in mind:

  • Feasibility: Ensure there is enough space to transport the building, considering obstacles like utility lines and railroad crossings.
  • Structural Soundness: Assess the building’s structural integrity and make necessary repairs before the move.
  • Finding a New Location: Secure a suitable location near the original site, preferably less than a mile away.
  • Historical Value: Understand that moving a building may affect its historical value, potentially impacting its status on historic registers.
  • Partnering with an Experienced Contractor: Work with a reputable building moving company that specializes in historic structures to ensure a successful move.

Contacting Preservation Experts for ancient structures

When undertaking a preservation project, it is beneficial to consult preservation experts . With years of experience, they offer expertise in lifting and moving historic structures. Their team can provide guidance, estimates, and support throughout the preservation process.

Additional Resources for Historic Preservation

(Photo from istock)

For further information and resources on historic preservation, refer to the following organizations and online references:

  • State Historic Preservation Offices: Contact your state’s preservation office for guidance and funding opportunities.
  • Fundraising and Grant Resources: Seek assistance from nonprofit organizations and professional fundraising consultants.
  • Community Engagement: Build relationships with community leaders, media, and local organizations to generate support and awareness for your preservation project.

Conclusion

Preserving and maintaining ancient structures is a challenging but rewarding endeavor. By understanding the significance of these buildings, identifying their purpose, building partnerships, securing funding, and implementing appropriate preservation methods, we can ensure that our heritage remains intact for future generations. With careful planning, collaboration, and the support of preservation experts, we can save these historical, cultural, and architectural treasures. Let us embark on this journey to preserve our past and shape a brighter future.

Reference:

Wolfe

Searching for tips to recycle the construction waste, what are you waiting for, click on the link below:

How to recycle and reuse construction waste


Eco-Friendly Household: Transforming Your Home

Eco-Friendly Household: Transforming Your Home

It can be hard to think about making some eco-friendly adjustments because there are so many different ways to describe anything as “eco-friendly”: green, sustainable, energy-efficient, etc.

With only a few simple steps, you can start building an eco-friendly home. You can make significant improvements when you start to save more money. You might be shocked to learn that protecting the environment might also help you save money!

Energy efficient windows for eco-friendly home

Image via Unsplash.com

Your windows usually let air seep in if your home is older. Modern double-paned windows insulate better than single-paned ones. Replace obsolete single-pane windows with energy-efficient ones to save up to $465 annually.

For replacing outdated windows with energy-efficient ones, there are a number of tax benefits offered in the US. For a complete list of these credits, visit the US Department of Energy’s website.

Skylight in your eco-friendly home

When installed properly, a skylight can reduce your energy usage while illuminating your home with lovely natural light. In order to get the most out of your skylight, it’s crucial to take location into account. Consult an architect or designer.

An eco-friendly skylight is more than just a glass-filled opening in the roof. There are many energy-efficient skylights available on the market, but to ensure their efficiency and safety, they should always be professionally installed.

Sustainable flooring

Image via Unsplash.com

A home’s value and aesthetic appeal are increased by hardwood floors, but many of the trees used to make them take several years to mature. If you need to replace the flooring in your home, think about selecting sustainable materials like bamboo. Bamboo is still beautiful and strong while growing swiftly and requiring less land.

Another alternative for sustainable wood flooring is cork. Since cork is softer than bamboo, it muffles noise and provides a plush underfoot feel. It can occasionally be less resilient than bamboo.

Planting trees in a eco-friendly home

Having shade trees around your home throughout the summer may help you use less energy to cool it. If your site doesn’t already have any shade trees, it will be a while before you start to benefit fully from this phase.

In addition to providing shade, trees also release oxygen and significantly absorb carbon dioxide. One tree has the capacity to produce four people’s worth of oxygen in a single day.

Try to work around existing trees when building a new house. Even your home’s architecture might embrace them, such as by adding a terrace beneath a huge oak tree with plenty of shade.

Near the south and west sides of your home, plant deciduous trees (trees that lose their leaves every year). By doing so, they can protect your home from the summer’s intense afternoon sun while allowing sunshine to enter during the winter.

Applying cooling roofs

Image via Unsplash.com

Cool roofs don’t absorb sunlight; they reflect it. This lowers the energy use in your house. Additionally, it might make your roof last longer. People who live in hot regions benefit most from these roofs since they lessen the need for air conditioning.

There are numerous warehouses and home improvement businesses that sell cool roof coatings. These coatings may be applied pretty quickly and are similar to incredibly thick paint. They typically have pigments that reflect light, rather than absorbing it, and are white or very pale in color. Applying cool roof coatings to shingle roofs is not advised.

If your roof slopes steeply, you might want to think about switching to cool asphalt shingles. These tiles include grains that have been deliberately created to reflect sunlight.

A metal roof already reflects a great deal of sunlight. However, because of how much heat these roofs absorb, you may need more electricity during the summer. It is possible to improve the energy efficiency of your metal roof by painting it a light color or using a cool roof coating.

Composite toilet: eco-friendly home

Image via Unsplash.com

Unlike conventional toilets, composting toilets often don’t “flush” with water. They can also turn a variety of human wastes into fertilizer for use in farming. Although they initially cost more to install than standard toilets, they are much more environmentally friendly and will ultimately pay for themselves.

In a rural or suburban location, composting toilets are typically the simplest to construct and maintain. Installing and maintaining a composting toilet could be more challenging if you live in an apartment or urban high-rise.

Durable sliding

Water and pests are naturally repelled by materials like cedar. They are also robust and require little upkeep. Use more environmentally friendly siding in place of old aluminum siding.

Other environmentally friendly siding possibilities include particle board and fiber cement board. These are strong and long-lasting. Search for products that weren’t produced with formaldehyde.

Talking with a designing team

Image via Unsplash.com

Consider discussing a “whole-house systems approach” with a design team if you are building a new home or performing substantial modifications on an older one. This thorough approach takes into account a variety of aspects of your home, such as the local temperature, the unique features of your site, your appliance requirements, etc. A whole-house systems approach can significantly lower your energy use because it takes all these aspects into consideration.

A programable thermostat

When you’re not home, a programmed thermostat can keep your home at the desired temperature. A programmable thermostat, for instance, can maintain the inside temperature higher than you typically would while you are out at work and only turn on the air conditioning when you return home. One correctly used can result in annual savings of up to $180.

Before purchasing a programmable thermostat, do some research. Yours could not wind up saving you money or energy if it is difficult to use.

Replacing old appliances

Image via Unsplash.com

Older appliances like water heaters, fridges, and stoves may be wasting a lot of electricity. Your home will consume less energy if you swap out such items for ones that have earned the Energy Star certification. For changing out outdated, inefficient items with new eco-friendly ones, tax rebates are frequently available. For a complete list of these credits, visit the US Department of Energy’s website.

USEFUL LINKS:

Check out ways of creating eco-friendly household 
Tips to make your home fireproof 


Outdoor Living Spaces: Renovating your Backyard

Outdoor Living Spaces: Renovating your Backyard

If your backyard is thoughtfully planned, you’ll always have a spot to unwind, host guests, and take in the outdoor. Whether your backyard is a sizable suburban lot or a huge acre, you may design a getaway that you’ll enjoy for many years. Simply consider the features you want or need the most in your outdoor, such as a grilling space or a garden shed, and then construct around those.

Do not alter the natural landscape

Image via unsplash.com

Your backyard probably simply needs a little TLC, even if it’s difficult to recognize its potential. During the design stage, spend some time outside and become quite familiar with the layout of your property. Focus on various regions and picture yourself unwinding and enjoying the area. Then, make an effort to integrate your desired characteristics into the terrain as organically as you can.

A well-designed backyard should highlight the surrounding area’s natural beauty. If you have a very interesting tree, for instance, you might wish to set up a table and chairs behind it to create a shady area for afternoon tea!

The sun and wind pattern: renovating your outdoor

Consider how the sun and breeze will make you feel when you’re outside while you’re designing your backyard. However, keep in mind that these will change throughout the year, making it necessary to spend a lot of time outdoors throughout each of the many seasons in order to truly comprehend them.

A children’s play area wouldn’t be a good idea in a particular location of your garden if the sun is directly overhead during the summer.

Similar to this, a fire pit or grill would not be appropriate in a windy environment, such as between two buildings, as you will likely struggle to maintain a fire.

Leave the harmless trees

Image via unsplash.com

Trees are beneficial for the environment and offer beauty to your yard. They also give the local creatures a place to live. Try to keep as many trees in your yard as you can if you have the choice, and plan your landscaping around them. Have the tree trimmed rather than having it completely removed if it won’t cause immediate damage to your house but some of the branches are getting close to your roof or electricity lines.

Some trees, such as towering pines, pose a risk to a house because they might break during strong wind conditions. If so, get a pro to take care of the tree removal for you.

Working with natural slope

. You most likely have some hills or dips in your backyard because it’s extremely uncommon for a piece of land to be completely flat. Although levelling the entire yard is usually not practical, you might need to do so if you’re adding a structure like a deck or patio. Instead, incorporate the slopes into your design by using stone steps, elevated or lowered plant beds, and retaining walls.

Instead of trying to level out your entire yard, this will frequently provide a beautiful, natural-looking landscape instead of one that can look extremely unnatural.

Maintaining your land’s natural slope may aid in water drainage away from your house.

Walkway

Image via unsplash.com

It’s a smart idea to incorporate walkways into your design to make sure you can move across your yard securely. If you decide to utilize paving stones, use a slightly coarser type so they won’t be slippery in the rain. Additionally, place the materials with a 1-2% slope to allow water to drain off of them.

Popular materials for walks include stone, brick, gravel, and concrete. Depending on the design you select, they may be a relatively low-cost investment that adds a significant amount of comfort and style to your garden.

It is recommended that secondary paths, such as those leading out into a garden, be at least 3 ft (0.91 m) wide.

Creating borders or fences

You may not need to add any additional boundaries to your area if your backyard is modest and you already have a fence. However, if your backyard is bigger, you can make it feel more coherent by designating specific areas. For instance, to make your play space feel more contained, you may erect a wall of plants along the outside perimeter. A fantastic living fence is made of ferns.

You may increase your seclusion from neighbors and onlookers by building rock walls and wooden fences. These features will also enhance the beauty of your backyard.

Adding flower

Image via unsplash.com

Adding a flower garden to your outdoor area is an easy way to make a huge impact. Your flower garden can be anything from a straightforward bed running along the side of your patio to a vast network of exotic species, depending on your gardening expertise and financial constraints. Choose perennial plants that will grow back year after year for the option that requires the least upkeep!

To entice butterflies to your backyard, plant flowers that produce nectar.

Grow herbs and veggies in your garden to consume food that you have grown yourself.

Consider planting lavender close to your dining areas if you live somewhere where bugs are a regular outdoor annoyance. Insects will avoid the fragrance.

Shrubs for extra greenery: renovating your outdoor

Include shrubs in your garden and gardens to provide the impression of a verdant retreat of your outdoor. To keep your shrubs in good shape and size, prune them with shears once a year, either in the spring or the autumn.

By cutting your plants into interesting shapes, you can make a topiary. Boxwood, yews, and holly are suitable shrubs for topiaries.

Shrubbery will bring an additional layer of privacy and security to your yard in addition to being aesthetically pleasing.

Planting trees: renovating your outdoor

Image via unsplash.com

Trees can be a great addition to your outdoor if you’re planning to use it now and in the future. If you want to provide your yard some shade, plant trees with a wide canopy, such as maple, oak, or aspen. Choose a smaller flowering variety of tree, such as a magnolia or an Eastern redbud, if you’re more interested in decorative trees.

Fruit trees are a lovely way to eat fresh food that you have grown yourself!

USEFUL LINKS:

Click here to keep hovering on the topic 
 Build an organic garden from scratch 

Tips for achieving a bohemian decor at home

Today, the term “boho” is used to identify items that are unique and artistic. What does boho actually imply then? First off, it’s a shortened version of the French word “bohemian,” which refers to Bohemia, a territory in the modern Czech Republic.

The Romani people, the largest ethnic minority in Europe, were mistakenly thought to hail from Bohemia. Originating in India, the Romani were famed for their ingenuity and led mostly nomadic lives, with many of them being accomplished musicians, artists, and craftspeople.

Mixing patterns and colours

Throw pillow blending and matching can be done in a professional manner using a tried-and-true method, but there are no restrictions when designing a bohemian-style room. Boho fashion is characterized by vivid hues, a profusion of patterns, especially floral and paisleys, as well as natural prints and geometric designs. If flashy colours aren’t your thing, try a muted combination of olive green, cognac, mustard yellow, and rusty orange.

Even in a living room area you can add a layer of added comfort, flair, and eclectic spirit by scattering a variety of cushions and throws on a day bed or plain sofa.

Natural and rustic finishes

(Photo from iStock)

Accessories made from natural or raw materials like hemp, sisal, wood, and rattan have become increasingly popular since the hippie influence of the 1960s and 1970s on boho design. Consider sisal area rugs, macrame plant hangers, braided wall art, or leather accent chairs. Even while using natural textures is important, don’t let that stop you from adding metallic accents, like a floor light for some shine, to go with the natural aspects.

Know the bohemian culture

When designing your room in a bohemian style, it’s crucial to understand exactly what you’re representing in terms of global and cultural elements. The Instagram account Afro Bohemian Living takes this to heart, incorporating classic bohemian elements while keeping distinctive African culture at the forefront. Her home is filled with African-inspired décor, including woven baskets, artwork, and ornamental things.

Add stuff from across globe

If you have the opportunity to visit far-off locales, hunt for gorgeous trinkets that will help you furnish your home with genuine items to give it a natural-eclectic vibe. If you can’t afford that luxury, you can still locate more accessible. And less expensive foreign accents by browsing charity shops, flea markets, and apps like Next-door and Mercery. Wherever feasible, try to buy things straight from the nations where they were produced. An ancient globe could be a quirky and lovable touch to your décor with a travel theme.

Go casual for bohemian style

When it comes to this look, keeping it casual is crucial to remember. Bohemian interior design is uncomplicated. Think of seating arrangements that promote talking, reading, listening to music, playing games. And lounging on the floor pillows and pouffes as opposed to watching TV or throwing formal dinner parties.

Layering many textures

(Photo from iStock)

Boho-chic interior design can be achieved by layering textures. To add depth to a more minimalist room, layer boho-style bedding in a variety of textures, hues. And/or patterns, or place a chunky knit throw on your bed.

Mixing styles as bohemian look

Boho-style rooms use unusual and distinctive things in inventive ways, just like any eclectic, interesting home setting. The emphasis here is primarily on mid-century modern accessories. And items with a nod to the free-spirited hippy lifestyle of the 1960s and 1970s rather than subscribing strictly to one style. For instance, a modern white bookshelf with plants and a mid-century hairpin leg desk combined with a geometric print rug.

Be artistic while designing

Without a carefully chosen, imaginative combination of art and books, no bohemian-style setting would be complete. In fact, it’s possible that earlier beatniks had a much larger collection of books than they did of clothing, furniture, or other tangible belongings.

If you like this decorating style, you presumably already appreciate the arts, so you’re off to a good start. You are free to stack art books on the coffee table, frame record covers as wall art. Or display an eclectic assortment of art prints on a gallery wall that extends from floor to ceiling if your goal is to create a boho-style environment.

Try neutrals for bohemian style

(Photo from iStock)

Boho is one of several styles that benefit from neutrals as a foundation. Focus more on working with your neutral colour scheme and sprinkling in a few bohemian flourishes. If you’re not as crazy about going colourful or extremely eclectic. This living area has a well chosen gallery wall with a variety of art prints. Which keeps everything in balance while maintaining the bohemian aesthetics slightly disorganized feel. The addition of a printed rug atop a solid white rug, as well as the leather and wicker accessories in the design, enhance the motif.

Adding plants

One can never have enough plants when decorating in a bohemian manner. They offer character to any space in your house and are the ideal functional design option. The plants in this living room belong to Leaf and Lolo. And they come in all different sizes, shapes, and designs. The wicker baskets and the macrame wall hanging only strengthen the bohemian theme.

A gallery wall

A space with boho design can really be elevated with gallery walls. Working with items as well as photographs or art prints is crucial. We suggest a humorous approach wherever feasible because there are really no rules. And certainly no rhyme or reason—to how your art collections and things should be organized.

Boho and Scandinavian vibes together

Despite certain contrasts, boho and Scandinavian fashion are sometimes associated together. Boho tends to be more free-spirited and flawed in its approach. Whereas Scandinavian styles place a greater emphasis on simplicity, minimalism, and functionality. However, the two designs can blend effectively, particularly in bedrooms. The muted colour scheme and simple furnishings are complemented by amusing wicker baskets, plush blankets, and other cozy elements.

Reference:

the spruce
Making your home fireproof is important, searching for some effective tips?, your wait is over click on the link below:
Tips to make your home fireproof

Open source software for architects

For architecture and design firms, software costs are rising sharply. Businesses are growing more and more dependent on commercial software publishers as numerous software programs and file formats become de facto industry standards. A lot of companies in the software business have switched from selling software as a one-time purchase—which would remain functioning after it was fully paid for—to a recurring monthly subscription model, under which the tool loses functionality if the user stops paying.

(Photo from iStock)

As a result, businesses in all sectors have seen an increase in their monthly software costs. Examining open-source alternatives, which have grown in popularity recently, is one method that architecture and design firms can lessen this cost burden while still having access to the software and technology required to run their operations.

The right to download, use, and modify open-source software as well as its source code is granted to users under a specific license. Open-source software projects, in contrast to commercial software, which frequently has a protected source code and proprietary file formats, are not profit-driven and encourage users to alter and share their code with the larger community.

The development of apps that can accommodate various points of view and methods of operation is frequently the aim of these initiatives. The Linux operating system, the WordPress website publishing tool, and the Audacity audio editing programs are some examples of well-known open-source projects.

Open-source options

(Photo from iStock)

Free, open-source software may seem like a nice idea, and, more significantly, many of these programs are appropriate for the design workflow, especially as architects take on more digital tasks. Seven possibilities are listed below for you to think about, from energy analysis software to 3D modelling tools.

Blender3d.com

A free and open-source collection of 3D modelling tools called Blender allows for modelling, rendering, animation, and simulation. Despite the fact that the suite is more focused on character animation and visual effects than architectural applications, a user community provides training and resources for AEC professionals on websites like Blender3DArchitect. Blender can import open formats like DXF but cannot import proprietary file formats like Autodesk’s DWG or RVT natively.

GIMP.ORG

An open-source alternative to Adobe Photoshop for producing and modifying digital photos is the GNU Image Manipulation Platform. Version 2.10 of GIMP, which was first made available in 1996, is known for being a little more difficult to use than Photoshop and for not offering as many capabilities. However, a strong user community has sprung up around it. GIMP is cross-platform, which means it runs on Linux, MacOS, and Windows.

Inkspace.org

Inkscape performs for vector graphics what GIMP does for raster graphics. with the scalable vector graphics (SVG) file format, users can produce scaled visual pictures with this free and open-source program. Inkscape offers adaptable tools for 2D drawing and text manipulation, much like Adobe Illustrator.

LiberCAD.org

This open-source 2D CAD program’s interface and ideas are comparable to those of Auto-CAD, making the transfer of skills simple. Unlike Auto-CAD, LibreCAD only supports 2D drawing, making it unable to modify or create 3D models. It can also only import DXF files. Files can, however, be exported in a variety of formats. More than 30 languages are supported by LibreCAD, which is cross-platform like GIMP.

LiberOffice.org

Many of the tools in LibreOffice will be recognizable to users of the Microsoft Office package. Applications for doing common office chores including word processing, PDF editing, presentation design, and spreadsheet generation are included in this full-featured package of office tools. Open-document is a non-proprietary, open-source document file format that is used by LibreOffice. LibreOffice is not cloud-hosted like Google Workspace, which depending on your workflow could be advantageous or a hindrance.

FreeCAD.org

A complete set of 3D modelling options are offered by FreeCAD in an open-source program. Additionally, it is a parametric modelling tool, allowing users to update the model’s history directly. An Arch Workbench in FreeCAD offers BIM-specific workflows for the program. Additionally, drafting tools are included in a 2D Workbench for producing conventional 2D documentation and drawings. File types supported by FreeCAD include DXF, OBJ, STEP, and IFC.

OpenStudio.net

This open-source energy modelling system was created by the National Renewable Energy Laboratory and is based on the EnergyPlus simulation engine. The SketchUp plug-in in OpenStudio, which enables users to create models in Trimble SketchUp and then analyse them in OpenStudio. Is one of the program’s key advantages. The final analysis is then directly viewable in SketchUp.

Open-source for commercial software

(Photo from iStock)

Additional open-source projects have been constructed on top of commercial software in addition to the stand-alone programs mentioned above. With this strategy, industry-standard tools and file formats are widely used along with the community. And transparency of open-source projects. For instance, PyRevit is a well-liked open-source add-in for Autodesk Revit, created by architect and programmer Ehsan Iran-Nejad. Despite the fact that Revit is not free, Iran-Nejad’s add-in is. Users can download the source code or the built add-in and alter it to suit their needs.

Some for-profit software providers, like Autodesk, have furthermore made software available under open-source licenses. As an open-source project, Dynamo, a visual programming tool, is free to use. Although Autodesk includes Dynamo in its Alias, Civil3D. And Revit software packages, it no longer sells the add-on separately as of June 2017. Additionally, starting on January 31, 2022, Autodesk intends to terminate and remove Dynamo Studio from its AEC Collection. Customers can still download Dynamo Sandbox, a standalone, open-source version of the program. Users are free to alter the source code anyway they see fit. Even if this version does not have all the functionality offered in the one that comes with the premium program from Autodesk.

Brilliance of software

The Burj Khalifa, the largest free-standing structure in the universe, is a 163-floor skyscraper that has garnered widespread attention for its architecture and beauty. This building is a known marvel of architecture and engineering. This marvel has broken numerous records. These works of art only demonstrate the creative prowess, architectural excellence, whole team coordination, and a clean project execution with premium pre-visualization technologies.

Reference:

Architect
Making your home fireproof is important, searching for some effective tips?, your wait is over click on the link below:
Tips to make your home fireproof


Things you must consider first before building a commercial building

A commercial building is a fantastic real estate venture that has the potential to be very lucrative. However, a significant time and financial investment is required. Investors need to be sure it’s the right decision for them and their company.

Construction of a commercial building might be a little intimidating, especially for novice investors or contractors. You need to be conversant with the entire process of commercial building construction. Here are some pointers for ensuring that the construction of your commercial building goes well.

A well thought budget

  (Photo from iStock)

Develop a precise budget before beginning your business  project. This will assist you in deciding how to complete the project and gather sufficient funding for the building.

A good construction budget should make it clear how much it will cost to acquire the land or property, as well as the approval fees, consultancy fees, VAT,  supplies, design work, and labour. All of these expenses are quite important for budgeting.

As you create the budget, take a 5% to 10% contingency into account for-unforeseen events. However, if you are unable to produce the budget, you may think about hiring a bank adviser or a business contractor to create construction estimates while the project is being planned.

Good architecture and design

Even if you have a strong sense of execution, your commercial building project will still require the services of a skilled architect and interior designer. Despite your desire to save money up front, neglecting this crucial step can result in issues like wasteful space use.

Your structure will be practical and effective if you work with an excellent architect. You should make sure your building and layout can fit your equipment when designing a commercial office building. An architect assists in conceiving the needs of the project owner and developing a solution.

An experienced contractor

(Photo from iStock)

Choosing the top local builder is essential to the success of any business construction project. If you choose the wrong construction company, all of your love, devotion, and money could be wasted on your commercial  project.

Make sure the business is authorized, financially secure, and prepared to provide references and warranties on the job completed. Obtaining at least three quotes is a solid general rule. A contractor that has at least ten years of experience has likely participated in a number of projects.

Prepare all valid documents of building

Make sure you receive all necessary government paperwork, including any necessary approvals and permits for your nation or region. When these documents are not provided when requested, it can result in severe penalties and fines. In extreme circumstances, it can result in the cancellation of your construction project.

In addition to standard permits, environmental clearance is required when establishing a commercial facility. Additionally, to ensure the success of your commercial building project, think about hiring a legal counsel.

Realistic project timeline

(Photo from iStock)

Even while you may want your commercial construction project to be finished as quickly as possible, this may not always be feasible given how long it takes to construct a high-quality building. Typically, a project has too many moving components, including subcontractors, heavy machinery, and building inspections.

Think about how the environment might affect your construction while determining the project time-frame. Before choosing a deadline, talk to your contractor. Your business contractor needs to provide the work on schedule and should set realistic completion dates.

Regular chat with contractor about building

Effective communication between the project owner and the contractor is essential to a commercial building project’s success. As the project’s owner, you should prepare for unforeseen circumstances that can occur during construction. Be careful to keep up constant communication with your contractor. To simplify your communication, offer a single point of contact as well. When the contractor simultaneously serves as the project’s general manager, this is advantageous.

Use strong and quality material

(Photo from iStock)

Of course, you want a business structure that won’t need regular upkeep. However, the building materials employed during construction affect a commercial structure’s longevity. You must concentrate on establishing a sturdy, low-maintenance commercial structure if you want to manage long-term operating expenditures. Strong building systems and finishes are more durable, damage-resistant, and require less upkeep.

Arrange finances for building

It goes without saying that a business property will require a sizable sum of money. For instance, if you want to build a shop on your property, you can decide how you will finance it. However, most business owners choose bank financing, so it is just as crucial to get this element of the project right as the building itself. You need to talk to your bank about the proposed construction, the associated expenditures, and the most affordable option to establish a business building. It is best to start a conversation as soon as possible and avoid waiting until the very last minute while constructing a commercial structure.

Protective environment measures

(Photo from iStock)

Choose an environmentally friendly type when developing commercial property. The construction process itself must be environmentally friendly. Going above and above what the law requires may result in many other benefits, even though some construction methods and  types are now covered by local authorities and compliance with them would be absolutely needed. By including methods like rainwater collection and water conservation, commercial green building may help protect the environment while saving money on energy costs. These days, people hold green buildings and their owners in high respect, which might benefit your company’s public relations (PR).

Contingency planning

Given the likelihood of cost overruns in any construction project, it would be prudent to set aside around 10% of the estimated expenses for how to build commercial buildings. When planning how to build a commercial building step by step, you should also account for the loss of work that will occur during the transition from your current setup to the new structure. Unforeseen circumstances may cause delays in the construction of a commercial building, which will raise the overall cost of construction. When learning how to construct a commercial structure, these expenses cannot be disregarded, and only you, the owner, will be responsible for paying them.

Reference:

Build

Searching for tips to recycle the construction waste, what are you waiting for, click on the link below:

How to recycle and reuse construction waste


Tips to make your home fireproof

Any home owner would be wise to increase their home’s fire resistance. If you reside in a region where wildfires are often, it’s an especially wise move. You can take measures to build your new home using materials that will smother fires. If you want to make your current home more fireproof, you may do it by reducing the number of fire sources there. This will help shield your property from internal fires.

Fireproof barrier

(Photo from iStock)

Making a perimeter around your property that is essentially fireproof is one technique to safeguard it from a fire. Driveways and patios, which are made of concrete and gravel, aid in forming a break line. You can also utilize small, close-growing plants that are resistant to fire.

California lilac, ornamental strawberry, yellow ice plant, French lavender, and California fuchsia are a few examples of fire-resistant plants. Look for plants with a high moisture content and low resin content.

Make sure fire trucks can access your home

Firefighters cannot extinguish the fire if a fire truck cannot reach your home. You must make sure that even your driveway is sturdy enough to support a fire truck because a fire truck needs a good path to reach your home. Having a decent location to turn the truck around also helps. Additionally, consider anything that restricts entrance, like a gate. If you’re in a region that is prone to fires, it is best to keep access open.

Use fireproof materials on roof

(Photo from iStock)

While the primary building material is crucial, you also need to be mindful of the materials you use for your siding and roof. For example, you can utilize siding made of brick, stucco, stone, tile, metal, or even concrete for your roof.

If a wood roof is absolutely necessary, check to see if the shingles have been treated to resist fire.

Remove debris from roof

As much as a mile can be covered by a fire’s embers. They might touch down on your roof. Even though your roof is composed of flame-resistant materials, it can catch fire if there is trash there. It’s a good idea to frequently clean your gutters.

In order to check for soot accumulation, get your chimney cleaned once a year as well.

Overhead power lines

You should make sure that any electrical lines that are close to or above your property won’t be damaged by falling tree limbs. Any tree limbs that are close to a power line should be kept cut back.

Keep an eye out for limbs that dangle over your power lines or that are beginning to grow in between them. The majority of power suppliers will cut your trees for you.

Give away what you don’t need

The simpler it is for a fire to spread, the more things you have in your house. Make sure you’re only keeping items in your home that you find useful, whether for practical reasons or for aesthetic ones, by going through your belongings. For instance, it’s time to give or throw away any clothing you haven’t worn in a year.

Take out candles

Candles can cause fires because they are prone to being knocked over. Additionally, the flame may spread to surrounding fabrics or be topped by an object. Use oil diffusers instead, such bamboo sticks, or go with a wax-warming device. Although electrical sources have the potential to catch fire, they are typically safer than open flames.

Practice electrical safety

(Photo from iStock)

You either have an issue with your electrical system or you are overloading your outlet if you frequently trip the breaker or blow a fuse. If the issue persists despite using less of that outlet, you should contact an electrician.

Fires may result from poor electrical systems. Do not also run cords underneath rugs.

Replace faulty appliances

It is best to replace a lamp or other electronic item if it sparks, produces odd noises, or smells odd. Faulty appliances may cause fires in your home by emitting sparks that ignite a fire.

Keep lamps away from drapes

(Photo from iStock)

Lamp and nightlight light bulbs can heat up to the point that they can catch fire, especially when used near fabric. Make sure that nothing, especially curtains or bed sheets, is too close to a lamp’s bulb.

Use furniture made from natural material

The synthetic materials used in contemporary furniture are generated from petrochemicals. These furnishings burn quickly and emit noxious gases when lit. Natural furnishings burn more slowly and do not give off harmful fumes.

Check space heaters

Space heaters can be dangerous, especially the older models with open heating elements. A heater should not be placed in a location where a child or pet could tip it over. Also, keep anything flammable far away from heaters.

Install fire alarms

The risk of death in a fire for your family is reduced by 50% by smoke alarms. One should be present on each floor of your home as well as in each bedroom. The smoke will rise to the detectors, so mount them high on the wall or ceiling.

Check fire alarms time to time

Make sure your fire alarms are operational by checking them twice a year. You’ll need to swap out the battery if they’re not. You might need to call an electrician to fix a fire alarm that is wired into your electrical system.

Keep fire extinguisher at home

Make sure to maintain at least one fire extinguisher in your home, if you don’t already. Since many fires begin in the kitchen, it is a good idea to keep one there. Ensure that everyone in the home has easy access to it, that they are all old enough to use it, and that it is conveniently located.

If your home is multi-story, you should also have a fire extinguisher on each floor.

Always be prepared

(Photo from iStock)

You should be familiar with the best escape routes before a fire ever breaks out in your home. Make an effort to establish at least two exits for each space. Additionally, confirm the viability of your escape routes. For instance, if a window doesn’t open, you might not be able to escape via it.

Create a meeting place for your family that you can all go to in case of an emergency, such a fire, such as the mailbox.

Reference:

wikiHow

Searching for tips to recycle the construction waste, what are you waiting for, click on the link below:

How to recycle and reuse construction waste