Modern house design is one of the hottest trends in interior design right now, with minimalist furnishings, standout pieces, and a subdued colour scheme. Modernizing your home is a terrific way to update its appearance and feel while also incorporating the newest smart home technology and appliances.
These house décor and home automation ideas will immediately give your property a modern feel, whether you’re getting ready to sell or you just feel like changing things up.
Keep what’s essential
Eliminating unnecessary clutter and concentrating exclusively on décor that enhances your house’s overall appeal is one of the finest ways to update it. Choose a few statement pieces that go with the colour scheme of your home rather than filling your shelves with a tonne of small trinkets or displaying all of your coffee table books. As always, less is more.
Smart home appliances


Advance your home’s technology beyond simple cosmetic updates. Your phone and your home technology are integrated via smart home hubs to simplify home automation and lifestyle management. Your smart home gadget, whether you go with Google Home, Amazon Echo, or Apple’s Home-pod, can play music, dimmer lights, monitor security systems, and set alerts for you.
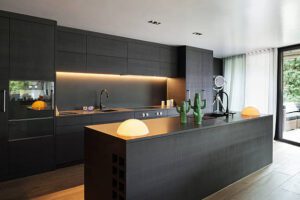
Prefer natural materials
Organic materials are a terrific option if you’re remodelling your house and want to attain a modern aesthetic. Your kitchen and dining area can be completely transformed by adding dark wood cabinets and stone countertops; alternatively, bamboo flooring or exposed brick walls are ideal for giving your home an industrial chic appearance.
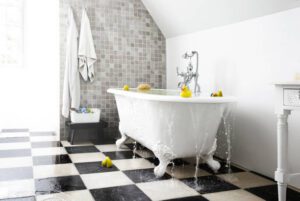
Using glass creates space
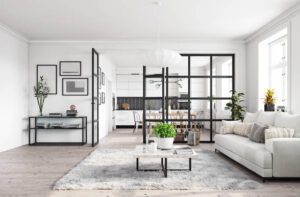

Glass and contemporary home design are inseparable, but you don’t have to use it as furniture; instead, use it to let more light into your living, dining, and bathroom spaces. To give your bathroom a contemporary feel, swap out any shower curtains or patterned screens with clear ones. You could also add glass walls with panels to divide your living and eating areas while still maintaining a semi-open floor plan.
Smart lightening
Upgrades to your lighting can transform the look of your interior design, especially if you’re looking for low-cost home automation solutions. Your home’s décor can be greatly influenced by lighting. You can set your lights to come on or go off after work, dim them using your phone or voice commands, and change the colours to match your mood thanks to smart lighting solutions. Make sure your smart lighting systems are Bluetooth-compatible with smart home hubs before installing the rest of your home.
Use statement colours
One popular misconception about modern house design is that it is only based on black, white, and grey colour palettes. Pops of colour brighten up a space and give a little individuality and flair. These are some of the best home décor ideas. Use vibrant wall art to add colour to your interior design, or choose a daring bright colour scheme for your pillows or carpets. If in doubt, utilize a colour wheel tool to help you pick the ideal colour scheme for your home. Regardless of the hues you select, just make sure they work well together.
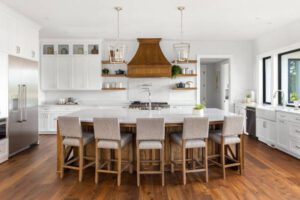
Say yes to floorboards

Although they provide excellent insulation and are comfortable underfoot, carpets may be challenging to keep clean and may eventually begin to appear shabby. If you’re ready and eager to make some significant changes to your home, now might be a good time to switch to floorboards because they not only appear more contemporary but also are more durable and easier to maintain. Your choice of color will mostly rely on the size of your room and the style you want to achieve. Lighter colours make rooms appear larger and sunnier, while darker colours give homes a more dramatic and rustic feel.
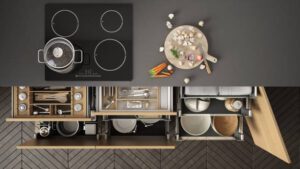
Open shelving
If you want to add more usable storage space to your house and have a blank wall, open shelving is the ideal solution. Add open shelves behind your sofa to exhibit artwork or collectibles, or use open shelves to create more storage in your kitchen and keep your favorite glasses and dinnerware there.
A clean coat of paint
Modern homes are light and airy, and painting the inside is one of the simplest ways to give them a new look. For a simple, clean aesthetic, go with white hues, or if you want to be a little braver, pick a vibrant colour and make a statement wall.
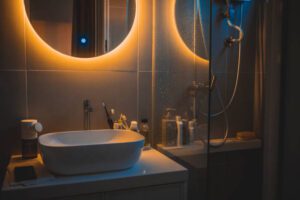
Be careful about shapes
Modern design is characterized by strong shapes like squares and rectangles. Here, a palette of brilliant white makes the floating sink’s design stand out. The modest space is made more spacious. And peaceful with the help of a floor-to-ceiling backlit mirror. And a straightforward white colour palette.
Do not overdo
Traditional design is the polar opposite of modern design, which emphasizes clean lines. A restrained use of color, and minimal decoration. The kitchen, dining area, and living room. Are all connected by an open floor plan in this tastefully decorated living space. In stark contrast to the room’s dazzling white walls, the two-story fireplace serves as a focal point.
Simplicity is best

Modernism and minimalism complement one another. This modern bedroom’s bleached hardwood flooring, low, neutral furniture, and crisp white walls. All work together to create a sparse atmosphere. A classic example of mid-century modern furniture. The Eames rocker was created by Charles. And Ray Eames in 1948 for a competition at the Museum of Modern Art. It blends in beautifully with the streamlined style.
High contrast of high style
In order to create this urban black-and-white kitchen, a limited colour scheme and recurring materials were used. A waterfall countertop in dazzling white covers the sleek black island. Philippe Stack’s Louis Ghost chairs. Which skilfully combine Baroque and cutting-edge modern design, are combined with a lower floating counter. Long, white cabinets with a glossy finish give the space height and brightness.
Purposeful designing
Modern design is for you if you thrive on simplicity. This approach requires you to choose carefully. Looking for items that can truly stand alone while still having a significant effect. For instance, in this elegant hallway. A sleek table is combined with a striking black-and-white poster. An exquisite arrangement and a piece of coral offer splashes of vivid colour.
Reference:
HGTV
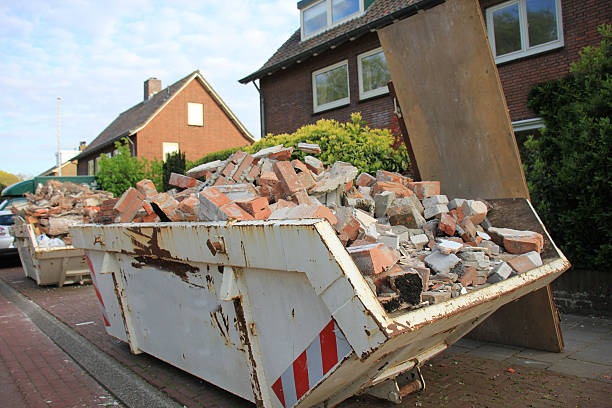
Searching for tips to recycle the construction waste, what are you waiting for, click on the link below:
How to recycle and reuse construction waste