All posts by Anish

15 Motivational Quotes to Boost Your Team’s Morale

In today’s fast-paced and competitive business world, maintaining high team morale is essential for productivity and success. A motivated team is more likely to overcome obstacles, achieve their goals, and drive the company towards excellence. To boost your team’s morale, you can harness the power of motivational quotes. These words of wisdom have the ability to inspire, uplift, and energize your team, helping them stay focused and determined. In this article, we’ll explore 15 motivational quotes that can ignite the spirit of your team and drive them towards greater achievements.

  • Following are 15 amazing motivational quotes that will boost your team’s morale and help them working with fresh mind:

(Photo from iStock)

“The only limit to our realization of tomorrow will be our doubts of today.” – Franklin D. Roosevelt

Franklin D. Roosevelt’s quote reminds us that doubt and insecurity can limit our potential. Encourage your team to embrace uncertainty as an opportunity for growth. By believing in their abilities, they can push through challenges and achieve their goals.

“Success is not final, failure is not fatal: It is the courage to continue that counts.” – Winston Churchill

Winston Churchill’s words emphasize the importance of resilience. Your team can find strength in knowing that their perseverance is what counts in the long run.

(Photo from iStock)

“The only way to do great work is to love what you do.” – Steve Jobs

Steve Jobs highlights the significance of passion in the workplace. Encourage your team to find joy in their tasks and projects. When they love what they do, they’re more likely to produce outstanding results and maintain high morale.

(Photo from iStock)

“The harder I work, the luckier I get.” – Samuel Goldwyn

Samuel Goldwyn’s quote emphasizes the relationship between hard work and success. It reminds your team that luck often follows diligent effort. Encourage them to put in the work, and success will naturally come their way.

“The only thing that stands between you and your dream is the will to try and the belief that it is actually possible.” – Joel Brown

Joel Brown’s words remind your team that their dreams are within reach if they have the will to try. Encourage them to believe in their capabilities and take bold steps towards their aspirations.

“The best way to predict the future is to create it.” – Peter Drucker

Peter Drucker’s quote reinforces the idea that your team has the power to shape their own destiny. By setting goals and working tirelessly towards them, they can create a bright future filled with achievements.

(Photo from iStock)

“Success is walking from failure to failure with no loss of enthusiasm.” – Winston Churchill

Winston Churchill’s wisdom once again emphasizes the importance of resilience. Failure is a part of every journey, but it shouldn’t deter enthusiasm. Encourage your team to learn from their mistakes and maintain their zeal for success.

“The only person you are destined to become is the person you decide to be.” – Ralph Waldo Emerson

Ralph Waldo Emerson’s quote reminds your team that they have the power to determine their own destiny. Encourage them to set ambitious goals and make decisions that will lead them towards becoming the person they want to be.

“Success is not in what you have, but who you are.” – Bo Bennett

Bo Bennett’s quote underscores the idea that success is not solely measured by material possessions. It’s about personal growth, character, and the impact one has on the world. Encourage your team to focus on becoming better individuals, and success will follow.

(Photo from iStock)

“The future depends on what you do today.” – Mahatma Gandhi

Mahatma Gandhi’s quote is a powerful reminder that the actions we take today shape our future. Encourage your team to be proactive, set goals, and work diligently to achieve them.

(Photo from iStock)

“You miss 100% of the shots you don’t take.” – Wayne Gretzky

Wayne Gretzky’s quote is a testament to the importance of taking risks. Encourage your team to step out of their comfort zones, try new things, and take chances. Great achievements often come from daring to take a shot.

“The only place where success comes before work is in the dictionary.” – Vidal Sassoon

Vidal Sassoon’s quote emphasizes the fundamental relationship between hard work and success. Encourage your team to put in the effort required to achieve their goals.

(Photo from iStock)

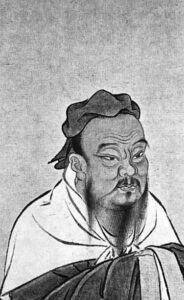
“It does not matter how slowly you go as long as you do not stop.” – Confucius

Confucius’ wisdom reminds your team that progress is more important than speed. Encourage them to stay persistent and never give up, even if they face obstacles or progress seems slow.

“Your work is going to fill a large part of your life, and the only way to be truly satisfied is to do what you believe is great work.” – Steve Jobs

Steve Jobs’ quote highlights the importance of finding satisfaction in one’s work. Encourage your team to aim for greatness and to be genuinely satisfied with their contributions. When they feel fulfilled, their morale will soar.

“The best preparation for tomorrow is doing your best today.” – H. Jackson Brown Jr.

Jackson Brown Jr.’s quote emphasizes the significance of daily effort and preparation. Encourage your team to give their best each day, as it sets the foundation for a successful tomorrow.

Conclusion

Motivational quotes can be a powerful tool for boosting your team’s morale. They have the ability to inspire, encourage, and remind your team of the values and attitudes that lead to success. By incorporating these 15 motivational quotes into your team’s daily routine, you can help them maintain high spirits, overcome challenges, and achieve their goals. Remember that consistent motivation is the key to sustained success in any organization. Hence, these motivational quotes play vital role in keeping team members enthusiastic towards their work without fail. This also help team leaders to keep their energy in check.

Reference:

Exela HR Solutions 

Your little friend needs a toy, confused between what to choose?, what are you waiting for click on the link below:

How to choose right dog toy on your own


5 Current Developments in the Foreign Market

The global economy is constantly evolving, driven by technological advancements, geopolitical shifts, and changing consumer preferences. These developments have a profound impact on international trade and foreign markets. In this article, we will explore five current developments in the foreign market that are shaping the landscape of international business.

1. Digital Transformation and E-commerce

(Photo from iStock)

According to Statista, global e-commerce sales reached $4.28 trillion in 2020, and this number is projected to continue growing. The COVID-19 pandemic accelerated the adoption of online shopping, and consumers are now more comfortable buying products from foreign countries. Businesses that adapt to the digital marketplace can tap into this vast customer base.

In addition to traditional e-commerce, new models like cross-border e-commerce and direct-to-consumer (DTC) sales are emerging. Cross-border e-commerce allows businesses to reach international customers more easily, and DTC models enable companies to bypass traditional distribution channels, selling directly to consumers worldwide.

The impact of this development on foreign markets is substantial. It opens up opportunities for businesses of all sizes to expand their global reach. However, it also poses challenges, such as navigating complex international regulations, customs, and taxation. Successful foreign market entry in the digital age requires careful planning and a deep understanding of local consumer preferences and regulations.

2. Geopolitical Shifts and Trade Wars

(Photo from iStock)

Geopolitical developments have a significant impact on foreign markets. The past few years have witnessed trade tensions and disputes between major economies, particularly the United States and China. These trade wars have led to tariffs and trade barriers, disrupting global supply chains and affecting businesses operating in foreign markets.

The COVID-19 pandemic further strained international relations, with countries implementing export restrictions on critical medical supplies and vaccines. These events highlight the importance of understanding the geopolitical landscape when engaging in foreign trade.

In response to these developments, many businesses have been revaluating their global supply chain strategies. Diversifying suppliers, reshoring production, and exploring alternative markets have become strategies to mitigate risks associated with geopolitical tensions.

Another notable development is the Regional Comprehensive Economic Partnership (RCEP), which was signed in November 2020. This trade agreement involves 15 Asia-Pacific countries, including China, Japan, and South Korea. It aims to reduce trade barriers and promote economic integration in the region. The RCEP agreement is a significant shift in global trade dynamics, potentially creating new opportunities for businesses operating in the Asia-Pacific region.

3. Sustainable and Ethical Business Practices

(Photo from iStock)

Sustainability and ethical considerations are playing an increasingly important role in foreign markets. Consumers are becoming more conscious of the environmental and social impact of their purchases. Businesses that adopt sustainable practices and demonstrate a commitment to ethical standards are gaining a competitive edge in the international market.

Sustainability initiatives, such as reducing carbon emissions, using renewable energy sources, and implementing eco-friendly packaging, are becoming standard practices for many multinational corporations. In the foreign market, companies are also expected to adhere to international environmental and labour standards.

Sustainable and ethical practices are not only important for brand reputation but can also lead to cost savings and access to new markets. For example, the European Union has introduced the European Green Deal, which aims to make the EU carbon-neutral by 2050. Businesses that want to access the EU market will need to align with these sustainability goals.

4. Technological Advancements in Cross-Border Payments

(Photo from iStock)

The way we make international payments is evolving rapidly, and this is a critical development in foreign markets. Traditional cross-border payments are often slow and costly due to the involvement of multiple banks and intermediaries. However, technological advancements are making cross-border transactions more efficient and cost-effective.

One notable development is the use of blockchain and cryptocurrencies for cross-border payments. Cryptocurrencies like Bitcoin and Ethereum offer the potential for faster and cheaper international transactions. They also enable businesses to circumvent traditional banking systems, which can be particularly valuable in countries with limited access to banking services.

Furthermore, financial technology (FinTech) companies are offering innovative solutions for international payments. Services like TransferWise (now known as Wise) and Revolut allow individuals and businesses to send money across borders with lower fees and competitive exchange rates. These platforms have gained popularity and are changing the landscape of international money transfers.

The development of central bank digital currencies (CBDCs) is another significant trend in cross-border payments. Several countries, including China, are developing digital versions of their national currencies. CBDCs could simplify international transactions, reduce reliance on traditional banking systems, and offer more transparency and security in cross-border payments.

5. Changes in Consumer Behaviour and Preferences

(Photo from iStock)

Consumer behaviour is continually evolving, and these changes have a profound impact on foreign markets. Understanding the preferences and needs of consumers in foreign countries is crucial for the success of any international business.

One significant development is the rise of conscious consumerism. Consumers are increasingly looking for products and brands that align with their values, whether that involves supporting sustainability, ethical sourcing, or cultural sensitivity. Businesses need to adapt their marketing and product offerings to meet these evolving demands.

Moreover, the growth of the middle class in emerging economies has led to changes in consumption patterns. As disposable incomes rise, consumers in these countries are demanding higher-quality products and services, and they are willing to pay a premium for them. This creates opportunities for businesses that can cater to the needs of these expanding consumer bases.

Conclusion

The foreign market is in a state of constant evolution, driven by digital transformation, geopolitical shifts, sustainability considerations, technological advancements in payments, and changing consumer behaviour. Businesses looking to succeed in foreign markets must be agile and adaptive to these developments.

To thrive in the international arena, businesses need to stay informed about these trends, conduct thorough market research, and develop strategies that address the unique challenges and opportunities presented by foreign markets. By embracing these developments and tailoring their approaches, companies can position themselves for success in the global economy.

Reference:

Forbes

Your little friend needs a toy, confused between what to choose?, what are you waiting for click on the link below:

How to choose right dog toy on your own


Best Drills for Improving Hand Strength in Sports

Best Drills for Improving Hand Strength in Sports

Every day you utilize your hands for various tasks, yet you might not consider strengthening them by exercising them. However, you may increase your flexibility and grip by performing easy and best hand and wrist workouts, which will make daily tasks easier. If you have arthritis or are recuperating from an injury, hand strengthening exercises may also be beneficial, but first speak to your doctor or a physical therapist.

Touching your thumb to palm: best hand drills

Image via Unsplash.com

Stretch out your arm so that you can see your extended palm fingers. Put your thumb in full contact with your palm so that the tip of your thumb is close to the base of your pinky. After holding it in place for 5–10 seconds, return to the starting position by extending your thumb.

After completing 10 reps, switch to the other hand. Perform three sets per hand each day.

Curl your fingers and thumb

Your hand should be held out with your fingers extended and your thumb pointing in your direction. Keep your thumb extended, but press the tips of your fingers together. Repeat ten times while holding for 5–10 seconds at a time. Repeat the drill while switching hands.

Finish three sets per hand each day.

This exercise can also be done in combination. To finish a rep, curl your fingers, open your hand, make a closed fist (while keeping your thumb extended), and then open your hand once again.

Add a straight fist to each rep to turn it into a triple combination exercise by placing your fingertips flat against the base of your hand.

Touch your thumb to every finger-tip: best hand drills

Image via Unsplash.com

Pinch the thumb and index finger pads together with an open hand, palm facing you. Open your hand, then contact your thumb and middle finger after holding for 5 seconds. Work your way backwards to your index finger after completing the technique with your ring and pinky. One set is complete after this.

Perform three sets with each hand.

Open and close your hand

With your hand extended and positioned as though you were attempting to sever the table in half, place your forearm on a table. Make a full fist with your fingers, thumb, and hand; hold it for five seconds; and then release. Ten reps are completed, then swap hands.

Alternately, you can perform the repetitions without a table by holding your upper arm at your side and bending your elbow 90 degrees.

With each hand, try to complete 3 sets each day.

Extend rubber band wrapped around hand

Image via Unsplash.com

With your hand extended and positioned as though you were attempting to sever the table in half, place your forearm on a table. Make a full fist with your fingers, thumb, and hand; hold it for five seconds; and then release. Ten reps are completed, then swap hands.

Alternately, you can perform the repetitions without a table by holding your upper arm at your side and bending your elbow 90 degrees.

With each hand, try to complete 3 sets each day.

Bend your wrist: best hand drills

Your forearm should be flat on the table, with your fingers and thumb extended. Bend your wrist to the left, hold for five seconds, and then return to the beginning position while keeping your forearm stiff and your palm flat on the table. In order to complete 1 rep, bend your wrist to the right for 5 seconds, then bring it back.

Change hands after 10 repetitions. Every day, perform three sets with each hand.

Palm up and down: best hand drills

Image via Unsplash.com

Again, place your forearm flat on the table with your fingers extended and your palm flat. Turn your hand over so that the palm is facing down and twist your wrist until the back of your hand is flat on the table. Hold for 2 seconds. Ten times each, then switch hands.

Every day, do 3 sets with each hand.

Chop your wrist up and down on a table

Position your hand with the fingers outstretched in a chopping motion. Your wrist and hand should stretch over the side of the table as you lay your forearm down there. While keeping your forearm stiff, chop downward with your wrist. To complete 1 rep, hold the downward chop for 5 seconds, go to the starting position for 5 seconds, then chop upward for 5 seconds.

Fold a tea towel or sock and place it under your arm at the point where your forearm hits the edge of the table if you have any soreness there.

One set should consist of 10 reps, and each hand should receive 3 sets every day.

Lower and lift your open palm: best hand drills

Once more extend your wrist and hand over the edge of the table, but this time position your palm so that it is towards the ground instead of upward. Maintaining a firm forearm on the table, bend your wrist downward for five seconds before returning to the beginning position. To complete a rep, extend your wrist upward for 5 seconds before returning to the starting position.

If you have pain where your lower forearm contacts the edge of the table, place a towel or sock under it.

Do three sets of 10 repetitions for each hand each day.

Add hand weights

Image via Unsplash.com

Almost all wrist exercises can be modified for use with hand weights; however, to lower the risk of injury, start with a very little weight. Try these things:

Skip the table and tuck your elbow to your side for wrist bends that go from side to side. While retaining the weight in your hand, swivel your wrist in both directions.

Similarly, instead of resting your forearm on a table when performing palm flips, tuck your elbow to your side. As you rotate your hand back and forth, hold on to the weight in your hand.

When performing wrist chops, hold the weight in your hand while extending your wrist and hand off the end of the table like before.

USEFUL LINKS:

Check out more tips about hand strength 
Build your own computer with our guide


Increase Your Endurance in Swimming with this Guide 

Increase Your Endurance in Swimming with this Guide

Stamina may help you push yourself to the edge without overtaxing your arms and legs, whether you’re a pro or an amateur swimmer. Whatever your swimming objectives are, having stamina can help you achieve them. You need to workout consistently, but you also need to make the most of your training time if you want to develop your stamina. You can increase your stamina by incorporating cross-training exercises into your swimming sets.

Training routine: tips to increase endurance

Image via Unsplash.com

Establish a training regimen that enables daily practice and improvement. Make a weekly commitment to swimming at a specific time so you develop a habit and your muscles don’t deteriorate between sessions.

At least twice a week, go swimming frequently. Alternate your swimming sessions with cross-training workouts in between to give your other muscles a chance to grow stronger as well.

Practice variety of strokes

Include a variety of strokes throughout your sets instead of only practicing freestyle. Your endurance is only as strong as your weakest muscles since different strokes use different muscles differently.

When learning a new swimming stroke, practice it for three or four laps (or until you feel comfortable with it). Freestyle, breaststroke, backstroke, and butterfly stroke are all excellent strokes to learn.

Increase the time you spend on each stroke gradually. To increase your endurance, try holding a certain stroke for 1-2 minutes longer each time.

Closed fist swimming: tips to increase endurance

Image via Unsplash.com

Make a fist with your hand instead of cupping it or holding it out flat while you swim to concentrate on strength. Your hands will provide less velocity, and your arms will have to work more to maintain balance. Your forearms will become stronger as a result, and your workout tolerance will rise.

Instead of swimming with closed hands towards the end of your session, do it first. Saving swimming with your fists for your final sets may leave you too exhausted since it is exhausting.

Include kickboard in your practice

Your swimming strength will significantly enhance if you have a strong kick. So that you can concentrate solely on boosting leg endurance, swim with your kickboard for a certain number of laps. Practice various kicks, such as sidekicks, back kicks, and butterfly kicks.

When you are nearing the finish of your workout and your arms are more exhausted, consider using a kickboard.

Practice swimming drills: tips to increase endurance

Image via Unsplash.com

Drills are exercises created to help you improve your technique. You will be able to swim more quickly the better your stroke technique. At the beginning of each day’s swim practice, run one or two drills.

The hand-drag drill quickens the pace at which hands recover. Swim a stroke like you normally would, but during the recovery period drag your hand through the water. Your hands will be able to complete the drill much more quickly once you can swim normally once more.

Try dolphin kicks to gain momentum more quickly. Kick your right and left legs simultaneously, as if they were a dolphin fin, to practice dolphin kicks.

Varying pace of laps

Change your pace every lap to enhance your energy and acquire control over your speed. Swim some laps slowly, some laps moderately, and some laps quickly, as appropriate.

Don’t just run your laps from slowest to fastest for the greatest results. To give yourself time to regain your breath, alternate quick laps with slow or moderate ones during your workout.

Set time for yourself: tips to increase endurance

Image via Unsplash.com

The pace watch, a small device with a minute and second hand that divides time into 5 second intervals, from 5 to 60 seconds or minutes, is found in the majority of swimming pools. Try to complete a particular lap or drill in a predetermined amount of time, reducing the time limit as your pace increases.

Consider investing in a waterproof stopwatch or creating your own personal pace clock if your swimming pool lacks one.

Swimming in a line

Increasing your efficiency is a part of improving your speed. Do your utmost to maintain a straight body line. Keep your arms and legs from crossing over; for instance, your left arm should never enter the right lane.

If you struggle to swim straight, practice the one-arm drill. Per lap, make a stroke using only one arm. If you have difficulties keeping afloat, use your other arm to hold onto your kickboard.

Utilize your eyes when doing a backstroke. Concentrate your vision on anything straight ahead, such as a chair or a diving board. You can swim more steadily if you do this.

Planning cross-training: tips to increase endurance

Image via Unsplash.com

Balance is necessary for stamina, and cross-training will help you develop it. Swim two to three times a week, and then work out in different ways the other four days.

Pick enjoyable exercise activities. Make your workouts more like the things you like to do, and you’ll be more motivated to work out. If you enjoy what you do, building up your stamina will be lot simpler.

For swimmers, long-distance running is a particularly beneficial cross-training activity since it improves cardiovascular and muscular endurance.

Consume protein and carbohydrates

Protein will help you build more muscle, while carbohydrates will give you energy to use throughout workouts. To prevent cramping, eat a meal at least 2-4 hours prior to swimming, or a snack at least 30 minutes beforehand.

Bring simple carbohydrate foods (such honey, pretzels, or fruit) to consume right after your activity. You’ll feel more energized and your blood sugar will rise as a result.

Choose quality over quantity when choosing protein. Choose a diet high in whole eggs, milk, seafood, and soybeans instead of protein drinks and red meat.

Aerobic exercise: tips to increase endurance

Image via Unsplash.com

Your cardiovascular system is exercised during aerobic exercise, and the muscles that pump blood to your heart are strengthened.  Consider adding a couple of aerobic cross-training workouts per week. Running, cycling, kickboxing, and trekking are a few examples of aerobic exercises.

Swimming is an aerobic activity, therefore include your swim sessions as aerobic days if you’re lacking in them one week.

USEFUL LINKS:

Learn more tips to build endurance is swimming 
Check out the basics of swimming here 

Ultimate Guide to Building Speed for Athletes

Ultimate Guide to Building Speed for Athletes

To run faster, there is no secret formula. Without regular exercise, restraint, and attention to form, it is impossible to achieve. Fortunately, a few straightforward tips can make the road to quicker running speed a little bit simpler to travel. You can see progress in as little as a few weeks by following a ultimate fitness regimen and challenging yourself to run as far as you can.

Warm up: ultimate workout

Image via Unsplash.com

Jog for two minutes to quicken your heartbeat and get your blood flowing before you run. You’ll feel a little more energized, and it will be simpler to concentrate on running rapidly. You won’t be too exhausted to give your run your all as long as your warmup isn’t too strenuous.

Consistent practice

The ideal schedule for most runners is daily or every other day runs. Consistency is crucial in this case. You must maintain a regular training regimen and gradually increase the level of effort over time if you want to see long-term improvements. Your performance may stagnate or even decline if you give up or fail to challenge yourself.

Interval training: ultimate workout

Image via Unsplash.com

Spend 10 minutes every day running in intervals. Follow this pattern while running: sprint for 10 seconds, then jog for a minute to recover. Repeat 10 more times.

Every week, shorten your breaks and increase your sprinting time to increase your level of difficulty. You will eventually be able to run farther and faster.

Running with your friends

Try competing against a friend who is a little bit speedier than you. It will be considerably more difficult than running by yourself or with someone who is slower than you, and it will offer you the incentive of winning. Avoid running alongside someone who is significantly faster than you or you could give up.

Good running form: ultimate workout

Adopt a good running stance by maintaining a straight back and swinging your elbow-held arms at a 90-degree angle. Run by springing off the balls of your feet with each step.

To give yourself a longer stride, try pushing your legs further back. You will gain a firmer footing and be able to spring off the ground, giving you an added boost with each step. You’ll note that sprinters competing in the Olympics almost usually take very large strides.

Additionally, your upper body is crucial. With each step, bend your arms and quickly pump them up and down.

Breathing pattern

Image via Unsplash.com

You want to be getting enough oxygen while running so that you can carry on a simple conversation. If you can’t, you’ll probably lose momentum and have to slow down. Long-term, slow, deep breathing will help you run faster.

Some people take three deep breaths through their noses, followed by two more. Check out your comfort level; one person’s preferred breathing technique may not be the best for you.

Set a time goal: ultimate workout

Every time you go for a run, time yourself with a stopwatch. Try to travel the same path a little bit faster each time. You’ll be able to exert your maximum effort thanks to the additional incentive.

Even if it seems impossible, strive to extract as much power as you can from your body just before you arrive at your destination and unleash a burst of speed. When you are aware that you are close to achieving your objective, you might be astonished by how quickly you can move. This can significantly shorten your wait time.

Focus on the prize

Image via Unsplash.com

You can improve as a runner by doing something as easy as altering the way you look ahead. Instead of looking directly in front of your feet, try to fix your attention on the direction you wish to walk. You won’t ever feel like you’re almost done, so you won’t give up as easily. Keep your attention on new locations further down the trail as you advance.

Try focusing on a point far ahead of the finish line and forcing yourself to go there, for instance, if you’re running on a straight track and you’re nearing the end. Up until the point where you decide to give up, this can help maintain your motivation high.

Hydrate yourself: ultimate workout

You won’t be able to run as quickly as you can if your biological demands aren’t being met. Before your run, sip on a little water to make sure your muscles have the fluids they require when it counts. Additionally, it’s a good idea to have some water with you so you may hydrate as needed while running.

But there is such a thing as drinking too much water. Avoid consuming a lot of water straight before a run. Drink little by little as you go, but try to avoid taking large gulps. You’ll get cramps from this.

Running sprints

Image via Unsplash.com

Running sprints is an excellent way to speed up and concentrate on your form, even if you’re not a sprinter. Perform sprints by jogging briefly to warm up, then sprint for around 30 seconds. After taking a two-to-five-minute break, resume your sprint.

Before taking a lengthy break, try to sprint around four times straight.

Vary your running pace: ultimate workout

The Swedish word “fartlek” means “speed play.” Start your run for 40 to 60 minutes, then choose a site to start sprinting to perform fartlek exercise. Sprint as quickly as you can for as little time as you can (often 1 to 3 minutes), then resume your regular speed.

With the fartlek training method, you can adjust the amount of jogging to sprinting based on how you’re feeling at the time.

Running on hills

Image via Unsplash.com

Either locate a hill outside, or utilize an inclination setting on a treadmill. For as long as you can, run as quickly as you can up and down the same slope. Your stamina and endurance will grow with time, allowing you to run farther and faster.

Hill runs are really beneficial for your body since they enable you to work out hard while reducing the joint shock that comes with running on flat surfaces.

USEFUL LINKS:

Check out more tips to build speed here 
Meals to enjoy while loosing weight 


iPhone and Android Apps to Simplify Your Routine

In today’s fast-paced world, smartphones have become an indispensable part of our daily lives. Whether it’s for communication, entertainment, or productivity, these pocket-sized devices have revolutionized the way we manage our everyday tasks. Thanks to the ever-evolving app ecosystem, both iPhone and Android users can access a plethora of apps designed to simplify and streamline various aspects of their lives. This article explores a selection of indispensable apps on both platforms that can help you navigate your daily routines with ease.

Productivity Apps

  • Microsoft Outlook (iPhone & Android)

(Photo from iStock)

Microsoft Outlook combines your email, calendar, and files into one powerful app. It helps you manage your emails, schedule meetings, and access your files from cloud storage services like OneDrive and Dropbox. The Focused Inbox feature automatically filters important messages to keep you organized, making it an excellent choice for professionals.

  • Evernote (iPhone & Android)

Evernote is a note-taking app that allows you to jot down ideas, create to-do lists, and organize your thoughts. You can add multimedia content, web clippings, and handwritten notes, making it a versatile digital notebook. Evernote syncs across devices, ensuring that your important notes are accessible whenever and wherever you need them.

  • Trello 

Trello is a popular project management and collaboration app that uses a card-based interface to organize tasks and projects into boards. This app is particularly useful for teams and individuals looking to manage and track their work in a visual and intuitive way.

Health and Fitness Apps

  • MyFitnessPal (iPhone & Android)

MyFitnessPal is a top-notch calorie counting and fitness tracking app. It allows you to log your meals, exercise routines, and monitor your progress towards fitness goals. The app offers a vast database of food items and exercises, making it easy to keep track of your health and fitness.

  • Calm (iPhone & Android)

Calm is a meditation and relaxation app that helps you manage stress and anxiety. With a variety of guided meditation sessions, sleep stories, and soothing music, it’s perfect for unwinding after a long day and getting a good night’s rest.

  • Nike Training Club (iPhone & Android)

(Photo from iStock)

Nike Training Club is a fitness app that offers a wide range of workouts, from yoga and strength training to HIIT and mobility exercises. The app also features personalized training plans and guided workout sessions to help you achieve your fitness goals.

  • WaterMinder (iPhone & Android)

Staying hydrated is essential for your health, and WaterMinder helps you do just that. It allows you to set daily water intake goals and sends you reminders to ensure you’re drinking enough water throughout the day.

Finance and Budgeting Apps

  • Mint (iPhone & Android)

Mint is a powerful personal finance app that allows you to track your expenses, create budgets, and monitor your financial health. It syncs with your bank accounts and credit cards to provide a comprehensive overview of your financial situation.

  • You Need a Budget (YNAB) 

YNAB is a budgeting app with a unique approach to managing your money. It focuses on giving every dollar a job, helping you prioritize and allocate your funds effectively. With YNAB, you can gain control over your spending and savings.

  • PayPal (iPhone & Android)

(Photo from iStock)

PayPal is a widely-used app for online payments and money transfers. It’s handy for sending and receiving money, making online purchases, and managing your PayPal balance.

Entertainment Apps

  • Netflix (iPhone & Android)

Netflix is one of the most popular streaming apps, offering a vast library of movies and TV shows. With a subscription, you can enjoy hours of entertainment on the go, including the option to download content for offline viewing.

  • Spotify (iPhone & Android)

(Photo from iStock)

Spotify is a music streaming app that provides access to millions of songs and podcasts. You can create playlists, discover new music, and even download your favorite tracks for offline listening.

  • Kindle (iPhone & Android)

If you’re an avid reader, the Kindle app is a must-have. It allows you to purchase and read e-books, and it syncs your progress across devices, ensuring you never lose your place in a good book.

  • YouTube (iPhone & Android)

YouTube offers a vast array of videos, from music and tutorials to vlogs and entertainment. You can subscribe to your favorite channels and even save videos for offline viewing.

Communication Apps

  • WhatsApp (iPhone & Android)

WhatsApp is a popular messaging app that allows you to send text messages, make voice and video calls, and share multimedia content with friends and family, both locally and internationally.

  • Telegram (iPhone & Android)

(Photo from iStock)

Telegram is a feature-rich messaging app known for its strong focus on privacy and security. It offers features like secret chats and self-destructing messages.

  • Slack (iPhone & Android)

Slack is a communication and collaboration app that’s widely used in professional settings. It offers channels for team discussions, direct messaging, and the integration of various productivity tools.

  • Skype (iPhone & Android)

Skype is a well-known video conferencing and messaging app, perfect for both personal and business communication. It allows for voice and video calls, instant messaging, and screen sharing.

Travel and Navigation Apps

  • Google Maps (iPhone & Android)

Google Maps is a versatile navigation app that provides directions, real-time traffic information, and local business reviews. It’s your go-to app for finding your way around town or exploring new places.

  • Airbnb (iPhone & Android)

(Photo from iStock)

If you’re looking for unique accommodations while traveling, the Airbnb app connects you with hosts who offer a wide range of places to stay, from private rooms to entire homes.

  • Uber (iPhone & Android)

Uber is a ride-sharing app that makes it easy to get from one place to another in many cities around the world. It’s a convenient alternative to traditional taxis.

Education and Learning Apps

  • Duolingo (iPhone & Android)

(Photo from iStock)

Duolingo is a language-learning app that makes acquiring new language skills fun and engaging. It offers courses in numerous languages, from Spanish and French to less common ones like Welsh

Reference:

Forbes

Your little friend needs a toy, confused between what to choose?, what are you waiting for click on the link below:

How to choose right dog toy on your own


Focus on Women and Minorities’ Participation and Significance

In our ever-evolving global society, the inclusion of women and minorities has become an integral part of the discourse surrounding equality, social justice, and progress. The recognition of their participation and significance is not merely a matter of ticking boxes to meet diversity quotas, but rather an essential aspect of building a fair and just world. This article delves into the importance of focusing on women and minorities’ participation in various aspects of society, emphasizing their significance in shaping a more inclusive and equitable future.

The Changing Landscape

In recent years, the landscape of social and political change has been significantly altered by the growing influence and activism of women and minorities. While progress has been made in various parts of the world, substantial barriers still exist. It is crucial to understand that recognizing the value of women and minorities’ contributions is not about establishing a hierarchy or diminishing the significance of any group. Instead, it is about acknowledging and celebrating the unique perspectives and experiences that different individuals bring to the table.

  • Economic Participation

(Photo from iStock)

Economic participation is one of the most crucial aspects of any society. It not only determines the financial well-being of individuals and families but also contributes to the overall economic health of a nation. Women and minorities have often been marginalized in the workforce, but their participation has shown to have a profound impact on economic growth and prosperity.

  • Empowering Women in the Workforce

Empowering women in the workforce is not only a matter of gender equality but also smart economics. A diverse workforce that includes women in various roles has been shown to boost creativity, productivity, and innovation. Furthermore, economic studies indicate that closing the gender pay gap could add trillions of dollars to global GDP. Women, who constitute a significant portion of the global population, must be actively encouraged and supported in pursuing careers in traditionally male-dominated fields.

  • The Significance of Minority Entrepreneurs

Minorities, including people of color and individuals from diverse cultural backgrounds, have made substantial contributions to entrepreneurship. Certainly, they bring unique perspectives, skills, and experiences to the business world, resulting in innovative solutions and the creation of jobs. Fostering an environment that supports minority entrepreneurs not only benefits these individuals but also enriches society as a whole.

  • Political Participation

(Photo from iStock)

Political participation is the cornerstone of democracy, and it is vital that women and minorities are not only represented but actively engaged in the political process. Hence, inclusive representation is crucial for crafting policies and making decisions that reflect the needs and desires of a diverse population.

  • The Importance of Minority Representation

Minority representation in politics is equally critical. When individuals from diverse backgrounds are elected to positions of power, they bring with them a wealth of cultural, social, and economic experiences that can help shape policies that address the unique challenges faced by their communities. Furthermore, minority representation encourages inclusivity and ensures that a broader range of perspectives is considered in decision-making.

  • Social and Cultural Significance

Inclusivity goes beyond just economic and political participation. It extends to the social and cultural fabric of society. Women and minorities play a pivotal role in shaping culture, challenging stereotypes, and fostering understanding among different communities.

  • Shaping Cultural Narratives

(Photo from iStock)

Women and minorities have been instrumental in shaping cultural narratives. They have contributed to literature, art, music, and film in profound ways. Their creative expressions have challenged stereotypes, explored important social issues, and broadened our understanding of the human experience. Evidently, recognizing and supporting these contributions is essential to creating a more diverse and enriching cultural landscape.

  • Challenging Stereotypes

One of the most significant contributions of women and minorities is their ability to challenge stereotypes and prejudices. By sharing their experiences and stories, they help break down barriers and foster understanding. This, in turn, leads to more inclusive and accepting societies where individuals are judged by their character and abilities, rather than their gender or ethnicity.

  • Education and Research

Education and research are powerful tools for advancing society and addressing global challenges.  Eventually, women and minorities are underrepresented in various fields, and their active participation in these areas can yield significant benefits.

  • Healthcare and Well-being

(Photo from iStock)

Access to quality healthcare is a fundamental right. Further,  the participation of women and minorities in the healthcare sector is essential for providing culturally competent and inclusive medical care.

  • Women in Healthcare

Women comprise a significant portion of the healthcare workforce, serving as doctors, nurses, and healthcare administrators. Their participation is crucial in understanding and addressing women’s health issues. Additionally, women’s perspectives are valuable in decision-making processes related to healthcare policies and research.

  • Culturally Competent Care

Minorities often face disparities in healthcare outcomes due to a lack of culturally competent care. Increasing the participation of minority healthcare professionals is essential for improving healthcare access and quality for minority communities.  Besides, these professionals are more likely to understand the unique needs and challenges faced by their own communities.

  • Social Advocacy and Change

(Photo from iStock)

The advocacy efforts of women and minorities have led to transformative social change.  Moreover, their activism has played a pivotal role in advancing civil rights, gender equality, and social justice.

  • Women’s Rights Movements

Women have a long history of advocating for their rights and gender equality. From the suffragette movement to contemporary feminist activism, women’s rights movements have made significant strides in challenging discriminatory practices and achieving legal and social change.

  • Equal Opportunities

Equality of opportunity is the foundation for inclusivity. It ensures that women and minorities have access to education, employment, and political participation on an equal footing with other groups. This requires addressing systemic barriers and prejudices that may hinder their progress.

  • Diverse Leadership

Promoting diverse leadership in businesses, organizations, and governments is essential for inclusive decision-making. Additionally,  leaders from different backgrounds bring varied perspectives and experiences to the table, resulting in well-rounded policies and strategies.

  • Intersectionality

(Photo from iStock)

Recognizing the concept of intersectionality is essential.  Hence, this means understanding that individuals may face multiple forms

Reference:

UN Women 

Your little friend needs a toy, confused between what to choose?, what are you waiting for click on the link below:

How to choose right dog toy on your own


Improve Your Stroke in Swimming with these Tips 

Improve Your Stroke in Swimming with these Tips

In the past, participants in a freestyle race could swim however they pleased. However, the term freestyle has taken the place of front crawl as the moniker for the stroke as what was once known as the front crawl became the preferred method of freestyle. Want to how to improve your swimming?

While the head is submerged and the swimmer breaths sideways, freestyle entails alternating arms moving forward in windmill patterns. In order to stabilize the body, it is complemented with a two- or six-beat flutter kick that is timed with arm movements. Learn how to use your arms, kick your legs, and breathe properly if you want to learn how to freestyle for entertainment, fitness, or contests.

Hand placement and entry: improve your swimming

Image via Unsplah.com

Your hands should be at ease and your fingers should be clasped together as you start your stroke. Fingers first, dip your hand into the water 15 inches above your head. In order for your index and middle fingers to dip into the water first, your palm should be turned outward at a 45-degree angle. Your elbow will be lifted above your wrist, and your wrist should be angled down and above the fingers. When entering, try to minimize splashing with your hand. Extend your arm another 4 inches after putting your hand in the water.

Once your hand is submerged, extend your fingers slightly and press your hand outward. “Getting a feel” for the water is what this involves.

Work on your downs weep: improve your swimming

During this part of the stroke, your arm will function as a lever. Your body will rotate towards the arm that is being stroked as you do so. With your elbow held at roughly a 45-degree angle, move your forearm and hand backward and downward. Throughout this part of your stroke, your elbow should remain elevated in the water. Pay attention to effectively navigating the downs weep.

This stage ought to proceed quickly. Although it won’t help you go forward much at this period, trying to move quicker could produce drag.

Pull your hand and body towards center of body

Image via Unsplah.com

Use your hand as a paddle during this portion of the stroke to move as much water as you can. Here, you begin to advance your body while making arm stroke motions. In the “propulsive” phase, it is the initial section. Additionally, your upper arm will incline inward towards your ribcage and chest. You’ll start to move your elbow into a 90-degree angle. You’ve reached the backs-weep when your hand begins to converge on your body’s midline.

Instead of stroking at your sides, keep your arms closer to your body.

Up, out and backward motion: improve your swimming

The second “propulsive” phase is where your stroke can pick up speed. You’ll cease drawing water as soon as your hand reaches your body’s midline and begin pushing it instead. Up till your arm touches the line of your thigh, keep pushing water out and up. You can go forward with the maximum force during this portion of the stroke because it will happen at the fastest rate.

Move your elbow out of water

Image via Unsplah.com

Your arm does not drive you forward during the release, but it does support the arm that is tugging underwater. It’s crucial to practice your release technique for a clean hand entry. Launch your hand out of the water in front of you, parallel to your shoulder, to finish your stroke. Your hand should swing broader than your arm and your fingers should dangle gently above the water. You should swing your arm wide and with ease.

Don’t force a down spin at the conclusion of the release; instead, focus on rotating your arm forward.

Flutter kick below surface: improve your swimming

Even while kicking only contributes 10 to 15% of your total stroke power, it is still a crucial component of your freestyle technique. Make a series of rapid kicks while keeping your hips close to the water’s surface. Your kicking range of motion should be restricted since you want to concentrate on reducing drag as you move ahead. Your legs shouldn’t kick out of the water or break below your body’s line of symmetry.

Kick using your thighs and hips. Avoid kicking with your knees bent; this is known as a bicycle kick and will increase drag. While kicking, you may slightly sag your knees, but this should not be where your force is coming from.

Two beat kick: improve your swimming

Image via Unsplah.com

Long distance and medium distance swimmers both employ the two-beat kick, which requires less force. Per cycle of the stroke, you kick one leg. One arm’s worth of strokes constitutes one cycle. In addition to the inswing of the opposing arm, kick one leg. You may visualize how your kicking should be synchronized with your arm stroke if you can think about how your arms and legs move together as you walk, with your arm moving forward at the same time as the opposing leg.

Three kicks each arm stroke cycle is necessary for the six-beat kick. In the recovery phase, the third beat of the kicking cycle will begin. This is a quicker kick that quicker swimmers use.

Point towards toes while kicking

Your exposed forefoot will provide extra drag if your toes are not pointed while you kick. As you kick, your big toes should be close to touching and facing inward. Your ankles’ flexibility is being worked when you point your toes. If your ankles aren’t flexible, you might want to practice your kick with a pair of mid-length flippers.

With the added propulsion that flippers offer, you can concentrate on your freestyle arm and leg skills more effortlessly. However, during drills, simply use your flippers to assist in training your feet.

Hold your head under water: improve your swimming

Image via Unsplah.com

The water should be situated between your eyebrows and hairline. While swimming, keep your upper back and neck muscles relaxed. A 45-degree forward cock should be present on your head. More resistance will be felt if you lower your head too much towards your chest.

USEFUL LINKS:

Check out more techniques to be good at swimming 
Learning how to swim: Things you should take care of 


Best Exercises for Improving Shoulder Strength in Sports

Best Exercises for Improving Shoulder Strength in Sports

To build up your shoulder muscles and increase your range of motion, you don’t necessarily need to carry big objects or to the gym. If you want to accomplish any other type of heavy lifting or achieve best  fitness, strong shoulders are a need.

If you have restricted flexibility or are healing from an injury, you might also need to work on strengthening your shoulders. Before engaging in any type of exercise at home, always remember to stretch thoroughly.

Stretching for little longer: best strength workout

Image credits: Unsplash.com

If you really want to benefit from each of these stretches, hold it for a long enough period of time that you feel a tiny burning or tingling in the muscle. To concentrate your breathing while stretching, inhale for 3 seconds, hold it for 3 seconds, and then gently exhale. Additionally, it will help you stretch while being in the moment.

If you really want to make sure you stay flexible, perform each of these stretching exercises twice.

Work your shoulder stretches into your other stretches if you’re putting your shoulder workouts into another training regimen.

Shoulder shrugs: best strength workout

This can be done while seated or standing. Lift the tops of your shoulders straight up in the direction of your ears without moving your neck until you feel a little tightness. Relax your arms after 10 to 15 seconds of holding it. Do this procedure 5–10 times. Then elevate your shoulders in a circular motion while rotating them without elevating your arms. For 15 to 20 seconds, repeat.

If you’d like, you can use this as a muscle-building exercise. Holding a few 10-15 lb. (4.5-6.8 kilograms) weights by your side will help you do this.

Chest stretches

Image credits: Unsplash.com

Put your left hand flat against a corner wall at shoulder height in your house. Until your chest and arm start to feel tight, turn your complete body away from the wall. For 15 to 20 seconds, hold it. Then, by turning the other way, use your right hand to stretch the other side of your body.

If you’re already reasonably flexible, you can perform this stretch on a conventional wall piece, but it’s simpler to maintain the stretch if you can press up against a corner of the wall.

For best results, keep your arm elevated and straight while performing this.

Overhead stretches: best strength workout

Raise your left arm up in the air. Your wrist should hang behind your back as you bend your elbow. Your right hand should gently press onto your elbow. Hold for a moment before switching arms to extend your right side. Your upper pectoral and upper back muscles will be stretched as a result.

The muscles around your shoulder can be stretched most effectively in this manner.

You ought to have some tightness in your side as well when done properly.

Forearm stretches

Image credits: Unsplash.com

Lean forward and raise your left arm. Take hold of your wrist with your right hand, palm down. It should be lowered for 15-20 seconds before being raised for the same amount of time. When you’re done stretching your left wrist, switch hands and stretch your right arm’s forearm.

This stretches the muscles in your forearm and above your elbow but not your shoulder specifically. Before working on your shoulders specifically, it’s crucial to loosen up these muscles since they are employed in almost every shoulder workout.

Elevated push-ups: best strength workout

Put your feet on the platform and assume the push-up stance while holding a chair or a small footrest. Maintaining a shoulder-width distance between your arms, lower yourself until your chest is 3-6 inches (7.6-15.2 cm) off the floor. As you raise yourself back up to the starting position, try to keep your back as straight as you can. Depending on your upper body strength, perform 5–10 reps.

Scap pushups

Image credits: Unsplash.com

Your knees should be 15 degrees apart from your hips as you are on all fours. Lock your arms and extend your hands just past your shoulders. Without moving your arms, contract your back muscles and drop your chest to the ground by 3-6 inches (7.6-15.2 cm). Re-raise your chest until it reaches your shoulder blades. To strengthen the muscles in your upper back, scapula, and shoulder blades, repeat this motion 10–20 times.

To prevent knee pain, perform this on a yoga mat or carpet.

When you get proficient at these, move your knees further away from your upper body to slightly tighten your chest and core.

Headstands: best strength workout

Get a platform or chair that won’t move around on the ground. Step up onto the chair or platform, then slowly descend to the ground. Elevate your back until it creates a symmetrical arch, then hold yourself steady. To strengthen your shoulder muscles with the resistance, hold this position for 15 to 30 seconds. To strengthen your shoulders, if you are able to do a headstand, brace yourself against a wall and do that instead.

This is a more challenging exercise. Reduce the angle you’re rising yourself up at when you first start exercising to make it simpler to balance.

Holding push-ups for 20-30 seconds

Place your feet firmly on the ground and assume the typical push-up position. To slightly bend your back, slide back 4-6 inches (10–15 cm). To provide some light pressure to your shoulders and encourage the muscles to remain contracted, hold this position for 20 to 30 seconds. This exercise is excellent for capping off your workout because it doubles as a cool-down stretch.

Outward rotations

Image credits: Unsplash.com

Bend your elbows in front of you while keeping your arms at your sides. Both hands should be wrapped in a resistance band. Pull the band away from you 4–12 inches (10–30 cm) starting with your left hand. To stimulate and strengthen your outer shoulder muscles, repeat this motion 10-15 times. Do the same thing with your right hand.

As much as possible, maintain the stationary hand’s position.

USEFUL LINKS:

To know more workout tips to build shoulder strength, click here 
Learn the appropriate way to throw dinner parties with us 

Ultimate Guide to Building Explosiveness for Athletes

Ultimate Guide to Building Explosiveness for Athletes

Explosive training combines strength and speed to boost your output of power. Athletes that need to exert a fast burst of maximum effort frequently use explosive power drills. Sports like football, track and field, court sports, and even cycling benefit from this kind of ultimate training.

Large muscle movements are used in conventional explosive exercises. These are squats, power cleans, weighted or unweighted vertical jumps, heavy ball throws, and even hill sprints. Although they will only target those specific muscle areas, workouts like push-ups and bench presses can also be utilized to increase power.

Need of explosive workouts: ultimate workout

Image via Unsplash.com

Exercises that demand a maximal or almost maximum power output from the athlete in a brief period of time are used to develop rapid, explosive power. The purpose of explosive exercise training is to develop the necessary strength to eventually move heavy weights quickly.

Explosive training, however, carries some risk. Start with light weights and moderate, controlled motions to lower your risk of injury. Over several weeks and numerous training sessions, the weight utilized during an exercise and the speed at which it is lifted should be raised.

Side skip for height: ultimate workout

Side skips are a fantastic explosive exercise that can greatly enhance an athlete’s lateral power, speed, and agility. You may strengthen important muscle groups like the hips, glutes, and quads. These are essential for improving your capacity to change direction fast and exert force from a lateral posture.

Athletes in sports like basketball, soccer, and tennis that call for powerful lateral movements can benefit especially from side skips for height.

Box jumps: ultimate workout

Image via Unsplash.com

Targeting the lower body muscles. Particularly the quads, glutes, and hamstrings, seated box jumps are a very effective explosive workout created to improve athletic performance.

By beginning in a seated position and driving your muscles to develop explosive force without the use of stored elastic energy. This effective workout removes the stretch-shortening cycle. For athletes participating in sports like basketball, football, and track and field that call for vertical leaps, fast bursts of speed, and strong lower body motions, seated box jumps are especially advantageous.

Heiden jumps

Heiden Jumps are an effective plyometric exercise that can greatly enhance an athlete’s explosive power, lateral speed, and overall agility. Targeting the glutes, quads, and hamstrings in particular, the lower body is the focus of this dynamic exercise.

Athletes who compete in sports like basketball, soccer and hockey, which call for quick changes in direction, can benefit most from Heiden Jumps.

Starting from a standing position with your feet hip-width apart, perform Heiden Jumps. From a box, lower yourself into a quarter squat stance and then drop to quickly push off your right foot, leaping laterally to the left.

Stair jumps: ultimate workout

Image via Unsplash.com

For athletes looking to improve their explosive power, leg strength, and general athleticism, stair jumps are a superb plyometric workout. This workout increases the difficulty of standard leaps by using stairs, pushing athletes to exert more power to lift themselves upward.

Athletes who compete in sports like basketball, volleyball, and track and field, which call for powerful lower body movements or vertical leaps, can benefit most from stair jumps.

Find a stairway with at least four to six steps so that you may perform stair jumps. Start by placing your feet shoulder-width apart at the bottom of the stairs. To jump onto the first step quickly, lower yourself to a quarter squat position and use your arms to create propulsion.

Kneel down and lower your hips to lessen the shock when you land. Then immediately take the next step, and so on until you have reached the top of the steps. After performing the exercise for the necessary number of sets, cautiously descend the stairs.

Impact of explosive workout

For athletes looking to improve their performance across a variety of sports, developing explosive power through flexibility is essential. Athletes get an advantage over rivals in speed, agility, and force production thanks to their muscles’ quick storage and release of energy. In addition, greater elasticity can assist absorb and disperse force during high-impact activities, which can improve injury prevention.

Athletes can benefit from explosive training in a variety of ways, including improved speed, power, and mobility. Athletes can achieve new heights in their athletic endeavors and realize their full potential by adding these routines into a regular training schedule.

There are many advantages to including stair jumps in your explosive training for improved athletic performance. Stair jumps can increase your vertical leap, speed, and power by putting more stress on the muscles in your lower body to produce more force.

Seated dumbbell: ultimate workout

Image via Unsplash.com

Standing Dumbbell Exercises like “Good Mornings” are excellent for working the posterior chain and making the body engage high-threshold motor units for increased intensity. You may enhance your explosiveness and raise your capacity to produce force during explosive activities like sprinting and jumping by training these muscles.

Hurdle hops

For athletes aiming to increase their explosive strength, speed, and agility, hurdle hops are a very effective exercise. For those who play sports like basketball,  or track & field that include jumping and quick direction changes, this plyometric exercise is very advantageous.

You can build the lower body strength and suppleness required to excel in your sport by including hurdle hops in your training program.

Set up several hurdles or markers at a convenient height for performing hurdle hops. Usually, hip height or slightly above is acceptable. Start by placing your feet shoulder-width apart on one side of the first hurdle.

Jump over the obstacle forcefully, paying attention to your form and reducing the amount of time you spend on the ground. When you reach the next obstacle, hop over it without landing hard. Repeat this process until all of the obstacles have been overcome. This will test your capacity to exert force at first, absorb it, and then apply it again right away.

USEFUL LINKS:

Check out more about explosive workout here 
Personality traits that indicate high intelligence 

Improve Your Jumping Technique in Skateboarding With these Tips

Improve Your Jumping Technique in Skateboarding With these Tips

Alan “Ollie” Gelfand created the fundamental skateboard jump in 1970, and it immediately rose to prominence as one of the most significant tricks. When this trick is executed properly, the skateboarder can leap into the air while carrying the board with them in a manner that gives the impression that the board is fastened to their feet. You can improve your techniques easily.

If you intend to attempt additional, more challenging maneuvers, it is imperative that you master the “Ollie,” and learn it well. The “Ollie” is the foundation of many other skating feats. Fortunately, with enough practice, it is rather simple to master.

Find a good spot: improve skateboarding techniques

Image via Unsplash.com

Find a flat area to practice this skill first. If you have never skateboarded before, you should do this in an area where the board will be perfectly stationary and not roll.

You could even want to begin on the grass or even a carpeted surface if you are worried about falling.

Positioning your feet: improve skateboarding techniques

Put your front foot two inches from your bolts and close to the center of your board. Your back foot should be on the tail.

Just behind the front bolts, your front foot should be totally on the skateboard.

Your rear foot’s ball should be in line with the middle of the board. As a result, your heel will protrude from the top of the board.

It is best to place both feet forward. Do not slant the board with any foot.

Pop the tail: improve skateboarding techniques

Image via Unsplash.com

Push down quickly and firmly with your back foot on the board’s tail.

The skateboard’s tail will hit the ground as a result of the downward force you impart to it, creating a strong upward velocity as the board “pops” up. Consider doing this as a quick ankle flick downward.

Avoid pressing down on your tail too forcefully since doing so will cause your weight to prevent the board from rising into the air.

Sweep foot along board

As the front end rises, drag the side of your front foot along the board’s surface.

The board will be dragged upward with your body by the friction of your foot against the grippy grip tape.

Level up: improve skateboarding techniques

As you reach the highest point of your jump, lift your back foot and use your feet to level the board beneath you. To get the board level with your shoulders, you might need to slightly press down with your front foot.

Land safely

Image via Unsplash.com

As you descend, extend your legs to the ground while maintaining your knees bent to minimize impact.

Keep your knees bent to prevent knee injuries and to maintain control of the board.

Work more on pop: improve skateboarding techniques

One of the most challenging aspects of learning this maneuver is figuring out how much force to apply to the tail to have the pop occur as it should.

In order to elevate the front end of the board and cause the tail to touch the ground with enough force to cause it to bounce high off the ground, you must press down forcefully and quickly enough.

The board will bounce higher up the harder you bash it down. Nevertheless, maintaining control is more crucial than making a high jump when you are initially learning how to do this. Achieve the ability to pop the board without losing control by experimenting with various forces.

Try for a clean sweep

Image via Unsplash.com

The sweep of your foot, which pulls the board up with you as you leap and maintains its direction of travel, is equally challenging. Additionally, there will be a significant bit of trial and error involved.

Keep your front foot loose enough to allow the ankle to roll just a little bit. You will need to develop the ability to control your first instinct to tense up these muscles.

When doing the sweep, which should bring your foot all the way to the front edge of the board, you must leverage the friction created between the edge of your shoe and the board to maintain control.

Work on your timing

Getting the time correct is another difficult aspect of performing this feat effectively. The actions must be completed quickly, in just a fraction of a second, even though they should be done in the order listed in Part 1.

In specifically, the pop and the jump must be performed practically simultaneously, in a single motion. Timing is crucial in this situation and will require practice.

You can view slow-motion recordings of people executing the trick to gain a better sense of the timing and to thoroughly examine the specifics of what you need to do.

Learning to land: improve skateboarding techniques

Finally, landing on the board without toppling over can be very challenging. The important thing in this situation is to maintain your knees bent and to level your board before it lands.

You should try to land with all four wheels on the ground simultaneously.

Throughout the process, keep your shoulders level. When performing this trick, resist the urge to lean forward because doing so could result in you landing on the front of the board.

Jump higher while moving

Image via Unsplash.com

You will begin performing the higher jump while moving once you have mastered it in place.

The steps resemble jumping higher while stationary. However, you should go slowly when taking the first few steps.

You should eventually pick up the pace. Your jump will be higher the faster the moving object is.

Turn skateboard up and jump

The secret to this trick is that it makes the skateboard seem to stick to our feet when we jump high. Is there anything except natural attraction at play here?

Pulling the front foot towards the skateboard’s nose while making the skateboard bounce high is required to execute this move. Your back foot will kick down the tail while your front foot raises.

USEFUL LINKS:

To know more about skateboard techniques, check this out 
Detoxing and juicing: Know the right way 

A Collection of 5-Star Customer Reviews

Whether we are shopping for a product, booking a hotel, or trying a new restaurant, we often turn to customer reviews to guide our choices. Among these reviews, the coveted 5-star rating signifies excellence, leaving a lasting impression on potential customers. In this article, we will explore the importance of 5-star customer reviews, the thinking  behind their influence, and why businesses should cherish and cultivate them.

The Power of 5-Star Customer Reviews

A 5-star customer review is the highest accolade a product, service, or business can receive. It symbolizes exceptional quality, unmatched customer satisfaction, and the pinnacle of excellence. Such reviews are often seen as seals of approval, and they carry significant weight in shaping public perception and influencing consumer behaviour.

  • Trust and Credibility

(Photo from iStock)

Trust is the cornerstone of any successful business, and 5-star customer reviews play a crucial role in establishing and maintaining trust. When potential customers see a product or service consistently receiving top ratings, it installs confidence and reassures them that they are making a wise choice. Positive reviews signal that others have had a great experience, which makes the decision-making process easier and more reassuring.

  • Improved Conversion Rates

5-star reviews are known to boost conversion rates significantly.  When customers see a high volume of positive reviews, they are more likely to convert and make a purchase. This is especially true for online retailers, where customers cannot physically inspect the product before buying.

  • Enhanced Brand Image

Receiving consistent 5-star reviews is not just about immediate sales; it also contributes to the long-term reputation and brand image of a business. Positive feedback creates a positive narrative around the brand, making it more appealing to potential customers. A strong collection of 5-star reviews is a testament to the brand’s commitment to quality and customer satisfaction.

  • Competitive Advantage

(Photo from iStock)

In highly competitive markets, 5-star reviews can be a key differentiator. They set a business apart from its rivals and give it an edge in capturing market share. In a sea of options, customers are more likely to choose a product or service that has received rave reviews over those with a lower rating.

Psychology Behind the Influence of 5-Star Reviews

The power of 5-star customer reviews goes beyond mere numbers and statistics. It’s deeply rooted in the psychology of consumer behaviour. Understanding the psychological factors at play can help businesses harness the influence of 5-star reviews.

  • Social Proof

The concept of social proof, popularized by Robert Cialdini, refers to people’s tendency to look to others for guidance in uncertain situations. 5-star reviews serve as a form of social proof, assuring potential customers that they are making the right choice by following the crowd. People are more likely to trust the opinions and experiences of others, especially when they share a consensus.

  • Confirmation Bias

Confirmation bias is the cognitive bias that leads people to seek out and interpret information in a way that confirms their pre-existing beliefs and expectations. When customers are considering a purchase and come across a product with numerous 5-star reviews, they are more inclined to interpret these reviews as evidence that aligns with their initial positive perception of the product. This reinforces their decision to make a purchase.

  • Halo Effect

(Photo from iStock)

The halo effect is a cognitive bias where one positive trait or quality of a person, product, or brand influences the perception of other traits or qualities. When a product receives consistent 5-star reviews, it creates a “halo” effect, where customers assume that all aspects of the product or business must be of high quality. For example, if a restaurant consistently receives 5-star reviews for its food, customers may assume that the service, ambiance, and overall experience are also exceptional.

  • Fear of Missing Out (FOMO)

In a world where options are abundant and information is readily accessible, the fear of missing out (FOMO) is a powerful motivator. Customers don’t want to miss out on great experiences, and when they see others raving about a product with 5-star reviews, they fear missing out on a fantastic opportunity. This fear can be a driving force behind the decision to purchase.

How to Cultivate 5-Star Reviews

Earning and maintaining a collection of 5-star reviews is not a matter of chance; it requires a proactive approach. Here are strategies businesses can implement to cultivate positive feedback:

  • Deliver Outstanding Quality

The foundation of 5-star reviews is delivering exceptional quality. Businesses must prioritize providing top-notch products or services that meet or exceed customer expectations. Consistency in quality is essential to build a reputation for excellence.

  • Customer-Centric Approach

(Photo from iStock)

Putting customers at the center of the business is key to earning their trust and positive reviews. Businesses should actively seek feedback, address customer concerns, and continuously strive to enhance the customer experience.

  • Encourage and Incentivize Reviews

Send follow-up emails, provide clear instructions, and consider offering incentives, such as discounts or loyalty points, for leaving reviews. However, it’s crucial to ensure that these practices align with review platform guidelines.

  • Monitor and Respond

Stay engaged with reviews by monitoring them regularly. Respond to both positive and negative reviews, showing appreciation for positive feedback and addressing concerns in a constructive manner.

  • Showcase Positive Reviews

(Photo from iStock)

Leverage your 5-star reviews by featuring them prominently on your website and marketing materials. These endorsements serve as powerful testimonials that can influence potential customers.

  • Use Review Management Software

Review management software can streamline the process of collecting and managing reviews. It allows businesses to send automated review requests, track feedback, and analyse trends in customer sentiment.

  • Seek Expert Guidance

For businesses struggling to build their collection of 5-star reviews, seeking expert guidance from reputation management professionals or marketing agencies can be a wise investment.  Additionally, these experts can provide strategies tailored to the specific needs of the business.

Conclusion

In a world where information and options are abundant, 5-star customer reviews have emerged as a powerful tool for businesses. They influence consumer behaviour, build trust and credibility, and contribute to long-term success. While cultivating a collection of 5-star reviews requires dedication and a customer-centric approach, the benefits far outweigh the effort.

Reference:

Birdeye

Your little friend needs a toy, confused between what to choose?, what are you waiting for click on the link below:

How to choose right dog toy on your own


Best Drills for Improving Flexibility in Sports

Best Drills for Improving Flexibility in Sports

Being flexible can lower your risk of injury and make leading an active lifestyle easier. Although there isn’t a quick fix to instantly increase flexibility, most people can succeed in this endeavor with best perseverance and commitment.

Focus on including flexibility exercises both before and after your aerobic and strength-training workouts, and include flexibility-enhancing exercises like yoga. You may improve your flexibility by adopting some healthy lifestyle adjustments, such as consuming more water and reducing your stress.

A quick warm up: best flexibility drills

Image via Unsplash.com

Before working out, it used to be common practice to perform static stretches such holding a toe touch and triceps stretches. Instead, it’s preferable to first do some mild exercise and dynamic stretching to loosen up your muscles and joints, followed by some static stretches once your main workout is through. Your warmup could consist of riding, jogging, strolling, or even just doing some light housekeeping, depending on your level of fitness. Your objective is to start to sweat lightly.

This warmup should ideally last 10 minutes. If it’s not possible, try to finish in at least 5 minutes.

Dynamic stretching

Dynamic stretches prioritize range of motion while also continuing the process of warming up your muscles and joints. Do three sets of 20–30 reps of 3-5 dynamic stretches. The traditional dynamic stretches include lunges, squats, jump jacks, lunges, sit-ups, and push-ups.

Try some of the choices outlined in the remaining sections of this section if you’d like to diversify your dynamic stretching repertoire.

Leg swings: best flexibility drills

Image via Unsplash.com

Swing your outer leg up like the pendulum of a clock while bracing yourself against a wall. With each return, the swing’s height should be increased. To complete the second leg, change sides. A similar exercise can be performed with your arms.

Do this exercise only if you have access to a solid grab bar that you can grasp with your supporting hand if you have balance issues.

Walking lunges: best flexibility drills

Take long, brisk steps, almost bending down to your knee with each one. By rotating your upper body away from the back leg that is extended as you move, you can increase the stretch even further.

Dynamic stretching can also be accomplished with stationary lunges, which can be performed in a forward, backward, or sideways motion.

Try doing inchworms

Starting in a push-up position, progressively advance your feet until they are as close to your hands as possible. Once you’ve accomplished this, walk till you are back at the beginning while using your hands. You can add a spine stretch by arching your back.

Your back, hamstrings, and core may all be stretched out well with inchworms.

Strength workout: best flexibility drills

Image via Unsplash.com

Your flexibility and general health will both benefit from maintaining a regular schedule of aerobic and muscle-building exercises. Aim for 2-3 strength training sessions (lasting around 30 minutes each) and 150+ minutes of moderate-intensity aerobic exercise per week, after consulting your doctor, unless otherwise prescribed.

You should be breathing so forcefully during moderate-intensity aerobic exercise that it is challenging to have a full conversation. Numerous activities, including swimming, biking, running, circuit training, rollerblading, and dancing, can be used as aerobic exercises.

Cool down and static stretch

Do some easy activity, like walking, for around 5 minutes as a quick cool-down after your main workout. In the following five to ten minutes, perform a series of static stretches, holding each pose for at least 30 to 60 seconds. Pay attention to your chest, lats, and hip flexors as well as the muscles you just worked out.

The following should be the order of the workouts overall: Warm-up (5-10 min), dynamic stretches (5-10 min), aerobic or strength-training workout (30 min), cool-down (5 min), and static stretches (5-10 min) are the order of the workout.

Seated hamstring stretches: best flexibility drills

Image via Unsplash.com

Your legs should be extended and apart while you sit on the ground. With the tips of your same-side fingers, reach forward and touch one foot at a time, or as close as you can without hurting yourself.

If bending your other leg helps the stretch feel less painful, do so.

Butterfly groin stretches

Occupy a floor seat. Get your heels as near to touching your crotch as you can by pulling both ankles in towards it. To intensify the stretch, if you can, press your knees to the floor.

Shoulder stretch: best flexibility drills

While pressing against your arm, use the opposite arm to bring your elbow across your front and towards the opposing shoulder. Keep your head forward, your arm straight, and level while you stretch it. The stretched arm should rest directly beneath your chin.

Contract-relax method

Image via Unsplash.com

Because these stretches are a little more difficult, think about first seeking advice from a personal trainer. Enter the stretch of your choice, then exhale and tighten the muscles for five seconds. Move into the stretch again after releasing the contraction and relaxing the muscles. Perform 2–3 contractions with each stretch.

After each contraction, try to tighten the stretch a little more. If, however, the pain becomes more than a minor discomfort, stop increasing the stretch.

PNF, short for proprioceptive neuromuscular facilitation, is another name for this approach.

Joining a yoga class

Yoga is a kind of exercise and meditation that has been proved to lower stress and anxiety. Additionally, it works wonders for improving flexibility and balance. Find a neighborhood practice group to join, or enroll in a class at the community center or gym nearby.

Choose a course and instructor that are appropriate for your current expertise level and medical requirements. For instance, pick a program that is appropriate for your situation if you have decreased flexibility as a result of arthritis.

Try mixing up your regular training routines (like jogging and weightlifting) with yoga two to three times a week. Yoga doesn’t count towards your 150+ minutes of weekly aerobic activity, but depending on your current health, it can count as a strength-training session.

USEFUL LINKS:

Click here to read more 
The importance of International Relations 


The Ultimate Playlist: Songs to Get You in the Mood for a Busy Day

Every day is a new opportunity to achieve your goals, pursue your dreams, and conquer the challenges that lie ahead. To kickstart your busy day with the right energy and mindset, you need a powerful tool in your arsenal: music. The right songs can motivate, inspire, and energize you, making your busy day not only manageable but also enjoyable. In this article, we’ll explore a handpicked selection of songs from various genres and eras that are sure to get you in the mood for a productive and exciting day ahead.

  • “Eye of the Tiger” – Survivor

(Photo from Wikipedia)

We begin with an undisputed classic: “Eye of the Tiger” by Survivor. Featured in the movie “Rocky III,” this song is synonymous with determination, perseverance, and overcoming obstacles. Its driving rhythm and motivational lyrics are perfect for those mornings when you need an extra dose of courage to face the day’s challenges head-on.

  • “Don’t Stop Believin'” – Journey

(Photo from Wikipedia)

The catchy melody and inspirational message will remind you that, with a little perseverance, you can achieve anything you set your mind to.

  • “Hall of Fame” – The Script ft. will.i.am

(Photo from Wikipedia)

The Script and will.i.am collaborated to create “Hall of Fame,” an uplifting song that encourages you to strive for greatness. It’s a reminder that you have the potential to reach the pinnacle of success. The song’s combination of hip-hop and rock elements makes it an ideal choice for those looking to boost their confidence and motivation.

  • “Stronger” – Kanye West

(Photo from Wikipedia)

Kanye West’s “Stronger” is a dynamic and energetic track that samples Daft Punk’s “Harder, Better, Faster, Stronger.” Its pulsating beat and lyrics about resilience and personal growth are guaranteed to get you pumped up and ready to take on the day’s challenges.

  • “Here Comes the Sun” – The Beatles

(Photo from Wikipedia)

The Beatles’ “Here Comes the Sun” is a timeless classic that radiates optimism and hope. Its gentle acoustic melody and George Harrison’s soothing vocals can be a calming and reassuring presence in the midst of a hectic morning, offering a glimpse of brighter days ahead.

  • “Beautiful Day” – U2

(Photo from Wikipedia)

“Beautiful Day” by U2 is a song that celebrates the simple beauty of life. Its anthemic sound and Bono’s emotive vocals serve as a reminder to appreciate the present moment, even when your day is packed with tasks and responsibilities.

  • “I Will Survive” – Gloria Gaynor

(Photo from Wikipedia)

Gloria Gaynor’s “I Will Survive” is the ultimate empowerment anthem. Whether you’re facing a challenging project or just dealing with the daily grind, this disco classic will remind you that you’re resilient and capable of conquering whatever comes your way.

  • “The Man” – Taylor Swift

(Photo from Wikipedia)

Taylor Swift’s “The Man” is an anthem of self-assuredness and empowerment. This song is all about asserting your worth and not letting anyone hold you back. Start your day with the confidence and attitude of “The Man.”

  • “Can’t Stop the Feeling!” – Justin Timberlake

(Photo from Wikipedia)

“Can’t Stop the Feeling!” by Justin Timberlake. It’s the perfect choice for jump-starting your day with a burst of positivity and a reminder that you can’t stop the good vibes.

  • “Don’t Worry, Be Happy” – Bobby McFerrin

(Photo from Wikipedia)

Bobby McFerrin’s “Don’t Worry, Be Happy” is a simple yet profound reminder that happiness is a state of mind. Even in the midst of a busy schedule, you have the power to choose happiness, and this song is a delightful invitation to do just that.

  • “Happy” – C2C ft. Derek Martin

(Photo from YouTube)

“C2C” featuring Derek Martin delivers another dose of happiness with their funk-infused track “Happy.” This modern classic is filled with energy and positive vibes, making it a great choice for getting you in the mood for a busy day.

  • “Best Day of My Life” – American Authors

(Photo from Wikipedia)

“Best Day of My Life” by American Authors is a breezy, folk-pop song that can remind you that every day has the potential to be the best day. The catchy melody and optimistic lyrics will set the tone for a day filled with positivity.

  • “Walking on a Dream” – Empire of the Sun

(Photo from Wikipedia)

“Walking on a Dream” by Empire of the Sun is a dreamy and upbeat electro-pop track that can transport you to a brighter, more positive mental space. It’s the perfect song for envisioning a successful and fulfilling day.

  • “Good Life” – OneRepublic

(Photo from Wikipedia)

It’s a reminder that life is an adventure to be embraced, even during the busiest of days.

  • “Uptown Funk” – Mark Ronson ft. Bruno Mars

(Photo from Wikipedia)

“Uptown Funk” is a modern funk and R&B classic by Mark Ronson and Bruno Mars. The infectious groove and catchy lyrics will have you dancing your way through the morning, setting a dynamic and fun tone for your day.

  • “On Top of the World” – Imagine Dragons

(Photo from Wikipedia)

Imagine Dragons’ “On Top of the World” is a jubilant pop-rock song that exudes positivity. Its spirited lyrics and catchy rhythm will make you feel like you’re on top of the world, ready to take on whatever challenges come your way.

  • “Wake Me Up” – Avicii

(Photo from Wikipedia)

Avicii’s “Wake Me Up” is a dance-pop anthem that combines elements of folk and electronic music. Its uplifting melody and lyrics about living life to the fullest will motivate you to make the most of your day.

Conclusion

Songs have  incredible power to shape our emotions and mindset. Whether you’re facing a daunting workday, a busy schedule of errands. Or just need an extra boost of motivation, these songs can help you kickstart your day. With enthusiasm, energy, and a positive attitude. With the right music, you can face any challenge, accomplish your goals, and make the most of every moment. So, turn up the volume. And let these songs get you in the mood for a busy day full of possibilities.

Reference:

Cosmopolitan

Your little friend needs a toy, confused between what to choose?, what are you waiting for click on the link below:

How to choose right dog toy on your own


Increase Your Power in Surfing with these Tips 

Increase Your Power in Surfing with these Tips

Surfing has progressed from modest beginnings to enormous mainstream popularity, and it likely always will be a highly gratifying and fun past time. You can increase power in surfing easily.  Finding the ideal wave on your own, alone with nothing but water surrounding you, and riding it to the top will give you the biggest natural high.

Surfing is no different from other physical activities in that it becomes more enjoyable as your fitness level increases. Your ability to surf for extended periods of time will quickly increase if you maintain a regular fitness plan that incorporates all of these activities.

Doing chin-ups: increase power in surfing

Image via Unsplash.com

You might be surprised to learn how much more your upper body plays a role in standing up on a surfboard and maintaining your balance. Finding a good wave and missing it because you couldn’t paddle or get up quickly enough is one of the most aggravating things for a surfer. Training your upper body is crucial in this situation. Chin-ups are one of the greatest exercises for surfers.

If you don’t currently perform chin-ups on a regular basis, you should begin by using a chin-up bar. Right over your shoulders, grab the bar with your hands, and hang there. Lift yourself up from this starting posture until your chin is over the bar. You should ideally perform two sets of six repetitions each, with a minute break in between. If you’re not yet capable of doing it, start with as many as you can and gradually work your way up to it.

Front squats: increase power in surfing

The right squat technique is also essential for standing up on the board fast and holding it in place. Front squats will not only help you become a better surfer, but they will also enhance your posture and endurance.

There should be three sets of 12 squats in each workout. Squats can be started by utilizing simply your bodyweight as part of your surf workout. You can then increase the weight after you’ve perfected a squat technique to strengthen your lower back, ankles, knees, and hip region.

Running exercises

Image via Unsplash.com

Cardio is a major component of any exercise program designed to increase endurance, including surf fitness programs. Running is the simplest approach to build physical endurance; just get out there and do it as often and for as long as you can. This will strengthen your legs, maintain you at your ideal weight, and improve your lung capacity—all things important if you want to spend hours out there catching waves.

In a perfect world, you would run for a certain amount of time, say, 30 minutes three times per week. If your time and schedule don’t permit it, you can still reap the rewards of running by doing it in quick bursts of speed rather than over extended periods of time. Your endurance will improve dramatically with just 10 minutes of fast sprints interspersed with brief rests.

Push-ups: increase power in surfing

The push-up is the multi-muscle exercise equivalent of the Swiss Army knife in terms of strength and fitness. As you paddle to a wave, attempt a duck dive, then rapidly spring up on the surfboard, developing your upper body and core strength will be of great benefit to you. Additionally, performing push-ups correctly and frequently will help you prevent shoulder issues.

Once you understand the proper form for a push-up, you can begin by performing as many as you can and then progressively increase the number as your fitness level improves. You can raise your legs or add weight to your back to make them more difficult if you want.

Mobility drills

Image via Unsplash.com

Mobility plays a significant role in endurance since it requires less energy to move your body naturally. It’s a quality that, as we become older or adopt a less active lifestyle, tends to swiftly disappear.

Just ten minutes of mobility exercises each workout will keep you flexible for years to come. Although you still need to warm up, be sure to gently stretch and rotate your ankles, hips, spine, neck, and shoulders. Just be careful not to overdo it.

Dumbbells drills: increase power in surfing

Dumbbells, which imitate the dynamic aspect of surfing, are a superior tool for training surfers than fixed resistance fitness machines. Additionally, you can find a dumbbell-based exercise for almost any muscle area, making them incredibly adaptable.

With bench presses, one-arm swings, and even deadlifts, you can strengthen your arms and upper body. You may strengthen your core and back by bending over at a 90-degree angle and performing rowing exercises while holding a dumbbell in each hand. As your strength improves, start with five reps each arm and work your way up. Additionally, you may perform push-ups and squats while carrying dumbbells, as well as many variations for everybody area.

Planks: increase power in surfing

Image via Unsplash.com

As we’ve already discussed, your endurance and surfing skill depend on having a strong core. Even though it may not seem like much from the outside, planking works every muscle in your body and is quite difficult to maintain for more than a few seconds.

To perform it correctly, you only need to lie on your stomach as you would for a push-up, but instead of pushing yourself up and down, you merely need to maintain a straight body while supporting yourself with your forearms. Keep doing it for as long and as frequently as you can, and you’ll start to see benefits shortly.

History of surfing

at July 1885, three Hawaiian princes who are credited with inventing surfing carried their redwood boards to Santa Cruz, California, and surfed the waves at the San Lorenzo River Bay. Hawaiian surfer George Freeth visited California in 1907 to show off his surfing skills. Two years later, at Wrightsville Beach in North Carolina, surfing made its East Coast debut. Surfing as a sport and a culture has become universal. Major tournaments are now conducted in Florida, California, Virginia, and Hawaii in the United States.

USEFUL LINKS:

Living the digital nomad lifestyle 
Click here to know some more tips on Surfing 


Ultimate Guide to Building Quickness for Athletes

Ultimate Guide to Building Quickness for Athletes

When referring to your physical or mental abilities, agility is the trait of quickness or resourcefulness.  Since agility is not an inherent ability, you have a good possibility of developing it. Your physical and mental agility can swiftly increase if you take these ultimate actions.

Working on your balance: ultimate guide

Image via Unsplash.com

To improve general agility, practice balance exercises. This helps you focus your activity on a small scale in addition to strengthening your muscles.

Put your other leg out in front of you while standing on one leg. Ten seconds later, swap legs and repeat with the other. To make sure your legs are straight, you can also use a mirror.

When you feel you have mastered beginner’s balancing, perform handstands or cartwheels. Both your balance and coordination will be helped by these.

You should equally divide your weight. When your entire body should be performing as a unit, you don’t want to strain or harm any particular parts.

Training with weight: ultimate guide

You have a variety of exercises at your disposal that target various muscle groups. Work gradually, beginning with handheld weights and progressing to heavier weights as your strength increases.

To tone your legs and hamstrings, perform squats and deadlifts. While performing the squat or deadlift, you can hold one hand weight in each hand, though barbells are typically used for deadlifts. For squats, a barbell is an additional option. If you decide to go with this strategy, sling the barbell over your shoulder.

You can perform arm exercises like bench presses. This will strengthen your arms, which will benefit you when throwing and catching things.

Cone taps

Image via Unsplash.com

In front of you, position one cone. When one leg is raised high enough, softly tap the cone’s top with the ball of your foot before lowering it to rest. Replicate with the other foot. Three sets of 30 second drills are alternated.

This workout tones the muscles of the ankles and feet. Additionally, it improves foot coordination and makes you more mobile.

Attempt to avoid tripping over the cone. If you discover that you are toppling the cone, gradually slow down your actions until you are no longer doing so.

Increase your speed after you’ve mastered the first level of this workout to improve your ability and balance. You can perform additional repetitions for 30 seconds.

Do ladder drills: ultimate guide

Run gently through each rung of an agility ladder that is about 10 yards (9 m) long and made of 18-inch (45.7 cm) blocks. Change your arms and legs as you move up the ladder, pumping your arms high and lifting your knee to your chest. Return to the beginning of the ladder after finishing the last drill.

Complete each drill 2 to 4 times, upping the number of repetitions as you improve. As you get better, you can also speed up.

If you don’t already have one, you can make one out of tape or sticks and twine if you don’t have an agility ladder.

Suicide runs

Image via Unsplash.com

Start by moving forward roughly 20 feet (6 meters). When you get there, turn around and sprint back to where you started. Without stopping, turn around and jog back to where you started from a distance of 30 feet (9.1 m). Finally, without pausing, turn and jog back to where you started from a distance of 40 feet (12.2 m).

For optimal results, perform several cycles of these runs. Once you find that the initial runs are too simple for you, you can increase the distance.

These are excellent strategies to increase your power, quickness, stability, and accuracy. To properly reap the rewards, perform these a couple times per week.

Jump hurdle drills: ultimate guide

6 or 12 inch (15.2 or 30.5 cm) hurdles should be arranged in a straight line in a 5–10 count row. Jump over the first hurdle with your first leg as you approach it from the side, pause for a little while, and then lower your other leg to stand between the first two hurdles. Restart by leaping over the opening obstacle. Repeat the same lateral jump over block 1 and then over block 2 after that before returning to the beginning. Repeat this process for each block, clearing each obstacle before beginning again. Turn around and repeat on the other side, this time using the opposite leg to lead.

Once you’ve mastered it, try speeding up when you cross the obstacles.

Eat right breakfast

Image via Unsplash.com

Over time, eating a diet high in vitamins, minerals, and antioxidants can help you think more clearly. Additionally, strengthening your immune system and enhancing your health are advantages.

The B vitamin choline, which is abundant in hard-boiled eggs, helps improve your linguistic and visual abilities. A new study has also connected this vitamin to a decline in dementia.

Consume meals high in zinc, such bran cereal. Zinc is essential for the development of memory and cognitive stability. Additionally, it enhances the tone of your skin.

Exercising during day: ultimate guide

To improve mental performance, you can undertake a quick workout at any time of the day. By lowering stress, enhancing mood-improving brain chemicals, reducing anxiety, promoting relaxation, and fostering creativity, it also supports mental health and agility.

Exercises like aerobics release important neurotransmitters that improve concentration and brain power as well as assist with focus. The hippocampus, a region of the brain important for learning and memory, can produce more brain cells as a result of cardiovascular exercise.

Reading is essential

Image via Unsplash.com

Reading stimulates a variety of brain regions associated with memory, cognition, and imagination, whether you’re reading the newest thriller, a classic book, or your favorite magazine. Your mind conjures up settings, characters, and voices for conversations. Your brain must remember word and concept meanings even when you are speaking in short sentences, which promotes brain growth. Additionally, reading enhances mood and relaxation.

Choose a reading genre that most interests you. Your mind will stay engaged as long as you are interested and enjoying it.

USEFUL LINKS:

Click here to read more 
How to style your wardrobe 


Improve Your Footwork in Boxing With this Guide

Improve Your Footwork in Boxing With this Guide

Boxing requires excellent footwork. Having superb footwork puts you in a position to hit your opponent hard and keeps you out of harm’s way when they attack. When you move around the ring with good footwork, it makes it more challenging for opponents to knock you down. You can easily improve your footwork.

When you find yourself in risky situations, like being pushed against the cage, your footwork may even be your most useful defensive tool. You can exit the danger zone with a few well-planned steps.

Shadow boxing: improve footwork

Image via Unsplash.com

Without a training partner, shadow boxing is a fantastic technique to practice footwork. The ring allows you to move around, practice your punches, develop your defensive techniques, and concentrate on your footwork. Try to perform three rounds of shadow boxing lasting three minutes each, with one minute between each round.

Lateral shuffle

The lateral shuffle is a great workout for strengthening your footwork. To begin this workout, start by standing with your feet together. Next, step your right foot out to the side, followed by your left foot. Make sure your feet stay in step as you continue to move from side to side. Then pause for 30 seconds after doing this for 30 seconds. Five times in total, repeat this technique.

Forward-backward shuffle: improve footwork

Image via Unsplash.com

In contrast to the lateral shuffle, you will be moving forward and backward throughout this exercise. Standing with your feet together, take a little step forward with your right foot. Follow it with your left foot and take a small step back with your right foot. Keep moving forward and backward while keeping your feet in a straight line. Then pause for 60 seconds after doing this for 60 seconds. Aim for five or more reps.

Side jumping rope

Although you will be jumping rope instead of jogging in this exercise, it is comparable to the forward-backward shuttle run. Begin by stepping your feet together to form a standing position, then jump to the side with your right foot. After doing so with your left foot, jump to the side with your right foot once more. Continue your side-to-side jumping while keeping your feet planted. After 30 seconds of doing this, pause for 30 seconds. Do five repetitions or so.

Single leg hops: improve footwork

Excellent for enhancing balance and coordination is this exercise. Standing up straight on your left leg, step forward with your right leg. As soon as your right foot touches the ground, take a step back with your right leg. Continue to hop backwards and forwards, being sure to land on the same foot each time. After 60 seconds, switch legs and repeat. When you practice this drill, try to get at least five sets.

Carioca exercise

Image via Unsplash.com

The carioca exercise is excellent for enhancing your ability to move laterally. Step out to the side with your right foot as you begin by standing with your feet together. Step to the side with your right foot once more, then follow it with your left. Continue your side-to-side movement while making sure your feet remain joined. Follow this for 60 seconds, then pause for 30 seconds. Five times, please.

Cone drills: improve footwork

Cone exercises are excellent for enhancing agility. Cones should be placed in a straight line; begin at the first cone. Place your hand on the second cone after running over to it. Run over to the third cone and touch it with your hand. Run while touching each cone until you reach the end of the queue. Reverse the drill’s direction after that. After two minutes of this, pause for one minute. Plan on performing three rounds.

Jump squats

Image via Unsplash.com

To increase your explosiveness, try doing some jump squats. You become better at closing gaps and fending off threats as a result. Place yourself in a standing stance with your feet shoulder-width apart, then crouch down until your thighs are parallel to the ground. Jump as high as you can from that point. Squat down again and spring up right away after a soft landing. Then pause for 30 seconds while continuing this for another 30. Get this five times, if you can.

Rope skipping

Skipping rope is an excellent way to improve your footwork. Your rhythm and coordination get better, and your legs get used to moving quickly. You can perform this exercise for two minutes at a time, then relax for one minute.. Five times should be done.

Skipping also increases your stamina, enabling you to continue about the ring for extended periods of time without becoming fatigued.

L-steps: improve footwork

Image via Unsplash.com

We need a distinct movement to move out to the back foot side. Here, we defy the advice to tighten your stance, but we must bring the front foot in first to dodge the oncoming opponent. Take another step out with the back foot after returning to a position where our feet are close together.

By doing this, we have formed the long side of the letter L before moving on to the short side. This enables you to quickly change directions, offer ground to an opponent who is moving forward, but also to come offline and avoid the ropes or a corner. The rear straight is once more a successful counter-shot as a result.

Distributing weight on both feet

People mean this when they say to “always be on your toes.” From the balls of your feet, the tiny knobs just before your toes start, you may move far more quickly. In particular, your rear heel should never touch the ground.

Your front foot would be at a 45-degree angle if you drew a straight line in front of you. Nearly 90 degrees should be where your back foot is.

Always land and push off from your feet’s balls with each movement.

Never cross feet

Image via Unsplash.com

Your right and left feet should be separated by an imaginary line that shouldn’t be bent or crossed. Crossing your feet throws you off balance and makes it difficult for you to adjust course, which makes you a target for adversaries. To maintain stable footwork, keep this phantom line between your feet solid.

USEFUL LINKS:

Check out more on perfecting footwork 
Click here to know how to make money online 


The Ultimate Guide: Places to Shop for Pet Products

For pet owners, ensuring the well-being and happiness of their furry companions is a top priority. From nutritious food to comfortable bedding and entertaining toys, the needs of our beloved pets are diverse. Fortunately, there are a plethora of places where you can shop for pet products, catering to the unique requirements of every pet. In this comprehensive guide, we will explore a wide range of options, both online and offline, to help you find the best products for your pets.

Places to shop products can be:

  • Local Pet Stores

(Photo from iStock)

Local pet stores are often the go-to option for many pet owners. These small, independent shops specialize in pet supplies and offer a personalized shopping experience. Here are some reasons why local pet stores are a great choice:

  1. Knowledgeable Staff: Local pet store employees are typically well-versed in pet care and can provide expert advice on product selection and pet care tips.
  2. Unique and Handpicked Products: These stores often carry a unique selection of products, including specialty items that may not be available at larger retailers.
  3. Support Local Businesses: Shopping at local pet stores helps support your community and ensures that you’re contributing to the local economy.
  • Big-Box Retailers

(Photo from iStock)

Big-box retailers like PetSmart, Petco, and Walmart have a wide range of pet products, making them a convenient option for many pet owners. Here are some advantages of shopping at big-box stores:

  1. Convenience: Big-box stores are typically located in accessible areas, making it easy to find one near you.
  2. Variety: They offer a wide selection of pet products, from food and treats to grooming supplies and pet accessories.
  3. Competitive Prices: Due to their large scale, big-box stores often have competitive pricing, which can be budget-friendly for pet owners.
  • Specialty Pet Boutiques

(Photo from iStock)

For pet owners looking for unique and high-quality pet products, specialty pet boutiques are a fantastic option. These boutiques focus on premium and niche items, such as artisanal pet foods, designer pet clothing, and customized accessories. While often pricier, these boutiques cater to those who want the best for their pets and enjoy indulging in luxury items.

  • Farm Supply Stores

(Photo from iStock)


Farm supply stores are not just for farmers; they also carry a range of pet products suitable for various animals, including dogs, cats, and small animals like rabbits and chickens. These stores often offer cost-effective options for pet food, bedding, and other essentials.

  • Veterinary Clinics

(Photo from iStock)

Veterinary clinics often stock essential pet care products, including prescription medications, dietary supplements, and specialty foods recommended by veterinarians. Shopping at your vet’s office can ensure that you’re purchasing the right products to address your pet’s specific health needs.

  • Online Marketplaces

(Photo from iStock)

In addition to dedicated pet product retailers, you can also find pet products on popular online marketplaces like eBay and Etsy. While these platforms may not specialize in pet products, they offer a wide range of options from various sellers, including handmade and unique items.

Pet Product Categories and Recommendations:

Now that you have a better idea of where to shop for pet products, let’s explore some essential categories of pet products and offer recommendations within each category.

  • Pet Food

(Photo from iStock)

Choosing the right pet food is crucial for your pet’s health and well-being. Consider factors like your pet’s age, activity level, and any dietary restrictions when making your selection.

  1. Dry Dog Food: Brands like Hill’s Science Diet, Royal Canin, and Orijen are known for their high-quality dry dog food options.
  2. Wet Cat Food: For cats, popular brands like Wellness, Blue Buffalo, and Merrick offer a variety of wet food choices.
  3. Grain-Free Options: If your pet has dietary sensitivities, explore grain-free options from brands like Canidae or Natural Balance.
  4. Prescription Diets: Veterinary clinics often carry prescription diets for pets with specific health issues. Brands like Royal Canin Veterinary Diet and Hill’s Prescription Diet offer specialized formulas.
  • Pet Toys

(Photo from iStock)

Toys are essential for pets to stay mentally and physically active. Consider your pet’s size, age, and preferences when selecting toys.

  1. Kong Classic Dog Toy: A classic choice for dogs, the Kong toy can be stuffed with treats or peanut butter to keep your pup engaged.
  2. Feather Wand Toys: Cats love interactive feather wand toys like those offered by GoCat and Da Bird.
  3. Puzzle Toys: Puzzle toys like the Outward Hound Hide-A-Squirrel provide mental stimulation for dogs.
  4. Laser Pointers: Laser pointers provide endless fun for cats, and options from brands like Friends Forever are popular choices.
  • Pet Accessories

(Photo from iStock)

Enhance your pet’s daily life with useful accessories.

  1. Collars and Leashes: Lupine Pet and Blueberry Pet offer stylish and durable collar and leash options for dogs.
  2. Pet Carriers: For traveling with your pet, consider carriers from Sherpa and Petmate.
  3. Litter Boxes: For cats, litter boxes from brands like Nature’s Miracle and IRIS are practical choices.
  4. Training Aids: Brands like PetSafe and Simple Solution offer training aids to assist in behavioural training.

Conclusion

Shopping for pet products is an important aspect of responsible pet ownership. Whether you prefer the personalized service of a local pet store, the convenience of big-box retailers, or the vast selection of online platforms, there are countless options available to meet your pet’s needs. These all product shops are easily available in every town and city. The availability makes it easier for pet owner to buy the desired products for their four-legged friends.

Remember that each pet is unique, and their requirements may change over time. Stay informed about the latest products. And trends in pet care to provide the best possible life for your furry companions. Ultimately, the happiness and well-being of your pets depend on the love, warmth, happiness and care you provide, along with the thoughtful selection of the products that enrich their lives.

Reference:

Medium 

Your little friend needs a toy, confused between what to choose?, what are you waiting for click on the link below:

How to choose right dog toy on your own


13 Dishes You’ve Always Wanted to Try

Food is one of the most delightful ways to explore and appreciate different cultures and cuisines from around the world. Whether you’re a dedicated foodie or simply someone who enjoys trying new things, there are countless dishes waiting to tantalize your taste buds. In this article, we will take you on a gastronomic journey to discover 13 dishes you’ve always wanted to try. These dishes represent a diverse range of flavors, ingredients, and cooking techniques from various corners of the globe. So, grab your culinary passport and get ready to embark on a delicious adventure!

1. Sushi (Japan)

(Photo from iStock)

Sushi is a beloved Japanese dish that has gained worldwide popularity for its simplicity, elegance, and deliciousness. It typically consists of vinegared rice, fresh seafood (such as raw fish or cooked shrimp), and various accompaniments like soy sauce, wasabi, and pickled ginger. Nigiri, sashimi, and maki are some of the popular sushi varieties that offer a spectrum of flavors and textures.

2. Paella (Spain)

(Photo from iStock)

Paella is a flavourful Spanish dish originating from the Valencia region. It’s a saffron-infused rice dish cooked with a variety of ingredients such as chicken, rabbit, seafood, and vegetables. The combination of saffron and a crispy layer of rice called “socarrat” makes paella a tantalizing and aromatic culinary experience.

3. Pho (Vietnam)

(Photo from iStock)

Pho is a fragrant and comforting Vietnamese noodle soup that has captured the hearts of food enthusiasts worldwide. It consists of rice noodles served in a rich, aromatic broth, typically made with beef or chicken. Pho is garnished with fresh herbs, bean sprouts, lime wedges, and chili slices, allowing you to customize the flavors to your liking.

4. Tacos (Mexico)

(Photo from iStock)

Tacos are a quintessential Mexican street food, known for their versatility and mouth-watering combinations. A soft tortilla filled with various ingredients like grilled meats, salsa, avocado, and cheese, tacos are a delightful explosion of flavors in every bite. Whether you prefer carne asada, al pastor, or vegetarian options, there’s a taco for everyone.

5. Pad Thai (Thailand)

(Photo from iStock)

Pad Thai is a beloved Thai stir-fried noodle dish that perfectly balances sweet, salty, sour, and umami flavors. It typically includes rice noodles, shrimp or chicken, tofu, bean sprouts, peanuts, and a tangy tamarind-based sauce. Thereupon, the combination of textures and flavors in Pad Thai makes it a must-try dish for anyone exploring Thai cuisine.

6. Moussaka (Greece)

(Photo from iStock)

Moussaka is a classic Greek dish that’s a comforting and hearty casserole. It consists of layers of sautéed eggplant, minced meat (often beef or lamb), and a creamy béchamel sauce. Therefore,  baked to perfection, this dish offers a delightful fusion of flavors and textures, making it a staple in Greek cuisine.

7. Kimchi (Korea)

(Photo from iStock)

In general, Kimchi is a staple in Korean cuisine and is known for its bold and spicy flavors. Surely, it’s a fermented dish made primarily from napa cabbage and Korean radishes, mixed with garlic, ginger, and chili pepper paste. The result is a spicy, tangy, and crunchy condiment that can be enjoyed on its own or as a side dish to complement various Korean meals.

8. Croissant (France)

(Photo from iStock)

While many may have tried croissants, there’s something special about savouring an authentic French croissant in a cozy Parisian café. Especially, these flaky and buttery pastries are made by layering thin sheets of dough with butter, resulting in a delicate, crispy exterior and a soft, airy interior. Once, pair it with a café au lait for the ultimate French breakfast experience.

9. Peking Duck (China)

(Photo from iStock)

Peking Duck is a famous Chinese dish that’s been enjoyed for centuries.  Overall, the dish features perfectly roasted duck with a crispy skin, often served with thin pancakes, hoisin sauce, and thinly sliced scallions. Occasionally, the combination of flavors and textures in Peking Duck makes it a culinary masterpiece and a must-try when exploring Chinese cuisine.

10. Goulash (Hungary)

(Photo from iStock)

Goulash is a hearty Hungarian stew known for its rich, savoury flavors and tender chunks of meat. Typically, made with beef or pork, goulash is seasoned with paprika and simmered to perfection with onions, bell peppers, and tomatoes. Meanwhile,  served with a side of fresh bread or dumplings, it’s a satisfying and comforting meal.

11. Tandoori Chicken (India)

(Photo from iStock)

Tandoori chicken is a popular Indian dish that’s famous for its smoky, charred flavour and tender, marinated meat.  Further, Chicken pieces are marinated in a mixture of yogurt and aromatic spices, including cumin, coriander, and garam masala, before being cooked in a tandoor (a clay oven). Hence, the result is succulent chicken with a delightful smoky aroma and a burst of Indian spices.

12. Ceviche (Peru)

(Photo from iStock)

Ceviche is a refreshing and tangy dish from Peru that highlights the freshness of seafood. Eventually,  it typically features raw fish or seafood, such as shrimp in a mixture of lime or lemon juice, red onions, and chili peppers. Finally, the acid in the citrus juice “cooks” the seafood, giving it a tender texture and zesty flavour.

13. Falafel (Middle East)

(Photo from iStock)

Falafel is a popular Middle Eastern street food made from ground chickpea or fava beans, mixed with herbs and spices, and deep-fried to golden perfection. Additionally, these crispy  patties are often served in pita bread with tahini sauce,  and pickles. Moreover, Falafel offers a  combination of  flavors, making it a  favorite.

Conclusion

Exploring new  dishes from around the world is not only a delicious adventure but also a way to connect with different cultures and traditions.

So, don’t worry to step out of your  comfort zone and embark on a journey to try these dishes you’ve always wanted to experience. After all, you travel to the countries of origin or seek out original restaurants in your own city, these dishes will undoubtedly leave a lasting impression on your taste buds and a deeper appreciation for the rich  global dishes. Bon appétit!

Reference:

Holidify 

Want to do a meal prep, what are you waiting, go check some amazing ideas for meal prepping, click on the link below:

How to do your meal prepping routine

How to Save Money on Healthy Food Products

The rising cost of groceries and the allure of cheaper, less nutritious options can make it challenging to stick to a healthy eating plan. But fear not! With some smart strategies and careful planning, you can enjoy a nutritious diet without breaking the bank. In this article, we’ll explore various ways to save money on healthy food products.

  • Create a Budget

(Photo from iStock)

The first step towards saving money on healthy food products is to create a budget. Determine how much you can allocate for groceries each month and stick to it. Having a budget in place will help you make informed decisions and avoid impulsive purchases that can add up quickly. There are various budgeting apps and tools available that can assist you in tracking your expenses and staying within your budget.

  • Plan Your Meals

Meal planning is a powerful tool to save money and eat healthily. Take stock of what you already have in your pantry and fridge to reduce waste. Plan meals around ingredients that are on sale or in-season, as they are typically more affordable. Make a shopping list based on your meal plan and stick to it when you go to the grocery store. This will help you avoid buying unnecessary items and stay on track with your budget.

  • Buy in Bulk

(Photo from iStock)

Buying certain healthy food products in bulk can be a cost-effective strategy. Look for items like rice, pasta, canned goods, and frozen vegetables that have a long shelf life. Warehouse stores and bulk food stores often offer substantial discounts for buying in larger quantities. Just be mindful of expiration dates and storage space to prevent food waste.

  • Embrace Generic and Store Brands

Don’t shy away from generic or store-brand products when shopping for healthy food. These alternatives are typically more affordable than name-brand items but often just as nutritious. Read ingredient labels and compare nutrition facts to ensure you’re making a healthy choice. You might find that the generic version of your favorite product is just as good as the branded one, but at a lower cost.

  • Clip Coupons and Use Cashback Apps

(Photo from iStock)

Coupons can be a fantastic way to save money on healthy food products.  Additionally, many grocery stores have their own apps or loyalty programs that offer digital coupons and discounts on healthy items. Cashback apps, such as Ibotta and Checkout 51, also provide opportunities to earn money back on select purchases. These small savings can add up over time.

  • Take Advantage of Sales and Promotions

Monitor your local grocery store’s weekly circulars and take advantage of sales and promotions. Many stores offer discounts on fresh produce, meats, and dairy products on a rotating basis. Plan your meals around these discounted items to save money while still enjoying nutritious food. It’s also a good idea to stock up on non-perishable items when they go on sale, ensuring you have a well-stocked pantry without overspending.

  • Buy Frozen Fruits and Vegetables

(Photo from iStock)

Fresh produce can be expensive, especially when certain items are out of season.  Frozen options are often more affordable, have a longer shelf life, and can be just as nutritious as fresh produce. Plus, they’re convenient to have on hand for quick and easy meal preparation.

  • Reduce Meat Consumption

Reducing your meat consumption can significantly lower your grocery bill while promoting a healthier diet. Opt for plant-based proteins like beans, lentils, tofu, and tempeh. When you do buy meat, choose lean cuts and consider stretching it by using it as an ingredient rather than the main focus of a meal.

  • Grow Your Own Produce

(Photo from iStock)

If you have space and the inclination, consider starting a small vegetable or herb garden. Growing your own produce can be incredibly rewarding and cost-effective. Even if you don’t have a backyard, you can grow herbs and some vegetables in pots on a balcony or windowsill. Homegrown produce not only saves you money but also ensures that you have access to fresh, organic options.

  • Minimize Food Waste

Reducing food waste is a critical aspect of saving money on healthy food products. Plan your meals carefully to use up perishable items before they go bad. Store food properly to extend its shelf life, and consider freezing leftovers for future meals. Get creative with using leftover ingredients in new recipes to prevent them from going to waste.

  • Cook at Home

(Photo from iStock)

Eating out or ordering takeout can be convenient but costly. Cooking at home allows you to control the ingredients and portion sizes, saving you money and promoting a healthier diet. Try batch cooking and meal prepping on weekends to have ready-made meals throughout the week. Cooking can also be a fun and rewarding activity that brings family and friends together

  • Learn Basic Cooking Skills

Investing time in learning basic cooking skills can go a long way in saving money on healthy food products. When you can prepare meals from scratch, you have greater control over the ingredients and can avoid the markup on pre-packaged and pre-cooked items.

  • Take Advantage of Leftovers

(Photo from iStock)

Get creative with leftovers to stretch your budget further. For instance, use yesterday’s roasted vegetables as a topping for a salad or a filling for a wrap. Cooked rice can become the base for a stir-fry or fried rice the next day. Repurposing leftovers can save both money and time in the kitchen.

  • Don’t Shop Hungry

One of the simplest but most effective ways to save money on healthy food products is to avoid shopping on an empty stomach. When you’re hungry, you’re more likely to make impulsive and less healthy food choices. Eat a balanced meal or snack before heading to the grocery store to help you stick to your shopping list and make rational decisions.

Conclusion

Eating healthily doesn’t have to be a financial burden. By implementing these strategies and being mindful of your spending, you can save money on healthy food products while still nourishing your body with nutritious options. Remember that small changes in your shopping and cooking habits can add up to significant savings over time, making it easier to maintain a balanced and budget-friendly diet. So, start today and take control of your health and finances through smart food choices.

Reference:

TD Bank 

Want to do a meal prep, what are you waiting, go check some amazing ideas for meal prepping, click on the link below:

How to do your meal prepping routine

Save Money At The Dollar Tree

Dollar Tree made a significant adjustment to its original $1 business plan in 2022. And this one shocked devoted Dollar Tree customers everywhere. The retailer stated it was raising its fabled $1 price to $1.25 across all of its outlets in response to pressure from rising product costs and growing supply chain issues. Thankfully, this modification was just temporary.

In 2023, Dollar Tree made a U-turn and returned 300 to 400 items to its original $1 price, giving customers the deal they had cherished for years. But the store is fantastic for other reasons as well. To learn more about how to save money when shopping at Dollar Tree, keep reading.

Bring your coupons

(Photo from iStock)

Your savings from Dollar Tree’s consistently low prices are already substantial. You can further increase your savings by clipping coupons.

You can get a product for nothing by using coupons! This is so that you can use a valid coupon for more than one item that costs $1. And that could leave you with nothing at a dollar store where hundreds of items are only a dollar! (However, as Dollar Tree doesn’t offer overages, don’t expect to receive any cash back if the coupon is larger than the purchase price.)

Unit prices

True bargains are abundant in dollar stores. That said, not everything that costs $1 is a bargain.

Don’t confine your comparison shopping to internet purchases or things from the grocery store. Even at the dollar store, compare unit prices. For instance, the only way to tell whether something is cheaper at the dollar shop or elsewhere is to calculate how much it costs per ounce.

Earning cashback

You can get money back on purchases from dollar stores in two different ways. Choose whichever appeals to you most, or use both in the same transaction:

Use a credit card with cash back to make a purchase. Make use of a coupon app like Ibotta. Using the free Ibotta app, you can get cash back on purchases made at a variety of physical retailers, including Dollar Tree.

Shopping online

(Photo from iStock)

Need to cut back on both time and gas? Online shopping at the dollar store. One of the companies with online stores is Dollar Tree.

Even better, making purchases from such websites entitles you to cash back. Simply use a free cash-back gateway like Rakuten to conduct your online shopping. Use Dollar Tree’s free in-store pickup option to pick up online items at your neighbourhood shop to avoid paying any shipping fees.

Ever wondered why Dollar tree is cheap?

The original five Dollar Tree locations, then known as Only $1.00, debuted in Georgia, Tennessee, and Virginia in 1986. J. Douglas Perry, his brother-in-law Macon F. Brock, Jr., and their business partner H. Ray Compton came up with the ambitious idea of selling a variety of high-quality goods for just one dollar. Their ambitious proposal was met with scepticism by retail industry experts, yet their dollar stores were an instant success. All 48 contiguous states had Dollar Tree locations by 2004. The shop opened their 3,000th store in 2006, marking 20 years in operation. They have now opened thousands more outlets around the US and Canada.

Family meals

When you shop at Dollar Tree and choose any of their name or in-store brand pasta products that are less expensive than other shops, dinner is ready.

A wide variety of spices are also available at Dollar Tree, which can help you save money each time you need to restock. You can also purchase protein bars, oats, soup, crackers, chips, hot sauce, cake mix, noodles, and instant coffee at Dollar Tree. With Dollar Tree groceries, you can put up a lunch for each person for as little as $2. Dollar Tree can supply family dinners for a budget of $750 a month (though you might need to find fresh fruit and veggies elsewhere). The average monthly food budget for a four-person household is at least $1,000.

Cookware

(Photo from iStock)

Eating is something you do throughout the day. If you prepare three squares a day and meal prep, you should consider buying your cookware at Dollar Tree to save money.

You can get discounts on items like cooling racks, coffee filters, funnels, measuring cups, utensils, drinkware, and pizza and cake pans. Some of them are regular expenses that could help you cut $20 or more from your meal preparation budget.

Organizing and storing tools

Even when it comes to things you enjoy, having too much of anything can be detrimental. Fortunately, Dollar Tree has a wide variety of storage and organisation items. From huge, transparent plastic bins to keep clothing or other belongings secure to food containers to preserve the freshness of your favourite foods.

For a third of the price of what you would pay at Target or other places, you can even acquire refrigerator organisers or storage bins for your closet.

Cleaning supplies

You’ll have to clean occasionally throughout the year. You may purchase name-brand goods at Dollar Tree for a small fraction of what they would cost at other stores. At Dollar Tree, stain removers, disinfectants, and tile cleaners all range in price from $3 to $5.

Clothing items

(Photo from iStock)

Despite your best efforts, you will eventually do harm to your garments despite spills and tearing. For essential clothing like socks, tank shirts, caps, scarves, and gloves, head to the place. All of these range in price from $1.25 to $5.

If you have children, you probably constantly need to buy new socks and shirts. You might save up to $30 on basic wardrobe products on a monthly basis.

School supplies

By purchasing your children’s notebooks, pens, pencils, crayons, scissors, glue, and other school supplies from Dollar Tree, you may save a significant amount of money—two thirds of what you could spend elsewhere.

Additionally, consider all the money you’ll save when you buy art supplies at Dollar Tree if you are an artist or know one. The Dollar Tree offers everything at a reduced price, from pouring paints to water colour pads.

Reference:

Yahoo

Want to do a meal prep, what are you waiting, go check some amazing ideas for meal prepping, click on the link below:

How to do your meal prepping routine

Best Exercises for Improving Upper Back Strength in Sports

Best Exercises for Improving Upper Back Strength in Sports

Whether you’re more active or inactive, you use your back muscles practically constantly. In order to keep your back strong and free from injuries, it’s crucial to include exercises both of the upper back and lower back.

Consulting a doctor: best exercises

Image via Unsplash.com

Before starting a new workout or making any adjustments to an existing one, always with your doctor. If you are recuperating from an accident or have a history of back injuries, this is particularly crucial.

Always seek your doctor’s approval before beginning a back exercise regimen. Ask her when you can begin exercising, what kind of exercise you should do, how much resistance you should use, and if there are any additional limitations.

Correct form is crucial

One of the most frequent causes of injuries occurs when people exercise with poor form.  It’s crucial to constantly practice proper form because back injuries can be serious and disabling.

Think about having a conversation with a personal trainer, an exercise expert, or a gym employee. They’ll be able to instruct you on how to perform exercises, operate the equipment, and maintain proper form during your workout.

A mirror could be helpful when performing some of your workouts. As you make the transition, pay attention to yourself. Verify that you are using the proper format, and adjust it as needed.

Adding more to your workout: best exercises

Image via Unsplash.com

Fitness experts advise toning and strengthening various muscle groups outside your back, whether you’re attempting to avoid an injury or are just recuperating from one.

Your back muscles are supported or helped by multiple muscle groups in a range of tasks. Because your back muscles are smaller than those in other parts of your body (like your legs), joining two muscle groups together can help you become stronger.

Your core, pelvis, and hips should all receive special attention. Each of these muscle groups must be used in a variety of actions.

Stretching before workout: best exercises

In order to keep yourself healthy and strong, stretching is crucial, especially if you haven’t worked out in a while.

Warm muscles need to be stretched. After a brief warm-up, stretch before working out. Stretch not only your back but the complete body.

Perform a neutral 90/90 back stretch. Your back muscles will become more flexible as a result, making them more prepared for exercise. Additionally, the stretch will help your chest muscles relax and ease general muscular and ligament tension.

An additional option to think about is a thoracic stretch. Put a chair back in front of you to act as a stable support. Standing behind it, spread your feet shoulder-width apart, and slightly stoop your knees.

Perform Planks

Image via Unsplash.com

A single movement that engages several different muscle groups is the plank exercise. The plank exercises your shoulders, legs, and abs in addition to your back.  This combined position is excellent for your body.

Lay down on the floor face down to begin. As you raise yourself into the standard push-up position, place your body on your forearms rather than your hands. As you bend your elbows, be sure they are parallel to your shoulders.

Rotate your pelvis forward and towards your head to activate your core. As long as you can, maintain a stiff, straight line with your body.

If required, release the stance and repeat again.

Downward facing dog pose: best exercises

A fantastic yoga pose to help stretch and strengthen your entire back is this one.

On your hands and knees, start in this position with your fingers pointed outward.

Lift your knees off the ground and tuck your toes in. Your buttocks should be pointed upward as you lift your pelvis. An upside-down V should be visible on your torso.

While extending your legs, keep a tiny bend in them.

Firmly push with your heels and hands while lifting your pelvis off the ground.

To keep your body in place, keep your core, arms, and legs tight. In front of you, let your head hang between your arms.

The Superman pose: best exercises

Image via Unsplash.com

This simple strengthening exercise can help you tone your entire backside, including your back.

On a yoga mat, lie on your stomach. Your arms should now be straight out in front of you once you have extended them.

Straighten your legs up in the air, pointing your toes away from your torso. Lift your head, arm, and shoulders off the floor at the same time. Your body should have the appearance of flying or forming a small U.

As long as you can, maintain this posture; then, when you can, relax.

Doing push-ups

Maintaining as much straightness in your spine will help this exercise engage your back muscles. Additionally, it helps to develop arm and chest strength.

Lay flat on the ground. Standing on your hands and toes, straighten your body out. Be sure to hold your hands shoulder width apart with your wrists tucked behind your shoulders.

By bending your elbows away from your torso, you may lower your body while keeping it straight.

Reduce your body slowly until your chest is just an inch or two off the floor. Repeat as necessary, pushing yourself back up to the starting position.

Dog and cat exercises

The flexion and extension of the spine are improved by this low-intensity workout. To get the most benefit from this exercise, try to perform the movements as fluidly as you can.

Get on your hands and knees and squat down. To make this workout on your hands and knees more comfortable, use an exercise mat.

Flex your spine so that it is curled upward and upwards. Push upwards through your lower back. Your head should be down towards the ground. Hold for a short while.

Release the position gradually, pushing your lower back towards the floor until it is concave. Your face should be raised up and towards the ceiling. Hold on to this position for a short while.

Bent over reverse flys

Image via Unsplash.com

Reverse flys bolster your upper back and shoulders. Additionally, this exercise can aid in maintaining appropriate posture.

Place your feet shoulder-width apart while standing upright. Knees should be slightly bent. Don’t let the back arch; instead, keep the spine neutral and your core active.

In each hand, hold a tiny dumbbell. Lift your arms so they are parallel to the ground and out to the sides. Bend your torso forward until your body is almost at a 90-degree angle while contracting your core.

USEFUL LINKS:

Know more exercises here 
How to stay and fit and healthy 


Master the Art of Scoring in Field Hockey

Master the Art of Scoring in Field Hockey

Throwing a big hockey stick at a small, hard ball is the most pleasurable thing ever. In hockey, you can dribble, flick, roll and other things with the ball. You need some basic equipment, such as a stick and a mouthguard, to start playing. So that you may start playing, learn the game’s fundamental strategies and rules to master the game.

Safety equipment is important: master the hockey

Image via unsplash.com

These are the fundamental safety equipment requirements for hockey players. The shin guards provide a little bit more ankle protection than football shin guards but are otherwise similar. You can make them comfier by putting on socks underneath. Although mouthguards are the most crucial piece of oral protection, they always have a tendency to feel uncomfortable. You are protected against flying objects and long sticks by wearing goggles. They shield your face’s front and sides.

Online and most sporting goods retailers both sell equipment. As you learn the game, shin pads for football can be a smart place to start.

Along with a caged helmet, goalies also need some lightweight arm and leg padding.

Wearing hockey cleats: master the hockey

Field hockey games are played on grass or turf, just like in other outdoor sports like soccer and football. To prevent slippage while running, hockey shoes include tiny, rubber studs on the bottom. Pick a pair of shoes that fit comfortably without being constrictive.

Use your soccer cleats to begin if you have them. The longer studs nevertheless offer a lot of traction on the field. Special hockey studs are then an option after you get more into the sport.

Holding the hockey properly

Image via unsplash.com

The flat end of the stick should now be facing away from you. Put your left hand over the top of the stick and point your thumb downward towards the bottom, curled end. Place your right hand around the bottom of the grip, which is the portion of the stick made of black, white, or leather that extends halfway down.

For dribbling and ball control, use this simple grip.

Your thumb should be roughly in line with the stick’s curve. Grip the handle with your fingers curled around it, but be ready to adjust them sometimes as you play.

No such thing as a “lefty” stick exists. Although you can change how you hold your hands, most left-handed players hold their sticks in the same way.

Crouching with your back straight: master the hockey

The standard position for hockey players is crouching. Pushing your stick out in front of you while bending your body at the waist. Keep the stick’s curled end firmly planted on the ground and its flat end pointed outward. To be able to view the field in front of you, keep your chest raised.

Do not forward lean. To avoid back pain, bend at the waist and keep your knees slightly bent.

On the pitch, you spend the majority of your time stooping. Only when rushing after a ball or standing still do you stand up straight.

Pointing towards ball

Image via unsplash.com

Set your left foot in line with the ball as you make your aim. To provide support, put your right foot behind you. Maintain a stick’s distance between the ball and your body.

At all times, make an effort to maintain the same relationship between the ball and your body. It will be challenging to control the ball if you allow it to go too near to or too far from your body. Instead of bending your back, move in its direction if it runs away from you.

Trapping the moving ball: master the hockey

Face the ball and touch the ground with your stick. Use the rounded edge of the stick to stop the ball by placing it on the ground. You might need to take a small step backwards to slow the ball down before halting it. To stop the ball, lean the stick forward.

The ball may roll over the stick and past you if you don’t lean it forward just a little bit. You can better control the ball if you trap it, which will improve the accuracy of your passes and shots.

When receiving the ball, be gentle. Assume it is an egg. If you bump it too hard, the ball will roll away and be grabbed by the opposing team rather than breaking.

Perfecting Indian dribble

Image via unsplash.com

The ball should be in front of you, and your stick should be near to it. Flick the ball to your right while it is on your left. With your left hand, turn the stick such that the flat side is now to the right of the ball. As long as you can, flick the ball to your left and keep doing so.

This kind of dribbling is great for maintaining possession of the ball while you move.

Always use the flat side of the stick to tap the ball. Even seasoned players may struggle to grasp this approach.

First, try dribbling stationarily. Once you have mastered it, stroll up the field while dribbling.

Hook pass: master the hockey

Similar to how you stop a ball, place your stick parallel to the ground. The ball should be wrapped around the stick’s hooked end. Swing the stick forward in a single, fluid action, shifting your weight from your rear foot to your front foot.

To stay balanced and generate force, use your legs. Try not to bend forward more than is necessary to catch the ball.

You can access balls that are out of your reach by using the hook pass. Keep practicing even though it probably won’t feel as accurate at first as sweep passes!

Performing slap shot

Image via unsplash.com

Keep your left hand wrapped around the top of the stick as you stand with the ball in front of you. While raising your right hand, hold onto your stick firmly. To begin your swing, bring your stick back behind you. Put your weight on your front foot as you extend your stick.

This type of club swing is comparable to driving a ball far in cricket or golf. Instead of attempting to hit the ball with force, push the ball on the ground for more precision.

Keep in mind that you can only shoot the ball from inside the scoring circle by striking it with the flat section of your stick.

USEFUL LINKS:

Learn more tips and rules here 
Mountain biking safety guide for beginners 

Ultimate Guide to Building Endurance for Long-Distance Runners

Ultimate Guide to Building Endurance for Long-Distance Runners

Whether you’re a novice or a seasoned runner, you definitely want to increase your stamina and speed when jogging. There are numerous strategies to get better, but some of the most ultimate ones are strength training, interval training, and stretching. You may speed up your best running time in a short amount of time with perseverance and effort!

Squats with dumbbells: ultimate guide

Image via Unsplash.com

Select a set of light dumbbells. Point your toes forward and space your feet about shoulder width apart. Dumbbells in your arms should be pressed up against your side. Keeping your knees under your toes and extending your backward, stoop down to a low position. Repeat this practice multiple times.

Planks are effective

Lay flat on the ground or a yoga mat. Put your hands shoulder-width apart, directly beneath your shoulders. Create a straight line with your body by straightening your neck and back. Before taking a break, hold this position for a minute.

Keep your back upright and avoid letting your hips sag towards the mat to prevent back injuries.

Do set of pushups: ultimate guide

Image via Unsplash.com

Lay down on the ground or a yoga mat. Palms facing down, place your hands on the floor just beneath your armpits. Using only your arms, raise yourself into a plank posture from the floor. When your arms are fully extended, squat down once more until your chest is barely off the surface. Arms extended, return to the plank position.

To prevent injuries, make sure your back remains straight.

If performing regular pushups is too difficult, think about modifying your technique. Put your knees on the ground, tuck your feet behind you, and place your feet behind you.

Warm up your body before workout

Try five minutes of slow jogging or walking to warm up. In order to prepare for the interval exercise, this should assist stretch out your legs and rouse your muscles. Your body learns to use oxygen more effectively during interval training, which increases both your running speed and total endurance.

Run at normal pace for fifteen minutes: ultimate guide

Run at a somewhat challenging pace that also raises your heart rate.  Try to run at 70 to 80 percent of your fastest pace.

Don’t exert too much effort.  The goal of this exercise is not to exhaust you. Instead, your goal should be to increase heart rate so that your body can begin absorbing oxygen more effectively.

Interval training: ultimate guide

Image via Unsplash.com

This is the portion of the workout that increases muscle mass and improves endurance. Run at your fastest pace for one minute, working hard to increase your heart rate and fatigue your muscles. After that, go for a two-minute walk to allow your muscles to relax.

For the duration of the minute-long run, exert the most effort you can. If your muscles aren’t completely exhausted, interval training won’t be effective. This is referred to as “entering the anaerobic zone” or working out until you are visibly struggling for breath.

Repeat the process

A twelve-minute workout should result from this. Although it doesn’t seem like much time, at the conclusion of the twelve minutes, you ought to be completely worn out. If not, your effort level during the minutes of running was insufficient.

It’s crucial to repeat exercises because it forces your body to absorb oxygen more effectively. This increases the greatest amount of oxygen your blood can contain over time. You can run harder and faster the more oxygen you have in your system!

Cooling your body: ultimate guide

Image via Unsplash.com

Continue to walk for another five minutes at a brisk enough pace to exercise your muscles but a slow enough pace to reduce your pulse rate. You ought to be shockingly weary at this point after such a brief workout. If not, you should intensify the interval workout while increasing your heart rate.

Pushing your limits

At least once a week, try to undertake interval training. You risk hurting yourself if you perform this exercise more than twice in a ten-day period.  Make the practice more difficult for yourself by cutting the cooldown time from two to one minute after a few weeks of interval training.

Whenever you run for exercise, increase your weekly running time by five minutes. This will progressively increase your training and aid in your improvement. Start by weekly adding one minute to your usual routine if five minutes is too much.

Measuring your improvement

To have concrete evidence of your progress, timing yourself when you complete your normal running workout and note your times in a journal. Running as quickly as you can for as long as you can while keeping track of the distance and time is another effective approach to gauge progress. You’ll be able to run faster for longer stretches of time after a few weeks of interval training.

Take a break from your regular routine once every few weeks and run the entire 5k if you’re training for a race like a 5k. To keep track of your run times, keep a journal. After a few weeks of interval training, you’ll start to see a significant improvement.

There are several helpful phone apps that may be used to track your time and mileage. If you don’t want to use your phone while running, think about investing in a stopwatch to pace yourself and running on a track to calculate your distance precisely.

Stretching before and after running

Image via Unsplash.com

Before starting an exercise program, it’s crucial to loosen up your muscles. This can help you avoid injuries and lessen your chance of getting cramps when running.

Perform some walking lunges. With your right leg, take a big stride forward, extending your left leg far behind you. You should descend such that your right thigh is parallel to the ground. Make sure your right knee is above your right ankle and your left knee is not touching the floor. Ten lunges each leg, repeat for the left leg.

You should stretch even though you will be weary from jogging to prevent muscular cramps.

Perform a few standing quads. Put your legs together and stand tall. While maintaining your thighs firmly pulled together, bring your left foot around to your left hand. Don’t extend your leg too far when pressing your foot with your hand.

USEFUL LINKS:

See things you should take while learning swimming 
Check out more tips on endurance building 


How to Utilize Your Basic Ingredients: A Culinary Journey

In the realm of cooking, basic ingredients are the cornerstone of creativity. These humble components, found in every kitchen, are the building blocks of countless dishes and cuisines worldwide. From flour and eggs to vegetables and spices, mastering the art of utilizing basic ingredients can transform even the most modest pantry into a source of culinary inspiration.

In this article, we’ll explore the art of harnessing the potential of basic ingredients to create delicious and satisfying meals. Whether you’re a novice in the kitchen or an experienced home cook, you’ll discover tips, tricks, and ideas that will enhance your cooking repertoire and inspire your culinary journey.

Flour: The Versatile Foundation

(Photo from iStock)

Flour is the cornerstone of many dishes, and it comes in various forms, including all-purpose, bread, whole wheat. Likewise,  specialty flours like almond or coconut. Here’s how to make the most of this versatile ingredient:

  •  Baking: Flour is the primary ingredient in baking, used to make bread, cakes, cookies, and more. Experiment with different types of flour for unique textures and flavors in your baked goods.
  •  Thickening: Flour serves as an excellent thickening agent for soups, stews, and sauces. Create a roux by mixing flour and fat (butter or oil) to achieve the desired consistency in your dishes.
  •  Breading: Coat proteins like chicken or fish with flour before frying to achieve a crispy exterior. You can season the flour with herbs and spices for added flavour.
  •  Pasta: Homemade pasta is a delightful culinary endeavour. Combine flour and eggs to make fresh pasta dough and experiment with various shapes and sizes.

Eggs: Nature’s Perfect Protein

(Photo from iStock)

  • Eggs are not only a protein powerhouse but also a binding and leavening agent in many recipes. Here are some ways to harness their potential:
  •  Baking: Eggs provide structure and moisture to baked goods. They can be used for leavening, creating a tender crumb, or adding richness to desserts.
  • Binding: Eggs are the glue that holds ingredients together in dishes like meatloaf, meatballs, and veggie burgers. They’re also essential for binding ingredients in casseroles and frittatas.
  • Breakfast Classics: Eggs are incredibly versatile for breakfast. Make omelettes, scrambled eggs, poached eggs, or sunny-side-up eggs with various toppings and seasonings.

Homemade Mayonnaise: Whisk egg yolks with mustard, vinegar, and oil to create your own creamy mayonnaise.

Vegetables: Nature’s Bounty

(Photo from iStock)

Vegetables are a colourful and nutritious canvas for culinary creativity. Whether fresh, frozen, or canned, here’s how to utilize them effectively:

  •  Roasting: Roasting vegetables enhances their natural sweetness and imparts a delightful caramelized flavor. Try roasting carrots, broccoli, or Brussels sprouts with olive oil, salt, and pepper.
  • Stir-Frying: Quickly cook vegetables in a hot pan with some oil and your choice of seasonings for a simple and healthy side dish or main course.
  • Soups and Stews: Vegetables are essential in hearty soups and stews. Create a base with onions, carrots, and celery, then add your choice of ingredients like beans, potatoes, or greens.
  •  Salads: Fresh vegetables make for vibrant salads. Combine various veggies, leafy greens, proteins, and dressings to create a wide range of salads.

Protein: The Heart of Every Meal

(Photo from iStock)

Proteins like meat, poultry, fish, tofu, and legumes provide sustenance and flavour to your dishes. Here’s how to make the most of them:

  •  Marinating: Marinating proteins in a flavourful mixture of herbs, spices, oils, and acids (like vinegar or citrus juice) infuses them with taste and tenderness.
  •  Grilling: Grilling proteins can impart a smoky and charred flavour. Experiment with different marinades and sauces to enhance the taste.
  • Slow Cooking: Tough cuts of meat become tender and flavourful when slow-cooked. Use a crockpot or Dutch oven to create mouth-watering dishes like pulled pork or beef stew.

Vegetarian Options: Plant-based proteins like tofu, tempeh, and legumes are excellent meat substitutes. Additionally, explore recipes like chickpea curry, tofu stir-fry, or lentil burgers.

Spices and Herbs: The Flavour Enhancers

(Photo from iStock)

Spices and herbs are the secret ingredients that can elevate your dishes from ordinary to extraordinary. Here’s how to use them effectively:

  • Flavour Combinations: Learn about flavour profiles and how to pair spices and herbs to create balanced and harmonious dishes. For example, basil and tomatoes, rosemary and lamb, or cumin and coriander in Indian cuisine.
  •  Fresh vs. Dried: While fresh herbs provide brightness, dried spices offer concentrated flavors. Experiment with both to discover their unique contributions.
  •  Toasting Spices: Toasting spices in a dry pan before using them can intensify their flavors. Be cautious not to burn them.
  •  Infused Oils and Vinegars: Create your own flavoured oils and vinegars by infusing them with herbs, spices, or citrus zest. These can add depth to dressings and marinades.

Dairy and Dairy Alternatives: Creamy Indulgences

(Photo from iStock)

Dairy products like milk, cream, cheese, and yogurt are luscious additions to many recipes. Furthermore,  if you’re dairy-free, there are also excellent alternatives available:

  • Creamy Sauces: Cream and cheese are the foundation of rich and creamy sauces, like Alfredo or macaroni and cheese. Experiment with dairy-free options like coconut milk or cashew cream.
  • Yogurt: Yogurt can be used in both sweet and savoury dishes. It’s a fantastic addition to marinades, dressings, smoothies, and desserts.
  •  Butter Substitutes: When a recipe calls for butter, try using olive oil, coconut oil, or vegan butter alternatives for a different flavour profile.

Leftovers: Creative Second Acts

(Photo from iStock)

Don’t underestimate the power of leftovers. Eventually, with a little creativity, you can transform yesterday’s meal altogether into something entirely new:

  •  Stir-Fry: Leftover cooked proteins and vegetables can become a quick and satisfying stir-fry. Add some soy sauce and your favorite spices for flavour.
  •  Sandwiches and Wraps: Use yesterday’s roast chicken or grilled vegetables to create a delicious sandwich or wrap. Add some fresh greens and condiments for a different twist.
  • Frittatas and Quiches: Leftover vegetables and meats can be incorporated into frittatas or quiches for a savoury breakfast or brunch option.
  •  Soups and Casseroles: Combine leftover meats, vegetables, and grains to make hearty soups or casseroles. These dishes are perfect for freezing and reheating.

Conclusion

Utilizing basic ingredients is a fundamental skill that empowers home cooks to create a diverse array of delicious dishes. Although from flour and eggs to vegetables, spices, and pantry staples, each ingredient has its unique role in the culinary world. By exploring different cooking techniques, flavour combinations. Another way is creative uses for leftovers, you can transform your kitchen into a haven of culinary inspiration. So, roll up your sleeves, sharpen your knives, and embark on a delicious journey of culinary creativity generally using your basic ingredients.

Reference:

Slurrp

Want to do a meal prep, what are you waiting, go check some amazing ideas for meal prepping, click on the link below:

How to do your meal prepping routine


Snuffly Facts About Calicos

The distinctive coat pattern of a Calicos cat consists of white, black, and orange or red patches. They are distinctive and stunning due to their fascinating and brilliant coat colours. They are a favourite among cat lovers and aficionados worldwide due to their stunning patterns and colour combinations.

Exploring the world of Calico cats reveals a tapestry of wonder and appeal, whether you’re just interested or thinking about bringing one into your house. We explore a number of Calico cat facts in this article in the hopes that they will increase your admiration for them.

They are not a breed

Cats with the calico pattern exhibit a particular set of traits. The X chromosome and the genes that control coat colour are crucial to the genetics of Calico cats. Male cats have one X and one Y chromosome (XY), while female cats have two X chromosomes (XX).

Calico cats are virtually exclusively female since the gene that determines their orange coat colour is on the X chromosome.

Variations in coat pattern

Calico cats also have a variety of coat patterns, including the traditional “brindle” pattern, in which the colours mingle to create a mottled appearance. The “tortoiseshell” or “tortie” pattern, in which the colours merge more haphazardly, is another common design.

Their tri-coloured coat may also be covered in tabby patterns, solid colour patches, or both. their colour and pattern is unique. The tri-color coat pattern of white, black, and orange or red patches is the most noticeable characteristic of calico cats.

These colours are distributed in a way that gives an eye-catching, distinctive appearance. Each cat has a distinctive design as a result of the large range of colour options. While some Calico cats may have bold colour patches, others may have more subtle patterns. For instance, some cats will have 25% to 75% of their bodies covered in a single colour.

Colors and geographical location

(Photo from iStock)

According on their area, calico cats may have varying coat colours. For instance, white, black, and orange/red patches make up the majority of the American classic Calico pattern. Due to variances in coat colour genetically, Calico cats in various European nations, however, may have blue or cream patches instead of orange/red patches.

Calico is a fur

The term “calico” refers to the plain cotton that was bleached, coloured, and printed in a variety of patterns in the Indian port city of Calicut. The fabric would eventually arrive in Northern America. The two-color prints were the most prevalent pattern on the clothing. Calico cats earned their name because people frequently described them as having “calico” fur.

Good luck

(Photo from iStock)

In certain traditions, calico cats considered an omen of success and wealth. They are known as “Maneki-Neko” or “beckoning cat” in Japanese, and are viewed as lucky and prosperous emblems.

Calicos are not limited to regions. Cats with calico patterns are not restricted to a particular area and are common around the world. Although they are frequently linked to North America, you can also probably find them in Europe and Asia.

Male Calicos

In males, there is only one X chromosome. Only one colour gene—orange or black—can be inherited; not both. They can only have an orange or black coat as a result.

There are male Calico cats, though. The cats are typically sterile and have chromosomal abnormalities, and this only occasionally occurs. These boys have Klinefelter syndrome, a disorder marked by an extra X chromosome (XXY). A tri-color pattern results from the inheritance of two distinct coat colour genes made possible by the extra X chromosome.

Conversation starters

(Photo from iStock)

The distinctive and striking appearance of calico cats frequently draws admiration. If you have a cat that looks cool, don’t be surprised if people ask you where you got it or just want to talk to you. Having a Calico cat can lead to interesting conversations and friendships with other cat enthusiasts, whether you’re out for a stroll or hosting visitors at your house.

Cultural significance

Having a Calico cat can enhance the romance and mystique of the relationship for individuals who understand its symbolism and cultural value. If someone else compares your cat to a kind-hearted witch full of luck, don’t take it personally.

Their fame in Maryland

(Photo from iStock)

Since 2001, Maryland has designated the Calico cat as its official feline. This choice was based on the cat’s unusual fur pattern, which resembles the Baltimore oriole, the state bird. The cat’s coloration resembles the baseball team the Baltimore Orioles. This is another reason why some people think the cats would bring luck to the squad.

Cats with the distinctive tri-color coat patterns and alluring personality of calicos are interesting creatures. They are a source of fascination and appreciation because to their distinctive genetic make-up and complex coat colour inheritance. These adorable creatures also hold a particular place in the hearts of many pet lovers around the world due to their scarcity and cultural meaning.

In addition, calico cats have made an impact on literature, history, and popular culture. Through viral videos, they even rose to internet celebrity while inspiring writers and artists.

Calico cats continue to attract and enchant individuals who accept them into their lives, regardless of whether you recognise their genetic marvel, cultural significance, or charming disposition.

Calicos and famous people

The adored Calico cat of well-known British author and poet T.S. Eliot was named Marzipan. As he created “Old Possum’s Book of Practical Cats,” his renowned collection of poetry, Eliot used her as his muse and source of inspiration. Later, the poems served as the inspiration for the successful musical “Cats.”

George Herriman’s well-known cartoon cat, “Krazy Kat” There was a Calico cat in the universe of the same-named comic strips. With Krazy Kat’s unpredictable escapades at its core, the comic strip, which ran from 1913 until 1944, was renowned for its poetic storytelling and surrealist storytelling.

Reference:

Excited Cats

Searching for the tips to design perfect logo for your business, what are you waiting for?, click on the link below:

How to design a logo that best represents your company

Living the Digital Nomad Lifestyle

Contrary to what you might think, you shouldn’t suddenly quit your work and start living as a digital nomad. While it may be tempting to forgo prudence and dive headfirst into this novel and thrilling experience, starting before you leave home is a much better strategy.

The majority of businesses need a few months to begin turning a profit (and blogs can take years). I wouldn’t advise starting your new digital nomad job while travelling unless you have a significant amount of savings to live off of. Do it initially at home. Create a clientele so that you can start making money before you go. You won’t experience anxiety trying to start a business and travel the world that way.

Work and travel

(Photo from iStock)

The hardest part about working remotely abroad is finding balance. In a foreign nation, it is simple to overindulge in leisure activities and neglect work. You can be tempted to spend a little too much time off the clock by new delicacies, new attractions, and new people.

Establish limits between working hours and exploration hours to ensure that you finish your work. The top digital nomads adhere to rigid schedules to make sure they complete everything. Maybe you split up each day, maybe you devote whole days to one or the other. Choose a strategy and stick to it. By doing this, you can be sure that your task gets done and that you also get to see the place.

Don’t rush while travelling

Going slowly is the ideal approach to balance work and travel while also getting to know places in great depth. Don’t travel to a different city every day. Do not relocate, not even weekly. Consider remaining in one spot for several weeks or even months.

You’ll have plenty of time to establish useful routines and habits while also acquiring a comprehensive understanding of the place you’re in. More than the average tourist, you’ll be able to play tourist, network, go to events, and get a feel for life there. I can’t stress how much I like this. superior quality to quantity!

Check wi-fi

Fast Wi-Fi is essential when working online. Consider the Wi-Fi situation before selecting your location or destinations. Is it simple to get to? Is it quick? Can you purchase a SIM card with trustworthy data?

Be sure to research your destination before you travel because every country and even individual regions within countries vary. This is crucial for anyone who uploads large files when working with video or pictures.

Use nomadlist.com to learn more about the Wi-Fi speeds available in various nations. It’s a fantastic tool for digital nomads and will provide you with the most recent information about the Wi-Fi situation where you’re heading, among many other things.

Additionally, request a screenshot of the Wi-Fi speed from the property owners before renting an Airbnb or a long-term residence. I’ve spent a lot of time searching for good Wi-Fi in various nations, and I can attest that nothing kills productivity like searching for good Wi-Fi all day when you could have it at home right away!

Connecting with locals

(Photo from iStock)

Therefore, be sure to routinely contact with others and break out of your shell. Not only will it be enjoyable, but the networking possibilities could benefit your company.

Visit a neighbouring co-working place as well. There are probably ongoing events worth attending.

VPN is important

You’ll be connecting to Wi-Fi networks all over the place as a digital nomad. If you’re not careful, your banking information, private messages, and email can all be viewed. By using a trustworthy virtual private network (VPN), which hides your online signature to prevent data theft, you can ensure that your information is secure. You must protect your internet data while travelling, just as you would your belongings in a hotel or hostel safe. You may achieve that with the aid of a VPN like TunnelBear.

Noise cancellation earphones

(Photo from iStock)

Invest in a good set of noise-cancelling headphones if you’re easily distracted or if you have a lot of meetings to attend. These headphones are great for working in crowded spaces, such as coworking spaces, as well as on buses or aeroplanes, where there is background noise from the vehicle itself. These are a wise investment if you enjoy quiet while working, especially if you plan on doing so in a variety of unusual locations!

Know the time difference when you travel

Remember to account for time differences if your job necessitates meetings with other individuals. You don’t want to have emails start pouring in as you’re ready to log out for the day, or you don’t want to have to wake up at 4am for a conference call.

You can still travel to remote locations, but you’ll need to let your employees and/or clients know about the time difference. Inform them of your location and the anticipated time of your response. You won’t feel under pressure to get out of bed at odd hours to answer emails or phone calls that way.

Carry a water bottle

(Photo from iStock)

In many parts of the world, drinking tap water is unsafe. Although it might not kill you, it can ruin your digestion for days, weeks, or even months at a time. Although it is a cheap alternative, bottled water is a huge waste of resources. Single-use plastic waste, much of which ends up in the ocean, is a problem in many places throughout the world.

Invest in a reusable bottle with a built-in filter to travel responsibly.  Bring a reusable bottle so you may drink water safely and prevent single-use plastic from being used.

Remember to log off

Being your own employer makes it all too easy to work constantly—checking email intermittently, scheduling projects, and working from home when you should be sleeping (or off sightseeing!). Even though it takes a lot of work to launch a new business, you should always make sure to set limitations. Email is not urgent. Tasks can wait. Maintain your daily schedule. Avoid the pitfall of overworking yourself.

The Internet never sleeps, so give it everything you’ve got. Keep it from controlling you. Considering how easily those “few hours of work” might morph into a full day spent in a café.

Reference:

Nomadic Matt

Searching for the tips to design perfect logo for your business, what are you waiting for?, click on the link below:

How to design a logo that best represents your company

How to Make Money Online

Nowadays, number of ways are available to every person to make money online. Possibilities to achieve the goal of online money making is very high these days. And it does not matter whether you are going for online money as your primary income source or secondary This article will demonstrate a few simple methods for fast making money.

Taking surveys

(Photo from iStock)

By completing online surveys, you can make $50 to $100 per month in cash and merchandise. Search online for “paid survey sites” to find survey providers. To improve your chances of being chosen for surveys with bigger pay-outs, register with many survey sites. To respond fast to survey offers, register with an email address and make it a habit to check your inbox frequently.

The majority of polls pay between $1 and $3 and might take up to 45 minutes to complete. Additionally, you might get compensated with gift cards, complimentary goods, or entries into sweepstakes.

Never pay a fee to take a survey.

To ensure that they are not selling your personal information, look for a privacy policy that is publicly stated on the website that is very essential when you begin the journey of online money making.

Testing website

(Photo from iStock)

Remote usability testing is receiving payment to explore a website for the first time while providing comments to the website operator. The majority of exams last around 15 minutes, and you can get paid up to $10 for each one. On the client’s website, you play out a scenario and record yourself executing it as part of a test. You might be required, for instance, to choose and purchase a product from a retailer’s website.

An updated web browser, a computer with a microphone, and a fast internet connection are required. User Testing, WhatUsersDo, UserLytics, and UserFeel are websites that pay you to test websites.

Teaching students

The flexibility of employing an online tutor is preferred by many families. Depending on your education, you might only be assisting a child with their homework or you might be offering college-level assistance. You must have a personal computer and fast internet. Some call for “strong experience,” while others demand a certain level of education.

Some businesses will assign you pupils, while others will display your profile online and let visitors choose you. Depending on your educational experience and the subject you teach, you might earn between $9 and $30 per hour. Tutor.com, HomeworkHelp.com, Aim4a, and Brainfuse are among the websites that employ elementary-level tutors.

Understanding niche website

(Photo from iStock)

Target of the niche website is to concentrate on the niche subject to its entirety. The number of monthly visits to successful niche websites ranges from 1,000 to 10,000. By creating material around a specific term, you can get passive revenue through Google Adsense or affiliate links.

Finding profitable niche

Start with your interests and as many speciality topics as you can. Think about the topics that people would research online. The list can contain challenges like debt relief, phobias like spiders or public speaking, and passions like bodybuilding or surfing. Conduct keyword research to determine the level of interest in the topic. Check to see if the keyword already has a domain name that exactly matches it. Use a keyword tool to carry out keyword research.

Creating a site

Go with a platform for constructing websites, like WordPress, Joomla, or Drupal. Following that, pick a domain name and web hosting for your website. Your website address is the domain name. Your website is linked to the internet by a service called web hosting. Go to your hosting account’s control panel and install your website platform once you have a domain name and web hosting. Choose and install a theme to help you design your website. Bluehost and WPEngine are two well-known web hosts. This is the popular way of making money online.

Creating content

Create informative material that will appeal to readers and improve your search engine rating. By conducting keyword research, you could discover what topics people are looking for. Provide content on these topics to improve your search engine ranking. You cannot monetize if you have no clients.

For keyword research, make use of a programme like Market Samurai. Promote your website with adverts to attract more visitors. Utilise social media sites like Facebook and Twitter to create a marketing campaign.

Monetize your site

(Photo from iStock)

To monetize your website, pick from a variety of ways. You can place advertisements on your website and get paid when users click the adverts. You can also advertise goods, whether they are yours or belong to someone else, and get compensated when customers make purchases.

With Google Adsense, you add some code to your website so that advertisements can run there. When users click the adverts, you get compensated. Additionally, you can charge for website advertising space. You can promote products for your niche by using affiliate marketing. On your website, there is a link or banner promoting the product. You will be compensated if customers click on it and buy something.

Consider your expertise

You’ll find that you have more knowledge to write about than you might imagine if you take the time to think back on your experiences. List three things about yourself that best describe you, such as your profession, a unique pastime, or a characteristic. These three things that, for example, religion, education, or charitable work, motivate you. List three more of your aspirations, such as getting married, going on a trip, or spending more time with your kids. You should find plenty of things to write about from these three lists.

Finding work

When you initially start out, you might have to accept writing assignments on subjects that don’t particularly interest you. You must be willing to accept jobs that might not be in your preferred field. Additionally, maintain an open mind. But as you continue to write, you not only learn about new topics. Meanwhile,  you also build up your credibility. As time goes on, you can start to be pickier about the assignments you accept.

Find websites that recruit freelancers to perform work online by searching the internet in that way you can make money online.

Reference:

wikiHow

Searching for the tips to design perfect logo for your business, what are you waiting for?, click on the link below:

How to design a logo that best represents your company


How to Throw Dinner Parties

Progressive dinner parties can be the ideal answer if you enjoy hosting dinner parties but detest the stress involved. A progressive dinner, sometimes known as a safari supper, consists of numerous dishes, each of which is served by a different host in a different residence. Although it takes a little more preparation, the enjoyable and cooperative experience is typically well worth it! Learn how to host a progressive dinner party that goes as smoothly as Hollandaise sauce by reading on.

Prepare guest list

(Photo from iStock)

The guests are the most significant aspect of any dinner parties, and progressive dinner parties are no exception! Make sure to invite everyone if you’re organising an event for your neighbourhood. Try to choose people that know each other or will get along well if you’re just looking for a relaxing evening with pals.

Take into account the size of the homes where the party will be held. Most homes can only comfortably accommodate twelve people, and many apartments are much smaller. Create a plan for it.

Consider dividing the attendees into teams of a manageable size (six to twelve) if you want to give a larger party (maybe for the neighbourhood or a major club).

Choosing your hosts

The majority of progressive dinners feature three to four courses, each with a host. When choosing your hosts, you might want to think about many things, such as whether or not their residences are similar in size. Will they all have room for your visitors?

…Are they trustworthy? Are they within walking distance of one another? You want hosts who will remember the celebration and put effort into their part. Do they, instead, have sufficient parking nearby so that visitors might drive or take public transportation?

…is the homes ADA compliant? It is advisable to ensure sure visitors with mobility issues can enter the homes they visit if you have guests.

Select any theme

(Photo from iStock)

Choosing the meal, music, and decorations according to a theme can be very simple. Think about cultural or historical themes (such as Valley of the Dolls or Game of Thrones), holiday themes (such as Friendsgiving or Talk Like a Pirate Day), or even foreign themes (such as Italian or Indian).

Brainstorming menu

While you don’t have to commit to it just yet, you should have a sense of what complements what. Otherwise, instead of a meal that is more cohesive, you can find yourself serving a cheese plate as an appetiser, pizza as the main dish, and milkshakes as the dessert.

Finalizing drinks

(Photo from iStock)

If you’re on a tight budget, tell visitors to bring their own. If the hosts are up for it, they could also provide a few bottles of wine or something similar as an alternative. But in reality, a progressive dinner is more about the food and the people than it is about the alcohol.

Sending invitations

Make sure all the details are in written so your attendees have something to refer to. These can be paper invites, a plain text email, or a link to an event-planning service like Event Brite or Signup Genius. Include the timings and locations of each host’s home, an RSVP request, and a question regarding dietary restrictions.

Make sure who’s coming

(Photo from iStock)

In particular for the host who will be serving the main dish, you want to have a precise count of attendees. Additionally, you should make sure that visitors are aware of the travel and scheduling expectations.

The best method for this is a short phone call or SMS. Say something like, “Hello, my name is Sarah, and I really hope to see you at the progressive dinner on Sunday at 7! Tell me if you’re available.

Follow up with the hosts

Make sure each host is aware of the final guest count and is still prepared to host their portion of the dinner after taking a count of the attendees. It’s crucial to give the hosts a sense of inclusion and gratitude. They should receive assistance because they are your partners.

Verify that there is enough seating in each residence for the expected number of visitors. It’s a good idea to have a few folding chairs on hand.

Inquire whether the hosts require assistance with non-perishables like dishes, ice, decorations, and playlists.

Think about creating a group playlist on Apple Music, Google Music, or Spotify.

Test tun between houses

Practise driving or walking between the hosts’ homes at the time of day when the party is scheduled to begin. Consider traffic, lighting, and other safety hazards so that you are prepared to alert your guests if pavement work is taking place on a dark street.

Clean your place

(Photo from iStock)

It’s important for people to be able to move about, sit down and use the loo. Make sure the restrooms are close by and that there is access for people with disabilities. Rearrange the furnishings according to your setup’s needs. Store goods safely yet easily accessible so that you’ll be ready if you ever run out of something. You must be able to use the space, too!

It’s just going to get messy to some point. Therefore, despite the fact that you ought to have a clean table, toilet, and floor, hold off on using your toothbrush to scrub away years’ worth of dirt. After the party, when you’re already on your hands and knees cleaning up blobs of eerie sticky goo, you can do that.

Arriving early

To ensure that your guests arrive on time at each stop, be ready to shuffle them along. After one last check-in with the hosts, be ready to enjoy the party!

Clearing the dishes is one clever technique to tidy up while you’re out and about. However, don’t go too far out of your way—you’re there to have fun.

It probably go without saying, but try not to get so wasted that you can’t lead others if necessary!

Helping when necessary

As you assist them with clean-up, think about buying them each a modest gift (such as flowers or wine) to say thanks. You can all relax and munch on the leftover cheese if you’re all in the mood to do so.

Reference:

wikiHow

Want to do a meal prep, what are you waiting, go check some amazing ideas for meal prepping, click on the link below:

How to do your meal prepping routine


Homebrewed Beer

(Photo from iStock)

Making your own beer at home is simple, affordable, enjoyable, and will almost certainly result in a beverage that is far superior to that tasteless canned beer. Your beer mates will start to think of you as Bacchus! We’ll outline the fundamental procedures for getting started and demonstrate how to develop your abilities and increase the number of beer variants you can brew.

Cleanliness is the secret

Any seasoned brewer will tell you that cleanliness is 80% of the formula for success. Clean and disinfect everything that will come in contact with your beer thoroughly. Using an electric dishwasher set to the high heat setting or a powdered cleaner like PBW (Powdered Brewery Wash) are the two simplest ways to accomplish this.

Use a scrubber that won’t scratch the surface of whatever it is you are cleaning because bacteria love to thrive in the grooves left behind and are nearly impossible to sanitise. Thoroughly rinse before taking a quick soak in a bleach or iodine solution.

Rinse everything properly

(Photo from iStock)

Use incredibly clean potable or distilled water to rinse off bleach before using objects. Never assume that tap water is sterile when using it to rinse brewing equipment.

If you’re using bleach to sanitise, mix one ounce (30ml) of bleach with one ounce (30ml) of white vinegar in five gallons (19 litres) of cold water. Before adding the vinegar and bleach to the water, do not combine them. The vinegar will increase the water’s acidity, allowing the bleach to sanitise more effectively.

Iodine solutions shouldn’t be rinsed; instead, let equipment drip dry.

Be aware that bleach can impart undesirable flavours to your beer and that it must be rinsed, which exposes your sterilised equipment to germs.

Take bote before starting

Get a notebook and start recording everything you do before you start home brewing, including the cleaning procedure, the yeast strain, the quantity and kind of malt, the type of hops, and any speciality grains or additional additives.

This will enable you to duplicate any particular brew or provide you a starting point for exploration and development.

Steeping grain

(Photo from iStock)

Put any speciality grains in a grain bag (a mesh bag to retain the grains; similar to a tea bag, but much larger) and steep them for about 30 minutes in the large stock pot with three gallons (10 litres) of very hot water that is around 150°F (66°C).

Take out the grains and let the water fall into the saucepan from the grain bag. Squeezing the bag could cause tannins to be extracted, which would give your beer an astringent flavour.

Add malt extract and boil everything

The timings will be specified for you in the instructions included with the kit for your particular style of beer. Hops are typically added at various intervals to provide flavour, bitterness, or aroma.

Generally speaking, early addition of hops to the boil will result in a greater bitterness contribution at the price of flavour and aroma. The flavour and aroma of hops added towards the end of the boil will be more noticeable, but they won’t considerably increase the beer’s bitterness.

If you want your beer to taste more vibrant and less bitter, think about dry hopping it.

Chilling your wort

The liquid, which is referred to as wort and is pronounced “wrt,” must be immediately cooled after it has boiled. The simplest method is to submerge the entire pot in an ice-filled washbasin or bathtub.

While you can gently stir the wort to hasten cooling, avoid splashing or aerating it while it’s still hot (this can result in weird flavours).

You are prepared to transfer it to the fermenter once it reaches about 80°F (27°C).

Pouring cooled water into fermenter

(Photo from iStock)

Splashing should only be encouraged after the wort has cooled and before fermentation begins. Splashing the wort as you pour it into the fermenter will provide the oxygen that the yeast needs to grow.

You should limit exposure to air once fermentation has begun because it will result in off flavours and odours.

Scoop out the hops using a large strainer—you’ve already extracted all the beneficial components—which is typically found at restaurant supply stores. Strain the wort as you pour it into the carboy if using one.

To make five gallons (20 litres), add water. Now that you are prepared, “pitch” (add) the yeast.

Prepare for bottling

The activity from the airlock will eventually come to a standstill after about a week. Two weeks should pass since the beginning of the brewing or fermentation process. It’s now time to put the beer in bottles. Most likely, your kit included priming sugar or DME (dry malt extract). Once your beer is in the bottle, this is used to give it carbonation.

Heat up some sugar in some water, then let it cool. Then, add it to your fermented beer or the empty, clean, and sanitised bucket with the spigot.

Transferring brew

Use the cleaned and sanitised plastic tubing as a syphon to move the beer as gently as you can from the fermenter to the bottling bucket that has the priming sugar solution in it, ensuring that there is little to no aeration. Try to avoid getting any trub (fermenter sediment) into the bucket used for bottling.

Your cleaned and sanitised bottle filler should be connected to your clean and sanitised plastic tubing, with the other end of the tubing connecting to the spigot’s bottom end. (It’s crucial to allow the fermented beer to settle after adding the priming sugar solution if you’re using just one bucket. The beer will taste sour because of the trub (sediment) on the bottom.

Clean and sanitized bottles

(Photo from iStock)

Simply open the spigot on the bottling bucket and pour the bottle filler into a bottle. Beer will flow if the bottle filler is pushed to the bottom.

If utilising the one bucket technique, place the bottle filler in a glass, bottle or the sink. Press down to allow the water flow out. And the beer will begin to flow in the tube like a syphon. Fill the tube (connected to the bottle filler) with water. Place the open end in the fermented beer, and place the bottle filler in one of these locations.

Reference:

wikiHow

Want to do a meal prep, what are you waiting, go check some amazing ideas for meal prepping, click on the link below:

How to do your meal prepping routine