All posts by Aarshiya Jaidka

Snuffly Facts About Calicos

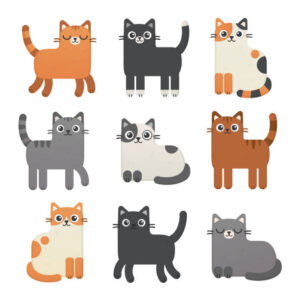
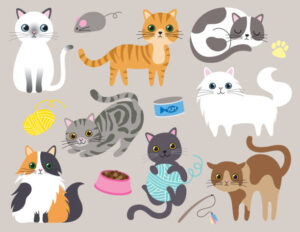
The distinctive coat pattern of a Calicos cat consists of white, black, and orange or red patches. They are distinctive and stunning due to their fascinating and brilliant coat colours. They are a favourite among cat lovers and aficionados worldwide due to their stunning patterns and colour combinations.

Exploring the world of Calico cats reveals a tapestry of wonder and appeal, whether you’re just interested or thinking about bringing one into your house. We explore a number of Calico cat facts in this article in the hopes that they will increase your admiration for them.

They are not a breed

Cats with the calico pattern exhibit a particular set of traits. The X chromosome and the genes that control coat colour are crucial to the genetics of Calico cats. Male cats have one X and one Y chromosome (XY), while female cats have two X chromosomes (XX).

Calico cats are virtually exclusively female since the gene that determines their orange coat colour is on the X chromosome.

Variations in coat pattern

Calico cats also have a variety of coat patterns, including the traditional “brindle” pattern, in which the colours mingle to create a mottled appearance. The “tortoiseshell” or “tortie” pattern, in which the colours merge more haphazardly, is another common design.

Their tri-coloured coat may also be covered in tabby patterns, solid colour patches, or both. their colour and pattern is unique. The tri-color coat pattern of white, black, and orange or red patches is the most noticeable characteristic of calico cats.

These colours are distributed in a way that gives an eye-catching, distinctive appearance. Each cat has a distinctive design as a result of the large range of colour options. While some Calico cats may have bold colour patches, others may have more subtle patterns. For instance, some cats will have 25% to 75% of their bodies covered in a single colour.

Colors and geographical location

(Photo from iStock)

According on their area, calico cats may have varying coat colours. For instance, white, black, and orange/red patches make up the majority of the American classic Calico pattern. Due to variances in coat colour genetically, Calico cats in various European nations, however, may have blue or cream patches instead of orange/red patches.

Calico is a fur

The term “calico” refers to the plain cotton that was bleached, coloured, and printed in a variety of patterns in the Indian port city of Calicut. The fabric would eventually arrive in Northern America. The two-color prints were the most prevalent pattern on the clothing. Calico cats earned their name because people frequently described them as having “calico” fur.

Good luck

(Photo from iStock)

In certain traditions, calico cats considered an omen of success and wealth. They are known as “Maneki-Neko” or “beckoning cat” in Japanese, and are viewed as lucky and prosperous emblems.

Calicos are not limited to regions. Cats with calico patterns are not restricted to a particular area and are common around the world. Although they are frequently linked to North America, you can also probably find them in Europe and Asia.

Male Calicos

In males, there is only one X chromosome. Only one colour gene—orange or black—can be inherited; not both. They can only have an orange or black coat as a result.

There are male Calico cats, though. The cats are typically sterile and have chromosomal abnormalities, and this only occasionally occurs. These boys have Klinefelter syndrome, a disorder marked by an extra X chromosome (XXY). A tri-color pattern results from the inheritance of two distinct coat colour genes made possible by the extra X chromosome.

Conversation starters

(Photo from iStock)

The distinctive and striking appearance of calico cats frequently draws admiration. If you have a cat that looks cool, don’t be surprised if people ask you where you got it or just want to talk to you. Having a Calico cat can lead to interesting conversations and friendships with other cat enthusiasts, whether you’re out for a stroll or hosting visitors at your house.

Cultural significance

Having a Calico cat can enhance the romance and mystique of the relationship for individuals who understand its symbolism and cultural value. If someone else compares your cat to a kind-hearted witch full of luck, don’t take it personally.

Their fame in Maryland

(Photo from iStock)

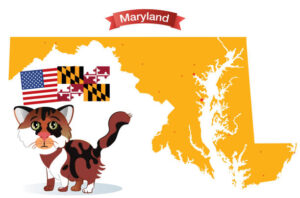
Since 2001, Maryland has designated the Calico cat as its official feline. This choice was based on the cat’s unusual fur pattern, which resembles the Baltimore oriole, the state bird. The cat’s coloration resembles the baseball team the Baltimore Orioles. This is another reason why some people think the cats would bring luck to the squad.

Cats with the distinctive tri-color coat patterns and alluring personality of calicos are interesting creatures. They are a source of fascination and appreciation because to their distinctive genetic make-up and complex coat colour inheritance. These adorable creatures also hold a particular place in the hearts of many pet lovers around the world due to their scarcity and cultural meaning.

In addition, calico cats have made an impact on literature, history, and popular culture. Through viral videos, they even rose to internet celebrity while inspiring writers and artists.

Calico cats continue to attract and enchant individuals who accept them into their lives, regardless of whether you recognise their genetic marvel, cultural significance, or charming disposition.

Calicos and famous people

The adored Calico cat of well-known British author and poet T.S. Eliot was named Marzipan. As he created “Old Possum’s Book of Practical Cats,” his renowned collection of poetry, Eliot used her as his muse and source of inspiration. Later, the poems served as the inspiration for the successful musical “Cats.”

George Herriman’s well-known cartoon cat, “Krazy Kat” There was a Calico cat in the universe of the same-named comic strips. With Krazy Kat’s unpredictable escapades at its core, the comic strip, which ran from 1913 until 1944, was renowned for its poetic storytelling and surrealist storytelling.

Reference:

Excited Cats

Searching for the tips to design perfect logo for your business, what are you waiting for?, click on the link below:

How to design a logo that best represents your company

Living the Digital Nomad Lifestyle

Contrary to what you might think, you shouldn’t suddenly quit your work and start living as a digital nomad. While it may be tempting to forgo prudence and dive headfirst into this novel and thrilling experience, starting before you leave home is a much better strategy.

The majority of businesses need a few months to begin turning a profit (and blogs can take years). I wouldn’t advise starting your new digital nomad job while travelling unless you have a significant amount of savings to live off of. Do it initially at home. Create a clientele so that you can start making money before you go. You won’t experience anxiety trying to start a business and travel the world that way.

Work and travel

(Photo from iStock)

The hardest part about working remotely abroad is finding balance. In a foreign nation, it is simple to overindulge in leisure activities and neglect work. You can be tempted to spend a little too much time off the clock by new delicacies, new attractions, and new people.

Establish limits between working hours and exploration hours to ensure that you finish your work. The top digital nomads adhere to rigid schedules to make sure they complete everything. Maybe you split up each day, maybe you devote whole days to one or the other. Choose a strategy and stick to it. By doing this, you can be sure that your task gets done and that you also get to see the place.

Don’t rush while travelling

Going slowly is the ideal approach to balance work and travel while also getting to know places in great depth. Don’t travel to a different city every day. Do not relocate, not even weekly. Consider remaining in one spot for several weeks or even months.

You’ll have plenty of time to establish useful routines and habits while also acquiring a comprehensive understanding of the place you’re in. More than the average tourist, you’ll be able to play tourist, network, go to events, and get a feel for life there. I can’t stress how much I like this. superior quality to quantity!

Check wi-fi

Fast Wi-Fi is essential when working online. Consider the Wi-Fi situation before selecting your location or destinations. Is it simple to get to? Is it quick? Can you purchase a SIM card with trustworthy data?

Be sure to research your destination before you travel because every country and even individual regions within countries vary. This is crucial for anyone who uploads large files when working with video or pictures.

Use nomadlist.com to learn more about the Wi-Fi speeds available in various nations. It’s a fantastic tool for digital nomads and will provide you with the most recent information about the Wi-Fi situation where you’re heading, among many other things.

Additionally, request a screenshot of the Wi-Fi speed from the property owners before renting an Airbnb or a long-term residence. I’ve spent a lot of time searching for good Wi-Fi in various nations, and I can attest that nothing kills productivity like searching for good Wi-Fi all day when you could have it at home right away!

Connecting with locals

(Photo from iStock)

Therefore, be sure to routinely contact with others and break out of your shell. Not only will it be enjoyable, but the networking possibilities could benefit your company.

Visit a neighbouring co-working place as well. There are probably ongoing events worth attending.

VPN is important

You’ll be connecting to Wi-Fi networks all over the place as a digital nomad. If you’re not careful, your banking information, private messages, and email can all be viewed. By using a trustworthy virtual private network (VPN), which hides your online signature to prevent data theft, you can ensure that your information is secure. You must protect your internet data while travelling, just as you would your belongings in a hotel or hostel safe. You may achieve that with the aid of a VPN like TunnelBear.

Noise cancellation earphones

(Photo from iStock)

Invest in a good set of noise-cancelling headphones if you’re easily distracted or if you have a lot of meetings to attend. These headphones are great for working in crowded spaces, such as coworking spaces, as well as on buses or aeroplanes, where there is background noise from the vehicle itself. These are a wise investment if you enjoy quiet while working, especially if you plan on doing so in a variety of unusual locations!

Know the time difference when you travel

Remember to account for time differences if your job necessitates meetings with other individuals. You don’t want to have emails start pouring in as you’re ready to log out for the day, or you don’t want to have to wake up at 4am for a conference call.

You can still travel to remote locations, but you’ll need to let your employees and/or clients know about the time difference. Inform them of your location and the anticipated time of your response. You won’t feel under pressure to get out of bed at odd hours to answer emails or phone calls that way.

Carry a water bottle

(Photo from iStock)

In many parts of the world, drinking tap water is unsafe. Although it might not kill you, it can ruin your digestion for days, weeks, or even months at a time. Although it is a cheap alternative, bottled water is a huge waste of resources. Single-use plastic waste, much of which ends up in the ocean, is a problem in many places throughout the world.

Invest in a reusable bottle with a built-in filter to travel responsibly.  Bring a reusable bottle so you may drink water safely and prevent single-use plastic from being used.

Remember to log off

Being your own employer makes it all too easy to work constantly—checking email intermittently, scheduling projects, and working from home when you should be sleeping (or off sightseeing!). Even though it takes a lot of work to launch a new business, you should always make sure to set limitations. Email is not urgent. Tasks can wait. Maintain your daily schedule. Avoid the pitfall of overworking yourself.

The Internet never sleeps, so give it everything you’ve got. Keep it from controlling you. Considering how easily those “few hours of work” might morph into a full day spent in a café.

Reference:

Nomadic Matt

Searching for the tips to design perfect logo for your business, what are you waiting for?, click on the link below:

How to design a logo that best represents your company

How to Make Money Online

Nowadays, number of ways are available to every person to make money online. Possibilities to achieve the goal of online money making is very high these days. And it does not matter whether you are going for online money as your primary income source or secondary This article will demonstrate a few simple methods for fast making money.

Taking surveys

(Photo from iStock)

By completing online surveys, you can make $50 to $100 per month in cash and merchandise. Search online for “paid survey sites” to find survey providers. To improve your chances of being chosen for surveys with bigger pay-outs, register with many survey sites. To respond fast to survey offers, register with an email address and make it a habit to check your inbox frequently.

The majority of polls pay between $1 and $3 and might take up to 45 minutes to complete. Additionally, you might get compensated with gift cards, complimentary goods, or entries into sweepstakes.

Never pay a fee to take a survey.

To ensure that they are not selling your personal information, look for a privacy policy that is publicly stated on the website that is very essential when you begin the journey of online money making.

Testing website

(Photo from iStock)

Remote usability testing is receiving payment to explore a website for the first time while providing comments to the website operator. The majority of exams last around 15 minutes, and you can get paid up to $10 for each one. On the client’s website, you play out a scenario and record yourself executing it as part of a test. You might be required, for instance, to choose and purchase a product from a retailer’s website.

An updated web browser, a computer with a microphone, and a fast internet connection are required. User Testing, WhatUsersDo, UserLytics, and UserFeel are websites that pay you to test websites.

Teaching students

The flexibility of employing an online tutor is preferred by many families. Depending on your education, you might only be assisting a child with their homework or you might be offering college-level assistance. You must have a personal computer and fast internet. Some call for “strong experience,” while others demand a certain level of education.

Some businesses will assign you pupils, while others will display your profile online and let visitors choose you. Depending on your educational experience and the subject you teach, you might earn between $9 and $30 per hour. Tutor.com, HomeworkHelp.com, Aim4a, and Brainfuse are among the websites that employ elementary-level tutors.

Understanding niche website

(Photo from iStock)

Target of the niche website is to concentrate on the niche subject to its entirety. The number of monthly visits to successful niche websites ranges from 1,000 to 10,000. By creating material around a specific term, you can get passive revenue through Google Adsense or affiliate links.

Finding profitable niche

Start with your interests and as many speciality topics as you can. Think about the topics that people would research online. The list can contain challenges like debt relief, phobias like spiders or public speaking, and passions like bodybuilding or surfing. Conduct keyword research to determine the level of interest in the topic. Check to see if the keyword already has a domain name that exactly matches it. Use a keyword tool to carry out keyword research.

Creating a site

Go with a platform for constructing websites, like WordPress, Joomla, or Drupal. Following that, pick a domain name and web hosting for your website. Your website address is the domain name. Your website is linked to the internet by a service called web hosting. Go to your hosting account’s control panel and install your website platform once you have a domain name and web hosting. Choose and install a theme to help you design your website. Bluehost and WPEngine are two well-known web hosts. This is the popular way of making money online.

Creating content

Create informative material that will appeal to readers and improve your search engine rating. By conducting keyword research, you could discover what topics people are looking for. Provide content on these topics to improve your search engine ranking. You cannot monetize if you have no clients.

For keyword research, make use of a programme like Market Samurai. Promote your website with adverts to attract more visitors. Utilise social media sites like Facebook and Twitter to create a marketing campaign.

Monetize your site

(Photo from iStock)

To monetize your website, pick from a variety of ways. You can place advertisements on your website and get paid when users click the adverts. You can also advertise goods, whether they are yours or belong to someone else, and get compensated when customers make purchases.

With Google Adsense, you add some code to your website so that advertisements can run there. When users click the adverts, you get compensated. Additionally, you can charge for website advertising space. You can promote products for your niche by using affiliate marketing. On your website, there is a link or banner promoting the product. You will be compensated if customers click on it and buy something.

Consider your expertise

You’ll find that you have more knowledge to write about than you might imagine if you take the time to think back on your experiences. List three things about yourself that best describe you, such as your profession, a unique pastime, or a characteristic. These three things that, for example, religion, education, or charitable work, motivate you. List three more of your aspirations, such as getting married, going on a trip, or spending more time with your kids. You should find plenty of things to write about from these three lists.

Finding work

When you initially start out, you might have to accept writing assignments on subjects that don’t particularly interest you. You must be willing to accept jobs that might not be in your preferred field. Additionally, maintain an open mind. But as you continue to write, you not only learn about new topics. Meanwhile,  you also build up your credibility. As time goes on, you can start to be pickier about the assignments you accept.

Find websites that recruit freelancers to perform work online by searching the internet in that way you can make money online.

Reference:

wikiHow

Searching for the tips to design perfect logo for your business, what are you waiting for?, click on the link below:

How to design a logo that best represents your company


How to Throw Dinner Parties

Progressive dinner parties can be the ideal answer if you enjoy hosting dinner parties but detest the stress involved. A progressive dinner, sometimes known as a safari supper, consists of numerous dishes, each of which is served by a different host in a different residence. Although it takes a little more preparation, the enjoyable and cooperative experience is typically well worth it! Learn how to host a progressive dinner party that goes as smoothly as Hollandaise sauce by reading on.

Prepare guest list

(Photo from iStock)

The guests are the most significant aspect of any dinner parties, and progressive dinner parties are no exception! Make sure to invite everyone if you’re organising an event for your neighbourhood. Try to choose people that know each other or will get along well if you’re just looking for a relaxing evening with pals.

Take into account the size of the homes where the party will be held. Most homes can only comfortably accommodate twelve people, and many apartments are much smaller. Create a plan for it.

Consider dividing the attendees into teams of a manageable size (six to twelve) if you want to give a larger party (maybe for the neighbourhood or a major club).

Choosing your hosts

The majority of progressive dinners feature three to four courses, each with a host. When choosing your hosts, you might want to think about many things, such as whether or not their residences are similar in size. Will they all have room for your visitors?

…Are they trustworthy? Are they within walking distance of one another? You want hosts who will remember the celebration and put effort into their part. Do they, instead, have sufficient parking nearby so that visitors might drive or take public transportation?

…is the homes ADA compliant? It is advisable to ensure sure visitors with mobility issues can enter the homes they visit if you have guests.

Select any theme

(Photo from iStock)

Choosing the meal, music, and decorations according to a theme can be very simple. Think about cultural or historical themes (such as Valley of the Dolls or Game of Thrones), holiday themes (such as Friendsgiving or Talk Like a Pirate Day), or even foreign themes (such as Italian or Indian).

Brainstorming menu

While you don’t have to commit to it just yet, you should have a sense of what complements what. Otherwise, instead of a meal that is more cohesive, you can find yourself serving a cheese plate as an appetiser, pizza as the main dish, and milkshakes as the dessert.

Finalizing drinks

(Photo from iStock)

If you’re on a tight budget, tell visitors to bring their own. If the hosts are up for it, they could also provide a few bottles of wine or something similar as an alternative. But in reality, a progressive dinner is more about the food and the people than it is about the alcohol.

Sending invitations

Make sure all the details are in written so your attendees have something to refer to. These can be paper invites, a plain text email, or a link to an event-planning service like Event Brite or Signup Genius. Include the timings and locations of each host’s home, an RSVP request, and a question regarding dietary restrictions.

Make sure who’s coming

(Photo from iStock)

In particular for the host who will be serving the main dish, you want to have a precise count of attendees. Additionally, you should make sure that visitors are aware of the travel and scheduling expectations.

The best method for this is a short phone call or SMS. Say something like, “Hello, my name is Sarah, and I really hope to see you at the progressive dinner on Sunday at 7! Tell me if you’re available.

Follow up with the hosts

Make sure each host is aware of the final guest count and is still prepared to host their portion of the dinner after taking a count of the attendees. It’s crucial to give the hosts a sense of inclusion and gratitude. They should receive assistance because they are your partners.

Verify that there is enough seating in each residence for the expected number of visitors. It’s a good idea to have a few folding chairs on hand.

Inquire whether the hosts require assistance with non-perishables like dishes, ice, decorations, and playlists.

Think about creating a group playlist on Apple Music, Google Music, or Spotify.

Test tun between houses

Practise driving or walking between the hosts’ homes at the time of day when the party is scheduled to begin. Consider traffic, lighting, and other safety hazards so that you are prepared to alert your guests if pavement work is taking place on a dark street.

Clean your place

(Photo from iStock)

It’s important for people to be able to move about, sit down and use the loo. Make sure the restrooms are close by and that there is access for people with disabilities. Rearrange the furnishings according to your setup’s needs. Store goods safely yet easily accessible so that you’ll be ready if you ever run out of something. You must be able to use the space, too!

It’s just going to get messy to some point. Therefore, despite the fact that you ought to have a clean table, toilet, and floor, hold off on using your toothbrush to scrub away years’ worth of dirt. After the party, when you’re already on your hands and knees cleaning up blobs of eerie sticky goo, you can do that.

Arriving early

To ensure that your guests arrive on time at each stop, be ready to shuffle them along. After one last check-in with the hosts, be ready to enjoy the party!

Clearing the dishes is one clever technique to tidy up while you’re out and about. However, don’t go too far out of your way—you’re there to have fun.

It probably go without saying, but try not to get so wasted that you can’t lead others if necessary!

Helping when necessary

As you assist them with clean-up, think about buying them each a modest gift (such as flowers or wine) to say thanks. You can all relax and munch on the leftover cheese if you’re all in the mood to do so.

Reference:

wikiHow

Want to do a meal prep, what are you waiting, go check some amazing ideas for meal prepping, click on the link below:

How to do your meal prepping routine


Homebrewed Beer

(Photo from iStock)

Making your own beer at home is simple, affordable, enjoyable, and will almost certainly result in a beverage that is far superior to that tasteless canned beer. Your beer mates will start to think of you as Bacchus! We’ll outline the fundamental procedures for getting started and demonstrate how to develop your abilities and increase the number of beer variants you can brew.

Cleanliness is the secret

Any seasoned brewer will tell you that cleanliness is 80% of the formula for success. Clean and disinfect everything that will come in contact with your beer thoroughly. Using an electric dishwasher set to the high heat setting or a powdered cleaner like PBW (Powdered Brewery Wash) are the two simplest ways to accomplish this.

Use a scrubber that won’t scratch the surface of whatever it is you are cleaning because bacteria love to thrive in the grooves left behind and are nearly impossible to sanitise. Thoroughly rinse before taking a quick soak in a bleach or iodine solution.

Rinse everything properly

(Photo from iStock)

Use incredibly clean potable or distilled water to rinse off bleach before using objects. Never assume that tap water is sterile when using it to rinse brewing equipment.

If you’re using bleach to sanitise, mix one ounce (30ml) of bleach with one ounce (30ml) of white vinegar in five gallons (19 litres) of cold water. Before adding the vinegar and bleach to the water, do not combine them. The vinegar will increase the water’s acidity, allowing the bleach to sanitise more effectively.

Iodine solutions shouldn’t be rinsed; instead, let equipment drip dry.

Be aware that bleach can impart undesirable flavours to your beer and that it must be rinsed, which exposes your sterilised equipment to germs.

Take bote before starting

Get a notebook and start recording everything you do before you start home brewing, including the cleaning procedure, the yeast strain, the quantity and kind of malt, the type of hops, and any speciality grains or additional additives.

This will enable you to duplicate any particular brew or provide you a starting point for exploration and development.

Steeping grain

(Photo from iStock)

Put any speciality grains in a grain bag (a mesh bag to retain the grains; similar to a tea bag, but much larger) and steep them for about 30 minutes in the large stock pot with three gallons (10 litres) of very hot water that is around 150°F (66°C).

Take out the grains and let the water fall into the saucepan from the grain bag. Squeezing the bag could cause tannins to be extracted, which would give your beer an astringent flavour.

Add malt extract and boil everything

The timings will be specified for you in the instructions included with the kit for your particular style of beer. Hops are typically added at various intervals to provide flavour, bitterness, or aroma.

Generally speaking, early addition of hops to the boil will result in a greater bitterness contribution at the price of flavour and aroma. The flavour and aroma of hops added towards the end of the boil will be more noticeable, but they won’t considerably increase the beer’s bitterness.

If you want your beer to taste more vibrant and less bitter, think about dry hopping it.

Chilling your wort

The liquid, which is referred to as wort and is pronounced “wrt,” must be immediately cooled after it has boiled. The simplest method is to submerge the entire pot in an ice-filled washbasin or bathtub.

While you can gently stir the wort to hasten cooling, avoid splashing or aerating it while it’s still hot (this can result in weird flavours).

You are prepared to transfer it to the fermenter once it reaches about 80°F (27°C).

Pouring cooled water into fermenter

(Photo from iStock)

Splashing should only be encouraged after the wort has cooled and before fermentation begins. Splashing the wort as you pour it into the fermenter will provide the oxygen that the yeast needs to grow.

You should limit exposure to air once fermentation has begun because it will result in off flavours and odours.

Scoop out the hops using a large strainer—you’ve already extracted all the beneficial components—which is typically found at restaurant supply stores. Strain the wort as you pour it into the carboy if using one.

To make five gallons (20 litres), add water. Now that you are prepared, “pitch” (add) the yeast.

Prepare for bottling

The activity from the airlock will eventually come to a standstill after about a week. Two weeks should pass since the beginning of the brewing or fermentation process. It’s now time to put the beer in bottles. Most likely, your kit included priming sugar or DME (dry malt extract). Once your beer is in the bottle, this is used to give it carbonation.

Heat up some sugar in some water, then let it cool. Then, add it to your fermented beer or the empty, clean, and sanitised bucket with the spigot.

Transferring brew

Use the cleaned and sanitised plastic tubing as a syphon to move the beer as gently as you can from the fermenter to the bottling bucket that has the priming sugar solution in it, ensuring that there is little to no aeration. Try to avoid getting any trub (fermenter sediment) into the bucket used for bottling.

Your cleaned and sanitised bottle filler should be connected to your clean and sanitised plastic tubing, with the other end of the tubing connecting to the spigot’s bottom end. (It’s crucial to allow the fermented beer to settle after adding the priming sugar solution if you’re using just one bucket. The beer will taste sour because of the trub (sediment) on the bottom.

Clean and sanitized bottles

(Photo from iStock)

Simply open the spigot on the bottling bucket and pour the bottle filler into a bottle. Beer will flow if the bottle filler is pushed to the bottom.

If utilising the one bucket technique, place the bottle filler in a glass, bottle or the sink. Press down to allow the water flow out. And the beer will begin to flow in the tube like a syphon. Fill the tube (connected to the bottle filler) with water. Place the open end in the fermented beer, and place the bottle filler in one of these locations.

Reference:

wikiHow

Want to do a meal prep, what are you waiting, go check some amazing ideas for meal prepping, click on the link below:

How to do your meal prepping routine


Things To Prepare For Outdoor Cooking

Outdoor cooking is a delightful culinary adventure that brings us closer to nature and enhances our appreciation for food. Whether you’re grilling in your backyard, camping in the wilderness, or having a picnic at the park, preparing for outdoor cooking is essential to ensure a safe, enjoyable, and delicious experience. In this article, we will explore the key things you need to prepare for outdoor cooking, from choosing the right equipment to planning your menu and ensuring food safety.

Selecting the Right Equipment

  (photo from iStock)

The first step in preparing for outdoor cooking is selecting the appropriate equipment. The choice of equipment will largely depend on your location and the type of outdoor cooking you plan to do. Here are some essential items to consider:

  • Grill or Stove

If you’re planning a barbecue, you’ll need a grill. There are various types of grills to choose from, including charcoal, gas, and electric grills. Charcoal grills offer that classic smoky flavour, while gas grills provide convenience and precise temperature control. Electric grills are ideal for locations where open flames are not allowed. Additionally, portable camping stoves are a great option for outdoor cooking while camping or hiking.

  • Cookware

Pack the necessary cookware, including pots, pans, and utensils. Cast iron skillets are versatile and can be used directly on an open flame or grill. Make sure to choose cookware that can withstand outdoor conditions and is easy to clean.

  • Cooking Utensils

Don’t forget essential cooking utensils like tongs, spatulas, grill brushes, and oven mitts. These tools will make your outdoor cooking experience much more manageable and enjoyable.

  • Fuel and Fire Starters

If you’re using a charcoal grill or campfire, ensure you have enough charcoal or firewood. Don’t forget fire starters or matches to get your fire going. For gas grills, check the propane tank and bring a spare if needed.

  • Cooler and Ice Packs

If you plan to store perishable food items, a cooler and ice packs are essential. Ensure your cooler is clean and in good condition. Consider using separate coolers for food and beverages to prevent cross-contamination.

  • Cutting Boards and Knives

Bring cutting boards and knives for food preparation. It’s a good idea to have a dedicated cutting board for raw meats to prevent cross-contamination.

  • Table and Chairs

To create a comfortable outdoor dining area, bring a folding table and chairs. This will make it easier to prepare and enjoy your outdoor meals.

  • Camping Supplies (if applicable)

If you’re camping, don’t forget camping essentials like a tent, sleeping bags, and camping chairs. These items will ensure a comfortable night’s sleep after a day of outdoor cooking and adventure.

Planning Your Menu

  (photo from iStock)

Once you’ve gathered your outdoor cooking equipment, it’s time to plan your menu. The menu should be tailored to your outdoor setting, the available cooking methods, and your guests’ preferences. Here are some considerations for planning your outdoor cooking menu:

  • Food Selection

Choose foods that are suitable for outdoor cooking. Grilling is perfect for items like burgers, hot dogs, steaks, chicken, and vegetables. For camping, consider easy-to-prepare meals like foil packet dinners or one-pot dishes.

  • Preparation

Prep as much as possible at home to minimize work at the outdoor cooking site. Marinate meats, chop vegetables, and portion out ingredients in advance. This will save time and reduce the need for extensive food preparation in the outdoors.

  • Seasoning and Marinades

Consider flavour profiles that complement the outdoor experience. Experiment with different marinades, rubs, and seasonings to enhance the taste of your dishes. Ziplock bags or airtight containers are handy for transporting marinated meats.

Sides and Accompaniments

  (photo from iStock)

Don’t forget about side dishes and accompaniments like salads, bread, and condiments. These can elevate your outdoor meal and provide variety.

  • Allergies and Dietary Restrictions

Take into account any allergies or dietary restrictions your guests may have. Offer alternative menu options to accommodate everyone’s needs.

  • Packaging and Storage

Use airtight containers or resealable bags to store prepped ingredients and cooked food. This helps keep your food fresh and prevents contamination.

  • Beverages

Consider what beverages you’ll serve. Water is essential for staying hydrated, but you can also bring refreshing drinks like lemonade, iced tea, or your favorite beverages.

  • Desserts

Don’t forget about dessert! You can prepare simple treats like s’mores or fruit skewers for a sweet ending to your outdoor meal.

Food Safety

  (photo from iStock)

Food safety is paramount when cooking outdoors. The outdoor environment poses unique challenges, so it’s crucial to follow proper food safety guidelines to prevent foodborne illnesses. Here are some food safety tips:

  • Temperature Control

Maintain proper temperature control for perishable foods. Keep cold foods below 40°F (4°C) in a cooler with ice packs and hot foods above 140°F (60°C) on a grill or stove. Use a food thermometer to ensure meals are cooks.

  • Hand Hygiene

Practice good hand hygiene by washing your hands with soap and clean water before and after handling food. If clean water is not available, use hand sanitizer with at least 60% alcohol.

  • Cross-Contamination

Prevent cross-contamination by using separate cutting boards and utensils for raw and cooked foods. Clean and sanitize surfaces and utensils.

Conclusion

Preparing for outdoor cooking is about more than just picking the right equipment and planning a menu. It’s about embracing the unique experience of cooking in the great outdoors while ensuring the safety of yourself, your guests, and the environment. By following the guidelines outlined in this article, you can make your outdoor cooking adventures not only delicious but also memorable and safe. So, fire up that grill, set up your camp stove, and savour the flavors of outdoor cooking while enjoying the beauty of the natural world. These certain tips are totally subjective, but by considering the methods written above, the job is made quite easier.

Reference

Barebones

Want to do a meal prep, what are you waiting, go check some amazing ideas for meal prepping, click on the link below:

How to do your meal prepping routine


How to Make Your DIY Instant Meal

In today’s fast-paced world, convenience often takes precedence over nutrition, leading many individuals to rely on pre-packaged instant meals. While these meals are convenient, they often lack the nutritional value and flavour that homemade dishes offer. However, with a little planning and preparation, you can create your own DIY instant meals that are not only quick and easy but also packed with flavour and nutrients.

In this article, we will guide you through the process of making your own DIY instant meals. Whether you’re a busy professional, a college student, or just someone looking to simplify mealtime, these homemade instant meals will be your secret weapon for healthy and delicious eating on the go.

Chapter 1: The Benefits of DIY Instant Meals

Before diving into the how-to of making your own DIY instant meals, it’s essential to understand the numerous benefits they offer.

  1. Nutritional Control: One of the biggest advantages of DIY instant meals is that you have complete control over the ingredients. You can choose fresh, whole foods and avoid unhealthy additives, excessive salt, or preservatives commonly found in commercial instant meals.
  2. Cost-Effective: Homemade instant meals are often more budget-friendly than their store-bought counterparts. Buying ingredients in bulk and preparing meals in batches can help you save money in the long run.
  3. Customization: You can tailor DIY instant meals to suit your dietary preferences and restrictions. Whether you’re vegan, gluten-free, or have specific taste preferences, you can create meals that meet your needs.
  4. Flavourful Varieties: Homemade instant meals can be as diverse and flavorful as you desire. Experiment with different cuisines, spices, and ingredients to keep your taste buds excited.
  5. Reduced Waste: Preparing your own instant meals reduces the amount of packaging waste generated by store-bought options, contributing to a more sustainable lifestyle.

Chapter 2: Essential Tools and Ingredients

Before you begin making your DIY instant meals, you’ll need some essential tools and ingredients. Here’s what you’ll need:

Tools:

(Photo from iStock)

  1. Mason Jars or Airtight Containers: These are perfect for storing your DIY instant meals as they keep the ingredients fresh and prevent moisture from seeping in.
  2. Measuring Cups and Spoons: Accurate measurements ensure that your meals turn out consistently every time.
  3. A Vacuum Sealer (Optional): If you want to extend the shelf life of your instant meals, a vacuum sealer can help remove air from the containers, preventing freezer burn and maintaining freshness.
  4. A Stove, Microwave, or Electric Kettle: You’ll need one of these appliances to cook or reheat your instant meals when you’re ready to eat.

Ingredients:

(Photo from iStock)

  1. Grains: Rice, quinoa, couscous, or pasta serve as a great base for many instant meals.
  2. Proteins: Consider dried beans, lentils, freeze-dried meats, or tofu for your protein source.
  3. Vegetables: Freeze-dried or dehydrated vegetables work well in instant meals. You can also use fresh vegetables, but be sure to chop and prep them before assembly.
  4. Spices and Seasonings: Stock up on your favorite spices, herbs, and seasonings to add flavor to your meals.
  5. Sauces and Condiments: Soy sauce, hot sauce, olive oil, and vinegar can enhance the taste of your instant meals.
  6. Nuts and Seeds: Add a crunchy texture and extra nutrition by including nuts or seeds like almonds, cashews, or sunflower seeds.

Chapter 3: DIY Instant Meal Ideas

Now that you have your tools and ingredients ready, let’s explore some DIY instant meal ideas that are easy to prepare and pack a flavourful punch:

  1. Veggie-Packed Instant Noodles:

(a Photo from iStock)

  • Base: Dried ramen noodles or rice noodles.
  • Protein: Tofu cubes or freeze-dried shrimp.
  • Vegetables: Dehydrated mushrooms, bell peppers, and green onions.
  • Seasonings: Soy sauce, sesame oil, and a pinch of red pepper flakes.
  • Extras: Add a small container of miso paste to mix in when you cook it.
  1. Mexican Quinoa Bowl:

(Photo from iStock)

  • Base: Quinoa.
  • Protein: Dried black beans or freeze-dried ground beef.
  • Vegetables: Dehydrated corn, bell peppers, and tomatoes.
  • Seasonings: Taco seasoning, cumin, and chili powder.
  • Extras: A packet of salsa or hot sauce.
  1. Curry Rice Bowl:

(Photo from iStock)

  • Base: White or brown rice.
  • Protein: Freeze-dried chicken or chickpeas.
  • Vegetables: Dehydrated peas, carrots, and bell peppers.
  • Seasonings: Curry powder, turmeric, and coconut milk powder.
  • Extras: A small container of chutney or lime pickle.
  1. Mediterranean Couscous Salad:

(a Photo from iStock)

  • Base: Couscous.
  • Protein: Freeze-dried falafel or feta cheese.
  • Vegetables: Dehydrated cucumber, tomatoes, and olives.
  • Seasonings: Dried oregano, lemon zest, and olive oil.
  • Extras: A separate container of hummus.

Chapter 4: Meal Assembly and Storage

Once you’ve chosen a DIY instant meal idea, it’s time to assemble and store it for future use. Here’s how to do it:

  1. Layering: Start with the base (grains) at the bottom of your mason jar or airtight container. Add your protein source, followed by the vegetables and seasonings. Be creative with your layering to ensure that the flavors meld together well.
  2. Avoid Moisture: Moisture is the enemy of instant meals as it can cause ingredients to spoil or become mushy. To prevent this, add ingredients like sauces or condiments in a separate container or packet.
  3. Storage: Store your DIY instant meals in a cool, dry place away from direct sunlight. If you plan to keep them for an extended period, consider vacuum sealing the containers for added freshness.
  4. Shelf Life: The shelf life of DIY instant meals can vary depending on the ingredients used. Generally, they can last anywhere from a few weeks to several months. Be sure to check for any signs of spoilage, such as an off odor or discoloration, before consuming.

Chapter 5: Cooking and Reheating

When it’s time to enjoy your DIY instant meal, follow these simple steps to cook or reheat it:

             1. Boiling Water Method:

(Photo from iStock)

  • Boil Water: Bring water to  boil.
  • Cook: Pour the contents of your instant meal into a heatproof bowl or container. Carefully add boiling water until the ingredients are fully submerged.
  • Cover and Wait: Seal the container with a lid or plastic wrap and let it sit for the recommended time (usually 5-10 minutes).
  • Stir and Enjoy: After the waiting period, give the meal a good stir, and it’s ready to eat.

             2. Microwave Method:

(Photo from iStock)

  • Transfer the contents of your instant meal container or zip lock bag to a microwave-safe bowl.
  • Add water to the bowl. The amount of water will vary based on your meal, so follow the recipe or package instructions.
  • Microwave on high for the recommended time, usually 2-5 minutes depending on the ingredients.
  • Carefully remove the bowl from the microwave, add your sauces and seasonings, and stir well.

Reference:

The Yummy Life

Want to do a meal prep, what are you waiting, go check some amazing ideas for meal prepping, click on the link below:

How to do your meal prepping routine


Mastering the Art of Replicating Healthy Dishes

In a world where health-conscious eating is becoming increasingly popular, replicating your favorite restaurant dishes or comfort foods in a healthier way is a skill worth mastering. Whether you’re looking to cut down on calories, reduce fat, or increase nutrient content, learning how to replicate a healthy dish can be both satisfying and beneficial for your well-being. This article will guide you through the process, offering valuable insights, tips, and techniques to help you recreate your favorite dishes with a healthier twist.

Choose Your Target Dish Wisely

The first step in replicating a healthy dish is selecting the right recipe or restaurant dish to work with. Consider your dietary goals and preferences. Are you looking to make a classic comfort food healthier, or do you want to recreate a favorite restaurant dish? Once you’ve decided, research the dish thoroughly, including its ingredients, preparation methods, and nutritional information.

Gather Essential Tools and Ingredients

(Photo from iStock)

Before you begin replicating a healthy dish, make sure you have all the necessary tools and ingredients at your disposal.

  • Cooking utensils: Ensure you have the right pots, pans, knives, and kitchen gadgets for the job.
  • High-quality ingredients: Opt for fresh, organic, and minimally processed ingredients whenever possible.
  • Substitutes: Identify healthier ingredient substitutes for items that are high in unhealthy fats, sugars, or other undesirable components.
  • Spices and seasonings: A well-stocked spice rack can elevate the flavour of your dishes without adding extra calories or sodium.

Analyse the Original Dish

To replicate a dish, you must first understand its composition. Break down the original dish into its components: proteins, carbohydrates, vegetables, sauces, and seasonings. This analysis will help you identify areas where you can make healthier substitutions or modifications.

Reduce Unhealthy Ingredients

(Photo from iStock)

One of the key principles of replicating a healthy dish is to reduce or eliminate unhealthy ingredients. Here are some common substitutions and modifications:

  • Fats: Replace saturated fats with healthier alternatives like olive oil, avocado oil, or coconut oil. Use cooking spray instead of butter for greasing pans. Trim visible fat from meats and choose lean cuts.
  • Sugars: Replace refined sugars with natural sweeteners like honey, maple syrup, or stevia. Reduce sugar quantities in recipes, as you can often use less sugar than called for without sacrificing taste.
  • Salt: Lower sodium content by using herbs, spices, and citrus zest for flavour. Opt for low-sodium or no-salt-added versions of canned ingredients like beans or tomatoes.
  • Cream and Cheese: Substitute heavy cream with low-fat yogurt or milk, and use reduced-fat or plant-based cheese options.

Increase Nutrient Density

While reducing unhealthy ingredients is essential, it’s equally important to increase the nutrient density of your dish. Incorporate more fruits, vegetables, whole grains, and lean proteins to enhance the nutritional value.

  • Vegetables: Load up on colourful vegetables to add vitamins, minerals, and fibre to your dish. You can also try spiralizing vegetables as a pasta substitute or using cauliflower rice instead of regular rice.
  • Proteins: Choose lean protein sources like skinless poultry, tofu, beans, or legumes. Marinate proteins with flavourful herbs and spices to add depth to your dish.
  • Fibre: Incorporate high-fibre ingredients like beans, lentils, and whole grains to promote satiety and digestive health.

Experiment with Cooking Techniques

(Photo from iStock)

Healthy cooking isn’t just about ingredients; it’s also about how you prepare them. Explore different cooking techniques to reduce the need for excess fats and oils:

  • Grilling: Grilling imparts a smoky flavour and requires minimal oil. It’s a great way to cook lean proteins and vegetables.
  • Roasting: Roasting vegetables enhances their natural sweetness.
  • Steaming: Steaming retains the nutrients in vegetables while minimizing the use of fats. Invest in a steamer basket for your pots.
  • Stir-Frying: Stir-frying quickly cooks ingredients with minimal oil. Use a non-stick pan or a wok to reduce the amount of oil needed.
  • Baking: Baking allows you to achieve a crispy texture without deep frying. Use breadcrumbs or crushed whole-grain cereal for a healthier crust.

Portion Control

Even healthy dishes can be less healthy if portion sizes are too large.  Use smaller plates and utensils to help gauge appropriate serving sizes. If you’re dining out, consider sharing dishes or requesting a to-go box to pack up half of your meal before you start eating.

Balanced Plating

Presentation plays a significant role in your dining experience. Arrange your replicated healthy dish thoughtfully on the plate, using a variety of colors and textures. Aim for a balanced plate with a combination of proteins, vegetables, and grains. Garnish with fresh herbs, lemon wedges, or a drizzle of healthy sauce to enhance visual appeal.

Taste Testing and Adjustments

Replicating a healthy dish often involves some trial and error. Taste your dish as you go and adjust seasonings, spices, or other ingredients as needed to achieve the desired flavour. Be patient and willing to adapt the recipe to your taste preferences.

Document Your Recipe

(Photo from iStock)

Once you’ve successfully replicated a healthy version of your favorite dish, take the time to document your recipe. Write down the ingredients, measurements, and cooking instructions, including any modifications you made. This will make it easier to recreate the dish in the future and share your healthy recipe with others.

Practice and Refine

Becoming proficient at replicating healthy dishes takes practice. Continue experimenting with different ingredients, cooking techniques, and flavour profiles. Over time, you’ll become more skilled at transforming dishes into healthier versions.

Seek Inspiration from Healthy Cookbooks and Blogs

To expand your repertoire of healthy dishes to replicate, consider exploring healthy cookbooks and food blogs. These resources offer a wealth of creative and nutritious recipes. Particularly,  look for dishes that align with your dietary goals and provide step-by-step instructions and nutritional information.

Conclusion

Replicating a healthy dish is a rewarding culinary journey that allows you to enjoy your favorite flavors while prioritizing your well-being. Additionally, by choosing the right target dish, gathering the necessary tools and ingredients, and making thoughtful substitutions and modifications. Moreover,  you can transform indulgent recipes into nutritious creations. Experiment with cooking techniques, practice portion control, and focus on balanced plating to enhance your dining experience. But, you should remember that refining your skills and seeking inspiration from reputable sources will help you master the art of replicating healthy dishes. Overall, embrace the challenge, savour the results, and take pride in your ability to make every meal a healthier one.

Reference:

Tasty

Want to do a meal prep, what are you waiting, go check some amazing ideas for meal prepping, click on the link below:

How to do your meal prepping routine


How to Choose the Best Dairy-Free Products

In recent years, the demand for dairy-free products has surged dramatically. Whether you’re lactose intolerant, vegan, or simply looking to make healthier dietary choices, there’s a wide array of dairy-free options available today. However, with so many choices on the market, it can be overwhelming to determine which dairy-free products are the best for your needs. In this comprehensive guide, we will explore how to choose the best dairy-free products, covering everything from milk alternatives to cheese, yogurt, and more.

  • Why Go Dairy-Free?

(Photo from iStock)

Before we dive into the details of choosing dairy-free products, let’s briefly discuss the reasons why someone might opt for a dairy-free diet:

  1. Lactose Intolerance: One of the most common reasons people go dairy-free is lactose intolerance. Lactose is the sugar found in milk, and individuals with lactose intolerance lack the enzyme needed to digest it properly. This can lead to digestive discomfort, bloating, and diarrhoea.
  2. Veganism: Vegans avoid all animal products, including dairy, for ethical and environmental reasons. They choose dairy-free alternatives to enjoy the taste and texture of traditional dairy products without contributing to animal exploitation.
  3. Dietary Preferences: Some people choose to reduce or eliminate dairy from their diets for various dietary preferences, such as paleo, keto, or Whole30 diets.
  4. Allergies: Dairy allergies can be severe and even life-threatening for some individuals. In such cases, it is crucial to avoid all dairy products and opt for dairy-free alternatives.

Now that we understand why people choose dairy-free options, let’s explore how to select the best ones:

  • Choose Milk Alternatives Wisely

(Photo from iStock)

Milk alternatives are among the most popular dairy-free products. They come in various forms, including almond milk, soy milk, coconut milk, oat milk, and more. When choosing a milk alternative, consider the following factors:

  1. Taste and Texture: Taste preferences vary from person to person, so it’s essential to try different milk alternatives to find the one that suits your palate. Some may prefer the nutty flavour of almond milk, while others may enjoy the creaminess of oat milk.
  2. Nutritional Content: Examine the nutritional content of milk alternatives. Look for options fortified with calcium and vitamin D, as these nutrients are typically found in dairy milk. Ensure that the product provides adequate protein if that’s an essential dietary consideration for you.
  3. Allergies: If you have nut or soy allergies, be cautious when choosing almond or soy milk. Opt for alternatives like rice milk or oat milk, which are typically nut- and soy-free.
  4. Shelf-Stable vs. Refrigerated: Milk alternatives are available in both shelf-stable and refrigerated formats. Shelf-stable options have a longer shelf life but may contain more additives, while refrigerated versions are often more natural but have a shorter shelf life.
  • Evaluate Dairy-Free Cheese

(Photo from iStock)

Dairy-free cheese has come a long way in terms of taste and texture. It can be a great addition to sandwiches, pizzas, or pasta dishes. Here’s what to consider when choosing dairy-free cheese:

  1. Taste and Texture: Just like milk alternatives, the taste and texture of dairy-free cheese can vary widely. Some products melt well and have a cheesy flavour, while others may not be as convincing. Experiment with different brands and types to find your favorite.
  2. Ingredients: Check the ingredient list for dairy-free cheese products.
  3. Melting Properties: If you plan to use dairy-free cheese for melting, pay attention to its melting properties. Some brands melt better than others and can be used for making gooey grilled cheese sandwiches or pizza.
  4. Nutritional Profile: Examine the nutritional content of dairy-free cheese. Some products are fortified with vitamins and minerals, while others may be higher in fat and sodium.
  • Explore Dairy-Free Yogurt

(Photo from iStock)

Dairy-free yogurt is a versatile product that can be enjoyed on its own or used in recipes and smoothies. When selecting dairy-free yogurt, take the following factors into account:

  1. Flavour Varieties: Dairy-free yogurt comes in a wide range of flavors, from plain and unsweetened to fruity and sweetened. Consider your taste preferences and how you plan to use the yogurt when choosing a flavour.
  2. Probiotics: Some dairy-free yogurts are fortified with probiotics, which can be beneficial for gut health. If this is a priority for you, look for products that specify the presence of live and active cultures.
  3. Sugar Content: Pay attention to the sugar content of dairy-free yogurt. Some flavoured varieties can be high in added sugars. Choose unsweetened or lightly sweetened options if you’re concerned about sugar intake.
  4. Texture: Dairy-free yogurt comes in different textures, such as creamy, thick, or drinkable. The texture can influence how you use it in recipes, so select the one that fits your needs.
  • Don’t Forget About Dairy-Free Butter and Cream

(Photo from iStock)

Dairy-free butter and cream are essential ingredients in many recipes, from baking to cooking savoury dishes. Here’s how to choose the best dairy-free options:

  1. Taste and Texture: Dairy-free butter and cream substitutes should have a flavour and texture that work well in your recipes. Some brands are known for their buttery taste, while others excel in creaminess.
  2. Ingredients: Examine the ingredient list for dairy-free butter and cream products. Look for options with clean, natural ingredients and avoid those with hydrogenated oils or trans fats.
  3. Melting and Baking Properties: If you plan to use dairy-free butter for baking or cooking, ensure that it melts and performs similarly to dairy butter. Some dairy-free butters have a lower smoke point, so be mindful of their use in high-heat cooking.
  4. Nutritional Value: Review the nutritional content to ensure that the dairy-free butter and cream products align with your dietary goals. Some options may be lower in saturated fat or calories than their dairy counterparts.
  • Experiment and Find Your Favourites

Ultimately, the best dairy-free products for you will depend on your personal taste preferences, dietary needs, and culinary goals. Don’t be afraid to experiment with different brands and varieties to discover your favourites. Additionally, keep in mind that the availability of dairy-free products may vary by location, so explore local grocery stores and specialty shops to find hidden gems.

Reference:

Safefood

Want to do a meal prep, what are you waiting, go check some amazing ideas for meal prepping, click on the link below:

How to do your meal prepping routine


How to Know If Your Food Is Organic: A Comprehensive Guide

In an era where health and sustainability have become paramount concerns, the demand for organic food has skyrocketed. Consumers are increasingly seeking out organic products, believing them to be healthier and more environmentally friendly than their conventional counterparts. But how can you be sure that the food you’re buying is truly organic? In this comprehensive guide, we’ll explore the various ways to determine if your food is organic and why choosing organic can be a wise and responsible choice.

(Photo from iStock)

  • The Organic Revolution

The organic food movement has gained immense popularity in recent years, driven by growing concerns about the health and environmental impacts of conventional farming practices. Organic agriculture focuses on sustainability, biodiversity, and natural processes, eschewing synthetic chemicals and genetically modified organisms (GMOs). It’s a holistic approach to food production that prioritizes soil health, animal welfare, and reduced pesticide usage.

  • Look for the Organic Certification Label

(Photo from iStock)

One of the most straightforward ways to identify organic food is by checking for an organic certification label. These labels, issued by authorized certifying bodies, verify that a product complies with organic farming and production standards. In the United States, the USDA Organic label is widely recognized and signifies that the product meets stringent organic requirements.

Here’s a breakdown of the USDA Organic label and what it means:

  • 100% Organic: Products bearing this label are made entirely from organic ingredients. No synthetic chemicals, pesticides, or genetically modified organisms (GMOs) are allowed in these products.
  • Organic: Products labelled as “Organic” must contain at least 95% organic ingredients. The remaining 5% may include non-organic ingredients that are on the USDA’s approved list.
  • Made with Organic Ingredients: For products with this label, at least 70% of the ingredients are organic. The remaining 30% must meet the USDA’s criteria for non-organic ingredients.
  • Get to Know Your Farmers and Local Producers

If you’re passionate about organic food and want to ensure its authenticity, consider getting to know local farmers and producers. Farmers’ markets, community-supported agriculture (CSA) programs, and direct-to-consumer sales can be excellent sources of organic produce and products. Building a relationship with local producers allows you to ask questions about their farming practices, visit their farms, and gain a deeper understanding of their commitment to organic principles.

  • Read Product Labels and Ingredient Lists

When it comes to processed foods, reading product labels and ingredient lists can help you identify whether the food is truly organic. Organic ingredients must be clearly indicated on the ingredient list, and the product may also bear the USDA Organic label if it meets the organic standards.

  • Use Digital Resources and Apps

(Photo from iStock)

In today’s digital age, there are numerous resources and apps available to help consumers determine if their food is organic. These tools can provide valuable information at your fingertips, making it easier to make informed choices while shopping. Here are some popular options:

  • Organic Food Apps: Several apps, such as the “Organic Food Scanner” and “Fooducate,” allow you to scan barcodes and get detailed information about a product’s organic status. These apps can provide insights into whether a product is organic or contains any potentially harmful additives.
  • Sustainable Food Guides: Websites and apps like the “Sustainable Seafood Guide” can help you make eco-conscious choices when it comes to seafood or produce.
  • Certification Websites: Many certifying bodies and organizations have websites with searchable databases of certified organic products. You can use these websites to verify the organic status of specific brands or products.
  • Join the Community of Organic Enthusiasts

Engaging with the organic community can be an excellent way to stay informed about organic food options and share knowledge with like-minded individuals. Social media platforms, online forums, and local organic food associations can connect you with others who are passionate about organic living.

  • Visit Farmers’ Markets and Local Stores

Shopping at farmers’ markets and local stores can be a rewarding experience for those seeking organic food. Many small-scale farmers and artisanal producers sell their organic products directly to consumers at these venues. Here’s how to make the most of your visits:

  • Ask Questions: When you visit farmers’ markets and local stores, don’t be afraid to strike up conversations with vendors. Ask them about their farming practices, whether they use pesticides, and if they have any organic certifications. Most vendors are happy to share information about their products.
  • Check for Organic Signs: Look for signs or labels indicating that a product is organic. Many farmers’ markets and local stores take pride in offering organic options and will clearly label them.
  • Support Local: By shopping at farmers’ markets and local stores, you not only have the opportunity to buy organic but also to support your local economy and small-scale farmers.
  • Consider the Price and Seasonality

(Photo from iStock)

While this price difference can be a deterrent for some consumers, it’s essential to consider the long-term benefits of organic eating, both for your health and the environment.

Here are some tips to help you manage the cost of organic food:

  • Prioritize: Focus on buying organic versions of items from the “Dirty Dozen” list mentioned earlier. These items are more likely to contain pesticide residues, so choosing organic can have a more significant impact on your health.
  • Buy in Bulk: Purchasing organic items in bulk can often lead to cost savings. Look for bulk bins at your local grocery store or consider joining a food co-op where you can buy organic products in larger quantities.
  • Seasonal Eating: Embrace seasonal eating by buying fruits and vegetables when they are in season. In-season produce is typically more affordable and has a lower environmental footprint since it doesn’t require long-distance transportation.
  • Stay Informed and Be a Conscious Consumer

In conclusion, knowing if your food is organic involves a combination of factors, from checking certification labels to asking questions and using digital resources. Being a conscious consumer and supporting organic agriculture is not only beneficial for your health but also contributes to a more sustainable and environmentally friendly food system.

Reference:

Healthline

Want to do a meal prep, what are you waiting, go check some amazing ideas for meal prepping, click on the link below:

How to do your meal prepping routine


Best Beers Worldwide

For thousands of years, people have consumed this traditional beverage. We have experienced the ups and downs of daily life as well as the rise and fall of several civilizations while drinking beer. It continues to be popular in the modern period. Here are some of the best-selling selections with fascinating facts and drink details like alcohol by volume (ABV) and calorie content if you’re inquisitive about the most popular beer in the world.

In this post, we’ll go out on a mission to locate some of the world’s top beers.

The Art of Brewing

(Photo from iStock)

Before discovering the best beers, it is essential to comprehend the art of brewing. Beer brewing is a special example of the confluence of science and creativity. Water, malted barley (or other grains), hops, and yeast are the four main components used to make beer.  The steps in the brewing process are:- mash the grains, boil the wort (unfermented beer), add hops for flavor and aroma, use yeast to ferment, and condition the beer for taste and clarity.

In addition to the superiority of their ingredients, the top brewers in the world distinguish out for their abilities, innovation, and dedication. It calls for command of these procedures and a steadfast dedication to excellence.

Budweiser

(Photo from Global Beer Network)

For a very long time, Budweiser, also referred to as “the king of beers,” was the most popular beer in the entire world. Even though they are both produced by the same firm, Bud Light now holds the same royal title.

Several intriguing details regarding this well-known beer brand: It was initially developed in 1876 but was put on hold during the Prohibition era by a ban. The market was in a slump during World War II. Then, in 2008, the parent firm of Budweiser, Anheuser-Busch, was acquired by Belgian brewing corporation InBev.

German Precision: Weizenbock

(Photo from Beerwanderers)

The Weizenbock stands out as a true diamond among the broad spectrum of German beer styles. Germany is known for its accuracy and devotion to quality, and this is also true of its beer.

A robust wheat beer known as a “Weizenbock” is distinguished by its dark amber color, full body, and a flavorful balance of malt sweetness and yeast-produced esters and phenols. The Weihenstephaner Vitus is among the finest illustrations of this style.

The oldest brewery in the world, Bayerische Staatsbrauerei Weihenstephan, produces Vitus, a beer with a delightful blending of banana and clove flavors and a silky, somewhat sweet finish. It’s a beer that displays the precision of German brewing since that’s where art is at its best.

American Craft Revolution: Russian Imperial Stout

(Photo from Beer & Brewing )

One of the most well-known beer styles to develop as a result of the craft beer movement in the United States is the Russian Imperial Stout.
It is a type of beer that dates back to the 18th century, when England began producing robust, strong brews for export to the Russian Imperial Court.

The rich, roasted malt flavor, high alcohol concentration, and intricate flavor profiles of Russian Imperial Stouts are well-known characteristics. The Founders Brewing Company’s “KBS” (Kentucky Breakfast Stout) is a well-known example of this kind.

After being brewed, it is aged in bourbon barrels with coffee and chocolate. Rich flavors of roasted coffee, dark chocolate, and vanilla are prominent in it, and they are all expertly incorporated with the oak and caramel notes of the bourbon barrel. It is a beer that perfectly captures the essence of American craft beer: it is daring, cutting-edge, and totally wonderful.

Tsingtao

(Photo from Cantillon)

A staggering 22.9% of the beer market in China is accounted for by the Chinese beer brand Tsingtao. Because, China’s large population makes it one of the world’s top-selling alcohol brands just based on the strength of its domestic sales.

This top-selling beer brand has a complicated past. Certainly it has a close connection to Qingdao, the hometown of this pale lager, which Germany briefly occupied. The beer is now offered in many nations and is distinguished by its distinctive green bottle and fruity aroma. There are 157 calories and a 4.5% ABV in this beverage.

Corona among popular beers

  (Photo from Russian River Brewing)

This well-known beer brand shouldn’t be confused with the coronavirus. Despite, the fact that we are aware the coincidence naming is terrible. Above all, Corona is one of many well-known and fashionable Mexican beer brands.

This 4.5% ABV, 148-calorie pilsner is a light golden color. Also it tastes fantastic with a fresh lime wedge, which is especially cooling while lounging on a patio in the heat.

Heineken

(Photo from iStock)

One of the most popular beers in the world, Heineken has been made in the Netherlands for more than a century.

Its popularity can fluctuate depending on where you are in the world.  Whether you’re Dutch or not. But, it has constantly held the top rank overall among beer consumers. The ABV of this alcoholic beverage is 5.0%, and a bottle contains 148 calories. It is regarded as a premium lager beer.

Molson Coors

(Photo from Food & Wine)

Molson Coors, the world’s best-selling brewer (formerly MillerCoors before its acquisition), is the source of Coors Light. This beverage is a favorite all over the world. And among the most consumed in America. With production plants in Colorado, Georgia, Virginia, and Wisconsin, Coors Light may be found on store shelves around the country.

Its distinctive silver packaging, light golden hue, and casual sipping characteristics are easily recognizable. It has an ABV of 4.2% and 102 calories, making it a lighter beer.

Sapporo

Sapporo Premium, a Japanese beer with more than a century of history, a stellar reputation, and some of the most captivating advertisements we’ve ever seen, must be included.

This beverage has a crisp, slightly bitter flavour and a beautiful gold colour. It has a greater alcohol by volume (ABV) than other lagers at 4.9%, and each serving has 140 calories.

Pabst Blue Ribbon

Not necessarily a beer you’d anticipate seeing on the “world’s most popular” list is Pabst Blue Ribbon. After all, the home market typically contributes to its strength. However, as a representation of American brewing methods, this light, malty lager makes significant progress abroad. It’s accessible in a number of nations. The ABV is 4.6%, and each can contains 144 calories.

Reference:

VINEPAIR
Making your home fireproof is important click on the link below:
Tips to make your home fireproof


Homesteading: A Journey Back to Self-Sufficiency

In an age dominated by urban landscapes and digital connectivity, homesteading represents a nostalgic return to the roots of self-sufficiency and a sustainable way of life. Homesteading, once a vital means of survival for early American settlers, is experiencing a renaissance in the 21st century. This article explores the concept of homesteading, its history, principles. And the modern homesteading movement.

What is Homesteading?

Homesteading is a lifestyle and philosophy cantered around self-sufficiency, sustainability. And a deep connection with the land. Homesteaders seek to reduce their reliance on external systems and instead produce their own food, energy, and resources.

While homesteading can vary in scale and approach, the core principles remain consistent:

  • Self-Sufficiency

(Photo from iStock)

Self-sufficiency lies at the heart of homesteading. It involves producing one’s own food, generating energy, and acquiring essential resources independently or with minimal reliance on external sources. This principle is rooted in the desire for autonomy and resilience in the face of economic or environmental challenges.

  •  Sustainability

Homesteaders prioritize sustainable practices that protect and enhance the natural environment. This includes responsible land management, organic farming, and eco-friendly energy solutions. Sustainability not only benefits the homesteader. But also contributes to the long-term health of the planet.

  • Simple Living

Homesteading often involves a commitment to simple living. By reducing consumption and focusing on necessities, homesteaders aim to minimize their environmental footprint and improve their quality of life. This can lead to a greater sense of fulfilment and freedom.

  • Community and Sharing

While homesteading emphasizes self-sufficiency, it also values community and sharing. Many homesteaders participate in bartering, local markets. So, cooperative efforts to strengthen community bonds and exchange resources and knowledge.

A Brief History of Homesteading

Homesteading has a rich history deeply intertwined with the development of the United States and other countries. Its roots can be traced back to various historical periods and regions:

  • American Homesteading

In the 19th century, the United States government initiated the Homestead Acts, a series of laws that provided 160 acres of public land to settlers who improved the land by building a dwelling and cultivating crops. This policy was aimed at encouraging westward expansion and promoting agricultural development. It led to the establishment of countless homesteads across the American frontier.

  • Canadian Homesteading

Canada also had its own version of homesteading, particularly in the Prairie provinces. The Dominion Lands Act of 1872 allowed settlers to acquire 160 acres of land for a small fee, provided they built a home and cultivated the land within three years.

  • Contemporary Homesteading

(Photo from iStock)

While the historical context of homesteading is fascinating, contemporary homesteading takes a different form. It’s no longer driven by the need to conquer new territories but rather by a desire to live sustainably, independently, and closer to nature. Today’s homesteaders are as likely to be found in rural areas as in suburban or even urban settings.

Homesteading Principles in Practice

Homesteading principles are applied in various ways to achieve self-sufficiency and sustainability. Here are some key practices that modern homesteaders embrace:

  • Gardening and Farming

Growing one’s own food is a fundamental aspect of homesteading. Homesteaders often maintain gardens, orchards, and livestock to produce fruits, vegetables, eggs, dairy, and meat. Many practice organic and permaculture methods to minimize environmental impact.

  • Energy Independence

(Photo from iStock)

Homesteaders explore alternative energy sources such as solar panels, wind turbines, and hydroelectric generators to reduce their reliance on the grid. This not only lowers energy bills but also minimizes their carbon footprint.

  • Sustainable Building

Homesteaders frequently engage in sustainable building practices. They construct energy-efficient homes using natural materials like straw bales, adobe, or reclaimed wood. Rainwater harvesting and composting toilets are also common features.

  • Food Preservation

(Photo from iStock)

To ensure a year-round supply of food, homesteaders often practice food preservation techniques such as canning, drying, fermenting, and root cellaring. Because these help to reduce waste and reliance on store-bought groceries.

  •  Livestock and Animal Husbandry

Raising animals like chickens, goats, rabbits, or bees provides homesteaders with meat, dairy, eggs, and honey. Proper animal husbandry practices prioritize the welfare of the animals and their contribution to the homestead.

The Modern Homesteading Movement

In recent years, the modern homesteading movement has gained momentum. This resurgence can be attributed to several factors:

  • Concerns about Sustainability

Growing concerns about climate change, resource depletion, and environmental degradation have led many people to seek sustainable alternatives to conventional living.

  •  Desire for Self-Sufficiency

The desire for greater self-sufficiency and independence is a significant driver of the modern homesteading movement. The global economic landscape, with its uncertainties, has spurred people to explore self-reliant lifestyles.

  • Health and Wellness Trends

(Photo from iStock)

The emphasis on organic, locally sourced, and non-GMO foods has aligned with the principles of homesteading, attracting individuals who prioritize health and wellness.

  • Information Accessibility

The internet and social media have made it easier for aspiring homesteaders to access information, connect with like-minded individuals, and learn from experienced homesteaders.

  •  Pandemic Resilience

The COVID-19 pandemic exposed vulnerabilities in centralized supply chains. Many individuals turned to self sufficiency as a means of ensuring a stable food supply during lockdowns.

Tips for Aspiring Homesteaders If you’re considering homesteading, here are some tips to help you get started:

  • Research and Education

Take the time to research and educate yourself about the specific aspects of it that interest you. Books, online resources, and local workshops are valuable learning tools.

  •  Start Small

(Photo from iStock)

Begin with manageable projects, such as a small vegetable garden or backyard chickens, before scaling up to more ambitious endeavours.

  •  Build a Support Network

Connect with experienced homesteaders, join online forums or local homesteading groups. And seek mentorship to learn from others’ experiences.

  • Set Realistic Goals

Set achievable goals for your homestead, considering your available time, resources, and skill level. But, be prepared for setbacks and challenges along the way.

  •  Embrace the Learning Process

Homesteading is a continuous learning process.  Above all embrace mistakes as opportunities for growth and improvement.

Conclusion

Homesteading offers a path to a more sustainable, self-sufficient, and fulfilling way of life. While it presents challenges, the rewards of increased self-reliance. Because of their  deeper connection with nature. Additionally,  a reduced environmental footprint make it an appealing choice for many. As the modern  movement continues to grow, more individuals are rediscovering the beauty. And practicality of living close to the land, forging a new path to self-sufficiency in the 21st century.

Reference:

Homesteading

Want some amazing jewellery making ideas, that too at your home, what are you waiting for?, click on the link below:

Homemade Jewellery making for kids


How to Preserve Your Vegetables and Fruits

Vegetables and fruits are a vital part of a healthy diet, packed with essential nutrients, fibre, and antioxidants. The freshness is these fruits and vegetable are often short-lived. Which leads to food waste and increased grocery bills. But, the good news is that there are numerous methods to preserve vegetables and fruits, allowing you to enjoy their goodness for an extended period. In this extensive guide, we’ll explore various preservation techniques, from traditional methods to modern approaches, so you can make the most of your fresh produce and reduce food waste.

Following are a few ways mentioned which are used to preserve vegetables and fruits:

  • Canning

(Photo from iStock)

Canning is a classic method of preserving vegetables and fruits, dating back to the 18th century. It involves sealing produce in airtight containers (jars) and then heating them to kill bacteria, yeast, and moulds that cause spoilage. The sealed jars create a vacuum, preventing air and microorganisms from re-entering the container, thus preserving the contents.

Canning is ideal for preserving high-acid fruits like berries, peaches, and tomatoes. It’s essential to follow safety guidelines and recipes precisely to avoid spoilage and potential health risks.

  • Freezing

(Photo from iStock)

Freezing is one of the easiest and most popular methods to preserve vegetables and fruits. It involves lowering the temperature of produce to inhibit the growth of microorganisms and enzymes that cause spoilage.

Freezing works well for a wide range of vegetables and fruits, including berries, peas, corn, and bell peppers. It preserves both the nutritional value and flavour of your produce.

  • Dehydrating

(Photo from iStock)

Dehydrating involves removing the moisture from vegetables and fruits to inhibit the growth of bacteria and moulds. This method concentrates the flavors and nutrients while extending the shelf life of your produce.

Dehydrated vegetables and fruits are excellent for making snacks, trail mixes, and adding to soups and stews. They are lightweight, making them perfect for backpacking or emergency food supplies.

  • Fermentation

(Photo from iStock)

Fermentation is a unique preservation method that not only extends the shelf life of vegetables but also enhances their flavour and nutritional value. It involves the growth of beneficial bacteria that produce lactic acid, creating an acidic environment that prevents spoilage. Sauerkraut, kimchi, and pickles are classic examples of fermented vegetables.

Fermented vegetables are not only delicious but also packed with probiotics, which are beneficial for gut health. Fermented vegetables are highly useful in making of various dishes.

  • Pickling

(Photo from iStock)

Pickling is a preservation method that involves soaking vegetables or fruits in a brine solution, typically consisting of vinegar, salt, and spices. This method creates an acidic environment that inhibits the growth of spoilage-causing microorganisms. Common picked products are pickles, chutney’s etc.

Pickled vegetables and fruits add a burst of flavour and tanginess to salads, sandwiches, and various dishes. They’re also an excellent way to preserve excess produce from your garden.

  • Root Cellaring

(Photo from iStock)

Root cellaring is an age-old method of preserving vegetables, particularly root vegetables like carrots, potatoes, and beets. It involves storing produce in a cool, humid, and dark environment, such as a cool basement. The controlled conditions slow down the ripening of  vegetables, allowing them to last for months.

Root cellaring is an excellent method for preserving large quantities of root vegetables, as it doesn’t require any special equipment or energy consumption. It allows you to enjoy your garden’s bounty throughout the winter months.

  • Vacuum Sealing

(Photo from iStock)

Vacuum sealing is a modern preservation technique that involves removing air from containers to create an airtight seal. This method helps inhibit the growth of spoilage-causing microorganisms and prevents freezer burn in frozen items.

Vacuum sealing is a well known method that can be used for various types of produce, including fruits, and even cooked meals. It’s an excellent choice if you want to extend the shelf life of your fresh produce and prevent freezer burn.

  • Preserving in Oil or Vinegar

(Photo from iStock)

Preserving vegetables and fruits in oil or vinegar is a method that not only preserves the produce. But also infuses them with flavour. This technique is commonly used for items like sun-dried tomatoes in oil or pickled peppers in vinegar.

Preserved vegetables and fruits in oil or vinegar are a flavourful addition to salads, antipasto platters, and sandwiches. For pasta sauces and marinades they prove to be a good choice.

  • Drying with drying agents

(Photo from iStock)

Drying with drying agents is a method suitable for small quantities of vegetables and fruits. These are substances that absorb moisture, making them an effective way to preserve produce without the need for special equipment.

Drying with drying agents is an excellent method for preserving small batches of produce or herbs. It’s simple, requires minimal equipment, and is ideal for those who don’t have access to a dehydrating agents.

  • Making Preserves, Jams, and Jellies

(Photo from iStock)

Preserves, jams, and jellies are sweet spreads made from fruits. They are often mix with sugar and pectin. They are mainly used for adding flavour to breakfast items. Like toast and muffins. We use jellies in deserts and savoury dishes to enhance the taste.

Making preserves, jams, and jellies is a tasty way to enjoy the flavors of many fruits all over the year. You can get creative with flavour combinations and even experiment with less sugar recipes.

Conclusion

Preserving vegetables and fruits is a valuable skill that allows you to enjoy the flavors and nutrients of fresh produce well beyond their typical shelf life. Whether you choose traditional methods like canning  and other modern techniques like vacuum sealing and drying, each approach has its unique advantages. By following proper techniques and safety guidelines. So, you can reduce food waste, save money. And savour the taste. So, roll up your sleeves, get creative in the kitchen. And embark on a journey of preserving your favorite vegetables and fruits. Your taste buds and your wallet will thank you.

Reference:

The Spruce

Want to do a meal prep, what are you waiting, go check some amazing ideas for meal prepping, click on the link below:

How to do your meal prepping routine


How to Get Ready for Camping: Meal Ideas and Preparation

Camping is a beloved outdoor activity that allows you to disconnect from the hustle and bustle of everyday life and immerse yourself in the beauty of nature. Whether you’re a seasoned camper or a novice, one of the most crucial aspects of a successful camping trip is preparing delicious and satisfying meals. After a long day of hiking, fishing, or simply enjoying the great outdoors, a well-prepared camping meal can be a source of comfort and energy. In this article, we will explore how to get ready for camping by discussing meal ideas and the essential steps to meal preparation in the wilderness.

Planning Your Camping Meals

(Photo from iStock)

Before heading out on your camping adventure, it’s essential to plan your meals carefully. Planning helps ensure that you have the right ingredients, equipment, and cooking methods available to make your camping meals a success.
  1. Determine the Duration of Your Trip: The length of your camping trip will significantly influence your meal planning. For a weekend getaway, you can plan simple meals with minimal perishable items. For longer trips, you may need to think about more elaborate meal options and preservation methods.
  2. Consider Dietary Restrictions: Take into account any dietary restrictions or preferences of the individuals in your camping group. This includes allergies, vegetarian or vegan diets, and food preferences. Planning meals that cater to everyone’s needs is essential for a harmonious trip.
  3. Calculate Portion Sizes: Determine how much food you’ll need for each meal and snack. Keep in mind that camping activities can be physically demanding, so plan for slightly larger portions than you would eat at home.
  4. Create a Meal Plan: Once you’ve gathered all the necessary information, create a meal plan for each day of your camping trip. A typical plan might include breakfast, lunch, dinner, and snacks. Consider the ease of preparation and cleanup for each meal.
  5. Make a Shopping List: With your meal plan in hand, create a shopping list that includes all the ingredients you’ll need for each meal. Double-check your camping gear to ensure you have all the necessary cooking equipment.

Camping Meal Ideas

Now that you’ve laid the groundwork for your camping meals let’s explore some meal ideas that are not only delicious but also practical for the outdoors.

Breakfast:

(Photo from iStock)

  1. Campfire Pancakes: Pack a pre-made pancake mix in a resealable bag. At the campsite, add water, mix, and cook the pancakes on a griddle over the campfire. Top them with fresh berries and maple syrup for a tasty morning treat.
  2. Breakfast Burritos: Prepare breakfast burritos at home with scrambled eggs, cooked bacon or sausage, cheese, and diced vegetables. Wrap them in aluminium foil and heat them over the campfire or on a camp stove.
  3. Overnight Oats: Combine rolled oats, dried fruits, nuts, and your choice of sweetener in a mason jar. Add milk or water, seal the jar, and leave it in your cooler overnight.

Lunch:

(Photo from iStock)

  1. Trail Mix and Jerky: For a quick and energy-boosting lunch, pack a variety of nuts, dried fruits, and beef jerky. This is perfect for a mid-hike refuel.
  2. Sandwiches: Prepare sandwiches with your favorite fillings, such as turkey, ham, or hummus with veggies. Wrap them in wax paper or foil for easy transport.
  3. Couscous Salad: Prepare couscous at home and pack it in a sealed container. Add diced vegetables, feta cheese, olives, and a simple vinaigrette dressing at the campsite.

Dinner:

(Photo from iStock)

  1. Campfire Foil Packets: Create foil packets with your choice of protein (chicken, fish, or tofu), vegetables, and seasonings. Cook them over the campfire for a flavourful and easy dinner.
  2. One-Pot Pasta: Choose a pasta that cooks quickly, like spaghetti or penne. Boil the pasta, drain it, and then mix it with a simple sauce made from canned tomatoes, garlic, and herbs.
  3. Tacos: Pre-cook ground beef, chicken, or plant-based meat at home, and pack it in a sealed container. Heat it up at the campsite and serve with tortillas, salsa, shredded cheese, and fresh toppings.

Snacks:

(Photo from iStock)

  1. Trail Mix: Customize your trail mix with a variety of nuts, seeds, dried fruits, and chocolate chips for a quick and energy-packed snack.
  2. Fruit Kabobs: Skewer bite-sized pieces of fruit like melon, pineapple, and berries for a refreshing and healthy snack.
  3. S’mores: No camping trip is complete without the classic s’mores. Pack graham crackers, marshmallows, and chocolate for a sweet treat by the campfire.

Essential Camping Meal Preparation Tips

  1. Food Safety: When camping, it’s crucial to maintain food safety. Keep perishable items in a well-insulated cooler with ice packs or frozen water bottles to prevent spoilage so that you are always prepared.
  2. Cooking Equipment: Ensure you have all the necessary cooking equipment, including a camp stove, portable grill, pots, pans, utensils, and a reliable campfire starter. Test your equipment before your trip to avoid any surprises so that you are safe.
  3. Fire Safety: If you plan to cook over an open flame, familiarize yourself with fire safety regulations and guidelines in your camping area.
  4. Leave No Trace: Practice Leave No Trace principles when cooking and eating in the wilderness. Dispose of food scraps and trash properly, and avoid disturbing wildlife.
  5. Clean-Up: Bring biodegradable soap and a sponge or scrubber for dishwashing. Dispose of grey water in a designated area, following Leave No Trace principles.
  6. Reusable Containers: Use reusable containers and utensils to minimize waste. Avoid single-use plastic whenever possible.
  7. Water Supply: Ensure you have access to clean water for cooking and drinking. Bring a water filter or purification tablets if you’re unsure about the water quality at your campsite.
  8. Meal Timing: Plan your meals to coincide with your daily activities. because a hearty breakfast is essential for a day of hiking, while a lighter dinner may be suitable for a relaxed evening by the campfire.

Conclusion

Camping can be a rewarding and memorable experience, made even better by delicious and well-prepared meals. By carefully planning your camping meals, considering dietary preferences and choosing convenient yet satisfying recipes, you can enjoy a hassle-free and tasty dining experience in the great outdoors.

Remember to prioritize food safety, practice Leave No Trace principles and invest in reliable cooking equipment to make your camping trip as enjoyable as possible. With the right preparation, you can savor the flavors of the wilderness while creating lasting memories around the campfire.

Reference:

Country Living
Want to know tips for meal prep, click on the link below:

https://theperfectblogger.com/how-to-do-your-meal-prepping-routine-at-home-everyday/


A Beginner’s Guide to Start Goat Yoga

In recent years, the world of fitness and wellness has seen a surge in unconventional and delightful practices, and one such trend that has captured hearts and gained popularity is Goat Yoga. Combining the tranquility of yoga with the playful presence of goats and this unique fusion offers a one-of-a-kind experience that is both relaxing and exhilarating. If you’re intrigued by the idea of practicing yoga while adorable goats frolic around you then this article will guide you through the steps to start your own adventure.

Understanding Goat Yoga

(Photo from istock)

Before diving into the details of how to start Goat Yoga, it’s essential to understand what it entails and why it has become so popular.

  •  What is Goat Yoga?

It is a form of yoga that incorporates the presence of goats into traditional yoga poses and exercises. It originated in 2016 when a yoga instructor in Oregon introduced goats to her classes and it quickly gained attention for its unique combination of relaxation and laughter.

  • Benefits of Goat Yoga

While Goat Yoga might seem whimsical but it offers several benefits:

  1. Stress Reduction: The calming effect of nature and animals can reduce stress and anxiety levels so that you are calm.
  2. Enhanced Focus: Practicing yoga amidst goats can improve concentration and mindfulness because of their aura.
  3. Laughter and Joy: Interacting with the playful goats adds a layer of fun to your practice, releasing endorphins and boosting your mood.
  4. Community Building: These classes often create a sense of community among participants.

 Preparation and Planning

Starting Goat Yoga requires careful planning and preparation. Here’s how to get started:

  • Research and Education

Before you begin, learn as much as possible about it. Study its history, benefits, and the experiences of other instructors. Attend Goat Yoga classes or workshops to gain first-hand knowledge of what it’s like.

  • Location and Space

Choosing the right location is crucial. Look for a peaceful, open space where goats can roam freely but still be managed during classes. A farm or rural setting is ideal, but urban Goat Yoga has also gained popularity.

  • Legal and Regulatory Considerations

Ensure you comply with local regulations and obtain any necessary permits. Check if your property allows for such activities, or if you need to lease space.

  • Goat Selection

Select goats with friendly and sociable temperaments. Avoid aggressive or overly timid goats, as they may disrupt the class experience.

  • Yoga Instruction

If you’re not already a certified yoga instructor, consider becoming one. A strong foundation in yoga will help you create a balanced experience.

Goat Care and Welfare

(Photo from istock)

The well-being of your goats should be a top priority. Proper care ensures that your Goat Yoga sessions are enjoyable for both participants and the goats themselves.

  •  Veterinary Care

Regular veterinary check-ups are essential to monitor the health of your goats. Ensure they are up to date on vaccinations and deworming.

  • Nutrition

Provide your goats with a balanced diet. Consult a veterinarian or an experienced goat farmer for dietary guidance.

  •  Shelter and Safety

Goats need shelter from harsh weather conditions. Ensure they have access to a safe and comfortable space.

  •  Interaction

Socialize with your goats regularly to build trust and familiarity. This will make them more comfortable during Goat Yoga sessions.

 Equipment and Setup

(Photo from istock)

To start Goat Yoga, you’ll need some essential equipment and a well-organized setup.

  • Yoga Mats and Accessories

Provide participants with yoga mats and any necessary accessories. Ensure they have enough space to practice comfortably.

  • Goat-proofing

Fence the yoga area to prevent goats from wandering too far. Create a boundary that allows goats to be within reach but not disruptive.

  • Goat Yoga Props

Consider using goat-friendly props like hay bales or climbing structures for goats to interact with during the session.

  • Signage and Guidelines

Post clear guidelines for participants, including rules about interacting with the goats and maintaining a respectful environment.

Marketing and Promotion

(Photo from istock)

To attract participants to your Goat Yoga classes, you’ll need effective marketing strategies.

  • Online Presence

Create a website and use social media platforms to showcase your Goat Yoga offerings. Share photos and videos of your classes and goats.

  •  Networking

Collaborate with local yoga studios, wellness canters, and event organizers to promote your classes. Attend local fairs and festivals to introduce Goat Yoga to a wider audience.

  • Promotions and Discounts

Offer introductory discounts or package deals to encourage people to try this yoga.

  • Testimonials and Reviews

Encourage satisfied participants to leave reviews and testimonials to build trust and credibility.

Conducting Goat Yoga Classes

When you’re ready to host your first Goat Yoga class, make sure it’s an enjoyable experience for everyone involved.

  • Class Structure

Design a class structure that combines traditional yoga poses with opportunities for goat interaction. Start with a brief introduction to this yoga.

  • Goat Handling

Train your goats to be gentle around participants. Monitor their behaviour and intervene if necessary to maintain a safe environment.

  • Instructor’s Role

As the instructor, your role is to guide the yoga practice while also managing goat interactions. Encourage participants to embrace the playfulness of the goats.

  •  Participant Engagement

Foster a sense of community among participants. Encourage them to interact with each other and share their experiences.

Safety Considerations

(Photo from istock)

Safety should always be a priority in Goat Yoga so that you can grow.

  •  Participant Safety

Ensure that participants are aware of potential risks and how to interact safely with the goats. Have a first-aid kit on hand because it is much-needed.

  •  Goat Safety

Protect the well-being of your goats by preventing them from eating toxic plants and ensuring they are not overexerted during classes.

  •  Liability Insurance

Consider obtaining liability insurance so that you can protect yourself in case of accidents or injuries during yoga classes.

Growing Your Goat Yoga Business

As your new business gains popularity, consider expanding and growing because it is beneficial.

  • Adding Services

Explore opportunities to offer workshops like private sessions, or even goat-themed merchandise.

  • Additional Locations

If possible, expand to multiple locations or partner with existing yoga studios to host these classes.

  • Continuing Education

Stay up to date with the latest trends in both yoga and goat care and consider obtaining additional certifications in animal-assisted therapy.

  • Community Involvement

Engage with your local community by participating in charity events or offering free Goat Yoga sessions for special occasions.

Conclusion

It is a unique and enjoyable practice that combines the benefits of yoga with the playfulness of goats. Starting your new business requires careful planning, proper goat care and effective marketing strategies. By following the steps outlined in this guide and prioritizing safety and well-being, you can create a memorable and fulfilling this experience for both yourself and your participants. So, go ahead and embark on this exciting journey where serenity meets playfulness, and discover the joy.

Reference:

Simon & Schuster

Want some amazing jewellery making ideas, that too at your home, what are you waiting for?, click on the link below:

Homemade Jewellery making for kids


All About Social Media: Its Evolution, Impact, and Future

Social media has become an inseparable part of our day to day lives because it shapes the way we maintain social relations with other people. It has evolved rapidly over the past few decades, influencing various aspects of society, from politics and business to personal relationships and self-expression. In this article, we’ll explore the history and evolution of social media, its impact on individuals and society and its potential future developments.

The Evolution of Social Media

(Photo from iStock)

  • Early Beginnings

The concept of social media dates back to the early days of the internet. In the late 1960s and early 1970s, the development of ARPANET, the precursor to the internet, laid the foundation for online communication but these platforms were limited to text-based communication among researchers and academics.

  • Bulletin Board Systems (BBS)

The 1980s saw the emergence of Bulletin Board Systems (BBS), which allowed users to post messages, share files and interact with  others in a more organized manner so BBS created the first online communities, setting the stage for the social networks we know today.

  • The Internet’s Explosion

(Photo from iStock)

With the widespread availability of the internet in the 1990s so online communication became more accessible to the general public. Services like AOL Instant Messenger (AIM) and ICQ introduced the concept of real-time messaging, while platforms like GeoCities enabled users to create their own web pages.

  • The Birth of Social Networking

The 2000s witnessed the rise of true social networking platforms. Friendster, launched in 2002, is often credited as the first social media site but it faced scalability issues and eventually lost its popularity.

  • The Facebook Era

(Photo from iStock)

In 2004, Mark Zuckerberg and his college roommates launched Facebook, which would change the social media landscape forever. Facebook allowed users to create detailed profiles, connect with friends and share photos and status updates. It quickly gained popularity because of college students and expanded to a global audience.

  • The Age of Microblogging

Microblogging platforms like Twitter, founded in 2006, introduced the concept of real-time, short-form communication. Users could share thoughts, news and updates in 140 characters or less. This format proved highly effective in spreading information quickly because it engages a large audience.

  • Visual Content Takes Center Stage

With the launch of Instagram in 2010, visual content became a dominant force in social media. Instagram allowed users to share photos and short videos, focusing on aesthetics and storytelling. This emphasis on visual content led to the rise of influencers and brand marketing through imagery.

  • The Snapchat Revolution

(Photo from iStock)

Snapchat, founded in 2011, popularized ephemeral messaging. Users could send photos and videos that disappeared after a short time, creating a sense of urgency and privacy. This innovation challenged the idea of permanent online content.

  • Video Sharing Platforms

YouTube, founded in 2005, became the go-to platform for sharing and consuming video content. It created opportunities for creators to build massive audiences and monetize their videos. Platforms like TikTok (2016) and Vine (2013-2017) further expanded the influence of short-form video.

  • The Era of Messaging Apps

(Photo from iStock)

Messaging apps like WhatsApp, WeChat, and Facebook Messenger have become essential communication tools. They offer features beyond simple text messaging, including voice and video calls, group chats, and even business services.

The Impact of Social Media

  • Personal Relationships

Social media has transformed how we maintain and nurture personal relationships. It enables us to stay connected with friends and family, regardless of geographical distance. However, it has also been associated with feelings of loneliness and the paradox of being “connected” yet isolated.

  • Communication

Social media has redefined communication. It allows for instant, global communication, making it easier to share news, opinions, and ideas. However, this accessibility has led to challenges such as misinformation, cyberbullying, and harassment.

  • Self-Presentation and Identity

Social media platforms offer users the opportunity to curate their online personas. This has led to questions about authenticity and the impact on self-esteem and mental health, as individuals may compare themselves to carefully curated representations of others.

  • Business and Marketing

(Photo from iStock)

Social media has revolutionized marketing and advertising. Businesses leverage platforms like Facebook, Instagram and Twitter to reach a vast audience and engage with customers. Influencer marketing has also emerged as a powerful tool for brands to connect with their target demographics.

  • Political Influence

Social media plays a significant role in politics, enabling politicians to communicate directly with constituents and mobilize support. It has also been a platform for political activism and social movements, from the Arab Spring to the Black Lives Matter movement.

  • Privacy and Data Concerns


The collection and use of user data by social media companies have raised concerns about privacy and data security. Incidents like the Cambridge Analytica scandal have highlighted the potential misuse of personal information for political and commercial purposes.

  • Information Consumption

Social media is a primary source of news and information for many people but the spread of misinformation and echo chambers, where users are exposed to only like-minded views, are pressing challenges.

  • Mental Health

(Photo from iStock)

The constant use of social media has been linked to mental health issues including anxiety, depression and addiction. The pressure to maintain a perfect online image and the fear of missing out (FOMO) contribute to these problems.

The Future of Social Media

Social media continues to evolve and its future holds several exciting possibilities and challenges.

  • Virtual and Augmented Reality

The integration of virtual reality (VR) and augmented reality (AR) into social media could revolutionize the way we connect. Imagine attending virtual parties, exploring digital worlds or meeting friends in immersive environments.

  • Privacy and Regulation

(Photo from iStock)

As concerns about data privacy and misinformation grow, governments and regulatory bodies are likely to enact stricter regulations on all  companies. This may impact how these platforms collect and use user data because it is actually effective.

  • Artificial Intelligence

AI-driven algorithms will continue to shape our social media experiences because they will determine the content we see, recommend connections and even create personalized content. The ethical implications of AI in social media will be a topic of ongoing debate so that we thrive for a better future.

  • New Platforms and Technologies

Innovation will give rise to new social media platforms and technologies we can’t even imagine today. These platforms may disrupt the dominance of current giants like Facebook and Twitter.

  • Mental Health Support

As awareness of mental health issues related to social media grows, platforms may implement features and tools to promote healthy usage. This provides support to users struggling with addiction or mental health challenges.

Conclusion

Social media has come a long way since its inception therefore fundamentally changing the way we communicate, connect and express ourselves. Its impact on society is undeniable, from the way we form relationships and consume information to its role in business, politics and personal identity.

Reference:

Tech Target

Want some amazing jewelry making ideas, that too at your home so what are you waiting for?, click on the link below:

Homemade Jewelry making for kids


How To Properly Ice A Cake

Icing a cake is an art form that can transform a simple dessert into a masterpiece. Whether you’re a novice baker or an experienced one, knowing how to properly ice a cake is a valuable skill that can elevate your baking game. In this comprehensive guide, we will walk you through the step-by-step process of how to properly ice a cake to perfection.

  • Why Proper Icing Matters

The way you ice a cake can significantly impact its taste, texture, and appearance. Proper icing serves several important purposes:

  1. Flavour Enhancement: Icing adds sweetness and flavour to the cake, complementing the taste of the cake layers.
  2. Texture Improvement: A good icing can provide a contrast in texture, making each bite more interesting and enjoyable.
  3. Moisture Retention: Icing helps lock in the cake’s moisture, keeping it fresh and delicious for longer.
  4. Aesthetic Appeal: The presentation of a cake can be just as important as its taste. A well-iced cake can be a showstopper at any event.
  • Essential Tools and Ingredients

Before we dive into the icing process, let’s gather the necessary tools and ingredients:

Tools:

  1. Cake stand or turntable: This makes it easier to rotate the cake for even icing.
  2. Cake boards or cardboard rounds: These provide a sturdy base for your cake.
  3. Offset spatula: An offset spatula is the go-to tool for smoothing and spreading icing.
  4. Bench scraper: This tool helps achieve smooth, straight sides and sharp edges.
  5. Piping bags and tips (optional): Useful for creating decorative designs or borders.
  6. Cake leveller or serrated knife: For levelling the cake layers if needed.

Ingredients:

  1. Cake layers: Baked and cooled cake layers of your choice.
  2. Icing: Select the type of icing you prefer – buttercream, cream cheese, ganache, or fondant.
  3. Flavourings and colourings (if desired): Vanilla extract, food coloring, or other flavourings to customize your icing.

Now that you have everything you need, let’s get started on the icing process.

  • Step 1: Prepare Your Cake

(Photo from iStock)

Before you begin icing, make sure your cake layers are completely cooled. Warm cakes can cause the icing to melt or become uneven.

If your cake layers have domed tops, level them using a cake leveller or a serrated knife. The goal is to create flat, even surfaces to work with.

  • Step 2: Secure the Cake

(Photo from iStock)

Place a small amount of icing on a cake board or cardboard round to act as glue. Then, center your first cake layer on top. This will prevent the cake from sliding during the icing process.

  • Step 3: Crumb Coat

(Photo from iStock)


The crumb coat is a thin layer of icing that seals in the cake crumbs, providing a smooth base for the final coat. To apply the crumb coat:

  1. Apply a thin layer of icing: Use your offset spatula to spread a thin layer of icing evenly over the top and sides of the cake. Don’t worry about making it perfect at this stage; the goal is to lock in the crumbs.
  2. Chill the cake: Place the cake in the refrigerator for about 15-30 minutes to set the crumb coat. This will make it easier to apply the final coat.
  • Step 4: Apply the Final Coat

(Photo from iStock)

Now it’s time to add the final layer of icing for a smooth finish:

  1. Start with the top: Begin by adding a generous amount of icing to the top of the cake. Use your offset spatula to spread it evenly, working from the center outward.
  2. Ice the sides: Apply a layer of icing to the sides of the cake. Start at the top and work your way down, turning the cake as you go. Use the offset spatula to smooth the icing as you rotate the cake.
  3. Smooth the sides: To achieve smooth sides, use a bench scraper. Hold it against the side of the cake, gently rotating the turntable as you scrape off excess icing.
  4. Smooth the top: After the sides are smooth, use your offset spatula to create a flat, level top surface.
  • Step 5: Decorate and Customize

(Photo from iStock)

Once your cake is beautifully iced, you can take it to the next level by adding decorative touches. Here are some ideas:

  1. Piping: Use piping bags and tips to create borders, flowers, or other designs with additional icing. Practice on parchment paper before piping directly onto the cake.
  2. Texture: Experiment with different textures, such as swirls, rosettes, or ruffles, using your offset spatula or a decorating comb.
  3. Colors: Add food coloring to your icing to create custom colors for your cake. Gel food coloring is preferable as it doesn’t affect the consistency of the icing.
  4. Edible Decorations: Consider adding edible decorations like sprinkles, edible flowers, or edible glitter for extra flair.
  • Step 6: Clean Up

(Photo from iStock)

After you’ve finished decorating, it’s time to tidy up your cake’s presentation:

  1. Clean the cake board: Use a clean, damp cloth or paper towel to wipe any excess icing or crumbs from the cake board or cardboard round.
  2. Refrigerate: If you’ve used perishable fillings or icings (e.g., cream cheese icing), store the cake in the refrigerator until serving to keep it fresh.
  • Tips for Success

Icing a cake can be challenging, especially if you’re new to baking.

  1. Practice: Like any skill, cake decorating improves with practice.
  2. Room temperature icing: Ensure your icing is at room temperature for easy spreading. If it’s too stiff, you can briefly microwave it in short intervals to soften it.
  3. Consistency matters: The consistency of your icing is crucial. It should be firm enough to hold its shape but not so stiff that it’s difficult to spread. Adjust the consistency by adding small amounts of milk or powdered sugar as needed.
  4. Patience: Take your time, especially when applying the final coat of icing.
  5. Use a cake turntable: If you have one, a cake turntable makes it much easier to achieve a smooth finish and sharp edges.
  6. Keep it clean: Frequently clean your spatula, bench scraper, and any other tools you’re using to ensure a neat and polished look.
  • Conclusion

To ice a cake is a delightful and rewarding endeavour that allows you to showcase your creativity and baking skills. With the right tools, ingredients, and techniques, you can turn a plain cake into a work of art that tastes as good as it looks. Remember, practice makes perfect, so don’t be afraid to experiment with different designs and flavors to create the perfect cake for any occasion. Happy baking!

Reference:

Food Network

Want to do a meal prep, what are you waiting, go check some amazing ideas for meal prepping, click on the link below:

How to do your meal prepping routine


How To Check If Your Cake Is Overbaked

Baking a cake can be a delightful and rewarding experience, but it’s not without its challenges. One of the most common pitfalls in cake baking is overbaking. Overbaking can turn a moist and delicious cake into a dry, crumbly disaster. In this article, we will explore the signs of an overbaked cake, the common causes behind it, and how to prevent it from happening.

The Art of Baking: Finding the Perfect Balance

Baking is often referred to as a science, but it’s also an art. Achieving the perfect balance of time and temperature is crucial for baking a cake that’s moist, tender, and full of flavour. Overbaking, on the other hand, can result in a cake that’s dry, tough, and lacking in the desired texture and taste.

Signs of an Overbaked Cake

(Photo from iStock)

Before we delve into the causes of overbaking and how to prevent it, let’s first identify the tell-tale signs of an overbaked cake:

  1. Dry Texture: An overbaked cake will have a dry and crumbly texture. When you take a bite, it may feel as if it’s sucking the moisture out of your mouth.
  2. Cracked Surface: Overbaked cakes often develop cracks on the surface. These cracks can be subtle or pronounced, depending on the severity of overbaking.
  3. Darkened Edges: The edges of an overbaked cake tend to become excessively browned or even burnt. This is a clear indication that the cake has spent too much time in the oven.
  4. Shrunken Appearance: Overbaked cakes may appear slightly shrunken or pulled away from the sides of the pan. This is due to the excessive loss of moisture during baking.
  5. Lack of Moisture: When you insert a toothpick or cake tester into the center of an overbaked cake, it will come out dry or with a few dry crumbs clinging to it. A properly baked cake should yield moist crumbs.
  6. Unpleasant Taste: Overbaked cakes can have a bitter or burnt taste due to the caramelization of sugars and Maillard reactions that occur during extended baking.

Common Causes of Overbaking

Understanding the causes of overbaking is essential to prevent it from happening in the first place. Here are some common reasons why cakes get overbaked:

  1. Incorrect Oven Temperature: Ovens can vary in temperature accuracy. If your oven runs hotter than the set temperature, your cake may cook faster than expected, leading to overbaking. It’s crucial to invest in an oven thermometer to ensure your oven is calibrated correctly.
  2. Incorrect Baking Time: Following the baking time in a recipe blindly can be a mistake. Factors such as the size and type of cake pan, altitude, and humidity levels in your kitchen can all affect baking times. Always use the suggested time as a guideline and rely on visual and sensory cues to determine when your cake is ready.
  3. Opening the Oven Door Too Often: Every time you open the oven door while the cake is baking, you allow heat to escape. This can lead to uneven baking and extended baking times. Use the oven light and window to check the progress of your cake instead of opening the door.
  4. Overmixing the Batter: Overmixing cake batter can lead to an overdeveloped gluten structure, resulting in a tough and dry cake. Mix the batter until just combined to avoid this issue.
  5. Using the Wrong Pan Size: Using a pan that’s too small can cause the cake to be too thick, leading to uneven baking and overbaking on the outside before the center is fully cooked. Conversely, using a pan that’s too large can result in a cake that bakes too quickly.
  6. Inaccurate Measuring: Precise measuring of ingredients is crucial in baking. Using too much flour or not enough liquid can result in a dense and dry cake. Always measure ingredients carefully, preferably using a kitchen scale for accuracy.
  7. Failure to Rotate the Pan: Some ovens have hot spots, meaning certain areas inside the oven are hotter than others. Failure to rotate the cake pan during baking can result in uneven cooking, with some parts of the cake overbaking while others underbake.

How to Prevent Overbaking

(Photo from iStock)

Now that you know the signs and causes of overbaking, here are some effective strategies to prevent it:

  1. Invest in an Oven Thermometer: As mentioned earlier, an oven thermometer is a valuable tool for ensuring your oven’s temperature is accurate. Place the thermometer inside your oven to monitor the actual temperature during baking.
  2. Use the Right Pan Size: Always use the pan size recommended in your recipe. If you don’t have the specified pan, adjust the baking time accordingly. A smaller pan may require a longer baking time, while a larger pan may need a shorter one.
  3. Check for Doneness Early: Begin checking for doneness a few minutes before the minimum recommended baking time. Use visual cues such as the cake pulling away from the sides of the pan, a golden-brown top, and a toothpick or cake tester that comes out with a few moist crumbs (but no wet batter) to determine if the cake is done.
  4. Avoid Overmixing: Mix the cake batter until just combined. Overmixing can lead to a tough and dry cake due to excessive gluten development.
  5. Reduce Oven Temperature: If you suspect your oven runs hot, consider lowering the temperature by 25°F (about 15°C) and extending the baking time accordingly. This can help prevent overbaking.
  6. Rotate the Cake Pan: If you know your oven has hot spots, rotate the cake pan 180 degrees halfway through the baking time. This ensures even cooking.

Conclusion

Baking a perfect cake requires practice and attention to detail, but avoiding the common pitfall of overbaking is well worth the effort. By understanding the signs and causes of overbaking and implementing preventive measures, you can consistently create moist, tender, and delicious cakes that will impress your family and friends. And if an overbaked cake does happen to sneak into your kitchen, remember that with a little creativity, it can still be transformed into a delightful dessert. Happy baking!

Reference:

The Bake School

Want to do a meal prep, what are you waiting, go check some amazing ideas for meal prepping, click on the link below:

How to do your meal prepping routine


11 Essential Foods to Bring When Traveling

Traveling is an exciting adventure, but it often involves long journeys and unfamiliar destinations, which can make finding suitable meals a challenge. Whether you’re embarking on a road trip, going camping, or flying to a foreign country, bringing your own food can save you time, money, and the stress of searching for suitable options. In this article, we’ll explore 11 essential foods to bring when traveling, helping you maintain a balanced diet and ensure you’re well-prepared for your next adventure.

  • List of traveling food is as follows:

1. Trail Mix

(Photo from iStock)

Trail mix is a versatile and energy-packed snack that should be a staple in any traveller’s backpack. It typically contains a mix of nuts, dried fruits, and sometimes chocolate or seeds. Trail mix provides a quick source of protein, healthy fats, and carbohydrates, making it an excellent choice for on-the-go energy. Plus, it’s lightweight, doesn’t require refrigeration, and can be portioned into smaller bags for easy snacking throughout your journey.

2. Nut Butter Packets

(Photo from iStock)

Single-serving packets of nut butter (such as peanut, almond, or cashew butter) are a convenient and nutritious travel companion. These packets are portable, don’t need refrigeration, and can be spread on crackers, bread, or fresh fruit. Nut butter is rich in protein, healthy fats, and essential nutrients, making it a satisfying and energy-boosting snack.

3. Instant Oatmeal

(Photo from iStock)

When you’re staying in hotels or hostels, having a quick and nutritious breakfast option on hand can be a lifesaver. Instant oatmeal packets come in various flavors and only require hot water to prepare. They’re a great source of fiber, keeping you full and satisfied during your morning adventures. Additionally, you can add dried fruits, nuts, or honey to customize your oatmeal to your liking.

4. Canned Tuna or Salmon

(Photo from iStock)

Canned tuna or salmon is a protein-packed food item that doesn’t spoil easily. These convenient cans are perfect for making sandwiches or salads on the go. They provide essential nutrients like omega-3 fatty acids, which can help reduce inflammation and boost heart health. Look for cans with pull-tab lids to avoid the need for a can opener.

5. Instant Soup Packets

(Photo from iStock)


Carrying a few instant soup packets can be a warm and comforting option when traveling, especially during colder seasons. All you need is hot water, and you’ll have a tasty, hot meal in minutes. Many instant soup varieties are available, from classic chicken noodle to exotic international flavors. Check the packaging to ensure it’s suitable for your dietary preferences and any allergies.

6. Rice Cakes

(Photo from iStock)

Rice cakes are a lightweight, crunchy, and gluten-free snack option that can be a handy travel companion. They are low in calories and can be enjoyed plain or with toppings like nut butter, cheese, or avocado. Rice cakes are excellent for satisfying midday hunger pangs without weighing down your backpack.

7. Jerky

(Photo from iStock)

Jerky is a high-protein, low-fat snack made from dried and cured meat, typically beef or turkey. It’s an ideal travel food due to its long shelf life and portability. Jerky comes in various flavors and can be found in most convenience stores. However, be mindful of sodium content and opt for brands with minimal additives.

8. Dehydrated Fruits and Vegetables

(Photo from iStock)

Dehydrated fruits and vegetables are space-saving, lightweight, and nutritious options for traveling. They retain most of their vitamins and minerals while removing moisture, which helps extend their shelf life. Dehydrated fruits like apple slices, banana chips, or mango strips make for a sweet and healthy snack. Dehydrated vegetables can be added to soups or rehydrated with hot water to make a quick side dish.

9. Instant Coffee or Tea Bags

(Photo from iStock)

If you’re a coffee or tea enthusiast, having a stash of instant coffee or tea bags in your travel kit can be a lifesaver. These are especially handy during early morning flights or when you can’t access your favorite café. Just add hot water, and you’ll have a comforting beverage to start your day.

10. Crackers or Rice Chips

(Photo from iStock)

Crackers or rice chips are excellent for creating quick and satisfying snacks or mini meals on the go. Pair them with cheese, hummus, or canned spreads for a more substantial option. Look for whole-grain varieties to increase your fibre intake and provide longer-lasting energy.

11. Instant Noodles

(Photo from iStock)

While instant noodles aren’t the healthiest option on this list, they can be a budget-friendly and comforting meal choice, especially when you’re in a pinch. Opt for low-sodium options and consider adding vegetables or a protein source like canned tuna to enhance the nutritional value. Instant noodles can be prepared using hot water from a kettle or even a hotel room’s coffee maker.

Tips for Packing and Storing Travel Food

Now that you know which foods to bring when traveling, here are some tips for packing and storing them effectively:
  1. Use Ziplock Bags and Containers: To keep your food fresh and prevent spills, use zip lock bags for items like trail mix and rice cakes. For bulkier foods, invest in airtight containers.
  2. Check Local Regulations: If you’re traveling internationally, be aware of food import regulations to avoid any customs issues.
  3. Bring Utensils and a Reusable Water Bottle: Packing a reusable fork, spoon, and knife can be useful for eating your travel foods. A reusable water bottle can help you stay hydrated and reduce single-use plastic waste.
  4. Pack a Cooler Bag: If you’re on a road trip or have access to a cooler, consider bringing perishable items like fresh fruit, yogurt, or cheese.
  5. Be Mindful of Allergens: If you have food allergies or sensitivities, double-check labels and research local cuisine before traveling to ensure you have safe food options.

Conclusion

Traveling is a fantastic way to explore new places and create lasting memories. However, finding suitable and nutritious meals can be a challenge, especially in unfamiliar locations. By packing these 11 essential foods, you can ensure that you’re well-prepared for your journey, maintain a balanced diet, and save both time and money. So, before your next adventure, stock up on these travel-friendly foods to keep hunger at bay and your energy levels high, allowing you to fully enjoy your travel experiences.

Reference:

Desimealz
Want to know tips for meal prep, click on the link below:

https://theperfectblogger.com/how-to-do-your-meal-prepping-routine-at-home-everyday/


How to Cook an Indian Dish: Journey into Butter Chicken

Indian cuisine is renowned for its rich and diverse flavours, and while some Indian dishes may appear complex, there are plenty of delicious options that are easy to prepare at home. In this article, we’ll guide you through the step-by-step process of cooking an easy yet delectable Indian dish: Butter Chicken, also known as Murgh Makhani.

Butter Chicken is a North Indian favorite characterized by its creamy tomato-based sauce and tender chunks of marinated chicken. It’s a dish that has gained popularity worldwide for its comforting and indulgent taste. Whether you’re new to Indian cooking or a seasoned home chef, this recipe is designed to be accessible and satisfying.

Let’s dive into the ingredients and steps needed to create a homemade Butter Chicken that you’ll love.

Ingredients

For the Chicken Marinade:

(Photo from iStock)

  1. 500 grams boneless chicken (breast or thigh), cut into bite-sized pieces
  2. 1/2 cup yogurt (preferably full-fat)
  3. 1 tablespoon ginger-garlic paste (a blend of fresh ginger and garlic)
  4. 1 teaspoon red chili powder (adjust to your spice preference)
  5. 1/2 teaspoon turmeric powder
  6. 1 teaspoon garam masala
  7. Salt, to taste
  8. 2 tablespoons vegetable oil

For the Gravy:

  1. 2 tablespoons butter
  2. 1 large onion, finely chopped
  3. 2 large tomatoes, pureed
  4. 1/4 cup cashew nuts, soaked in warm water and blended into a smooth paste
  5. 1 tablespoon ginger-garlic paste
  6. 1 teaspoon red chili powder (adjust to your spice preference)
  7. 1/2 teaspoon turmeric powder
  8. 1 teaspoon garam masala
  9. 1 teaspoon ground coriander
  10. 1/2 cup heavy cream
  11. Salt, to taste
  12. Fresh coriander leaves (cilantro) for garnish (optional)
Now that you have your ingredients ready, let’s proceed to the cooking process.

Step 1: Marinate the Chicken

(Photo from iStock)

  1. In a mixing bowl, combine the yogurt, ginger-garlic paste, red chili powder, turmeric powder, garam masala, salt, and vegetable oil.
  2. Add the bite-sized chicken pieces to the marinade. Ensure that the chicken is well-coated. Cover the bowl and let it marinate in the refrigerator for at least 30 minutes, or ideally, for a few hours (overnight marination yields the best results).

Step 2: Cook the Marinated Chicken

(Photo from iStock)

  1. Heat a large skillet or pan over medium-high heat. Add a bit of oil if needed.
  2. Once the skillet is hot, add the marinated chicken pieces. Cook them until they are lightly browned and cooked through, about 5-7 minutes. Set aside.

Now Step 3: Prepare the Butter Chicken Gravy

(Photo from iStock)

  1. In the same pan, add 2 tablespoons of butter. Allow it to melt over medium heat.
  2. Add the finely chopped onions and sauté until they turn translucent and start to brown, which should take about 5-7 minutes.
  3. Stir in the ginger-garlic paste and sauté for another 2 minutes, until the raw aroma disappears.
  4. Add the tomato puree and cook for 5-7 minutes, stirring occasionally, until the oil starts to separate from the tomato mixture.
  5. Incorporate the cashew nut paste, red chili powder, turmeric powder, garam masala, and ground coriander. Continue to cook for another 5 minutes, allowing the flavours to meld.
  6. Pour in the heavy cream and mix until the sauce thickens and the chicken is fully coated. Simmer for an additional 5-7 minutes, adjusting the consistency with water if necessary.
  7. Season the Butter Chicken with salt to taste.

Step 4: Garnish and Serve

(Photo from iStock)

  1. Transfer your homemade Butter Chicken to a serving dish.
  2. If desired, garnish with fresh coriander leaves (cilantro) for a burst of freshness and color.
  3. Serve your Butter Chicken hot with steamed basmati rice, naan bread, or roti. It also pairs well with a cooling side of cucumber raita.

Variations and Tips

Butter Chicken is a versatile dish that can be customized to suit your preferences:
  1. Spice Level: Adjust the amount of red chili powder to make the dish milder or spicier according to your taste.
  2. Creaminess: For a richer and creamier texture, you can increase the amount of heavy cream or add a bit of yogurt at the end.
  3. Vegetarian Version: Substitute the chicken with paneer (Indian cottage cheese) or tofu for a vegetarian version of Butter Chicken.
  4. Healthier Options: Use low-fat yogurt and reduce the amount of butter and cream for a lighter version of this dish.
Here are some additional tips to ensure your Butter Chicken turns out perfectly:
  • Marinating the chicken for an extended period (overnight if possible) will result in more flavourful and tender meat.
  • Use ripe, red tomatoes for the tomato puree to achieve a rich and vibrant color in the gravy.
  • If you prefer a smoother texture, you can strain the tomato puree before using it in the gravy.
  • Be cautious with the amount of salt you add, as both the chicken marinade and the cashew paste may contain salt.
  • Taste and adjust the seasonings as you go, as Indian cooking often involves a balance of spices to achieve the desired flavour profile.

Conclusion

Cooking Indian cuisine at home may seem intimidating, but with the right ingredients and guidance, you can create a dish that’s bursting with flavour and sure to be a hit. Butter Chicken, or Murgh Makhani, is a prime example of an easy-to-make Indian dish that delivers on taste and comfort.

Whether you’re a beginner or an experienced cook, this recipe allows you to explore the world of Indian flavours in the comfort of your own kitchen. So, the next time you’re craving a taste of India, follow this step-by-step guide to cook up a delicious batch of Butter Chicken that you’ll absolutely love.

Butter Chicken, with its creamy tomato sauce and tender chicken, is more than just a dish; it’s an experience. The enticing aroma that fills your kitchen as you sauté the spices, the vibrant colors of the gravy, and the velvety texture of the sauce all contribute to the magic of this classic Indian cuisine. The beauty of Butter Chicken lies not only in its taste but also in its accessibility.

With this easy-to-follow recipe, you can savour the delightful flavours of India without the need for culinary expertise. So, roll up your sleeves, gather your ingredients, and embark on a flavourful journey into the heart of Indian cooking.

Reference:

TIMES FOOD
Want to know tips for meal prep, click on the link below:

https://theperfectblogger.com/how-to-do-your-meal-prepping-routine-at-home-everyday/


How to Choose the Right Products for Cooking

Cooking is a universal art form that transcends borders, cultures, and time. Whether you’re a seasoned chef or a novice in the kitchen, the importance of selecting the right products for cooking cannot be overstated. The ingredients and tools you use play a pivotal role in determining the taste, texture, and overall success of your culinary creations. In this comprehensive guide, we will delve into the intricate process of choosing the right products for cooking, encompassing ingredients, utensils, and cookware. By the end of this article, you’ll have the knowledge and confidence to make informed choices that elevate your cooking to new heights.

  • Ingredients Matter

(Photo from iStock)

The foundation of any great dish begins with the quality and selection of ingredients. Whether you’re preparing a simple pasta dish or a gourmet feast, understanding how to choose the right ingredients is essential.

Freshness is Key

One of the cardinal rules of cooking is to prioritize freshness. Fresh ingredients not only taste better but also provide superior nutritional value.

  • Fruits and Vegetables: Look for vibrant colors, firm textures, and a lack of blemishes or bruises. Avoid produce that appears wilted or has an off-putting odour.
  • Meat and Seafood: When selecting meat, opt for cuts that are bright red (for beef) or pink (for poultry and pork) with minimal marbling. For seafood, choose fish with clear, glossy eyes and a fresh oceanic scent.
  • Herbs and Spices: Fresh herbs should be fragrant and vibrant in color. Spices should be stored in airtight containers away from light and moisture to maintain their potency.

Organic vs. Conventional

The choice between organic and conventional ingredients is a matter of personal preference and budget. Organic products are grown without synthetic pesticides or fertilizers, making them a popular choice for those seeking to minimize exposure to chemicals. Conventional products, on the other hand, tend to be more budget-friendly. Keep in mind that while organic options may be healthier for you and the environment, both can be used in cooking effectively.

Seasonal and Local Ingredients

Cooking with seasonal and locally-sourced ingredients is a fantastic way to support local farmers and ensure you’re getting the freshest produce. Seasonal ingredients are also more likely to be at their peak flavour, which can elevate your dishes.

  • Choosing the Right Utensils

(Photo from iStock)


In the kitchen, the right utensils can make the difference between a seamless cooking experience and a frustrating one. From knives to cutting boards and measuring tools, here’s how to choose the right utensils for your culinary adventures.

Knives

A good set of knives is the backbone of any kitchen. Here’s what to consider when selecting knives:

  • Knife Types: Invest in a chef’s knife, a paring knife, and a serrated knife as essential basics. Specialty knives like boning knives and bread knives can be added as needed.
  • Material: High-quality stainless steel is a preferred choice due to its durability and resistance to corrosion.
  • Comfort and Grip: Choose knives with comfortable, ergonomic handles that allow for extended use without fatigue.
  • Maintenance: Knives should be easy to sharpen and maintain. Consider whether they require frequent honing or professional sharpening.

Measuring Tools

Accurate measurements are crucial in cooking. Invest in quality measuring cups and spoons, a kitchen scale, and a liquid measuring cup for precise ingredient quantities.

 Cookware

Pots and pans come in a variety of materials, each with its own advantages and disadvantages:

  • Stainless Steel: Stainless steel cookware is durable, non-reactive, and resistant to staining. It’s ideal for browning, deglazing, and creating fond.
  • Cast Iron: Cast iron cookware retains heat exceptionally well and provides excellent heat distribution. Seasoning is necessary to prevent rust and maintain non-stick properties.
  • Non-stick: Non-stick cookware is great for low-fat cooking and easy clean-up. However, it may not be as durable as other options and can deteriorate over time.
  • Copper: Copper cookware offers precise temperature control but can be expensive and requires regular polishing to maintain its appearance.
  • Aluminium: Aluminium cookware is lightweight and heats up quickly, but it may react with acidic ingredients, leading to off-flavours.
  • Ceramic: Ceramic cookware is non-reactive and provides even heat distribution. It’s a good choice for baking and braising.

Consider your cooking style, budget, and maintenance preferences when selecting cookware.

  • The Role of Seasonings and Condiments

(Photo from iStock)

Seasonings and condiments are the flavour enhancers that elevate your dishes from ordinary to extraordinary.

Salt

Salt is an essential seasoning in cooking, but not all salts are created equal:

  • Table Salt: This fine-grained salt is the most common. It’s perfect for general cooking and seasoning during or after cooking.
  • Kosher Salt: Kosher salt has larger, flakier crystals, making it easier to control when seasoning by hand. It’s a favorite among chefs for its texture and versatility.
  • Sea Salt: Sea salt comes in various forms and colors, each with a unique flavour profile.
  • Himalayan Pink Salt: Known for its pink hue, this salt is mined from ancient sea salt deposits in the Himalayas. It has a mild, slightly earthy flavour.

 Herbs and Spices

Herbs and spices add depth and complexity to your dishes. When choosing herbs and spices:

  • Dried vs. Fresh: Dried herbs are more concentrated in flavour than fresh, so you’ll need less. However, fresh herbs provide a vibrant, aromatic quality that dried ones can’t match.
  • Storage: Store dried herbs and spices in a cool, dark place away from moisture. Keep an eye on expiration dates to ensure freshness.
  • Experiment: Don’t be afraid to experiment with different herbs and spices to create unique flavour profiles.

Sauces and Condiments

Sauces and condiments can transform a simple dish into a culinary masterpiece:

  • Read Labels: Pay attention to the ingredients in store-bought sauces and condiments. Look for products with natural ingredients and minimal additives.
  • Homemade vs. Store-Bought: Consider making your sauces and condiments from scratch for more control over flavour and ingredients.

Dietary Considerations

When choosing ingredients and products for cooking, it’s important to take dietary considerations into account. Whether you’re cooking for yourself, family, or guests, being mindful of dietary restrictions and preferences is crucial.

Reference:

mealime

Want some amazing jewellery making ideas, that too at your home, what are you waiting for?, click on the link below:

Homemade Jewellery making for kids


The Ultimate Guide to the Best Television in Today’s Market

The television industry has witnessed a remarkable transformation over the past few decades, evolving from bulky CRT sets to sleek, high-definition wonders that adorn our living rooms today. With the rapid advancement of technology, choosing the right television has become more challenging than ever. This comprehensive guide will help you navigate the crowded television market and make an informed decision when shopping for the best TV for your home.

Types of Televisions

Before diving into specific television models, it’s essential to understand the different types of televisions available in today’s market. The primary options include:

  • LED/LCD TVs

(Photo from iStock)

LED (Light Emitting Diode) and LCD (Liquid Crystal Display) TVs are the most common and budget-friendly options. They offer excellent picture quality and come in various sizes.

  • OLED TVs

(Photo from iStock)

OLED (Organic Light Emitting Diode) TVs are known for their superior picture quality, vibrant colors, and deep blacks. They are thinner and more energy-efficient than LED/LCD TVs.

  • QLED TVs

(Photo from iStock)

QLED (Quantum Dot Light Emitting Diode) TVs use quantum dots to enhance color accuracy and brightness. They provide excellent picture quality and are a popular choice for those seeking premium performance.

  • 4K and 8K TVs

(Photo from iStock)

These TVs offer ultra-high-definition resolution, resulting in sharper and more detailed images. 8K TVs have four times the pixels of 4K TVs, but content is still limited for 8K.

  • Smart TVs

(Photo from iStock)

Smart TVs come with built-in Wi-Fi and pre-installed apps, allowing you to stream content from services like Netflix, Hulu, and Amazon Prime without additional devices.

Now that we’ve covered the different types, let’s explore some of the best televisions available in each category.

Best LED/LCD TVs

  • Samsung Q90T QLED TV

This 4K TV offers excellent picture quality, deep blacks, and impressive brightness. It features a Quantum Processor, making it ideal for gaming and sports enthusiasts.

  • LG CX OLED

Though technically an OLED TV, it’s worth mentioning because of its exceptional picture quality and gaming capabilities. It supports NVIDIA G-Sync and AMD Free Sync for smooth gaming experiences.

  • Sony X950H

Sony’s X950H is known for its superb upscaling capabilities, making it an excellent choice for watching lower-resolution content. It also boasts impressive color accuracy.

Best OLED TVs

  • LG C1 OLED

A successor to the popular CX OLED, the C1 offers outstanding picture quality, perfect blacks, and improved AI processing. It’s an excellent choice for movie and gaming enthusiasts.

  • Sony A80J OLED

This Sony OLED TV delivers stunning visuals, with the Cognitive Processor XR offering impressive upscaling and realistic color reproduction. It’s also equipped with HDMI 2.1 ports for gaming.

Best QLED TVs

  • Samsung QN90A Neo QLED: This 4K TV boasts exceptional brightness and color accuracy. Its Mini LED backlight technology enhances contrast and picture quality.
  • TCL 6-Series: Offering excellent value for money, the TCL 6-Series is a budget-friendly QLED TV that delivers good picture quality and supports both Dolby Vision and HDR10+.

Best 4K and 8K TVs

  • LG Z9 8K OLED: If you’re looking for the pinnacle of television technology, the LG Z9 is a stunning 8K OLED TV that offers unparalleled picture quality and upscaling capabilities.
  • Sony X900H 4K LED: Sony’s X900H is a solid 4K LED TV that combines good picture quality with HDMI 2.1 support for gaming. It also boasts impressive upscaling.

The Best Smart TVs

  • Samsung QN90A Neo QLED

This TV not only excels in picture quality but also in its smart capabilities. Samsung’s Tizen OS offers a user-friendly interface and access to a wide range of apps.

  • LG OLED C1

LG’s webOS is renowned for its intuitive interface and effortless navigation. The C1 OLED comes with the latest version of webOS and offers seamless integration with streaming services.

Factors to Consider When Buying a TV

(Photo from iStock)

  • Screen Size

Consider the size of your room and the viewing distance. A larger screen is more immersive but may not be suitable for smaller spaces.

  • Resolution

4K is the standard for most TVs today, but 8K options are available if you want the best possible picture quality. Ensure your content source supports the chosen resolution.

  • HDR (High Dynamic Range)

Look for TVs that support HDR formats like Dolby Vision and HDR10+ for enhanced contrast and color.

  • Refresh Rate

Higher refresh rates (e.g., 120Hz) provide smoother motion and are ideal for gaming and fast-action content.

  • Connectivity

Check for the number and type of HDMI ports, as well as USB ports, to ensure compatibility with your devices.

  • Smart Features

Evaluate the smart TV platform, app availability, and ease of use.

  • Audio Quality

While most TVs have built-in speakers, consider investing in a soundbar or external audio system for a better audio experience.

Tips for TV Shopping

(Photo from iStock)

  • Research Online

Read reviews, watch video demonstrations, and compare prices and features on reputable websites before making a decision.

  • Visit a Retail Store

If possible, visit a physical store to see the TV’s picture quality in person and ask questions about its features.

  • Set a Budget

Determine your budget range and stick to it. TVs come in various price points, so there’s likely an option that meets your needs.

  • Check Warranty and Return Policy

Review the manufacturer’s warranty and the retailer’s return policy to ensure you’re covered in case of issues.

  • Consider Future-Proofing

While it’s impossible to predict the future of technology, choosing a TV with the latest connectivity options and upscaling capabilities can help extend its lifespan.

Conclusion

Choosing the best television in today’s market can be an exciting yet challenging endeavour. With various types, brands, and features to consider, it’s crucial to assess your specific needs and preferences. Whether you prioritize picture quality, gaming capabilities, or smart features, there’s a television that’s perfect for you. By following the tips and recommendations in this guide, you’ll be well-equipped to make an informed decision and enjoy the ultimate home entertainment experience.

Reference:

Croma

Want some amazing jewellery making ideas, that too at your home, what are you waiting for?, click on the link below:

Homemade Jewellery making for kids


Creating Comprehensive Buying Guides for Kitchen Products

The kitchen is often considered the heart of the home, where delicious meals are prepared and cherished memories are made. As a result, it’s essential to have the right kitchen products and tools to make cooking and food preparation a breeze. However, with the plethora of options available in the market today, choosing the best kitchen products can be overwhelming. This is where buying guides come in handy. In this article, we will explore the importance of creating comprehensive buying guides for kitchen products and provide a step-by-step guide on how to create them effectively.

The Importance of Kitchen Product Buying Guides

  • Empowering Consumers:

Buying guides empower consumers by providing them with valuable information and insights about different kitchen products. These guides help consumers make informed decisions based on their specific needs and preferences.

  • Saving Time and Money:

Kitchen product buying guides save consumers time and money by helping them avoid purchasing products that don’t meet their requirements. With a well-researched guide, consumers can make confident choices without the need for extensive research.

  • Ensuring Quality and Durability:

A comprehensive buying guide includes information on product quality, materials, and durability. This helps consumers invest in kitchen products that will last, reducing the need for frequent replacements.

  • Staying Updated with Trends:

(Photo from iStock)

The kitchen industry is constantly evolving with new products and innovations. Buying guides keep consumers up-to-date with the latest trends and technologies, ensuring they don’t miss out on valuable improvements.

  • Comparing Options:

A well-structured buying guide allows consumers to compare different kitchen products side by side. This comparison helps them identify the best product for their specific needs and budget.

Creating Comprehensive Buying Guides for Kitchen Products

Now that we understand the importance of kitchen product buying guides, let’s delve into how to create them effectively.

Step 1: Identify Your Audience

Before creating a buying guide, it’s crucial to identify your target audience. Are you creating a guide for novice cooks, experienced chefs, or budget-conscious shoppers? Understanding your audience’s needs and preferences will guide the content and tone of your buying guide.

Step 2: Research Thoroughly

(Photo from iStock)

Comprehensive research is the foundation of an effective buying guide. Start by researching the types of kitchen products you want to include in your guide. This may include cookware, appliances, utensils, and more. Look for popular brands, models, and emerging trends in the market.

Step 3: Organize Your Content

Organize your buying guide into logical sections or categories. For example, you might have sections for cookware, small appliances, kitchen gadgets, and utensils. Each section should be further divided into subcategories, making it easy for readers to navigate.

Step 4: Provide Detailed Product Information

(Photo from iStock)

Within each section, provide detailed information about the products you’re reviewing. Include key specifications such as product dimensions, materials used, and capacity. Mention any unique features or technologies that set the product apart.

Step 5: Include Pros and Cons

Objective evaluations are essential in a buying guide. List the pros and cons of each product you review. Be honest and transparent about the strengths and weaknesses to help readers make informed decisions.

Step 6: Consider Budget and Value

While discussing each product, consider its price point and overall value for money. Not all readers will have the same budget, so it’s important to highlight options that cater to different price ranges.

Step 7: Include User Reviews and Ratings

User reviews and ratings provide valuable insights from real consumers. Incorporate snippets of user feedback to give your readers a sense of how a product performs in real-life scenarios. You can also mention any awards or recognitions a product has received.

Step 8: Highlight Trends and Innovations

Keep your readers informed about the latest kitchen trends and innovations. If there are emerging technologies or design trends in the kitchen product industry, be sure to mention them. Highlight how these innovations can enhance the cooking experience.

Step 9: Consider Maintenance and Cleaning

(Photo from iStock)


Kitchen products require regular maintenance and cleaning. Provide tips and guidelines on how to care for and clean the products you recommend. This information is particularly helpful for prolonging the lifespan of kitchen appliances and cookware.

Step 10: Add Visuals

Visual elements such as images, diagrams, and infographics can enhance the readability of your buying guide. Include high-quality images of the products, as well as any visual aids that explain product features or usage.

Step 11: Offer Buying Recommendations

Based on your research and evaluations, offer buying recommendations in each section. This could include a “Best Overall” choice, a “Budget-Friendly” option, and a “Premium Pick” for those willing to invest in quality.

Step 12: Update Regularly

The kitchen product market is dynamic, with new products constantly entering the scene. Make it a habit to update your buying guide regularly to reflect the latest offerings and trends. Outdated information can lead to confusion and frustration for your readers.

Conclusion

Creating comprehensive buying guides for kitchen products is a valuable service for consumers seeking the best tools and appliances for their culinary adventures. By following the steps outlined in this article, you can create informative and reliable guides that empower readers to make informed choices, save time and money, and enjoy their time in the kitchen to the fullest. Remember that the key to an effective buying guide is thorough research, honest evaluations, and a commitment to keeping the information up-to-date. With a well-crafted buying guide, you can become a trusted resource for kitchen enthusiasts and aspiring chefs alike. Happy cooking!

In addition to the steps outlined above, it’s essential to maintain a user-centric approach throughout the creation of kitchen product buying guides. Consider the real-world needs and challenges that your readers might encounter in their kitchens. Address common questions and concerns, such as product warranties, customer support, and return policies. Furthermore, encourage reader engagement by providing a platform for them to ask questions or share their experiences with the products you recommend. By continuously listening to your audience and adapting your buying guides accordingly, you can build a trusted relationship and ensure that your guides remain a valuable resource for kitchen enthusiasts.

Reference:

Forbes HOME

Want some amazing jewellery making ideas, that too at your home, what are you waiting for?, click on the link below:

Homemade Jewellery making for kids


Increasing Your Blog Conversions: Strategies for Success

Blogging has evolved from a mere hobby to a powerful tool for individuals and businesses alike to reach and engage with their target audience. Whether you’re a seasoned blogger or just starting, the ultimate goal is often the same – to convert readers into subscribers, customers, or loyal followers. This article will explore various strategies and techniques to help you boost your blog conversions and achieve your goals.

  • High-Quality Content

  (Photo from iStock)

Before diving into conversion strategies, ensure your blog provides value to your readers. Well-researched, informative, and engaging content will naturally attract and retain visitors, increasing the likelihood of conversion. Here are some tips for creating compelling content:

  1. Identify your target audience: Understanding your audience’s needs, interests, and pain points is crucial. Tailor your content to address these specific concerns.
  2. Conduct keyword research: Use tools like Google Keyword Planner or Ahrens to identify relevant keywords and incorporate them naturally into your content to boost your blog’s SEO.
  3. Write attention-grabbing headlines: A compelling headline piques readers’ interest and encourages them to click and read further.
  4. Use visuals: Incorporating images, infographics, and videos can make your content more engaging and shareable.
  5. Tell stories: Stories have a unique way of capturing readers’ emotions and keeping them engaged. Share personal anecdotes or real-life examples to connect with your audience.
  • Optimize Website Speed and Mobile Responsiveness

In today’s fast-paced digital world, users expect web pages to load quickly, regardless of the device they’re using. Slow-loading websites can lead to high bounce rates and lost conversions. To ensure your blog is up to speed:

  1. Choose a reliable hosting provider: Invest in a hosting provider that offers fast loading times and 24/7 support.
  2. Optimize images and videos: Compress images and videos to reduce their file sizes without compromising quality.
  3. Use responsive design: Ensure your blog is mobile-friendly to cater to the growing number of mobile users.
  4. Implement browser caching: Caching can significantly improve load times by storing frequently accessed files locally on users’ devices.
  5. Minimize HTTP requests: Reduce the number of elements that need to be loaded by combining CSS and JavaScript files and using asynchronous loading where possible.
  • Clear and Compelling Call-to-Actions (CTAs)

(Photo from iStock)

A well-placed and clear call-to-action (CTA) can be a game-changer for increasing blog conversions. Your CTAs should be attention-grabbing, action-oriented, and strategically placed within your content. Here’s how to make the most of them:

  1. Be specific: Instead of using generic phrases like “click here” or “learn more,” use CTAs that clearly state what action you want the reader to take, such as “Download our free e-book” or “Subscribe to our newsletter.”
  2. Use contrasting colors: Make your CTAs stand out by using colors that contrast with your blog’s overall design.
  3. Position strategically: Place CTAs at key points in your content, such as after an informative section or at the end of a blog post.
  4. Test different variations: A/B testing can help you determine which CTAs perform best, so you can refine your approach over time.
  • Build Trust with Social Proof

People are more likely to take action if they see that others have done so before them. Social proof can be a powerful tool in increasing blog conversions. Here are some ways to incorporate social proof into your blog:

  1. User reviews and testimonials: Display testimonials from satisfied customers or readers who have benefited from your blog’s content or products.
  2. Trust badges and certifications: If your blog has received awards, certifications, or endorsements from reputable sources, prominently display them.
  3. Highlight subscriber counts: Showcase the number of subscribers or followers your blog has to demonstrate its popularity and credibility.
  4. Case studies and success stories: Share real-life examples of how your blog or products have helped others achieve their goals.
  5. Display social media shares and likes: Show the social media engagement your content has received to indicate its value to readers.
  • Implement Email Marketing

(Photo from iStock)

Email marketing remains one of the most effective ways to convert blog readers into loyal subscribers or customers. Here’s how to leverage email marketing for your blog:

  1. Offer lead magnets: Create valuable lead magnets, such as e-books, guides, or templates, and offer them in exchange for visitors’ email addresses.
  2. Use email opt-in forms: Place strategically timed and well-designed opt-in forms throughout your blog to capture visitor emails.
  3. Segment your email list: Segment your subscribers based on their interests and behaviour to send them targeted content and offers.
  4. Send engaging content: Regularly send informative and engaging emails to keep your subscribers interested and informed.
  5. A/B test your email campaigns: Experiment with different subject lines, content formats, and sending times to optimize your email open and click-through rates.
  • Leverage Exit-Intent Popups

Exit-intent popups are a clever way to capture visitors’ attention just before they leave your blog. These popups can offer a last-minute incentive to keep readers engaged or convert them into subscribers or customers. When implementing exit-intent popups:

  1. Offer value: Provide a compelling offer, such as a discount code, free resource, or subscription, to entice visitors to stay or take action.
  2. Keep it non-intrusive: Ensure the popup doesn’t disrupt the reading experience and is easy to dismiss.
  3. A/B test designs and messaging: Experiment with different popup designs and messages to find the most effective combination.
  • Analyse and Optimize

(Photo from iStock)

Continuously monitoring and analysing your blog’s performance is essential for increasing conversions over time. Use analytics tools like Google Analytics to gain insights into your visitors’ behaviour and preferences. Key metrics to track include:

  1. Conversion rate: Monitor the percentage of visitors who take the desired action, whether it’s subscribing, making a purchase, or downloading a resource.
  2. Bounce rate: Keep an eye on your bounce rate to identify pages with high exit rates and work on improving them.
  3. User flow: Analyse how visitors navigate your blog and identify any drop-off points in the conversion funnel.
  4. Click-through rates (CTR): Measure the CTR of your CTAs and email campaigns to gauge their effectiveness.
  5. Heatmaps and session recordings: Use tools like Hotjar to visualize how visitors interact with your blog and identify areas for improvement.
  • Conclusion

Increasing your blog conversions requires a holistic approach that combines high-quality content, user-friendly design, persuasive CTAs, social proof, email marketing, and data-driven optimization. By implementing these strategies and continuously refining your approach, you can turn your blog into a conversion powerhouse, achieving your goals and building a loyal audience in the process. Remember that success may not happen overnight, but with dedication and persistence, you can steadily increase your blog’s conversion rates and reap the rewards.

Reference:

Site Centre

Want some amazing jewellery making ideas, that too at your home, what are you waiting for?, click on the link below:

Homemade Jewellery making for kids

Mastering Pinterest: Advice and Tips for Success

In today’s digital age, social media platforms have become a powerful tool for both personal and professional use. Among the multitude of platforms available, Pinterest stands out as a unique and highly visual platform that has captured the hearts of millions. Pinterest is not just a place to find creative inspiration; it’s also a powerful marketing tool for businesses and a source of income for many individuals. In this article, we’ll explore This advice and tips to help you make the most of this platform, whether you’re a casual user, a content creator, or a business owner.

Understanding Pinterest: A Visual Discovery Engine

(Photo from iStock)

Before diving into the advice and tips, it’s important to understand what makes Pinterest unique. It is often described as a “visual discovery engine” rather than a traditional social media platform. Unlike Facebook or Twitter, where users share updates and engage in conversations, it is all about discovering and saving visual content. Users create virtual bulletin boards, known as “boards,” to collect and organize images, known as “pins,” that they find interesting or inspiring.

Pinterest’s user base is primarily composed of people seeking inspiration, ideas, and solutions. Whether it’s home décor, fashion, recipes, travel destinations, or DIY projects, Pinterest is the go-to place for finding visually appealing content. This unique user base and content format make Pinterest an excellent platform for businesses and content creators to showcase their products and ideas.

Pinterest for Personal Use: Tips and Tricks

If you’re using Pinterest primarily for personal use, here are some tips to enhance your experience:

  • Create Well-Organized Boards

Take the time to create boards for different interests or projects in your life. Organize your pins into these boards to keep your content easily accessible and visually appealing.

  • Use Descriptive Titles and Descriptions

When creating boards and pins, use clear and descriptive titles and descriptions. This not only helps you remember the purpose of each board but also makes your content more discoverable by others interested in similar topics.

  • Follow Relevant Accounts

(Photo from iStock)

Follow accounts and boards that align with your interests. This will fill your feed with content that inspires you and keeps you engaged with the platform.

  • Engage with the Pinterest Community

Don’t be shy about commenting on pins or re-pinning content you love. Engaging with others can lead to interesting conversations and connections with people who share your interests.

  • Utilize Pinterest for Planning

Pinterest is an excellent tool for planning everything from vacations to home renovations. Create secret boards for personal projects, and use them to gather ideas and inspiration before taking action.

  • Enable Two-Factor Authentication

For added security, enable two-factor authentication on your Pinterest account. This helps protect your personal information and pins from unauthorized access.

Pinterest for Content Creators: Strategies for Success

If you’re a content creator looking to expand your reach and engage with a broader audience, Pinterest can be a powerful ally. Here are some strategies to help you make the most of Pinterest as a content creator:

  • Optimize Your Profile

(Photo from iStock)

Your Pinterest profile serves as your digital calling card. Make sure it’s complete and visually appealing. Use a high-quality profile picture, write a compelling bio, and include a link to your website or other social media profiles.

  • Pin High-Quality Content

Pinterest is a platform where aesthetics matter. Create visually appealing pins that resonate with your target audience. Use high-resolution images and make sure your pins are well-designed and informative.

  • Use Keywords Strategically

(Photo from iStock)

Pinterest is essentially a search engine for visuals. Incorporate relevant keywords into your pin descriptions and board titles to increase the discoverability of your content. Use tools like Pinterest’s own keyword planner to find popular search terms.

  • Create Fresh Content Regularly

Consistency is key on Pinterest. Make an effort to pin fresh content regularly. Create new pins for your existing blog posts, products, or services to keep your profile active and engaging.

  • Leverage Rich Pins

Pinterest offers several types of rich pins, including product pins, recipe pins, and article pins. These pins provide additional information directly on the pin itself, making them more valuable and clickable.

  • Join Group Boards

Collaboration is a great way to expand your reach on Pinterest. Join group boards in your niche where you can share your pins with a larger audience. Be sure to follow the rules and etiquette of each group board.

  • Promote Seasonal and Trending Content

Pinterest is a platform where trends come and go. Stay updated with seasonal trends and create content around them. Seasonal and trending content tends to get more attention.

Pinterest for Businesses: Driving Success

For businesses, Pinterest offers unique opportunities to connect with potential customers and drive sales. Here’s how you can leverage Pinterest for business success:

  • Verify Your Website

(Photo from iStock)

Verifying your website on Pinterest not only adds credibility but also enables you to track the performance of pins that link back to your site.

  • Create Product Pins

If you sell products, take advantage of product pins. These pins include real-time pricing and availability information, making it easy for users to make purchasing decisions.

  • Utilize Pinterest Ads

Pinterest offers advertising options to promote your pins to a larger audience. Take advantage of advertisements for your own business.

  • Pin Consistently

(Photo from iStock)

Being active on Pinterest  is a significant part, that should be consistent. Create a content calendar and pin regularly to keep your audience engaged.

  • Collaborate with Influencers

(Photo from iStock)

Influencer marketing can be highly effective on Pinterest. Collaborate with influencers in your niche to reach their engaged audience.

Pinterest Privacy and Etiquette: Best Practices

Whether you’re using it for personal or professional purposes, it’s essential to maintain privacy and follow proper etiquette. Here are some best practices:

  • Respect Copyright and Intellectual Property

Always give credit to the original source when re-pinning content, and avoid using copyrighted images without permission.

  • Use Secret Boards for Sensitive Content

If you’re planning a surprise or have content that you want to keep private, utilize Pinterest’s secret boards feature. Only you and invited collaborators can see the content on these boards.

  • Be Respectful in Comments 

If you leave comments on pins, ensure they are respectful and relevant. Avoid spammy or offensive comments.

  • Report Inappropriate Content

If you come across content that violates Pinterest’s guidelines, report it to help maintain a positive and safe environment.

  • Respect Group Board Rules

When joining group boards, always follow the rules set by the board owner. Failure to do so can result in removal from the board.

Conclusion

Pinterest is a unique and powerful platform that offers endless possibilities for personal users, content creators, and businesses alike. Whether you’re looking for inspiration, seeking to expand your online presence, or aiming to boost your sales, it provides the tools and opportunities you need to succeed. By following the advice and tips outlined in this article, you can harness the full potential of Pinterest and make it an integral part of your digital journey. Happy pinning!

Reference:

Medium

Want some amazing jewellery making ideas, that too at your home, what are you waiting for?, click on the link below:

Homemade Jewellery making for kids

The Art, Science, and History of Beards: A 2000-Year-Old Trend

Beards have been a symbol of masculinity, wisdom, and style for millennia. While the popularity of facial hair may ebb and flow with the times, the beard has consistently remained a powerful symbol of self-expression and identity. In this comprehensive article, we will delve into the art, science, and history of beards, exploring their cultural significance, grooming techniques, and even their place in modern society. From the ancient Egyptians to the hipster beard revival, the journey of the beard is a fascinating one.

The Cultural Significance of Beards

Throughout history and across cultures, beards have held diverse meanings and significance. Here, we’ll explore some of the cultural facets associated with facial hair:

  • Ancient Egypt: The Pharaohs and Beards

(Photo from iStock)

In ancient Egypt, beards played a pivotal role in religious and cultural contexts. Pharaohs, who were considered divine, were often depicted with long, stylized beards as a symbol of their power and divinity. Ordinary Egyptians, on the other hand, were typically clean-shaven. The act of shaving was not only practical but also symbolic of humility before the gods.

  • Greek Philosophy: Wisdom and Beards

(Photo from iStock)

In ancient Greece, beards were associated with wisdom, intellect, and age. Prominent philosophers like Socrates, Plato, and Aristotle all sported beards. The beard was seen as a sign of intellectual prowess, and many Greeks believed that facial hair absorbed knowledge and wisdom from the environment.

  • Roman Empire: The Influence of Fashion

(Photo from iStock)

The Romans had a complex relationship with beards. In the early days of the Roman Republic, beards were a symbol of virility and strength. However, as the Roman Empire grew, a preference for a clean-shaven face emerged. This shift was partly due to the influence of the military, as a clean-shaven face was more practical for wearing helmets and ensuring a proper seal for gas masks during battle.

  • Middle Ages: A Symbol of Knighthood

(Photo from iStock)

During the Middle Ages, beards became associated with knighthood and chivalry. Knights grew beards as a mark of honour, and the length and style of a knight’s beard often signified their rank and status within the order.

  • Renaissance: A Symbol of Artistic Expression

(Photo from iStock)

In the Renaissance era, beards once again gained popularity among artists, scholars, and intellectuals. The likes of Leonardo da Vinci, Michelangelo, and William Shakespeare all sported facial hair. Beards were seen as a symbol of creativity and artistic expression.

  • 19th Century: The Victorian Era Beard

(Photo from iStock)

The 19th century saw a resurgence of facial hair fashion in the Western world, especially during the Victorian era. Men grew elaborate beards, often accompanied by meticulously groomed moustaches. These beards were seen as a mark of masculinity, and various styles, such as the mutton chops and the chin curtain, gained popularity.

  • The 20th Century: Beards and Counterculture Movements

(Photo from iStock)

The 20th century brought about significant shifts in beard culture. During the early 1900s, beards went out of fashion, largely due to the influence of military grooming standards and the desire for a clean-cut appearance. However, beards experienced a revival during the counterculture movements of the 1960s and 1970s, with icons like the Beatles and Bob Dylan sporting facial hair as a symbol of rebellion against the establishment.

  • Modern Times: Beards as a Style Statement

(Photo from iStock)

In the 21st century, beards have become a prominent fashion statement once again. The “hipster” beard trend, characterized by long, well-maintained facial hair, gained popularity in the 2010s. Beards are no longer solely associated with rebellion or counterculture but have become a mainstream expression of personal style and identity.

The Science of Beard: What Determines Beard Growth?

While cultural and historical factors have influenced the perception of beards, the science behind beard growth is rooted in genetics and hormones. Understanding how beards grow can help individuals groom and care for their facial hair more effectively.

Beard Care and Maintenance

To maintain a healthy and attractive beard, proper care and grooming are essential:

  • Cleansing: Regularly wash your beard with a mild shampoo to remove dirt, oil, and dead skin cells. Use a beard-specific shampoo to prevent over-drying.
  • Trimming: Regularly trim your beard to maintain its shape and prevent split ends. Invest in a quality beard trimmer or visit a barber for professional maintenance.
  • Moisturizing: Apply beard oil or balm to keep your facial hair and the skin beneath it hydrated. This prevents dryness, itchiness, and beard dandruff.
  • Brushing: Use a beard brush or comb to distribute natural oils evenly, detangle hair, and maintain a neat appearance.
  • Diet and Lifestyle: A balanced diet rich in vitamins and minerals, particularly biotin, can promote healthy beard growth. Additionally, managing stress and getting adequate sleep can positively impact beard health.

The Role of Social Media

Social media platforms have played a pivotal role in the modern beard culture. Platforms like Instagram and TikTok have allowed individuals to showcase their beard styles and grooming routines to a global audience. Beard influencers and bloggers have gained significant followings, further fuelling the popularity of facial hair.

Grooming as Self-Care

For many men, grooming their beard is a form of self-care. Taking the time to cleanse, trim, and style one’s facial hair can be a relaxing and meditative ritual. Beard grooming also promotes healthy skin and hair, contributing to overall well-being.

Conclusion

Beards have a rich and diverse history, ranging from their symbolic significance in ancient cultures to their modern role as a form of self-expression and style. The art, science, and history of beards have evolved over the centuries, reflecting changing cultural norms, fashion trends, and individual preferences.

In contemporary society, beards continue to be a powerful symbol of masculinity, wisdom, and personal identity. Whether you choose to embrace a full, bushy beard, a meticulously groomed moustache, or a clean-shaven look, your facial hair is a canvas for self-expression and a reflection of your unique identity. As beard culture thrives in the 21st century, the journey of the beard remains a fascinating and ever-evolving one.

Reference:

The Manual

Want some amazing jewellery making ideas, that too at your home, what are you waiting for?, click on the link below:

Homemade Jewellery making for kids


Recipes for People Who Want to Lose Weight

Losing weight is a goal that many people aspire to achieve, and a healthy diet plays a crucial role in this journey. However, the misconception that weight loss diets are bland and boring is far from the truth. In fact, there are countless delicious and nutritious recipes that can help you shed those extra pounds while savouring every bite. In this article, we will explore a variety of recipes that cater to different tastes and dietary preferences, making your weight loss journey enjoyable and sustainable.

A nutritious and satisfying breakfast can set the tone for the rest of the day. Start your day with these delicious recipes that provide energy and keep you full until your next meal.

  • Here’s a list of some dishes you can have in breakfast for weight loss:

  • Greek Yogurt Parfait

(Photo from iStock)

Ingredients:
  • 1/2 cup Greek yogurt (low-fat)
  • 1/4 cup mixed berries (blueberries, strawberries, raspberries)
  • 1 tablespoon honey
  • 1/4 cup granola (choose a low-sugar option)
Instructions:
  • Greek yogurt should be layered at the bottom of a glass or bowl.
  • The yogurt should be topped with the mixed berries.
  • Drizzle honey over the berries.
  • Sprinkle granola as the final layer.
  • Enjoy a creamy, crunchy, and sweet breakfast.
  • Avocado Toast

(Photo from iStock)

Ingredients:
  • 1 ripe avocado
  • 2 slices whole-grain bread
  • 1/2 lemon
  • Salt and pepper to taste
  • Optional toppings: cherry tomatoes, arugula, poached egg
Instructions:
  1. Toast the bread until it’s lightly browned.
  2. Mash the ripe avocado in a bowl, adding a squeeze of lemon juice, salt, and pepper to taste.
  3. Toast the bread, then top with the avocado mixture.
  4. Top with your choice of additional ingredients like cherry tomatoes, arugula, or a poached egg.
  5. A satisfying and healthy breakfast is ready to enjoy.
  6. Lunchtime favourites

Lunch can be a tricky meal when you’re trying to lose weight, but these recipes are both filling and nutritious, helping you stay on track.

  • Grilled Chicken Salad

(Photo from iStock)

Ingredients:
  • 4 oz grilled chicken breast (sliced)
  • 2 cups mixed greens (spinach, kale, lettuce)
  • 1/4 cup cherry tomatoes
  • 1/4 cucumber (sliced)
  • 1/4 red onion (thinly sliced)
  • 2 tablespoons balsamic vinaigrette dressing (low-fat)
Instructions:
  1. Place the mixed greens in a large bowl.
  2. Add the grilled chicken, cherry tomatoes, cucumber, and red onion on top.
  3. Over the salad, drizzle the balsamic vinaigrette dressing.
  4. Toss gently and enjoy a protein-packed lunch.
  • Quinoa and Black Bean Bowl

(Photo from iStock)

Ingredients:
  • 1/2 cup cooked quinoa
  • 1/2 cup washed and drained canned black beans
  • 1/4 cup corn kernels (cooked)
  • 1/4 cup diced bell peppers (various colours)
  • 1/4 cup diced avocado
  • 1 tablespoon cilantro (chopped)
  • Juice of 1 lime
  • Salt and pepper to taste
Instructions:
  1. In a bowl, combine cooked quinoa, black beans, corn, bell peppers, and avocado.
  2. Squeeze fresh lime juice over the mixture.
  3. Season with salt, pepper, and cilantro.
  4. Mix well and enjoy a flavourful, plant-based lunch option.
  5. Satisfying Dinners

Dinner is an opportunity to savour a wholesome and balanced meal. These recipes are not only delicious but also support your weight loss goals.

  • Baked Salmon with Asparagus

(Photo from iStock)

Ingredients:
  • 4 oz salmon fillet
  • 1/2 bunch asparagus spears
  • 1 tablespoon olive oil
  • 1 lemon (sliced)
  • Salt and pepper to taste
  • Fresh dill (for garnish)
Instructions:
  1. Preheat the oven to 375°F (190°C).
  2. On a baking sheet covered with parchment paper, put the salmon fillet.
  3. Arrange asparagus spears around the salmon.
  4. Drizzle olive oil over the salmon and asparagus, then season with salt and pepper.
  5. Slices of lemon should be placed above the fish.
  6. Bake for 15-20 minutes until the salmon is cooked through and flakes easily.
  7. Garnish with fresh dill and serve this delightful and protein-rich dinner.
  • Almond and Berry Smoothie

(Photo from iStock)

Ingredients:
  • 1 cup unsweetened almond milk
  • 1/2 cup mixed berries (strawberries, blueberries, raspberries)
  • 1 tablespoon almond butter
  • 1 teaspoon honey (optional)
  • Ice cubes (optional)
Instructions:
  1. Combine almond milk, mixed berries, almond butter, and honey (if using) in a blender.
  2. Add ice cubes for a thicker consistency, if desired.
  3. Blend until smooth and creamy.
  4. Pour into a glass and enjoy this refreshing and protein-rich snack.
  • Veggie Sticks with Hummus

(Photo from iStock)

Ingredients:
  • Carrot sticks
  • Cucumber slices
  • Bell pepper strips (various colours)
  • Cherry tomatoes
  • 2 tablespoons hummus (store-bought or homemade)
Instructions:
  1. Wash and cut the vegetables into sticks and slices.
  2. Present hummus on the side for dipping.
  3. A crunchy and satisfying snack that’s low in calories and high in nutrients.
  4. Delectable Desserts

Your attempts to lose weight don’t have to be ruined by satisfying your sweet desire. These dessert recipes are indulgent yet guilt-free.

  • Chocolate Avocado Mousse

(Photo from iStock)

Ingredients:
  • 1 ripe avocado
  • 2 tablespoons unsweetened cocoa powder
  • 2 tablespoons honey or maple syrup
  • 1/2 teaspoon vanilla extract
  • Pinch of salt
  • Fresh berries (for garnish)
Instructions:
  1. Scoop out the flesh of the ripe avocado and place it in a blender or food processor.
  2. Add cocoa powder, honey or maple syrup, vanilla extract, and a pinch of salt.
  3. Blend until smooth and creamy.
  4. Refrigerate for 30 minutes before serving.
  5. Garnish with fresh berries for added flavour and antioxidants.
  • Greek Yogurt and Berry Popsicles

(Photo from iStock)

Ingredients:
  • 1 cup Greek yogurt (low-fat)
  • 1/2 cup mixed berries (blueberries, strawberries, raspberries)
  • 1 tablespoon honey
  • Popsicle moulds
Instructions:
  1. In a bowl, mix Greek yogurt, mixed berries, and honey.
  2. Pour the mixture into popsicle moulds.
  3. Freeze for at least 4 hours or until solid.
  4. Enjoy a cool and creamy treat that’s rich in protein and vitamins.

Conclusion

Losing weight doesn’t mean you have to sacrifice flavour or enjoyment in your meals. These recipes are not only delicious but also packed with essential nutrients to support your weight loss journey. Remember that portion control and balanced eating are key to achieving your goals.

Experiment with these recipes, and don’t hesitate to customize them to your taste and dietary preferences. With the right combination of healthy ingredients and mindful eating, you can reach your weight loss goals while savouring every bite. You should consider these both vegetarian and non-vegetarian dishes you can easily make at home, with low calories.

Reference:

Taste

Want some amazing jewellery making ideas for your kids, that too at your home, what are you waiting for?, click on the link below for amazing designs:

Homemade Jewellery making for kids


Rank your top 10 Television shows by genre

Television has evolved into a medium that offers a wide array of genres, each catering to different tastes and interests. Whether you’re a fan of thrilling dramas, hilarious comedies, gripping mysteries, or thought-provoking documentaries, there’s a TV show out there that’s perfect for you. In this article, we’ll take a deep dive into the world of television and rank the top TV shows across various genres, celebrating the diversity and excellence of storytelling on the small screen.

  • Following are some famous Television shows with their genres:

  •  Drama

“Breaking Bad” (Crime Drama)

(Photo from wallpapercave)

“Breaking Bad” is a crime drama that stands as a masterpiece of television. Created by Vince Gilligan, this series tells the story of Walter White, a high school chemistry teacher turned methamphetamine manufacturer. Bryan Cranston’s portrayal of Walter White is a masterclass in acting, and the show’s complex characters, moral dilemmas, and intense storytelling make it an unforgettable experience.

“Game of Thrones” (Fantasy Drama)

Based on George R.R. Martin’s “A Song of Ice and Fire” series, “Game of Thrones” redefined fantasy television. With its epic battles, political intrigue, and a sprawling ensemble cast, this show captured the imaginations of viewers worldwide. While the final season received mixed reviews, there’s no denying the impact this series had on the genre.

  •  Comedy

 “Friends” (Sitcom)

(Photo from wallpapercave)

“Friends” is a timeless sitcom that has continued to charm audiences since its debut. The hilarious misadventures of six friends living in New York City—Ross, Rachel, Monica, Chandler, Joey, and Phoebe—remain relatable and endlessly entertaining. Moreover, the show’s witty humour, memorable catchphrases, and endearing characters have earned it a permanent place in television history.

 “The Office” (Mockumentary)

(Photo from wallpapercave)

“The Office” (U.S. version) is a mockumentary-style sitcom that brilliantly satirizes the mundanity of office life. Led by Steve Carell’s iconic portrayal of Michael Scott, the show’s quirky characters and deadpan humour made it a cult classic. Hence, its influence on the mockumentary genre and its ability to capture the essence of workplace dynamics are unparalleled.

  • Mystery and Thriller

“Sherlock” (Mystery)

(Photo from wallpapercave)

“Sherlock” modernizes Sir Arthur Conan Doyle’s iconic detective for the 21st century. Benedict Cumberbatch’s Sherlock Holmes and Martin Freeman’s Dr. John Watson make for a dynamic duo. The series is known for its intricate mysteries, clever deductions, and sharp writing. It reinvigorated the detective genre for a new generation of viewers.

“Stranger Things” (Science Fiction Horror)

(Photo from wallpapercave)

“Stranger Things” combines ’80s nostalgia, supernatural elements, and a group of lovable kids facing otherworldly threats. The show’s blend of horror, science fiction, and heartfelt coming-of-age stories has made it a standout in the mystery and thriller genre. Further, its character-driven narrative and homage to ’80s pop culture have earned it a dedicated fan base.

  • Science Fiction and Fantasy

“The Twilight Zone” (Science Fiction Anthology)

(Photo from wallpapercave)

“The Twilight Zone,” created by Rod Serling, remains a seminal work in the science fiction anthology genre. With its thought-provoking and often eerie tales, it challenged societal norms and explored moral dilemmas. Hence, the show’s impact on both science fiction and television storytelling cannot be overstated.

 “The Mandalorian” (Space Western)

(Photo from wallpapercave)

“The Mandalorian” takes viewers to the far reaches of the Star Wars universe. This space western follows a lone bounty hunter, known as the Mandalorian, as he navigates the lawless outer reaches of the galaxy. Further, the show’s blend of epic space battles, memorable characters, and Western-inspired storytelling has captured the hearts of Star Wars fans and newcomers alike.

  • Historical and Period Drama

 “The Crown” (Historical Drama)

(Photo from wallpapercave)

“The Crown” offers a sumptuous and immersive portrayal of the reign of Queen Elizabeth II. This historical drama explores the political and personal challenges faced by the British monarchy. With its impeccable production values, stellar ensemble cast, and meticulous attention to historical detail, “The Crown” is a captivating journey through history.

“Mad Men” (Period Drama)

(Photo from wallpapercave)

“Mad Men” transports viewers to the glamorous but turbulent world of advertising in the 1960s. The series, created by Matthew Weiner, is known for its complex characters, sharp social commentary, and stunning period-accurate aesthetics. Hence, “Mad Men” skilfully weaves personal and professional dramas against the backdrop of a transformative era in American history.

  •  Animation

“Avatar: The Last Airbender” (Fantasy Animation)

(Photo from wallpapercave)

“Avatar: The Last Airbender” is a beloved animated series that combines fantasy, adventure, and profound storytelling. Set in a world where people can manipulate the elements, it follows Aang, the last Airbender, on his quest to bring balance to the world. The show’s rich world-building, character development, and moral themes make it a standout in animation.

 “Rick and Morty” (Science Fiction Animation)

(Photo from wallpapercave)

“Rick and Morty” is a darkly comedic science fiction animation that follows the misadventures of an eccentric scientist, Rick Sanchez, and his easily influenced grandson, Morty. The series explores complex scientific and philosophical concepts while maintaining a sharp sense of humour and irreverence. It has garnered a dedicated fanbase and critical acclaim.

  • Superhero and Comic Book Adaptations

“The Boys” (Dark Superhero Drama)

(Photo from wallpapercave)

“The Boys” subverts the superhero genre by depicting a world where superheroes abuse their powers and celebrity status. This dark and satirical series explores themes of corruption, corporate manipulation. Moreover,  the consequences of unchecked power.

  •  Romance and Relationships

“Outlander” (Historical Romance)

(Photo from wallpapercave)

“Outlander” seamlessly blends romance, historical drama, and time travel. The show follows Claire Randall, a WWII nurse who is transported back in time to 18th-century Scotland. The passionate love story between Claire and Jamie Fraser unfolds against the backdrop of historical events, making it a captivating journey through time and love.

 “Modern Love” (Anthology Romance)

(Photo from wallpapercave)

“Modern Love” is an anthology series that explores the complexities of love and relationships in the modern world. Each episode features a different story, showcasing a range of romantic experiences, from heart-warming to heart-breaking. Further, the show’s diverse cast and relatable themes make it a compelling exploration of human connection.

  • Horror and Supernatural

“The Haunting of Hill House” (Horror)

(Photo from wallpapercave)

“The Haunting of Hill House” is a spine-chilling horror series that weaves together supernatural elements and family drama. With its intricate storytelling, eerie atmosphere, and well-developed characters. Furthermore,  it stands as a modern classic in the horror genre.

 “American Horror Story” (Anthology Horror)

(Photo from wallpapercave)

“American Horror Story” is an anthology series that reinvents itself with each season, exploring different horror themes and settings. Its bold and often disturbing storytelling, coupled with a rotating ensemble cast. Hence, has earned it a dedicated following among horror enthusiasts.

Reference:

Pinkvilla

Want some amazing jewellery making ideas, that too at your home, what are you waiting for?, click on the link below:

Homemade Jewellery making for kids


Create video game walk-throughs and strategy guides

Video game walkthroughs and strategy guides have become an essential part of the gaming community. They provide invaluable assistance to gamers struggling with difficult levels, puzzles, or bosses. Additionally, they can offer insights into the lore and world-building of the game, enhancing the overall gaming experience. Creating your own walkthroughs and guides allows you to share your knowledge, help others, and potentially even turn your passion for gaming into a source of income.

One should follow the  steps mentioned below in order to make your own video game walk-through:

Choosing Your Video Game

(Photo from iStock)

The first step in creating a video game walkthrough or strategy guide is choosing the game you want to cover. Select a game that you are not only passionate about but also have a deep understanding of. Consider the following factors:

  • Expertise

You should have a high level of expertise in the game, meaning you’ve completed it multiple times, explored various paths, and discovered its secrets.

  • Demand

Investigate whether there’s a demand for a walkthrough or guide for your chosen game. Check gaming forums, social media, and other platforms to see if players are actively seeking assistance.

  • Niche

While popular games can attract more readers, consider that there might be more competition. Focusing on a less-covered or niche game can help you stand out.

Planning Your Walkthrough

Before diving into creating your video game walkthrough, it’s crucial to plan your approach. Consider the following aspects:

  • Scope

Determine the scope of your guide. Will it be a comprehensive walkthrough covering the entire game, or will you focus on specific sections, challenges, or strategies?

  • Structure

Decide on the structure of your guide. Will it be a step-by-step walkthrough, a collection of tips and strategies, or a combination of both?

  • Audience

Understand your target audience. Are you creating a guide for beginners, intermediate players, or advanced gamers? Tailor your content accordingly.

  • Platforms

Consider the platforms your audience uses. Will your guide be in written form, video format, or a combination of both? Each format has its advantages and audience preferences.

Research and Gameplay

Once you’ve chosen your game and planned your walkthrough, it’s time to start playing and researching. Here’s what you need to do:

  • Thorough Playthrough

Begin by playing the game from start to finish, taking detailed notes and screenshots along the way. This will help you understand the game’s mechanics, challenges, and intricacies.

  • Collect Data

Document every aspect of the game, including item locations, enemy behaviour, puzzle solutions, and quest details. Accuracy is key.

  • Game Mechanics

Understand the game’s mechanics, such as character abilities, weapons, and strategies. Experiment with different approaches to find the most effective ones.

  • Stay Updated

Games often receive updates, patches, or expansions. Make sure to stay updated and revise your guide accordingly to maintain its relevance.

Writing the Walkthrough

(Photo from iStock)

With your research and gameplay experience in hand, it’s time to start writing your walkthrough. Here’s how to go about it:

  • Start from the Beginning

Begin your guide with an introduction to the game, including its genre, developer, and release date. Provide a brief overview of what readers can expect.

  • Step-by-Step Instructions

Create a detailed step-by-step walkthrough that guides players through the game. Use clear and concise language, and be sure to include important details like item locations, quest objectives, and enemy strategies.

  • Tips and Strategies

Alongside the walkthrough, offer tips and strategies for particularly challenging sections or bosses. Explain different approaches and tactics.

  • Visual Aids

Incorporate screenshots, images, or videos to complement your written content. Visual aids can be extremely helpful in clarifying instructions and showcasing gameplay.

  • Use Subheadings

Organize your guide with descriptive subheadings for different sections or chapters. This makes it easier for readers to navigate and find the information they need.

Adding Visuals and Media

Visuals and media elements play a crucial role in enhancing the quality of your walkthrough or strategy guide. Consider the following:

  • Screenshots

Capture high-quality screenshots that illustrate key points in your guide. Further, ensure they are well-lit and clearly depict in-game situations.

  • Videos

Create short video clips or tutorials to demonstrate complex gameplay mechanics or strategies. Upload these to platforms like YouTube and embed them in your guide.

  • Graphics

Design custom graphics or maps to help players navigate through intricate levels or mazes. Visual aids like maps can be particularly valuable.

  • Infographics

Create infographics summarizing important information, such as character stats, weapon choices, or skill trees. Moreover, these can be easily referenced by readers.

Formatting and Organizing

(Photo from iStock)

A well-organized guide is more accessible and user-friendly. Pay attention to formatting and organization:

  • Consistent Structure

Maintain a consistent structure throughout your guide. Hence, use the same formatting for headings, subheadings, and bullet points to create a cohesive look.

  • Table of Contents

Include a table of contents at the beginning of your guide, allowing readers to jump to specific sections quickly.

  • Navigation Links

If your guide is in digital format, consider adding navigation links to help readers move between sections effortlessly.

  • Cross-Referencing

Cross-reference related sections or tips within your guide. For example, if you mention a specific item’s location in one chapter, link to it in the item’s description chapter.

Editing and Proofreading

Before publishing your walkthrough or strategy guide. Moreover, it’s essential to edit and proofread meticulously:

  • Grammar and Spelling

Check for grammar and spelling errors. Typos and grammatical mistakes can undermine the credibility of your guide.

  • Clarity

Ensure that your instructions and explanations are clear and concise. Avoid jargon or overly technical language that might confuse readers.

  • Consistency

Maintain consistency in terminology and formatting throughout your guide. Inconsistencies can be distracting and confusing.

  • Peer Review

Have a fellow gamer or editor review your guide. Furthermore,  fresh eyes can spot errors or suggest improvements you may have missed.

Promotion and Distribution

(Photo from iStock)

Creating a fantastic video game walkthrough or strategy guide is just the beginning. Hence, you’ll also need to promote and distribute it effectively:

  • Website/Blog

If you have a gaming-related website or blog, publish your guide

Reference:

gamepressure 

Want some amazing jewellery making ideas, that too at your home, what are you waiting for?, click on the link below:

Homemade Jewellery making for kids


List of your favorite board games by category

Board games have been a cherished source of entertainment for generations, fostering laughter, strategy, and camaraderie among friends and family. From classics that have withstood the test of time to innovative modern creations, the world of board games is a treasure trove of fun and excitement. In this article, I’m delighted to share my favourite board games, categorized by genre and type, to help you discover some gems you might not have encountered before.

  • Following are a few well known board games which are categorized as their playing genres:

1. Strategy Board Games

  • Catan (formerly known as The Settlers of Catan)

(Photo from iStock)

Catan, a modern classic, is a game of strategy and resource management. Players settle and develop an island, trading resources and striving for dominance. It’s a fantastic blend of competition and cooperation, and its simple rules make it accessible to new players.

  • Ticket to Ride

In Ticket to Ride, players embark on a railway adventure across North America. Hence,  the goal is to complete destination tickets, connecting cities by claiming routes. It’s easy to learn, yet offers depth and strategy, making it perfect for players of all skill levels.

  • Pandemic

Pandemic is a cooperative board game where players work together as a team of disease-fighting specialists. The goal is to prevent the outbreak of four deadly diseases worldwide. It’s an intense and challenging game that demands communication and strategy.

  • Carcassonne

(Photo from Amazon)

Carcassonne invites players to build a medieval landscape with tiles. Claim cities, roads, and fields to earn points. Moreover, its simplicity and quick gameplay make it a fantastic choice for casual and experienced gamers alike.

2. Euro or German style board games

  •  Agricola

Agricola places you in the shoes of a farmer striving to develop a successful homestead. Furthermore, balancing resource management, expansion, and family growth is key to victory in this engaging Eurogame.

  • Terra Mystica

Terra Mystica is a strategic game where players lead fantasy races in a land colonization race. Hence, each race has unique abilities, and the game encourages creative planning and interaction.

3. Family-Friendly Board Games

  • Ticket to Ride: Europe

(Photo from Amazon)

This version of Ticket to Ride takes you on a rail adventure across Europe. It’s as accessible as the original but introduces new mechanics and routes, providing a fresh experience for fans of the series.

  • Dixit

Dixit is a creative and imaginative game where players use beautifully illustrated cards to tell stories. It’s a perfect choice for family gatherings and encourages players to think outside the box.

  • Sushi Go!

Sushi Go! is a delightful card game where players draft sushi dishes to create the best meal. It’s fast-paced and easy to learn, making it an excellent choice for family game nights.

4. Party Board Games

  • Codenames

(Photo from Amazon)

Codenames is a word-based party game where players give one-word clues to guide their team to guess the correct words on a grid. It’s a game of clever wordplay and deduction that guarantees lots of laughs.

  • Telestrations

Telestrations is a hilarious drawing and guessing game, reminiscent of the classic “telephone” game. Hence, players draw what they see, and the results often lead to comical misunderstandings.

  • Cards Against Humanity

Cards Against Humanity is the ultimate party game for adult humour. Players fill in the blanks of outrageous statements, creating cringe-worthy and side-splitting combinations. It’s not for the faint of heart but guarantees a memorable evening.

5. Cooperative Board Games

  • Forbidden Island

(Photo from Amazon)

In Forbidden Island, players work together as adventurers to recover treasures from a sinking island. Effectively, the game’s collaborative nature adds tension and excitement as players race against time.

  • Ghost Stories

Ghost Stories is a challenging cooperative game where players defend a village from vengeful spirits. Hence, teamwork and strategic planning are essential to overcoming the game’s formidable difficulty.

  •  Spirit Island

Spirit Island offers a unique twist on cooperative gaming, where players take on the roles of powerful spirits defending their island from colonization. Moreover, the deep strategy and thematic storytelling make it a standout choice.

6. Card Games

  • Dominion

(Photo from Amazon)

Dominion is a deck-building card game where players create custom decks by acquiring new cards. Further, it’s a dynamic and strategic game with numerous expansions, ensuring lasting appeal.

  • Splendor

Splendor is a game of gem trading and card development. Players collect gems and cards to build an economic engine, competing to acquire valuable points.

  •  7 Wonders

7 Wonders is a card drafting game where players construct their civilizations. Hence, the game offers a rich blend of strategy and resource management, with multiple paths to victory.

7. Role-Playing Board Games

  • Gloomhaven

(Photo from Amazon)

Gloomhaven is a sprawling, cooperative adventure where players take on the roles of mercenaries in a dark and mysterious world. It offers a deep narrative and tactical gameplay.

  • Arkham Horror: The Card Game

Arkham Horror: The Card Game immerses players in the Lovecraftian horror universe. Moreover, players assume the roles of investigators, battling eldritch forces and uncovering sinister mysteries.

  • Dungeons & Dragons: Castle Ravenloft

Castle Ravenloft is a cooperative adventure based on the iconic Dungeons & Dragons role-playing game. Hence, players explore dungeons, battle monsters, and complete quests in this thrilling board game adaptation.

Conclusion

Board games offer a diverse range of experiences, catering to different tastes and preferences. Whether you’re a fan of strategy, family-friendly fun, party games, cooperative challenges, or immersive role-playing adventures, there’s a board game out there waiting for you. Further, the games listed above are just a few of my favourites. But, the world of board gaming is vast, with new titles constantly emerging. So, gather your friends and family, roll the dice, draw some cards, and embark on unforgettable board game adventures.

There’s a world of fun waiting for you at the tabletop. Hence, the good thing about board games is that they are not bound to any certain age group, people from every age can play and enjoy such board games. Moreover, in times of smartphones, board games in a way act as connecting chains that help family members to spend time together.

Reference:

apartment therapy

Want some amazing jewellery making ideas, that too at your home, what are you waiting for? Click on the link below:

Homemade Jewellery making for kids