All posts by Anish

Homemade cleaning products act as solutions to common problems

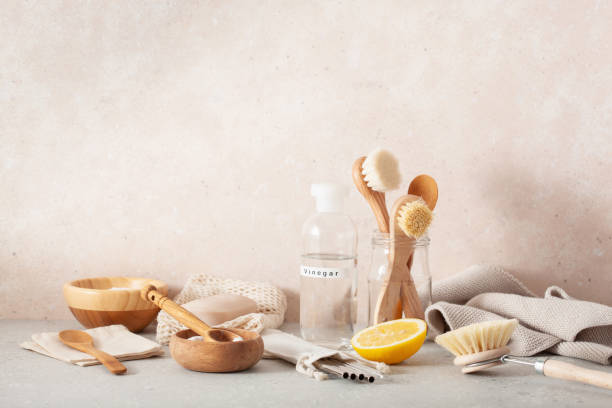
You may acquire a more eco-friendly cleaning regimen and save money with a few straightforward recipes. You could already have a lot of the materials. White vinegar, baking soda, borax, citrus fruits, and empty spray bottles make up a basic natural cleaning toolkit. Additionally, for aroma, you could wish to use hydrogen peroxide, cornflour, castile soap, tea tree oil, and other essential oils. To reduce waste, substitute microfiber cloths or used cotton T-shirts for paper towels.

Following are a few homemade cleaning products & solutions to common problems:

White vinegar

Natural disinfectants like vinegar have various applications in household cleaning. Its acidity makes it excellent for removing sticky build-up, rust, and hard water stains. To clean the build-up in your coffee maker, try vinegar. Lemon juice can be used similarly to vinegar, but because it spoils rapidly, you can’t keep cleaners created with it for more than a few days.

Baking soda

(Photo from istock)

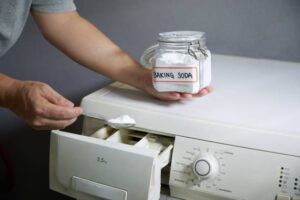
Baking soda is effective for numerous cleaning jobs and absorbs odors from the air. To reduce odors, use it in diaper pails, trash cans and litter boxes. Use it as a gentle surface cleaner on worktops, sinks, ovens, stoves, and bathtubs by sprinkling it over a moist cloth. In the grocery store’s baking section, you can find baking soda.

Borax

Borax, also known as sodium borate, is a more potent version of baking soda. It works well to remove dirt and stains from clothes and other surfaces because it is a natural bleach. Despite being natural, borax may cause skin, eye, or respiratory irritation, so use it carefully and keep children and pets away from it. It’s in the laundry department of your local store.

Mixing your cleaners

(Photo from istock)

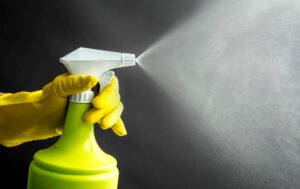
Use spray bottles or other containers that you won’t mistake for food containers while preparing your own cleaning solutions. Give them immediate labels. Cold water won’t clean as well as hot water, thus in most circumstances, freshly produced cleaners will perform best. As opposed to using store-bought cleansers, you might need to scrub a little more vigorously or let cleaning solutions rest for a little longer.

Clean or disinfect?

The aim of the majority of household cleaning is to get rid of dirt and germs. The natural DIY cleaners listed below will all accomplish that. However, you must make them fresh first. Some natural cleaners can help disinfect or kill bacteria. They still clean while stored, but they don’t disinfect as well.

Cleaner for all purpose

Mix 1/2 cup vinegar, 1/4 cup baking soda, and 4 to 8 cups hot water in a spray bottle for light cleaning. 2 teaspoons of borax can be used in place of the baking soda. For a fresh smell, add a few drops of essential oil to any combination.

Kitchen sanitizer

(Photo from istock)

Kitchen surfaces can be cleaned with soap and warm water, but if you want to get rid of dangerous bacteria like salmonella and E. coli, you’ll need to use hot vinegar or hydrogen peroxide and let it sit on the surface for at least a minute. As follows: Spray the mixture onto surfaces after heating 1/2 cup hydrogen peroxide (3%) or white vinegar (5%) to 130 degrees Fahrenheit. Give it a minute to sit before wiping it dry.

An alternative technique for cleaning surfaces is as follows: Combine the mixture with 1 cup vinegar, 1 cup club soda, and 2 drops of tea tree oil. Spray it on surfaces, then wipe it down to clean it. Only freshly made combinations have the ability to disinfect. Even 24 hours later, it doesn’t eliminate as much microorganisms.

Freshening garbage disposal

Run your waste disposal with ice and freshly squeezed orange, lemon, or lime if it starts to smell. The citrus peels will release a fresh smell, while the ice will assist in honing the blade.

Brass cleaner

You will need:

  • Lemon juice or white vinegar
  • Sodium bicarbonate

Apply salt after wetting a sponge with vinegar or lemon juice to clean non-lacquered tarnished brass cabinet pulls, decorative items, fixtures, and more. Over the surface, lightly massage. Completely rinse with water or a clean, moist cloth, and then dry right away with a clean, soft cloth.

Heavy duty scrub

You will need:

  • 1/2 lemon
  • Borax powder in a half cup

This powerful homemade cleanser easily removes rust stains from porcelain or enamel sinks and bathtubs. Scrub the surface with the lemon and borax, then rinse. (This is risky for granite or marble.) Advice: Look for borax, a laundry enhancer, in the detergent section.

Grease cleaner

You will need:

  • 1/2 cup ammonia that suds up
  • Little than 1 gallon of water

With this DIY kitchen and oven cleaning, get rid of grease. Ammonia with detergent in it helps clean stubborn dirt from metal surfaces. Fill a one-gallon container with 1/2 cup of water. Then, using a sponge dipped in the solution, wipe over the surface of your oven racks, stove hood and grill before washing with clear water. In addition, if the grill grates or oven racks are very grimy, you can add a little extra ammonia to the mixture and soak the items directly. A word of caution: Never use ammonia on aluminum. It may become dingier and develop pits.

Cloth stain remover

You’ll require:

  • Hot water 1 gallon
  • 1 cup of dishwasher detergent in powder
  • 1 cup of ordinary, non-concentrated or super liquid chlorine bleach

Mix the aforementioned materials in a stainless steel, plastic, or enamel bowl (not aluminum) to treat heavily soiled but washable white clothing that hasn’t responded to conventional methods. garment in water for 15 to 20 minutes. If the discoloration persists, give it a little more time to soak before washing the item as usual.

Marble cleaner

You will need:

  • Mild dish-washing liquid in two drops
  • 2 mugs of hot water

Marble may be cleaned with this homemade, sudsy cleaner. When cleaning natural stone countertops in the future, simply combine 2 drops of dish soap, such as Dawn, with water. To get rid of any soap residue, use a sponge to scrub the marble. Do not let the marble air-dry; buff with a gentle cloth. A word of caution: Never use lemon, vinegar, or any other acidic cleanser on marble or granite surfaces as it can etch the stone.

Reference:

Good Housekeeping

Memorize historical dates easily:

How to memorize historical dates in simple methods 


Scrapbooking for beginners

Scrapbooking is the activity for you if you’ve always wanted to be able to create something crafty and artistic and preserve priceless photographic memories. We have a tutorial that will walk you through the entire scrapbooking process if you want to learn how to do it.

What is scrapbooking?

Scrapbooking is a means to preserve images with written memories and decorative elements in a lovely way. Since we now have digital cameras, it is even more crucial that we actually print and use the images that we have instead of just storing them. Furthermore,  nowadays, we snap more pictures than ever before, yet we frequently don’t print them or remove them from our cameras.

Essential supplies

(Photo from istock)

There are a few scrapbooking necessities that you will require when learning how to scrapbook. What do I need for my basic scrapbooking kit? A beginner kit should include a few basic supplies including card-stock, scissors, and a paper cutter. There are also many lovely little extras that you may buy.

Size of scrapbook

Your homemade scrapbook pages are kept in a scrapbooking album. Hence, how big should scrapbook albums be? Further, there are several sizes for scrapbook albums;

  • 8 1/2 by 11 inches by 12 x 12 inches.
  • 6-by-8 inches
  • 6 x 6 inch tiny albums for planners
  • you can choose any size!
  • You might even decide to complete your entire digital scrapbooking project online.

Choose the size of your scrapbook and begin by gathering some cards.

You may purchase a tiny planner book and decorate it instead of the album at beginning.

Choose the size of your scrapbook and begin by gathering some cards. Hence, you may purchase a tiny planner book and decorate it instead of the album at beginning.

Quality glue and tape

Scrapbooking is simple to begin, but there are a few considerations. Use archival-quality supplies and acid-free adhesive since you want your images to stand the test of time. To prevent the corroding or discoloration of your photographs, all glues and tapes should be acid-free.

Collect your tools

Depending on your goals, you will need different equipment to create a scrapbook.

These fundamental scrapping necessities are required;

  • Photos, card scissors, and possibly a paper trimmer
  • Wet glue, double-sided tape, or glue
  • a writing instruments
  • a scrapbook album in the size of your choice.
 You might want to purchase a few extra items in addition to the necessary components;
  • Paper or card with patterns
  • Decorative elements like ribbons or buttons
  • a chopping block
  • a specialty blades
  • A color ink pad
  • Stencils
  • Stamps Paint

Various styles of scrapbooking

(Photo from istock)

  • Scrapbooking comes in a variety of forms, each with its own aesthetic and function. Here are a few of the most well-liked formats for scrapbooks:
  • The most common style of scrapbooking, traditional scrapbooking uses acid-free paper, stickers, embellishments, and other ornamental elements to make a scrapbook page. The pages typically describe a story or recall a specific memory and are organized chronologically.
  • Scrapbooking using digital software, such as Adobe Photoshop, where you may use digital papers, embellishments, and fonts to create your scrapbook pages, is known as digital scrapbooking. Moreover, compared to conventional scrapbooking, digital scrapbooking gives more versatility and makes it simple to design pages.
  • Using pocket page protectors with pockets of various sizes to contain photos, cards, and other memorabilia, the “Project Life” style of scrapbooking is known as “pocket scrapbooking.” Scrapbooking in a pocket is a simple and effective way to capture ordinary events.
Further:
  • Scrapbooking a travel journal: As the name implies, scrapbooking a travel journal is all about recording your adventures. In this style of scrapbooking, you make pages that document your trip experiences using pictures, maps, and other mementos. Further, usually, they come in smaller journals that are portable.
  • Theme-based scrapbooking is frequently used in modern scrapbooking and entails making scrapbook pages with a particular theme in mind, such as a holiday, birthday, or wedding. Further, the colours, embellishments, and other ornamental features are typically chosen so that the pages represent the topic.
  • Artistic Mixed Media Scrapbooking: The focus of artistic scrapbooking is on designing one-of-a-kind, gorgeous scrapbook pages. This style of scrapbooking uses collage, painting, stamping, and other mixed media techniques to produce genuinely unique pages.
  • Creating scrapbook pages to record family history and ancestry is known as heritage scrapbooking. Hence, this kind of scrapbooking frequently uses old pictures and other artifacts to make pages that document the family’s traditions and heritage.

Steps to follow

(Photo from istock)

Typically, creating a scrapbook page is a fairly simple process beginning with your photo. Follow these instructions to make a lovely scrap-booking page.

  • Select your photo, whether it be one or several.
  • Pick some patterned paper that goes with or enhances your shot.
  • Using card-stock, make a background, and cut patterns from paper
  • Utilize archival glue to attach your photo on paper or a greeting card.
  • Organize your photos on the page, then affix them using glue.
  • Add handwritten or printed journaling about your images.
  • Add eye-catching elements to your page to create a visual impact.
  • Put a page protector over your document.
  • Insert your page into a book.
The first page
Keep these suggestions in mind when you create your first page:
  • Pick one photo from your collection to highlight in your scrapbook.
  • To preserve ancient family photos, scan them or utilize photo corners.
  • If you want to make a mixed-media background, try utilizing watercolor paints.
  • Create patterns for the background by using stamps and ink pads.
  • For more embellishments, print and cut out clip art at home.
  • For a more cohesive appearance, choose a color palette.
  • What was happening in the picture? Tell a story.
  • Place used tickets and maps in the page pockets.
  • On your page, doodle, paint, or draw.
  • Remember to date your page.
  • You were where? jot down the location where the picture was shot.
  • If the background is open space or a landscape, cropped images won’t work.
  • To add decoration to your page, use thread, paper flowers, or ribbon.
  • Distress edges or add texture to your page by tearing paper corners.
  • To attach tiny things, like sequins, use moist glue.
  • For photos and paper, use double-sided tape or reposition-able tape.
  • Don’t worry about the appearance of your page; it is your own creation.

Reference:

Like Love Do

A COMPLETE GUIDE FOR YOUR WARDROBE:

How to Style Your Wardrobe


Share homemade gift ideas your friends and family will love

The most expensive presents aren’t usually the greatest ones. In reality, gifts that are free (or nearly free) frequently call for a little more thinking, consideration, and imagination than a “saw this at the mall and thought of you” gift. Giving of yourself, your time, and your energy will be appreciated by the recipient without a doubt. Homemade gifting idea is  advantageous if you’re trying to budget more effectively or save money.

Following are a few homemade gift ideas your friends & family will love:

Writing a letter

(Photo from istock)

When was that? Make sure they comply as well. Put little slips of paper with all of your favorite memories of the recipient into a lovely jar with a title like “Jar of Awesome.” Include a few blank pieces of paper so they can carry on the custom and create new memories as you go.

Letters for certain occasion

Create a collection of sincere letters labelled “Read this when you’re feeling blue” or “Read this when you have something to celebrate,” and write them for various occasions. You’ll be there to deliver the ideal message at the ideal time.

Video tribute

Gather pictures to honour the recipient, and ask other family members and friends to contribute their thoughts and favorite memories. Together, you can edit it to create a priceless (and cost-free) present for your loved one.

Write to future

Create a time capsule and mark the day and time when it will be ready to be opened. For those under 18, this is a great (and free!) present. The tween in your life will be able to reflect on their K-POP addiction in about ten years if you document all of their present interests and loves.

Memento

Put together a little box or book filled with treasured mementos, such as old playbills, brochures, and ticket stubs, from your shared experiences. Include one or two sentences about the highlights of each adventure for extra credit.

A mix playlist

Create a playlist especially for them to listen to. You can provide new music you believe they’ll enjoy, include songs that bring back fond memories for you, or add inside jokes. If they’re still in the dark ages, you can still burn a CD, transfer it to a cassette, or just send it to them via Spottily or another streaming service.

A thankful journal

(Photo from istock)

If you already own a nice blank notebook, you can decorate the cover to make it into a thankfulness journal. Fill the pages with motivational quotes and write them in your finest handwriting. For starters, try a few well-known inspirational sayings.

Do something nice in their name

Spend some time helping for a cause or group that holds special significance for them. You can volunteer at a soup kitchen, give blood, or spend the day picking up rubbish in parks or on beaches. It will make you both feel wonderful and is a completely free gift.

A fun trip

Give the recipient a handcrafted gift card good for a fun-filled day that has been carefully planned. There are many activities you can do with your family that won’t break the bank, whether you take your nephew on a tour of the greatest nearby playgrounds or accompany a parent to their favorite art museum on a day when entrance is free.

A scavenger hunt

Sending your receivers around the home, around the block, or around the town with a list of activities to perform or items to seek for makes for a fantastic (and enjoyable) group gift. Bonus points if you incorporate a theme, particularly if it involves sentimental items or locations, such as “Take a selfie in front of our first apartment block”.

Passing your family recipes

Does everyone want to know your chocolate chip cookie recipe’s secret? Perhaps Grandma knows how to make a great pasta sauce that your friend would adore. For the ideal present for cooks, list your favorite recipes on recipe cards or combine them into a booklet.

A DIY trivia game

Can anyone recall the name of the imaginary buddy your small brother had or which college flatmate had the peach and mint color scheme? To determine who earns bragging rights, write down the Qs and As and have a great game night. Make a traditional game with a board and playing pieces or a virtual Jeopardy if you’re feeling particularly inventive.

Re-gift wisely

(Photo from istock)

shop virtually from home. Whether it’s the vase your friend has always praised or a book you’ve just finished that you know your sister would appreciate, you probably have something in your home that your friend or member of your family will adore. Donate freely.

Set a date to spend time

We’ve all come to realize how crucial it is to make time for the people you truly love. Therefore, make your gift a promise to spend time with them, whether it be a memorable weekend away with far-flung friends or a monthly date for tea and talk.

Printing a photo

(Photo from istock)

The photograph will probably find a position of honor in their house, whether you produce a duplicate of the grunge-era snapshot of you and your BFF from the 1990s or a more contemporary image from a family vacation. (And chances are, you already have one or two additional frames at home that you could use.)

Give them A pet rock

There’s undoubtedly one waiting outside your front door, so there’s no need to spend money on a “real” pet rock. To get started, all you need is a box and a URL to one of the online tongue-in-cheek care guides.

Family history

Become the family historian and begin searching online for historical information. You might sketch it out on paper and frame it for your loved one who enjoys history.

Hence, these are  a few amazing homemade gifting ideas that one can use.

Reference:

Real Simple

Memorize historical dates easily:

How to memorize historical dates in simple methods 


Share homemade holiday decorations ideas

Even while we genuinely adore the popsicle stick crafts done by children, we believe it’s time for grownups to prove our mettle. Everything is better when it’s homemade (gifts included! ), and these homemade holiday decorations are no exception. We’ll fight for this point any day. We’re decking the halls this holiday season in classic Pinterest style, from floor to ceiling and everywhere in between. We’ve got a couple suggestions up our sleeves that are simple as pie but nonetheless pay homage to the elegant surroundings of your home.

Following are a few homemade holiday decorations ideas:

Jar snow globes

Who said Mason jars were only useful for canning during the summer? The simple statement your side table needs is this little winter wonderland, and assembling it is easier than you would think. Add a few trinkets to the interior of the jar lid with adhesive.

Give it about 24 hours to dry. Three to five drops of glycerine and as much glitter as you like should be added to the jar after it has been filled with water to completely submerge the item. Put glue on the metal screw band of the jar and attach the lid. Dry that out. Put glue on the inner edge of the lid before screwing it onto the jar. When your Mason jar is entirely dry, you’re ready to set your side-table showpiece in its proper location.

Shining cranberries

(Photo from istock)

Sometimes holiday decorations can also be delicious. Although these sugared cranberries are a little different from our typical decorations, they are sure to sparkle at your holiday gatherings. This tasty addition may be prepared up to two days ahead of your Christmas gathering, and you can use it to garnish cakes, cookies, or baked brie. Whatever you choose to do with these brilliant stones, they will astonish your guests.

Ornaments from dried orange peels

Nothing is more lovely than taking advantage of the wealth of the season and making it a priceless tradition. In recent years, dried oranges have grown extremely popular as Southerners use the festive winter fruit to adorn their gifts and beverages. We’d like to extend the invitation to you to enjoy the contrast of sweet citrus and fresh pine on your Christmas tree. These ornaments are manufactured by drying orange slices in the oven and then poking them with an ornament hook.

Christmas trifle

You may have happy memories of watching your grandmother arrange her favorite trifle or hurricane dish; now it’s your turn to carry on the custom. For the simplest DIY on our list, layer limes, oranges, holly berries, and fresh foliage.

Pomander tree

Nothing enhances the opulence of a setting like a fresh citrus scent. You will adore these homemade pomanders if you are looking for a wonderful DIY with a great result. These ornaments, which were once used to keep garments and linens smelling fresh, are a wonderful addition to festive pleasure.

To insert the whole cloves, use a toothpick to make holes in each orange in the shape of your design. Let your imagination go wild after setting them away to dry. Trim a miniature tree by adhering a cardboard circle that is two inches wider than the cone’s base to a plastic foam cone.  Each pomander should be placed halfway up a toothpick, which should then be inserted into the tree from the bottom up.

Bow around coffee table

Why limit your Christmas gift wrapping to just those? Cross the strands of your favorite ribbon across the top and sides of your coffee table using a spool. For a festive finish that doesn’t overpower, we utilized subdued tones here. However, you can take this idea even farther by using unexpected colours and textures.

Ribbon tree

(Photo from istock)

Brilliantly coloured ribbon against a background of foliage is just so gorgeous. Using this simple DIY, you can transform a plain Christmas tree into a striking focal point. Put an embroidery hoop on top of your tree and just wrap your ribbon around it.

A paper lantern village

The ideal centrepiece for your mantel or dining room table is this hamlet of paper lanterns. Place an electric tea light behind each house you’ve made from white cardboard to give them a warm, inviting glow. Sprinkle some artificial snow beneath for extra points. It’s just as cheery as these Christmas quotes.

Wooden figurines

Rudolph, Frosty, and Santa are all fashioned of wood in this amazing line-up. Characters from your favorite Christmas movies can be recreated with just a few thick pieces of wood and some acrylic paint.

Holiday banner

At your holiday celebration, this festive banner is the ideal way to welcome guests. Cut triangle-shaped pieces of burlap (or another durable fabric) and hot-glue felt letters to form the words “Merry Christmas.” When the banner has dry, affix the flags to lengths of string and hang it. Use the official Christmas colours of red and green to make it even more festive.

A holy wreath

What could be superior to a genuine holly wreath? a felt one that will endure for years! A foam wreath form should first be wrapped in twine. Then, cut out holly leaf shapes from green felt. The wreath’s leaves are attached with a hot glue gun, and red pom-pom berries are placed on top. Uncertain of your Christmas plans this year? Obtain advice based on your horoscope.

Gift bag calendar

(Photo from istock)

All of these homemade Christmas decorations may not excite kids, but they’re guaranteed to love the one that offers 25 days of enjoyable surprises. To make the hanging mobile that serves as the advent calendar, attach some decorated paper goody bags to a long stick. One can be opened by the youngsters every day until Christmas morning.

Knitted Christmas tree

cozy and joyous? Count us in! Knitting needles and yarn are all you need to construct these easy DIY Christmas decorations. Create them for yourself or give them to Grandma as presents.

Your wine corks

(Photo from istock)

You can now put all of your wine corks in one spot! Attach them with hot glue to a foam wreath form, then embellish with a Christmas ribbon. For an added Christmas touch, add some pine cones and evergreen sprigs.

Reference:

Reader’s Digest

Finding the ways to keep your children entertained while you work, click on the link below:

Keep Your Children Entertained While You Work


Share ideas for making an income with DIY goods

Online selling is a great options for DIY. They are able to draw clients who are looking for that handmade, one-of-a-kind item by producing something distinctive. On Amazon, you won’t find a lot of unusual craft supplies. Yes, electronics, socks, and tin foil.

However, figuring out how to put your artistic abilities to use can be a little challenging. What create you? How can you provide something fresh and unique? What DIY goods are the best to sell online?

Following are a few ideas for making an income with DIY goods:

Bath bombs

Since the beginning of 2015, the popularity of bath bombs has increased, and they are now more readily available than ever. What’s even more intriguing is how inexpensive the components are.

The few essential supplies for these do-it-yourself crafts may be bought in great numbers for a low price (baking soda, Epsom salts, food colouring, to mention a few); this means big profits for you!

Candle DIY production

(Photo from istock)

One year-round DIY craft that can be marketed is candles. Quality candles make excellent gifts because most people won’t spend a lot of money on them for themselves. With birthdays, anniversaries, and several holidays throughout the year, you can always find an excuse to keep clients coming back. You may make a wide range of scent combinations in a variety of different sizes and shapes by buying wax and scented oils in bulk. The truly good news is that starting a candle-making business costs less than $100.

Making pet toys

According to the APPA, more than $60 billion is spent on the pet market annually, and the ASPCA estimates that there are over 70–80 million dogs in the United States alone. It goes without saying that people adore their dogs and are willing to spend money to keep them happy. By making custom, recycled pet toys that are affordable and Eco-friendly, you can take advantage of this enormous market. Such do-it-yourself crafts are covered in numerous YouTube video tutorials.

Handmade soap

(Photo from istock)

Customers are becoming more and more interested in using organic cleaning products that are safe. Profit from this trend by developing and selling your own, home-made goods, such as hand soap. You can start making soap with a small initial expenditure, and then you can start making one-of-a-kind DIY crafts to offer in this market.

Every host or hostess, sister, or uncle enjoys gifts that make them feel pampered, just like candles. With the incredible variety of scents and colours available, creating items for niche markets is simple. Using the leftover grain from breweries to create soaps that the brewery then brands and sells as souvenirs, one lady makes a life in the United States.

Printed throw pillows

Did you know that the home décor industry generates roughly $62.5 billion annually? It is real. Entering this market niche makes a lot of sense for that reason, especially if you have a truly distinctive product to offer, like custom printed throw pillows. Customers and recipients of gifts can express their pride and personality by personalizing throw cushions. Additionally, you may start doing this at home; you don’t need a screen-printing business.

DIY Jewellery

(Photo from istock)

Making resin jewellery is straightforward, and a beginner kit is reasonably priced. You can make lovely, unique items to sell online if you have some patience and a good sense for design. Additionally, you may also provide photo-based jewellery designs that let your customers turn a beloved photo into a priceless piece of jewellery using clear resin.

Napkins and handmade towels

Custom-made napkins or hand towels are a crucial design element for the home decorator who values the little things. You can make lovely table accessories and unique creations for the world’s ardent house decorators yourself with just a few inexpensive supplies and basic sewing skills. You may build up a sizable inventory of do-it-yourself goods to sell right away in only a few short hours.

Key-chains

(Photo from istock)

The keychain is always in trend. The item has long outlived its usefulness and is now used as an identifying piece, an animal broadcasts that the owner loves animals, and scenes from tourist destinations identify the user as a traveller. For clients with a variety of interests and routines, you can make keychains out of materials like leather, canvas, plastic, or linen. Sell to both men and women to maintain a sizable market. The modest size of key-chains ensures that your materials are used efficiently.

Tote bags

The average person uses 425 plastic grocery bags year, in case you didn’t know. Tote bags are more crucial than ever as more and more jurisdictions work to reduce the use of plastic bags. These multipurpose catch-all’s have a vast market, from the grocery store to the coffee shop—and they’re quite cheap to make. Your tote bags can draw customers and set you apart from rivals if they feature a distinctive design or message.

Holiday ornaments

It’s a yearly habit for many families to purchase new holiday decorations. More durable and able to be used year after year, handcrafted gifts demonstrate the thoughtfulness of the sender. Holiday decorations are just the start. Many craftsmen use this ability as a foundation to produce year-round sellers like personalized gift tags, serviette holder decorations, etc.

Planters

(Photo from istock)

Anyone who dislikes plants? Put them in a lovely container, and your space has just been improved. Shoppers can achieve the look they’re going for at home and at work by creating custom planters that speak to various tastes and fashions. Frequently, you can build them with inexpensive raw materials and still make them look chic by incorporating the various designs, from contemporary/modern to Victorian or Craftsman.

Wall art

Who says our walls need to be covered in framed pictures, posters, or artwork? In 2012, the US economy benefited by more than $698 billion thanks to the creation of arts and cultural products. It makes sense to enter that industry.

You enable customers to decorate their homes with items that are truly “them” by sharing your charming or unusual creations or by creating personalized wall art. Consider what you can produce that is distinctive, marketable, and lacking in the market for wall art at the moment.

References:

Ecwid

Finding the ways to keep your children entertained while you work, click on the link below:

Keep Your Children Entertained While You Work


Be a great friend with these amazing friendly tips 

Be a great friend with these amazing friendly tips

Though maintaining a strong friendship takes time and effort, being a good friend isn’t always simple.  Strength, joy, and meaning can be found in a good friend in ways that social media or the pursuit of popularity cannot.

There are things you can do to be a good friend to others whether you’re wanting to build new, quality connections or strengthen your current ones. All great friendships are built on mutual trust and support.

Be trustworthy to your friend

Image via Unsplash.com

Never, or at least don’t make it a habit, make a promise you can’t keep. If you promise to hang out with a friend but a real disagreement comes up, be sure to let them know. Give your pal a gift and apologize if you simply cannot go. Nobody is flawless, and it’s acceptable to occasionally breach a commitment, but avoid doing so frequently. If this keeps happening over time, people will probably view you as unreliable. Keep your word if you made a promise to a buddy about something significant to avoid alienating that person.

Be dependable for your friend

One of the most crucial characteristics of a good buddy is dependability. Especially during difficult moments, your friend will need your support. Nobody wants to hang out with friends who aren’t genuinely into them. A individual who doesn’t exhibit consistent and reliable behavior is difficult to trust. We’ve all seen well-intentioned yet unreliable individuals who promise something and then never follow through. If that describes you, know that you are losing your friends’ confidence and that they will soon stop trusting what you say.

Apologize when its necessary

Image via Unsplash.com

You can’t pretend to be perfect if you want your friends to trust you. If you’ve made a mistake and are aware of it, own up to it rather than continuing to deny it. Though they won’t be thrilled that you made a mistake, your friends will appreciate that you are responsible and grounded enough to own up to it rather than just acting as though nothing is wrong or, worse, blaming someone else.

Be honest and vulnerable with your friend

You must be honest about your emotions, about the behavior of your friends, and about how you feel about your friendship if you want to be a good friend and have people trust you. Direct channels of communication with your buddies will open up and they’ll be more likely to open up to you if you’re honest about how you feel and allow yourself to be vulnerable with your emotions. You shouldn’t be embarrassed to open up to your friend about something that is upsetting you if your friend has injured you.

Disagreeing respectfully with your friend

Image via Unsplash.com

It’s acceptable to express your disapproval when a buddy says something that you find offensive or simply do not share their viewpoint. Inform your friend of your opinions and your reasoning. Just make sure you communicate your viewpoints in a courteous manner.

Don’t use people

Your buddies will dump you like a hot potato if they think you’re just using them. Good friendships don’t come about by seeking to benefit from someone else’s fame or connections. It is not friendship; it is opportunism to try to become friends with someone in order to join a particular clique, and eventually the shallowness of your involvement will become apparent.

Loyalty is important

Image via Unsplash.com

As you would want your buddy to do for you, keep anything they tell you in confidence to yourself and don’t discuss it with anyone else. Avoid talking negatively about your friend behind their back and refrain from gossiping about the information they’ve given you in private. Never make comments about a buddy that you wouldn’t be willing to make in front of them. Be devoted to your genuine friends, and be ready to stand up for them if your acquaintances or new friends start spreading rumours against them.

Be respectful to your friend

Respectful relationships are characterized by open communication and reciprocal assistance. Respect your friend’s decisions and be receptive to learning more about them if their values and beliefs differ from your own. If you want a friend to trust you, let them know that they can talk to you about fresh ideas or express beliefs that you may not share. Your friendship won’t be respected if your friend believes that you’ll discredit any intriguing or novel ideas they may have.

Don’t let your friend feel left out

Image via Unsplash.com

This is a brief yet crucial aspect of having good friends. Don’t ever make your pals feel excluded. Not everyone is past you just because you start dating or have a partner. Always keep in mind that your friends will be there for you if you need them during a crisis. Your buddies will be there for you if the popular kids in class decide to make everyone hate you. Do not forget to support them as well!

Be selfless

Even if it is impossible to always be selfless, it is a crucial component of being a good friend. As much as you can, try to balance your actions with your friend’s wishes. Your friendship will grow if you return his or her generosity with your own acts of kindness. People will realize you aren’t looking out for them if you develop a reputation for being self-centred and only hanging out with your buddies when you need support.

Be a good listener

Instead of dominating conversations, give your friend your whole attention when they are speaking to you so that you may support them. Even if it seems straightforward, pay attention just as much to what others are saying as you do. Your companion isn’t benefiting from the connection if you dominate every conversation with your emotions. Assuring your friend that you care by listening creates a space between the two of you.

Help them with their struggles

Image via Unsplash.com

You must be able to look out for your friends when they are struggling if you want to be truly supportive. If you notice that your buddy is engaging in behaviour over which they have little control, such as using drugs, engaging in promiscuity, or overindulging at a party, help them escape the situation by speaking up about it.

USEFUL LINKS:

Check out this wonderful guide on friendship
See some budgeting tips for large families here 


Tips for Stress Free Photos of Your Children You Must Follow 

Tips for Stress Free Photos of Your Children You Must Follow

How to get their young children to smile and cooperate during the picture shoot is not stress free for parents when it comes to taking family portraits. Getting everyone in the family to look their best and stare at the camera at the same time presents obstacles every time, but you shouldn’t stress about it.

Whether it’s for family photos or individual portraits, we’ve put together a guide to help you get your little ones (and not-so-little ones!) ready for their big day in front of the camera.

Plan the shoot around kids to remain stress free

Image via Unsplash.com

It’s advisable to organize your photo shoot around the timetable of your children. To avoid them becoming fussy or irritable during the shoot, try to schedule your work around their naps or feedings.

It is undeniable—and probably not much of a surprise—that cheerful children take far better pictures. We have worked with thousands of children.

However, it may be quite simple to overlook this and unwittingly plan your activities around your personal schedule rather than the times that would be best for your children.

It goes without saying that if you’re having family photos taken, making sure your kids look their best will be a primary focus.

Make them excited so that you are not in stress

You should inform your kids well in advance of the photo shoot if you want them to be enthusiastic. Tell them what is going to occur and let them know what to expect when they arrive. Make it a special occasion to increase their excitement and interest in participating.

It will significantly affect how they behave when they finally get in front of the camera if you can get them excited about having their picture taken. So that they feel included, let them pick out their preferred attire to wear.

Make every effort to let them choose their own clothes, or at least a portion of them, even if mother and dad have to make a few recommendations along the way to steer them away from the superhero suits.

They will be more interested in what is going to happen. If it’s helpful, we can even snap a few pictures of them in their special attire before changing if that’s not the look you’re going for.

Informally discuss it with your children well in advance so they are prepared and are not caught off guard. Casually bring it up in conversation while maintaining that the photo shoot will be enjoyable. Of course, it will be a tremendous deal.

Give them a small treat to relive their stress

Image via Unsplash.com

Offering a special gift (such as chocolate or a small toy) after the photo shoot may help children behave, even though you might not enjoy the concept of employing a bribe.  A tiny reward can go a long way towards reducing the stress that comes with dealing with an obstinate toddler or preschooler.

If they are experiencing a “moment” at the wrong time, that added incentive might be really helpful. The majority of children like the experience and feel rather special when they are in front of the camera, but it never hurts to have a fallback.

Let your photographer be the instructor

It’s normal for parents to want to instruct their kids during a photo or change their clothes, but this frequently results in parents not looking directly into the camera. Don’t let your concern about what your children are doing effect how you appear in the pictures.

Let us take charge; we’ve dealt with everything you can think of and done this countless times before. You should just concentrate on dressing to impress and getting ready for the camera.

Preplan everything for stress free photoshoot

Image via Unsplash.com

The shot should be planned well in advance. Visualizing the picture session is the first stage in the planning process. Put the shoot on your calendar.

Prepare yourself mentally and physically weeks before; go through the kids’ closets to see what clothes they can wear, what accessories they can use, and what you might need to buy to supplement the clothes if necessary.

Choose well-lit regions of your home to use for the shoot, or if you’re heading to a nearby park, choose the location in advance. What playthings and props, if any, are available that match the theme and color scheme of the photo shoot, such as their favorite teddy bear, Legos, craft supplies, etc.?

Enjoy the stress free experience

Of course, we get your desire for each photo to be flawless, but your main priority should be taking in the moment with your family and kids.

The moments that appear least ideal at the time are frequently the ones that turn out to be the most idyllic. Don’t have preconceived notions about how the ideal family portrait should look. Rather, concentrate on enjoying the ideal family times.

When your family is interacting joyfully with one another, it really shows that we are capturing them in the most natural way possible. Your photos will be better and your kids will have more fun the more fun you are having.

Preparing your home for the shoot

Image via Unsplash.com

Remove debris and other items you don’t want to appear in the photos from the areas you want them to sit in. Select a location with plenty of natural light, such as close to a window. Place some of your favorite toys nearby in a bag.

Prepare your camera’s settings and set your camera aside. Create a distinct area for your youngster to sit in as well as a separate area for you. One toy should be removed from the bag you have already packed and placed in your child’s area. Your child is welcome to play with it.

Be a little adventurous

Image via Unsplash.com

Set it up well so it stands out if you’re having the shoot in your yard or on your patio. Additionally, keep it a surprise to pique their interest. Use a tent, some buntings, or a teepee, for instance. Or even better, take them on a picnic or adventure in your neighbourhood park. Make sure that they have a memorable time during the photo shoot.

USEFUL LINKS:

Enjoy a stress free photographing with your kids, click here
Learn how to build a toddler’s bed from scratch 


How to sell homemade goods at local markets and on Facebook

Have you ever considered putting your handmade goods up for sale on Facebook? If you’re a casual Facebook user, you might occasionally glance at Facebook Marketplace just to find used cars. And furniture and reject it as a way to market your painstakingly created goods. Facebook can also be a good alternative for your craft business since many craft firms use it to reach out to new clients.

Here are a few ideas to sell homemade products via Facebook:

Everyone uses Facebook

(Photo from istock)

There’s absolutely no escape how many people it might be possible to reach on the platform with 2.91 billion monthly active users on Facebook (as of February 2022). Does everything you have to provide appeal to all users? No, but there would be 14,550,000 customers worldwide if just 0.5% of all Facebook users were interested. Are 14.5 million new consumers required for your company to succeed? Most likely not! But the truth is that Facebook offers a lot of ways to connect with your prospective clientele.

Drive traffic to another site

Do you feel compelled to sell on platforms over which you have no control? Craft firms frequently amass a following on Etsy and other marketplaces, but struggle to get customers to their own store. You can use Facebook to direct traffic to another website if you’ve developed your own store on Shopify (or another platform). And want to start providing services to clients without paying fees of 10% or more.

Selling handmade products through Facebook page

Since Facebook made organic engagement more challenging, there isn’t much talk about Facebook pages, but what marketing professionals don’t tell you is that some businesses succeed on Facebook exclusively through their page. Why? They promote engagement by sharing material that their clients genuinely desire in their feed.

Showcase your items

(Photo from istock)

Make sure visitors to your page are aware of the products you offer by showcasing them. Instead of using the space at the top of your website for merely another logo (which is likely already the profile image), highlight some of your greatest and/or most well-liked products. Share articles that highlight your products as well; it’s best if you demonstrate how to utilize or style them. Encourage discussion among your audience about how they utilize them to boost engagement.

Facebook shops

In 2020, when so many companies were having trouble, Facebook launched its “shops” tool, allowing them to set up a storefront directly on Facebook or Instagram. If you’re in the US, you may now put up a storefront that is connected to your business profile.

Share with your community

Use your page to engage your audience with amusing and informative content. You can post about anything on your Facebook page that you would publish on social media. If you feel comfortable doing so, share additional personal information with them. For example, providing pictures of your pets. Or the processes you use to create your goods will help you establish a rapport. Consider forming a Facebook group where your customers, both current and potential, may gather to debate concepts if your product fits into a larger passion.

Linking to your site

You can configure your page so that it has a contact button in the content’s right-hand top corner. This enables you to link to your website so that clients may make purchases there. You may also send folks to your Facebook Marketplace profile so they can make purchases from you without going via a different website.

Also use Facebook marketplace

A frequently underused option that is available to craft vendors is Facebook Marketplace. Facebook Marketplace is generally simple to use and browse, and it enables you to sell to locals within 100 miles of your region. If you decide to start selling on Facebook Marketplace, the following are some best practices we advise:

Creating an account

Although you can sell through your personal profile, we advise setting up a commerce account so that you’ll be seen as a real company (it’s not presently feasible to link a commerce account and your business page, but that functionality may come in the future).

Pictures, headlines and description of goods

(Photo from istock)

Your images here matter, just like they do on other marketplaces! Focus on taking photos that clearly convey what your product is and does because they’ll either cause someone to click on your item or scroll past.

Write a headline that appropriately defines your product and includes any keywords you can think of once you’ve created an attention-grabbing image.

The only thing left to do is create an accurate product description that highlights your product’s best qualities and answers any questions your target buyer might have, such as how big it is and potential locations for it.

Paying a professional to create your product descriptions can be well worth it if you’re not good at it.

Utilize Facebook ads

You may pay to reach potential clients with your offers via Facebook Ads, which is really advantageous. They are abigtopic as well. A lot of people attempt them for a few days, become frustrated, and give up on them. There are entire courses available on learning how to produce good Facebook Ads, and it might be intimidating to start.

Recognize that you can make your advertisements efficient and that once you learn how to accurately calculate money in and dollars out, you may receive $50 in sales for every $5 you spend on advertisements. Who wouldn’t desire that? To get you going in the right direction, consider the following best practices:

SEO Keywords

Many businesses mistakenly believe that when it comes to Facebook ads, keywords don’t matter. With so many people attempting to control what appears in their feeds, interest-based campaigns can be hit or miss, but you can avoid them by using Facebook ads keyword targeting.

Wants of your audience

When they are scrolling, think about what they want to see that can cause them to pause and learn more about what you have to offer. You must show them an advertisement that stops them in their tracks since, as you go around Facebook, the majority of people aren’t actively looking to buy. Put their shoes on, consider what they want to see, then test, test, test!

Reference:

Crafty Base

Looking for perfect age gap between siblings, click on the link below for some prior knowledge:

What should be siblings ideal age gap?


How to Organize Your Photos: Simple Tips to follow 

How to Organize Your Photos: Simple Tips to follow

It can be intimidating to organize the chaos of your ostensibly vast collection of images, but by breaking it down into a number of phases. It becomes much more achievable to organize.

Not knowing where to begin while organizing your files contributes to its stagnation. Don’t worry; the list provided below will help you become organized. And provide you with a multitude of alternatives so you can finally control your photo storage.

Many of these will take some time and may be tedious. But, putting in the effort now will pay off later by making sure that your information is both secure and accessible.

All files into one location to organize

IMAGE CREDITS: Unsplash.com

Given that we use more gadgets every year. It’s simple to end up with a situation in which your digital photographs are dispersed over numerous sites, making any sense of order all but impossible.

Putting everything in one place is one of the most crucial first steps in taking control of your archive.

This will not only make it simpler to maintain, but will also make backing up simpler. Once your photos have been gathered together and renamed. The process of creating consistent, automated backups is much simpler.

Structured folders

When it comes to organizing your files and being able to move them between hard drives or simply back them up, having a system will be crucial. This includes having a method for naming your image files and organizing them into a folder structure.

Before you start organizing your files into the same photo library or location, you might want to set up a system. As an alternative, you can begin organizing once you’ve acquired your files.

Being unsure of whether to organize your photos by location, date, or camera might make it difficult to pick what kind of system to use.

Renaming your files on system to organize

IMAGE CREDITS: Unsplash.com

It’s recommended to rename your files and photographs as you move them into their new folders. Although there may not be any immediate benefits, you will eventually be appreciative of the work invested organizing these photographs.

When it comes to backing up your data as well as being able to locate files quickly, the time you invest today in creating effective processes will almost surely save you confusion and annoyance in the future.

Most cameras use file naming schemes that are fairly difficult to decipher, frequently beginning with DSC or some other seemingly random string of characters. A set of numbers that never seems to reset follows.

Check for duplicate photos when you organize

It can be very simple to end up with duplicate files if you don’t have a system in place. Fortunately, there is software available that can recognize duplicates even if their filenames differ.

Gemini 2 is a great Mac choice that will examine all of your computer’s files, not just your digital images. Gemini 2 is able to determine whether two image files are identical even if they have different names.

The cheapest buying option is simply $19.99 with a 30-day money-back guarantee, and it is free to test. In our review of the top duplicate photo finders and cleaners, you can read more about it.

Let go the unwanted photos

IMAGE CREDITS: Unsplash.com

This is a great time to go through your images and delete any files that are no longer required now that your photos and files have been logically renamed and neatly organized into folders.

Why not free up some disc space and remove all except the best of the 30 pictures of the sunset taken after your sister’s birthday party last year? You probably won’t need them.

Convert non-digital photos to help you organize

It has never been simpler to digitize vintage prints, negatives, and color slides. Even snapping a smartphone snapshot of an old print will produce a somewhat usable backup file in case the original is misplaced or destroyed.

Make use of a DSLR or mirrorless camera for greater resolution. On a cloudy day, position yourself close to a window or a sheer curtain and photograph in as even a light as you can.

Instead, achieve fantastic results by using a tablet or phone as a lightbox and a DSLR or mirrorless camera mounted on a tripod to capture the negative.

Suitable software to organize photos

IMAGE CREDITS: Unsplash.com

When it comes to helping you organize images, there are innumerable software applications available for every operating system, at different prices and levels of sophistication.

Others are fully-fledged, high-end photo editing apps, sometimes known as a DAM, or Digital Asset Manager, that can handle nearly every part of a professional photographer’s workflow. Some are little more than attractive file browsers with some useful capabilities.

An external hard drive

The answer to the question “What is the best device for storing digital photos?” is the cloud. Consider investing in an external hard drive.

The internal hard drives are frequently quite small and inadequate for storing digital images that take up tens or even hundreds of gigabytes because many of us use picture editing laptops together with tablets and phones.

Fortunately, external hard discs are often rather inexpensive. A 12-megapixel camera is capable of recording several hundred thousand images on a terabyte of storage, which can be purchased for as low as $50.

Keep in mind that as the resolution of camera sensors rises each year, so do the corresponding file sizes.

Back up for data

IMAGE CREDITS: Unsplash.com

Every hard drive will eventually fail, as was previously noted, so it is imperative that you maintain multiple copies of any data that is important to you, regardless of the type of file.

To maintain at least two layers of redundancy, professional photographers will keep numerous copies of their photographs in various locations.

The original external drive, a copy of that drive retained at home, a copy kept somewhere else, and/or a copy that is backed up to the cloud are frequently present.

A second hard drive is a practical choice, but it’s important to make sure your computer has enough ports to support connecting both hard drives at once.

USEFUL LINKS:

Check out more tips on organization of your photos
Learn about meal planning and recipe creation for beginners 


Style Tips for Your Photo Session: Your Fashion guide 

Style Tips for Your Photo Session: Your Fashion guide

Finding the ideal photography fashion to highlight your own personality and sense of style can be challenging.

You want to portray who you are by wearing something that does so without coming off as forced or weird.

This article will assist you in selecting fashionable photoshoot attire that suits you the best whether you’re taking solo, couple, or family images.

Street style fashion

Image via Unsplash.com

Big businesses don’t have to control street fashion; what matters is how individuals wear things to express their unique sense of style.

In order to give your picture session an urban vibe, choose an outfit that is something casual, somewhat edgy, and wholly you.

Timeless fashion style

Portraits and photographs are meant to be preserved for a long time. For this reason, picking classic clothing for your photo session clothes is a fantastic choice.

Making a statement with your clothing is highly enticing, but if you look back on your snapshot in a few years, it can seem out of date. According to the theory behind timeless fashion, you’ll always look amazing regardless of the most recent trends.

Casual look

Image via Unsplash.com

Some people view a photo shoot as the ideal occasion to dress up and don a gorgeous clothing that they don’t often get to wear, while others opt for a more laid-back appearance.

If you mean anything like this, then a pair of jeans and a t-shirt are just as classic as a cashmere jumper and a Hermes scarf. A flannel shirt can be added to the outfit if it gets too cool outside for this style, and you’ll have the ideal casual ensemble.

Dress code for family photoshoot

Because everyone has different tastes and preferences in clothing, taking family portraits can be difficult. Additionally, because of their varied ages and body types, they may appear better in certain sorts of clothing.

Making a style board for your family photo shoot is a great method to handle the issue. This will help you choose a color scheme for the family photo attire.

Flowery dress

Image via Unsplash.com

There are many alternatives for photoshoot attire for outdoor sessions in the spring and summer, which is fantastic.

An airy garment is ideal for capturing the mood. Additionally, it is cozy to wear and works well on most body types.

You can choose vibrant or neutral colors, depending on your personality and preferences. You may also go with flower prints or something colorful like a polka-dot dress.

Because moms and daughters can wear the same dress design with different patterns and colors, this is also a great concept for family photo costumes.

A vintage style

We are more cognizant of how we consume clothing as our awareness of our carbon footprint grows. Because of this, wearing antique clothing is not only the ideal attire for a picture shoot but also environmentally friendly.

If you don’t already own any retro-inspired attire, you can get it at second-hand stores, on specialized apps, or online.

To replicate a specific historical era, you can look at old magazines and photographs to see what people wore at the time. You can choose between a disco appearance from the ’70s or a pin-up look from the ’40s, depending on which is more enjoyable for you.

Contrasting colors

Image via Unsplash.com

Choosing clothing for your picture shoot by considering opposing colors—also referred to as complementary colors—is a terrific idea.

On the color wheel, complementary colors are those that are directly opposite one another, such as teal and red, blue and orange, yellow and purple, etc.

This technique can be applied, for instance, to a couple’s or best friend’s photo session. Coordination of family photo costumes also works. Members of the same household can dress in complimentary hues to one another.

If there is only one model, you can use this theory to decide on the wardrobe or the various components of the ensemble based on the color of the background.

Style in Necklines

Many individuals focus on the color of their photo attire, whether they are formal or informal, etc., but overlook the specifics. The secret to a flattering portrait is picking the proper neckline since it frames your face and draws attention to it.

Although female clothing has a greater range of necklines, men should still consider it when choosing what to wear to their picture shoot.

Learn which neckline suits you best, whether it’s on a dress, t-shirt, sweater or shirt.

Style in Printed dress

Image via Unsplash.com

The majority of fashion gurus will advise you to typically stay away from prints and patterns when dressing for photos. Yes, generally speaking, that makes sense; but, there is always that one outfit that serves as the exception to the rule.

Bright or chaotic patterns can be a statement piece of apparel that looks excellent in photographs when you have a neutral background.

Some shoes style

You can use the shoes as a foundation to create an ensemble for a picture session, just like you would with any other article of apparel. Shoes are a crucial accessory, whether you prefer a pair of heels or a pair of trainers.

It’s crucial to remember the shoes even if you’re not really focused on them at the moment. Make sure they are comfortable, clean, and, if not brand-new, at least color-coordinated with the rest of your attire.

Earthly colors for family

Image via Unsplash.com

The benefit of using earthy colors for family portraits is the vast range of tones available to each participant.

There are other colors as well, including leafy green, orange, and blue tones from the sky and water, as well as purple and yellow. Yes, the brown soil tone might not be that appealing, especially for the smaller ones.

Monochrome style

When you use distinct tones of the same color, you are using monochrome. This eliminates the challenge of knowing how to match various colors, whether it be for a family photo attire, a couple’s outfit, or even your own.

Choosing the same shade for your shirt, trousers, jacket and shoes is a safe bet. For a fully monochromatic image, you may even go all out and keep the background the same color.

USEFUL LINKS:

Keep hovering here to know more 
Always look fantastic in photos with these amazing tips 

Your Kids Photo Shoot: Location Ideas you must try today 

Your Kids Photo Shoot: Location Ideas you must try today

Kids are both photogenic and famously challenging to photograph. Kids may occasionally act shyly or otherwise differently during a prepared photo shoot, which makes the portraits appear staged or unnatural—or at the very least, challenging to photograph.

Because of this, some families decide to have a lifestyle picture shoot instead, striving for natural-looking photographs as opposed to posed ones. It can be difficult to capture a wonderful candid image of a child, but if you do, that picture might become cherished for years to come.

Here are some suggestions for your upcoming photo session with kids to help you improve your chances of getting the perfect photograph.

Fun and playful session for the kids

Image via Unsplash.com

Because they’ll be more at ease and likely to give you their nicest, most sincere smiles, you want the kids to have fun. In addition, since you’re giving the kids a good memory, the parents will also be happier.

The ages and personality of the children will determine how to make a photo shoot enjoyable. Ask the parents (and/or kids) in advance about their hobbies if you don’t already know them.

Allow them to pick out props, a location, or an activity if at all possible. By including them in this way, you may increase the shoot’s value and enjoyment for everyone involved.

Aim perfection

Photographers have the opportunity to organize and style a themed shoot when working with older kids who are able to learn. The effort and careful planning ought to pay off, producing imaginative, fascinating, and lovely imagery.

Exploring outside with kids

Image via Unsplash.com

With kids, natural behaviour isn’t a dial you can turn up or down. If a child is told to smile or go play, they can just sit by their parents’ side, expressionless.

Think carefully about the setting you chose for the photo session rather than depending solely on commands and compliance. Many children will naturally exhibit the expressions and behaviour you’re hoping to capture in a pleasant outdoor setting.

Beaches, parks, and forests are all excellent options. Your chances of getting a great candid portrait just by leaving the studio will increase, and the background will be lovely too!

Your kids favorite toys

If going outside isn’t an option, you’ll have to rely on toys to reassure a young youngster. It’s a good idea to invite the parents to bring their child’s favorite toys in addition to the toys you can (and should) bring yourself. What a child could want is merely a hunch, yet parents are intimately aware of every desire.

The toys are nevertheless valuable to have on hand even if they are unsightly or difficult to shoot since they can provide comfort for the child.

Bring some classic toys

Image via Unsplash.com

The family is welcome to bring any toys they choose, but you should only bring the cutest stuff. After all, the child’s personal toys will be associated with memories and nostalgia, whereas the toys in your studio are only set decorations.

Be sure to stock your toy collection with timeless items like pinwheels, bubbles, and magnifying glasses. These toys are highly photogenic and consistently entertaining. Your photographs may also have a beautiful, vintage appearance due to their timeless quality.

Don’t stand between your kids and fun

A hovering parent stifles playfulness more than anything. Try to be subtle and avoid being too close if you want a shy child to open up. Never, ever tell a child what to do. Give it to one of the parents to introduce if you want to try a different toy.

You’ll have a better chance of observing and recording natural behaviour by distancing yourself from the situation in this way.

Take the opportunity to learn more about the child’s personality if they aren’t performing in the way you’d anticipated or expected. While many photographers want to capture scenes of giddy excitement and delight, some kids are more reflective and reserved, even when having fun.

Even if they don’t smile for the camera, they will still exhibit other feelings like curiosity that are worth documenting.

Prepare yourself

Prepare for extra movement even if the child you’re photographing ends up playing quietly. However, if you’re counting on the kid to remain still… Do not rely on it. Think of the shoot like a sporting event. Although there may be quiet periods, the best feelings and photos frequently occur in the thick of the action.

Facial expression of kids can be heard to capture

Image via Unsplash.com

You can miss out on a lot of other fantastic images if you spend the entire shoot trying to catch the child’s facial expressions. In addition, if the youngster continues turning their head, concentrating just on the face can occasionally be annoying.

Instead of losing patience, take a step back and assess the situation as a whole. You might think of ways to take lovely pictures of the youngster using only their hands or feet.

Follow your kids

It could feel strange to you at first to take a backseat if you’re used to being completely in charge of a shoot. But keep in mind that you’re attempting to capture the child’s behaviour and personality accurately in a photograph; you’re not trying to manage it.

In other words, you’re not the kid’s boss; you’re just an observer. If instruction is required, it should be kind and playful rather than directive. Remain unperturbed and open to the possibilities unless they are about to harm something priceless, like your photographic equipment.

You could find that their originality and imagination are more motivating than anything you could have thought of on your own.

Asking for a pose

Image via Unsplash.com

Some kids genuinely enjoy striking poses. If you question the parents in beforehand, they will likely be able to tell you whether their child is camera-shy or a future movie star. But even if a child doesn’t seem to enjoy posing, it’s worth asking them if they would, possibly after you’ve already taken some lovely candid pictures.

USEFUL LINKS:

Check out some more ideas on kids photography here
Explore some best ideas on location for your family photoshoot

Your Baby’s Cake Smash Session: Some Prep Tips

Your Baby’s Cake Smash Session: Some Prep Tips

What exactly is a cake smash session for a baby? Your infant gets to smash their cake and have fun in front of the camera during a baby’s cake smash session, which is a fun and lively photo shoot. This is a wonderful way to get images of them enjoying themselves and smashing cake to mark their first year of life.

A typical cake smash session lasts an hour from beginning to end and includes snapping pictures of your child as they take turns playing with and crushing the cake. Following that, you can enjoy your child’s supper and some birthday cupcakes!

When to plan a cake smash session:

Image via Unsplash.com

The cake smash photography session usually takes place around the baby’s first birthday, and the pictures are then used to decorate invites to parties or inform family and friends about significant developmental milestones.

Offering cake to the child before that age would be of little benefit because they might not show any interest. Instead, a sudden burst of sweetness at 12 months is frequently the first time the youngster is able to eat as much cake as they want or, better yet, do anything they want with it.

The options are unlimited, from face painting into it to flinging the bits and pieces around like there’s no tomorrow!

How Can a Cake Smash Session Help You Remember Special Moments?

A cake smash session is a fantastic way to record your baby’s first year’s memories. Because it’s their first birthday and one of the final times you’ll spend with them as a baby, this session will be among the most thrilling and memorable ones.

Additionally, it records all of their subtle expressions and life events. This session is a fun way to capture spontaneous moments that can’t always be planned or captured on camera, just like with any type of photo shoot. It’s a chance for your child to have fun and enjoy themselves!

Your complete plan outlined:

Image via Unsplash.com

A kids photographer

Pick a photographer who has experience working with kids. A photographer who has worked with kids before will be able to put your youngster at ease while still capturing the greatest images.

Practicing a little

It never hurts to practice a little. The sudden spotlight and encouragement from a crowd of adults to dive into a huge cake can be rather daunting for some kids during a cake smash session. Give them a little cake or cupcake to practice on at home to help them get used to the procedure.

Theme

Image via Unsplash.com

Apply a theme. Planning the cake smash session around your child’s favorite toy or book will truly make the session come to life. Selecting a cake color will be simpler if there is a theme.

Choosing a cake

Pick your cake wisely. Choose a small to medium-sized cake when ordering your cake, and go for whipped or butter cream rather than fondant since the latter might be tricky for a young child to break. Additionally, it is advised that you check to see if your child has any allergies.

What to bring along with the cake?

Image via Unsplash.com

  • Prepare a clean change of clothing and some wet wipes for the aftermath.
  • Make sure the cake is at room temperature before the session if it needs to be chilled.
  • Ask the photographer how much of the theme-related décor you’ll need to provide as well as information regarding a backdrop.
  • It would be ideal to have a care taker if you are bringing additional kids so that there won’t be any interruptions.

Some prep tips

You can take a few steps to improve the outcome of your cake smash session. To ensure that you are fully prepared for the shoot, you should first make a plan for the session in advance.

To create the ideal cake smash photo shoot, you should collaborate with your photographer.  It’s a good idea to let your photographer know what color the cake is if they want you to deliver the cake so they can coordinate colors around the cake.

In order for your photographer to provide the ideal background, props, and decorations for your cake smash session, you should let her know if you have any special ideas for the theme.

Some party props

Image via Unsplash.com

Many parents adore dressing up their kids in designer clothing and bringing their own banners and props (often party decorations they plan on employing at their child’s first birthday celebration)! Or on the other hand, you might choose from a variety of banners, wooden toys, balloons, an old toy car, and other accessories that some parents enjoy utilizing!

Outdoor cake smack session

An outdoor cake smash session frequently has a more natural or rustic setting. We advise bringing water bottles, wipes, paper towels, and garbage bags to help clean your child before the ride home because you will be outside without much access to running water (something we have during a studio session).

Snack for the baby

Bring some baby-friendly puffs or little snacks! Even if the infant isn’t interested in smashing, we can still capture some fantastic pictures by using this clever little approach. They are simply inserted into the cake’s back! Additionally, keep a bottle or sippy cup close hand in case the baby wants a break or gets thirsty.

Consider your baby’s bedtime

Image via Unsplash.com

Planning a cake smash event should always take nap or bedtime considerations into account. We want to make sure that your child is well rested. Because the goal of these sessions is to capture their unique characteristics. Let’s make sure to arrange the session during that time if your child is not on a schedule. But, tends to be the happiest at specific times of the day.

Keep your little one a little hungry

We advise giving your child a meal before a session so they won’t be ravenous and cranky. But, during cake smash sessions, it may be helpful if they are just a little bit hungry.

Of course, you should still feed them. But, if they are a little puckish when you bring them to the shoot. They could be more likely to eat the cake. They might not be as eager to eat more if they’ve just finished a substantial dinner.

USEFUL LINKS:

We’ve got everything you need to know about cake smash session 
See some helpful tips in setting a craft center for your kids

Indoor Photoshoot Made easy with these amazing tips 

Indoor Photoshoot Made easy with these amazing tips

Outdoor photography can be a photographer’s dream, while indoor photography can be their worst nightmare. But it’s not necessary to be! We have made indoor photoshoot easy for you.

Although the camera’s sensor can’t see as well as your eyes can, there are a few strategies you may use to get past this drawback. So, take your camera indoors, read our suggestions for indoor photography, and get shooting!

Use higher ISO during indoor photography

Image via Unsplash.com

The sensitivity of the camera sensor to light is how most photographers refer to ISO. Even if this isn’t quite correct, it is a helpful method to approach indoor photography.

You’ll probably notice that the image is quite dark if you take a photo indoors at the default ISO of 100. The quickest and simplest solution is to raise the ISO, which greatly boosts the brightness of your photo.

Unfortunately, there is a drawback to adopting a high ISO. Since the ISO is actually boosting the brightness of the captured pixel, sometimes it does so too much, which causes the dreaded noise to appear in your picture. Don’t push your ISO too high because the objective is to minimize noise while still retaining an appropriate exposure.

Wide aperture lens for indoor photography

You must change your aperture and shutter speed in order to maintain low ISO levels and minimize noise.

The aperture is a hole in the lens that regulates the amount of light that enters (or exits) your sensor.

Due to the overall lack of light, you’ll need a lens with a wide aperture for interior photography. The widest aperture you can obtain with an autofocus lens is f/1.2, which is a genuine gem for indoor photography.

Lenses with stable image

Image via Unsplash.com

Another useful function that your lens and camera combination can have is picture stabilization. Your equipment likely includes image stabilization technology, which helps lessen motion blur brought on by camera wobble.

This enables you to maintain a slow shutter speed (while still getting sharp pictures!).

Shutter speeds for interior photography should be slower than they would be for bright-light outdoor photography. However, you should check to see if your slow shutter speed will result in camera shake if you have to use your camera handed.

A still setup during indoor photography

Even image stabilization won’t help you if you’re taking pictures in a very gloomy environment. In order to snap the picture, you’ll need to buy a tripod and a remote control.

You can set your shutter speed significantly slower than if you were holding the camera by mounting it on a tripod. If you use a remote release to open the shutter, you won’t even need to push the shutter button to take the picture!

Burst mode for faster shutter speed

Image via Unsplash.com

A tripod is excellent, but what if you want to take pictures of a moving subject, like a moving person or pet? There, a slow shutter speed is useless.

Here’s a little-known fact: By setting the camera to burst mode or high-speed continuous shooting, you may compensate for some slower shutter rates.

Burst mode enables you to press the shutter button while simultaneously taking as many pictures as you can. This is where the frames per second (FPS) capabilities of a camera are useful. It refers to the number of photos a camera can take every second.

Take care of white balance adjustment

The quickest and most efficient fix for inaccurate color rendition in indoor photography is to change the white balance.

When using the available light to take pictures indoors, the lighting output occasionally can look warm or cold (or downright strange, as with fluorescent lights). You’ll need to adjust your white balance settings to get the colors back where you want them. Colors are neutralized by the white balance to produce a more realistic picture.

Ambient light of your indoor

Image via Unsplash.com

Ambient lighting is illumination that comes from windows or other natural sources, such as a lamp. Because it keeps the atmosphere, purpose, and real story of your setting, ambient lighting is fantastic for indoor photography.

A window provides the most practical and convenient ambient light. In particular, place your subject near a window if you’re taking a picture of a moving object.

If you have white or light-colored sheer curtains, they can help soften the window’s light and give additional diffuser. Most subjects look beautiful in this uniform lighting.

Shooting in indoor at the best time of the day

In fact, there are specific times of day that are ideal for taking interior photos (or photos that suit a particular mood).

One such time is midday. While midday lighting might be disastrous for outside photography, it is ideal for indoor photography. The strong lighting significantly improves your shot.

A gorgeous, golden light that is both fanciful and whimsical can also fill your indoor frame during the golden hour, which is the period of time between sunrise and sunset. Whether your photography is inside or outside, golden hour light is generally flattering.

Artificial intelligence is feasible too

Use artificial light if the ambient or natural light isn’t working brilliantly for the picture you want to take! To add more light to a room, use a flash, strobe, or continuous lighting source.

Additionally, keeping your ISO levels low and shutter speeds quick will result in much more user-friendly camera settings. Just be aware that strobes and flashes are preferable for lowering your ISO because continuous light is less potent.

Make cautious not to point your flash or strobe straight at your subject if you’re using one. Directly aiming at your subject will produce an unpleasant and harsh light. Instead, aim the lighting fixture at a wall or ceiling to reflect the light.

Your topic will be illuminated in a much more organic and natural way when this light is reflected.

Shooting against window

Image via Unsplash.com

Whether you want to believe it or not, you can photograph people up against a window. It can be challenging to get the right exposure, though. Your window will be an overexposed dazzling white if you expose for the topic. A window exposure will result in a too-dark subject. What a conundrum!

Accepting the phenomenon that occurs is sometimes the best course of action! Allow your subject to seem silhouetted against the window’s light. This look is incredibly passionate and appealing since it is so expressive.

USEFUL LINKS:

Check some more tips on indoor photoshoot here 
Learn about some fundamental of SEO; click here 

Why Your Photographer Won’t Give You the RAW Files

Why Your Photographer Won’t Give You the RAW Files

Like any other commercial craft, a photographer needs skills photography to set himself apart from the competition. One such method is to digitally edit the RAW file in commercial photography to make the image appear more intriguing. When a photographer does deliver the finished product, he/she always send the edited version rather than the RAW version.

What makes photographers refuse to share the RAW files? Because RAW files are a sort of negatives that belong to the photographers, they are not provided to clients. Even when a client commissions a photograph, the client only ever pays for the finished image—a JPG or TIFF, for example—not the original shot.

Is it the sole explanation, though? No, but it is a significant factor. Unless otherwise specified in a contract or agreement, ownership of a photograph will always remain to the person who took it under copyright rules. Let’s look at the reasons why the majority of photographers never share their RAW files.

What is a raw file?

Image via Unsplash.com

It’s crucial to first comprehend what a RAW file is. An unprocessed image file called a RAW file contains all the data that the camera’s sensor has recorded. RAW files are frequently very big, and only specialized software can be used to open and manipulate them. A JPEG file, in contrast, is a smaller, compressed image file that has already undergone processing by the camera.

Ownership of the photos with the photographer

Like in any other industry, the possibility of having one’s work stolen looms large. The RAW files are evidence that the photographer actually took the picture, and they may be useful if you decide to take legal action against someone who plagiarized your work.

Even for commissions, the customer is only entitled to the finished product; unless otherwise specified in the contract, they are not entitled to the RAW files.

Brand value of the photographer

Image via Unsplash.com

Nowadays, practically all photos are digitally improved to improve their aesthetics or to express a specific feeling or message. If the RAW files are provided, anyone can add their own unique touch by digitally editing and posting the image online.

That image might be mistaken for the original by someone who is unfamiliar with the photographer’s work. The reputation and brand value of the photographer may suffer as a result. Thus, even if they give the photographer credit, a potential client may still judge him or her based on a copy that was created by someone else.

Accessibility and size

Huge RAW files are extremely difficult to send to another person. Sending several copies of a single file will always be a huge time waster for both sides because a single file can be many terabytes in size. Additionally, even if they are delivered to the customer, viewing them will require a compatible piece of software, such as Adobe Photoshop or Lightroom CC.

In order to avoid wasting time and energy, if they do send them, they will have to explain to them how to see them or why they are so large. Many customers don’t know how enormous RAW files are until they view them for themselves, even those who are knowledgeable about the field.

Reputation of the photographer before the client

Image via Unsplash.com

Due to the fact that all the magic happens during the processing and editing of the image, RAW files are usually always very unpleasant to look at. Every photographer will have a distinct manner of digitally modifying their photos, and that particular style may be what makes them stand out from the crowd.

Giving out their RAW data will therefore make their work appear to lack the magic or edge it once did. Since the photographer’s reputation is all they have when trying to attract new clients, this could be disastrous for them.

Wasting the efforts of photographer

Photographers sort through dozens or hundreds of photos after the shoot is finished to choose the best ones for editing. They are essentially squandering all the time and work they put into selecting the final files by providing the RAW files.

Some people think that by providing the customer with the RAW files, they will hire them again if they choose any of the photographs from the batch. However, this rarely occurs because most of the time the client either opts to perform the editing themselves or hire someone else to do it (who is more affordable but less competent). In either case, the photographer’s reputation suffers.

RAW files are unedited

Image via Unsplash.com

The RAW files contain the raw, unedited data and are not an accurate representation of the finished product that the photographer wants to offer, which is one reason why they might not want to send them to their clients.

In order to acquire the final appearance and feel of their work, photographers may expend a considerable amount of time and effort during the editing phase of their creative process. If the client decides to alter the files themselves, providing the RAW files could undercut their efforts and possibly reflect adversely on their work.

Legal reasons of photographer

Photographers may not offer RAW files for ethical or legal reasons. The use and ownership of RAW files are frequently outlined in legal contracts between photographers and their clients. RAW files are frequently regarded as intellectual property. Unauthorized distribution of RAW files may constitute a violation of contract or a copyright infringement.

RAW files need special tools to access

Another justification for withholding RAW files from customers is the likelihood that they won’t even be able to access them with their present software. Only specialized software packages, such as Adobe Photoshop and Lightroom CC, can open CR2 files.

A client’s hard disc likely won’t have the room to keep thousands of enormous RAW images. Each of which can easily surpass 25 megapixels. Thus, this is another issue.

Wrong impression on future clients

Image via Unsplash.com

Giving out unprocessed images will offer clients and anybody else they let view the photos an erroneous idea of your talents. And distinctive style because RAW files are only the raw materials that photographers employ. Along with digital image editing to create stunning images.

USEFUL LINKS:

See why photographers never share RAW files with their clients 
Want to know why do photographers charge their prices? Click here to know. 


Mini Session vs. Custom Photography: Some Vital Differences 

Mini Session vs. Custom Photography: Some Vital Differences

It can be challenging to choose which type of photography session is best for you when choosing between a mini session and a personalized one. Both have a few disadvantages as well as particular advantages to them. We’ll examine the distinctions between mini sessions and custom photography sessions in this blog post, as well as the benefits and drawbacks of each kind of photography session.

This article is intended to assist you in making an informed choice regarding the kind of photography session that would work best for you.

What is a mini session?

Image via Unsplash.com

A small photo shoot is a scaled-down version of a typical photo shoot. They last between 20 and 30 minutes and have a few poses and/or costume changes.

For people who want updated professional images but don’t require or want a full photo shoot, mini sessions are the ideal solution.

They’re particularly beneficial for active families who want to refresh their family portraits but don’t have a lot of spare time for a lengthy session.

The same backdrops and/or props are used for each client during the small sessions that many seasoned photographers offer during the Christmas season. Families and couples can easily and quickly take an annual family portrait using this method.

And what is custom photography?

For a single client or customer, custom photography entails the creation of one-of-a-kind, personalized photos.

Custom photography, in contrast to traditional photography, involves collaboration with the client to conceptualize and create photos that are tailored to their particular goals and requirements. Traditional photography frequently concentrates on capturing pre-existing subjects in planned settings.

Creating business branding materials, product images, individual portraits, website imagery, and many other things can all be done using custom photography. Custom photography can be a very important asset for both individuals and organizations because it is such a versatile tool.

Mini session: Pros and Cons

Image via Unsplash.com

There are advantages and disadvantages to small sessions to weigh. Mini sessions have the advantage of often lasting less time than sessions for custom photography. This can be a huge benefit if you’re pressed for time or have a restless toddler that has trouble staying still for extended periods of time.

Another benefit of small sessions is that they are frequently less expensive than sessions for custom photography. They are thus an excellent choice if you have a limited budget.

Mini sessions, however, also have some drawbacks. One drawback of a small session over a custom session is that you spend less time with the photographer.

This implies that you might not receive all the injections you require or want.

The fact that mini sessions are frequently conducted in “one-size-fits-all” settings is another possible drawback. Your selections for backgrounds and poses may be limited as a result. A small session might not be the best option for you if you have your heart set on a particular location or appearance.

Location in mini session

Location is another key distinction. While full custom sessions are normally chosen by the client, mini-session locations are typically selected by the photographer. The days and locations for your mini-sessions may vary depending on the photographer, and some photographers may only offer one round of minis each year in a single location.

Space for mini session

Image via Unsplash.com

Because mini-sessions are so brief, the photographer may frequently work more quickly with you and your children to obtain the photos required for your gallery. A mini-session might not be for you if you prefer a more laid-back style of photography or if your child is extremely shy and slow to warm up.

Custom photography: Pros and Cons

Every aspect of life has advantages and disadvantages, and bespoke photography is no exception. On the bright side, personalized photography can be an excellent way to record moments you’ll treasure always.

A specialized photographer will be able to capture what you are looking for and can offer suggestions and help both before and during the photo shoot.

Additionally, custom photographic sessions provide more room for creativity than conventional small sessions. With custom photography, you often have more time to capture several looks and styles and the chance to use a choice of backdrops and accessories to produce one-of-a-kind photographs.

Number of poses

Image via Unsplash.com

Because a mini session is shorter in duration, your photographer will make the most of this opportunity to get as many candid shots as they can. In contrast, a personalized photography session enables as many positions as are time-permitting.

While still attempting to take as many pictures as possible during your small session, your photographer. Naturally, you’ll get less pictures than you would have if you had scheduled a personalized session.

A short session will yield roughly 10 to 20 total photographs, but a custom session will produce between 40 and 60. The images captured during a small session will typically only need little retouching.

Number of photos

Even though the photographer will make every effort to take as many pictures as they can during your mini session, you will inevitably have fewer pictures than you would have if you had scheduled a custom session. A short session will yield roughly 10, whereas a custom session would produce between 30 and 40 photographs. The images captured during a small session will typically only need little retouching.

So, what’s the bottom line?

Image via Unsplash.com

What is the final verdict then? The choice between scheduling a small session or a custom photography session. Ultimately depends on your unique requirements and preferences.

A brief session can be the best option if your major concerns are time and money. Custom photography, however, can be the best option. If you’d want more control over the setting and general appearance of your pictures.

Whatever path you take, just make sure the photography session satisfies your unique requirements. You are unlikely to be pleased with the finished photographs. If you are not thrilled with the photography session as it is taking place.

USEFUL LINKS:

We have for you some more answers to your question; click here to know 
Know everything about lifestyle photography session; visit the site


Beautiful Photo: The necessary key elements 

Beautiful Photo: The necessary key elements

Have you ever pondered the factors that make a photo and out and evoke strong feelings in you? There are very precise components of photographic composition in amazing a photo that help bring them to life, make you take a second look, and help you remember them. Of course, a photo of your family and places familiar to you that you love will automatically give you the warm fuzzies.

Lightning in a photo

Image via Unsplash.com

Lighting is the most important factor in producing great photos. Beautiful lighting gives an image a certain atmosphere or tone and draws attention to the photo’s key elements. In a controlled setting, like a studio, using soft artificial light to create ambience can be the difference between success and failure.

A drastically different outcome can be obtained in a photograph by positioning the light source in the foreground as opposed to the background. Likewise, pointing down at your subject or over to the side. When trying to create great photos, light is a fantastic instrument that is incredibly versatile.

Surroundings of any photo

Although photographs are often taken with a particular individual in mind, that person is merely one element of the overall scene. The background, additional subjects, props, and lighting must all be taken into account in order to complete the scenario.

Your expert photographer does more than simply point and shoot. They constantly take into account the various aspects of photography to guarantee they get the desired result, which results in stunning photographs that you will cherish for a lifetime.

Texture of photo

Image via Unsplash.com

Despite being relatively basic, texture is one of the toughest photographic components to display. Some photographers use texture as a technique to accidentally enhance the subject while also bringing a portrait to life. Without meaning to, the inclusion of textured backgrounds, flooring, clothing, and/or accessories adds visual appeal.

Texture can draw attention to patterns and change how existing pieces of the image appear. In photography, texture has the power to elicit feelings and alter how a subject is viewed.

Perspective in a photo

Another crucial aspect to take into account while taking a stunning picture is perspective. It is crucial because, when used properly, varied viewpoints can make a two-dimensional snapshot appear to depict a three-dimensional scene.

Sometimes creating the ideal angle just requires getting down on the ground to look up to your subject or climbing a ladder to look down on your topic. The only restriction is the imagination of your photographer, which is truly unlimited.

Confidence

Image via Unsplash.com

People exude confidence when they show up to their picture session prepared and eager to appreciate the photo shoot experience for all that it is. These clients are a dream for a professional photographer because they maintain their confidence during the photo shoot, which makes it simple for our photographer to take the most wonderful and gorgeous photos that we are confident you will love and that will be loved for a lifetime.

Please don’t be concerned if you don’t arrive radiating confidence. It is only normal for certain clients to experience uncertainty. A photographer’s goal is to make you feel at ease during the process and to ensure that you look and feel your best.

Coordinating outfits

In a nutshell, it’s crucial to dress yourself, your family, and any guests in complementary colors and appropriate attire for the weather. You seek a cohesive appearance. Multiple patterns and busy prints can be obtrusive and detract from the main subject of attention, which is you. We want you to be gorgeous, at ease, and confident because this will show in your photos.

Live in the moment

Image via Unsplash.com

It is incredibly precious to have a professional photographer capture a memorable moment in time for you and your family. There aren’t many occasions in life where you can set aside time to be present with your loved ones, giving your full attention to yourselves, and savouring the priceless time you are sharing.

Time flies by so quickly. You’ll be glad you seized the opportunity to enjoy the moment and have these fleeting moments recorded for you. And the outcome? Beautiful family photographs that you will cherish forever.

Structure of good photo

Every artwork needs a solid foundation to draw the viewer’s eye from a distance. This arrangement of parts can be thought of as the basic composition. It instead refers to the fundamental components of an image, such as shapes, patterns, colors, and contrasts, rather than any specific subject in the picture. These combine to draw the viewer in and serve as a starting point for engaging them with the image’s finer elements.

Emotional response

The viewer’s emotions are evoked by a good shot. This is a strong component of the image and can be just as significant as the setup or lighting choices. A photograph’s ability to evoke an emotional response in the viewer is also more crucial than any of the image’s technical elements (such as the appropriate exposure, aperture, or shutter speed selection), as we tend to remember images that move us more vividly than those that don’t.

A balanced composition

Image via Unsplash.com

The photographer’s constant objective is to maintain the viewer’s eyes within the image’s frame. Keep the focal points of the picture away from the frame’s edge when you are composing it.

Further aiding in keeping the viewer’s attention on the image is to keep the corners and edges somewhat black. Be less preoccupied with the topic and the intricacies and instead concentrate on harmonizing the underlying composition of the elements.

A good photograph is made up of many different components. You can raise the calibre of your photos by deliberately considering them like you consider your compositions. Above all things, though, work on creating your own distinctive design and seek out imagery that inspires and intrigues you.

Post-production

It’s important to keep in mind that a nice image is actually formed in the camera, not in post-production. To improve our images, we can employ tools and strategies. In post-production, we can stress certain characteristics, such as the brightest parts of an image because the viewer’s eye naturally gravitates towards those areas first.

USEFUL LINKS:

Learn here the basic components of a good photo
You can now choose the best location for your family photoshoot session with these simple ideas


Taking a Selfie: Important Tips to remember 

Taking a Selfie: Important Tips to Remember

A good selfie shouldn’t be that difficult to take. But we’ve all experienced it: you take a selfie because you’re feeling hot and confident and are anxious to send it to last night’s steamy Tinder date, and surprise! Your camera suddenly becomes cold and vindictive and won’t let you appear as you actually do. The selfie is compromised.

You are given two choices. Continue shooting random selfies of yourself, each one getting worse than the last, until you lose patience and confidence, or read on for our selfie tips to learn how to take a great selfie every time.

Tilting something a bit

Image via Unsplash.com

Simply keep your phone still and tilt your head slightly upward, downward, or to the side. You can also tilt your phone and your head at the same time, although this will make you appear very stupid for a short period of time until you find your own unique phone + head + tilt combination that works best for you.

Whatever you do, taking a selfie with your face squarely in the camera is usually not going to result in the best photo, and this is independent of how gorgeous your face is. You can trust me.

Your eyes matter in a selfie

Any picture we encounter draws our attention to the eyes. That must make up half of the Mona Lisa’s appeal. We’re not machines, even though a lot of communication now takes place by email and iMessage. We continue to look for that sign of a personal connection in someone’s eyes.

Therefore, the key is to fix your gaze on the camera in order to produce an engaging selfie. not the entire phone area, but specifically at the camera. If you took my advice from earlier and moved your head and your phone around to obtain the ideal selfie angle, you must now stop, focus, and look intently into your phone’s camera.

Lightning makes a difference

Image via Unsplash.com

Avoid harsh lighting like bright white kitchen lights or direct sunshine whether taking selfies indoors or outdoors. Having said that, if there isn’t enough light, no amount of photo editing in post-production can fix blurry pictures.

The sun is now lowest in the sky just before sunrise and just after sunset, which are the finest times of day to snap images outside. Here are only a few fundamentals of photography for you to consider: You won’t wake up before the sun does for a good selfie, no matter how obsessed you are with doing it.

Avoid shadows when you click a selfie

While seeking the ideal lighting, it’s also a good idea to stay away from shadows. Even if you’ve located the ideal golden hour to take a selfie, it won’t be attractive if a pole or a set of window blinds casts a shadow across your face.

Distracting shadows can be avoided by taking photos in the shade. If the sun is causing your post-run selfie to have shadow difficulties, find a shaded area and hide there to get that dewy post-workout look.

If you can’t do that, position yourself so that the sun is at your back. As a result, there won’t be any shadows and you won’t have to squint at the camera to avoid the sun’s glare. Oh, and if you’re feeling extra, you might try using a solar diffuser or reflector to control the shadows.

A normal smile would do

Image via Unsplash.com

Do you recall the elementary school photo day? One child was always unable to smile naturally while facing the camera. Bring on the yearbook image that keeps everyone up at night.

Being able to grin naturally for the camera is definitely not simple. Unnatural smiles are rigid, artificial, unauthentic, and occasionally downright scary. You might need to practice since this is not always intuitive for everyone.

Take many selfies and practice varied lip purses, mouth openings, lip turns up, big smiles with all of your teeth and close-lipped smiles until you discover the one that looks the most natural and photogenic. Which smile seems most like “you”? Which smile is easiest to pull off without looking?

The background of selfie

Auto selfie. Your bedroom’s white, blank wall. the lobby mirror of your residential complex. So many times have I been there and done that. Although a full-on fashion runway is not necessary, your background should be eye-catching.

Try to take your selfie in front of a unique backdrop, whether you’re at the park, your house, or even the grocery store. With the perfect angle, an apple display in a store can look amazing. There are other possibilities if you’re not in the mood to be inventive right now.

Any photo’s background can be modified with Facetune2’s Backdrop tool. Use one of the patterned, glittery, or solid-coloured options in the program to replace your plain background, or upload your own image.

The flash of your phone

Flash turned on? It can be both a blessing and a disaster for your selfies at different times.

Flash is notorious for washing out your skin and making people’s eyes red. In essence, it gives you the appearance of a demon spawn from hell. That’s not a cute look, unless it’s Halloween.

When a subject needs light in a hurry, flash adds a burst of it. It works best inside, in dimly lit areas, or where there are lots of shadows.

If using flash doesn’t make you look any less possessed, try a new stance. Additionally, you may try utilizing two flashes—the first will dilate your pupils (and prevent red-eye), and the second will be a true flash.

Know ‘your side’ while clicking a selfie

Image via Unsplash.com

When it comes to your real posture, you’ve already tried tilting your camera in every direction.

Everybody has a preferred side of their face, known as their “good side.” Whose is it that you own? It’s possible that you have more freckles on your right side of the face, which can be a hint to how outgoing you are.

Alternatively, perhaps the bump on your nose from falling off a skateboard in high school makes you detest your right side more than the left.

USEFUL LINKS:

Be a pro while clicking a selfie with these amazing tips 
Discover some tips to consider while you click photos with your kids 

How to Look Thinner in Photos: Easy-going Tips 

How to Look Thinner in Photos: Easy-going Tips

Are you someone who detests having their photo taken? Do you avoid using the camera at all costs? If this describes you, then you’re overly critical and believe you look horrible in every picture.  But it is never hard to look thinner in photos. Alternatively, it’s possible that you clam up and experience awkwardness because you’re unsure of what to do. With useful tips you can look thinner. Fortunately, this article is here to assist you with simple suggestions and techniques you may use to reduce the pressure you feel when you’re in front of the camera!

Chin out to look thinner

Image via Unsplash.com

Although it may seem strange, extending your head or chin out slightly will prevent you from seeming to have the dreaded double chin. Is there any method to make your face appear thinner? Smile and place your tongue on the roof of your mouth.

No clicking from below

It can make you appear heavier by several pounds and is the least attractive viewpoint there is. While facing the camera directly can be effective, it’s preferable if it’s somewhat elevated. You’ll need to glance up because of the angle, which lengthens and thins out your neck and torso.

Dress accordingly to look thinner

Image via Unsplash.com

Although it may seem obvious, dress flatteringly if you know you’ll be in a situation where photos may be taken. If you’re in a tight dress or gown, wearing shapewear is also a fantastic idea. Your outfit’s foundation can make or break how your clothes appears on camera.

Wide-cut trousers should be worn with a tight-fitting blouse. Alternately, dress in a shorter skirt and tuck in a looser top. All-tight outfits might bring attention to areas you might not want them to, but all-baggy outfits can make you appear bigger all over.

Wear looser clothing in that area if you want to attract attention away from it.

Turn your body

We’ve observed famous people doing it: Set one foot in front of the other as you lean slightly to the side (away from the camera). Put your weight on your rear foot and point your toe at the camera. Usually, when you look directly into the camera, you appear bigger.

Positioning your arms

Image via Unsplash.com

Ever wonder why every celebrity poses with her arm on her hip and facing the camera? It does this by preventing her upper arm from being squashed against her torso, which would make it appear flattened (read: larger). If you think the hand-on-hip position looks a little forced, consider holding your arms just a little bit out to the sides.

Your hairdo to look thinner

Make sure the style of your hairdo is not too extreme if you’re wearing it up. Buns, braids, or ponytails that are overly tight can produce sharp angles, making your face and body appear larger. In contrast to some updos that can make your neck appear longer and thinner.

Sitting posture

Even though standing is typically preferred in photographs, if you find yourself seated as a photographer approaches, cross your legs at the ankles to make your thighs and calves appear thinner.

Faking a tan so that you look thinner

Image via Unsplash.com

Since the majority of us appear washed out in ordinary shots, a little glow can dramatically alter how we appear. A mild spray tan can make your legs, arms, shoulders, and neck look smaller if you’re displaying skin. Dust on some bronzer if you’re simply exposing your face.

Don’t stand in direct sunlight

Try it now and you’ll see what I mean. If you’re shooting outside, direct sunlight can cause you to squint, which can enlarge your jawline. Instead, the most attractive times of day for outdoor photography are in the late afternoon and early evening.

Use bag as a trick and look thinner

Even if it appears great in person, clothing that is tight, thick, or detailed around the middle may appear larger in photographs. To hide the region in photos, hold your bag directly in front of the scene.

Wearing a belt

Image via Unsplash.com

A belt will highlight how tiny your waist is if it is the narrowest section of your torso. If you’re taller, consider a broader belt; if you’re shorter, wear a belt that is more proportionate to your height.

Wide belts look excellent with dresses, blouse and skirt outfits, dress shirts and slacks and any other kind of attire.

Straight leg pants to look thinner

Avoid wearing trousers with front pleats as they tend to make your waist look bigger. Straight-leg trousers give the impression that your legs are longer and leaner Flat-fronted, flared trousers with a hint of elasticity to emphasize your contours. Avoid wearing trousers with front pleats as they tend to make your waist look bigger.

For the most slimming impact, choose trousers in a dark color like black, grey or navy.

Choose solid colors

Choosing solid dark shades is always a fantastic choice for looking thinner, regardless of the sort of clothing you wear. Vertical stripes are the perfect option if you like patterns and want to look thinner. Other patterns may also be acceptable as long as they are in darker hues, the print is low contrast, and the size of the design is appropriate for your overall frame.

Wide horizontal stripes should be avoided because they tend to make persons appear wider.

When taking selfies

Image via Unsplash.com

Never position the camera below your eyes when shooting a selfie. This is the least flattering position since it exaggerates the size of your face. Ask the photographer to raise the camera when taking your picture. A shot taken from a position just above eye level always has the best perspective.

To achieve the ideal angle, you should never look down at the camera when having your photo taken or when taking a selfie.

Use dark filters

Most digital cameras and smartphones contain filters that let you adjust the brightness or contrast of your photos. Try out different golden or darkening filters to discover which ones make you look your best.

Tilting hips

Image via Unsplash.com

Whatever your thoughts on whether or not individuals should attempt to have a thigh gap, it’s really simple to fake. To make room between your legs, all you need to do is tilt your hips back. While it may seem like a little adjustment, it will have a significant impact on how you seem in front of the camera.

USEFUL LINKS:

Click here to know some posing tips to look thinner 
Know how always look fantastic in photos, visit this site 


Ways to Personalize Your Family Photos

Ways to Personalize Your Family Photos

Family pictures are a classic way to preserve and treasure our loved ones’ memories. Only if you personalize them creatively.  But why limit yourself to bland, generic pictures that don’t really capture the character of your family? Your family pictures may be turned into amazing works of art that truly capture your family’s own style and attitude with a little imagination and  unique ways to personalize. In this article, we’ll look at some original techniques to accentuate and personalize your family photos.

These pointers will assist you in taking photos that you’ll cherish for years, from using props and accessories to capturing candid moments and including significant locations. Therefore, read on to learn how to highlight your family’s distinctive individuality in your next family photograph, whether you’re trying to refresh your family photo album or create a magnificent piece of wall art.

Add props and accessories to personalize

Image via Unsplash.com

Including relevant decorations and accessories in your family pictures is one way to give them some individuality. For instance, if your family enjoys hiking, you might pack some hiking equipment and shoot pictures in a beautiful area. As an alternative, if your family enjoys sports, you may consider taking pictures with your uniforms or gear. These small details can go a long way towards highlighting the interests and pastimes of your family.

Choosing a unique location

Location is important while trying to take the ideal picture. While conventional locations like parks and beaches can make for lovely backdrops, choose a special setting can elevate your images to a whole new level. Whether it’s an abandoned structure, an urban alleyway, or a remote woodland, a unique location may give your images a sense of adventure and mystery that can’t be achieved in a more conventional environment.

Your shots won’t just stand out from the competition; they’ll also tell a tale and have a distinct personality. Therefore, don’t be scared to explore outside the box and pick a place that accurately captures your style and personality when organizing your next picture shoot. There are countless options, and the ultimate result will be a vibrant and captivating image that you’ll remember for years.

The dressing code which personalize

Image via Unsplash.com

Dressing in a way that matches your family’s sense of style is another approach to show off your family’s uniqueness in photographs. For instance, if your family enjoys dressing up, you could have everyone wear their best attire and take pictures in a formal environment. Alternately, if your family is more easy-going, you might dress casually, such as in jeans and t-shirts, and take photos there.

Photos should be humorous

Family pictures are a time-honoured custom that preserves memories for future generations and captures the essence of our loved ones. But let’s face it, occasionally, these images can be rigid and monotonous. The humour then enters the picture! Humour may be incorporated into family portraits to add individuality and fun as well as to make the session more enjoyable for all parties involved.

Incorporating humour into your family pictures may produce a dynamic and fascinating photograph that genuinely reflects the character of your family, whether it’s through ridiculous faces, amusing props, or even a corny joke.

Get creative to personalize

Image via Unsplash.com

There are many original poses you can have your family members take for family pictures. There are countless opportunities to produce a special and unforgettable photograph that truly portrays your family’s personality, from traditional positions to more avant-garde ones.

Consider attempting something unexpected, such having your family members lie down on a blanket or positioning them in a playful and informal group stance, as opposed to the conventional sitting or standing poses. Incorporate movement by having your family members jump or sprint towards the camera. You could also play with levels by having some family members sit while others stand.

To give a special and personalized touch to your photo shoot, adding props is another fun idea. If your family enjoys travelling, for instance, you may bring a globe or a suitcase as a prop. Or, if your family enjoys sports, think about investing in some sports gear, such as a basketball or soccer ball, to use in your poses.

In the end, having fun and thinking creatively are the keys to striking a unique family pose. Try new things without hesitation and let your family’s character shine through. Then, with imagination and a willingness to try new things, you can make a family portrait that actually stands out and reflects your family’s distinctive character.

But why to personalize?

A memorable memory you may treasure for years can be created with personalized family photographs, which are a wonderful way to show off your family’s own characteristics. Your family’s hobbies and interests can be included in the photographs, as well as a special setting that means something to your family.

Thinking outside the box and being inventive are crucial when shooting family photos or working with a professional photographer. So, feel free to embrace your family’s unique personalities and idiosyncrasies while thinking beyond the standard family portrait box.

You can produce a work of art that accurately captures your family’s distinct characteristics by putting it into your portraits. Additionally, you can make your family photo a statement piece that displays the love and character of your family by choosing the right framing and display options.

So, the next time you think of getting a family portrait, feel free to get imaginative. There are numerous ways to customize your family photographs. And produce a one-of-a-kind piece that you’ll love for years. Whether you select an unusual location, use props, or just allow your family’s personality shine through.

Candid shots

Image via Unsplash.com

Family portraits that are posed are wonderful. But, candid images can often catch particular moments and feelings. Take unposed pictures of your family having fun or engaging in daily activities.

A photo wall

Create a picture wall to display your family images in a special and personalized way. To make a collage that captures the character and aesthetic of your family, utilize images in a variety of frames, sizes, and styles.

USEFUL LINKS:

See some more tips to personalize your family photos 
Discover some family command center ideas which you should explore 


Why Your Photos Need to Be Printed by a Pro?

Why Your Photos Need to Be Printed by a Pro?

When looking at photographers and their costs, you can discover that certain packages come with digital photo files or offer that as an add-on.  This enables you to save the photos to your computer’s hard drive or post them on social networking. However, you might want to give it some thinking before rushing to the nearby photo lab to have those photos printed.

Yes, you just paid a professional photographer to capture your photos, and yes, you want to save some money. However, if you choose not to have your photos printed by a professional, you won’t be able to fully appreciate the time and work that went into creating those images.

The photography industry has evolved as a result of advances in digital technology, but this does not mean that the availability of new tools and resources substitutes the skill and technique required to produce physical prints. Professional photography prints may be more important than ever in an era where images are taken more frequently than ever and shared online. Physical prints continue to offer advantages that digital photographs cannot easily supply as photographers adopt new techniques and adjust to the digital scene.

Perfection of the photos

Image via Unsplash.com

Your photographer spends hours retouching your images for a purpose. They strive to make the images as clear and color-accurate as possible so that they are a work of art rather than merely photographs. They frequently have the expert printing firm they hire calibrate their monitors as well.  Your neighborhood picture shop is not a professional photo shop, and the individual who prints your photos most certainly lacks photographic training, a trained eye, and color theory training.

Professional lab to print photos

A competent lab is accessible to your photographer, and they have a solid working relationship with them. These professional printers are a little more expensive since they require higher-quality supplies that you won’t find at a regular store, including paper, ink, and equipment. To guarantee that you get the greatest possible image quality, trained experts also keep an eye on the printing process.  Your prints will survive longer if you spend a bit more on them with your photographer because better materials were employed.

Photographic prints are memories

Image via Unsplash.com

Instead of just being an image on a screen, a photographic print turns into a physical item. By printing photos, the photographic medium is transformed from a bygone art form to a means of carrying our memories into the future. Professional photography prints are still important for providing your customers with a high-quality item that will last for years.

Endurance of photos prints

Do you possess a box filled with outdated photos from years or perhaps generations ago? Your family photo albums are likely kept safely nearby, whether or not you have lately looked at them. Could the same be said for your 20-year-old digital photos? There is a potential that many of these forgotten moments are lost forever without a prospect of recovery unless you have deleted photographs from every old computer and device you’ve ever owned.

Control over finished product

Image via Unsplash.com

Imagine capturing a stunning moment, only to have shoddy photo printing reduce the image’s impact. Clients frequently lack a thorough understanding of how various picture processing techniques differ. They can be primarily concerned with lowering the total cost, but they might not be aware that doing so frequently entails lowering overall quality. Try your best not to let your clients decide on the final product’s quality.

In particular, if customers take their images to a consumer-grade lab, the results could be off-colour or low-quality if you don’t print your photos professionally for clients. You want to present your work in the greatest light possible, as well as make sure that your customers receive prints that meet or surpass their expectations and properly represent your photos. Showing two versions of a handful of your own prints could be helpful if you want to demonstrate the differences in color, paper quality, and detail between prints created at professional and consumer-grade labs.

Photos are gifts

Any home you walk through is likely to have pictures on the walls. These pictures serve as more than just decorative items. They serve as constant memories of the good experiences we had with our loved ones. Printed images serve as tangible reminders of experiences and feelings when given as gifts. These moments, which can range from an unguarded conversation between friends to a formal family portrait, are precisely captured in time and serve as heartfelt, unique gifts to give to those who are closest to us.

Photographers love prints

Any astute businessman is aware that they are not selling consumers stuff. Rather, they are giving actual people the information, opportunities. And resources they need. While it may appear advantageous to use digital devices to display your photographs, doing so may remove an important step in the photo-buying process. proper visualization. You can present your physical prints to potential clients. And highlight your skills by providing them with actual examples of past portraits or albums that you have produced.

Why it is important?

Image via Unsplash.com

For you and your customers, professional photography is more than just a source of income. You and your group are saving memories for future generations. Don’t keep your clients from knowing how much you love photography. Make it clear to them that you value these particular times in their lives just as much. Your clients are looking for a photographer who fits their needs the best. With the aid of expert picture printing, assist them in seizing a fleeting moment of time that they can cherish forever.

Prints of photos are priceless assets for both you and your client. You can use these resources as a business owner to explain and demonstrate your skill and method. Everyone who is involved benefits from professional photography printing. Which also raises appreciation for this form of artistic expression.

USEFUL LINKS:

Check out some more reasons why your photos should be printed by a pro 
Bonding as a family: Ideas to unite together 


Growing fruits & veggies at home over the spring

The sun is shining, the earth has thawed, and the trees are starting to bloom. Will you be growing your own fruits and vegetables this year? Are you unsure about what crops to sow in the spring? A few springtime fruits and vegetables that are simple to grow, even for beginners, are included below.

When you cultivate your own fruits and vegetables, you can take advantage of all the advantages of gardening. While also obtaining the goodness and nutrients that are unique to homegrown produce. Knowing when to plant, sow, and harvest each crop, as well as the unique characteristics of your region’s environment. And an approximate date for the final frosts, will help you build a container garden that is both beautiful and fruitful all year long.

What spring-related image does your mind immediately conjure up?

Typically, it is the period of time between, or more accurately, a transition between, the winter and summer seasons. Because it is a time of natural renewal for the environment, it is also referred to as the “king of all seasons.

“Nature just embraces the arrival of this season of beauty and gregariousness by extending itself out to get embellished by fresh follicles and flower buds. Recovering from the withering and a wave of sorrow generated by the winter season that makes the atmosphere around us effete. Given that the weather is not too hot or too cold, it is the ideal period to grow a significant amount of veggies.

Are you unsure of the best plants to grow now? We’ve got you, so don’t worry!

We shall discuss the vegetables available in India throughout the spring along with some other crucial details. Vegetable list containing information on how to grow them, the climate conditions they need, and the nutritional value of each vegetable.

A short guide to spring vegetable planting is provided below:

  • CORIANDER

(Photo from istock)

Coriander is undoubtedly one of the most favoured garnishing herbs in Indian families because it has the ability to change a basic meal into a luxurious one. By simply being present on top of it. It becomes a tasty dip after being ground. It can be grown year-round because it is an annual herb. The optimum time to plant it in your garden is during the spring.

It is one of those spring vegetables that may be grown easily because its seed doesn’t need to be transplanted. Instead, it can be seeded directly into the soil. Vitamin C and dietary fibre are both abundant in coriander. Additionally, it is fantastic for your digestive system and eyes as well. Therefore, planting coriander seeds in your yard in the spring is undoubtedly a wise decision.

  • PEPPER PLANT

(Photo from istock)

One of the fuss-free and simple crops to produce in the spring is pepper, sometimes known more widely as mirchi. All pepper varieties can be planted in the spring, specifically in February and March. One of the most sought-after spring seasonal plants, it is really simple. Choose a tiny pot that is 8 to 10 inches deep for each plant of capsicum seeds if you want to grow sweet peppers (Shimla Mirch). And then fill it with potting soil. After that, scatter seeds over the earth, cover them with a thin layer of soil, add some water, and you’re ready to go! Different varieties of capsicums are simple to grow at home.

Have a sizable 10 to 12 inch deep pot available to plant the seeds for several types of chili peppers. You’ll feel so happy when you see gorgeous chilies in your backyard garden, so start growing them in your kitchen garden right away as it won’t take much of your time.

  • CAULIFLOWER

(Photo from istock)

Cauliflower seeds, whose name comes from the Italian word cavolfiore, which means “cabbage flower,” can be planted in India in the spring. Its production is limited by the weather because it needs a moderate daytime temperature and lots of sunlight, which makes it a perfect spring vegetable garden plant .In addition to having few calories and a lot of vitamins, it also has a lot of fibre, which helps with digestion.

  • PEA for spring

(Photo from istock)

Pea is another in this group of spring vegetables in India. They are simple to raise at home in both the winter and spring. Continuously plant pea seeds starting in November since peas may be grown on a balcony or patio until March. And occasionally even into April, depending on the weather. Making it one of the greatest cultivating vegetable of spring time. Peas are currently cooked, which weakens their cell walls. Increases their sweetness, and increases the bio-availability of their nutrients.

It also offers fantastic health advantages. The fact that peas are a fantastic source of protein and, more importantly, that they are high in fibre. Like the majority of vegetables and fruits, helps to support appropriate blood sugar regulation.

  • PUMPKIN

(Photo from istock)

Throughout the nation, pumpkin is adored for its flavour and wealth of health advantages. One of the finest times to produce this veggie is in the spring because these fruits do not thrive in cold winters and need a warmer atmosphere.

To cultivate pumpkin seeds in a pot, you’ll need a big bucket or container, and 100 grams (3.5 oz) of raw pumpkin, which has 110 kilojoules (26 kilo-calories) of dietary energy and is a great source of pro vitamin A beta-carotene and vitamin A.

  • CUCUMBER for spring

(Photo from istock)

One of those crops to grow in spring is cucumber, which is recognized as an essential organ of the detox diet. Cucumber seeds can be sown in the spring. However, if you’re using a pot for this, you’ll need one that is at least 14 inches in diameter. And you’ll need to water the seeds frequently in the summer.

Cucumbers are mostly water, 4% carbs, 1% protein, and very little fat when they are raw and with the peel on. Food energy in a 100-gram portion is 67 kilojoules (16 kilo-calories). It contains few micro-nutrients; the only one that stands out is vitamin K, a lack of which causes humans’ blood to clot more slowly. In India, cucumber growing is practiced on a large scale.

Hence, these are a few vegetables which you can grow in spring at home on your own.

References:

Urjaseeds

Looking for perfect age gap between siblings, click on the link below for some prior knowledge:

What should be siblings ideal age gap?

First Day of School: Ideas for Capturing Big Day

First Day of School: Ideas for Capturing Big Day

Anyone can snap a quick picture, but with a few pointers, you can make this year’s first day of school photos more unique. No matter how old your children are, you may capture great images of this first-momentous day without having to be a skilled photographer. You’ll receive the nicest smiles since you know them the best.

Interviewing your child on the first day

IMAGE CREDITS: Unsplash.com

One particularly astute and heartfelt father had the forethought to interview his daughter on the first day of school every year, turning it into a poignant montage in time for her high school graduation. The genius of this plan is that he interviewed her after her first day of classes for the year, so there was no need to find additional time on the morning of the first day of school. So that you may receive precise answers that will come together over the course of well over a decade, be sure to ask about their day when it is still recent in their memory.

Something personalized for the first day

With a small chalkboard or letter board, you can quickly create your own custom signs to celebrate the back-to-school season. You could easily use a small whiteboard, a piece of paper, or even a piece of cardboard, but I just so happened to have a piece of plywood painted with blackboard paint that I could dig out at the last minute. As an alternative, you could get a lovely chalkboard sign that you could personalize year. Even while it might seem like a cute photograph to share on social media, it might be best to share it just with close friends and family because the image might reveal information about your child that you might not want to make public.

Asking the same question

IMAGE CREDITS: Unsplash.com

How your child’s responses to the same question may alter as they progress through the school years is one of the most entertaining things to monitor. Consider, for instance, asking your children what they want to be when they grow up on the first day of school each year. To safely store the answers till the following year, you may either post the solution on a letter board or just purchase a little notebook or scrapbook.

Capture your kid at the same spot

Try taking a photo of your child in the same location each year if you have bad penmanship or a habit of forgetting to buy chalk. The front door is a clear-cut and straightforward option, but you could also have them stand next to a tree in your front yard and see how the tree develops over time with your child.

A funny annual tradition

IMAGE CREDITS: Unsplash.com

Make your child lie down for a horizontal photo session (like this) if you have a clean patio or driveway. This kind of remembrance of your kindergartener’s first day of school will undoubtedly win their approval, but how hilarious will it be when they’re 17 and it has become a yearly tradition?

Click their school journey on the first day

Looking back at pictures of me getting ready to board the school bus on the first day of a new school year makes me feel so nostalgic. Your children might choose to walk or ride with a buddy instead of taking the bus. Whatever the voyage entails, it will be beneficial to reflect back on it and remember it in the future.

Colorful signs for the first day

Create or purchase a vibrant sign, then customize it with the back-to-school message of your choice. Take numerous pictures of this vibrant and unforgettable occasion with your child posing with their backpack and a first-day clothing. They can be posed in front of your home or your place of instruction, or for more color, you can select a lovely backdrop.

Click a good-bye-hug

IMAGE CREDITS: Unsplash.com

You can include that in your first-day photos if your youngster is anxious about going to school. Request permission before taking a photo of the farewell hug. Your child will enjoy observing their emotional development as they gain more self-assurance. As the years pass, this kind of photo might become a priceless keepsake for you.

Chalk art before kindergarten

Have your kindergartener create many of chalk art on your driveway or front walk the day before school starts. It may have a school motif (e.g., ABCs, the school bus, etc.). Take pictures of your young artist with their chalk creation and rucksack on the first day of school.

Let your kids write on their first day

Try letting the kids write their own first day sign if you’re going to have them hold it up. Either a chalkboard sign or one made with crayons or markers adds to the beauty of your first-day images. You might mention the grade they will be entering or just focus on the first day of classes. In either case, take many pictures of your child holding up their original placard.

Click as your kid gets ready for school

IMAGE CREDITS: Unsplash.com

The daily routine that begins on the first day includes getting ready for school, and recording these commonplace events can be a pleasant way to save them. It’s simple to overlook the little things, so if you have the time, observe your child while they get ready. Take pictures of breakfast, tooth brushing, lunch preparation, and any other important rituals.

Celebrate the first day

Balloons are the ultimate “celebration” accessory and are ideal for giving your back-to-school photos that extra special, playful touch. Purchase balloons in the school’s colors, or just pick a variety of vibrant hues. In either case, take the perfect photo by having your child hold them while they are carrying a rucksack.

Get yourself clicked with them

IMAGE CREDITS: Unsplash.com

Grab the opportunity to be in the picture before your kids are old enough to feel ashamed about having you in the first day of school pictures. Despite the fact that you might not enjoy having your photo taken, you are a vital part of your child’s life. Having pictures that capture your relationship will be wonderful.

USEFUL LINKS:

See some cute and funny ideas for first day of of kids school
Know some Fun games that both parents and children will enjoy, click here  

Photo Craft Projects Your Kids Will Love

Photo Craft Projects Your Kids Will Love

Kids like being artistically inclined. Arts and craft activities are a terrific way to keep kids occupied for a while also getting them to have fun and exercise their creative muscles, whether it’s finger painting on a Saturday morning or a new spaghetti portrait of the dog. Art and craft keep your kids entertain.

Incorporating your most recent images into your child’s next arts and crafts project is the ideal method to achieve this if you constantly take photos and are seeking for new ways to display them.

Arrange your memories into a frame: craft buddies

IMAGE CREDITS: Unsplash.com

There are many  enjoyable frames you can create with your kids to use to display your favorite pictures. When you go on your next vacation, make it a point to bring back some shells that can be utilized to form a gorgeous frame. Pick up some noodles, glue them to a frame, and decorate it with paint fingerprints if you want! Have fun with it!

Creating a jigsaw puzzle: craft buddies

Select a favorite photo, make it larger, and print it. Put the photo on a piece of solid cardboard, then spray it with acrylic to protect it. Let your child put the photo back together by cutting out some puzzle pieces.  Additionally, many online stores like Shutterfly provide puzzles constructed from your images; you may find one for toddlers HERE!

A fridge magnet

Encourage your child to sketch something from their imagination while still leaving room for a photo. Create a quick photo frame for your fridge by laminating the drawing and adding magnetic sheets or tape on the back.

Make a pretend mobile

IMAGE CREDITS: Unsplash.com

Your family tree can be displayed in an original way on a mobile. Check out Pinterest and other similar websites for ideas. There are many imaginative templates available.

The ideal strategy to strengthen your relationship with your youngster and share some priceless memories is to use family photos in your upcoming arts and crafts activity. A wonderful time!

A to Z photo challenge: craft buddies

Give the kids cameras, and instruct them to take pictures of objects that correspond to each of the 26 letters of the alphabet as they explore the house or garden. TIP: The item may either begin with the required letter or resemble that letter. Create chic art prints that they may display in their rooms with the finished product.

Expressing through photos

While they are still young, teach the kids the virtue of thankfulness. Encourage them to take pictures of everything they are thankful for as they walk around the house or outside. Include the images in a classic photo album as a constant reminder of the things that brought them joy and gratitude.

‘A day in the life of’

IMAGE CREDITS: Unsplash.com

Give the kids the task of creating a photo gallery depicting “a day in their life.” They will document the minute details of their day, slowing down to soak it all in, from morning until night. Once everything is finished, you can compile the images into a stunning Photo Book, adding a time stamp and any information using the text tool of any Design Studio. Bring the book out a year from now to see how much has changed.

Your own toy story

Encourage your children’s imaginations by letting them narrate their very own toy narrative. As you take pictures and they describe the events, let them create “scenes” for the toys. Then you can upload your images using any Design Studio to make a unique childhood narrative book that future generations will adore.

A natural collage

For the first step in this art project, print out a full-body photo of your child (ours is 8.5 by 11 inches). After that, go on a walk outside to collect “natural art supplies” from the surroundings, such as leaves, twigs, flowers, and bark. Create a special collage to hang in your home after you get home and glue the things to the picture.

Kaleidoscope collage: craft buddies

Prepare to create this colorful kaleidoscope by grabbing some poster board or a sizable canvas! Make a mixture of 12 cup craft glue and 14 cup water first. Brush some of the glue mixture onto the poster after your child has drawn a significant shape (such as a square or circle). Squares of tissue paper should be applied to the wet board, additional glue should be brushed over them, and so on until the shape is covered.

We suggest finishing this task outside on a flat surface to avoid messy leaking (but watch the wind!).

Pastel scribbles: craft buddies

IMAGE CREDITS: Unsplash.com

Do you need a toddler art project? This painting is abstract, so it might work. Collect one sheet of white paper, oil pastels, tape, watercolor paints, paintbrushes, and water.

Have your child use oil pastels to completely cover the paper after taping it down to a surface. After that, students can paint the paper using watercolors that have been diluted. Pastel colors will easily show through painted surfaces.

Salt water color

Do you need a toddler art project? This painting is abstract, so it might work. Collect one sheet of white paper, oil pastels, tape, watercolor paints, paintbrushes, and water.

Have your child use oil pastels to completely cover the paper after taping it down to a surface. After that, students can paint the paper using watercolors that have been diluted. Pastel colors will easily show through painted surfaces.

A simple silhouette

IMAGE CREDITS: Unsplash.com

With just a few basic materials, your youngster may quickly recreate their own silhouette! Take a side view photo of their head, increase it to the necessary size, and print the black-and-white image. Place the image on a piece of black paper, then cut around the head and shoulders, making sure to cut both the photo paper and the black paper with the scissors. Place the silhouette in a frame for exhibition after adhering it to fabric or patterned card stock.

USEFUL LINKS:

Keep on exploring more about the craft ideas here 
See how kids can help around at home, click here 

Vacation Photos: Your Beginner’s Guide made easy 

Vacation Photos: Your Beginner’s Guide made easy

Your itinerary is well-planned, your baggage are packed, and your camera batteries are charged. Prepare to document your best vacation yet. Vacation photos are indispensable.

It shouldn’t be hard to use your camera to capture unforgettable moments throughout your journey, and using your camera shouldn’t make you feel more anxious than excited. So that you may always feel confident capturing once-in-a-lifetime experiences, we’ve assembled our top advice for taking holiday images you’ll love from our professional photographers.

Best time to take vacation pictures

IMAGE CREDITS: Unsplash.com

A beautiful image starts with a strong foundation. Since lighting can make or break your images, understanding how to manage your available light is the first step in producing aesthetically pleasing shots. The so-called “golden hour,” which is the time soon after sunrise and just before sunset when the light is low on the horizon, is one of our photographers’ favorite times to take images. When the sky is a riot of colors and there aren’t any harsh shadows caused by the setting sun, it’s nearly impossible to take a bad photo!

What should be in the photo?

You now have the ideal lighting, so it’s time to consider composition. You are getting ready to tell a tale as you peek through your viewfinder to take your picture. To compose your picture, follow the “rule of thirds”. Put your subject at one of the intersections of the three horizontal and vertical lines that divide your image; this will automatically bring your attention to the subject. Most importantly, maintain straight horizons for a classic appearance. Your images could drastically improve with one simple adjustment!

Utilizing the city around you will allow you to be more inventive with your composition. Use the reflections of the buildings in the water as you stroll along Amsterdam’s canals for a fresh viewpoint. Utilize the streets as “leading lines” to direct your eye over the image if you’re taking a photo while strolling through the vibrant streets of Cartagena, Colombia. If you’re strolling through Dubrovnik’s stone streets, coordinate the sea of red roofs with your attire for a complementary splash of color. Let the city inspire you no matter where you are.

Click like a professional

IMAGE CREDITS: Unsplash.com

Consider your “depth of field” as well, which determines how blurry the backdrop of your photo will be. Imagine taking a photo with your iPhone in portrait mode; the background will be hazy and your subject will be in focus. A wide depth of field, on the other hand, will draw the viewer’s attention to both the subject and the setting by bringing more of the backdrop into focus. Since showcasing your holiday area is half the fun, we think a deeper depth of field is crucial! Simply check your camera’s aperture; the greater the number, the greater the depth of field.

Tell story through vacation pictures

It’s time to add life to your stunning photographs now that you’re ready to capture them. You can remember not just how the moment looks, but how it feels, by taking candid, real-life images. Here are a few of the techniques our photographers use to capture unposed, classic photographs.

Make vacation photos more interesting

IMAGE CREDITS: Unsplash.com

Don’t be scared to include movement in your pictures. You and your partner are strolling Florence’s streets. Jumping and playing are your kids in Paris. When you look back on these photographs in 20 years, you’ll be reminded of how lovely that moment was because you captured real life as it happened rather than just posing and grinning for the camera. Don’t be hesitant to play up the scene as well when snapping pictures. To generate spontaneous, genuine moments that are photo-ready, whisper something nice in your partner’s ear or start a surprise tickle party with your children.

But where to start from?

You should interact with your surroundings as well as your loved ones and the people around you. Allow the pictures you take of the city you are exploring to inspire you to create new memories. Approach the store owner of the adorable storefront you snapped and strike up a conversation. Try some fresh fruit at a fruit stand and chat with the locals while you munch. These are the times that can add to how amazing and unforgettable your trip already is.

Finally, enjoy telling your story. It shouldn’t be stressful to take pictures; it should just be enjoyable! You may rest easy knowing that your best, must-have pictures with everyone in the picture have been taken by scheduling a vacation shoot with one of our skilled local photographers.

Plan your vacation photos

IMAGE CREDITS: Unsplash.com

Spend some time creating your shot list of the pictures you want to capture before you travel to your tourist sites. Instagram, Google Maps, travel guides, periodicals, and more are all good sources of inspiration. Make a note of these images and then arrange your day to take photos at the best times, such as sunrise or sunset.

If you do this, you’ll be able to make the shots you want to and get more purpose and direction. You should be aware that all of the top photographers create shot lists using apps like Google Maps or social media, and you should become used to it as well.

Framing your vacation photos

Don’t merely concentrate on the object when using the LCD or viewfinder. Make sure to examine the entire frame with your eyes to make sure you are not unintentionally missing anything important. Verify that everything is visible in the picture, such as your friend’s full torso or a mountain’s summit.

This isn’t necessarily true because sometimes leaving something out of the frame enhances composition, but you must make your own judgement. Additionally, think about whether anything around could act as a natural frame for your picture.

Ask for permission

IMAGE CREDITS: Unsplash.com

Travel photography isn’t just about capturing the world’s most breath-taking sunsets and stunning structures. Asking someone’s permission before snapping their picture is polite and considerate.

Give them a huge smile and ask if it’s okay to snap their picture if you’ve had a fantastic interaction with them or you simply notice a perfect opportunity to get a wonderful portrait.

USEFUL LINKS:

Explore how to take vacation photos here 
See some family activities you could do at night 


Prop Ideas for Your Family Session You should know 

Prop Ideas for Your Family Session You should know

Making images that endure in the face of the more than a trillion photos shot annually can be difficult. However a prop can be helpful. Family group photos are still as crucial as ever, even though many of our photos on our phones are forgotten about. They document a certain moment in time and honour the happiness of our families. and a prop can be a symbol of something special.

Your family session can benefit from the use of a prop by adding more meaning, making it more enjoyable, generating movement and energy, and removing any potential discomfort and forced poses. With kids, props are especially helpful because they may bring out their happy smiles with a few quick and enjoyable touches. Props can also serve to establish a certain historical period, such as a date or an occurrence.

Favorite toys as a prop

IMAGE CREDITS: Unsplash.com

Personalizing your family’s photo shoots is easy by including your kids’ beloved toys, including plush animals. These items let kids relax more easily and lend a nostalgic touch to photographs. Include your own childhood toys next to theirs to add even more nostalgia and you’ll have a picture that brings back happy memories.

Family games

Accept the passion for sports in your family! Sports-themed pictures are genuinely ageless, whether your family is kicking the football around or stepping up to the bat to hit a home run. Family portraits taken with these kinds of accessories are more lively and natural-looking, and you’ll be proud to hang them on the wall. Your images will have more color and setting if you choose a sports field, a swimming pool or a bowling alley as your backdrop.

Outdoor camping

Any outdoor theme can be improved with appropriate gear, such as wilderness camping. These accessories are fantastic for showcasing your family’s sense of harmony and togetherness, whether you’re sitting around the fire telling stories or busy setting up your tent.

Bike adventure

IMAGE CREDITS: Unsplash.com

Your images will have more movement and vitality if you stick with an outside, adventurous theme and include bicycles or kites. Bike-based family picture shoots highlight your family’s active approach to spending time together, while kite-based shoots enable photos with striking perspectives and effects.

Edible prop

Whether you prefer pizza, ice cream, or cakes, include some delectable food in your family photos is a terrific way to stand out. A family lunch is thought of as a great occasion for everyone to gather and discuss their days. Taking pictures at the time helps to preserve those joyful memories for the future.

Wooden wagon as a prop

A wooden wagon is a sweet backdrop for family portraits. Your child(ren) will have a great time throughout the picture session, and you’ll receive lovely family portraits with everyone beaming with joy and genuine grins.

Balloons as a prop

IMAGE CREDITS: Unsplash.com

Balloons are the ultimate happy-maker for children. If you want vibrant family images and cheerful faces, choose these. To achieve a similar effect, you could also use colourful plastic balls.

Drawing on chalkboard

Have fun drawing and writing on a chalkboard to share family history! If it’s large enough, you might even think about utilizing it as a background. A chalkboard can help to make indoor shooting enjoyable and extraordinary when there isn’t much room available.

Lifting your kids

IMAGE CREDITS: Unsplash.com

This is something that every parent does, and it deserves to be documented on video.

Your bed or couch

The secret is to maintain everyone’s ease so that candid photos can be taken. It is possible to sit and read a book, to lie on your front and queue, or to lie on your back and allow the photographer to take pictures from above.

From this location, you can capture images from a variety of perspectives, and your photographer can point out the best ones. This will be on the list of baby-related family photo ideas. In the future, you can use these photographs to make customized photo cards for your parents’ special occasions.

Confetti prop

Confetti is a versatile prop that you should always have in your camera bag. One option is toss it up and let it fall back down over your subject; however, you can also ask your subject to hold a handful and blow it in the direction of the camera.

Additionally, try to stay away from the foil-style confetti. You won’t have that lovely dreamy appearance because it will fall much more quickly. In contrast to paper confetti, it is also not biodegradable.

Fairy lights as a prop

IMAGE CREDITS: Unsplash.com

One of the most well-liked ideas for photo props is fairy lights, and for good reason. They work well for photographing in low light, and you can get some lovely pictures when you wrap them around a model.

These fairy lights will allow you a lot of creative freedom, and since they don’t need an external power source, you can use them for outdoor photography.

Prop on your hobby

The good news is that these specific props are totally uncharged. Simply ask your family members about their interests and have them bring some memorabilia from those activities to the photoshoot.

Your family members might, for instance, bring a guitar, skateboard, book, crochet, football, or any number of other items. You can convince them to play their instrument, ride their skateboard, or knit that jumper, and the props themselves will inspire you to create some fantastic pictures.

Old cameras

Both men and women can pose with old Polaroid and film cameras. Bring whatever old cameras you may already have with you to your picture shoot! And it’s alright if you don’t already have a vintage camera; you can find one on eBay or at thrift shops for low prices.

The old CDs as a prop

IMAGE CREDITS: Unsplash.com

The outdated CDs you have lying around your house do have a use, believe me! The underside of the disc reflects light in brilliant colors, making them excellent props for both adult and child photo shoots. You may either ask your subject to hold the CD for a cool vintage effect or utilize this to shine light over your subjects.

USEFUL LINKS:

Click here to know more about photo prop ideas 
See some screen free activities for families to try 

Meal planning and recipe creation for beginners

One of my all-time favorite weekly rituals is meal planning, and it doesn’t have to be difficult if you’re just getting started. I sit down every Friday to make a meal plan for myself that is fascinating, practical, varied, and, most importantly, something I look forward to.

I feel lost if I don’t have a plan! You’ll discover my step-by-step method for simple meal planning in this article. A manual like this would have been helpful when I initially started. All of this had to be learned the hard way.

Meal planning helps people eat healthier and saves them money and time. You can prepare precise grocery lists and waste less food if you have a well-thought-out meal plan because you’ll know exactly what you’ll use each component for rather than just buying things and finding out their usage later.

How does meal planning work exactly? Simply defined, it involves organizing all of your family’s or your own meals for the coming week. We are all in favor of making life a little easier and healthier by just planning ahead.  Don’t worry if you have never tried meal planning and the thought seems intimidating. The subject of this article is novice meal planning. Before getting into the steps, we’ll first talk about the advantages.

Here’s the list of steps for beginners of meal planning:

  • STEP 1: Take an Overview of your Calendar

(Photo from istock)

It’s crucial to look at the coming week and see what you have planned since our schedules can alter every week. Do you need to schedule any happy hours, dinner dates, or work meals? Even if you don’t yet have specific plans, do you tend to meet up with friends on weeknights at random? If so, prepare for that! Plan fewer dinners at home if you anticipate dining out a couple times after work.

Or perhaps you prefer ordering takeaway during the week but are not social. It’s crucial to avoid planning EVERY meal. Leave some of the mealtimes open to allow for spontaneity or to prevent over planning if something unexpected occurs.

Only schedule meals for Monday through Friday, when we are busier with work or school. The weekends should be unscheduled! Calculate the precise amount of meals you’ll need for the upcoming week. Without this knowledge, you won’t know how much food to purchase or how many portions you’ll need.

  • STEP 2: Check your Pantry

To use up what you currently have, start by shopping your pantry and freezer. By doing this, you can cut back on your food expenses and save money at the store the following time. Check out our top suggestions for freezer meal preparation if you want to start stocking your freezer but aren’t sure where to begin.

Make a note to look up meals that will use your abundance of canned beans. What happens if you have a lot of pasta? Meals with pasta are always ideal for the workday. Have you discovered any frozen ground Turkey in your freezer’s back? That protein works well in a variety of dishes.

  • STEP 3: Choose Recipes

Although it takes the longest, this step in the meal planning process is the most enjoyable. It’s simple to become lost in a Pinterest rabbit hole, and before you know it, three hours have been spent gazing at ornamental fruit pies.

Your lifestyle will determine a great deal of the dishes you make. Although I adore meal planning, you can completely do it even if you don’t prepare meals in advance. Alternately, you may combine meal planning (perhaps simply for breakfasts) with cooking one-off dinners and consuming leftovers for lunch.

Stews, chilies, pasta dishes, curries, sheet pan meals, stir fries, burrito bowls, enchiladas, and casseroles are the easiest and most fundamental meals to prepare. With these kinds of dishes, you truly can’t go wrong! Salads, wraps, and no-reheat meals are also an option; they just require a bit more care and attention in the refrigerator.

  • STEP 4: Make a Planner to put meals and recipes

(Photo from istock)

Prepared your recipes?  Great, it’s time to enter them into your calendar now. You may either use this free beginner’s meal planning template online or write it down by hand!

Simply put down the meals you intend to eat on the day/time you want to consume them to complete this simple task! Plugging in meals is less about determining what specific food to eat when and more about making sure you’ve selected enough meals with enough diversity for you.

It’s more important to be certain that you’re selecting the proper number of meals—not too many so that you have too many leftovers, and not too few so that you’re constantly looking for anything to eat.

Look at the ingredients in the dishes you selected for the week and list them while creating your grocery list.

  • STEP 5 Make a list for grocery

Okay, we’re nearly done. It’s time to construct a grocery list now that you have your recipes! Because I can work on my meal plan and grocery list on my laptop and it syncs with my phone, I maintain it in Google Sheets. I won’t ever forget my grocery list this way (unless I forget my phone at home, which is exceedingly improbable). Look at the ingredients in the dishes you selected for the week and list them while creating your grocery list.

Check your pantry before you go shopping to make sure you don’t buy anything twice! When I arrived home from the supermarket, I discovered a hardly used bottle of a sauce that I had brought home in a brand-new bottle.

  • STEP 6: Go for Shopping

(Photo from istock)

You’re done now. It’s time to go shopping now that you have a plan and a list.  For the time being, you don’t have to think about eating. You should give your brain a rest!

I certainly hope that these steps on meal planning for beginners will certainly prove useful.

References:

Work Week Lunch

Looking for perfect age gap between siblings, click on the link below for some prior knowledge:

What should be siblings ideal age gap?


Get Creative with Your Portrait Session: Beginner’s Guide 

Get Creative with Your Portrait Session: Beginner’s Guide

No two photographers will approach the same subject in the same way, even if that is what they set out to do. Though they both are creative. There are variances in the lighting, pose, location used, and even the editing. That has a lot to do with each photographer’s individual style, which they build by experimenting with various methods to get creative results.

As photographers, we have greater creative freedom the more aware we are of our alternatives. Check out the inventive portrait photography suggestions below whenever you want some inspiration for your picture shoots or just want to try something new. Then go out and put them to use.

Tight crops

IMAGE CREDITS: Unsplash.com

The term “tight crop” in photography describes a composition in which the subject occupies a significant amount of the frame. This method is frequently used to establish intimacy or to draw attention to a certain aspect. A tight crop can be a useful tool for enhancing an image’s impact when applied wisely. However, it’s critical to be mindful of the dangers. Cutting off crucial aspects that set the scene can sometimes result in a cluttered or busy composition when you crop too closely.

Color gels

To add a splash of color to your photos or even alter the color of the sky, you may attach colored lighting gels to your flash in a quick and enjoyable manner. Color gels can help you create the desired effect, whether you’re trying to add a subtle hue or make a dramatic statement. Gels come in a variety of colors, so you may try out several combinations to discover the one that works best for your image.

Theme photography

IMAGE CREDITS: Unsplash.com

You’ve probably heard photographers discuss the use of photography to tell tales. It is one of the most effective tools I am aware of for that use. As photographers, we have the chance to investigate ideas and subjects that aid in narrating the narratives of our customers. A creative portrait session might also be guided by a subject (like a holiday theme).

It’s crucial to take the time to organize the session in advance if you want to explore themes for your creative portrait photography sessions. Some themes may come from the experiences or interests of your clientele. For instance, clients can act out their first date during an engagement session. If your client is a high school athlete, consider including some sports-themed photographs in your session.

Creative reflections photoshoot

Reflections can offer a unique aspect to your creative portrait photography. You can emphasize compositional features like symmetry and proportion, add depth and dimension, and even convey an emotion or mood by placing a reflection in your frame.

Large bodies of water or mirrors make excellent reflective objects, but they are not required. When making reflection photographs, we can also use windows, counters, prisms, or even our smartphones.

Use gobos in creative portrait session

IMAGE CREDITS: Unsplash.com

A gobo is a photography accessory that is used to create a specific shape or shadow by positioning it between the subject and the light source. Metal, glass, and paper are just a few of the materials that may be used to create gobo.

They frequently do this by casting intriguing shadows, which give a picture more drama. Gobos, however, can also be utilized to merely block off undesired light or produce an even light gradient. It’s up to you how you employ a gobo in artistic portrait photography.

Double exposure

If you’re not aware with double exposure, it’s a unique method for photographing portraits that entails capturing two distinct pictures and combining them. The outcome is frequently a bizarre and dreamlike sight, which can have a remarkable effect. The simplest straightforward approach to create a double exposure is to simply shoot two photos on the same roll of film (or in-camera, a capability available on many digital cameras). If not, you can make a double exposure composite in post-production.

The composition of both photos is crucial to producing excellent double exposure photographs. For instance, depending on the approach, you might want to take a base shot with a lighter or darker background in relation to the subject, which you would then take a “layer” photo of.

Composite in creative photography

The term “composite” in photography describes an image that is composed of two or more separate photographs, but it functions differently from a conventional “double exposure.” Composites typically look more professional and don’t appear to have been created by mixing multiple photos. Photographers can employ composite techniques to produce a finished product that may be much more potent and emotive than they could with a single image.

A photographer might, for instance, take several images of newlyweds in various stances and then mix them to create a composite picture that would be impossible to get on camera otherwise. Or perhaps you want to take a picture of your subject while setting up a completely different background than the one they are in. Composites can be truly beautiful works of art in the hands of an experienced photographer.

Light painting

IMAGE CREDITS: Unsplash.com

Light painting is one of the inventive portrait photography concepts I’d recommend you try. Long exposures and a steady light source are both used in this lighting method. Depending on the particular type of light painting you produce. You might or might not need to use a flash unit (or a tripod). But the one thing you almost always require is a gloomy setting. You will be able to more readily capture movement from the camera, the subject, or the light source in dim or gloomy illumination.

Bokeh in creative photography

Who doesn’t enjoy a generous helping of smooth, creamy bokeh, at least when it’s expertly captured? We refer to the blur in out-of-focus regions of an image as “bokeh”. Because it has an appealing aesthetic quality. It can be used in a variety of ways, such as to give our portraits a dreamlike appearance. To make our people stand out from the background, and in many other situations.

USEFUL LINKS:

Get some more tips and ideas on creative portrait photograph 
Click here to know which life events require professional photographers 


Creative Family Photo Session Ideas You Must Try

Creative Family Photo Session Ideas You Must Try

A kind of photography known as family photography captures families in all of their variations. The term “family” is fairly broad and can refer to anything from a single person to a large extended family that includes grandparents and cousins. Some families also enjoy including their pets in the mix. Family can also refer to the family you’ve chosen for yourself, in whatever capacity. Regardless of how one defines family, the goal of this type of photography is to capture the spirit and character of a family while preserving key moments in life.

Since there are no set guidelines for family picture sessions, you can really customize each one to your client’s preferences. You can also design your family photo shoots around the family you’ll be photographing, their interests and hobbies, and any motivational pictures they may have shared with you.

Forest locations for family photoshoot

IMAGE CREDITS: Unsplash.com

Locations in the forest can provide a stunning and authentic backdrop for family portraits. The numerous lighting and scenery options, as well as the serene ambiance, can help to make the shoot successful and pleasurable for everyone. Don’t forget to use natural materials in your compositions as props and visual components, such as trees and vegetation.

A family outing

A special and intimate family photo shoot can result from joining a family on an expedition or activity they enjoy. It might be a wonderful chance to record unguarded, unplanned moments as the family enjoys a favorite activity. The family will not only find value in the final photographs, but the photo session itself may also be enjoyable and a chance to strengthen family ties.

Look away from the camera

IMAGE CREDITS: Unsplash.com

Getting a few pictures of your family facing away from the camera is a really effective method to capture the feeling of an intimate, private, and loving moment that people love to see in their family photos, regardless of the theme of your photo shoot. Plan on gently reminding your subjects during the shoot that they can glance away or at each other because most individuals are trained to smile and gaze at the camera.

Capturing some family details

While the family members will naturally be the main subject of your family picture sessions, surprising your clients with some unexpected detail photos can really win them over. These brief glances into a family’s life, whether they consist of a couple’s hands held together or a stack of folded infant garments, are special and are frequently overlooked by individuals.

Click in black and white

Photo shoots in black and white will always have a classic appeal that almost everyone appreciates. Delivering a few black-and-white photographs is a terrific method to delight your family; the entire shoot does not need to be done in this style. If you shoot film, it’s a good idea to carry some black and white film with you to your shoots since the true black-and-white film look has a certain quality that digital photography just can’t quite capture.

Shooting in the studio

IMAGE CREDITS: Unsplash.com

Studio family picture sessions can be an unexpected twist because this type of photography is frequently done outside or at the client’s home, regardless of whether you have access to a studio or have a portable studio setup that you can bring to customers’ homes. You can produce artistic, editorial-style family photos by taking them in a studio that is radically different from what most people have on the pages of their family albums.

Keep it simple and natural

Despite the fact that every kin photographer will have their own look and style and that there are many fantastic ideas for props and imaginative setups online, bear in mind that some of the best kin photoshoots are those who keep things straightforward. Pose your subjects in easy-going, unobtrusive attire, in a great, public setting, and with straightforward, tried-and-true positions that look good on everyone and feel natural.

Some special locations

Make sure to get some pictures that prominently display important aspects of the place if your kin have selected a location that is particularly meaningful to them for their shoot. In this manner, they will be able to pick one or two photos from your shoot to remind them of the reason they initially picked their unique location.

Mixing people with family

IMAGE CREDITS: Unsplash.com

Your kin photo shoot might only include two individuals on occasion, but if you’re photographing a larger group of people. Think about trying out some other poses. You will be able to tell various stories about your subjects as a result. You may, for instance, take a picture of all the female kin members from various generations. Or just the grandparents and their great-grandchildren. These various pairings will highlight various ties. And your consumers will appreciate the variety.

Care less about posing

In kin photo shoots, you’ll frequently be posing your subjects, but it’s also a good idea to leave some time for impromptu shots. This is especially true if the kin you’re photographing has kids. Whose liveliness will result in some stunning pictures. Spend some time getting to know your clients. Before the session to increase your chances of getting heart-warming candid kin images. Pose-free photographs will be considerably simpler to take when they are relaxed.

Click some walking shots of family

Clients can range from complete naturals in front of the camera to those who require a little assistance. Simply taking some walking pictures is one of the finest methods to get intriguing kin pictures while letting your subjects forget the camera is pointing at them. They’ll be less focused on their appearance when they’re moving. Which will make everyone appear more relaxed and natural. This is a fantastic way to start a kin portrait session.

Everyday setting

IMAGE CREDITS: Unsplash.com

Remember that some of the best and most priceless kin photos were taken around the home. If your kin is unsure of the place they want to use for their photo session. Since most individuals only have phone photos of their everyday life. It might be incredibly amazing to see it documented by actual photography. Additionally, when being photographed in an environment they are acquainted with, most people find it simpler to look natural and at ease.

USEFUL LINKS:

See more ideas for family photography here 
Learn everything about photo session with your pet, click here 


Setting up a craft centre for your kids

Working on an art and craft project is a favorite educational activity for many kids, whether it is done alone or in a group. Since art teaches kids about self-expression and creativity they can enhance their hand-eye coordination and fine motor abilities by working on art projects.

Who, my friends, both adores and detests “crafts”? Even though they may keep our kids entertained and engaged for countless hours, the sheer number of small pieces, messes. And disarray can be intimidating. An arts and crafts station may contain Play-Doh, clay, painting supplies, felt, crayons, pastels, coloring books, workbooks, sewing supplies, stickers, and more.

  • Here are a few simple steps that can help you organize your children’s art and craft supplies:

(Photo from istock)

  • Make wise location selections

You should keep your children’s art supplies in a part of the house that is convenient for when they naturally do their crafting. You might discover that your kids enjoy spending time. Creating at the Kitchen Island, table, or workstation.

It will be easy to obtain objects and quick and simple to put them away if there is a place nearby to keep everything. On our island, a kitchen cabinet houses all of the creative supplies. Avoid having different crafting supplies scattered over the house. Because this practice has a tendency to spiral out of control and frequently leaves behind small messes everywhere!

If there is room, think about using a low, accessible kitchen cabinet to keep your crafts. If finding the room is a challenge, think about using a mobile cart with wheels to hold crafts. And store it when not in use in a pantry, closet, under a desk, etc.

  • Systematically de-clutter your space

Kids’ crafts have a tendency of piling up and rapidly becoming out of control. After a birthday or Christmas, most kids have an entirely new set of supplies and activities! Start by gathering ALL of your kids’ crafts supplies and bringing them to a single spot.

This is the only way you will truly know how much you have, so do not skip it! Next, arrange the objects in categories. Play-doh, clay, art supplies, felt, crayons, pastels, chalk, paper, workbooks, coloring pages, sewing supplies, stickers, etc. Never “over sort” anything, remember!

Time to clear out the junk now! When deciding how many crayons or felts to keep. Use this method to sort through each pile of objects and save only those that are in good condition and are frequently used.

Items and large containers that have served their purpose should be discarded or recycled. When it comes to crafting ingredients, less is always more!

  • Put everything where it actually fits

(Photo from istock)

You need to have an easy layout in place that is simple to maintain in order to educate your children. How to clean up after themselves and to set them up for success when it comes to keeping crafts organized! You can “shop your home” for bins that will function to contain the goods by category. Now that you have categorized and made your list simpler.

Use small reusable containers, mason jars, or transparent plastic bins that were originally used to hold anything else. These solutions appeal to me since they are reliable, washable, and make it simple to see what is in each container.

Make a list of how many bins you’ll need to buy for each sorted pile if you need to rush out and obtain some bins to keep within your budget.

Everything should be marked! For young children who are illiterate, think about utilizing “picture labels”; all you have to do is locate a picture of the item on your computer, copy it, paste it into a Word document, print it, and stick it to the front of the bin.

Items that you don’t want curious little hands to handle can be enclosed, marked and kept nearby but out of reach, as at the top of a cupboard or closet.

  • Transform frequently

Make it a practice to inventory your home before bringing in anything new. It’s simple to see exactly what you have and DON’T need when you set up these kids craft organization bin system. Be clever when asking for specific goods that are running low for your child’s next birthday or holiday presents, or try something else and request a “experience gift” instead.

When trying to simplify, consider what hasn’t been used or played with recently. To make place for new, cheerfully release old things!

Always keep in mind that well-used objects have already “served their time” and delivered the happiness and entertainment they were intended to. Learn to identify objects that have never been used and decide whether to sell or donate those that still have use.

  • Rotate Crafts and Activities Monthly

(Photo from istock)

Having a “back pantry” or container where you put some supplies out of sight for a while and then rotate back into your child’s arts and crafts station every month or two is a terrific method to maintain your child’s interest and ensuring all crafting materials are really used.

This kids’ craft organization technique generates excitement, makes the room feel new and fresh. And keeps your child’s interest for a longer period of time. Additionally, it enables you to have less stuff out at once and is excellent when you don’t have much storage space.

When it comes to gift-giving after a birthday or holiday, resist the want to do it all at once! Instead, try putting this rotational system in place!

At a craft station, fewer options highlight the resources you have chosen carefully to keep on hand.

Hence, these are a few steps you can follow in order to make your own craft center for your kids. This will help kids in creative growth of mind and intelligence.

Reference:

Organized With Kids

Looking for perfect age gap between siblings, click on the link below for some prior knowledge:

What should be siblings ideal age gap?

Daddy and Me Photo Session: Why do you need one 

Daddy and Me Photo Session: Why do you need one

It’s simple to overlook taking pictures of the precious times you spend with your children because of the quick pace of life. Sessions with Daddy come in handy in this situation. These picture shoots provide an opportunity to commemorate the bond between daddy and kid and make enduring memories that will be cherished for a lifetime.

There are numerous Daddy and Me session ideas that can fit your hobbies and personalities, whether you favour outdoor excursions, indoor games, or imaginative themes.

These sessions provide an opportunity to reconnect with your child, discuss your passions, and celebrate that father and son link. They can capture sentimental treasures as well as light-hearted and enjoyable moments. We’ll discuss ideas for daddy and me sessions and photography shoot advice in this blog post.

Physical bonding with daddy

IMAGE CREDITS: Unsplash.com

During “Daddy and Me” sessions, physical touch and cuddling can lead to some of the most endearing poses. Encourage your clients to cuddle, hug, or hold their children close for some unposed and sincere photos.

Playfulness

Play and games can be a terrific addition to your photo shoot during daddy and me sessions. Suggest engaging in enjoyable activities that correspond with their hobbies and characteristics, such as throwing a ball, playing catch, or having fun.

Focus on emotions with your daddy

Encourage your kids to display emotion in their postures since Daddy and Me sessions are all about capturing the unique link between a parent and kid. To capture the actual nature of their connection, ask them to grin, laugh, and express their affection.

Use props for better shoot

IMAGE CREDITS: Unsplash.com

Your Daddy and Me postures can be made more imaginative and enjoyable by using props. Think about recommending toys, sporting goods, or other items that are a reflection of their interests and personality.

Try new angles while clicking with daddy

Your Daddy and Me images can gain a distinctive and artistic feel by experimenting with various angles and viewpoints. Try recommending using reflections or nearby natural features, photographing from above or below, or all of the above.

Playing games

Playing games and having a good time with their kids is something that dads excel at more than most. If kids prefer being outside, let’s get a picture of them swinging or playing hide-and-seek. Let’s get them to work on a puzzle together or play with their favorite toys if they’d rather be inside.

Snuggle, relax and click with your daddy

IMAGE CREDITS: Unsplash.com

Dad can read to the kids on the floor, a couch, or a picnic blanket in the grass if you get a couple blankets and books ready.

Always be creative

The kids can be creative with dad while preparing waffles in the kitchen or painting their upcoming piece of art, which provides for some great memorable photos.

Matching costumes

Why not send your child’s father a matching suit so they can pose together while wearing it? The attire for this could range from a waistcoat and bowtie to a super hero outfit.

Lots of hugs and kisses to your daddy

This is a fantastic activity for young children who adore giving their fathers hugs and kisses. Though it’s a straightforward concept, it may result in some of the best photographs.

Go for a walk

IMAGE CREDITS: Unsplash.com

Locate a picturesque area where father and child can stroll, such as a park or a lake. Take a photo of them walking together, or place your youngster on the shoulders of the father.

Close up shots with daddy

Images of their faces taken up close and in portrait mode are a lovely way to show how similar the father and child are.

Today’s the day with your daddy

Don’t wait for a birthday or Father’s Day photo session to get those priceless father-son moments on camera! Anytime is an excellent moment to take some adorable pictures to honour the unique bond between a father and son.

A father and child share a very special attachment that began the moment they first met. Here are a few suggestions for how to capture these moments correctly if you want to arrange a daddy and me photo shoot with your photographer to document this amazing bond.

Presenting the gift to your daddy

IMAGE CREDITS: Unsplash.com

Genuine human emotions, especially when it comes to family photography, make images seem real. It would be a great idea to capture youngsters giving their father a gift in a photograph.

Ask the kids to write a note of congratulations for their father and then wrap the gift in the paper. You can capture vivid feelings and get a great photo in this method.

A holiday card

Give your kids coloured pencils and ask them to doodle cheery congratulations to add some symbolism to your Father’s Day images. We advise utilizing handcrafted cards that have a family portrait on them because they make excellent props for this kind of photo shoot.

Surprise photo for dad

Involving a mother in a photo session is one of the best Father’s Day photo ideas. You could, for instance, take a picture beforehand. It should depict a mother holding a sizable holiday card or writing tablet with kind words for a father while being surrounded by her kids.

Palm to palm close up


If you have a baby, this kind of vaccination is especially advised. To take a fantastic snapshot for a parent, use beautiful newborn photo ideas. Picture a young child close to or in front of the father’s hand. Think about the palms. This image can be included in the family album in addition to being appropriate for Father’s Day.

Writing on body parts

For parents with multiple kids, this is among the simplest Father’s Day photo ideas. Using body paint sticks, write “we love daddy” or something else on their feet, then take a close-up picture. You can also write some encouraging phrases on the kids’ palms to get even cuter photos.

Photoshoot at home with your daddy

You can also take beautiful at home. It makes a lovely backdrop for sweet family portraits with dad. For instance, you may shoot these pictures while lying in a warm bed. Another choice is to take a picture of a dad and kids at the holiday table or while they are engaged in regular activities like watching a movie, having a conversation, or playing a board game.

USEFUL LINKS:

Click here to see Daddy and Me-mini session ideas 
Mommy and Me photo session: Why do you need one